Don't like the adverts?  Click here to remove them

Setting up AHC / Torsion Bars

nathanrobo

Well-Known Member
Joined
Apr 6, 2010
Messages
655
I've looked through a number of threads on the AHC suspension, but I still have a number of unanswered questions. I thought it would be good to have a step by step guide, for those who keep their trucks on standard system. Contributions would be really appreciated, particularly on TIS, on the sensors and settings for the Torsion Bars. This should provide answers to folk whose spheres need an overhaul, whose trucks may be leaning to one side or where the system is doing odd things.

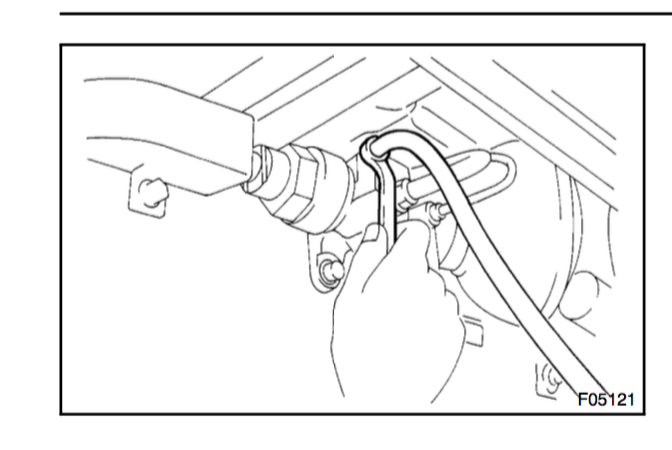
I'm about to set up my own after stripping out the Torsion Bars, Control Arms (rear) with it's linkage, removing spheres and draining AHC. There's no hurry as I need to get a few miles on the truck to run the rebuilt engine in and MOT it (been off the road for nearly two years). But I thought some Techstream screenshots, pictures of the torsion bars, sphere's etc and an overview of the correct pressure settings / body heights would be helpful to anyone doing this for the first time.

I need help for the post because, although I have some experience of spheres (remember "stitch in time" thread) and after the recent strip down and reassembly. I know there are others with far greater depth of knowledge on this subject.

Overview of AHC hydraulic components
View attachment 110951


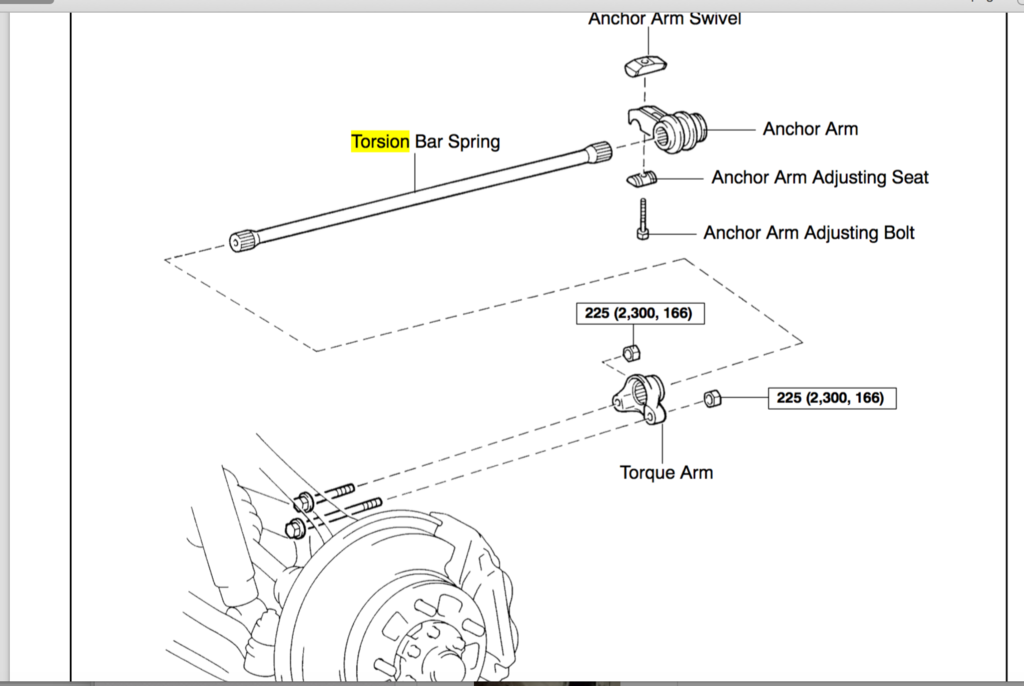
Overview of the torsion bar config
View attachment 110953


AHC%20components_zpsixu58jrk.png Torsion%20bar%20components_zpsrewcpyep.png
 
Last edited:
The hydraulic side of the system is really straight forward and very well built. Before overhaul of anything under pressure (front shock absorbers, spheres - AKA Damping Force Control Actuators), the bleed nipples on the valve that the spheres screw into just need to be opened to allow the pressure out. CAUTION: AS SOON AS THE BLEED NIPPLE IS OPENED THE TRUCK WILL RAPIDLY LOWER, SO MAKE SURE THAT YOU ARE
NOT GOING TO BE CRUSHED.

[URL=http://s1364.photobucket.com/user/nathanfiat500/media/Landcruiser%20refurb/bleading%20the%20spheres_zpsrvjkqlfp.png.html]bleading%20the%20spheres_zpsrvjkqlfp.png[/URL]

After replacing or refitting any part on the system, refit with a new o'ring seal, make sure that it's correctly fitted and reassemble. Once done, refill the reservoir (with Toyo's expensive AHC fluid) start the vehicle (in low first?) then after a minute or so raise to neutral (N), then check the reservoir again, bleed any aerated or dirty oil off, keeping an eye on the level.

Setting up the torsion bars and the height control linkages is a bit more in depth.
 

Attachments

  • bleading%20the%20spheres_zpsrvjkqlfp.png
    bleading%20the%20spheres_zpsrvjkqlfp.png
    97.3 KB · Views: 288
For a number of reasons you may not be using match marks for the torsion bars, for example, you may be fitting new ones, you may be correcting a lean towards one side, or you may have stripped out the TB's and had them repainted.

This is where I could use some input:

Torsion%20bar%20components_zpsrewcpyep.png[/URL]


If the anchor arm and torque arm has been separated from the TB spring - without match-marks, would the torque arm and positioned as suggested in the image below so that both parts are at the same relative angle? Is that correct? There has to be a fixed relationship between the two.

There has to be a fixed relationship between the two, otherwise the settings shown below have no meaning:

Torsion%20bar%20settings_zpsbijlvfdb.png[/URL]
 

Attachments

  • Torsion%20bar%20components_zpsrewcpyep.png
    Torsion%20bar%20components_zpsrewcpyep.png
    172 KB · Views: 264
  • Torsion%20bar%20settings_zpsbijlvfdb.png
    Torsion%20bar%20settings_zpsbijlvfdb.png
    220.5 KB · Views: 328
Last edited:
Based on a post a while back from SafaritecPeter:

I've backed off the bolts on both Anchor arms so that they are no longer under tension. Then screw both bolts until it comes into contact with the anchor arm adjusting seat (so as tight as I can by hand - then mark the TB's on their sides at 90 deg's - I also marked the large adjusting bolts and turned each bolt 16 full turns each, so all things being equal the Torsion Springs should be at the same tension.

The suspension heights are about right, but before having the car idle for some time, I want to MOT it and run the engine in for at least a couple of hundred miles. Should have this all done by end of the first week of January and I'll post again.

So procedure should be something like this:

  1. Assuming the car is lifted at the front with a good trolley jack (support either side with Axle Stands) - car is on flat level ground.
  2. Connect the Torsion springs so that the two bolt holes on the Torque Arm at horizontal and toward the bottom of the arm. On the other end the Anchor Arm is pointing at about 4'clock (I'll post a sketch later.
  3. Tighten the Anchor arm adjusting bolt finger tight (give the anchor arm or torque spring a shake to make sure it's a tight as you can get it by finger.
  4. Mark the Adjusting Bolt with typex or chalk
  5. Mark the Anchor Arm end of the Torsion Spring with typex or chalk
  6. Using a power bar and the correct sized socket rotate the bolt 360 deg x 16 times
  7. Lower the jack in stages - checking to see wether the TB marks have rotated (in my case they didn't)
Next stages will be to hook up the diagnostics to see what pressures there are on Front Left and Front Right (we're looking for 7 ish). I'll probably rig something up to check for level with a spirit level which will allow me to check for level across both winds with a long spirit level.
 
Last edited:
Set the torsion bars up and measurements seemed to be inline with the FSM and values on Techstream, but the nearside TB had very little adjustment left on it, where the RH torsion bar had plenty left, so I marked them up, slackened both off, adjusted the LH torsion bar vs. the torque arm. Then tightened the Anchor Arm Adjusting Bolt on both sides by hand until they wouldn't tighten any more, then torqued them up both 20 full rotations each side. Both sides measure up well - just need to put Techstream on to confirm that pressures are correct.
 
Back
Top