Citizen Brown
Member
- Joined
- Oct 18, 2013
- Messages
- 110
- Country Flag
Thanks to all the responses that confirmed the "mod" was not a mod but a bodge. So I set about fixing. Thought I would post this and hope it is not too "newbie" for the engineers out there. Not sure why my images are 90 degrees rotated they are right way up in my computer- help please!
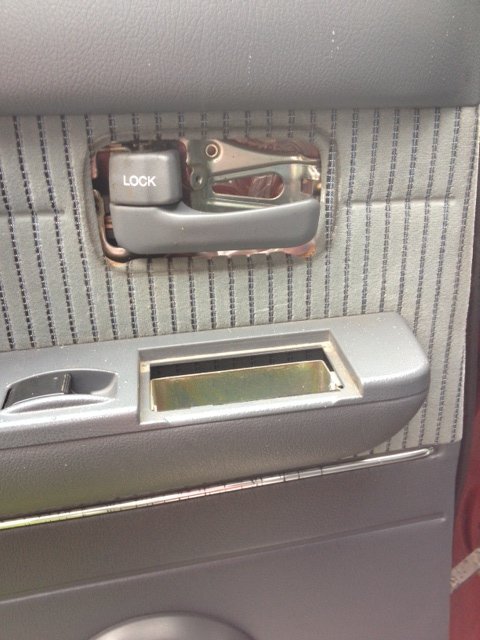
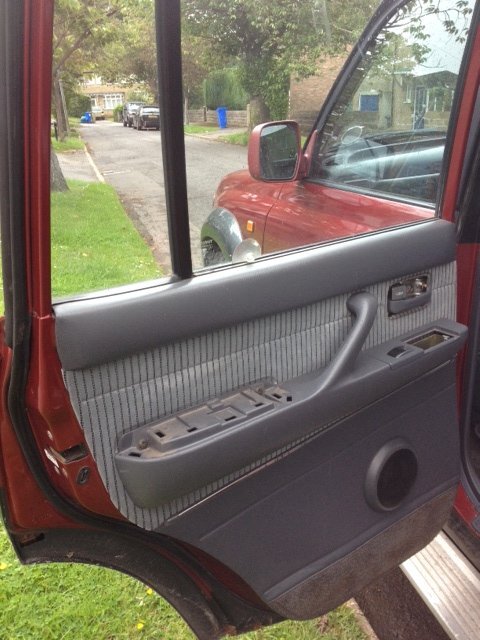
Easy bit strip the door card- small screw on plastic surround for the door release and 3 large self-tappers. 1 hidden at top of interior door-pull and two under the arm rest pad (pad clips off easily. Then the door card in held by a bunch of plastic plug clips so go gently so as not to rip the door card
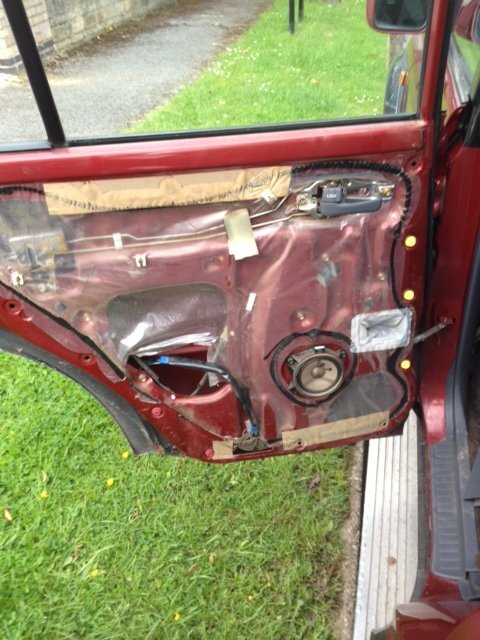
Brown packing tape is NOT OEM. Some one has been in here before!
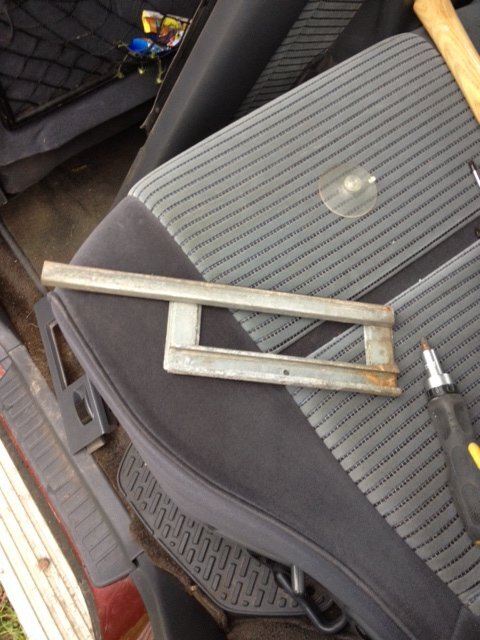
Found out why the window plummeted into cavity when "adventure-mod" removed - this bit is meant to be fixed to bottom of glass not lying at bottom of door cavity.
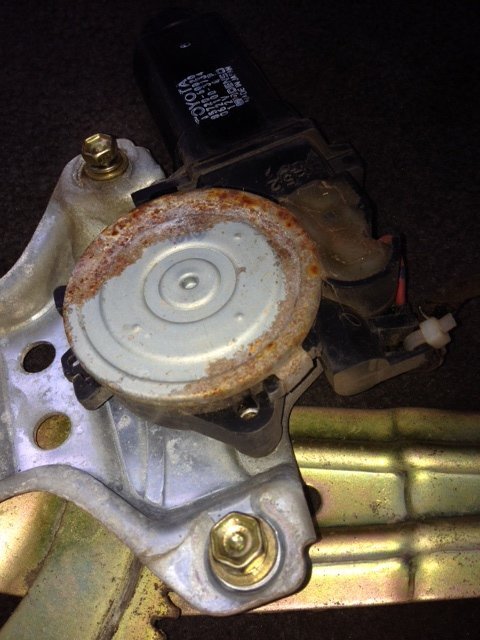
Removed motor and arm (4 bolts)
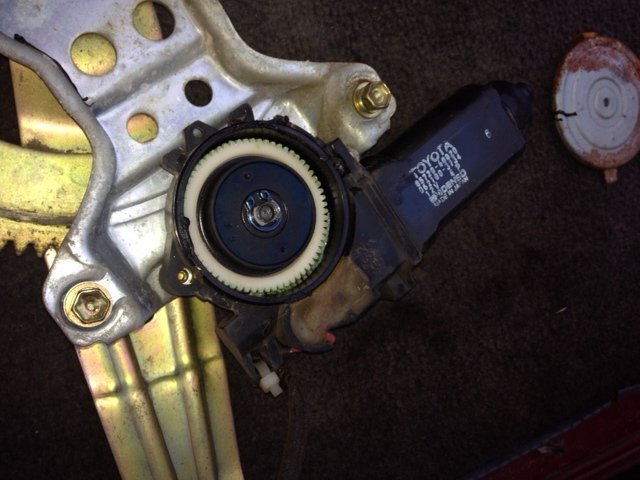
took rusty cover off for a nosey- grease was a bit hardened
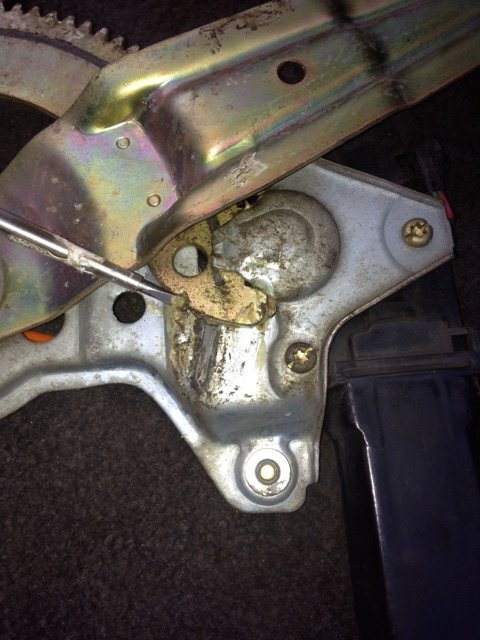
Separated motor from arm assembly (tork/ star key required) grease on the gear drive was congealed - cleaned it all off
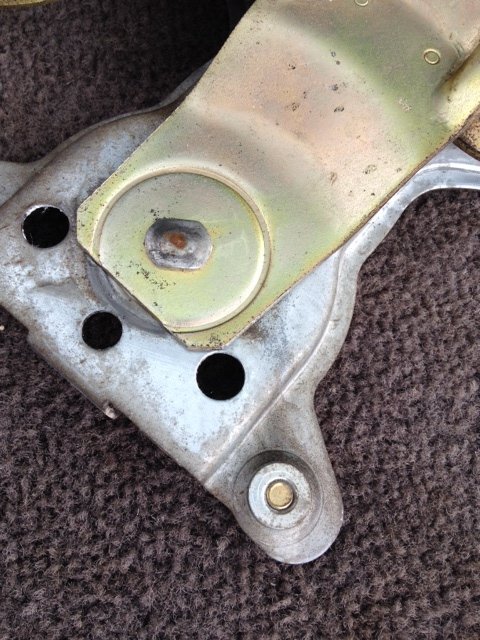
Lots of talk about the window rubbers being at fault for slow windows but this pressed rivet doesn't help. This was super stiff (ooer missus!) WD40 spun it round a few times and then tried to squeeze some white grease into it. Freed up noticeably.
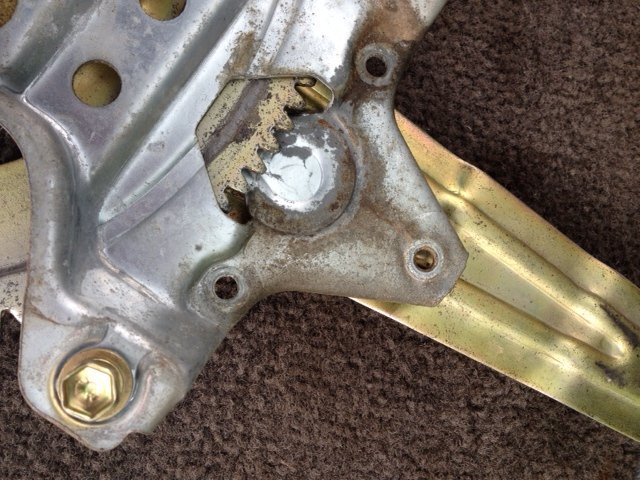
blobbed some grease on the hole where the motor drive sits
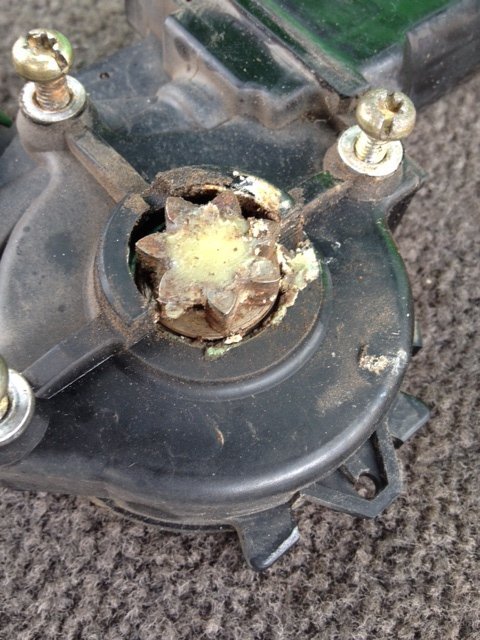
The grease on drive cog was past its best- cleaned out and regreased
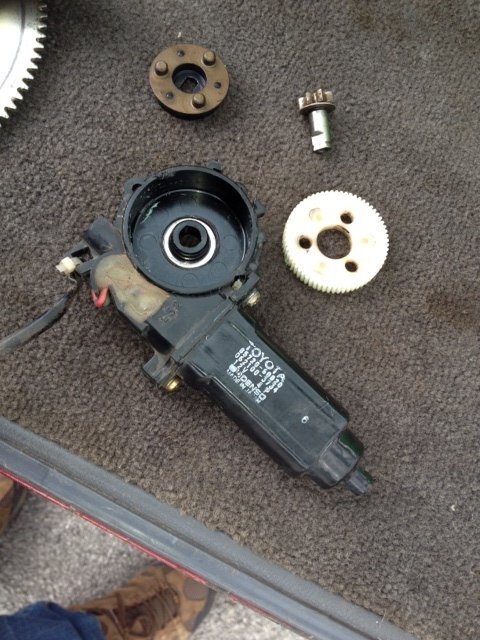
This is the motor in bits - nothing too complicated to it cleaned all and new greasage.
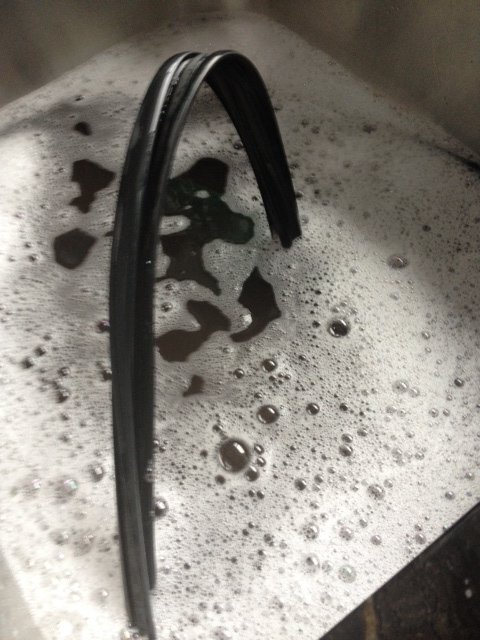
Model of lock ness monster - no gave window rubber a nice bath, dried it and coated with Gummi Pfledge
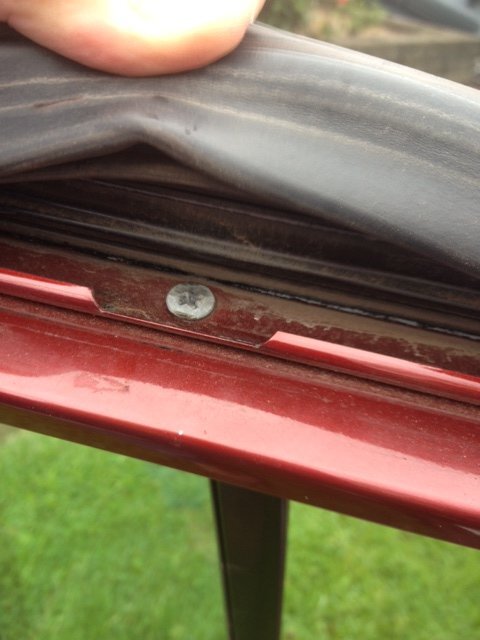
Easier to get the sliding glass bit out if you take rear quarter light out- 2 little bolts under door card and this little one on top of door frame - don't drop this little screw in the grass
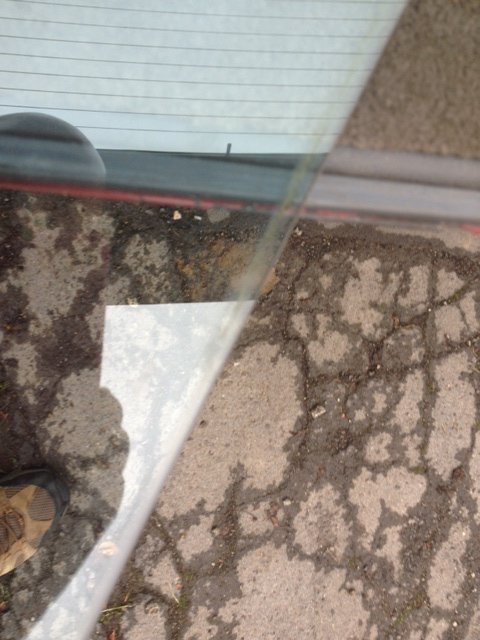
The edges of the glass where badly worn (dirt in between glass and rubber wears away) gave glass a good clean, fine wire wool, compound then glass cleaner - lovely
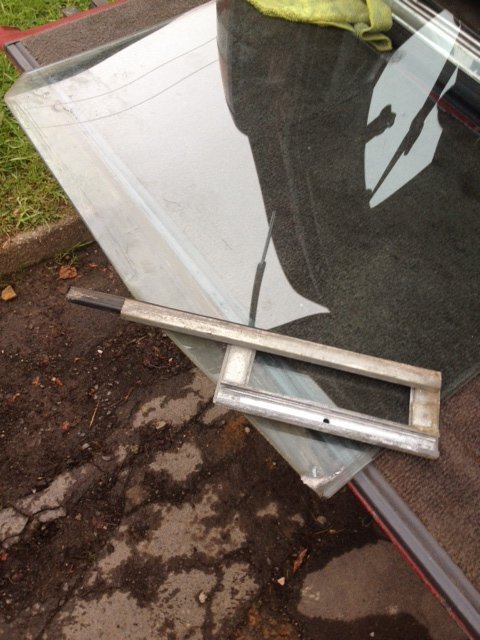
The glass sits in a channel in the metal bracket with rubber insert - friction holds it all in. i cleaned the rubber and dried it attached this to bottom of window and then slid the metal bracket over the rubber insert aided with a smear of Fairy liquid. takes a bit of fiddling.
The actuator arm attaches to this bracket with a small wheel that runs in a channel (again wire woolled and greased up.
The window now works! and a bonus is it seems a good deal faster than the other 3. i have not cleaned the contacts on the switches but plan to when I next get a moment
i am sure it would benefit from a new window rubber but i don't fancy shelling out £70.00 or so per window.
This whole process took about 1 and a half hours. I now plan to do the other 3 which should be quicker as I know my way around the door internals now and I don't have to fanny around fitting the metal bit back on the windows.
Hope this was of interest and not too infantile for the experts...


Easy bit strip the door card- small screw on plastic surround for the door release and 3 large self-tappers. 1 hidden at top of interior door-pull and two under the arm rest pad (pad clips off easily. Then the door card in held by a bunch of plastic plug clips so go gently so as not to rip the door card


Brown packing tape is NOT OEM. Some one has been in here before!

Found out why the window plummeted into cavity when "adventure-mod" removed - this bit is meant to be fixed to bottom of glass not lying at bottom of door cavity.

Removed motor and arm (4 bolts)

took rusty cover off for a nosey- grease was a bit hardened

Separated motor from arm assembly (tork/ star key required) grease on the gear drive was congealed - cleaned it all off

Lots of talk about the window rubbers being at fault for slow windows but this pressed rivet doesn't help. This was super stiff (ooer missus!) WD40 spun it round a few times and then tried to squeeze some white grease into it. Freed up noticeably.

blobbed some grease on the hole where the motor drive sits

The grease on drive cog was past its best- cleaned out and regreased

This is the motor in bits - nothing too complicated to it cleaned all and new greasage.

Model of lock ness monster - no gave window rubber a nice bath, dried it and coated with Gummi Pfledge

Easier to get the sliding glass bit out if you take rear quarter light out- 2 little bolts under door card and this little one on top of door frame - don't drop this little screw in the grass


The edges of the glass where badly worn (dirt in between glass and rubber wears away) gave glass a good clean, fine wire wool, compound then glass cleaner - lovely

The glass sits in a channel in the metal bracket with rubber insert - friction holds it all in. i cleaned the rubber and dried it attached this to bottom of window and then slid the metal bracket over the rubber insert aided with a smear of Fairy liquid. takes a bit of fiddling.
The actuator arm attaches to this bracket with a small wheel that runs in a channel (again wire woolled and greased up.
The window now works! and a bonus is it seems a good deal faster than the other 3. i have not cleaned the contacts on the switches but plan to when I next get a moment
i am sure it would benefit from a new window rubber but i don't fancy shelling out £70.00 or so per window.
This whole process took about 1 and a half hours. I now plan to do the other 3 which should be quicker as I know my way around the door internals now and I don't have to fanny around fitting the metal bit back on the windows.
Hope this was of interest and not too infantile for the experts...

