Allchin
Active Member
- Joined
- Nov 16, 2010
- Messages
- 67
Completed the gearbox rebuild and its back in the truck. All seems well with the box, although I have only driven it on my driveway. It probably will not be on the road until next year, as I am starting to build an extension to the garage for the truck and will take all summer.
I found nothing wrong with the gearbox and I followed all the measurements indicated by the WSM and all the checks were well within specification. The 1[SUP]st[/SUP] and 2[SUP]nd[/SUP] syncro's showed no signs of wear and looked exactly like the new ones I had ordered.

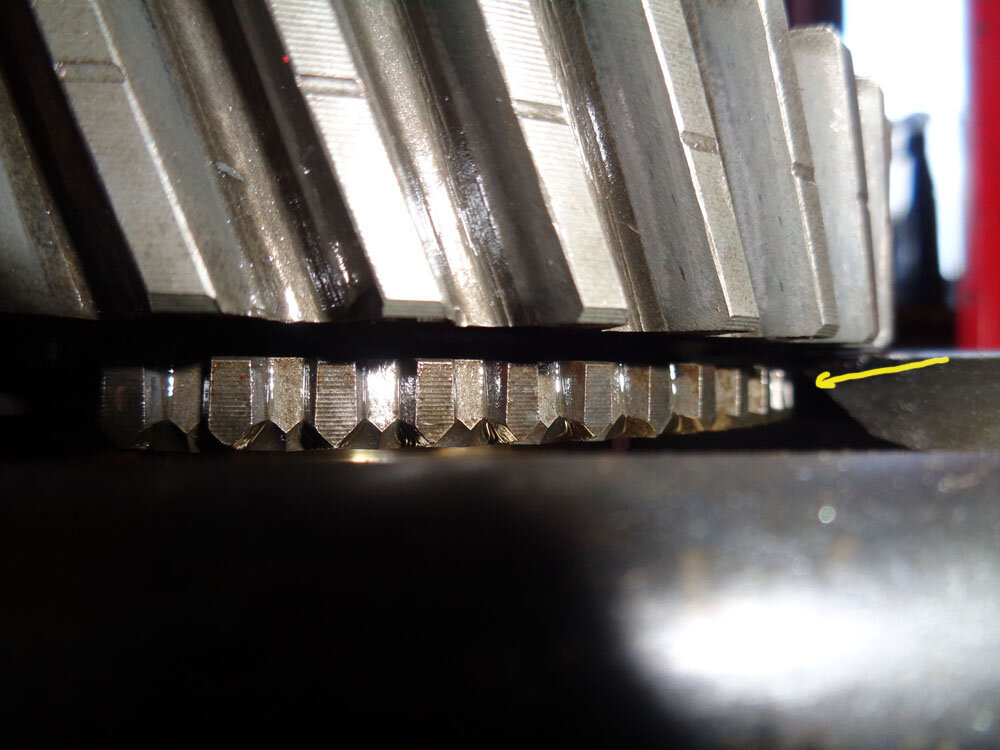
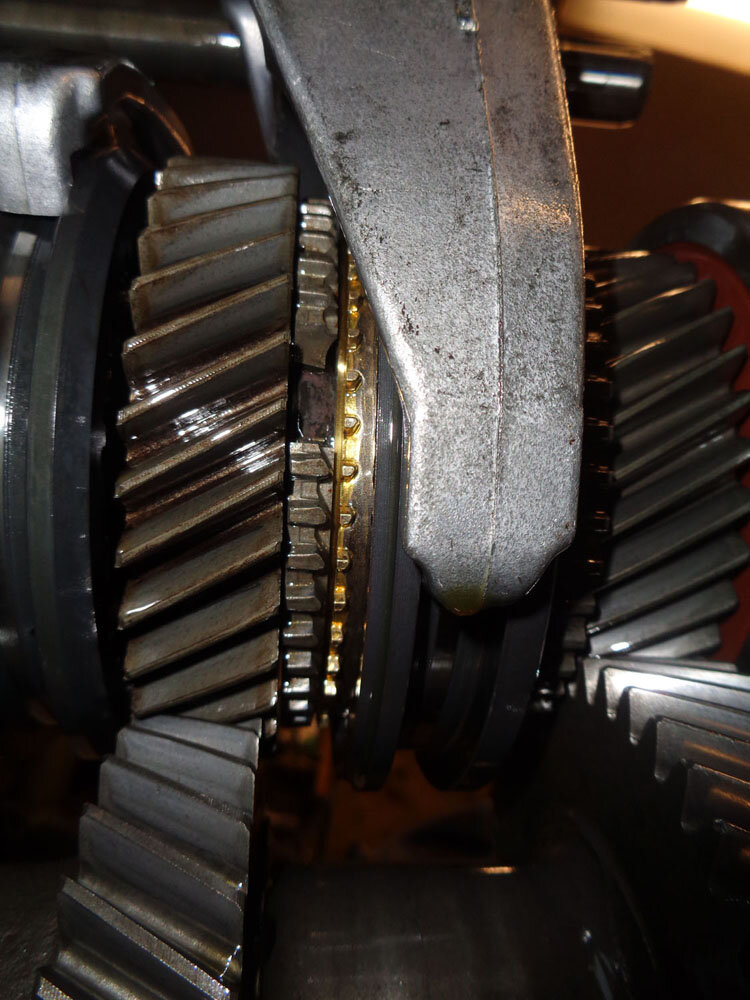
The one thing I did find was a small chunk of metal from the 3[SUP]rd[/SUP] gear. The gap was still correct for the slider, so it did not interfere with the operation. Not sure how long its been like this but I decided to leave it as it is.

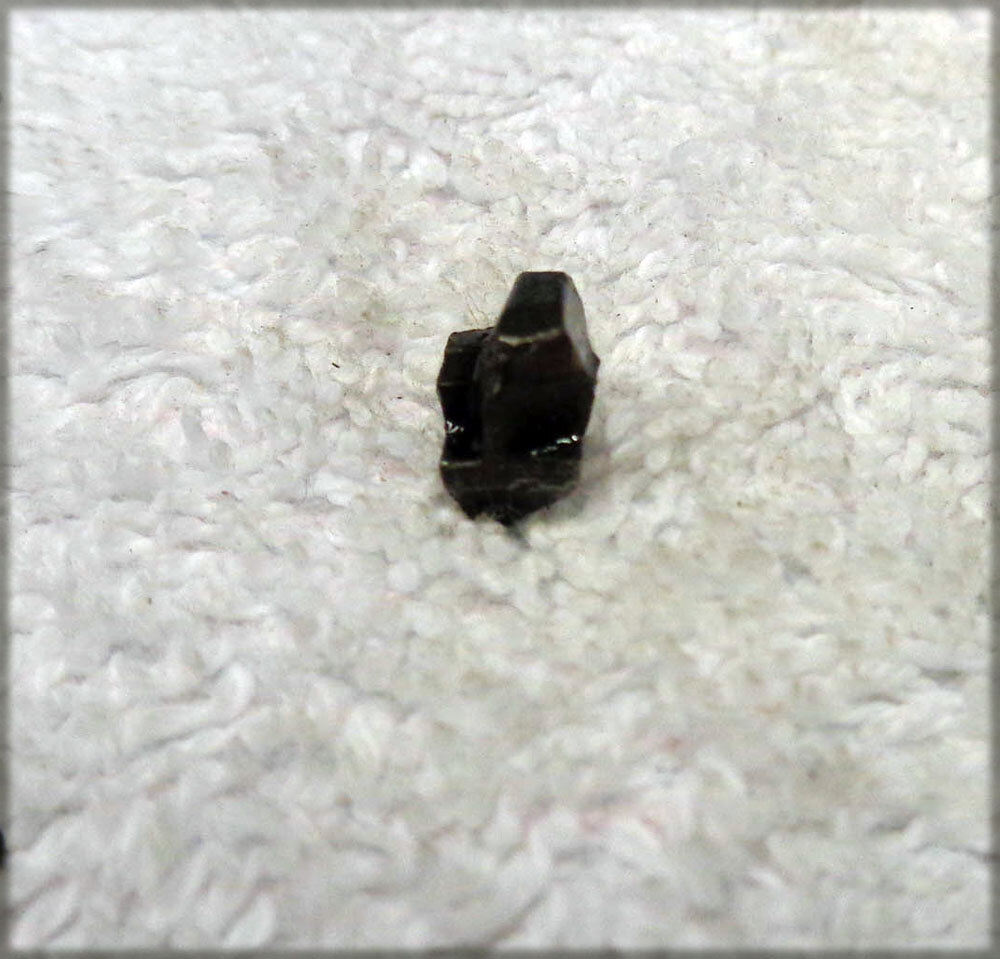
I actually found the broken tooth inside the case.

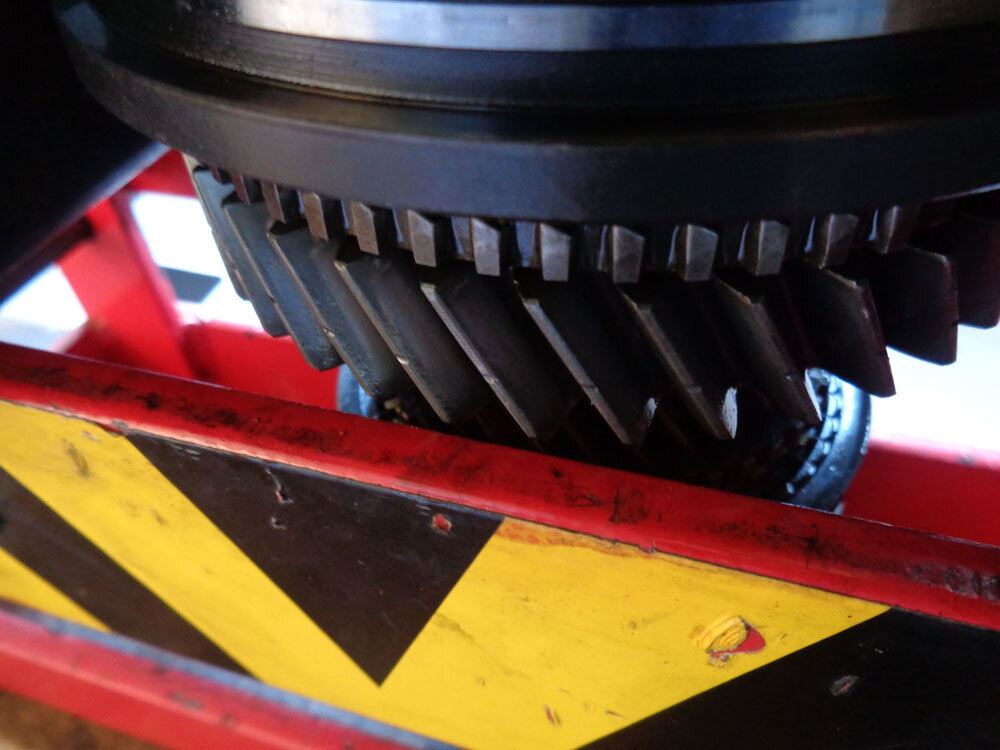
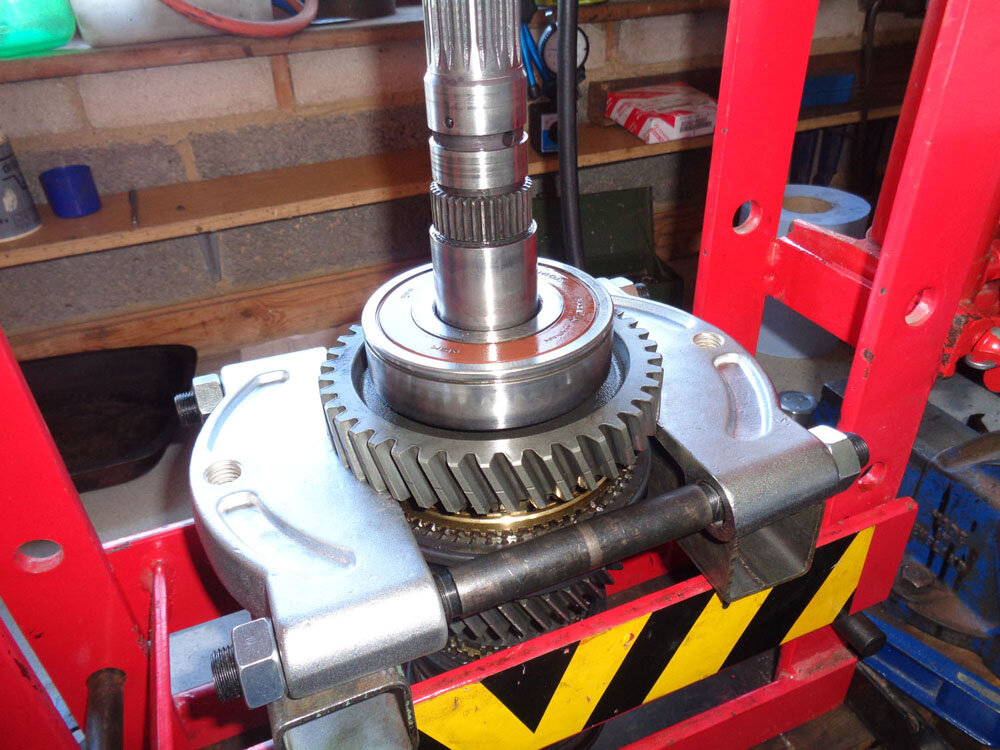
This is as far as I could go in dismantling as I found that my largest gear separator wasn't large enough. I ordered a 105-150mm sealey as my other ones were good quality.

While I was waiting for the delivery of the separator, I refurbish the starter motor that failed during our trip. I replaced them with a repair kit I had previously bought on ebay for around £15. The bearing were re-greased and now had a good starter motor. The one that was fitted was also given the same treatment.

The new separator in action.

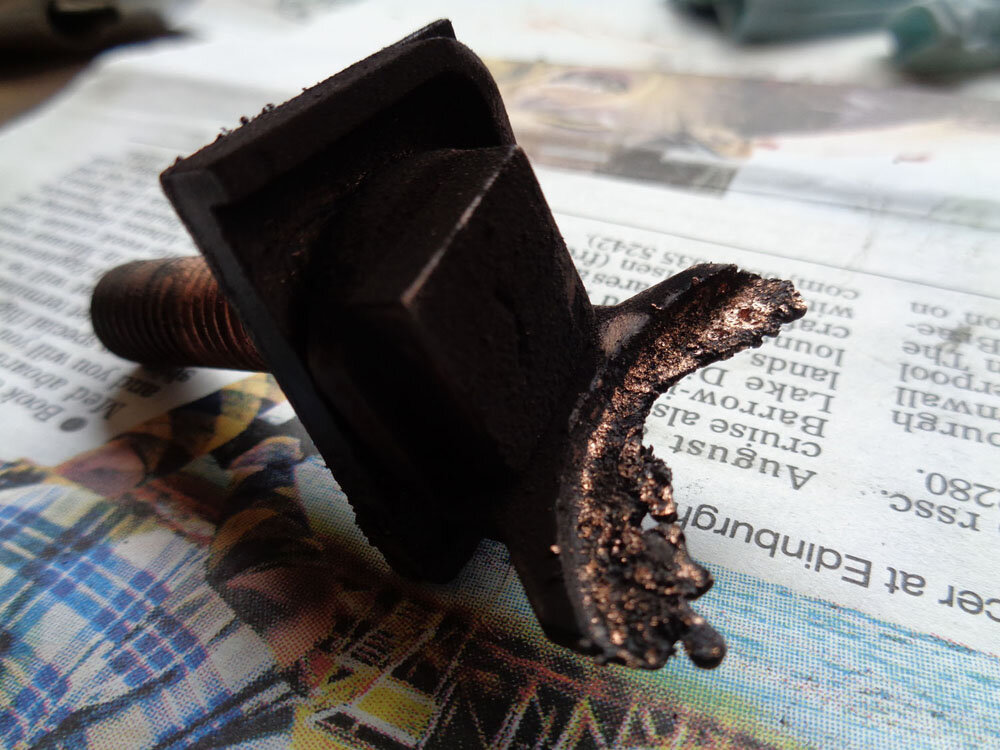
I was quite concerned, that if the separator twisted when it came under pressure it could damage part of the gear. I made sure there was an air gap between the separator and the gear. As it turn out it did not noticeably move.

The 2[SUP]nd[/SUP] gear just cleared the frame on my press by a couple of mm.
I was asked what I thought of the 'gearbox sticky' thread in regards to helping with the stripping and re-building of the gearbox. My thoughts were, it was very good and went hand in hand with the WSM, the photos greatly helped. Also some of the tips and hints that were not mentioned in the WSM. Areas of improvement would be a more detailed list of the tools and sizes needed, also the approx size of the spaces and tubes. For pressing on the gears and bearing for the output shaft, I had to raid a expensive bass tube with 5mm walls from the clock making supplies, had I known the required size I would have made one out of steel before stripping the box.
If I was doing again I would also order all the available sizes for each of the snap links to replace from Amayama, they list them around $1 each.
List of jobs done so far:
I think that will do for now.
Now where's my builder hat.
Stephen
PS.
I had to push the truck( with help) into the garage as it would not start anymore. I was under the impression that there was air in the system and the injection pump was leaking. When I came around to starting it again after 4 months 5 days a week it still wouldn't start! Eventually I found it was a blown fuse for the Fuel cut off valve!
I found nothing wrong with the gearbox and I followed all the measurements indicated by the WSM and all the checks were well within specification. The 1[SUP]st[/SUP] and 2[SUP]nd[/SUP] syncro's showed no signs of wear and looked exactly like the new ones I had ordered.
The one thing I did find was a small chunk of metal from the 3[SUP]rd[/SUP] gear. The gap was still correct for the slider, so it did not interfere with the operation. Not sure how long its been like this but I decided to leave it as it is.
I actually found the broken tooth inside the case.
This is as far as I could go in dismantling as I found that my largest gear separator wasn't large enough. I ordered a 105-150mm sealey as my other ones were good quality.
While I was waiting for the delivery of the separator, I refurbish the starter motor that failed during our trip. I replaced them with a repair kit I had previously bought on ebay for around £15. The bearing were re-greased and now had a good starter motor. The one that was fitted was also given the same treatment.
The new separator in action.
I was quite concerned, that if the separator twisted when it came under pressure it could damage part of the gear. I made sure there was an air gap between the separator and the gear. As it turn out it did not noticeably move.
The 2[SUP]nd[/SUP] gear just cleared the frame on my press by a couple of mm.
I was asked what I thought of the 'gearbox sticky' thread in regards to helping with the stripping and re-building of the gearbox. My thoughts were, it was very good and went hand in hand with the WSM, the photos greatly helped. Also some of the tips and hints that were not mentioned in the WSM. Areas of improvement would be a more detailed list of the tools and sizes needed, also the approx size of the spaces and tubes. For pressing on the gears and bearing for the output shaft, I had to raid a expensive bass tube with 5mm walls from the clock making supplies, had I known the required size I would have made one out of steel before stripping the box.
If I was doing again I would also order all the available sizes for each of the snap links to replace from Amayama, they list them around $1 each.
List of jobs done so far:
- 170ltr Aux. leaky fuel tank repairs, along with a tank sealer.
- Rear diff rebuilt with new bearings
- Both rear hubs rebuilt and re-greased
- Front and Rear propshaft rebuilt including sliding yokes( replacing the yokes vastly improved the transmission slack and hopefully should be quieter when on dirt roads)
- Gearbox rebuilt with all new bearings
- The clutch friction disc was ok but the diaphragm springs were wear was out of spec. so I replaced the clutch cover with the original one that came with the vehicle as it was in much better condition. I also fitted a new thrust release bearing and crankshaft oil seal.
- Front diff rebuilt all bearings ok. Replaced 3 broken studs.
- Welded a crack in a weld on the front axle, that had been weeping oil for the last 8 months. This was caused by bracket on the axle that holds the leading arm, fracturing, causing the front axle to move about and the broken part of the bracket that was still fastened to the leading arm kept on ramming the weld on the axle. Now you would have thought I would have felt change in handling with this problem but I didn't. The only thing I noticed was when braking the front drivers side dipped a little. I came across it during one of my under the truck inspections, it would have been after 2-3 inspections before I notice it!
- Total swivel hub rebuild including changing the bearings. Both CV's were changed (Milners,lasted 120k) along with the drive flange(starting to get too much movement). Also the 'speedsleeve' I used to repair the groove on the drive shaft caused by the oil seal had to be replaced (lasted 85k)
- Injection pump rebuilt (110k since last rebuild). This time I had the injection nozzles refurbished.
- Stripped the winch to check the bearing and grease where necessary. (been across a lot off deep rivers)
I think that will do for now.
Now where's my builder hat.
Stephen
PS.
I had to push the truck( with help) into the garage as it would not start anymore. I was under the impression that there was air in the system and the injection pump was leaking. When I came around to starting it again after 4 months 5 days a week it still wouldn't start! Eventually I found it was a blown fuse for the Fuel cut off valve!
Attachments
-
 This was as far as I progressed before I relised I needed a large gear seperator.jpg191.6 KB · Views: 156
 -
 Concerned if the seperator twisted could break the gear.jpg127.9 KB · Views: 154
 -
 Just room for the gear between the press bars.jpg123.9 KB · Views: 151
 -
 Part of the 3rd gear.jpg154.3 KB · Views: 158
 -
 Starter Contacts.jpg173.3 KB · Views: 150
 -
 The 105-150mm gear seperator .jpg196.2 KB · Views: 148
 -
 The small damage on the 3rd.jpg160.7 KB · Views: 155

