Trevor
Well-Known Member
- Joined
- Jul 25, 2010
- Messages
- 1,890
- Country Flag
As I had another pump to do, I thought I'd do a guide to the rebuild which will complement the guide that Rob did HERE
This is the repair kit

Remove the tin guard above the steering bars to aid access from underneath.
Remove this bolt that holds the clamp for one of the pipes, this will create the wiggle room you'll need to remove the end fitting from the pump.
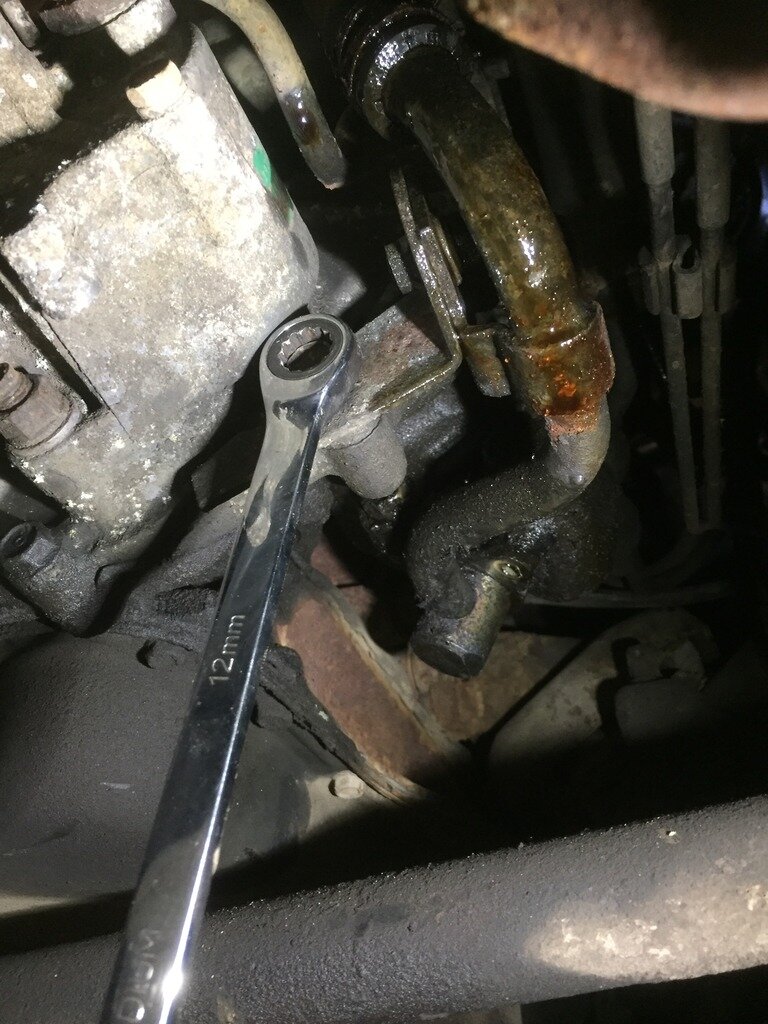
You can use a bar and 22mm socket to crack the banjo and then it should come undone by hand.
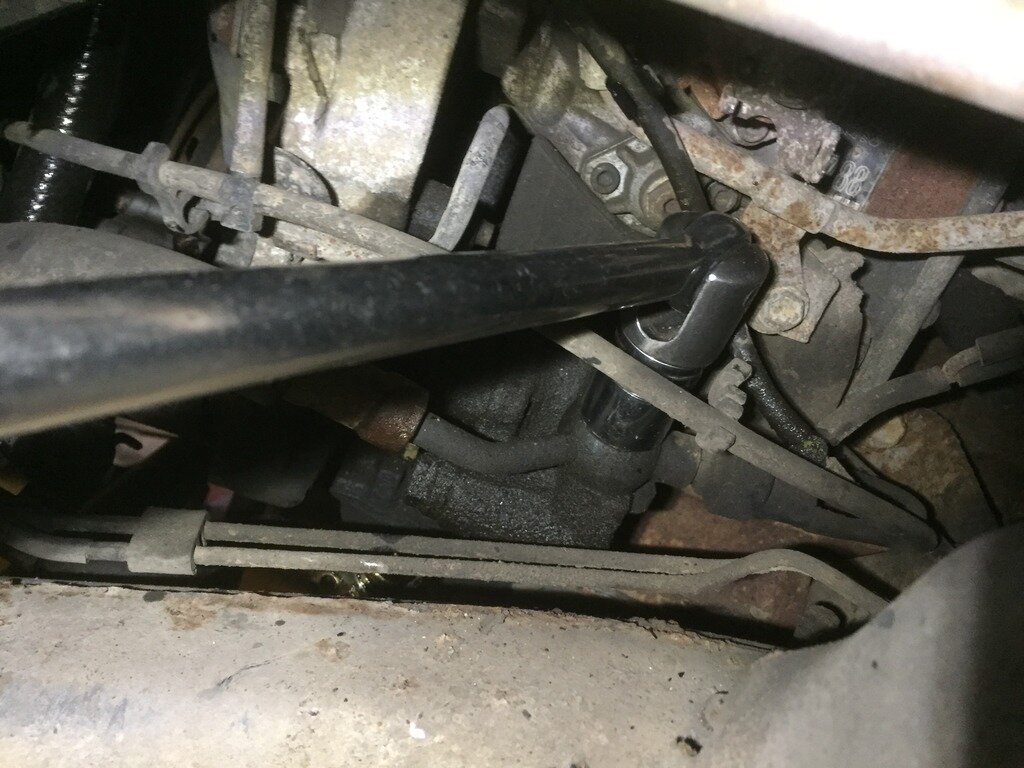
Remember to get both copper washers out with the banjo bolt and replace with the new ones in the kit.
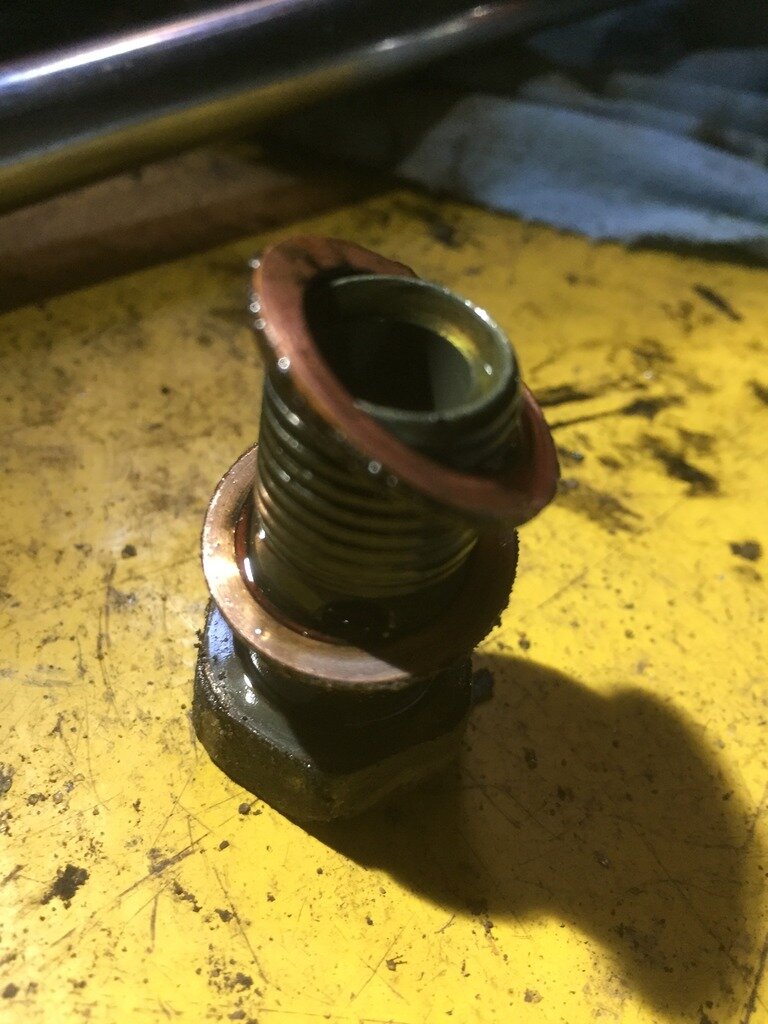
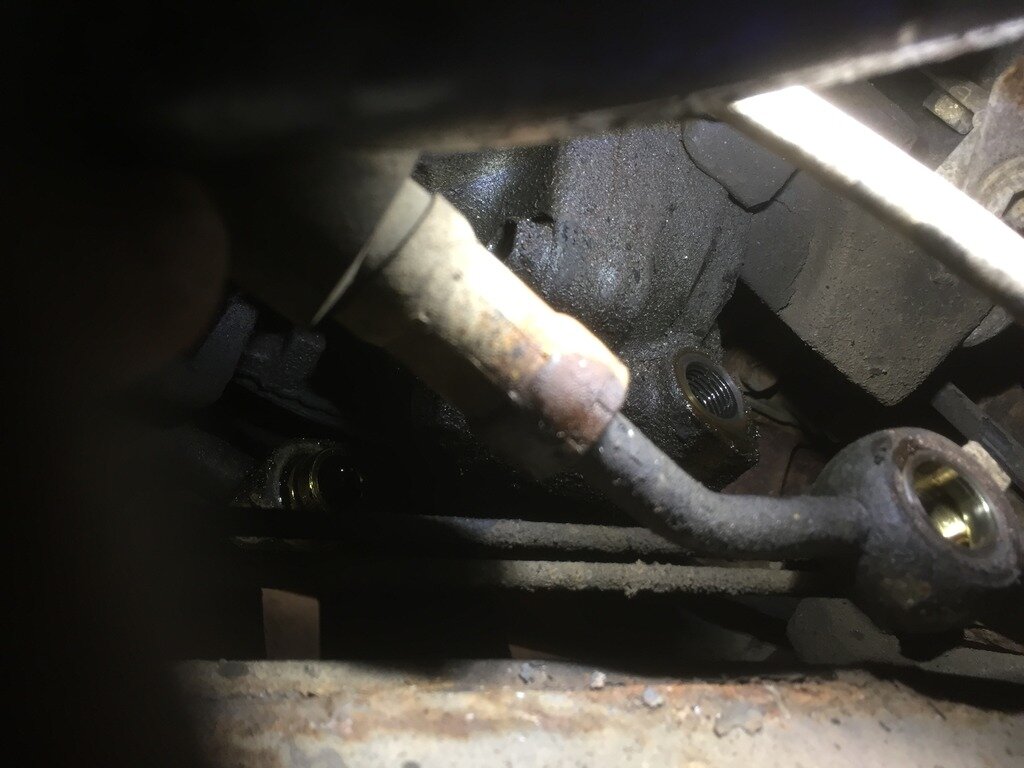
Undo the 2 bolts for the other pipe and pull pipe away. Note in the second picture below, the O ring on the end of the pipe is now revealed, change this with one of the 2 small ones in the kit. **** IMPORTANT *** These 2 small O rings are slightly different sizes, not much in it. The smaller of them is used on this pipe. If you fit the slightly larger one (which is for the unloader valve nut) you will nick the edge when refitting this pipe and it will leak.
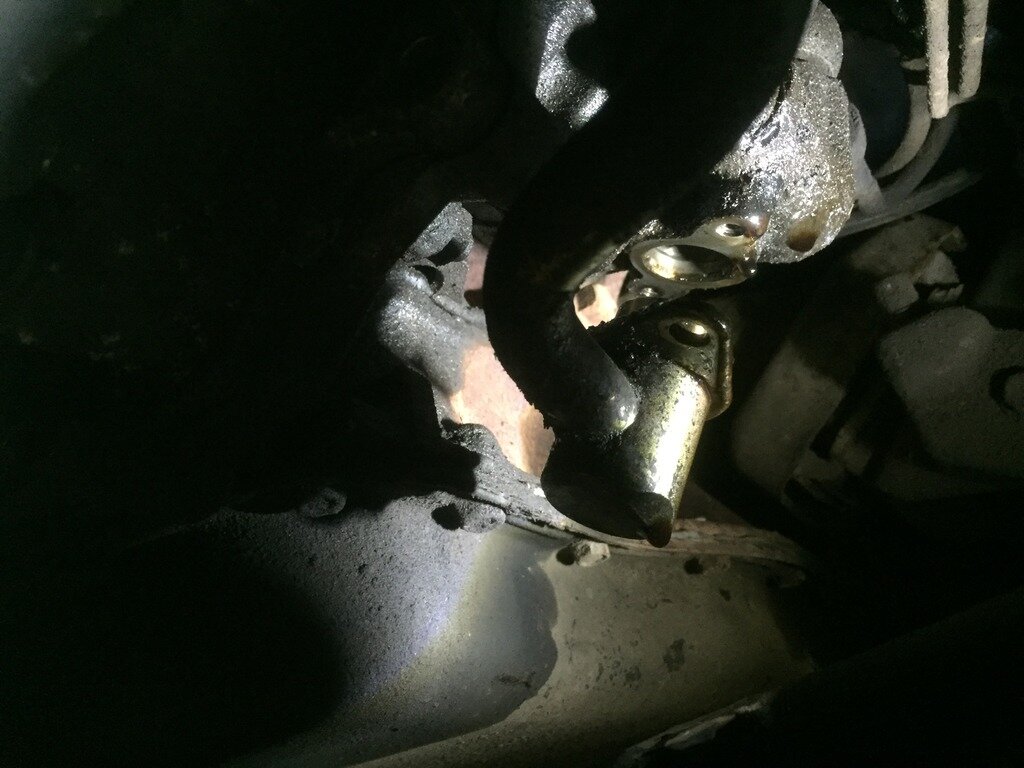

Now undo the 2 nuts that hold the pump, the top one where the spanner is has the foam insert to the right. You can wiggle a spanner in with the foam in situ or wrestle the foam out to give you more room.
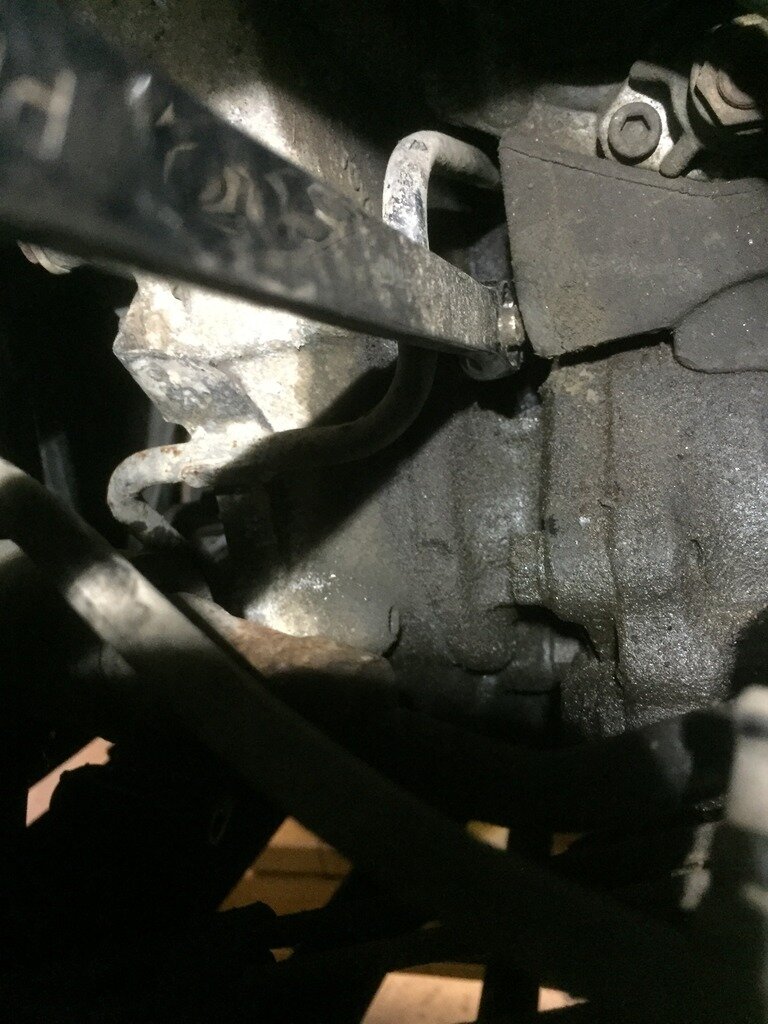
Wiggle the pump backwards off the studs and bring it down past the steering bars to remove.
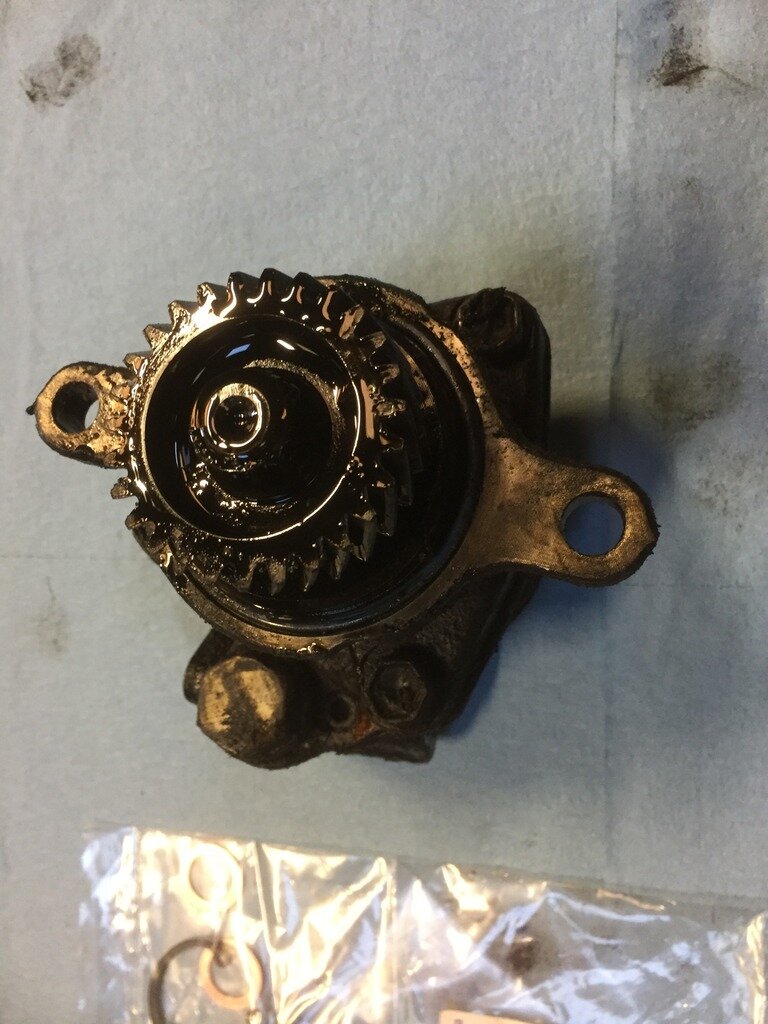
Place drive gear into a vise and undo the end bolt, this will be on very tight and needs some oomph to get it going, use a 12 sided socket for this.
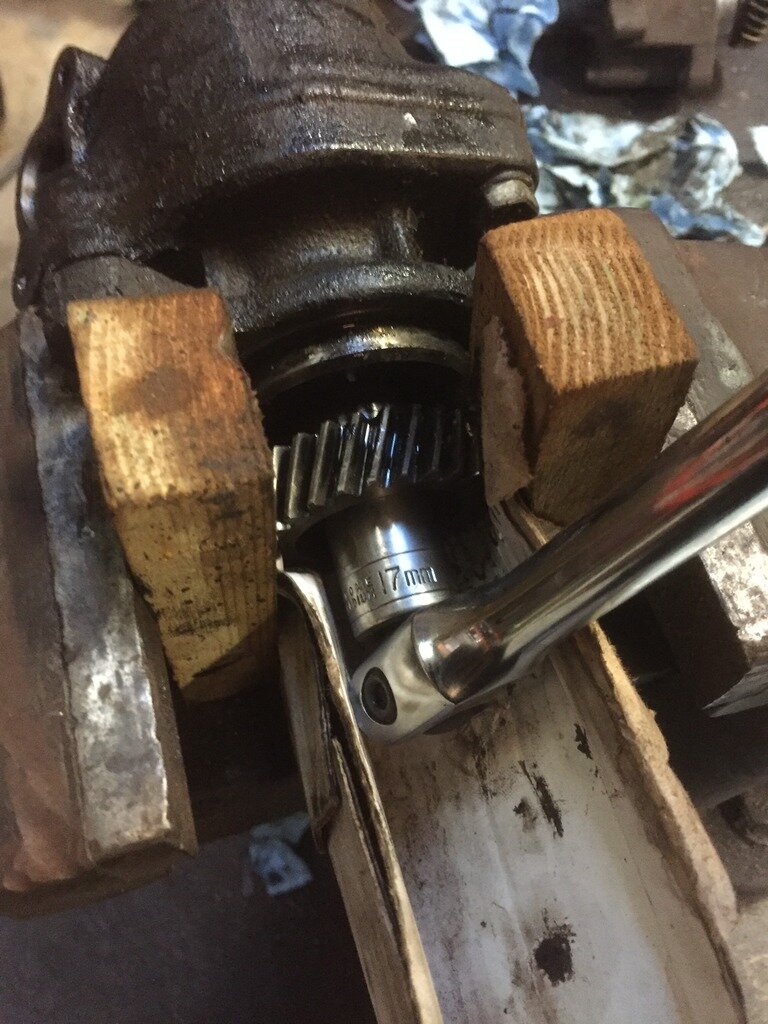
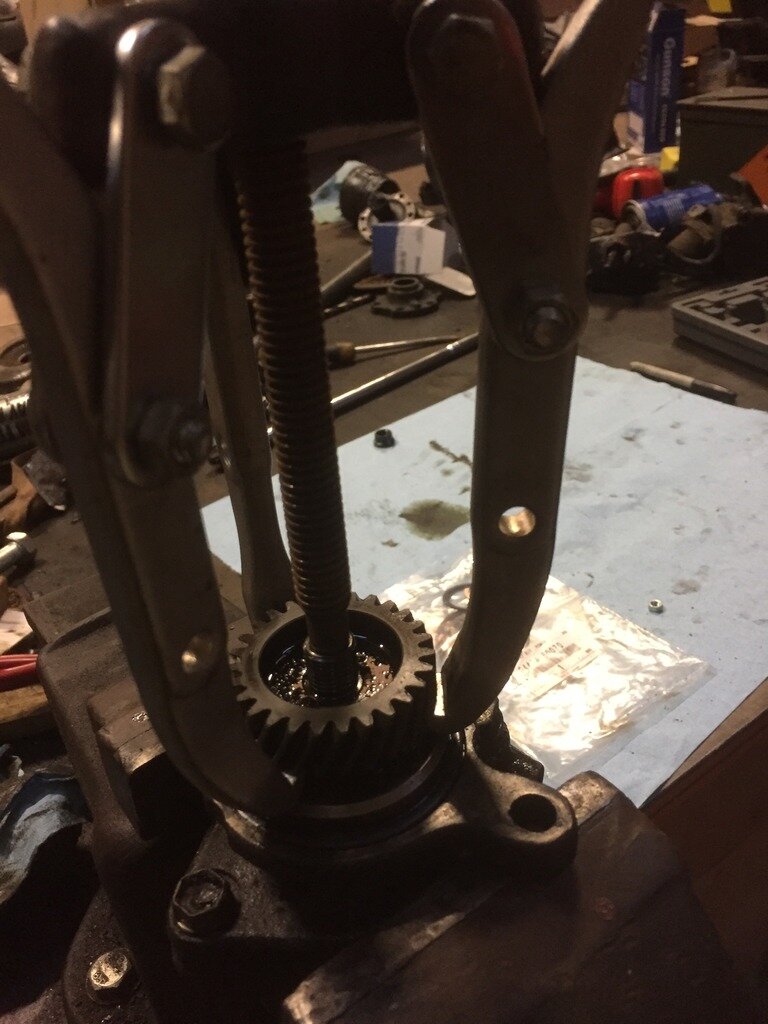
Use a 3 legged puller to remove the drive gear, this usually takes a fair bit of force before releasing with quite a bang, check that the woodruff key is still on the shaft at this point.
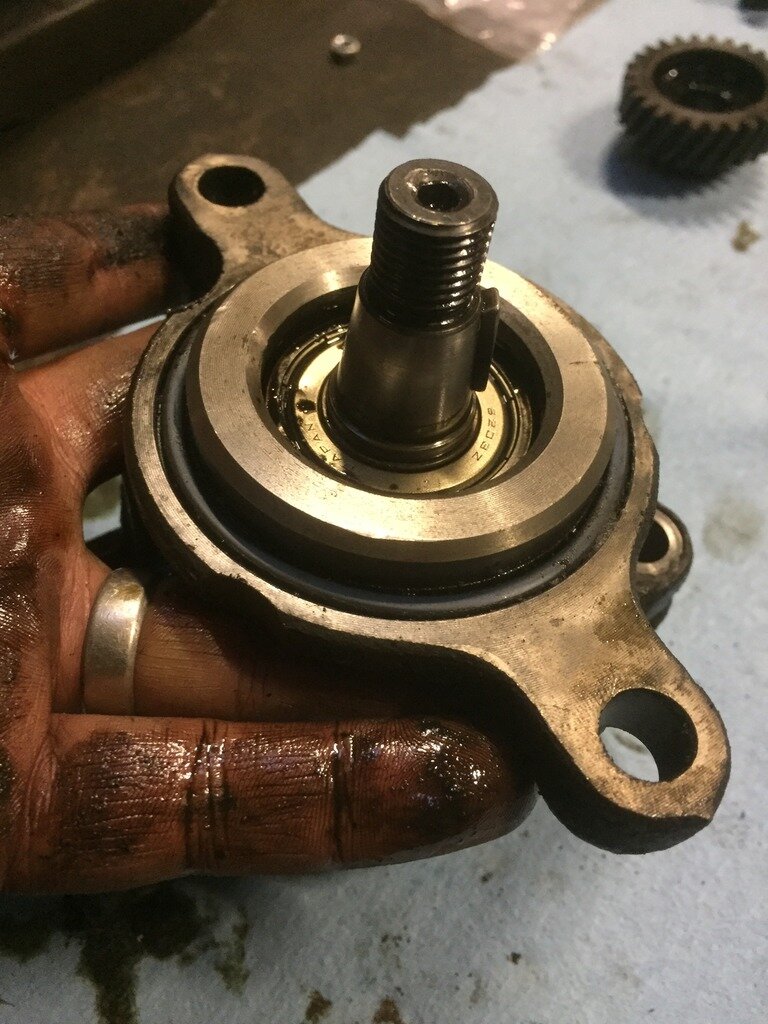
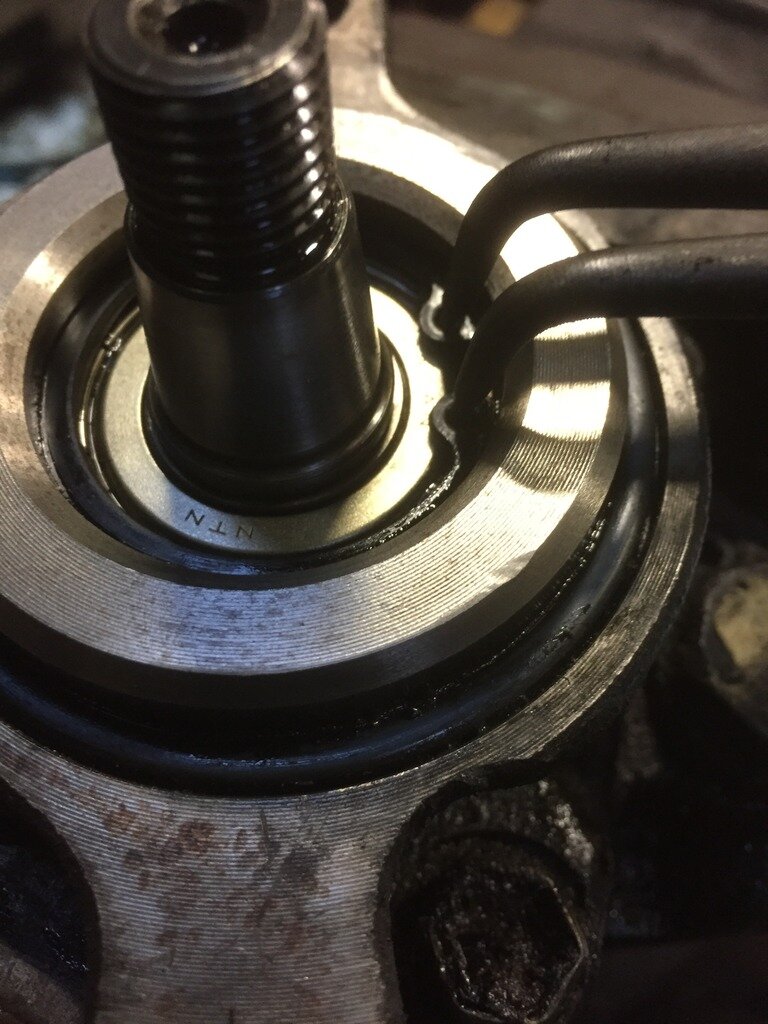
Remove the circlip retainer.
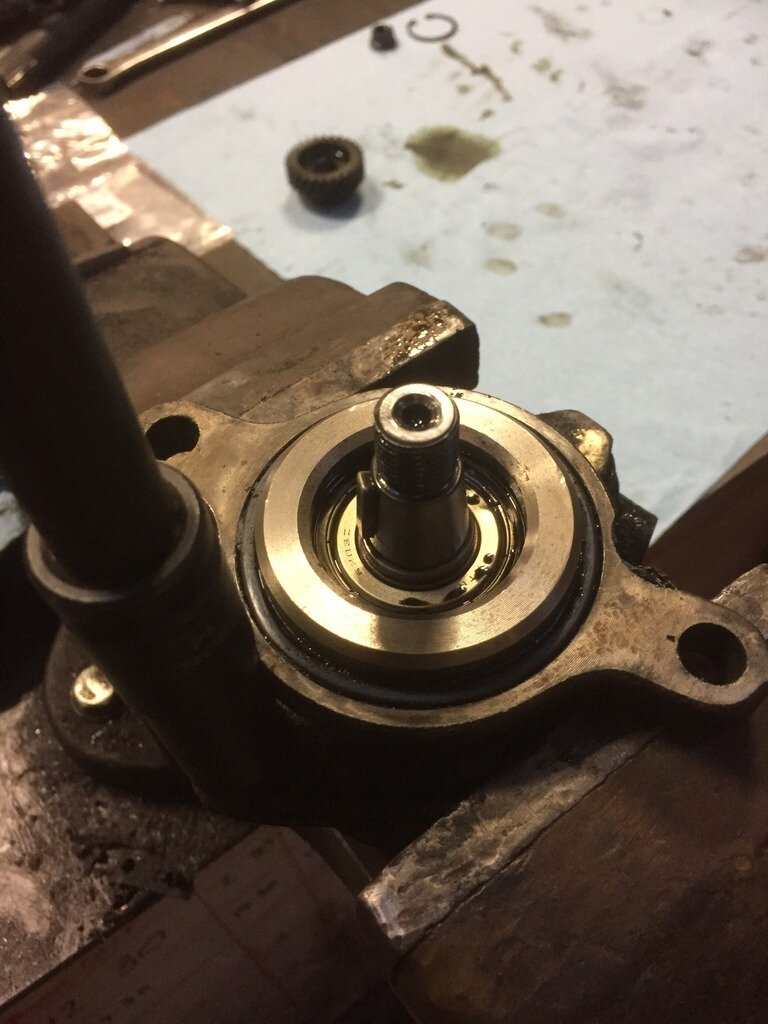
Undo the 3 bolts that hold the 2 halves of the casing together.
Now split the casing apart, this may need a few hits with a soft faced hammer to start it coming apart. It's at this point it may come apart really quickly and you spill various bits on the bench so take some care at this point. Be sure not to lose the little round pin.

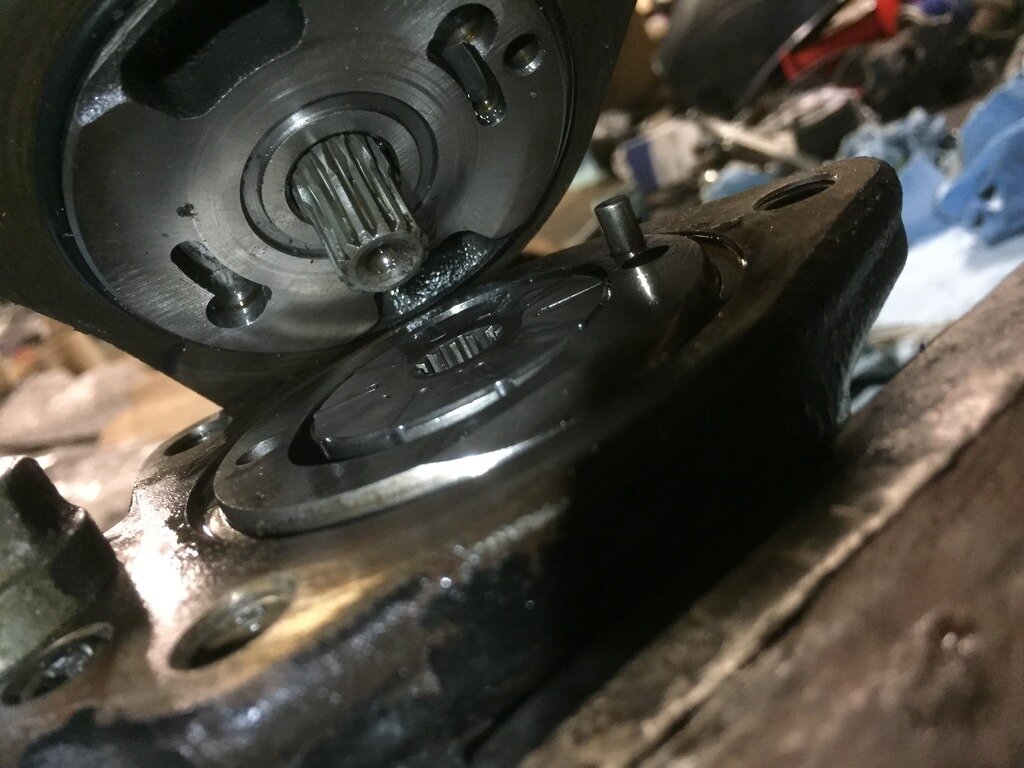
Take the half of the housing with the shaft in and hold in your hand so the drive gear thread shown is pointing down, use the soft faced hammer on the other end of the shaft (splined side) and tap the shaft and it's bearing out.
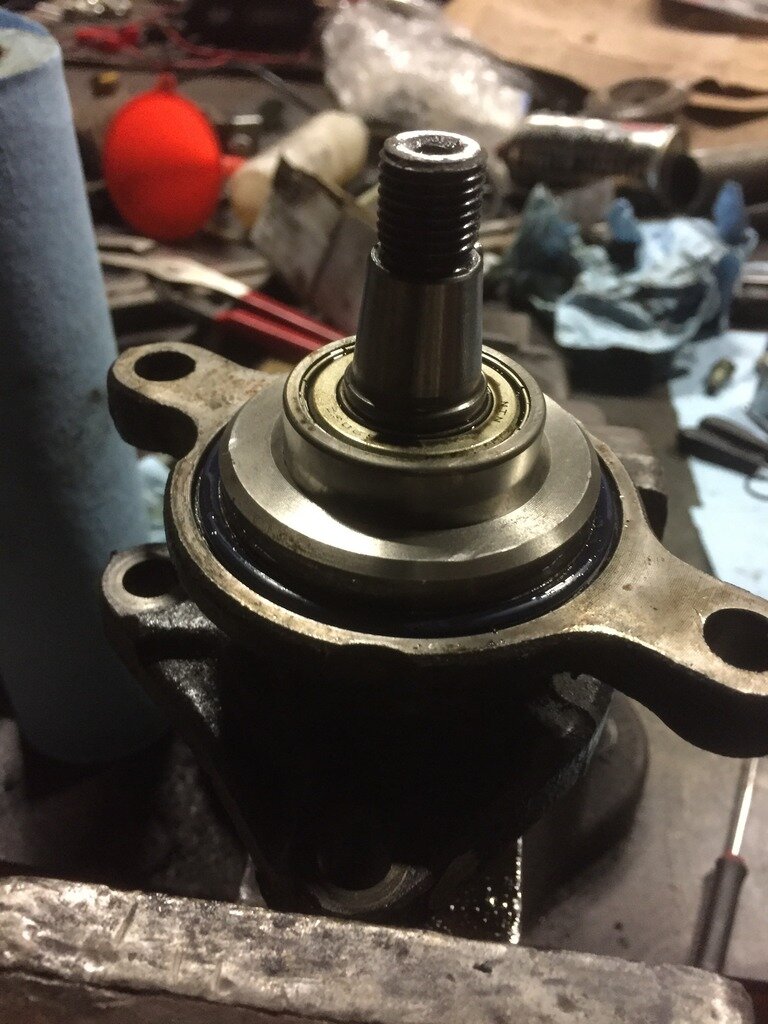
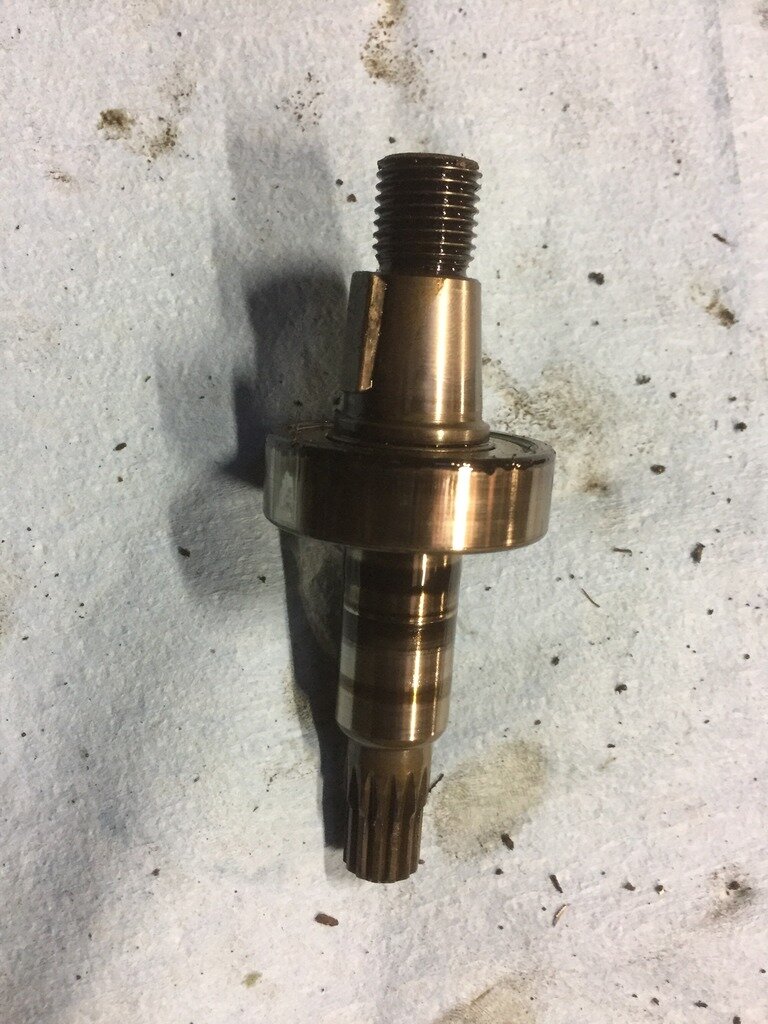
The bearing is not part of the repair kit, if this needed changing then remove the circlip to enable the bearing to be changed.
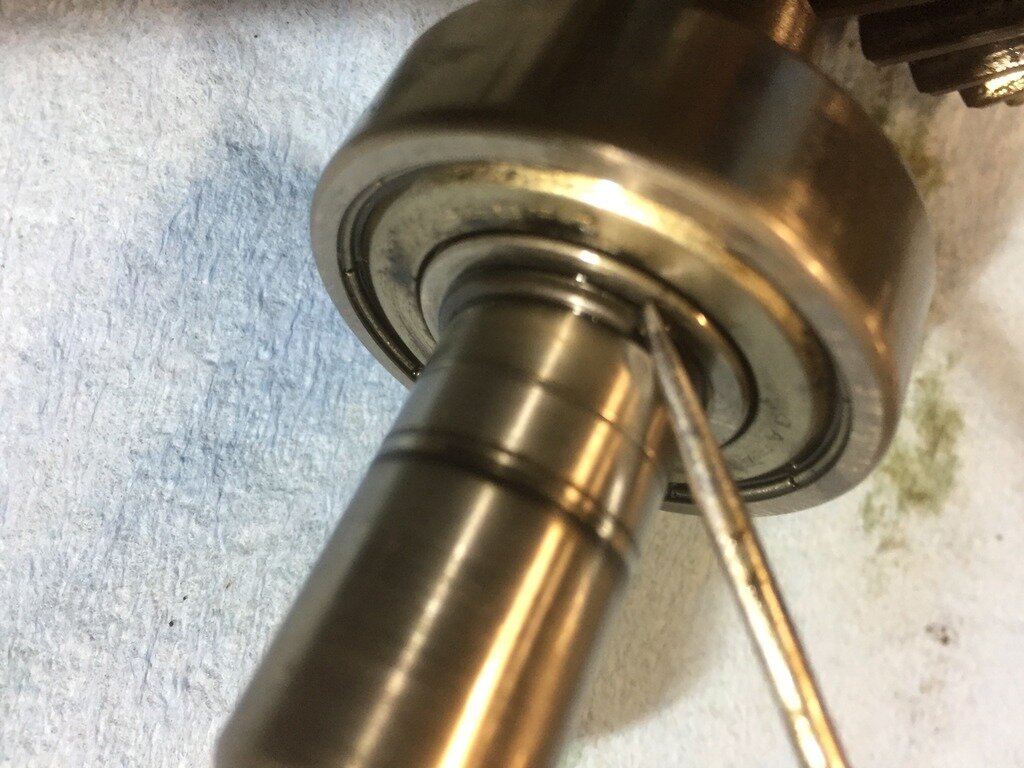
Now the shaft is removed, you can see the oil seal in the housing, you can use a small 2 legged puller from this side to remove it, alternatively you can use a medium flat blade screwdriver from the other side although that does take a little working before the seal will move.

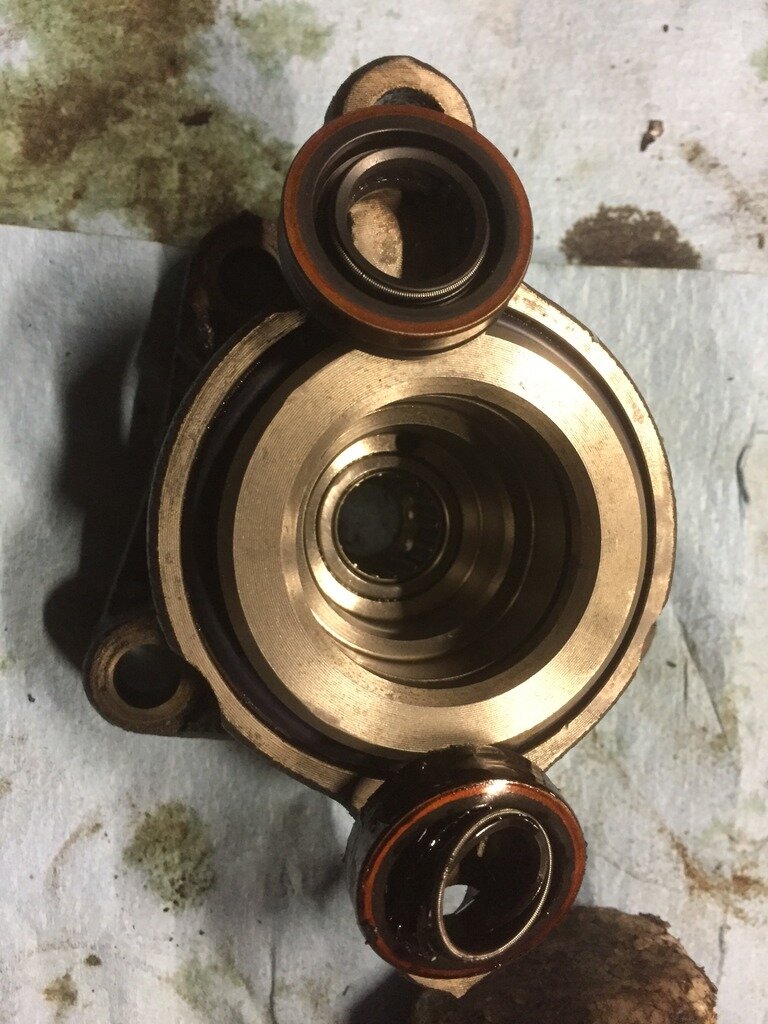
Use a socket to drive in the new seal, I smeared a little ATF around the edge to lubricate.
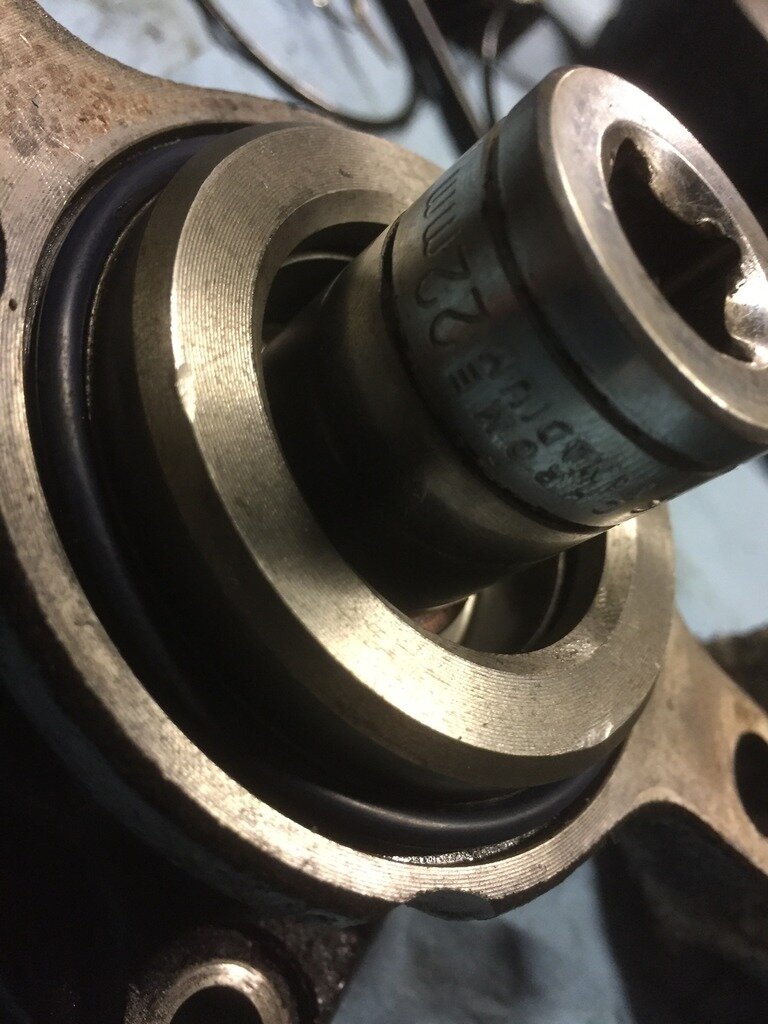
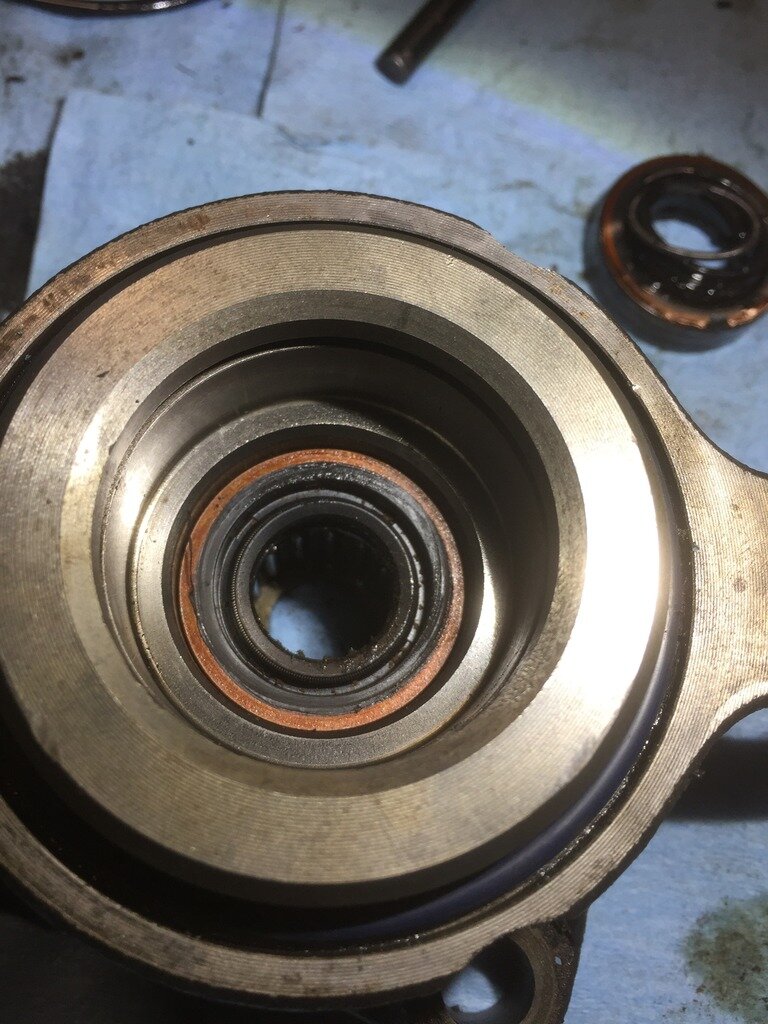
Insert the shaft (double check you are putting it in the correct way round, easy to get this wrong) and this time tap in with the soft faced hammer on the threaded drive gear side of the shaft until it's seated, check you have the groove in the housing showing on the drive gear threaded side to fit the new retaining circlip. Also note the blue O ring seal, fit the new one from the kit, this is the seal where the pump fits to the pump housing on the engine.
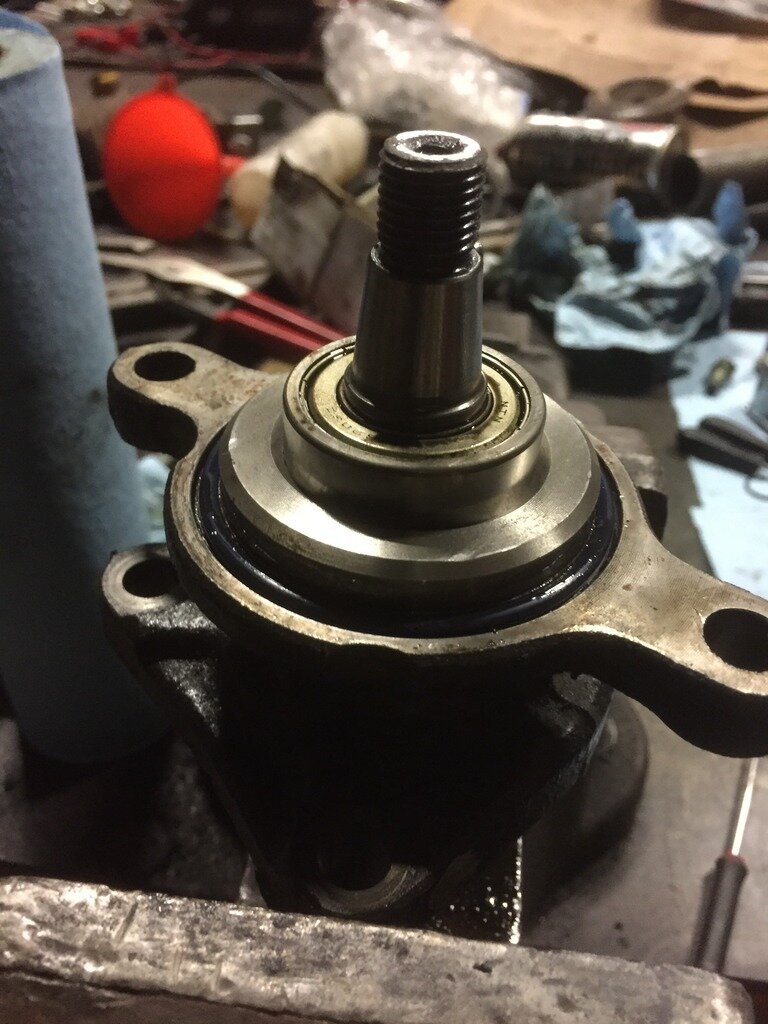
In the kit there are 2 large black O rings, 1 is slightly larger than the other. This is the one you need to replace the O ring where the 2 halves of the casing meet.
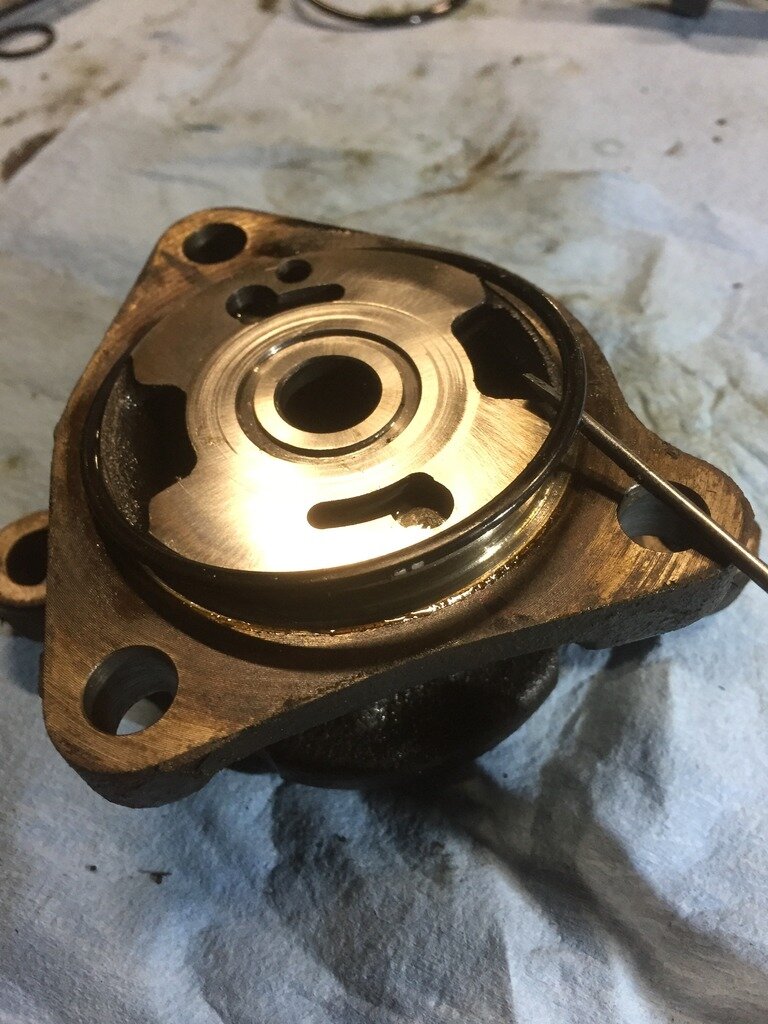
Don't fit the drive gear at this point.
Now we turn to the other half of the casing, remove the little circular pin and put to one side.
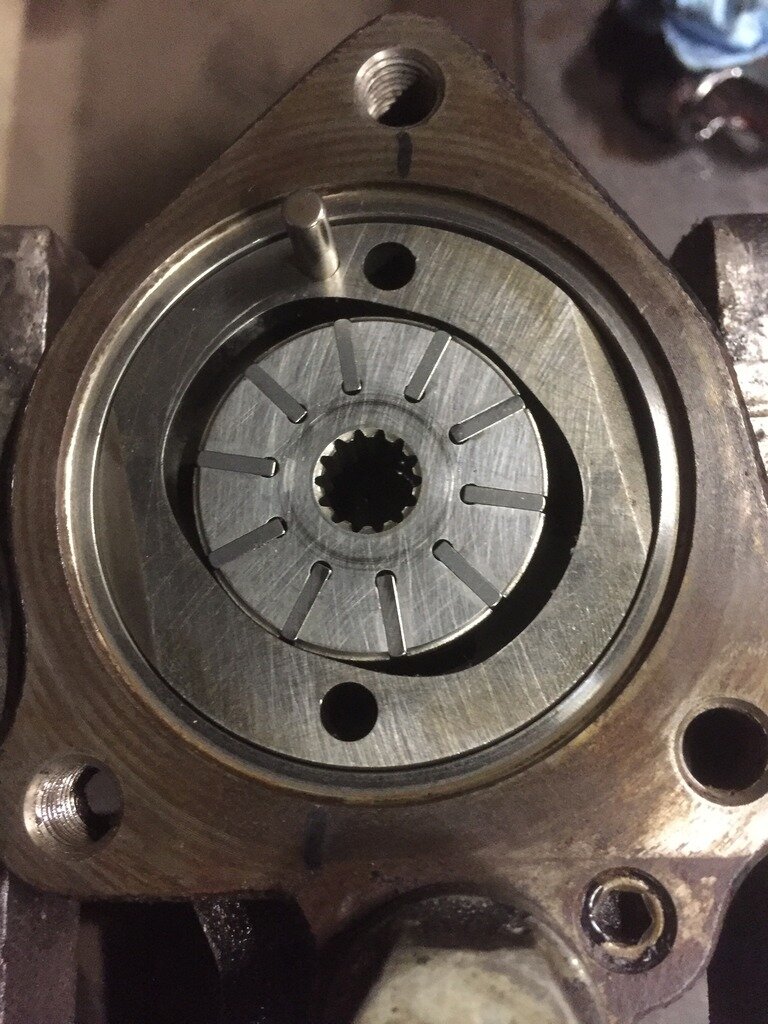
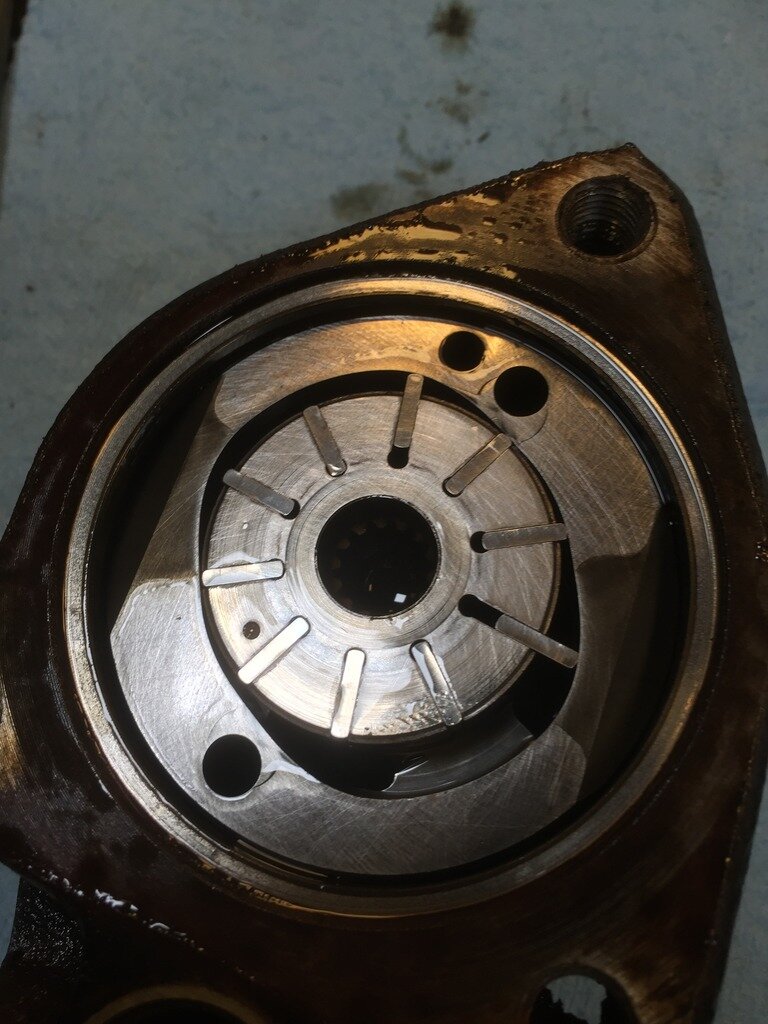
Turn the housing upside down into the palm of your hand so the casing exterior is uppermost, then using the soft faced mallet, hit the top of the casing smartly so that the internals drop into your hand. You may need to hit it sharply quite a few times before everything drops out. Keep your hand over the bench or table as the little vanes can come out.
If they do, the rounded edge of the vanes need to be outermost when you place them back into the carrier.
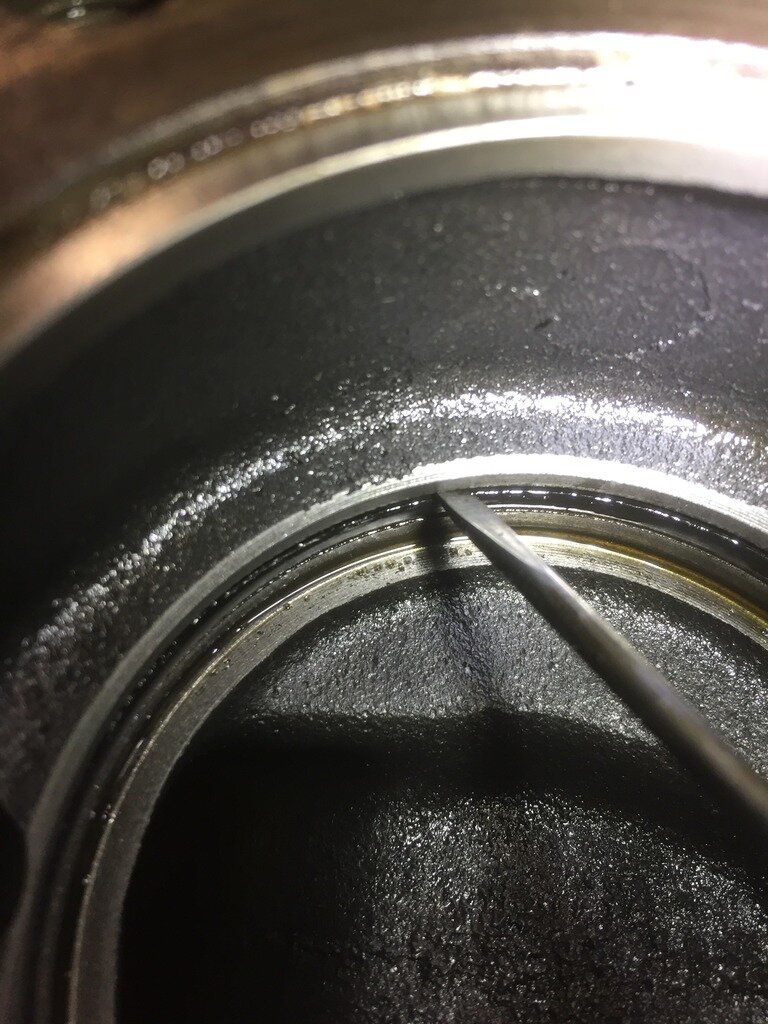
Once you've cleaned out the casing, there is an O ring in a groove near the bottom, this is the smaller O ring of the 2 large black ones in the kit. A small flat blade screwdriver will get it out, can a bit fiddly but not too bad.

Undo the bolt head for the unloader valve with a 22m socket.
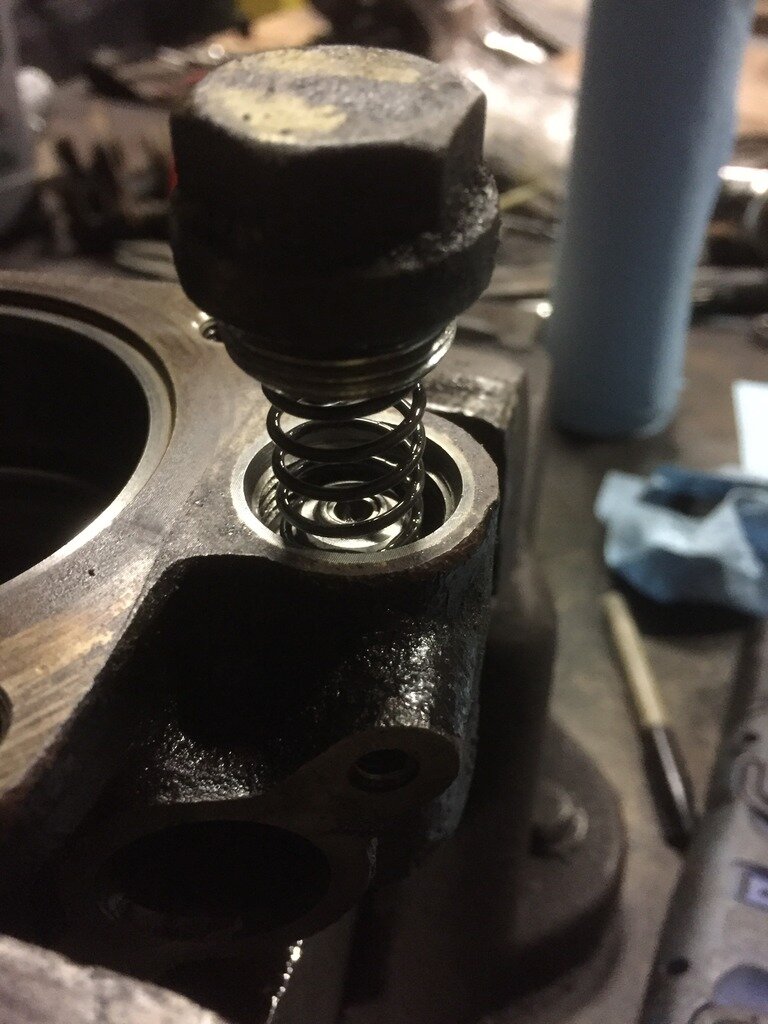
Remove the bolt head and spring, use the larger of the 2 small O rings from the kit to replace the O ring in the bolt head.
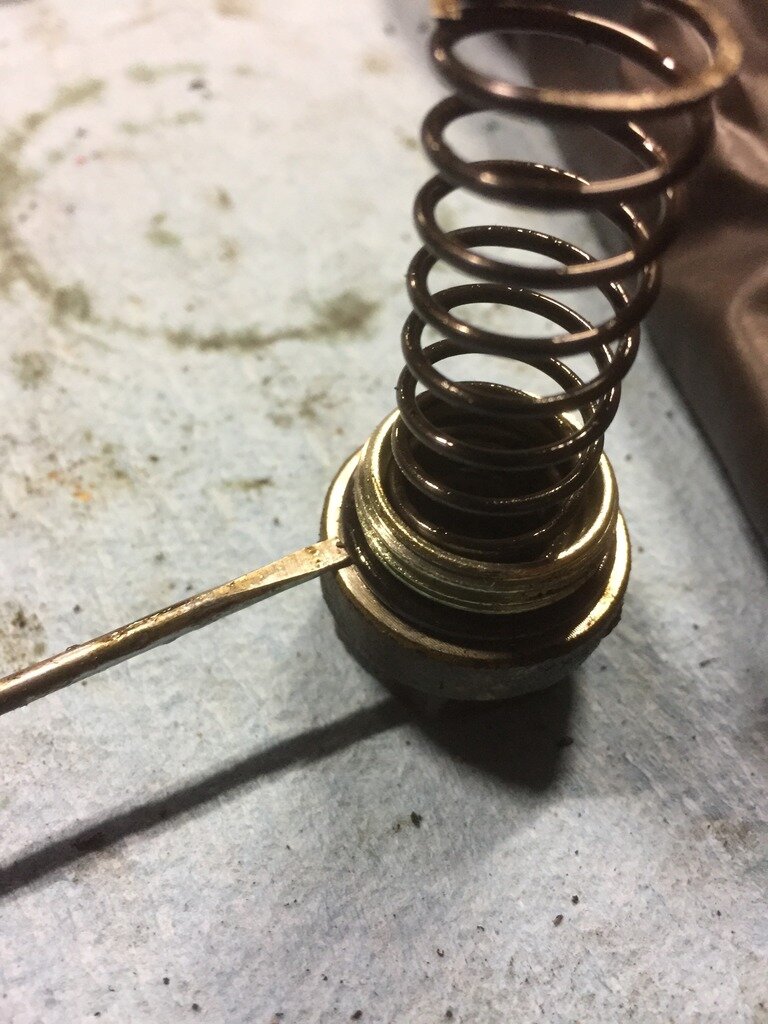
Remove the unloader valve.

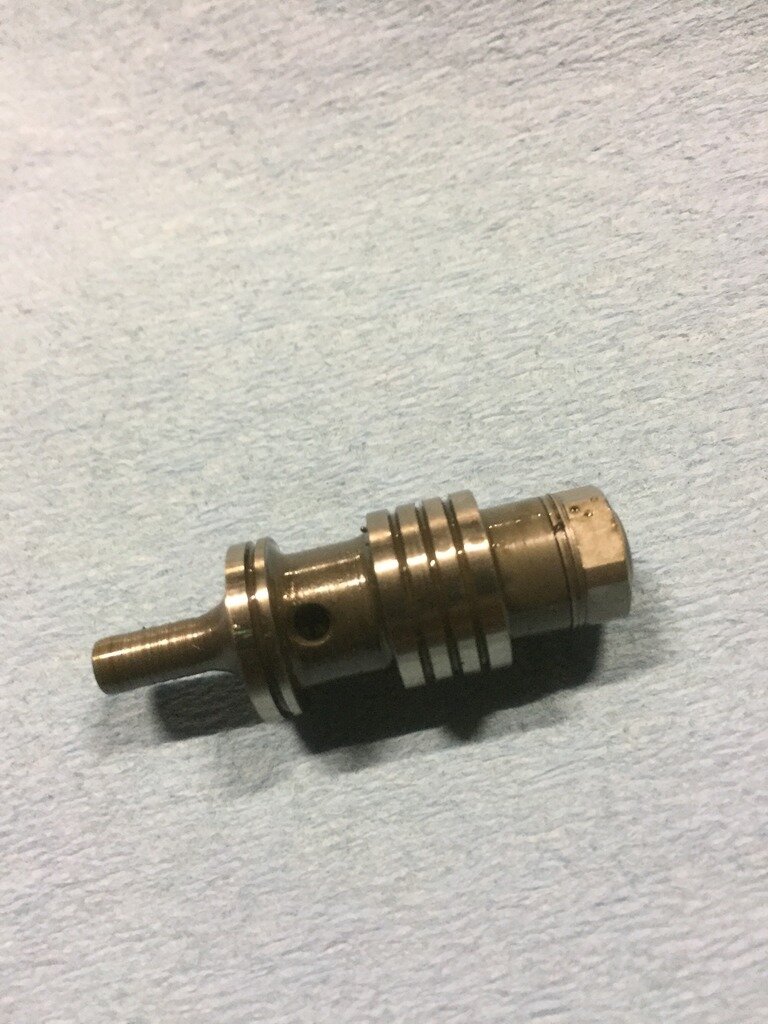
Undo the end with the gauze and it will strip down like this.
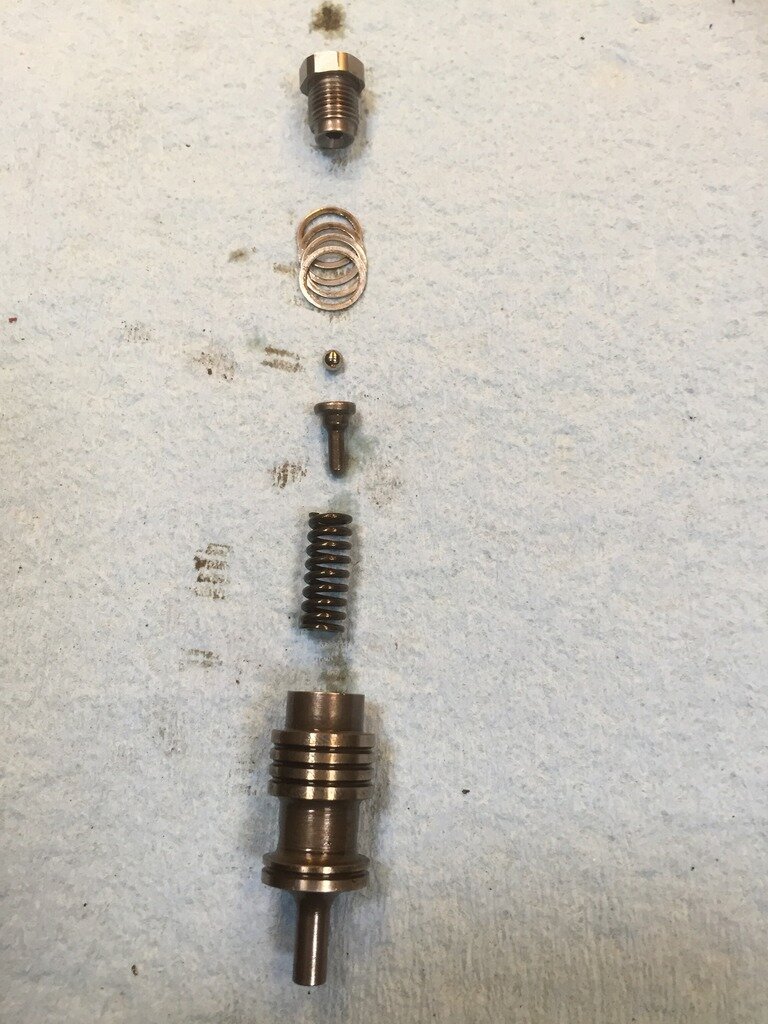
Check the gauze for crud by holding up to the light, use an airline and some ATF to clean. I tend to blow air in from each direction to get it as clean as I can.
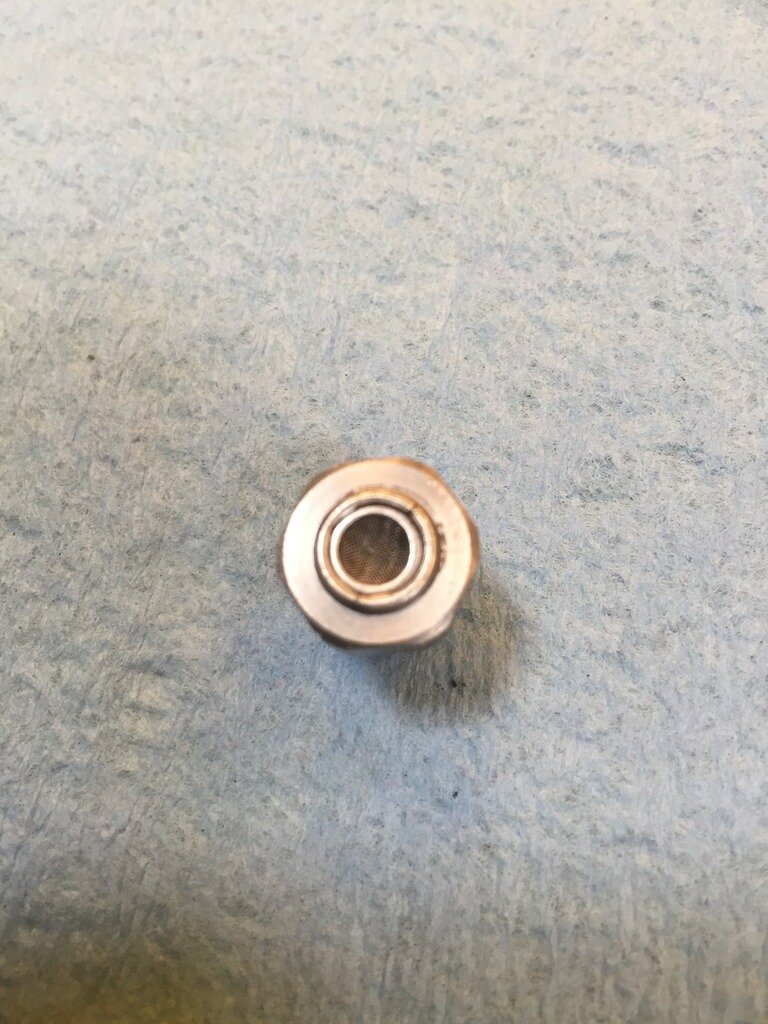
Reassemble the unloader valve and use ATF to lubricate everything and bolt back into the casing.
Now put the half of the casing with the shaft that you did earlier into the vise.
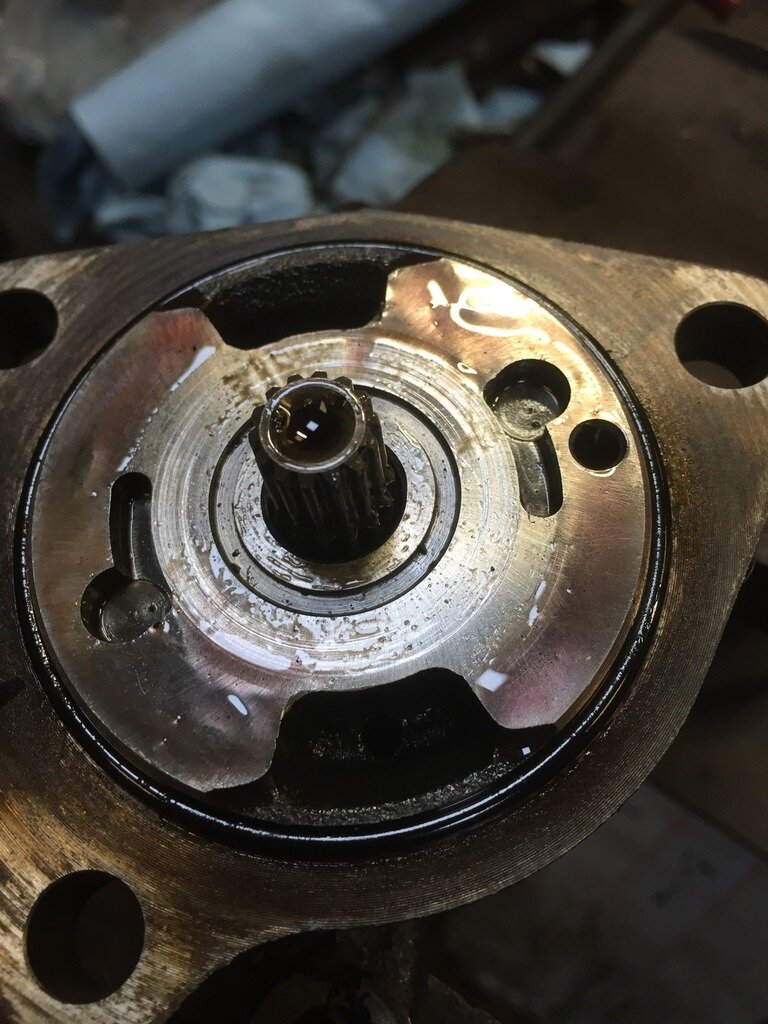
Put the pin back in.
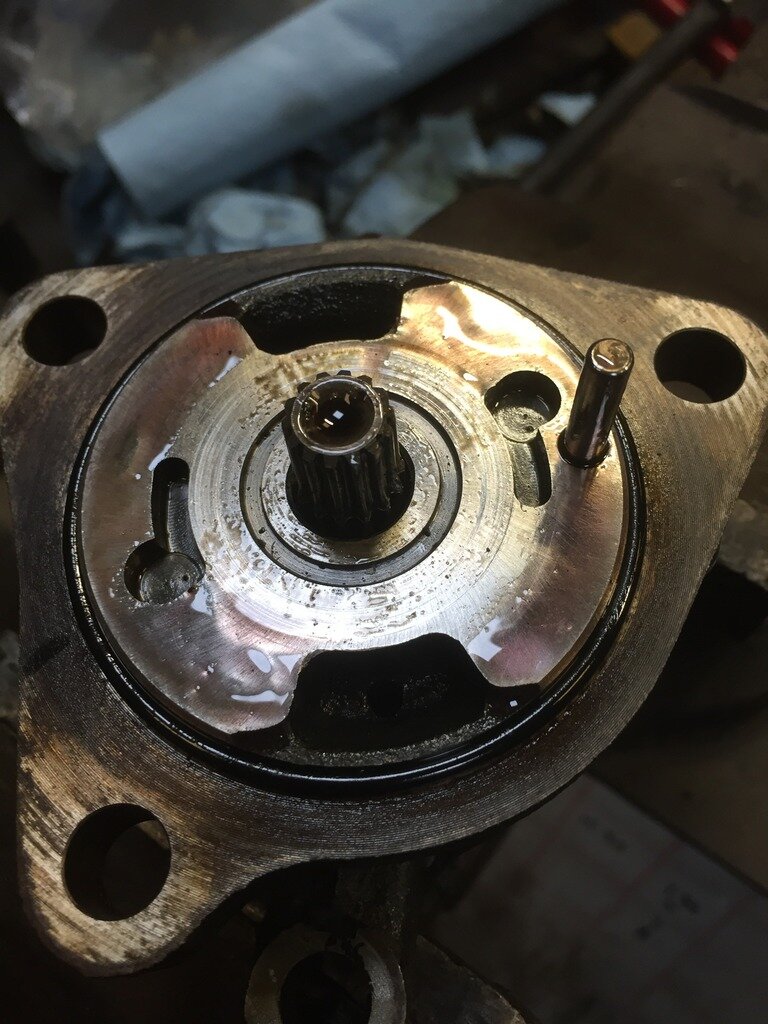
Then the vane carrier, lubricate with ATF. The vane carrier has a shoulder machined out in the splined bore, make sure you fit this the correct way round so the vane carrier sits down properly on the splined shaft.
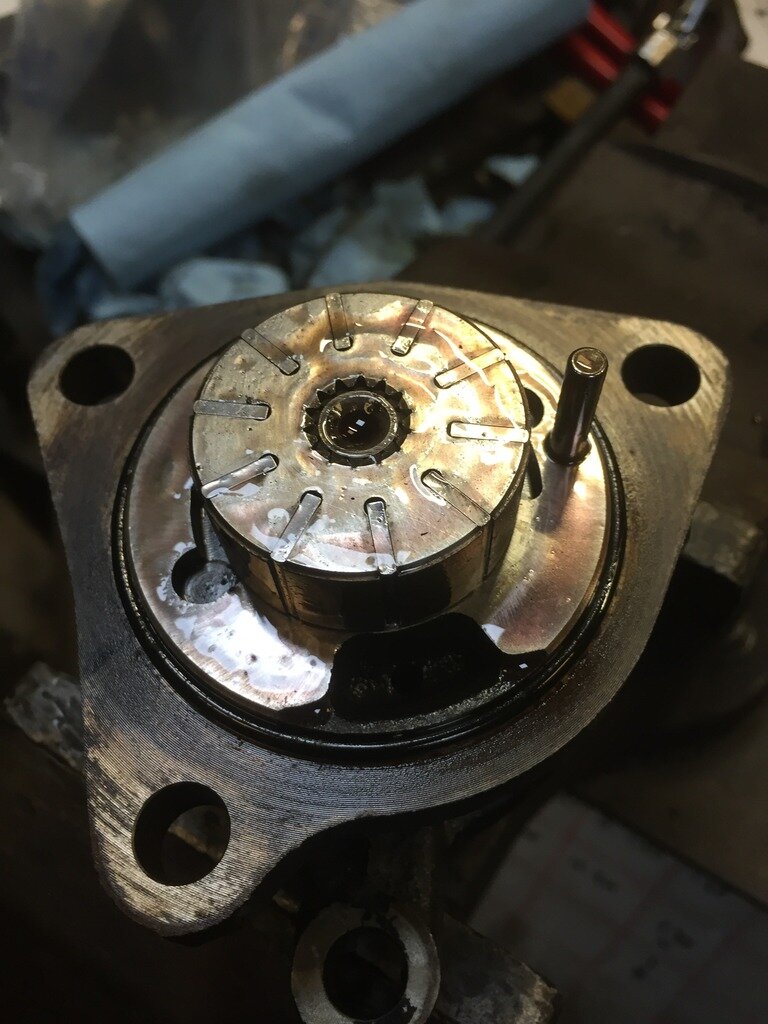
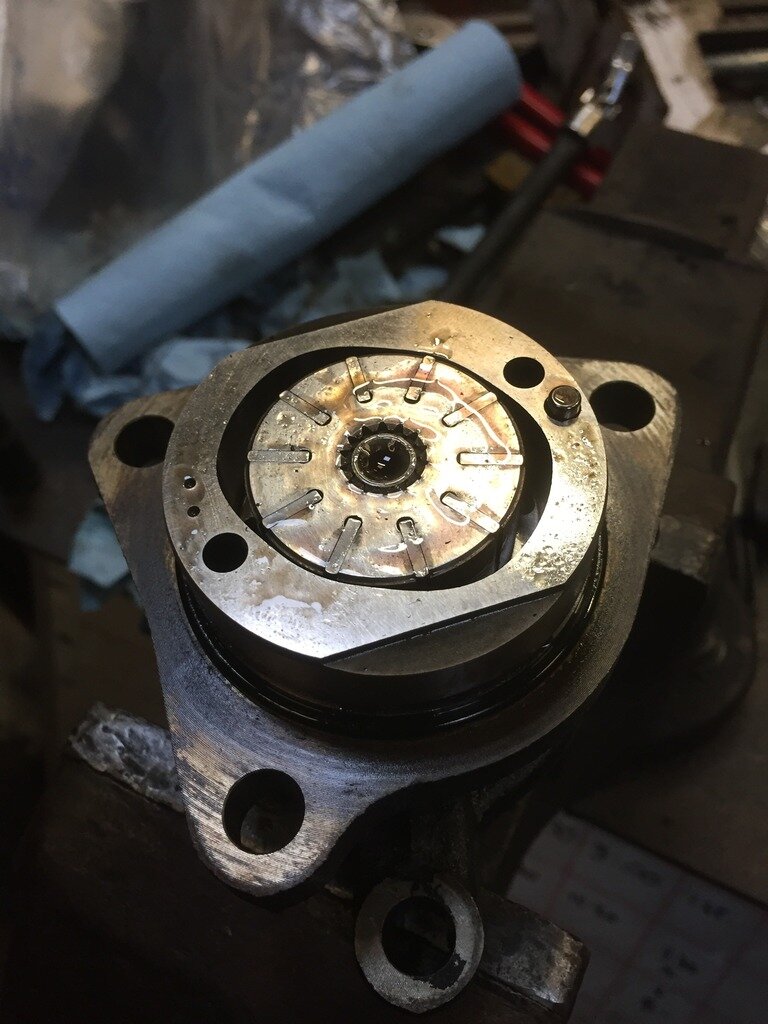
Now slide the outer ring over the pin and vane carrier (The little identifier holes facing uppermost), lubricate with ATF.
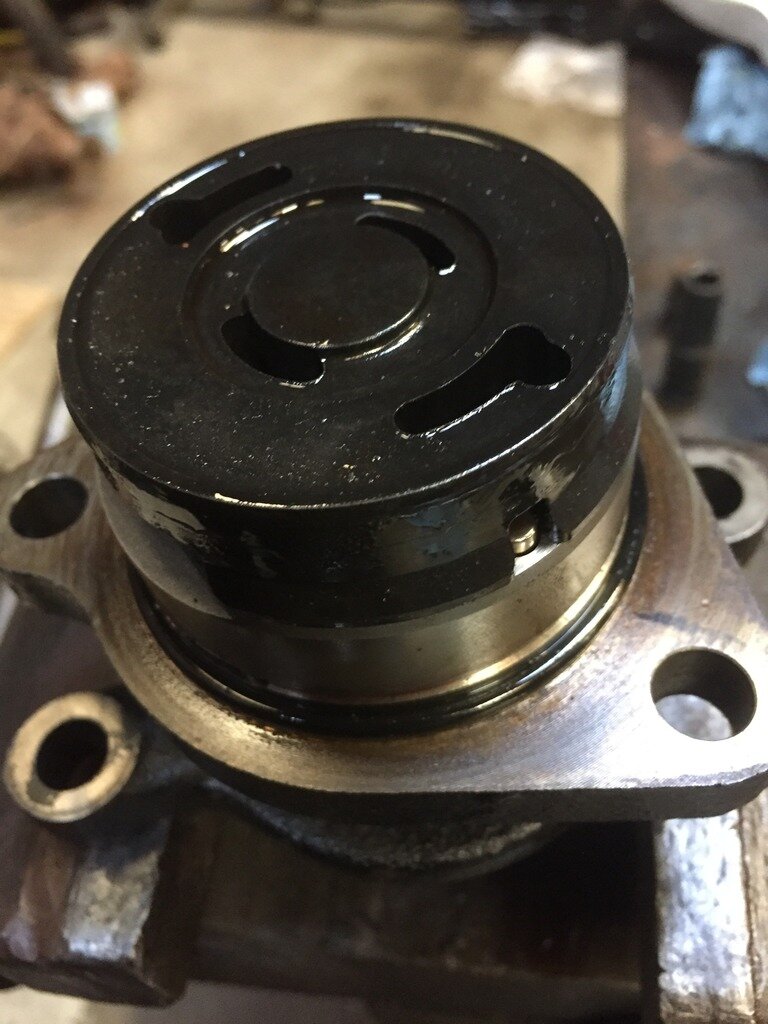
Now the spring base, note how the locating indent aligns with the pin.
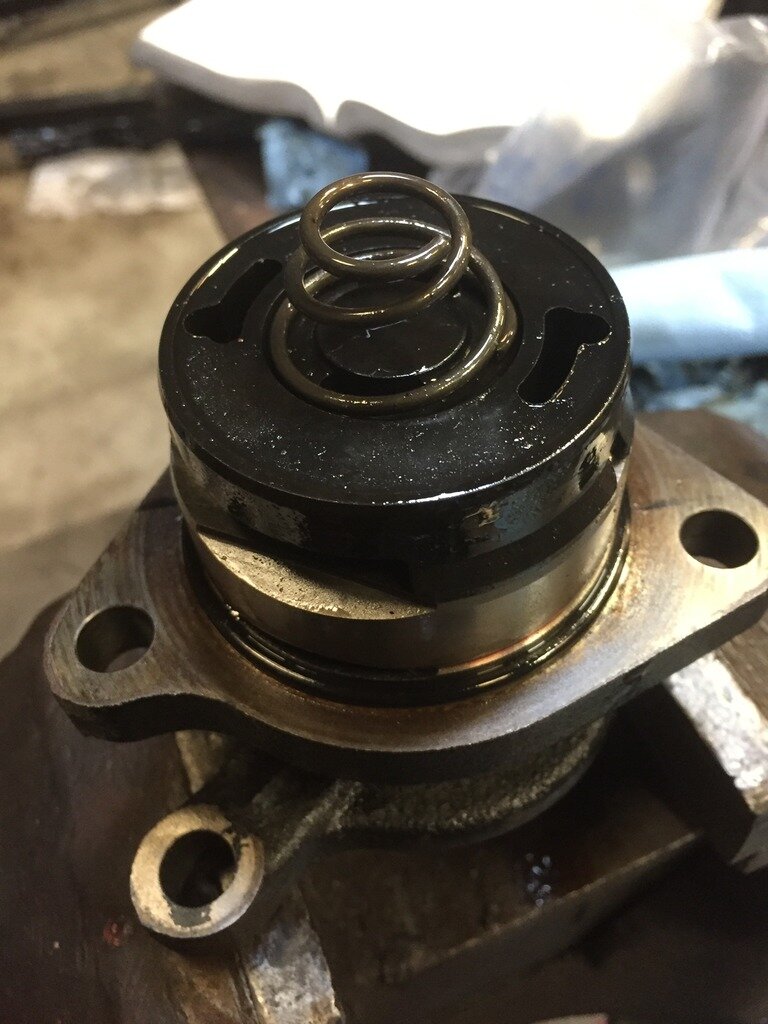
And finally the spring.
 .
.
Alternative view of how it goes together.
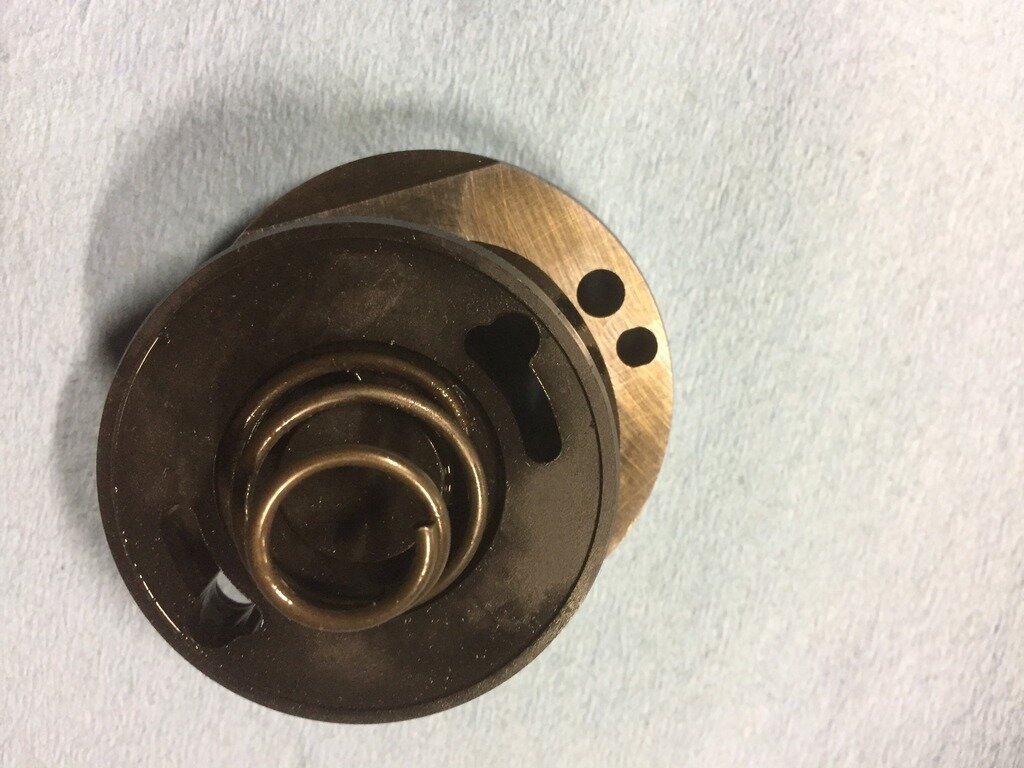
Now bring the empty half of the casing down over the assembly and wiggle it down. You'll be compressing the spring while doing this, put the 3 casing bolts back in and tighten evenly going round all 3.
Now refit the drive gear to the spline.
Refit the bolt and tighten up.
Your final check is to be able to spin the drive gear with only a small amount of drag felt, if there is significant resistance or its very stiff then it has not been assembled correctly. Do not refit to the vehicle, split the casing and reassemble again to correct the problem.
Refit pump to vehicle and refill with PAS fluid.
This is the repair kit

Remove the tin guard above the steering bars to aid access from underneath.
Remove this bolt that holds the clamp for one of the pipes, this will create the wiggle room you'll need to remove the end fitting from the pump.

You can use a bar and 22mm socket to crack the banjo and then it should come undone by hand.

Remember to get both copper washers out with the banjo bolt and replace with the new ones in the kit.


Undo the 2 bolts for the other pipe and pull pipe away. Note in the second picture below, the O ring on the end of the pipe is now revealed, change this with one of the 2 small ones in the kit. **** IMPORTANT *** These 2 small O rings are slightly different sizes, not much in it. The smaller of them is used on this pipe. If you fit the slightly larger one (which is for the unloader valve nut) you will nick the edge when refitting this pipe and it will leak.


Now undo the 2 nuts that hold the pump, the top one where the spanner is has the foam insert to the right. You can wiggle a spanner in with the foam in situ or wrestle the foam out to give you more room.

Wiggle the pump backwards off the studs and bring it down past the steering bars to remove.

Place drive gear into a vise and undo the end bolt, this will be on very tight and needs some oomph to get it going, use a 12 sided socket for this.

Use a 3 legged puller to remove the drive gear, this usually takes a fair bit of force before releasing with quite a bang, check that the woodruff key is still on the shaft at this point.


Remove the circlip retainer.

Undo the 3 bolts that hold the 2 halves of the casing together.

Now split the casing apart, this may need a few hits with a soft faced hammer to start it coming apart. It's at this point it may come apart really quickly and you spill various bits on the bench so take some care at this point. Be sure not to lose the little round pin.


Take the half of the housing with the shaft in and hold in your hand so the drive gear thread shown is pointing down, use the soft faced hammer on the other end of the shaft (splined side) and tap the shaft and it's bearing out.


The bearing is not part of the repair kit, if this needed changing then remove the circlip to enable the bearing to be changed.

Now the shaft is removed, you can see the oil seal in the housing, you can use a small 2 legged puller from this side to remove it, alternatively you can use a medium flat blade screwdriver from the other side although that does take a little working before the seal will move.


Use a socket to drive in the new seal, I smeared a little ATF around the edge to lubricate.


Insert the shaft (double check you are putting it in the correct way round, easy to get this wrong) and this time tap in with the soft faced hammer on the threaded drive gear side of the shaft until it's seated, check you have the groove in the housing showing on the drive gear threaded side to fit the new retaining circlip. Also note the blue O ring seal, fit the new one from the kit, this is the seal where the pump fits to the pump housing on the engine.

In the kit there are 2 large black O rings, 1 is slightly larger than the other. This is the one you need to replace the O ring where the 2 halves of the casing meet.

Don't fit the drive gear at this point.
Now we turn to the other half of the casing, remove the little circular pin and put to one side.

Turn the housing upside down into the palm of your hand so the casing exterior is uppermost, then using the soft faced mallet, hit the top of the casing smartly so that the internals drop into your hand. You may need to hit it sharply quite a few times before everything drops out. Keep your hand over the bench or table as the little vanes can come out.
If they do, the rounded edge of the vanes need to be outermost when you place them back into the carrier.

Once you've cleaned out the casing, there is an O ring in a groove near the bottom, this is the smaller O ring of the 2 large black ones in the kit. A small flat blade screwdriver will get it out, can a bit fiddly but not too bad.


Undo the bolt head for the unloader valve with a 22m socket.

Remove the bolt head and spring, use the larger of the 2 small O rings from the kit to replace the O ring in the bolt head.

Remove the unloader valve.


Undo the end with the gauze and it will strip down like this.

Check the gauze for crud by holding up to the light, use an airline and some ATF to clean. I tend to blow air in from each direction to get it as clean as I can.

Reassemble the unloader valve and use ATF to lubricate everything and bolt back into the casing.
Now put the half of the casing with the shaft that you did earlier into the vise.

Put the pin back in.

Then the vane carrier, lubricate with ATF. The vane carrier has a shoulder machined out in the splined bore, make sure you fit this the correct way round so the vane carrier sits down properly on the splined shaft.

Now slide the outer ring over the pin and vane carrier (The little identifier holes facing uppermost), lubricate with ATF.

Now the spring base, note how the locating indent aligns with the pin.

And finally the spring.
 .
.Alternative view of how it goes together.

Now bring the empty half of the casing down over the assembly and wiggle it down. You'll be compressing the spring while doing this, put the 3 casing bolts back in and tighten evenly going round all 3.
Now refit the drive gear to the spline.
Refit the bolt and tighten up.
Your final check is to be able to spin the drive gear with only a small amount of drag felt, if there is significant resistance or its very stiff then it has not been assembled correctly. Do not refit to the vehicle, split the casing and reassemble again to correct the problem.
Refit pump to vehicle and refill with PAS fluid.
Last edited:


