Don't like the adverts?  Click here to remove them

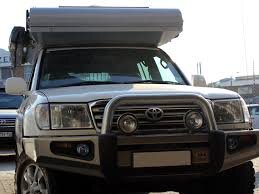
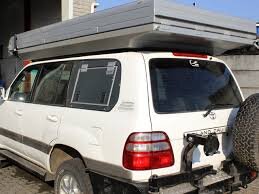
SAFARITEC`d Land Cruiser 100

IMG_9183.JPG

As she sits without the roof top box pictured in my last posting.

One may argue alot about the shape, heights etc etc on this...
There is a profound reason for all. We have absolutely maximized the space available on the roof, not compromising on head room inside the cabin, maiking sure we get enough space inside the "tented area" to both store the matrasses, bedding & have enough room for the feet.
Some of these points are fairly tugh to bring across in writing, so please do ask & I will attempt to elaborate.
The bed is "firm" from the front to the B-pillar. Thereafter there are 3 elements layed down going aft.
The last 2 bed elements are split longditudunal so that they are each on half of the bed in width.
It is now possible to climb into bed either from belowe or from the aft.
Acess from the aft will be much better granted I get around to fit the rear hatch ladder....
With "alot" of luggage in the back, it is abit of a hazzle to climb in & out from the inside without re-arranging all ones belongings..
 
Hanging out at the previously mentioned Adventure Northside show near Walsrode with my good friends from Hamburg
IMG_20161001_135954.jpg

FrontRunner Awning out.
A moskitonet that will fully enclose the covered area by the awning is with us, did not need the feel to pitch it though.
IMG_20161001_131442.jpg

We where "lucky" to be in that far corner... But it got very cramped on Saturday as visitors with bigger trucks startet to camp on the area secured for exhibitors. I was there by special invite... barely made it out of there late Saturday as I had a ferry to catch.
No escape routes established... which I found scary!!
 
The Cruiser will have to take the back seat for now as we are completing other big projects this year.
I don`t assume You guys want to see pics off Land Rovers with a Pop-top:p:cool:
 
Last edited:
Don't like the adverts?  Click here to remove them
May I ask who made the pop top roof ?
 
Hi MBLINKO

In essence the material & laboiur was supplied by me. The work & design where carried out under very strict surveilance from a known German company who oversaw the build & layed down the guidelines. Paint was outsourced.
Subesequently to completion the conversion has been fully TüV approved rendering the vehicle road legal.
If You would like any further information, please PM me respectively :)
 
Not to clutter this any further, a quick few shorts of the 1.st
Defender_1.jpg

A 2011 Defender "Rough", the blank canvas
IMG_0605.JPG

PopTop & 270 Awning
IMG_0607 (2).JPG

Sporting the new JW Speaker LED head lamps
IMG_0608 (2).JPG
IMG_0619.JPG

In order to do a PROPER jobm the fuel tank came out in order to install the Webasto Airtop Fuel pickup
IMG_0620.JPG

Wit the Airtop & the big fridge in the back, a dual battery setup was in order..... Its tight under the drives seat
IMG_0621.JPG

SafariSnorke fitted, hopefully soggy wet airfilters are now a thing of the past....
 
I think Alu-Cab used to make one for 100, not sure how many they sold though for the 100. The one on the car above looks very similar

Correct, AluCab made exactly 2 units or the LC J10. The number comes from the top floor in CT...
To even compare the AluCab unit to what I fitted to the LC 100 pictured above, one must be rather blind....
The AluCab unit looks like this...

AluCabLC1002.jpg AluCabLC1001.jpg
 
Correct, AluCab made exactly 2 units or the LC J10. The number comes from the top floor in CT...
To even compare the AluCab unit to what I fitted to the LC 100 pictured above, one must be rather blind....
The AluCab unit looks like this...

View attachment 110484 View attachment 110485

......"rather blind"......well actually I was thinking of the look of the Alu-Cab roof when mated to a 78 or 76 as these are much slicker designs than those 'prototype' pictures of the 100. I've never seem one in the flesh for a 100. Sadly the top box on your vehicle spoils the slim lines of the main roof IMHO. How long is your roof BTW - about 1.8m?
 
AluCab never made a poptop for the 76....
As for the 100, it was discontiniued. Apparently no marked...

My top box is a TOMS unit for a Hzj78 that has been reshaped to fit the LC100. It is detachable. The other option was a permanent lidded unit that did not float my boat. TopBox holds a spare wheel ao
The bed is >2m I can measure it Thursday if it is a pressing matter

Currently fitting lockers, reworked the original battery setup & added some more lights etc.
Nothing mayor.
 
Do I have to pull the rear ABS sensors out of the rear axle to retract the halfshafts safely??o_O

I ask before I f** up & have to shell out on new ones
 
Thanks Jon
I was having dinner when Your reply came in.
By that time I had already the shafts allright. TBH the sensor where stuck... I took a chance... :-D

The outer egde of the crown wheel is rather sharp... Sharfer than I like it to be
The print itself looks reasonable. Will do another test tomorrow with color. when I check the backlash
 
Had some time before Christmas to adress the Land Cruiser again.

As mentioned I completed wiring the rear reversing light.
Threw some red countersunk LED lamps into the upper rear hatch. They shine inwards when the hatch is lifted. Gives a great worklight, especially combined with the LED`s fitted to the poptop.
Wired in some more USB power outlets for the rear seat passengers. Fitted them into the rear seat belt cover on the C-pillar
The ARB unit went into the rear axle allright. Ran the airline with an outer tube to protect is against any potential foreign objects. Next up is the ARB locker in the front.
The main batteries went down on me, so I redid the wiring up front. The engine bay now hosts two identical 95Ah batteries. Alot less hazzle if they need to be replaced enroute or off the beaten track.
The rear hatch was fitted with a 9mm thick marine grade plywood plate thet I cladded with a 1mm food grade stainless steel plate. Should make a descent cutting board. Bye Bye carpet :)
Ontop of the Outback drawer systems I had fitted some cargotracks as tie down points. Unfortunately the Cub & Wolf boxes did not fit as neatly as intended. Shifted the FrontRunner tracks around & fitted a black HD Airline rail in the middle. Should have opted for them Airlines in the first place...
The rear access to the poptop had to be adressed again. The ladder I have had kicking about for awhile now, was offered to the truck only to realize it will not fit as pr makers instructions nor my desires. I brought out the grinder & the welder. We are getting there slowly :kissing:
As the undercarridge has suffered from harsh conditions on Norwegian roads, I blasted a good >10ltr FluidFilm NAS under the old thing. Should keep the tin worm lubed up for now :fearscream:
A stainless bracket ment to hold the manual main cut off switch for the winch is in the making. Strongly looking into replacing the winch too.
The previouse wire job to the sub tank diesel transfer pump was not to my liking. Ran a new thicker cable in conduit off the relay. The pump was fitted with an AMP connector. I did the same to the spare transfer pump.
May install the spare pump on a permanent bracket. If things go down, it should be fairly simple to switch piping & cables across. A stainless steel plate will shield the pump(s) acting as a small bash plate

Next on the list is some engine TLC for the upcomming trips in 2017.
& whatever else drops in my lap:sunglasses:
 
Abit more work is going into the LC again.
Will soon complete work on the lockers when the front diff gets its ARB unit too.
I`m gonna make up some Stainless bush wires to go between the pop top subframe & the top of the bullbar.
PO left a messy job on the winch. Tidying that up & adding a main breaker swicth under the bonnet.
Some needed mechanical maintenace is on the work list too
All in all overseeable.

Some more pics
Stainless steel over marine ply on the lower tail gate
IMG_20170212_145738.jpg
IMG_20170212_145720.jpg

The red LED`s acting as working light when working out of the back, I was thinking about it for some time-> Where best to hide the switch??? I thing it came out pretty nice
IMG_20170212_145659.jpg
IMG_20170212_145903_1.jpg

Then the illuminated rocker switch for the water plant. Underneight are USB & Ciglighter outlets
IMG_20170212_145834_1.jpg
 
Interested in where you got those water connectors for your Seagull filter - cant get anything suitable in the UK
 
Steve, these are very standard R1/2" fittings.
In this case I used chromed brass. I was not able to get hold of stainless at the time of assembly.
Where the white shower head hose connects, there is a R1/2-> 3/8"-reduction.

I could at least name a source in Aberdeen. I cannot understand You aren`t able to source this elsewhere.
Should I send You some??
 
Back
Top