Don't like the adverts?  Click here to remove them

MT Changing the Clutch

IRLGW

Well-Known Member
Joined
Dec 2, 2011
Messages
1,077
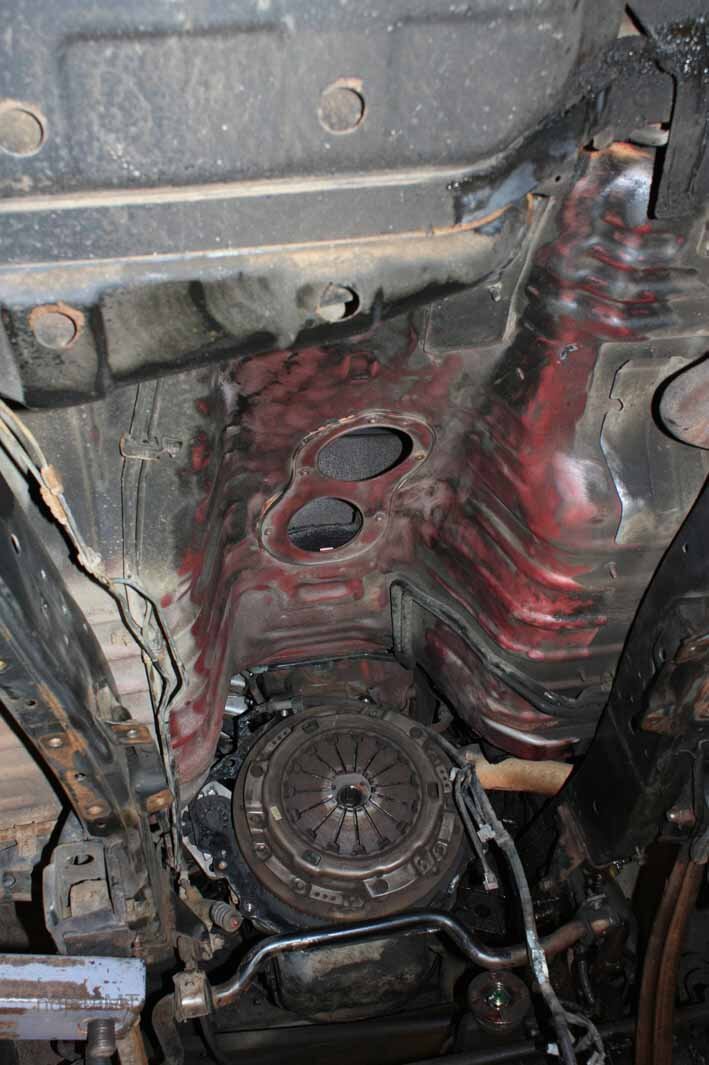
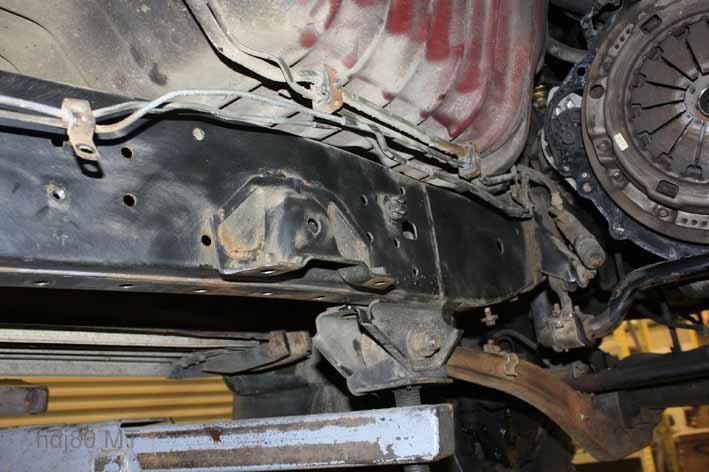
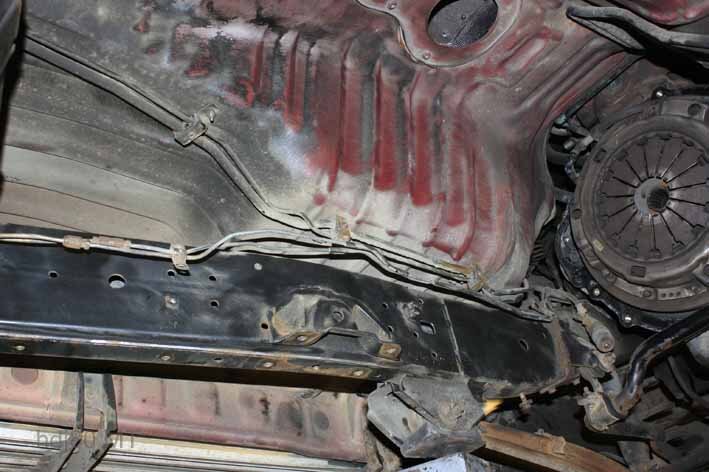
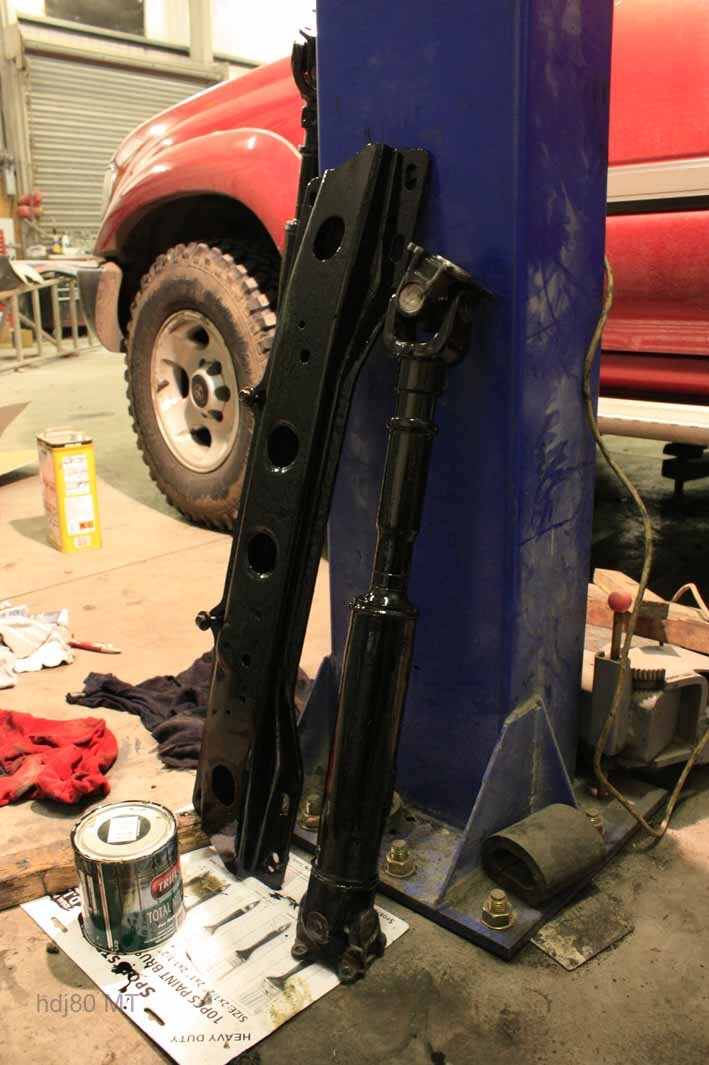
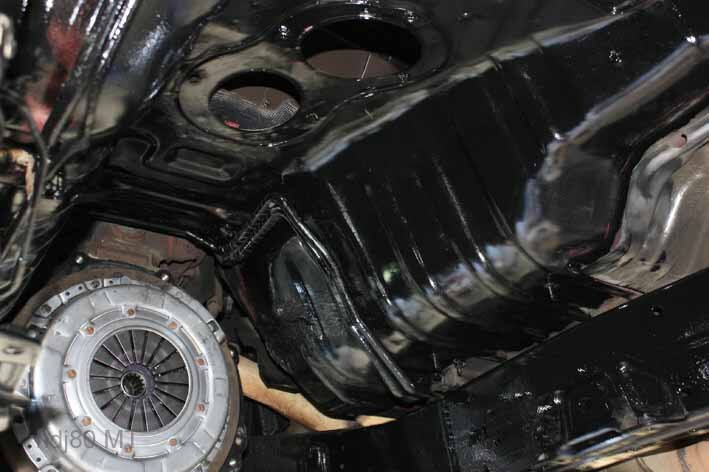
I think it took longer to re-size the photos than to actually change the clutch! That said I took some extra time to clean around the tunnel and remove and dirt or surface rust from the surrounding chassis and brake pipes and repaint with a smooth finish Metal paint (Triflow).Its a fairly simple jon and the FSM does pretty good except for two things.

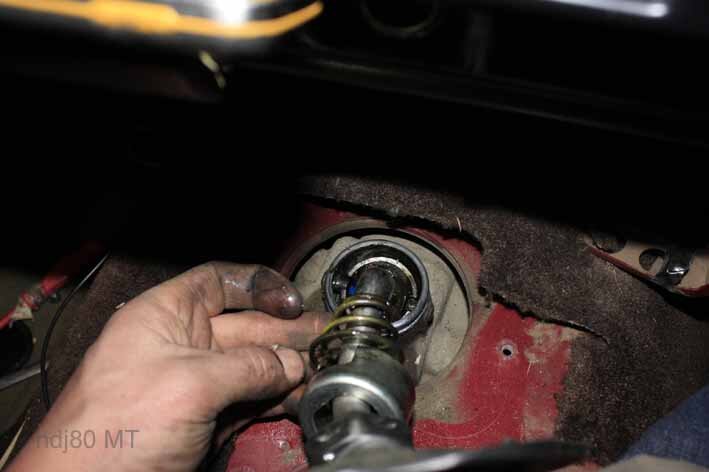
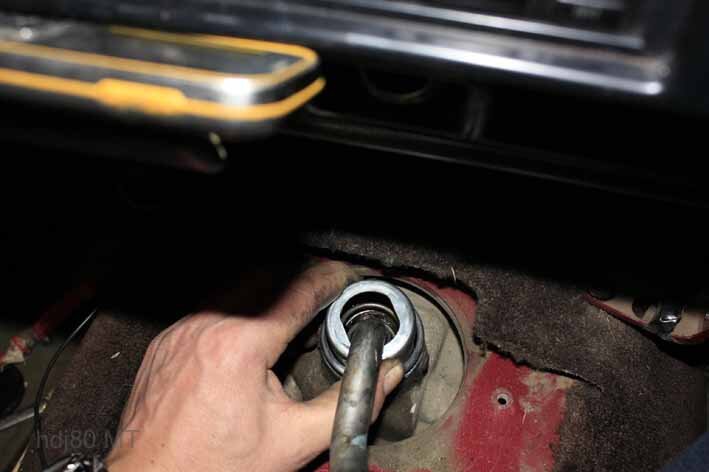
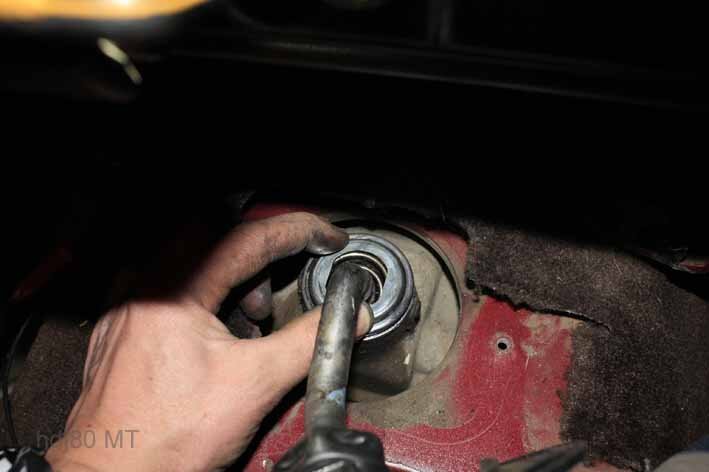
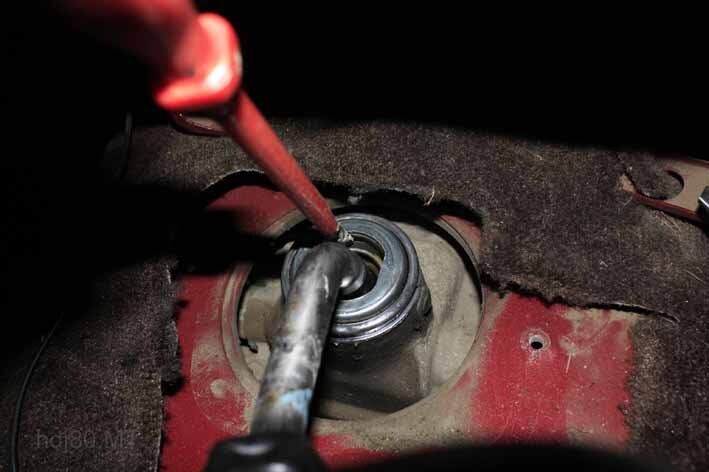
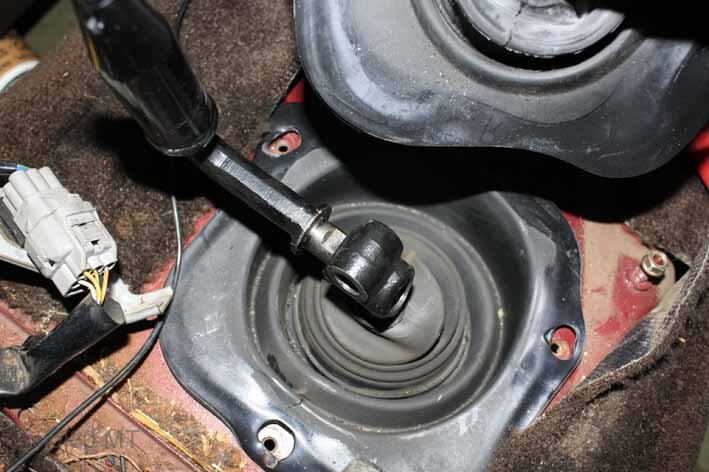
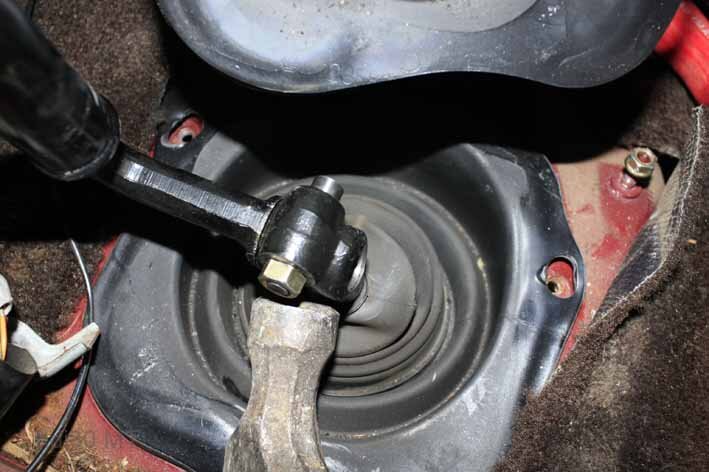
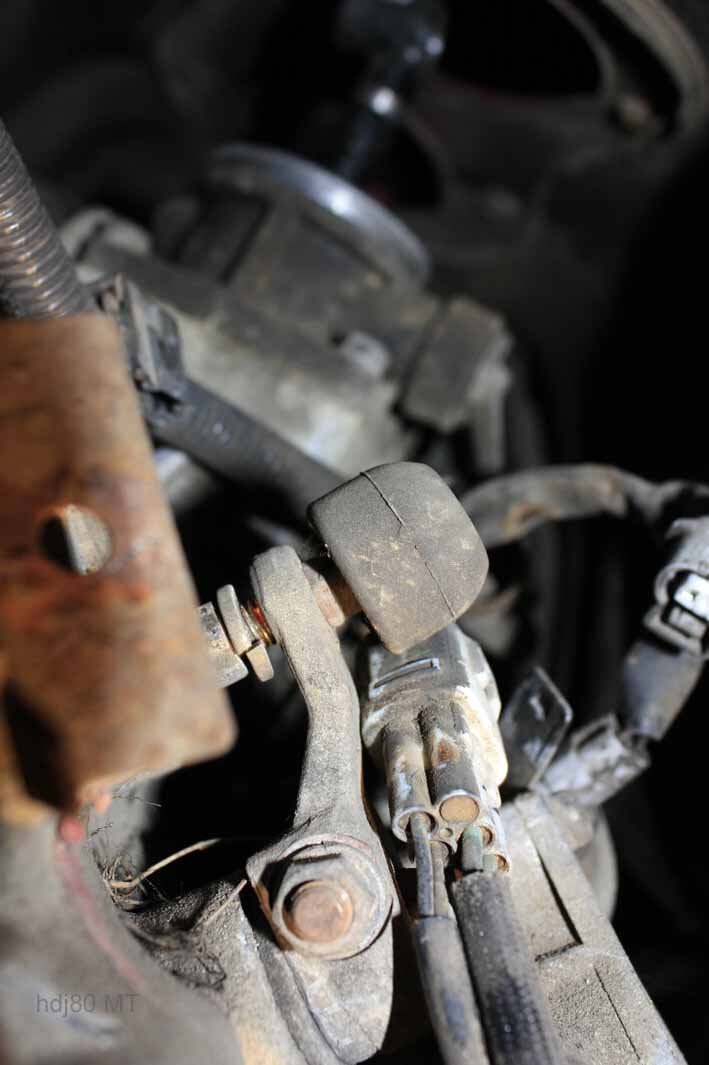
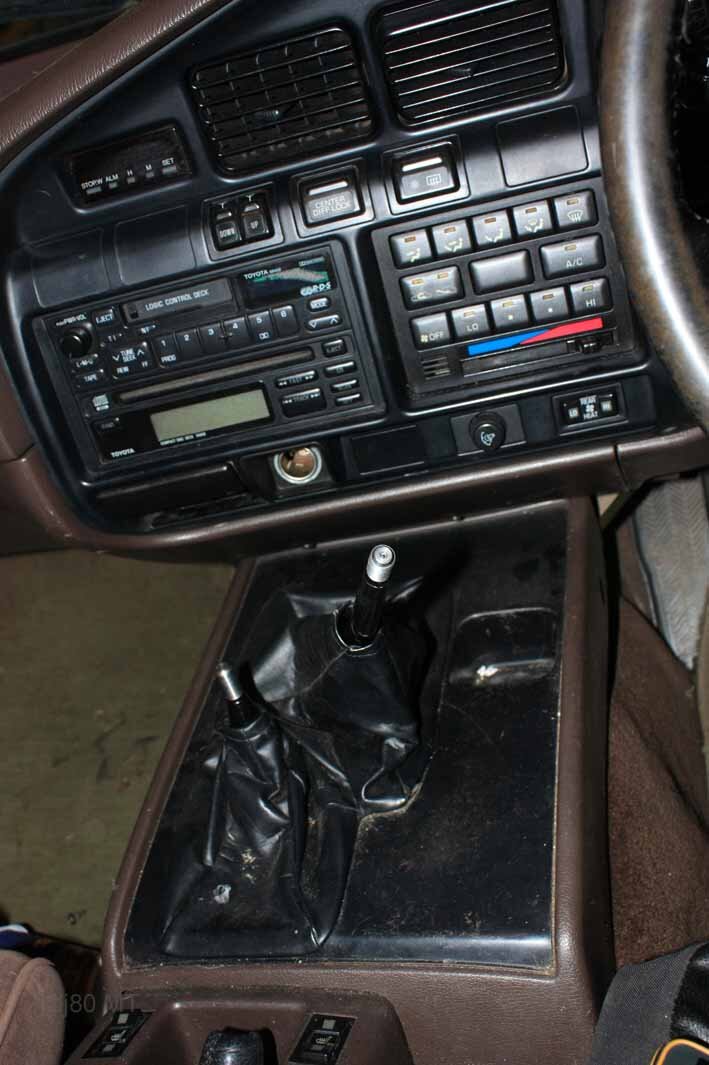
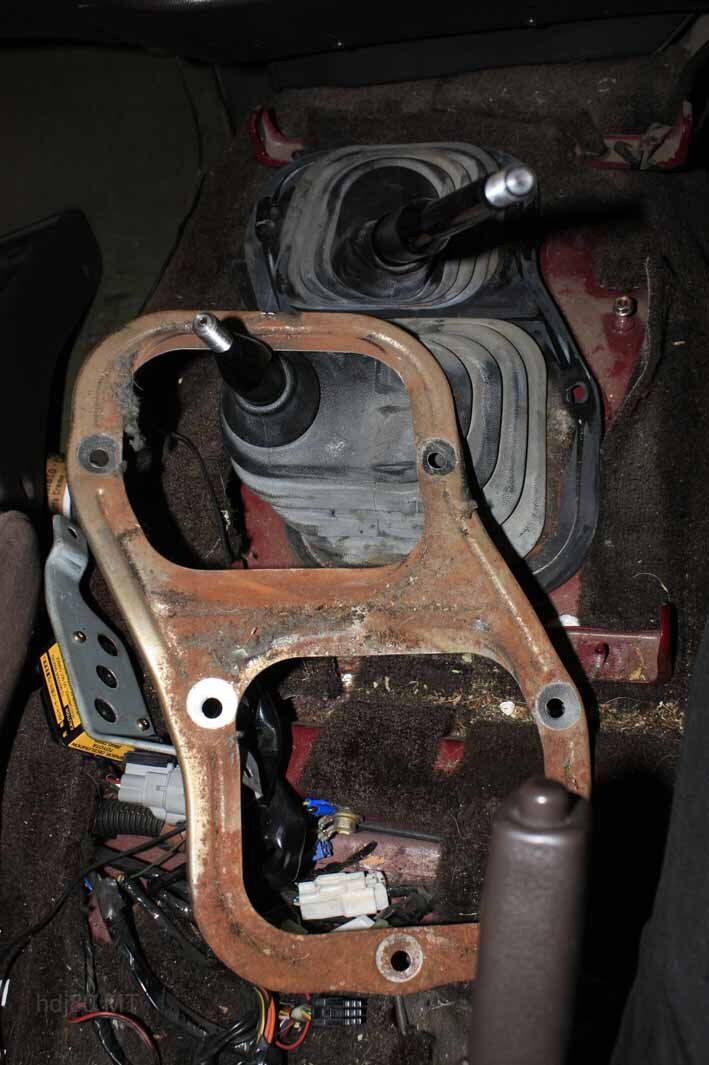
1). Removing the gear levers - it may be somewhere else but not under the clutch section!

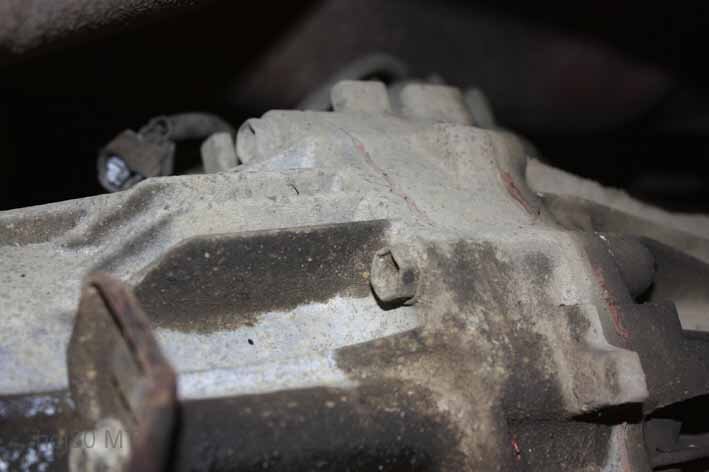
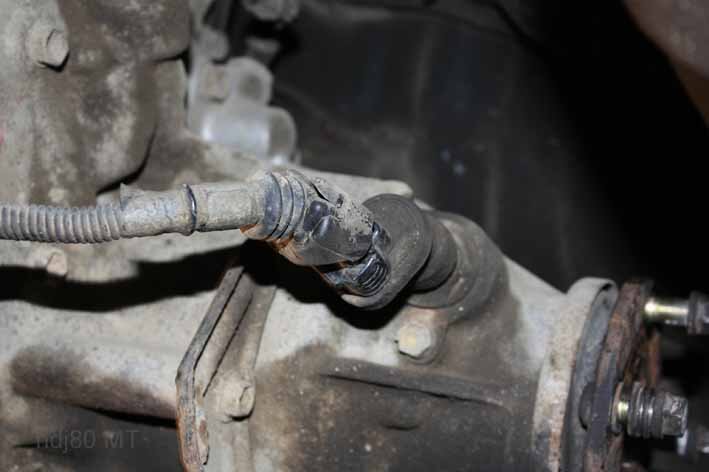
2). If you were to go step by step it would suggest removing the box then splitting the transfer box :eusa-naughty:
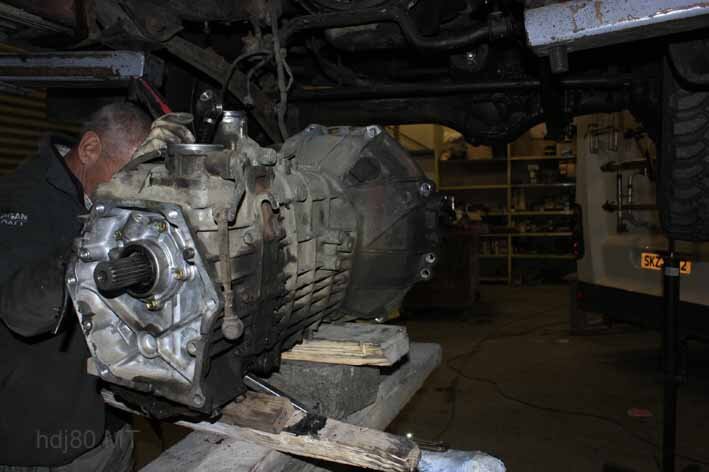
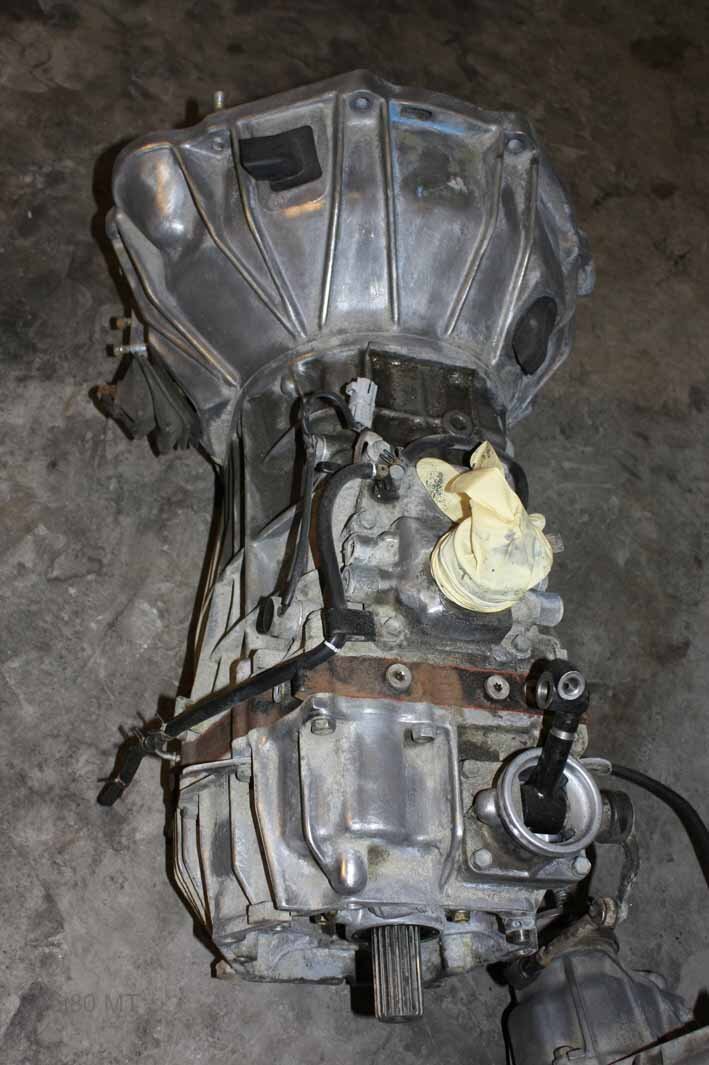
I would suggest likemany others have done to remove the transfer box first -even with a two post lift, two people and a transmission jack it wasn't so easy.

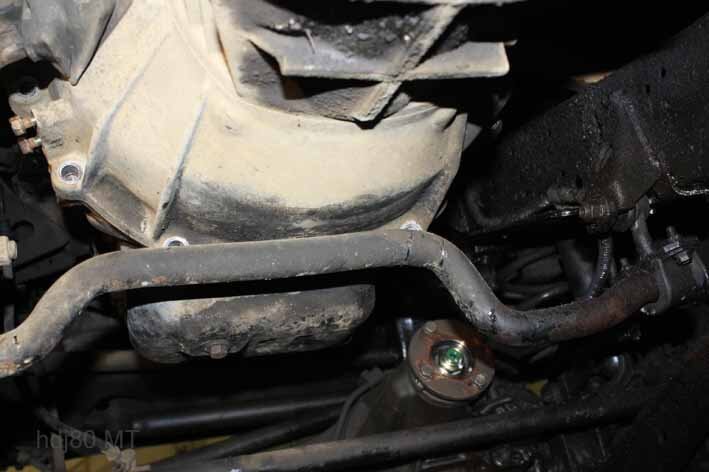
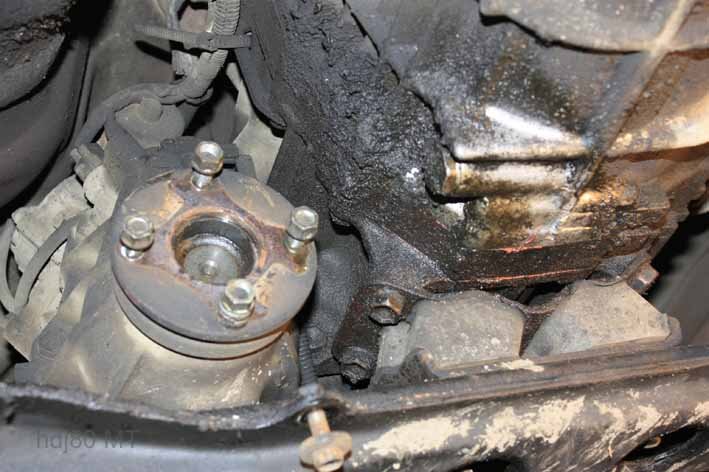
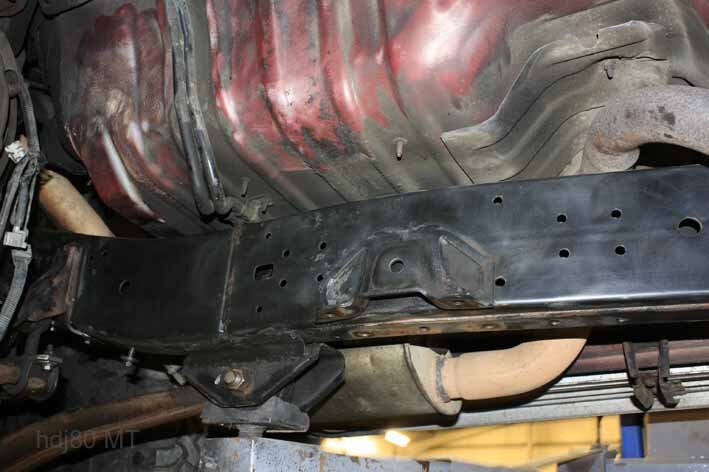
3). I left the front stabilizer bar in to help support the engine/gearbox while we removed the top two bolts in the bell-housing. This worked ok but I should have removed before separating the box to make life a little easier.

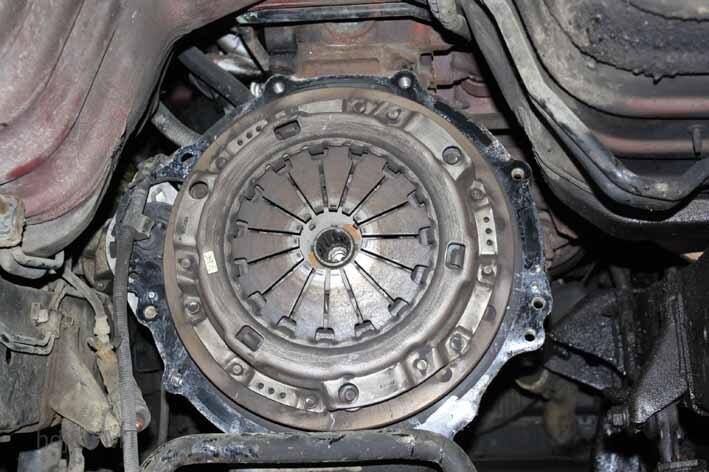
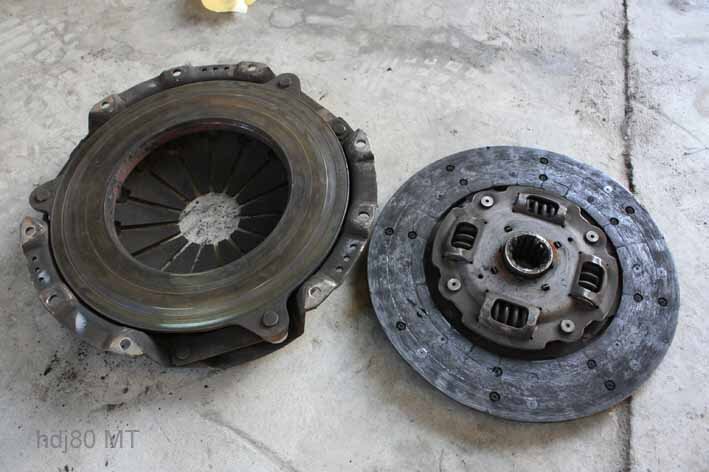
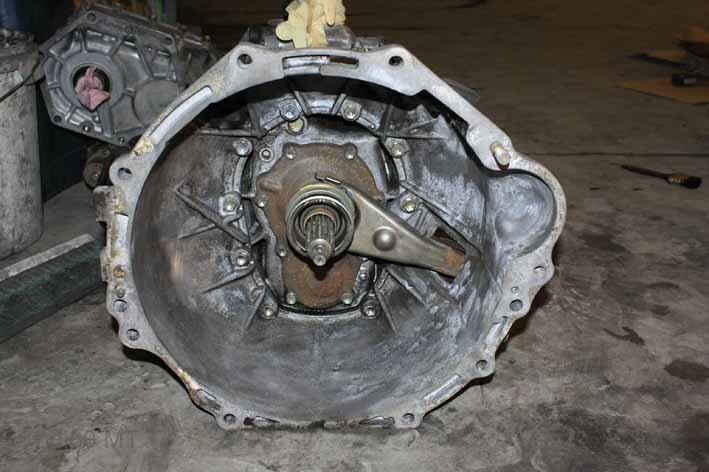
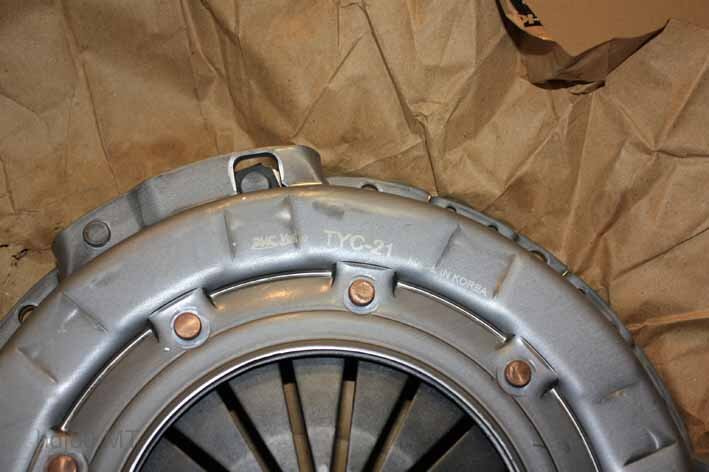
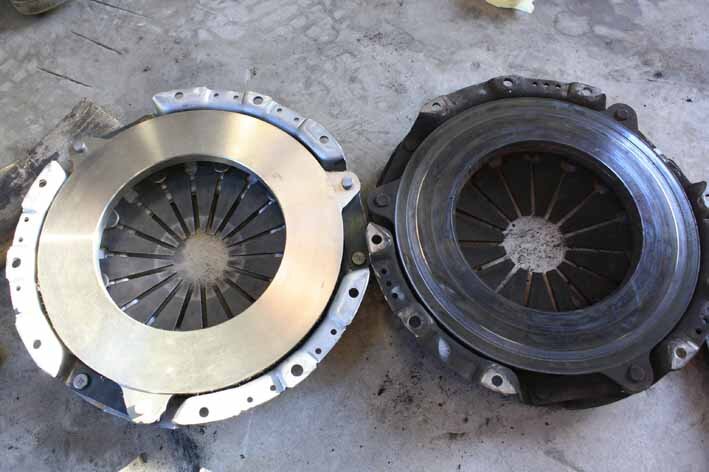
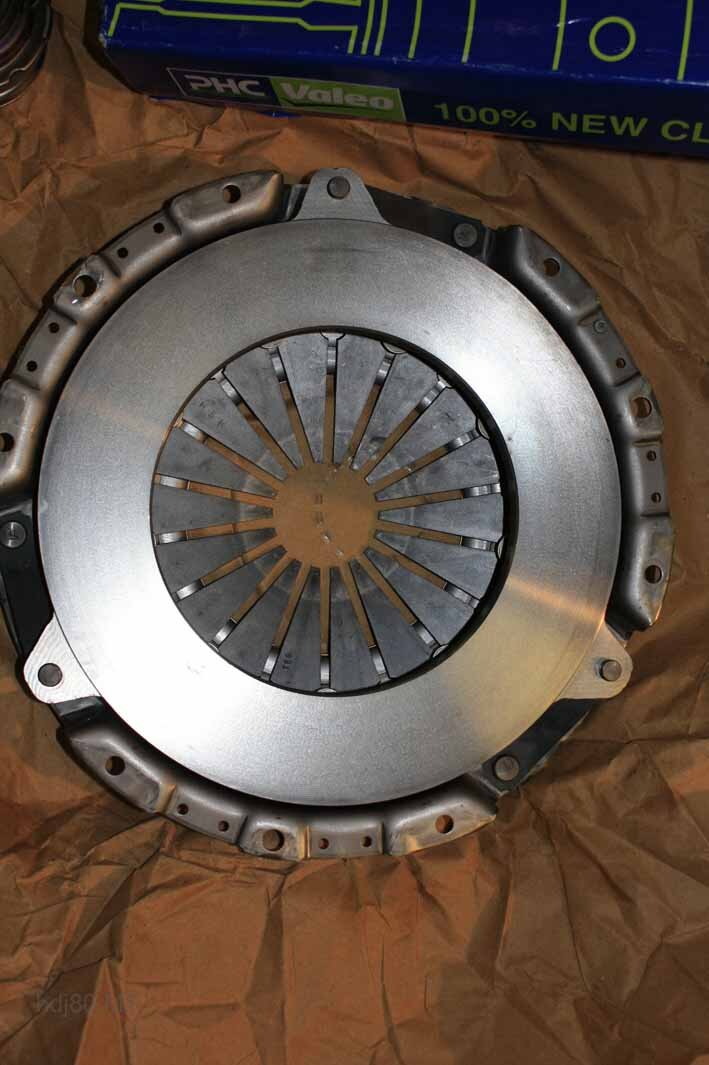
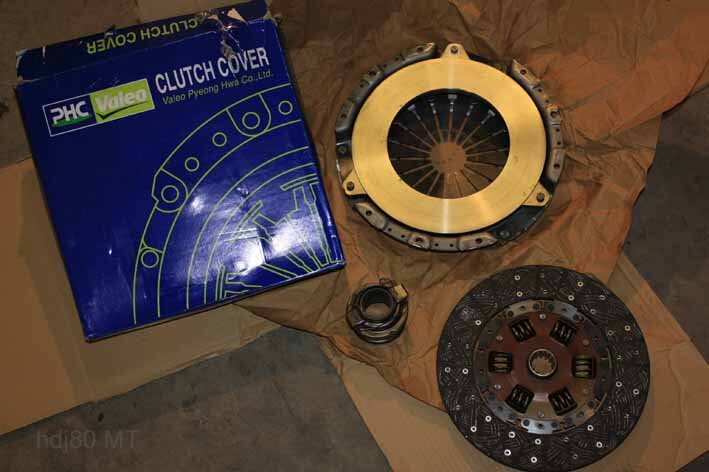
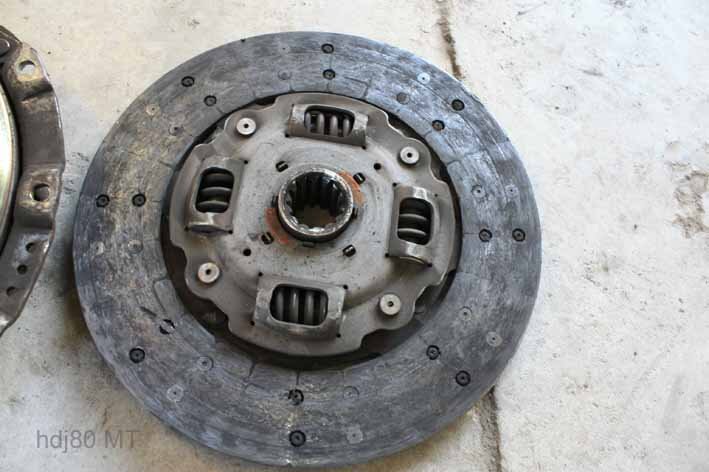
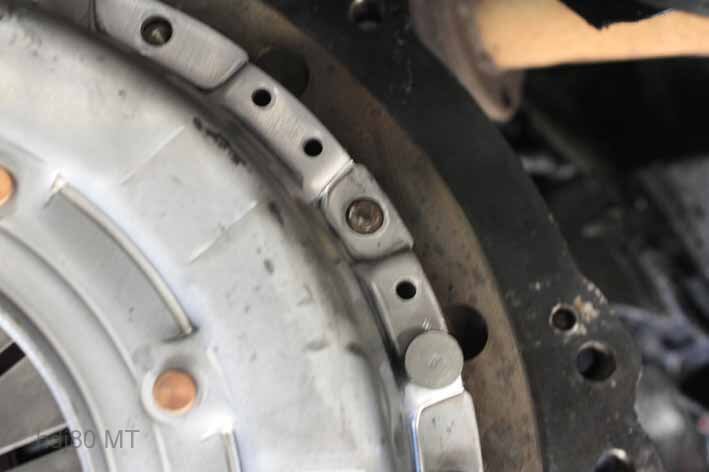
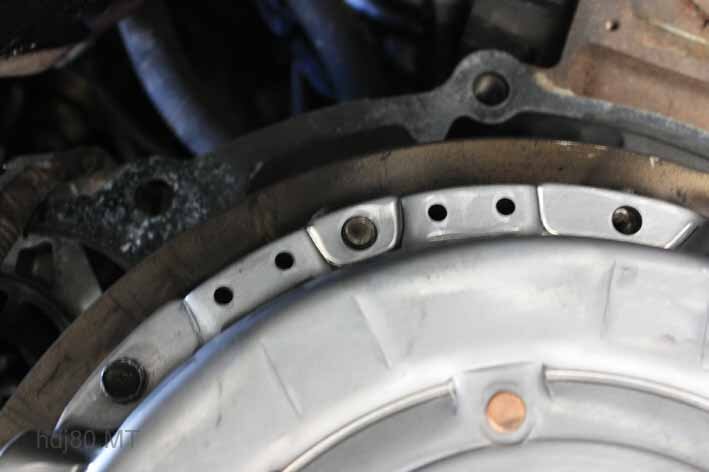
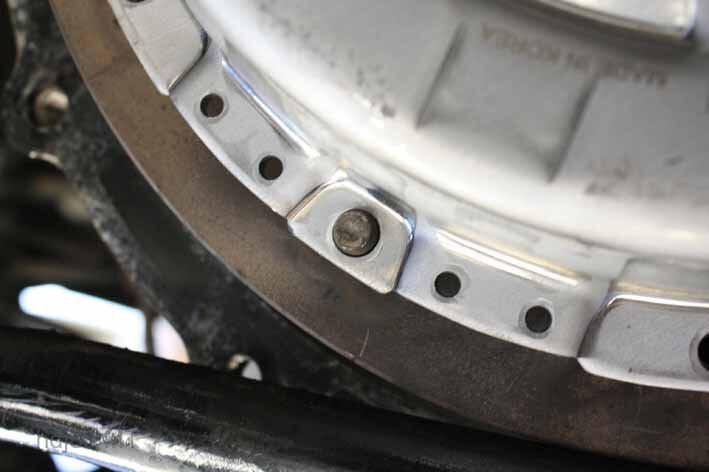
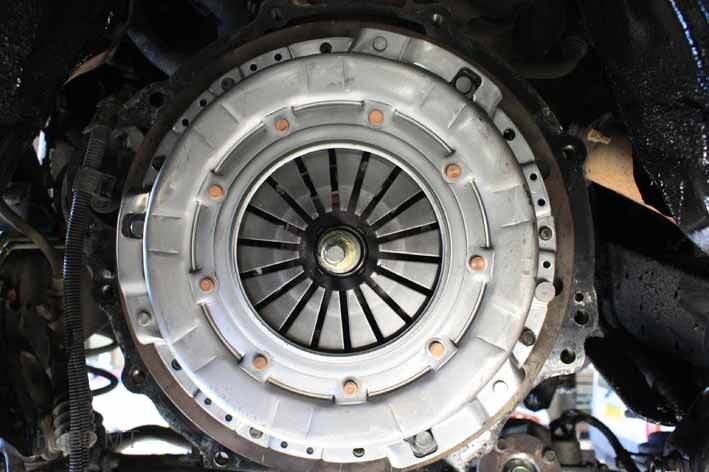
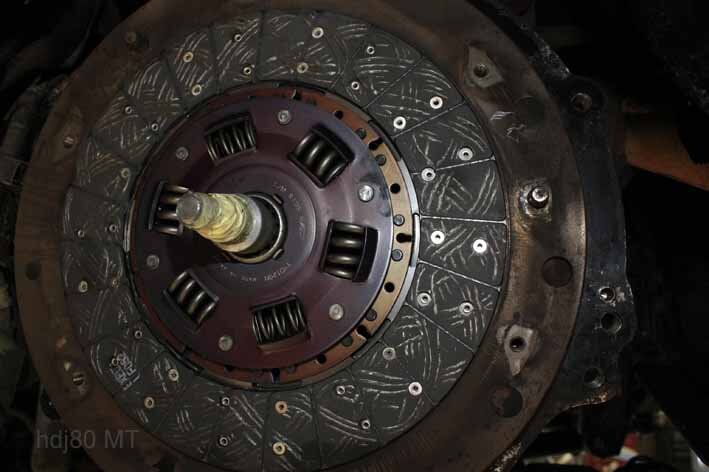
The clutch went completely as I was holding out for a delivery from OZ with a relative, so went for a cheap solution from Milners costing around £175 inc VAT & Delivery. It seems to be ok and although it has two more springs than the Toyota clutch that came out it doesn't feel just as tight on the pedal. The OEM one that I removed was from Aisan and Toyota stamped.


Lots of photos so hopefully they will upload ok and in the right order.
 

Attachments

  • 01jpg.jpg
    01jpg.jpg
    79.3 KB · Views: 76
  • 010jpg.jpg
    010jpg.jpg
    49.4 KB · Views: 76
  • 09jpg.jpg
    09jpg.jpg
    52.1 KB · Views: 69
  • 08jpg.jpg
    08jpg.jpg
    42.3 KB · Views: 65
  • 07jpg.jpg
    07jpg.jpg
    76.7 KB · Views: 73
  • 06jpg.jpg
    06jpg.jpg
    54.8 KB · Views: 65
  • 05jpg.jpg
    05jpg.jpg
    27.6 KB · Views: 70
  • 04jpg.jpg
    04jpg.jpg
    32.4 KB · Views: 68
  • 03jpg.jpg
    03jpg.jpg
    41.7 KB · Views: 69
  • 02jpg.jpg
    02jpg.jpg
    41.4 KB · Views: 67
not sure how to name these. the old forum let you caption each picture I think
 

Attachments

  • 20jpg.jpg
    20jpg.jpg
    32 KB · Views: 75
  • 19jpg.jpg
    19jpg.jpg
    53.6 KB · Views: 70
  • 18jpg.jpg
    18jpg.jpg
    38.6 KB · Views: 60
  • 017jpg.jpg
    017jpg.jpg
    50.9 KB · Views: 86
  • 016jpg.jpg
    016jpg.jpg
    30.4 KB · Views: 74
  • 015jpg.jpg
    015jpg.jpg
    31 KB · Views: 60
  • 014jpg.jpg
    014jpg.jpg
    29.7 KB · Views: 60
  • 013jpg.jpg
    013jpg.jpg
    35.6 KB · Views: 69
  • 012jpg.jpg
    012jpg.jpg
    51.1 KB · Views: 65
  • 011jpg.jpg
    011jpg.jpg
    46.1 KB · Views: 68
......
 

Attachments

  • 29jpg.jpg
    29jpg.jpg
    39.5 KB · Views: 82
  • 31jpg.jpg
    31jpg.jpg
    36 KB · Views: 61
  • 33jpg.jpg
    33jpg.jpg
    54.3 KB · Views: 66
  • 34jpg.jpg
    34jpg.jpg
    30.9 KB · Views: 61
  • 28jpg.jpg
    28jpg.jpg
    31.2 KB · Views: 63
  • 27jpg.jpg
    27jpg.jpg
    50.7 KB · Views: 65
  • 26jpg.jpg
    26jpg.jpg
    41.4 KB · Views: 73
  • 25jpg.jpg
    25jpg.jpg
    35.6 KB · Views: 63
  • 24jpg.jpg
    24jpg.jpg
    38 KB · Views: 64
  • 23jpg.jpg
    23jpg.jpg
    46.2 KB · Views: 77
.....
 

Attachments

  • 42jpg.jpg
    42jpg.jpg
    26.2 KB · Views: 70
  • 43jpg.jpg
    43jpg.jpg
    70.1 KB · Views: 65
  • 44jpg.jpg
    44jpg.jpg
    37.9 KB · Views: 71
  • 45jpg.jpg
    45jpg.jpg
    46.3 KB · Views: 79
  • 41jpg.jpg
    41jpg.jpg
    40.1 KB · Views: 61
  • 40jpg.jpg
    40jpg.jpg
    40.5 KB · Views: 59
  • 39jpg.jpg
    39jpg.jpg
    45.5 KB · Views: 70
  • 38jpg.jpg
    38jpg.jpg
    43.9 KB · Views: 66
  • 37jpg.jpg
    37jpg.jpg
    43.2 KB · Views: 64
  • 36jpg.jpg
    36jpg.jpg
    72.1 KB · Views: 61
,,,,,
 

Attachments

  • 54jpg.jpg
    54jpg.jpg
    80.5 KB · Views: 62
  • 55jpg.jpg
    55jpg.jpg
    55.5 KB · Views: 62
  • 61jpg.jpg
    61jpg.jpg
    43.4 KB · Views: 64
  • 62jpg.jpg
    62jpg.jpg
    42.3 KB · Views: 59
  • 53jpg.jpg
    53jpg.jpg
    41 KB · Views: 82
  • 52jpg.jpg
    52jpg.jpg
    49.4 KB · Views: 67
  • 51jpg.jpg
    51jpg.jpg
    49.7 KB · Views: 70
  • 50jpg.jpg
    50jpg.jpg
    41.7 KB · Views: 70
  • 47jpg.jpg
    47jpg.jpg
    46.2 KB · Views: 66
  • 46jpg.jpg
    46jpg.jpg
    77.5 KB · Views: 70
''''''
 

Attachments

  • 70jpg.jpg
    70jpg.jpg
    37.6 KB · Views: 56
  • 71jpg.jpg
    71jpg.jpg
    27.2 KB · Views: 61
  • 72jpg.jpg
    72jpg.jpg
    25.2 KB · Views: 55
  • 73jpg.jpg
    73jpg.jpg
    43.1 KB · Views: 70
  • 69jpg.jpg
    69jpg.jpg
    65.5 KB · Views: 83
  • 68jpg.jpg
    68jpg.jpg
    74.7 KB · Views: 60
  • 67jpg.jpg
    67jpg.jpg
    48.7 KB · Views: 61
  • 66jpg.jpg
    66jpg.jpg
    41.3 KB · Views: 57
  • 65jpg.jpg
    65jpg.jpg
    42.2 KB · Views: 57
  • 63jpg.jpg
    63jpg.jpg
    43.4 KB · Views: 59
Don't like the adverts?  Click here to remove them
######
 

Attachments

  • 92jpg.jpg
    92jpg.jpg
    41.7 KB · Views: 64
  • 91jpg.jpg
    91jpg.jpg
    38.9 KB · Views: 67
  • 90jpg.jpg
    90jpg.jpg
    77.1 KB · Views: 62
  • 80jpg.jpg
    80jpg.jpg
    27.4 KB · Views: 77
  • 79jpg.jpg
    79jpg.jpg
    28 KB · Views: 55
  • 78jpg.jpg
    78jpg.jpg
    30.2 KB · Views: 58
  • 77jpg.jpg
    77jpg.jpg
    47.5 KB · Views: 61
  • 76jpg.jpg
    76jpg.jpg
    39.3 KB · Views: 61
  • 75jpg.jpg
    75jpg.jpg
    39.4 KB · Views: 63
  • 93jpg.jpg
    93jpg.jpg
    42.6 KB · Views: 60
Nice pictures, thanks for taking the time to take them. This will be a job I am looking to do between Christmas and new year and was wondering where to get the clutch kit from. That kit should be okay shouldn't it. Valeo have been making them for a long time.
I like the painting you have done cleans it up well.

Cheers, Mark
 
Thanks mark,

I had hoped to caption the photos with explanations and tips as I did have to make a few hurried phone calls to Karl Webster but luckily his out of hours phone was still on! If you can see from the photos that my gearbox mount was sheared off and you can't really tell until the cross member is removed. I had also over-greased my drive shafts and you can see the crap that was flung round underneath as a result ( not to mention the leak from my power steering box). I like to use a proper metal paint as opposed to body shoot or waxoil but it does mean getting in with a few wire brush heads on the drill and grinder.

The two top bolts on the bell-housing (that everyone mentions as being difficult) are ok if you are using a lift but they could be tricky with the truck on the ground so even a pair of ramps would be a good help. You can see the discobobulator (SST 007) fashioned from every available socket extension that was needed though and I would recommend doing the job with a medium sized torque wrench for all the 17mm housing bolts as they are pretty tough to break with a regular ratchet.

One other tip is, that upon refitting the gearbox I warmed it up with a rag over the main gear selector and drained the old oil out. i was then able to fill it again through the gear selector socket rather than mess about with the side filler below.

Also if anyone can shed light on the missing box from uner the center console i assume it something to do with the alarm
 
You can inline the pics so you can add captions if that's what you mean but it does work differently and a bit more complicated than before. If you edit the post, click Manage Attachments, then look in the bottom of the dialog that comes up and you should see thumbnails of all the pictures attached to the post with little boxes to tick. Tick one then look for the 'insert inline' button (think that's right, going from memory though) and press it, that should put the picture inline in your post instead of at the end in a big block.
 
Good tip on changing the oil. I will do the same. If I haven't got a lift fitted in the yard by the time I do mine then I will have to do this with the truck up on 4 hgv axle stands so it shouldn't be too difficult. I hope.

Cheers, Mark
 
thanks Jon, I tried but I am not 'privileged' enough to have that option!

I liked the old website better....I mean the new landcruisers aren't necessarily better either!
 
Back
Top