Thanks to all who've replied, the advice has been much appreciated!
Anyway, I got into it last night & pulled it apart, regrettably without being able to solve the lack of continuity from end to end of the internal ribbon cable - if anyone is interested, at least this will show how it all comes apart (& what you can get away with breaking off - either deliberately or by accident!).
Clearly no-one wants an airbag kicking off by accident.

I disconnected the battery, left lights & wipers on as a drain on any residual current & went & had a cuppa (now, I'd been told both 30 seconds to wait as well as 30 mins to wait, so I wasn't taking any chances - and I reckon I deserved a cuppa, anyway).
Having already dropped off the lower steering column shroud earlier in the day, I confirmed that I'd left the wheel in the straight ahead position & prised off the cover plates on either side of the steering whee. Then I unscrewed the (#30) torx screws (1 on either side which unscrew to a limiting clip - you can see them on the left and right of the wheel, poking through the black clips & ali tabs).
Some gentle(ish) pulling & a squeeze of the clips inside the covers saw the airbag clear the wheel. 2 connectors later & it was put to one side. No "Kaboom" here!

Having undone the centre nut on the wheel, I left it about 3 turns on & pulled the wheel sharply up. doing it this way meant that I didn't get a face full of steering wheel as it came free. Remembering to mark both the steering wheel and the shaft for ease of positioning on reassembly, off came the wheel.
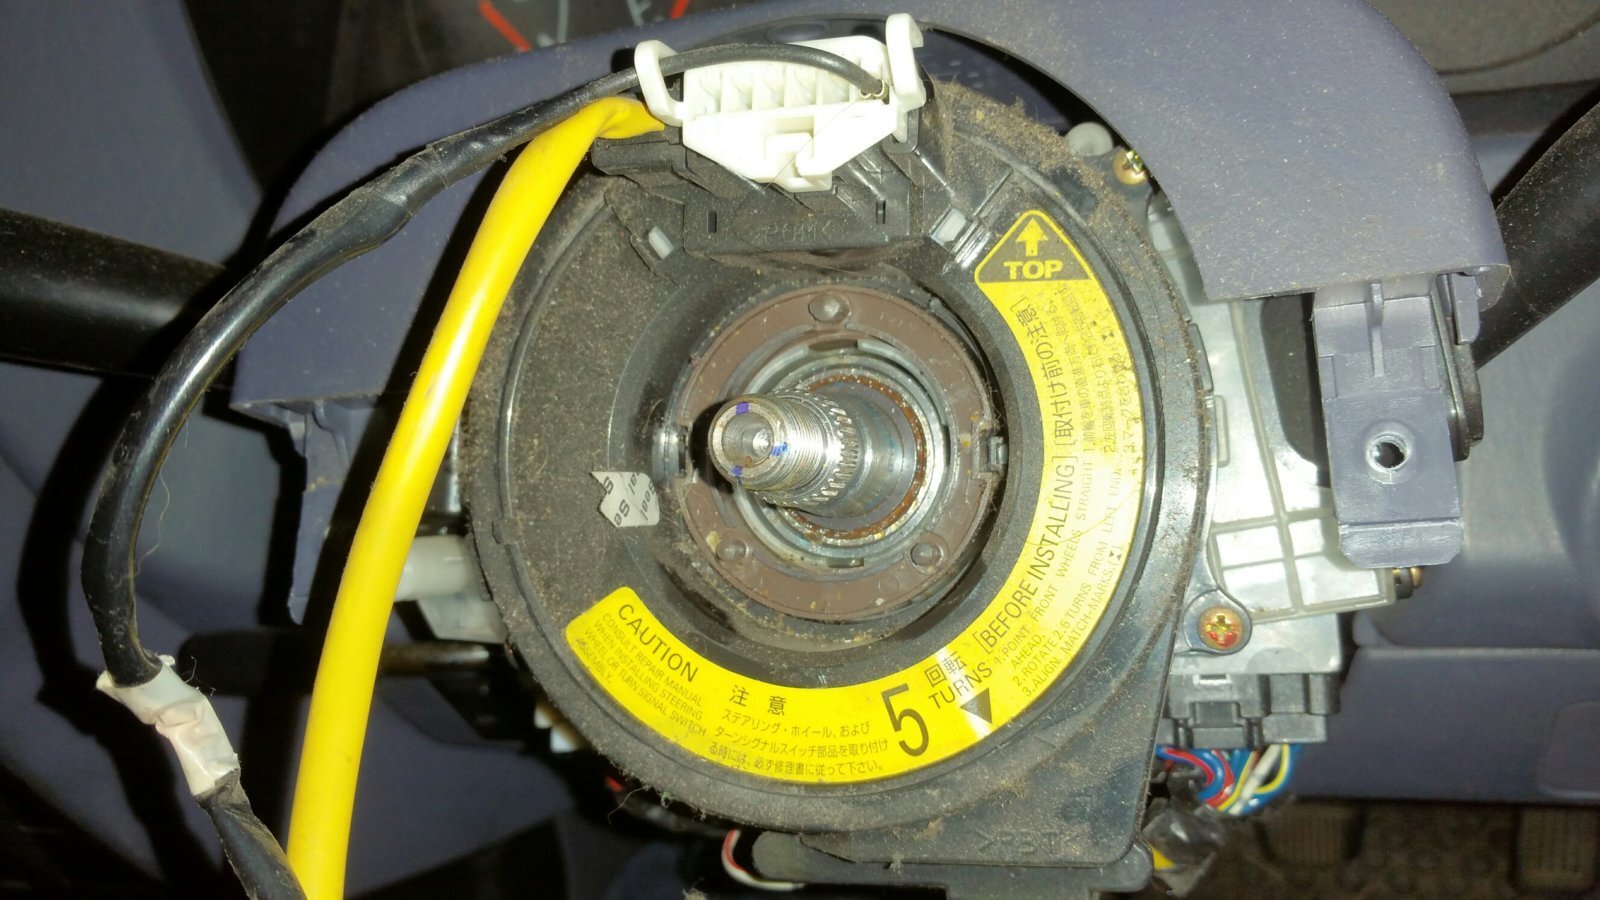
In the top of the 'squib', the yellow connector & cable is Airbag related while the black cable/white connector is the horn wire. 4 screws retain the squib to the steering column (roughly set at 7,11,1 and 5 on a clock face); don't forget to unclip the lower cables (the airbag connector is held by a second retainer over the top of the std one, whilst the horn (now white with red tracer) wire has a standard connector.
The next bit is important to remember... there is an alignment triangle in the 5 o'clock position on inner and outer parts of the squib. keep this lined up as the ribbon cable inside the unit is at the 'neutral' position here (if you are tearing into the innards, follow the instructions on the yellow information tab to reset the centre position). there is also a brown ring on the steering column which locates the inner part of the squib for turning. Do not disturb it's position (the pic below shows the inner ring and the position of the 2 RH mounting screws).
Having tested for continuity across all relevant circuits, there was none & squib felt both very sloppy and 'graunchy' when turning the inner section, so I figured opening it up might tell me something...
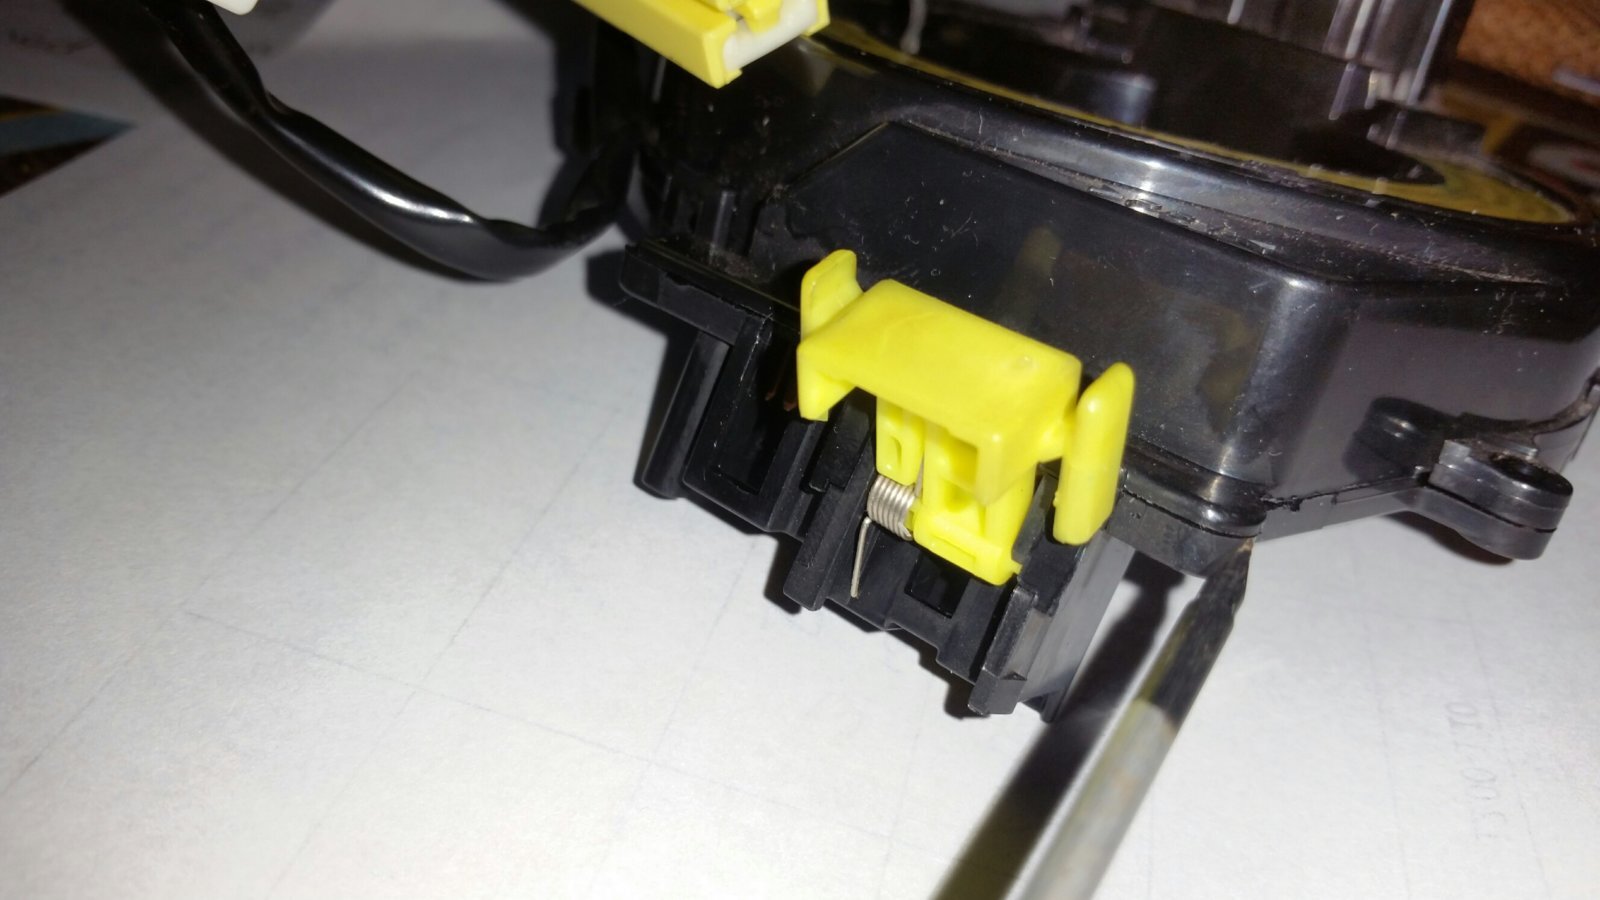
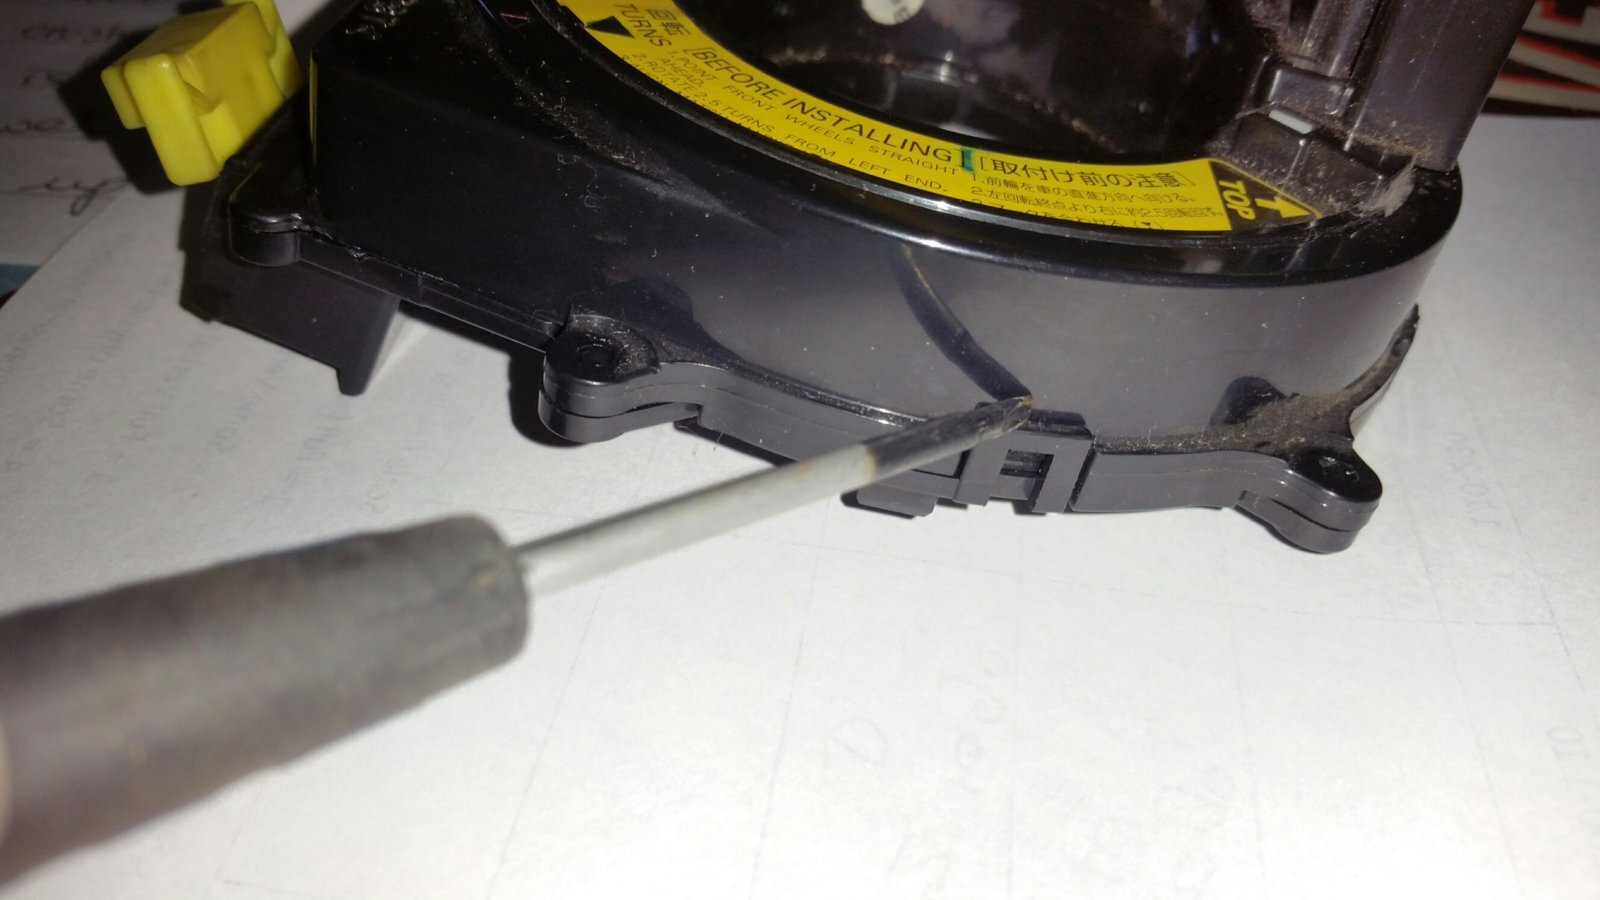
There are clips spaced around the lower edge of the unit which prise loose using a 3mm wide screwdriver tip.
The lower section (where the terminals are) has a moulding ending in 2 retaining pins which may or may not prise out cleanly. On mine, one came clear and the other broke off, while I stabbed myself in the thumb with the screwdriver.

Ouch!
Breaking either of these pins
isn't a major issue as the clips and the screw mountings around the outside of the unit are close enough to hold everything together on reassembly.
Opening the squib up revealed major scoring /gouging to the plastic bearing surface of the lower spacing plate.
Unfortunately, I couldn't get continuity between any of the relevant pins across the cable, so it would have to go back together temporarily until I can source a replacement.
Interestingly, having checked the part numbers online using the info from members on here (MANY THANKS!

), I can get one locally(ish) for sensible money. Of course, the part# comes up with several vehicle fitment options from the Toyota range...
THIS BIT IS GREAT

- Same part, same part number, same supplier - Toyota Starlet is £30 new while Landcruiser is £48 new! Go figure!
Anyway, I epoxied the bearing surface to try and smooth out the action & take up some wear in the system.
I then turned it over to use the reverse surface as this was much smoother than the epoxied one (trimming off the original locating tags to allow it to fit - it is held by the shape inside the casing) & reassembled the unit. It holds together just fine with the clips (no need for the pins after all).
Obviously, reassembly is the reverse of disassembly. Don't forget to line up all relevant markings if you want the wheel to end up exactly where you started.
Although the horn still doesn't work, the new part is on order & I'll update the refit as & when it arrives.
THANKS FOR ALL THE ADVICE!


 but his details shouldn't be hard to find with a forum search . Use the registration on a truck for sale and just tell him you need a male or female connection on the part .

 ), I can get one locally(ish) for sensible money. Of course, the part# comes up with several vehicle fitment options from the Toyota range...
 - Same part, same part number, same supplier - Toyota Starlet is £30 new while Landcruiser is £48 new! Go figure!


 It was under a tenner, delivered from China. AND ALL THE RIGHT PART NUMBERS TOO (yeah, right...


 ).
).
