weldaboy
New Member
- Joined
- Jul 30, 2021
- Messages
- 7
- Country Flag

Started my air con repairs last week but now i am forced to repair the corrosion problems before i refit the air con unit ,as if i have nothing else to do
So here goes
Firstly remove arch extensions
Two 10mm bolts from inside quater panel hold them firm,then pop out press fit white plastic studs from yellow inserts on the outside .
The rear plastic bumper corners had been restored by me several years ago and refitted using stainless fixings so that took 30 seconds to removed this time,
But if its a first time removal just grind,chisel,or snap the rusted fixings by tightening the nuts and bolts and renew all.. That will save much time and effort

And there is another job to do ,this is the rear bottom bracket,a good set of german pliers removes those screws ,i wont be using metal brackets when refitting.

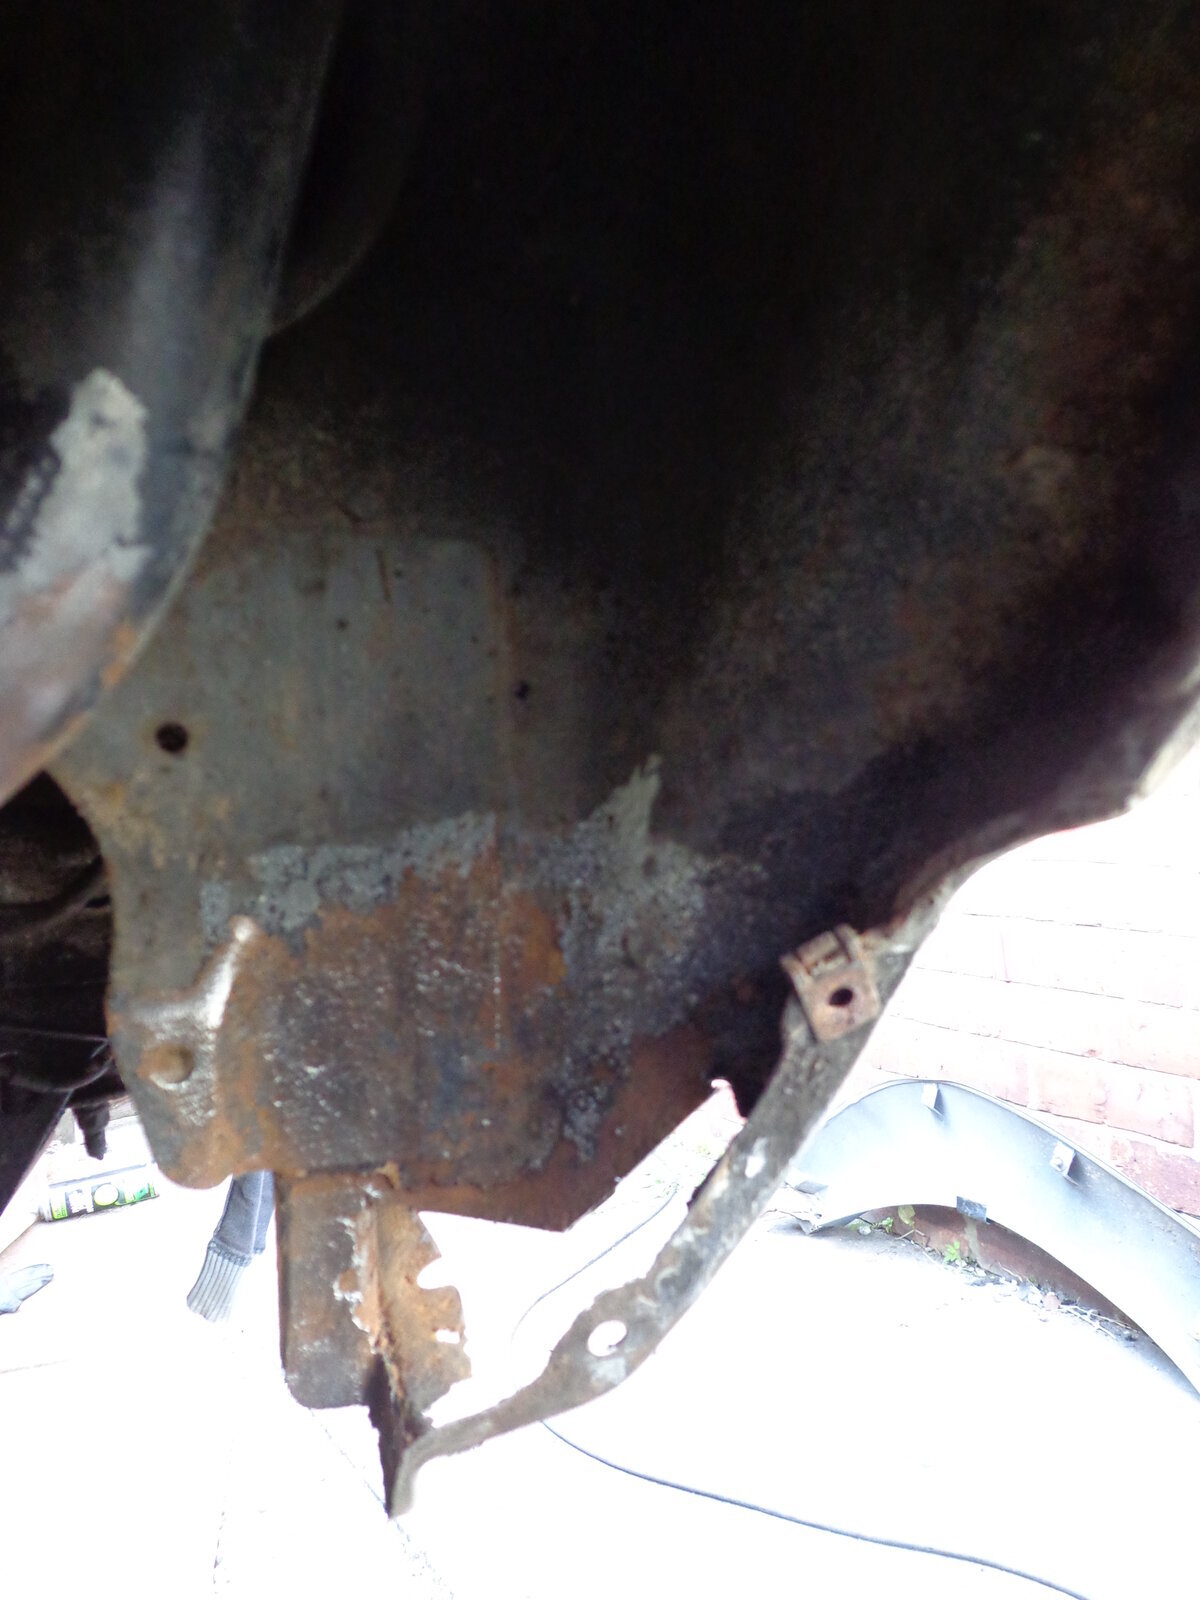
Whats left of the metal bracket which fits on the inside bottom of the rear arch

Drivers side with templates in place,but i then noticed heavy pitting at the rear , looks like corrosion from inside .
 AND HERE

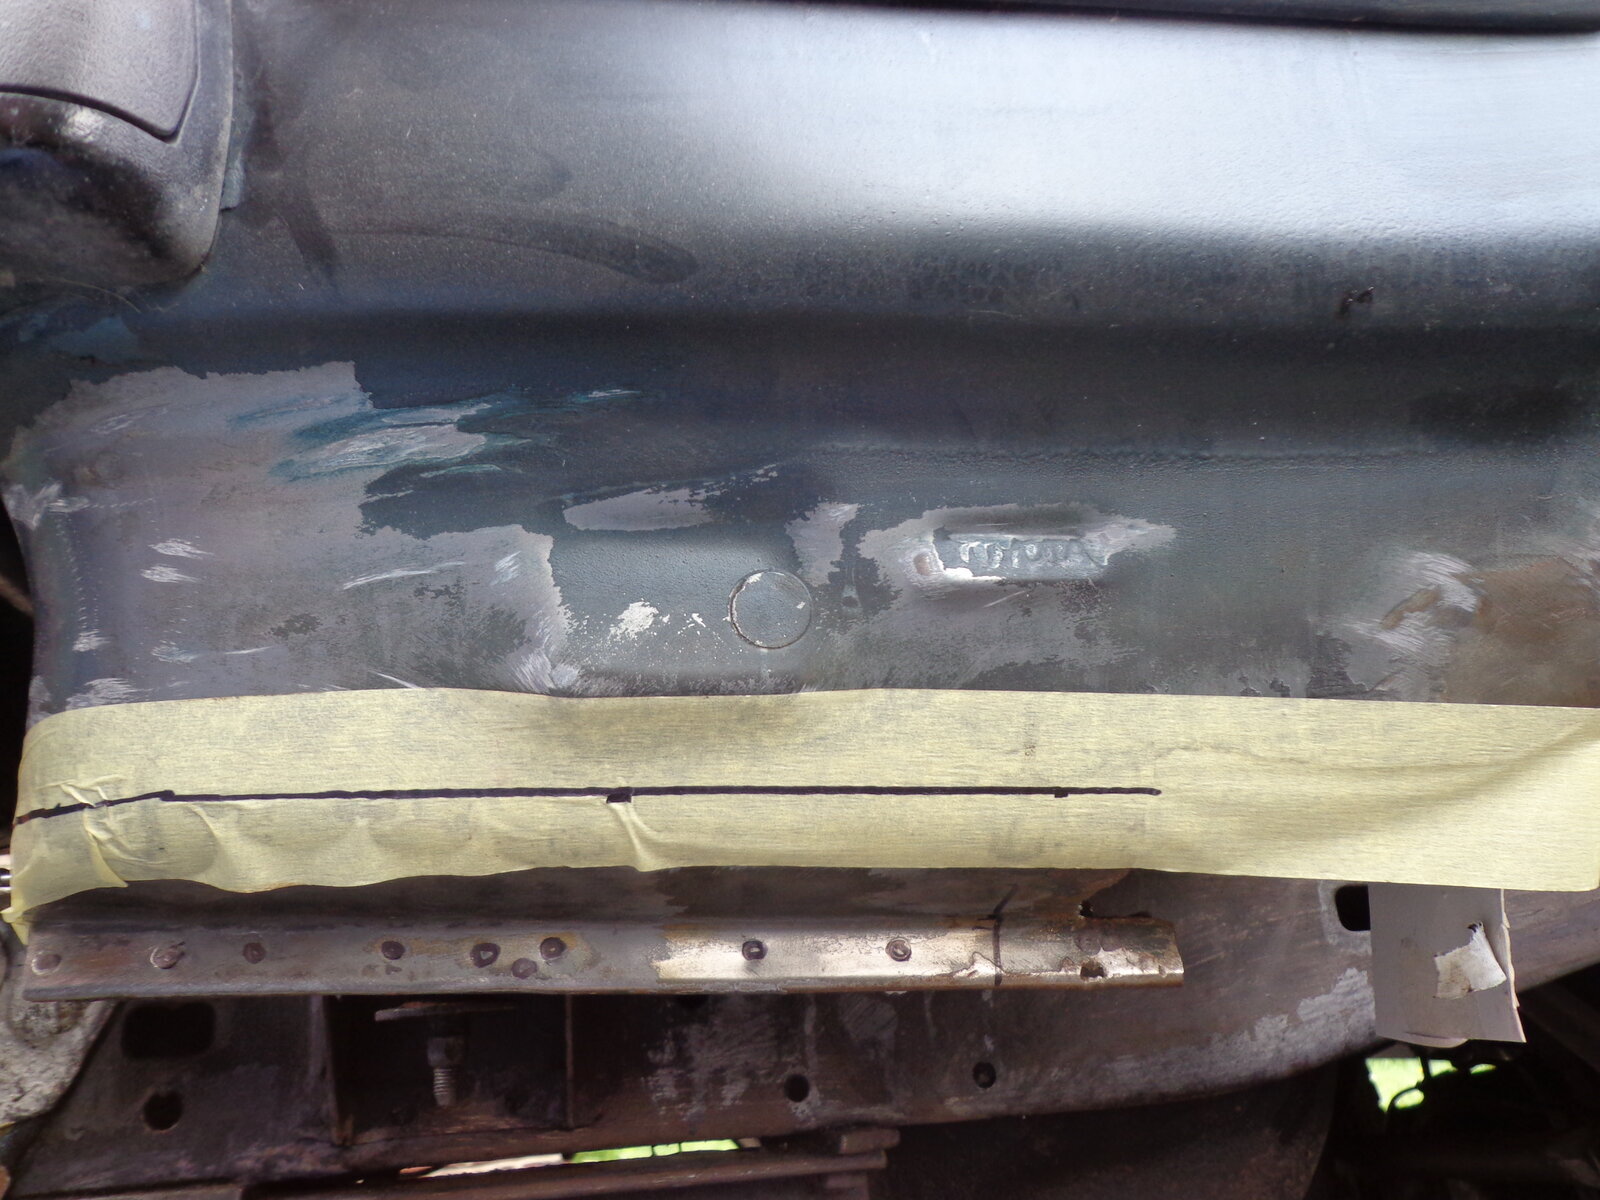
Always wear a full face mask and leather gloves, 1 or 1.5 mm cutting blade gives a clean cut,
 To give clear vision for cutting when wearing eye protection use a light colour tape and a black marker pen ,very easy to follow with the cutting disc.
 SO I DECIDED TO CUT ,DRILL AND TAKE A LOOK.
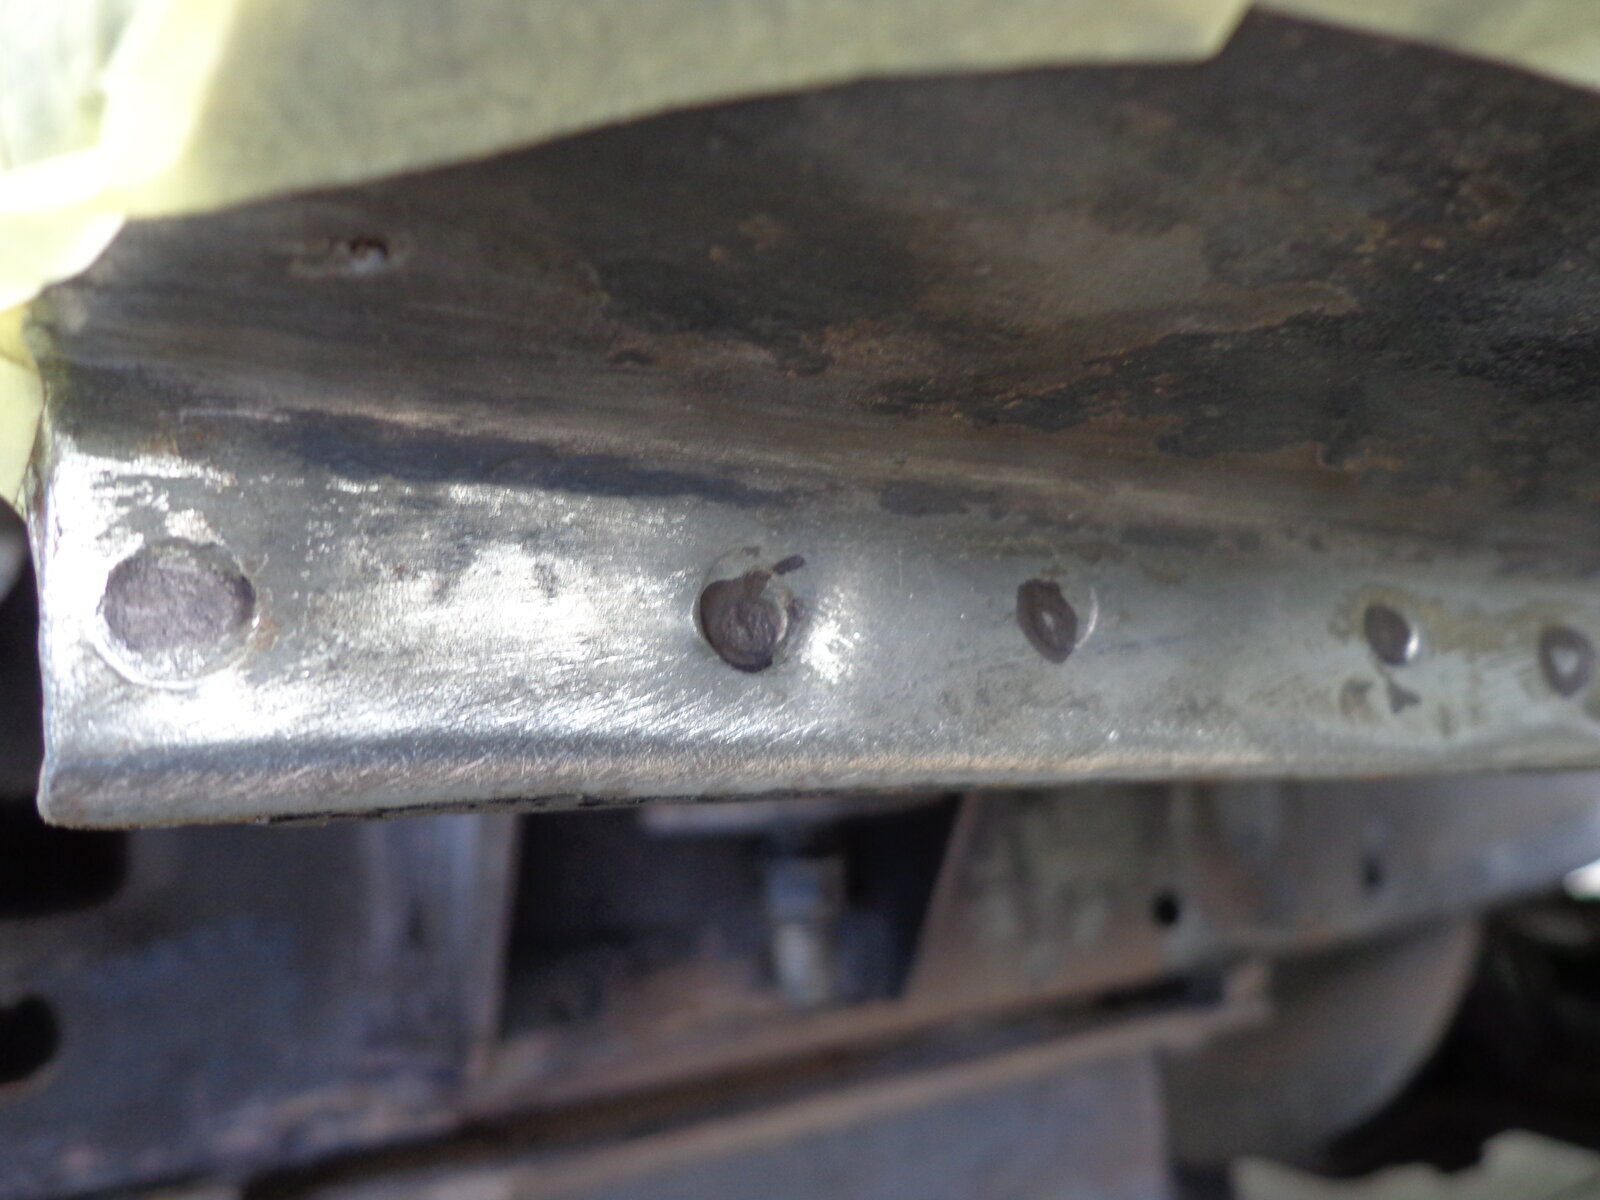
 Drill out spot welds ,small drill first all the way through then take a much larger drill and ease it half way untill you see this,the 2 layers of steel

I was not expecting it to come away with the ease it did,no hammer required.
But i am very please i cut this out, what a mess


 Use a wire brush on your grinder and clean it up....warning... These wires fly off and implale themselves into you and your clothing,leather jacket and double eye protection is required.


My initial plan was to acid dip this section and refit it,but after it came out of the acid i decided to make a new panel.
Drivers side has been affected worse with corrosion ,i think due to the aluminium pipes and fitting for the rear air con,
 Passenger side inspection hole cut out,
i will be cutting out bottom edge also same job as drivers side.once these jobs are done there is no serious corrosion problems on my 80 series.
The 2 main reason for corrosion here is the rear arch extension,which acts as a bucket for wet mud and salt.
And water leaks from inside ,windows,
rear tailgate seal,
rear vent on sliding windows
and there are no drain holes on this spot welded section as there are on the sills,
i will be making 3 drain holes in my new panels.
More next week
As mentioned ealier while all interior rear trim is removed i noticed rust on the rear window frames so here goes.
3 spots of corrosion like this on inside rear window frame,
 ali frame befroe removal
 before i cleaned the frames i inspected the corrosion affected areas as i was mystified as to why one window frame was this and the drivers side was perfect.
just look at the difference a plastic flap had made to the corrosion,this is a water flap,allowing water to drain from the bottom window channel, all 5 remaining flaps had protected the frame from corrosion,why i do not know.
 after removal and a acid dip
 The damaged aluminium window frame is going to be coated to protect it befroe refitting and the 3 rust spots on the interior window frame can be ground down,treated with acid and its as good as newish.
Concerning upgraded secirity .
As we are planning a trip next year overseas with young children and i also want carry some tools I am planning to fit 8mm lexan windows to replace the glass originals to give addional security ,manufacturing in progress now .
I will list results here if anybody is interested
Rather than fitting a lexan rear tailgate screen which to do properly is a costly process i am going use a blast resistant 3M window film which gives a decent level of impact protection but is only highly effective when overlapped by several inches on the window frames.
I refitted the window without the aluminium frame just to see what options i have for a refit,, water drain holes at bottom of winow rubber
 I am looking into fitting a plastic window channel, not in the facory form.
So here goes
Firstly remove arch extensions
Two 10mm bolts from inside quater panel hold them firm,then pop out press fit white plastic studs from yellow inserts on the outside .
The rear plastic bumper corners had been restored by me several years ago and refitted using stainless fixings so that took 30 seconds to removed this time,
But if its a first time removal just grind,chisel,or snap the rusted fixings by tightening the nuts and bolts and renew all.. That will save much time and effort
And there is another job to do ,this is the rear bottom bracket,a good set of german pliers removes those screws ,i wont be using metal brackets when refitting.
Whats left of the metal bracket which fits on the inside bottom of the rear arch
Drivers side with templates in place,but i then noticed heavy pitting at the rear , looks like corrosion from inside .
Always wear a full face mask and leather gloves, 1 or 1.5 mm cutting blade gives a clean cut,
I was not expecting it to come away with the ease it did,no hammer required.
But i am very please i cut this out, what a mess
My initial plan was to acid dip this section and refit it,but after it came out of the acid i decided to make a new panel.
Drivers side has been affected worse with corrosion ,i think due to the aluminium pipes and fitting for the rear air con,
i will be cutting out bottom edge also same job as drivers side.once these jobs are done there is no serious corrosion problems on my 80 series.
The 2 main reason for corrosion here is the rear arch extension,which acts as a bucket for wet mud and salt.
And water leaks from inside ,windows,
rear tailgate seal,
rear vent on sliding windows
and there are no drain holes on this spot welded section as there are on the sills,
i will be making 3 drain holes in my new panels.
More next week
As mentioned ealier while all interior rear trim is removed i noticed rust on the rear window frames so here goes.
3 spots of corrosion like this on inside rear window frame,
ali frame befroe removalbefore i cleaned the frames i inspected the corrosion affected areas as i was mystified as to why one window frame was this and the drivers side was perfect.just look at the difference a plastic flap had made to the corrosion,this is a water flap,allowing water to drain from the bottom window channel, all 5 remaining flaps had protected the frame from corrosion,why i do not know.
after removal and a acid dipThe damaged aluminium window frame is going to be coated to protect it befroe refitting and the 3 rust spots on the interior window frame can be ground down,treated with acid and its as good as newish.Concerning upgraded secirity .
As we are planning a trip next year overseas with young children and i also want carry some tools I am planning to fit 8mm lexan windows to replace the glass originals to give addional security ,manufacturing in progress now .
I will list results here if anybody is interested
Rather than fitting a lexan rear tailgate screen which to do properly is a costly process i am going use a blast resistant 3M window film which gives a decent level of impact protection but is only highly effective when overlapped by several inches on the window frames.
I refitted the window without the aluminium frame just to see what options i have for a refit,,
water drain holes at bottom of winow rubberI am looking into fitting a plastic window channel, not in the facory form.Attachments

Last edited:

