Don't like the adverts? Click here to remove them
You are using an out of date browser. It may not display this or other websites correctly.
You should upgrade or use an alternative browser.
You should upgrade or use an alternative browser.
GRJ78 Troopy to Overland ready home
- Thread starter Gr8Yota
- Start date

Gr8Yota
Well-Known Member
- Joined
- May 11, 2017
- Messages
- 889
- Country Flag

Supposed to beAre these wheels pcd150 ? Looks awesome.
Thanks I’ll fheck the link. Looks like Range Rover uses same size so I have one of them on the way to try. My wheels are steelies so wrong nuts. Shame they’re not M13 I have a complete set .Yumm- i just bought 5 of these in black
I'm expecting the standard 100 series nuts to fit- specifically these ones 14x1.5mm Flat 47mm Thread 22mm Hex Chrome Wheel Nut for Toyota Land Cruiser [J100] 98-07 - [Leaving Land Cruiser Club]
Gr8Yota
Well-Known Member
- Joined
- May 11, 2017
- Messages
- 889
- Country Flag
These are two piece wheels for internal bead lock or VFI.Nice looking wheels, I have a set of ROH Hammer wheels to fit to mine............ BTW love the colour.
View attachment 324583
Do you plan to correct the rear wheel track?
Won’t be doing a track correction as no funds until FJ sells
pugwash
Well-Known Member
- Joined
- Mar 1, 2010
- Messages
- 484
- Country Flag

Yes- so its like running a 20mm spacer - which is helpful if you're running wider tyres!I believe so but I think the standard offset is different.
Don't like the adverts? Click here to remove them

This is epic Sarah, what a blank canvas to start afresh with, she’s a beauty.
watching this with interest.
watching this with interest.
pugwash
Well-Known Member
- Joined
- Mar 1, 2010
- Messages
- 484
- Country Flag
Just picking up on this- i'm not sure the range rover are the same- they are the same thread and pitch, but have a different shape on the wheel facing end of the nut.Supposed to be
Thanks I’ll fheck the link. Looks like Range Rover uses same size so I have one of them on the way to try. My wheels are steelies so wrong nuts. Shame they’re not M13 I have a complete set .
I'm not saying they wouldn't work, but i wouldn't be sure they would either!
pugwash
Well-Known Member
- Joined
- Mar 1, 2010
- Messages
- 484
- Country Flag
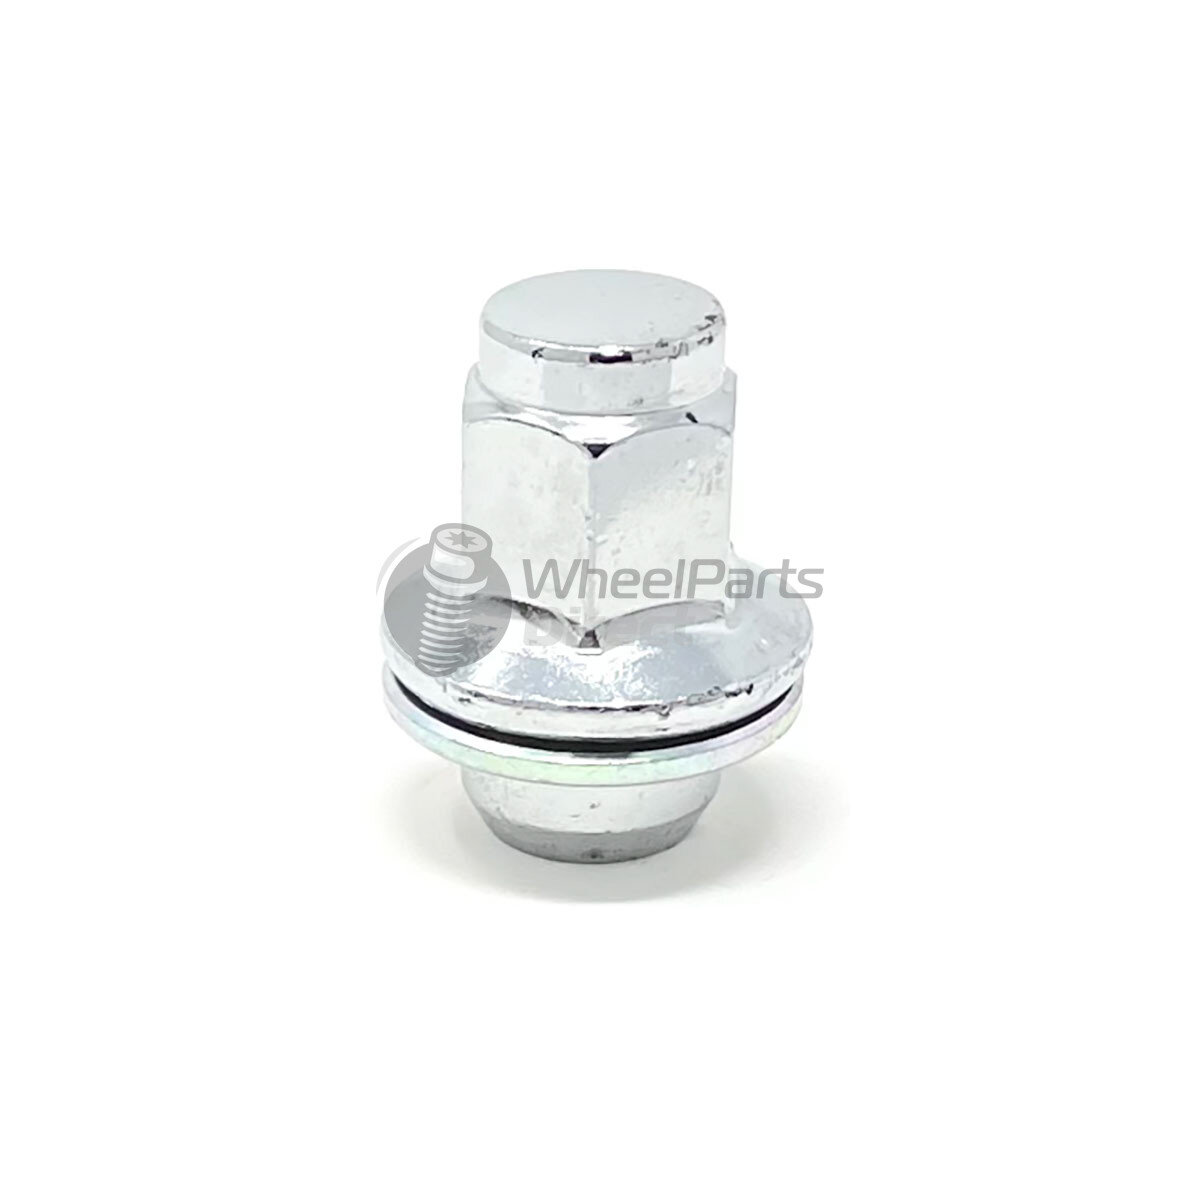
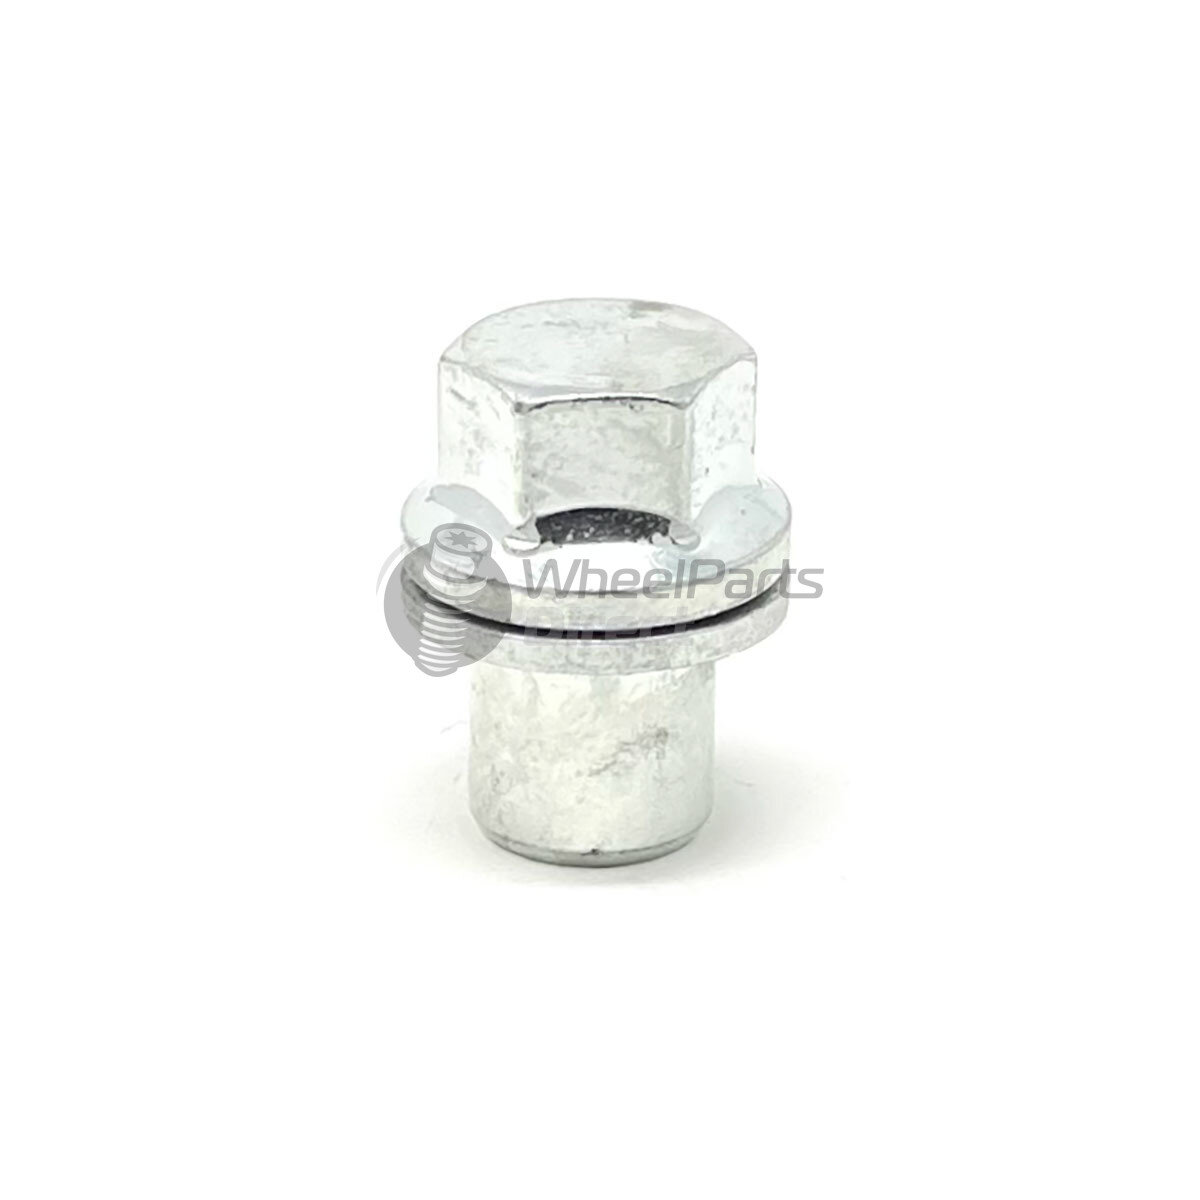
Just checked- they are definintely different- although they are both the same length- the placement of the nut "flat" is different, hopefully he two photos here help- the landcruiser is first, has the longer nut above the flat.
Attachments
pugwash
Well-Known Member
- Joined
- Mar 1, 2010
- Messages
- 484
- Country Flag
What vehcile are they on gr8? They look gr8 anyway .... Did you know that landcruiser wheel caps fit?
if they nuts are 2mm long doesn't that mean you can't use them? They will impact the hub before tightening against the wheel properly? These are hub centric wheels so it's even more important that they are tight against a clean hub......
if they nuts are 2mm long doesn't that mean you can't use them? They will impact the hub before tightening against the wheel properly? These are hub centric wheels so it's even more important that they are tight against a clean hub......
Gr8Yota
Well-Known Member
- Joined
- May 11, 2017
- Messages
- 889
- Country Flag
The pic is on my Troopy.What vehcile are they on gr8? They look gr8 anyway .... Did you know that landcruiser wheel caps fit?
if they nuts are 2mm long doesn't that mean you can't use them? They will impact the hub before tightening against the wheel properly? These are hub centric wheels so it's even more important that they are tight against a clean hub......
Yes the nuts are too long to allow the wheel to tighten (though did tighten against the drum on the back), but it was worth a look as LR/RR nuts are cheap and easy to get hold of.
Gr8Yota
Well-Known Member
- Joined
- May 11, 2017
- Messages
- 889
- Country Flag
Limited time over the weekend but some more electrics installed in the inner panel down the left side…
The distribution hub, (black box above is the TPMS controller, anyone know how to hack this so my light goes out?) The house batteries will run on an isolated circuit so positive and ground points for all circuits run from it. The blank space will have the switch panel but that will be installed in the covering trim panel.
Then a 1000W inverter. Again the 240V socket will go into the trim panel.

ARB twin pot at the back. Sat low so it sits inside the bench seat/bed not half way up the cushion. Between this and the inverter is the HAM radio body (detachable remote head will mount on the dash).

The distribution hub, (black box above is the TPMS controller, anyone know how to hack this so my light goes out?) The house batteries will run on an isolated circuit so positive and ground points for all circuits run from it. The blank space will have the switch panel but that will be installed in the covering trim panel.
Then a 1000W inverter. Again the 240V socket will go into the trim panel.
ARB twin pot at the back. Sat low so it sits inside the bench seat/bed not half way up the cushion. Between this and the inverter is the HAM radio body (detachable remote head will mount on the dash).
Gr8Yota
Well-Known Member
- Joined
- May 11, 2017
- Messages
- 889
- Country Flag
Well the week has had it’s ups and down…. I have finished most of the house electrics. But the constraints of space are causing issues. The water pump runs the opposite way to my flow so I need to try and reverse it so it faces out not in… that’s not too hard but that back corner is where the hob exhaust will be running and everything seems to need to be in the same space.
A Calorifier was to sit behind the front seats, pipework to run down the transmission tunnel to link in to the heater line but that won’t work, the tank is to tight against the floor and there are some structural body pieces blocking the path. It also wastes a lot of valuable space there. Moving it back to the least wasteful space gives a clear exit for pipes underneath but lengthens them by about a metre…

I still think the decision to ditch gas and find alternative means for heat, hot water and cooking was the right one but it is at a high cost, both money wise, costing me nearly 10x the gas plan! And space wise with the need for hot water and diesel to power the hob/air heater. Other options I looked at would have doubled the spend again! I haven’t really solved the issues yet and am starting to wonder if there is a way to get it all to fit and work.
Meanwhile when I leave it all alone and give the space to my carpenter this starts to happen!


So the urgency to sort the plumbing increases so as not to impede the cabinet build.
I have heaps to do but am finding it all quite hard on my own. I’ll get there… somehow.
A Calorifier was to sit behind the front seats, pipework to run down the transmission tunnel to link in to the heater line but that won’t work, the tank is to tight against the floor and there are some structural body pieces blocking the path. It also wastes a lot of valuable space there. Moving it back to the least wasteful space gives a clear exit for pipes underneath but lengthens them by about a metre…
I still think the decision to ditch gas and find alternative means for heat, hot water and cooking was the right one but it is at a high cost, both money wise, costing me nearly 10x the gas plan! And space wise with the need for hot water and diesel to power the hob/air heater. Other options I looked at would have doubled the spend again! I haven’t really solved the issues yet and am starting to wonder if there is a way to get it all to fit and work.
Meanwhile when I leave it all alone and give the space to my carpenter this starts to happen!
So the urgency to sort the plumbing increases so as not to impede the cabinet build.
I have heaps to do but am finding it all quite hard on my own. I’ll get there… somehow.
What a project!! Thank you for this write up - really looking forward to this build process and I've not seen anything that shows you how to get through the IVA either.
Can I ask your reasoning behind the Petrol engine choice vs Diesel?
And any idea about mpg (dare I ask?!)
Can I ask your reasoning behind the Petrol engine choice vs Diesel?
And any idea about mpg (dare I ask?!)
Gr8Yota
Well-Known Member
- Joined
- May 11, 2017
- Messages
- 889
- Country Flag
You can download the IVA manual but it is mostly irrelevant to a production car. I guess if you do this frequently it is easy, you get to know what they are anal about… But I now have the piece of paper and await registration… A very long wait from what others have said.
I went with the petrol for several reasons. Firstly I wasn’t sure how easy the 1VD would be to get through IVA and the 1HZ would be pretty much a non starter. (I would have bought an older 1HZ that only needed an MoT if I had been able to find a good one but I gave up the search)
Secondly I’m not really a fan of the 1VD, especially in the 70, for many reasons, one of which is it’s dependence on top quality fuel. I have the 1GR in my FJ Cruiser, albeit the later DVVTi version but it is a good engine, the SVVTi even stronger though a little less powerful than the dual. I love it and am definately a convert away from the diesels I’ve always had before.
On paper there is very little in the economy of the VDJ and the 1GR variants. I get between 20 and 30mpg from my FJ and don’t expect the Troopy to be much different.
The big disadvantage of the petrol is no option for factory diff locks but as it is cheaper to buy it about comes to the same thing to add a Harrop e-locker which is my plan.
Last edited:
Gr8Yota
Well-Known Member
- Joined
- May 11, 2017
- Messages
- 889
- Country Flag
Finally worked out how to get the plumbing to join up… trying to fit into too small a space but I think I have a plan….

Ply Floor back out, nutserts added so it can be fixed down and some 19 x 3mm steel bar added to it’s length on the underside where the dips between the floor ribs are so I can fix things down securely to the bar not just to the ply. So it’s ready for the floor to go in permanently and the vinyl to be added so the cabinets can be fitted and fixed in.

The bare floor to the right is where the exhaust from the hob will be plus water in so it will be left without insulation or ply for fire safety.
Meanwhile I started adding things up in the cabin… or at least adding wires… Well I guess it’s a good theft deterrent like this…

Ply Floor back out, nutserts added so it can be fixed down and some 19 x 3mm steel bar added to it’s length on the underside where the dips between the floor ribs are so I can fix things down securely to the bar not just to the ply. So it’s ready for the floor to go in permanently and the vinyl to be added so the cabinets can be fitted and fixed in.
The bare floor to the right is where the exhaust from the hob will be plus water in so it will be left without insulation or ply for fire safety.
Meanwhile I started adding things up in the cabin… or at least adding wires… Well I guess it’s a good theft deterrent like this…

Gr8Yota
Well-Known Member
- Joined
- May 11, 2017
- Messages
- 889
- Country Flag
Well now it’s starting to look a little more made… Floor down for good. A layer of insulation under 9mm poplar plywood and industrial vinyl on the top.

The ply is secured to the vehicle floor using countersunk bolts into nutserts. There are then steel bars running the length of the floor in the dips of the ribs so anything that is bolted to the ply is actually bolted into the steels or into the ribs depending on position thus the ply isn’t taking load alone.
Top right in the above pic are cut outs to seat the batteries...

Two 100Ah LiFePo units in parallel will provide ‘house’ power. These will be boxed in by the fridge base over the top and so cannot move from the cutout positions.
The ply is secured to the vehicle floor using countersunk bolts into nutserts. There are then steel bars running the length of the floor in the dips of the ribs so anything that is bolted to the ply is actually bolted into the steels or into the ribs depending on position thus the ply isn’t taking load alone.
Top right in the above pic are cut outs to seat the batteries...
Two 100Ah LiFePo units in parallel will provide ‘house’ power. These will be boxed in by the fridge base over the top and so cannot move from the cutout positions.
Similar threads
- Replies
- 9
- Views
- 304