Don't like the adverts? Click here to remove them
You are using an out of date browser. It may not display this or other websites correctly.
You should upgrade or use an alternative browser.
You should upgrade or use an alternative browser.
LJ70 Build Thread!
- Thread starter Ben
- Start date

Look Steven, dont get clever about bragging, an outsider looking in would look at the pictures and the only assumption would be to quote ben "WTF" have they been up to rip the countryside to shit and then bang the pictures on a public forum. It gives all the ammuinution to the powers that be to close the green lanes down.
Someone that day was arsing around and its not wise to brag about it becuase it spoil it for the rest of us let it lie at this.
Look Steven
Not trying to be clever, just accurate! You should give it a godont get clever about bragging
I don't think that to quote you this is the "ONLY" assumption that people would make. Some may say "Blimey he's had a lucky escape" or maybe "they did well to get him out of there" although it's clear the assumption that yourself and Mike have made about whats gone on!!!an outsider looking in would look at the pictures and the only assumption would be to quote ben "WTF" have they been up to rip the countryside to shit and then bang the pictures on a public forum.
Do you really think that this one small accident gives "ALL" the ammunition to the powers that be to close the green lanesIt gives all the ammuinution to the powers that be to close the green lanes down.
You see and there you go again assuming that this happened because someone was arsing around!!! It's not us that's giving ammunition to the powers that be, its you and Mike!! Posting inaccurate information and poorly chosen phrases, just so you feel you can have the last word!Someone that day was arsing around and its not wise to brag about it becuase it spoil it for the rest of us let it lie at this.
Last edited:
Yorkshire Devil
Well-Known Member
- Joined
- May 27, 2012
- Messages
- 260
Ben - You are missing the point here and need to see the bigger picture. People on the forum go green laning and know what its all about. People not on the forum will see a. young lad who's managed to roll his car on a flat road narrowley escaping serious injury damaging the country side (for your information grass doesnt grow back in winter, and nor do Christmas trees that were uprooted due to the winch - police could see this as criminal damage)
We all know that outsiders will the wrong impression of us genuine green laners, it wont be long before we all get tarred with the same brush as irresponsible young drink, drugged drivers and again an outsider looking in could think WTF was he on to roll that car. We all know that all the guy on this trip did nothing wrong except for one individual. I have not took offence to this thread, I have admired the vehicle build but I think you're way off the mark bragging about ripping the countryside to sh!t.
On other forums green lane chat is contained to private rooms with no public access. The moderating team/site founder may want to consider this for the forum.
Yorkshire Devil
Well-Known Member
- Joined
- May 27, 2012
- Messages
- 260
I'm not getting threatening all I'msaying is publising these ANTICS do us all NO favours. Can we all learn from that?

with my moderator hat on:
with my moderator hat off
The attitude in your post almost seems like it's designed to get peoples backs up, cause bad feeling and make sure they dismiss whatever you say Mike. Not many people are going to respond well to being accused of utterly moronic behaviour, idiocy, etc. You might think stuff their sensibilities but in doing so you are missing an opportunity to get your point of view across in a rational way that might have some influence on its audience and instead are helping to drive a wedge between users that should be working together so in your own way you are doing a lot of damage to the cause with this attitude.
I'd prefer all of the trip report pictures to have gone in the Green Lane section, that's what we created it for, but we've had that conversation before. They are far from being ALL the anti's need but why make it any easier for them is what I'd ask?
This is a user led forum, moderators are here to carry out moderation based on our perception of the expectations of the users, not a prescribed set of rules and regulations that posts can be measured against for moderation. I don't see a case for moderator intervention although you make some valid points very badly. Can't speak for the other moderators of coarse.and last - moderators not passing comment or removing images
with my moderator hat off
The attitude in your post almost seems like it's designed to get peoples backs up, cause bad feeling and make sure they dismiss whatever you say Mike. Not many people are going to respond well to being accused of utterly moronic behaviour, idiocy, etc. You might think stuff their sensibilities but in doing so you are missing an opportunity to get your point of view across in a rational way that might have some influence on its audience and instead are helping to drive a wedge between users that should be working together so in your own way you are doing a lot of damage to the cause with this attitude.
I'd prefer all of the trip report pictures to have gone in the Green Lane section, that's what we created it for, but we've had that conversation before. They are far from being ALL the anti's need but why make it any easier for them is what I'd ask?
Don't like the adverts? Click here to remove them

Ben - damaging the country side (for your information grass doesnt grow back in winter, and nor do Christmas trees that were uprooted due to the winch - police could see this as criminal damage)
I have admired the vehicle build but I think you're way off the mark bragging about ripping the countryside to sh!t.
On other forums green lane chat is contained to private rooms with no public access. The moderating team/site founder may want to consider this for the forum.
I'm being polite, I don't use bad language and I'm not being offensive, but is YD really trying to be serious in the above quotes?
Ben has never bragged about what happened, he admitted that he lost concentration and had an unfortunate accident. His post drew attention to how careful you have to be and what can happen to anyone that loses concentration momentarily. What happened as a consequence may be viewed by some as "damage" but there would be no way to prove any "criminal" intent. Please YD get a grip on reality. Maybe grass doesn't grow in the winter, but a scuff like that will be self repaired in a short time. As for the destruction of "Christmas trees" they grow faster than humans.
YD, what right do you have to call yourself a "genuine green laner"? What do you do that's so Holy, maybe you put the divvets back when you play golf... or perhaps you return to your laning on a bike and wipe all the leaves on the way to remove your carbon and sulphur deposits... Please get a life.
Ben,
I'm looking forward to you getting your post back to the build, and to shrug off all this nonsense. It's been entertaining though, so we must thank them for that.
- Joined
- Oct 13, 2010
- Messages
- 6,058
- Country Flag

I'm being polite, I don't use bad language and I'm not being offensive, but is YD really trying to be serious in the above quotes?
Ben has never bragged about what happened, he admitted that he lost concentration and had an unfortunate accident. His post drew attention to how careful you have to be and what can happen to anyone that loses concentration momentarily. What happened as a consequence may be viewed by some as "damage" but there would be no way to prove any "criminal" intent. Please YD get a grip on reality. Maybe grass doesn't grow in the winter, but a scuff like that will be self repaired in a short time. As for the destruction of "Christmas trees" they grow faster than humans.
YD, what right do you have to call yourself a "genuine green laner"? What do you do that's so Holy, maybe you put the divvets back when you play golf... or perhaps you return to your laning on a bike and wipe all the leaves on the way to remove your carbon and sulphur deposits... Please get a life.
Ben,
I'm looking forward to you getting your post back to the build, and to shrug off all this nonsense. It's been entertaining though, so we must thank them for that.

- Joined
- Oct 13, 2010
- Messages
- 6,058
- Country Flag
Luckily I had a spare rear window in the loft.

Decided to have a go at tinting it, so it would match the rest of the limo black rear windows.


Not perfect but OK for now.

Started fixing the dents in the new roof. Had it already been the same colour then I might not have decided to fill all of them, but i figured as ive got to paint the whole thing anyway I may aswell try and fill the dents first.


I figured the filler might stick better if I first sand it back to bare metal, and then score the metal with a screw driver


Got loads of filler left over from when I welded the new rear arches on.


The biggest dent was above the passenger door.


Between waiting for filler to dry and I decided to sort my steering wheel out. I picked up another steering wheel from the donor 70 that the roof came off. This meant I can now butcher my original toyota steering wheel and still have a spare to put on if vic roads dont like my quick release steering wheel.

This is the current setup which im not happy with for 3 reasons.
1. The boss is aluminium and ive been worried about the splines shearing off, especially when off road.
2. The length of the boss means that the steering wheel is 3-4" further towards the driver than the standard wheel.
3. The indicators dont auto cancel when turning.


This is the universal aluminium boss that i want to replace.


I found a really large thick washer. This one originally came off an industrial bench grinder and was used to clamp the grind stone in place on the spindle.Marked where it needed drilling.

Meanwhile I cut the middle out of the old steering wheel.

More cutting as I only wanted the spindle piece with.


Drilled the washer.

I used a bolt to clamp the 2 pieces together, it also helped make sure no weld splatter went on the splines.

The holes punched into the top of the spindle are what cause the auto cancelling on the indicators.

Welded together.

Steering wheel bolted back to the quick release boss, and my new boss bolted in place on the steering column.

A big improvement over the universal aluminium boss.The pic below shows how much further forward the steering wheel now sits.

Back to the bodywork..................................Sprayed some paint on the one area so i could sand over it and see the low spots which need more filler.

Took more paint off on more dents that needed filling.


This one wont really be seen because of the snorkel, but I decided to do it anyway just so there all filled.


I extended the legs on my tresels and got the roof on that to make it a bit easier to work on.


I went to Karl's to collect some replacement doors. On the way back I put my foot down on a dual carriageway and the side window blew out.
made for a very windy cold journey home.

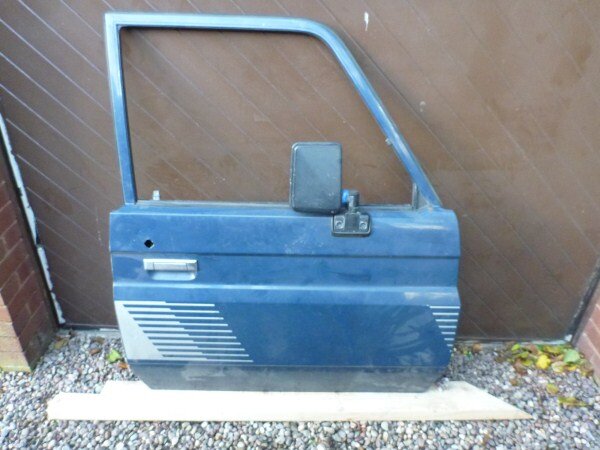
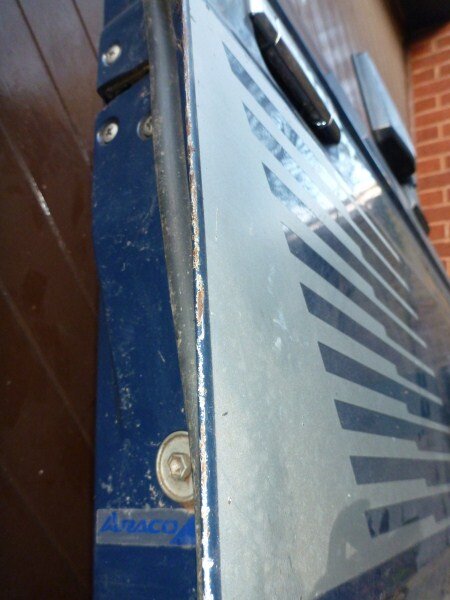
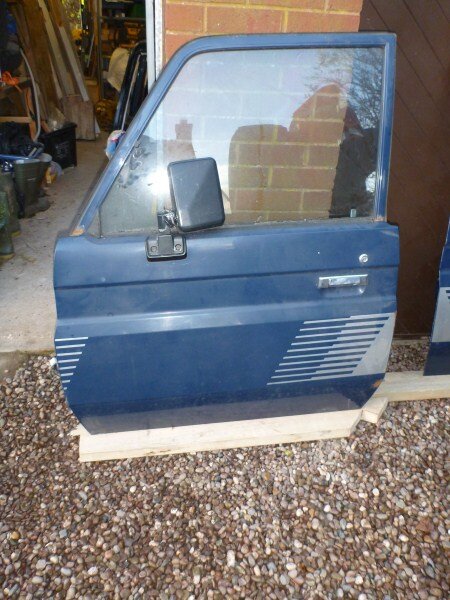
Replacement doors.

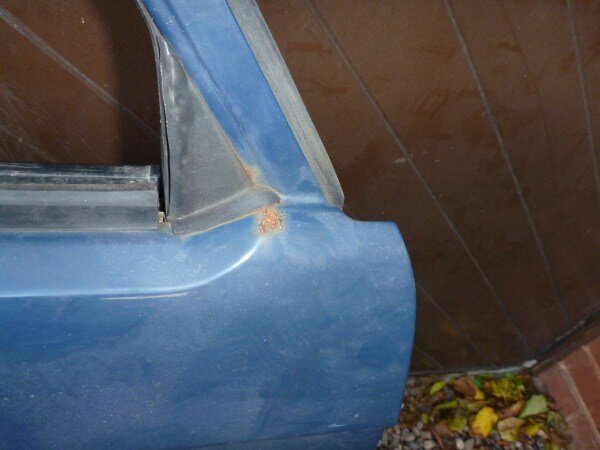
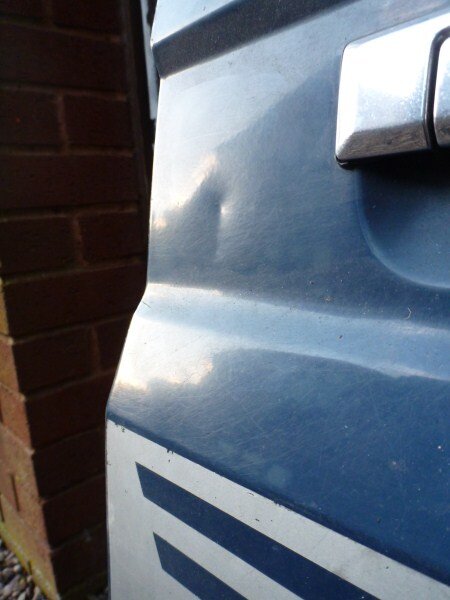
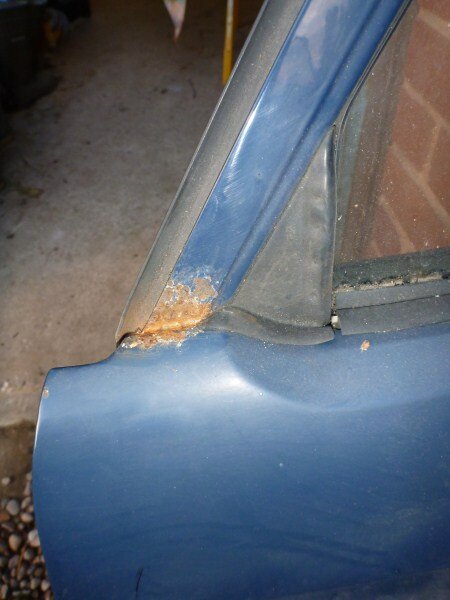
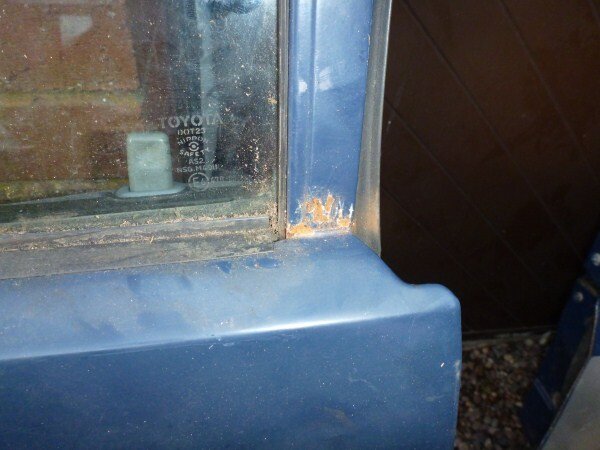
There a bit rusty, but there not bent and there the right colour.


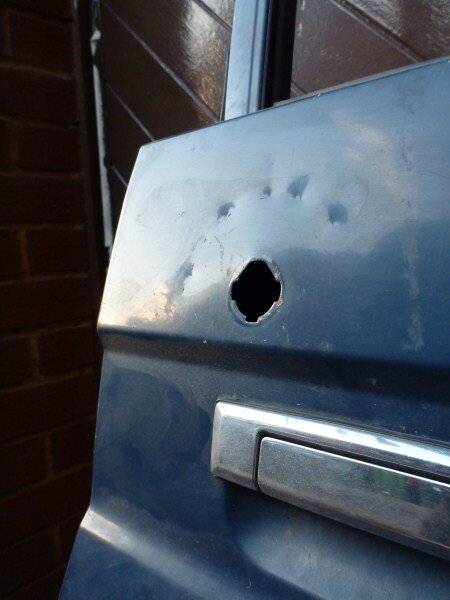
Looks like this door has been broken into.


Decided to fit the passenger door.


The pic below shows the seem where the A pillars meet the body. This is where the old ones will be removed and the new ones welded on.


Got the door on.

I didnt think the B pillars were very bent as theres no sign of paint rippling where theyve bent and the rear windows still fit perfectly.
But with the new door in place they do look bent. Im not worried though as I will straighten everything up once the old roof is off and both new doors are fitted.


More duck tape for now to keep the rain out.


Oh and my mate helped me pop the rear window back in the other night.

Hoping to have the roof filled and painted this week, then next weekend hoping to weld the new roof on.
Still need to get some 2K primer and MIG gas.
Decided to have a go at tinting it, so it would match the rest of the limo black rear windows.
Not perfect but OK for now.
Started fixing the dents in the new roof. Had it already been the same colour then I might not have decided to fill all of them, but i figured as ive got to paint the whole thing anyway I may aswell try and fill the dents first.
I figured the filler might stick better if I first sand it back to bare metal, and then score the metal with a screw driver
Got loads of filler left over from when I welded the new rear arches on.
The biggest dent was above the passenger door.
Between waiting for filler to dry and I decided to sort my steering wheel out. I picked up another steering wheel from the donor 70 that the roof came off. This meant I can now butcher my original toyota steering wheel and still have a spare to put on if vic roads dont like my quick release steering wheel.
This is the current setup which im not happy with for 3 reasons.
1. The boss is aluminium and ive been worried about the splines shearing off, especially when off road.
2. The length of the boss means that the steering wheel is 3-4" further towards the driver than the standard wheel.
3. The indicators dont auto cancel when turning.
This is the universal aluminium boss that i want to replace.
I found a really large thick washer. This one originally came off an industrial bench grinder and was used to clamp the grind stone in place on the spindle.Marked where it needed drilling.
Meanwhile I cut the middle out of the old steering wheel.
More cutting as I only wanted the spindle piece with.
Drilled the washer.
I used a bolt to clamp the 2 pieces together, it also helped make sure no weld splatter went on the splines.
The holes punched into the top of the spindle are what cause the auto cancelling on the indicators.
Welded together.
Steering wheel bolted back to the quick release boss, and my new boss bolted in place on the steering column.
A big improvement over the universal aluminium boss.The pic below shows how much further forward the steering wheel now sits.
Back to the bodywork..................................Sprayed some paint on the one area so i could sand over it and see the low spots which need more filler.
Took more paint off on more dents that needed filling.
This one wont really be seen because of the snorkel, but I decided to do it anyway just so there all filled.
I extended the legs on my tresels and got the roof on that to make it a bit easier to work on.
I went to Karl's to collect some replacement doors. On the way back I put my foot down on a dual carriageway and the side window blew out.
made for a very windy cold journey home.
Replacement doors.
There a bit rusty, but there not bent and there the right colour.
Looks like this door has been broken into.
Decided to fit the passenger door.
The pic below shows the seem where the A pillars meet the body. This is where the old ones will be removed and the new ones welded on.
Got the door on.
I didnt think the B pillars were very bent as theres no sign of paint rippling where theyve bent and the rear windows still fit perfectly.
But with the new door in place they do look bent. Im not worried though as I will straighten everything up once the old roof is off and both new doors are fitted.
More duck tape for now to keep the rain out.
Oh and my mate helped me pop the rear window back in the other night.
Hoping to have the roof filled and painted this week, then next weekend hoping to weld the new roof on.
Still need to get some 2K primer and MIG gas.
Attachments
Last edited:
Graham
Well-Known Member
Good work Ben,
Keep at it.
Looking at the long adapter for the steering wheel, could you perhaps got some one to put it in a lathe, and cut a piece out, then simply re-weld the two pieces back together?
I know there is probably more to it than that, but just thinking.
Gra.
Keep at it.
Looking at the long adapter for the steering wheel, could you perhaps got some one to put it in a lathe, and cut a piece out, then simply re-weld the two pieces back together?
I know there is probably more to it than that, but just thinking.
Gra.
- Joined
- Oct 13, 2010
- Messages
- 6,058
- Country Flag
Good work Ben,
Keep at it.
Looking at the long adapter for the steering wheel, could you perhaps got some one to put it in a lathe, and cut a piece out, then simply re-weld the two pieces back together?
I know there is probably more to it than that, but just thinking.
Gra.
This is the current setup which im not happy with for 3 reasons.
1. The boss is aluminium and ive been worried about the splines shearing off, especially when off road.
2. The length of the boss means that the steering wheel is 3-4" further towards the driver than the standard wheel.
3. The indicators dont auto cancel when turning.
Thanks Gra.
Good work Ben, it's going to be long and tedious I'm afraid!
Maybe you mean a primer coat, but is it wise to paint the roof prior to fitting it? I would have thought to fit it first and then paint it all in one go, welds and all.
I wondered whether you had taken any measurements, some comparisons of diagonals and such like, they might give you a better idea as to whether there has been any distortion in the pillars.
I can see a lot of jacking and cable / strap restraints being used when you try to locate all the roof connection points, and get them suitably aligned. Looking forward to that part of the thread...
- Joined
- Oct 13, 2010
- Messages
- 6,058
- Country Flag
Thanks Clive. 
I know idealy all the paint work should be done afterwards but...........................
Its not going to be easy to spray the roof afterwards for 2 reasons.
1. its over 6ft off the ground.
2. its bloody freezing here and the truck wont fit in the garage.
So I was thinking of priming and top coating the roof in the garage, before fitting it.
I realise that I will need to grind back the paint in places, and also that the heat might damage some of the paint. But I think it will be easier to have to sand back and re-paint a few small areas around the pillars afterwards, than try and spray the whole roof after fitting.
Im hoping to not put too much heat into the roof when i weld it.
I know what your saying about jacking/moving the pillars to line up with the new roof. I will probably end up using ratchet straps and pieces of wood.
If i fit the new front doors which are straight, after cutting the old roof off. Then hopefully I will be able to drop the new roof in position and then strench/pull/move the pillars until everything lines up and the doors open and close properly.
Then tack weld it all together, and remove any straps/clamps/pieces of wood etc. and hope nothing moves.
Then if im happy with the position of everything fully weld everything.
Its not going to be a quick job. I want to remove the bonnet, wings, dashboard, seat, and possibly doors. And thats before I even start cutting the old roof off.
spackrackman
Well-Known Member
- Joined
- Mar 7, 2010
- Messages
- 438
Ben do you have a spare drivers side wing mirror? Good to catch up yesterday by the way!
Sure you're right about getting the job done quickly, I'd forgotten that you're about to go "down under".
What a time for this to have happened
What a time for this to have happened
jeepmadmike
Well-Known Member
- Joined
- Feb 11, 2011
- Messages
- 229
How do you intend to joint the pillars, butt joints?
In the past when I've fitted roofs, quarters etc I have always staggered the cuts on pillars, that is cut the inner and outer parts at different lengths. It makes getting it all back in line is easier as there's something to clamp together / pull or push on.
In the past when I've fitted roofs, quarters etc I have always staggered the cuts on pillars, that is cut the inner and outer parts at different lengths. It makes getting it all back in line is easier as there's something to clamp together / pull or push on.
- Joined
- Oct 13, 2010
- Messages
- 6,058
- Country Flag
Didnt do much on the truck today.
I think I must have become a bit of a hoarder in the last 12-15 years.
Put 52 items on ebay today and still got loads more stuff I need to get rid of before the big move.
I decided to try and fit the air box that I got off the donor 3 litre 70.
This was the air intake pipe that I made up with old pieces of pipe when I took the old 2.4 engine out and fitted the 3 litre.

I think this pipe must have restricted the engine a little bit, which was the main reason for me wanting to change it.

I removed my 4-runner air box and compared it to the huge KZJ70 one.
Im not sure why toyota thought the 70 series needed such a huge airbox compared to the 4-runner, considering they both use the same 3 litre engine.

While the airbox was out I decided to finally make a start sorting some of the dodgy wiring out.
All the wiring inside the truck is now OK, just a few bits under the bonnet to neaten up, and a few more wires that I need to work out where there meant to go.
Anyway..............I decided to sort the wiring out to the alternator.

Now I know the alternator is all wired up properly I could solder and heat shrink the wires properly.
Got to use my new Aldi £5 soldering iron.

Worked well.

Wiring done I decided to fit the air box.

With the air box in place I couldnt get the intake pipe to fit.
I put this down to the 2" bodylift.

Decided I didnt really like it anyway, it seems too big for the engine bay and takes up loads of room.
Interestingly enough the actual filter is the same in both air boxes, just the KZJ70's box is bigger.

So I re-fitted the 4-runner air box but used the KZJ70 intake pipe.


Need to crack on with the roof repairs now.
I think I must have become a bit of a hoarder in the last 12-15 years.
Put 52 items on ebay today and still got loads more stuff I need to get rid of before the big move.
I decided to try and fit the air box that I got off the donor 3 litre 70.
This was the air intake pipe that I made up with old pieces of pipe when I took the old 2.4 engine out and fitted the 3 litre.
I think this pipe must have restricted the engine a little bit, which was the main reason for me wanting to change it.
I removed my 4-runner air box and compared it to the huge KZJ70 one.
Im not sure why toyota thought the 70 series needed such a huge airbox compared to the 4-runner, considering they both use the same 3 litre engine.
While the airbox was out I decided to finally make a start sorting some of the dodgy wiring out.
All the wiring inside the truck is now OK, just a few bits under the bonnet to neaten up, and a few more wires that I need to work out where there meant to go.
Anyway..............I decided to sort the wiring out to the alternator.
Now I know the alternator is all wired up properly I could solder and heat shrink the wires properly.
Got to use my new Aldi £5 soldering iron.
Worked well.
Wiring done I decided to fit the air box.
With the air box in place I couldnt get the intake pipe to fit.
I put this down to the 2" bodylift.
Decided I didnt really like it anyway, it seems too big for the engine bay and takes up loads of room.
Interestingly enough the actual filter is the same in both air boxes, just the KZJ70's box is bigger.
So I re-fitted the 4-runner air box but used the KZJ70 intake pipe.
Need to crack on with the roof repairs now.
- Joined
- Oct 13, 2010
- Messages
- 6,058
- Country Flag
How do you intend to joint the pillars, butt joints?
In the past when I've fitted roofs, quarters etc I have always staggered the cuts on pillars, that is cut the inner and outer parts at different lengths. It makes getting it all back in line is easier as there's something to clamp together / pull or push on.
To be honest Mike I havnt had a proper look at it yet.
Im going to have a look at the bottom of the A pillars on the new roof.
Im hoping I can cut the inner section out of the pillars on the bottom of the A pillars on the new roof.
Then on the truck, cut the A pillars a few inches above where the seem/joint is. Then with the roof out of the way, hopefully I will be able to cut the outer section off possibly in bits.
What im then hoping is It will will be very similar to the original construction method, where by the A pillars will sit down and over the bottom pieces of A pillar.
Does that actually make any sense?
I know exactly how I'm thinking of doing it, its just difficult to explain it in words.
I think how I'm thinking of doing it is how you've said you've done it before, by staggering the outer and inner sections.
Similar threads
- Replies
- 6
- Views
- 385