Don't like the adverts?  Click here to remove them

My 150 Kakadu

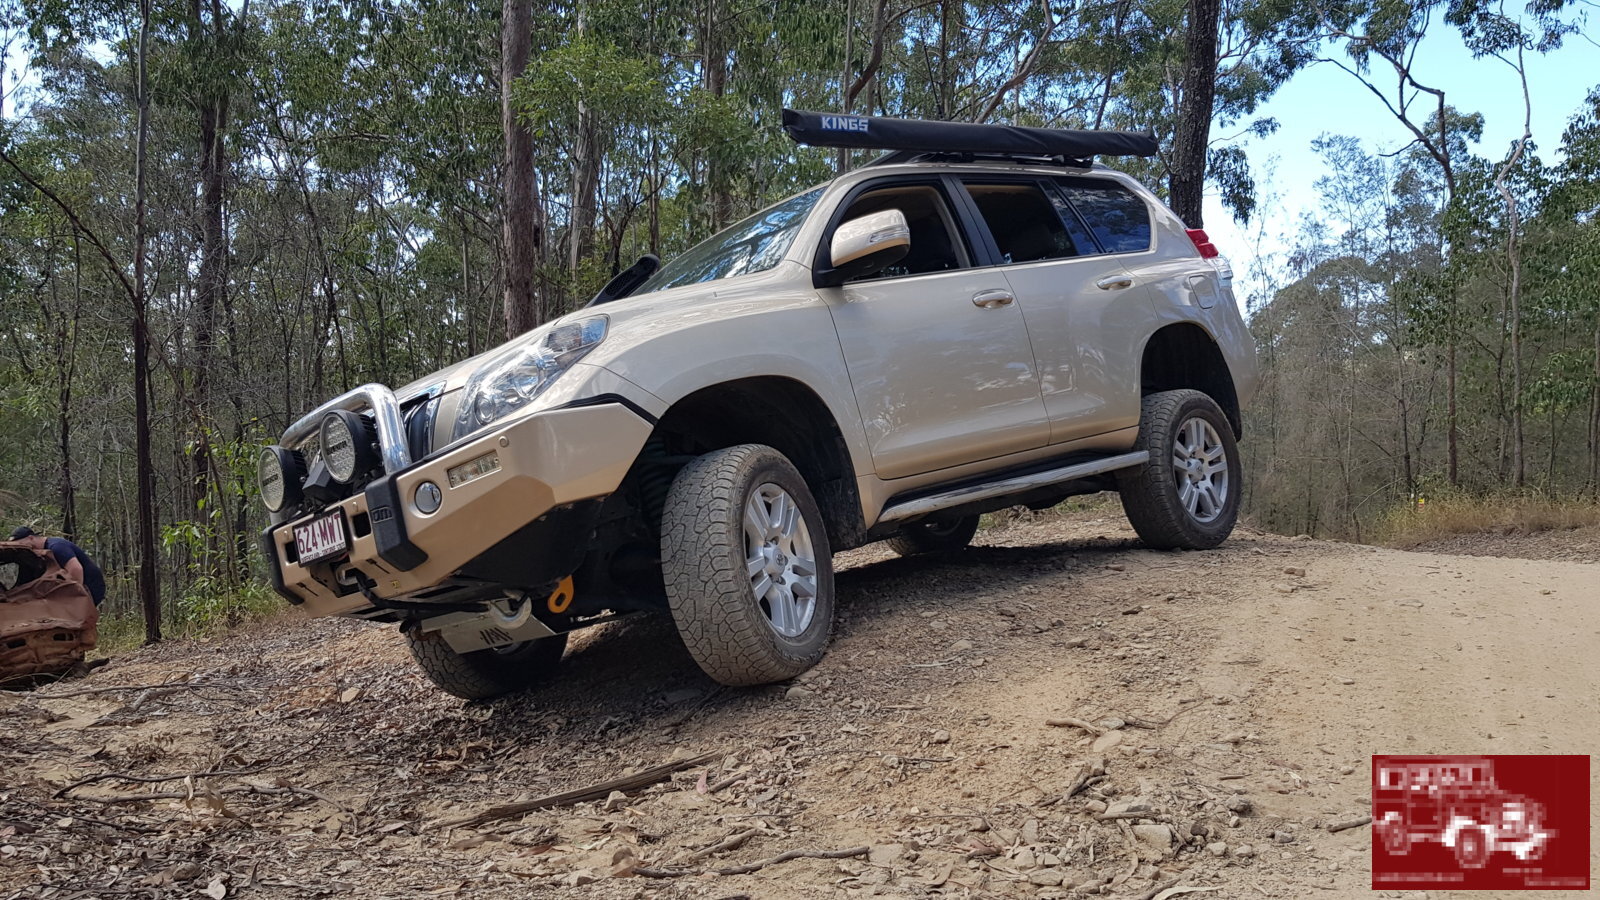
Spent the weekend at Levuka 4x4 park. Couple of pics below. Didn't get to try out the winch.
This is actually the wife driving. Shes pretty proud of herself. I switched on the crawl control for her and off she went.
full.png

It was pretty dry out there but I managed to find some mud to play in
full.jpg

Will get a video done once the young fella gives me access to his phone
 
Noticed the rear tank bash plate was a little bent from the Last Adventure, I was concerned the plate may be rubbing on the tank it was meant to protect. Unfortunately I was correct, though only the paint was rubbed off.
I used the weight of the vehicle and my jack to press the dents out
full.jpg

Straighten out ready for paint. All the Diagonal scrapes were where the dents were .
full.jpg


All done. Whole job only took 2 beers and a rum
full.jpg
 
I recently embarked on a rear drawer system build. I managed to do it with limited tools and resources but am pretty happy with the outcome.

Here's how it went down!

Power tools:
Circular saw $98 , Drill , Belt sander
Hand tools:
Curved scalpel , sanding block , Scissors , chalk line , chalk , pencil , tape measure

Misc:
hole saws , Drill bit for pilot holes.

Tools I really could have done with but didn't have:
Table saw , set square , big clamps , proper work bench.

Bill of Materials:
3 x 8kg Magnetic latches $35
2 x 2400 x 1200 15mm ply $free (packing sheets from work)
4m² outdoor carpet $8m² (on sale ½ price)
Approx 100 x 6g x 75 batten screws (from work)
45 x 6g x 15mm wood screws $4
wood glue $5? missus picked it up
2 x 50mm x m6 and m10 bolts and washers to suit $10
2 x flat black paint $7
1 x painters masking tape $3
nylon strips for runners $ free from building site skip.

Time taken: approx 30 hours

I'm gonna say about a total $200 AU including the cost of the circular saw. I could have gone down to 4wd super centre and picked up a set for about $300 but they weigh around 75kg and weight is a bad thing in a 150 as it has a very limited payload. I haven't weighed them but I'm gonna guess 40kg max.
 
Last edited:
First cut! Measured the space in the wagon and set to work building the carcass
After test fitting the carcass I realised that if I was to fit a fridge I would need to lower one side
The carcass covered
I had an after thought and decided to paint any visible timber black to give it a better finish
Here the runners can be seen. Drawers covered , painted and ready.
The Magnetic latches in the back of the drawers, the back of the carcass is off here, the backs hold the rest of the latch assembly
all bolted in

The table will be taken to work and edged with a wood grain veneer and the top will be stained. Wings will be added for power , air and water outlets.
 
Last edited:
Don't like the adverts?  Click here to remove them
Finally got some new underbody protection. 4mm Silver Zinc plated steel from Bushskinz 4x4. It came in 3 pieces weighing nearly 35kg , covering from the radiator to just behind the transfer case.

Factory plates are a little munted


Yeah now I just gotta get around to washing her
 
Last edited:
Hi, that looks very nice, well done.
How have you tied them down?
 
Thanks Hamba, I removed the bolts from the factory tie downs that were in the backs of the seats/floor . I swapped them out for 50mm bolts and big washers and bolted through the bottom of the carcass. I didn't need to countersink as first planned as the slides together (8mm) were high enough to clear the bolt heads. I can take a pic if you require.
 
Ah, very nicely done. I first tried to make screws that would fit in the slots but they kept coming loose. I'll try your way next. Thanks.
 
Just keep in mind that you cant access the bolts furthest from the rear from the handle end of the drawers. I designed mine in such away that the back of the carcass could be removed gaining the access needed .
 
Scored almost a complete hayman reese tow bar kit for $250. Install went well
Just missing the ECU module so nothing interferes with the cars computer and the actual patch a trailer would plug into. I dont own a trailer yet so it will serve as a recovery point until then
 
Thanks for sharing.

What's you thoughts on 150? One is on the cards in a while
 
Depends on which one you're after. The D4D up until 2014 were prone to piston failure. Pretty sure EU vehicles were recalled but toyota AU wont come to the party. The Latest are having DPF issues here. The V6 petrol is trouble free but thirsty. Otherwise an awesome car. Not a lot of room for gear if you have a small family camping wise. Very comfortable also.
 
Not sure on the year I w9uld be looking foe yet.

Why do the pistols fail on the 3.0 d4d? Poor oil getting to the top of the piston?

Is the dpf issues due to short runs do you think.

We don't get the petrol here plus i like diesels...
 
Poor Design . They were made differently to meet Euro emissions standards(some coating removed). They crack from the edge and through the gudgeon pin . Also the Injectors were not the greatest. They are known to fail also causing the inferior piston to melt or crack. A lot of guys are now replacing injectors with the full DLC item found in the 2014+ models. Others are even going as far as replacing the pistons with after market forged pistons which will handle the pressures of injector failure. A class action is underway now for these issues in Aus

No DPF in these models, still EGR which is also painful. A block can be done with a plate with a 7mm hole so it doesnt throw codes or can be shut off via techstream. I think DPF is only in the 2017-18 models. DPF issues are costing Toyota so much that they now rather than replace them immediately, the DPF gets cleaned . If the vehicle returns more than 3 times it then gets replaced.
 
Installed some diff breathers over the weekend. Was harder than expected but got it done. I bought a kit from Air on board . Rear diff was as easy as swapping a connection and routing a plastic tube upto the engine bay. There was no chance of reaching the connection on the front diff , transmission and transfer with out some major disassembly . Luckily the front diff has the breather beside the fuse box , I just joined the new line to that and ran it around to the other side of the engine bay.

The transfer and transmission posed a much greater challenge. There are 3 breathers located just above the bell housing. I managed to unclip them and pull them far enough down to access the ends of the breather hoses from under the car. It was then I realised that I'm gonna need some joiners. I drove to several auto stores where they tried to sell me 1 joiner for $6, I needed 5 in total. I ended up at Bunnings hardware and bought a couple of packs of micro irrigation joiners (20 pieces) for just over $7.

Any way I managed to tear off one of the hoses from the transmission whilst I was pulling them down which was A bit of a set back but in the end I was a successful mod.
 
Back
Top