Don't like the adverts? Click here to remove them
You are using an out of date browser. It may not display this or other websites correctly.
You should upgrade or use an alternative browser.
You should upgrade or use an alternative browser.
My 150 Kakadu
- Thread starter Gasmanjc
- Start date


Gasmanjc
Well-Known Member
- Joined
- Oct 11, 2016
- Messages
- 201
- Country Flag

Are they not between the firewall and the back of the engine like mine were? Could be the same.I thought about extending the transmission breathers on my auto hilux, but just couldn't find them

Nice neat job there JC, like the look of that a lot 
Gasmanjc
Well-Known Member
- Joined
- Oct 11, 2016
- Messages
- 201
- Country Flag
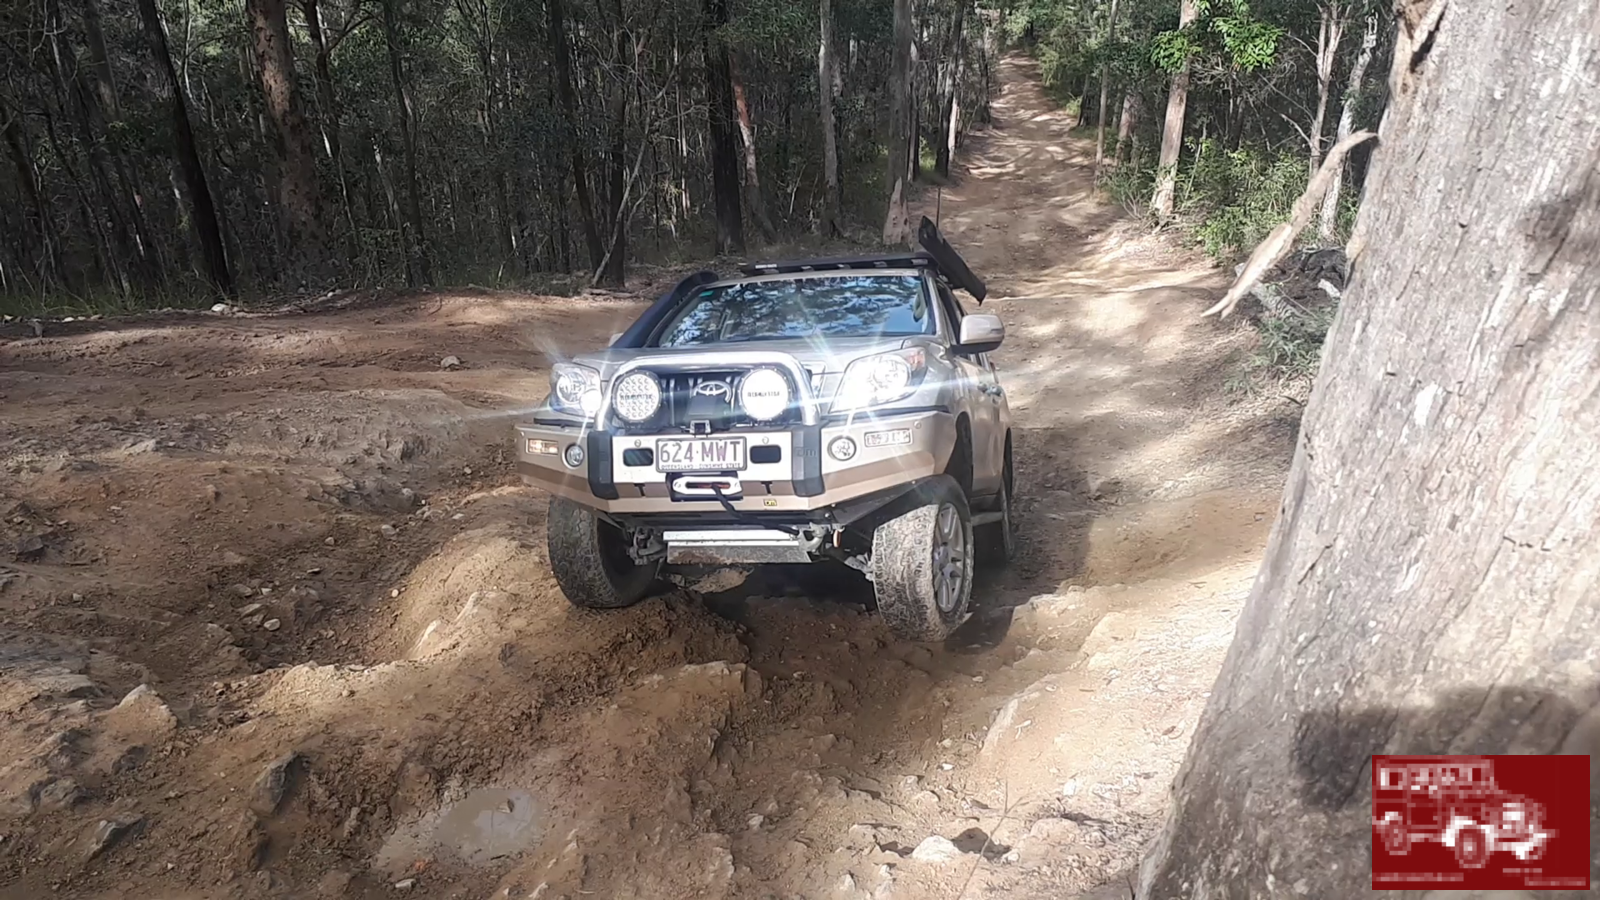
Found some local tracks last week. Met a work mate there, he has a Prado 150 2016 GXL and his son came also for his first off road experience in his own Holden Rodeo. I made a vid of the best bits we encountered.
Gasmanjc
Well-Known Member
- Joined
- Oct 11, 2016
- Messages
- 201
- Country Flag
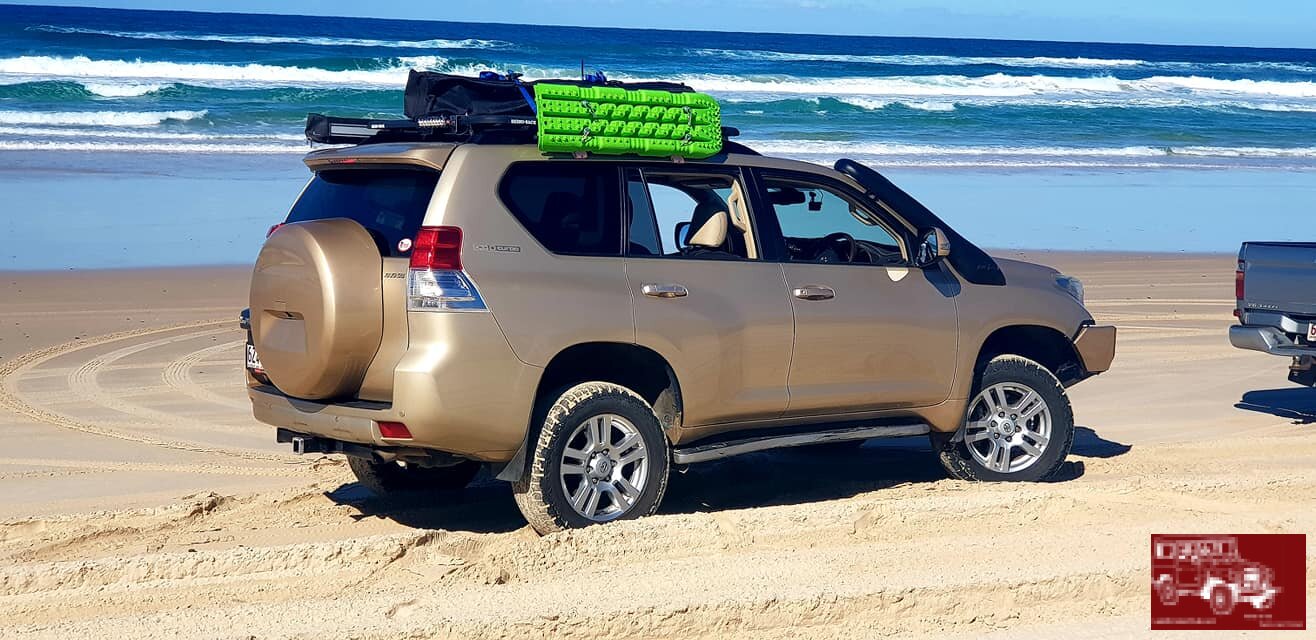
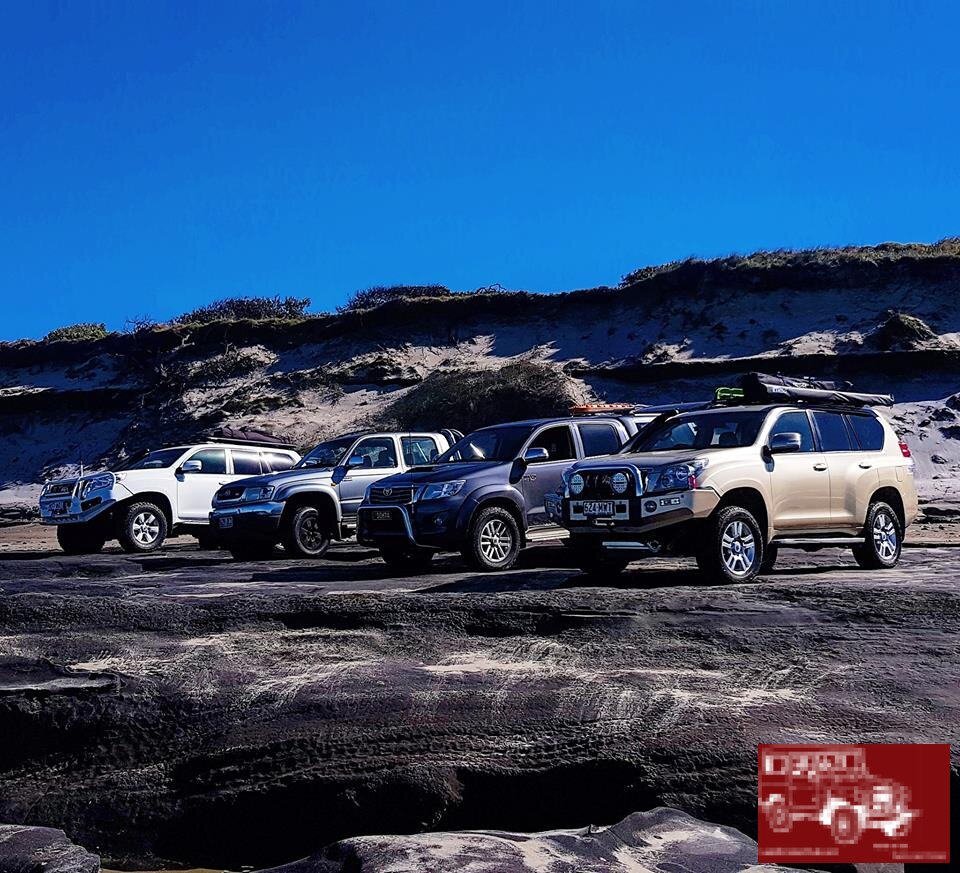
Did our first ever beach/sand drive Last week end. Was very Easy as sand was mostly hard. Couple of Pics.
Don't like the adverts? Click here to remove them
Gasmanjc
Well-Known Member
- Joined
- Oct 11, 2016
- Messages
- 201
- Country Flag
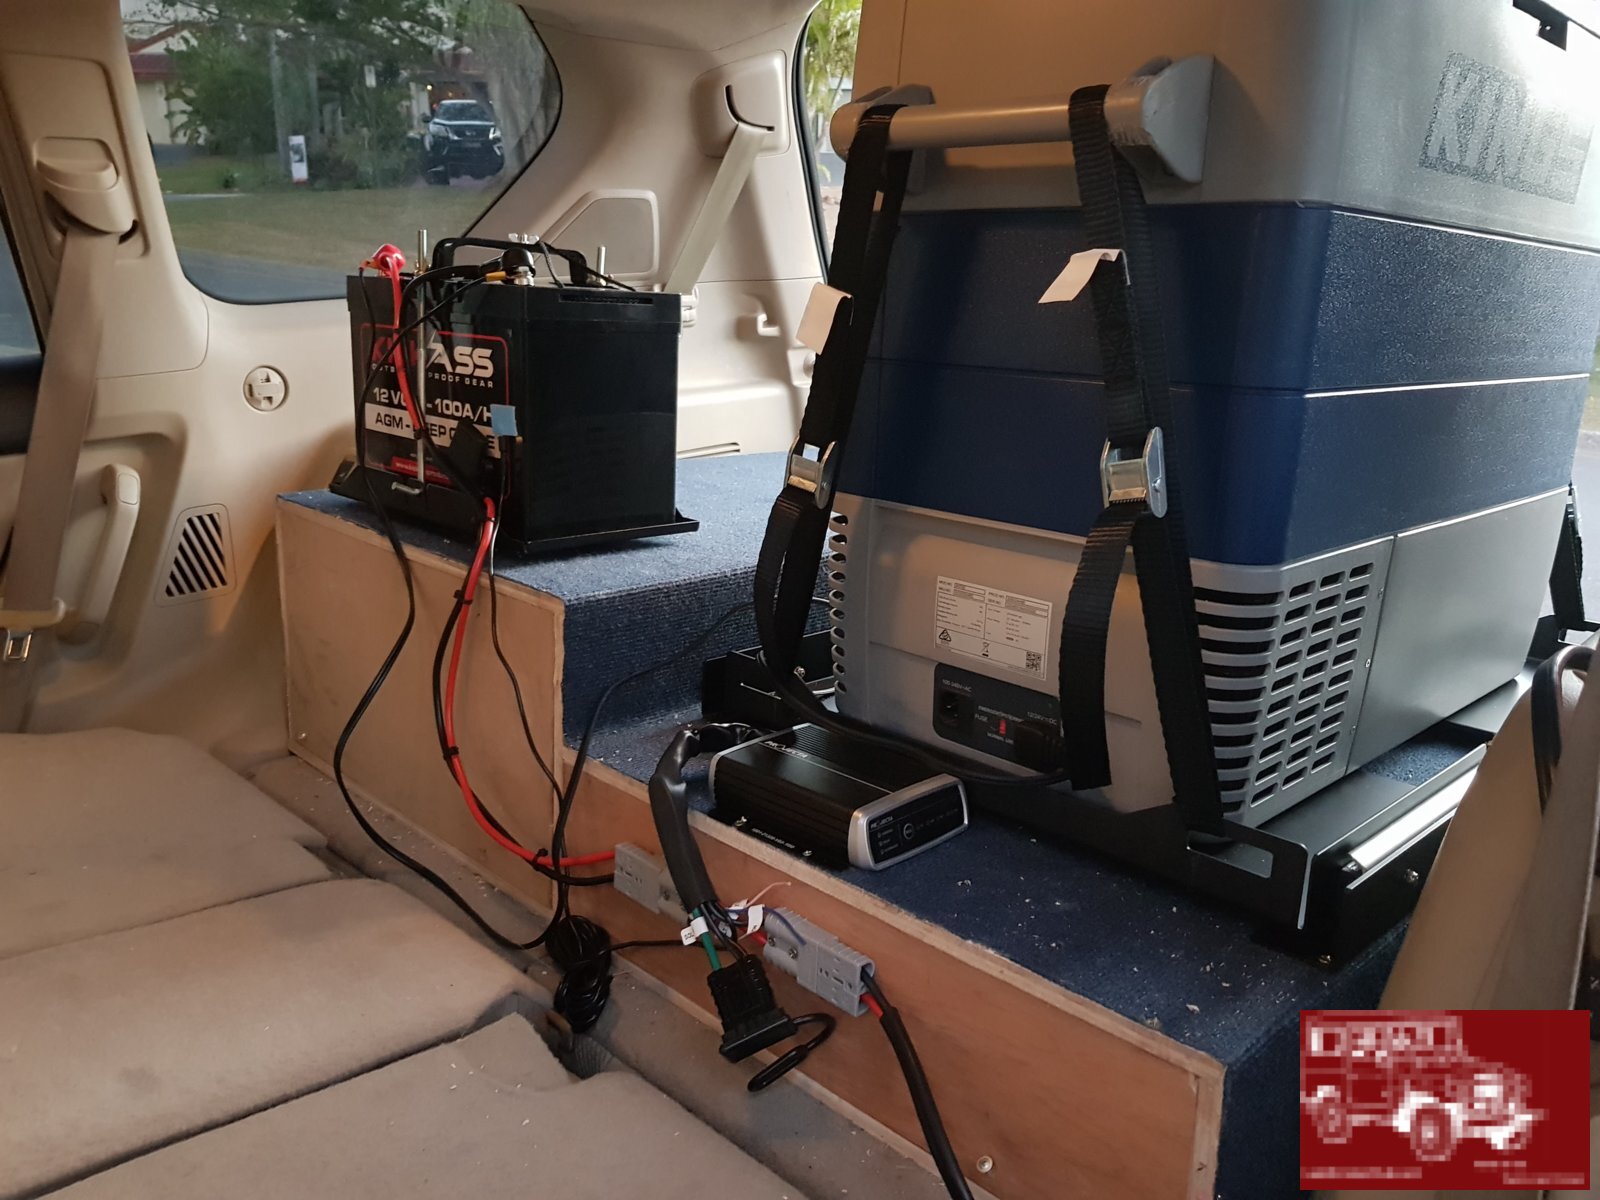
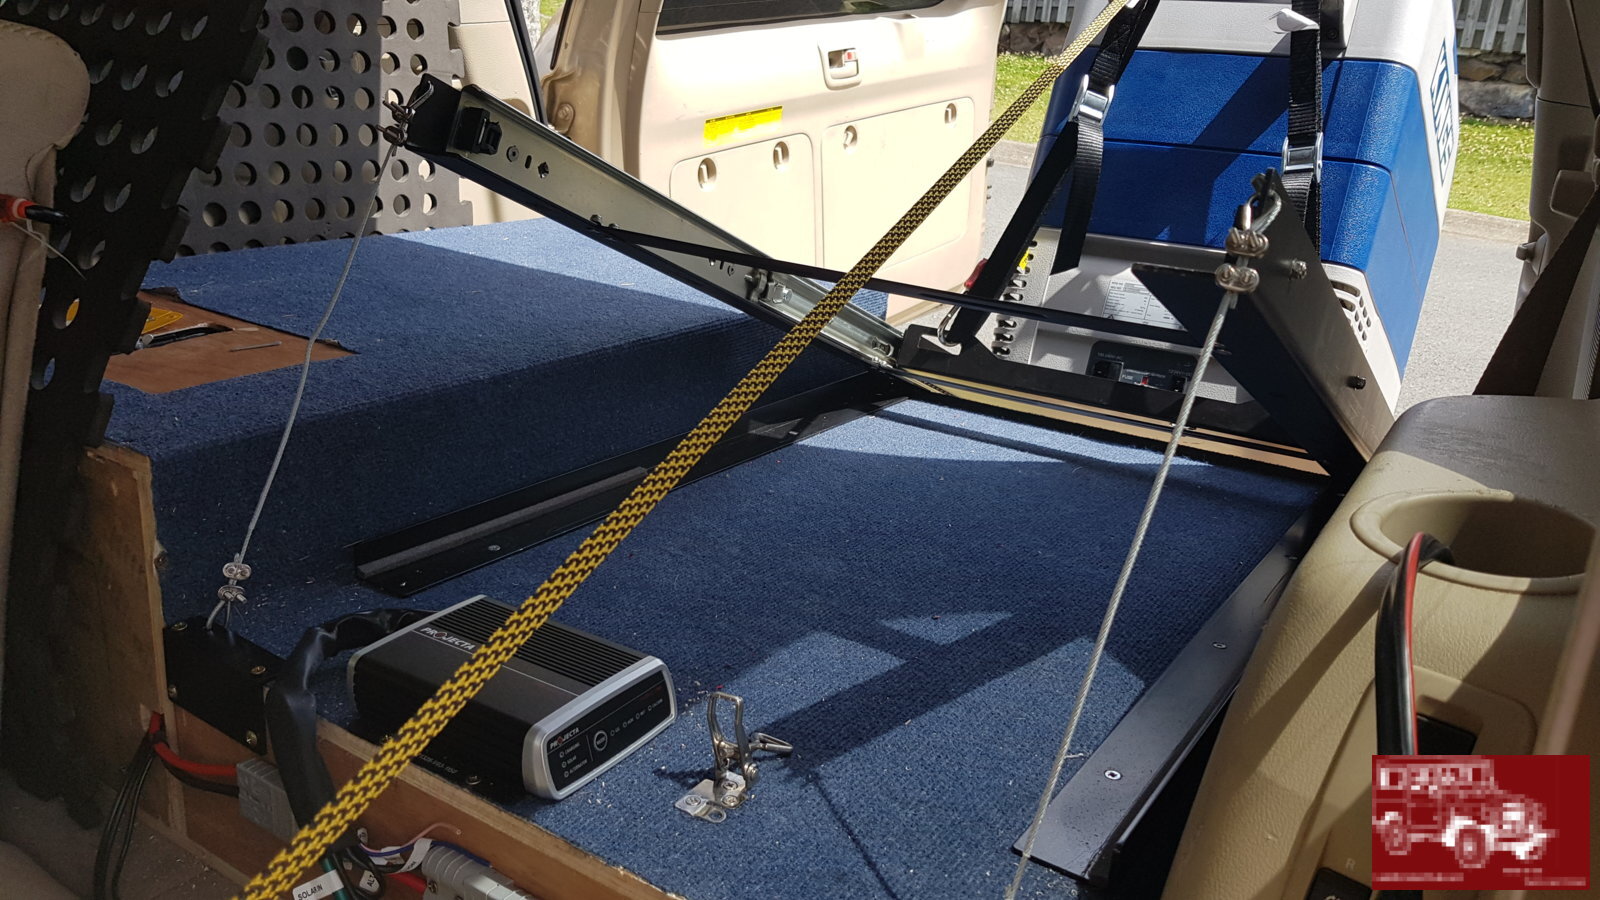
Installed a Dual battery system and fridge over the weekend. Thought I would keep it simple , or so I thought.
I ordered a 100ah kick ass AGM , projecta IDC25 ( all plugs pre installed) and a battery tray. The Plan was to install the battery and charger in the spare battery space under the bonnet. After receiving the battery I soon discovered the warranty on the battery would be void if it was fitted in the engine bay. So plan B was to install it in the rear of the wagon.
I ran the supplied 8Ø wire from the starter battery underneath along the passenger side chassis, up inside the rear ¼ bumper. There was a bung there with other wires running through into the jack compartment which I followed through. The cable was then sent back up inside the rear plastics where I drilled a hole through the cup holder and exited the cable there.
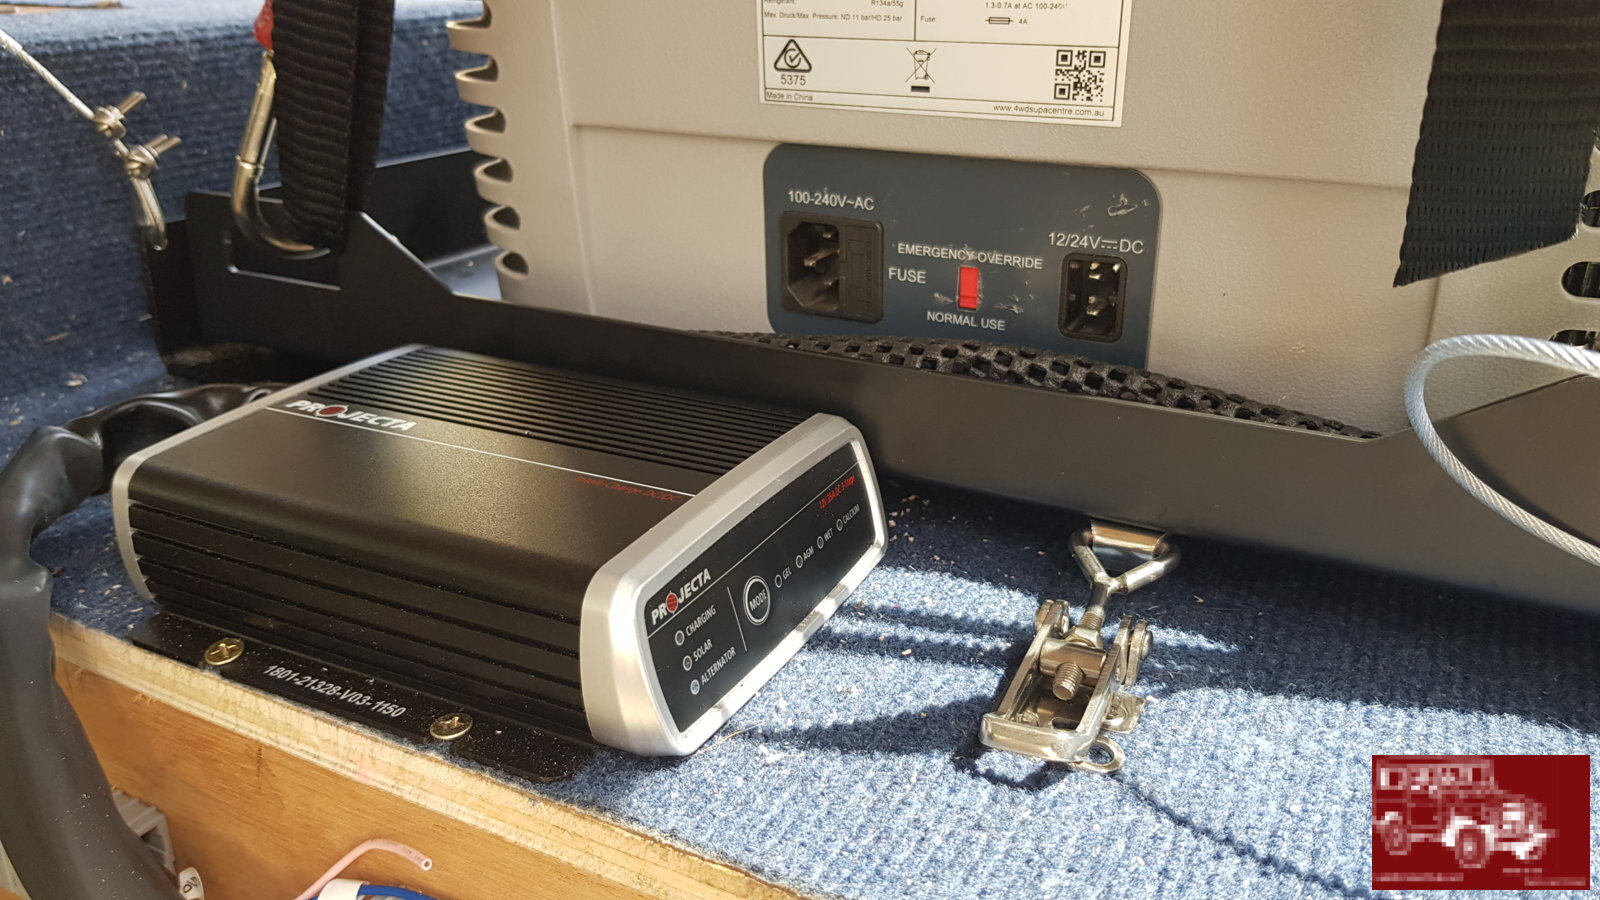
I then installed the fridge slide and discovered there was not enough room to fit the battery behind it, so the battery had to go on top over the opposite draw. I wasn't too keen on this as it took up a lot of use able space there. The charger stayed behind the fridge slide
Plan B
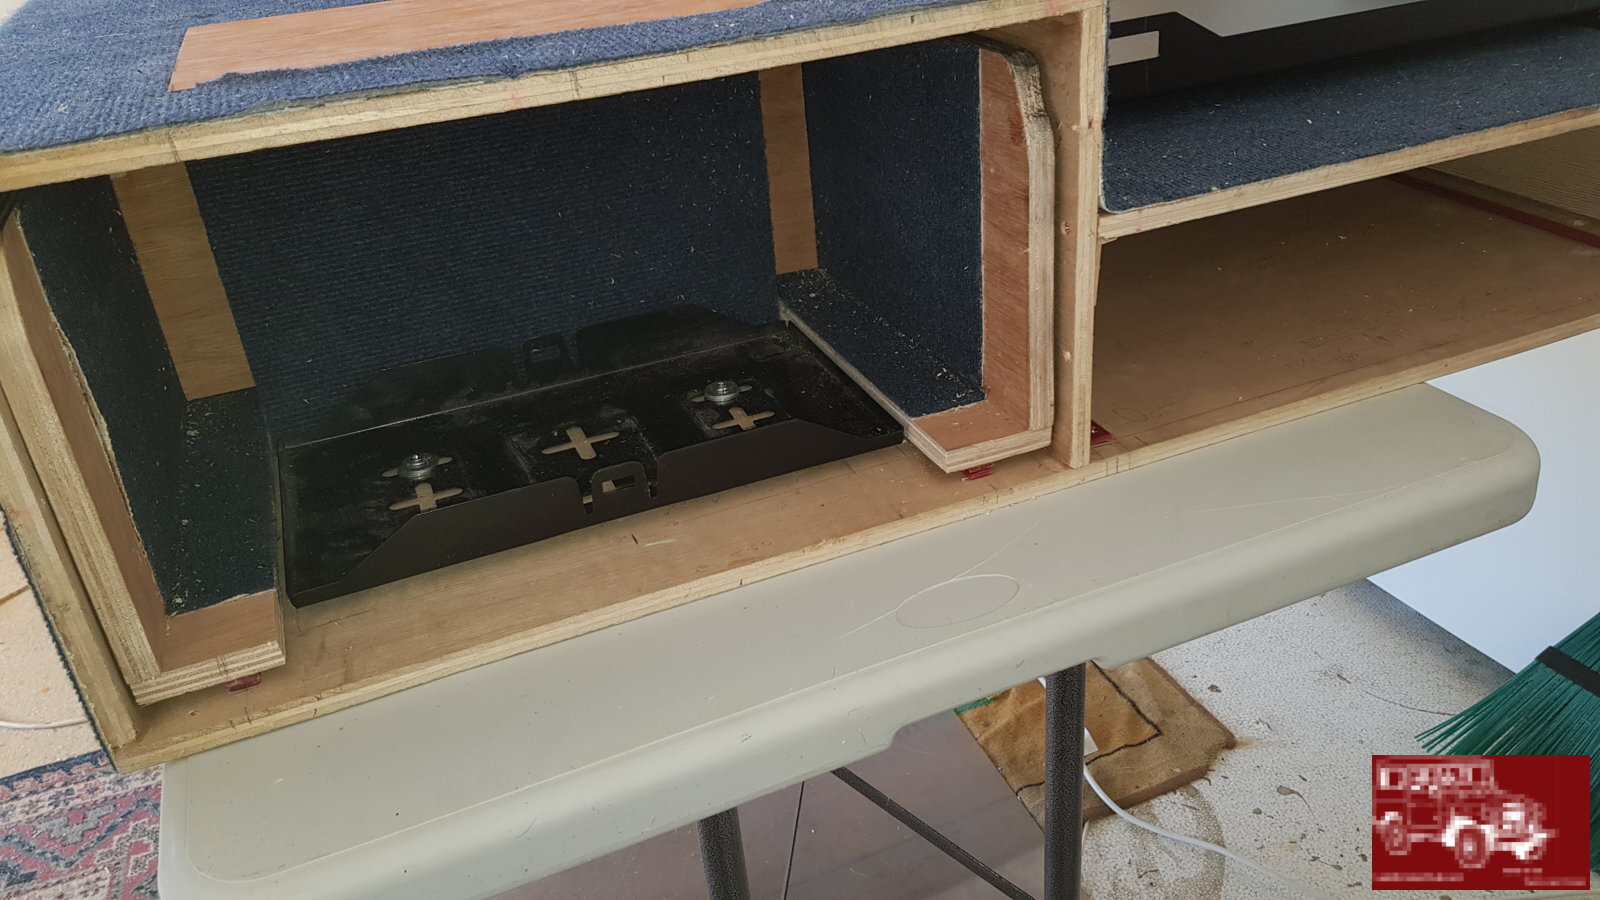
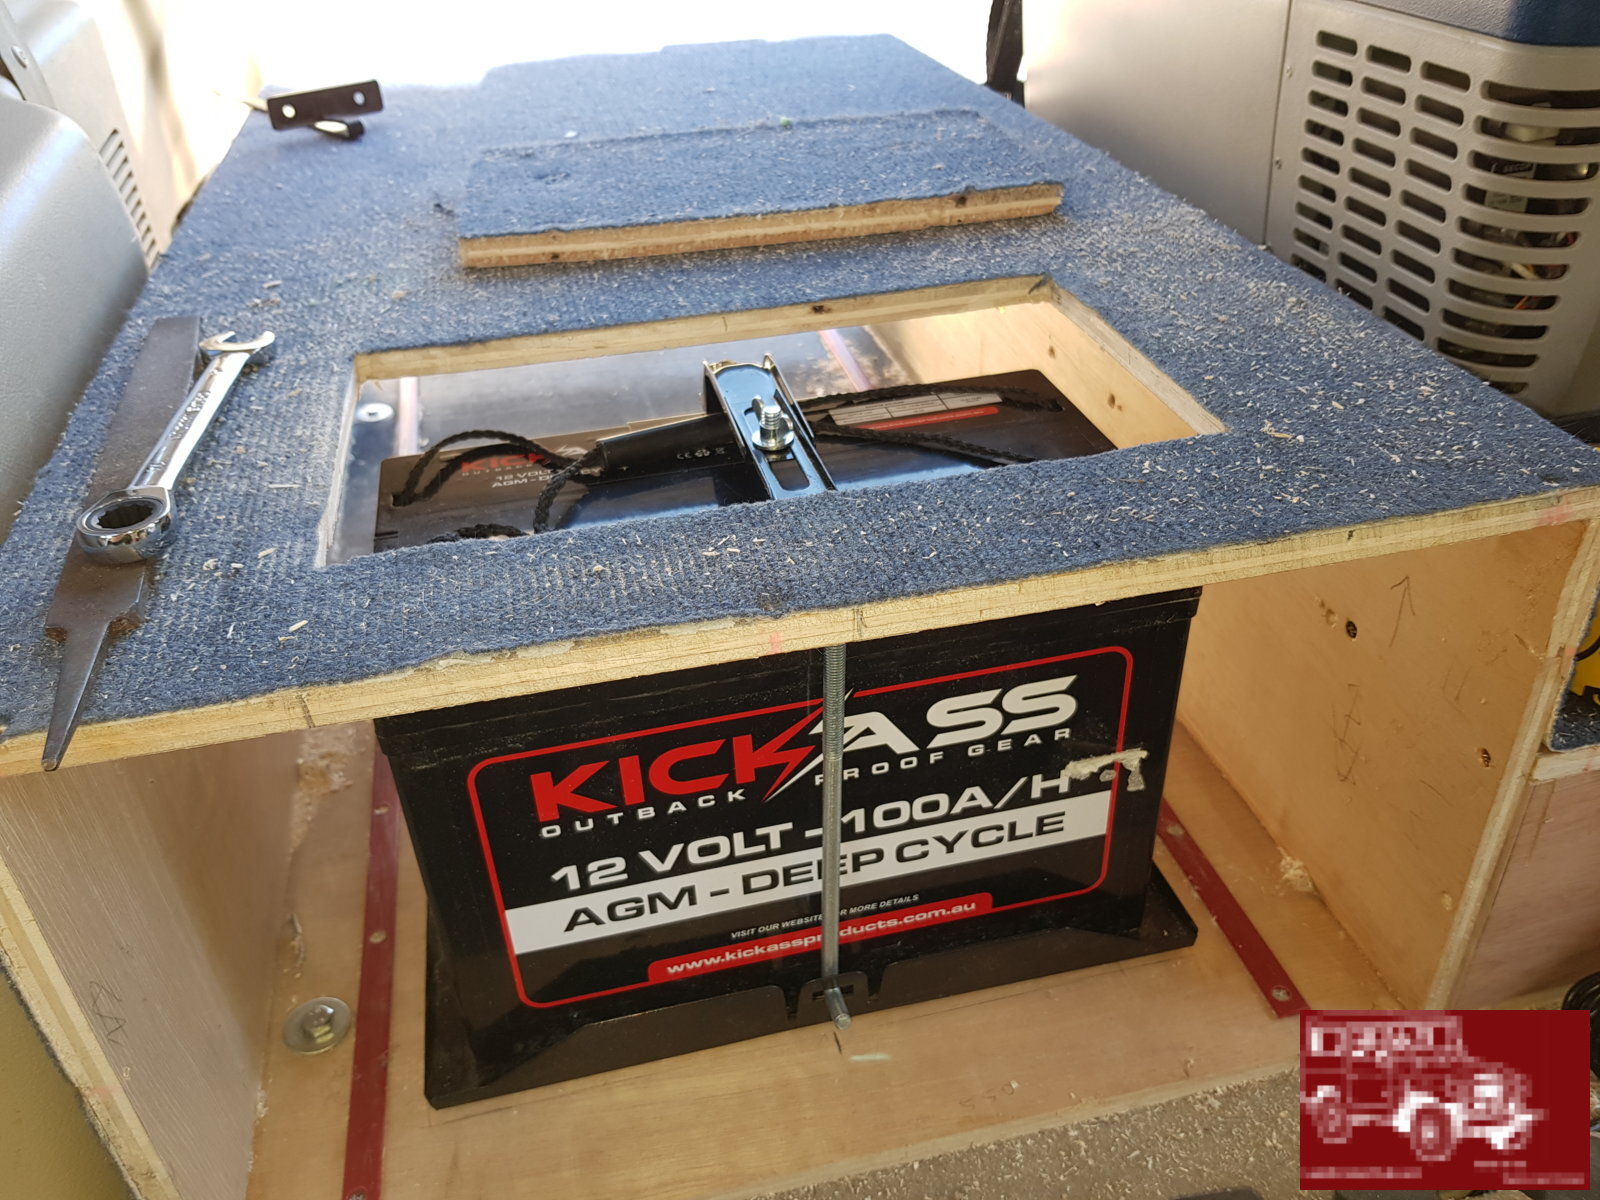
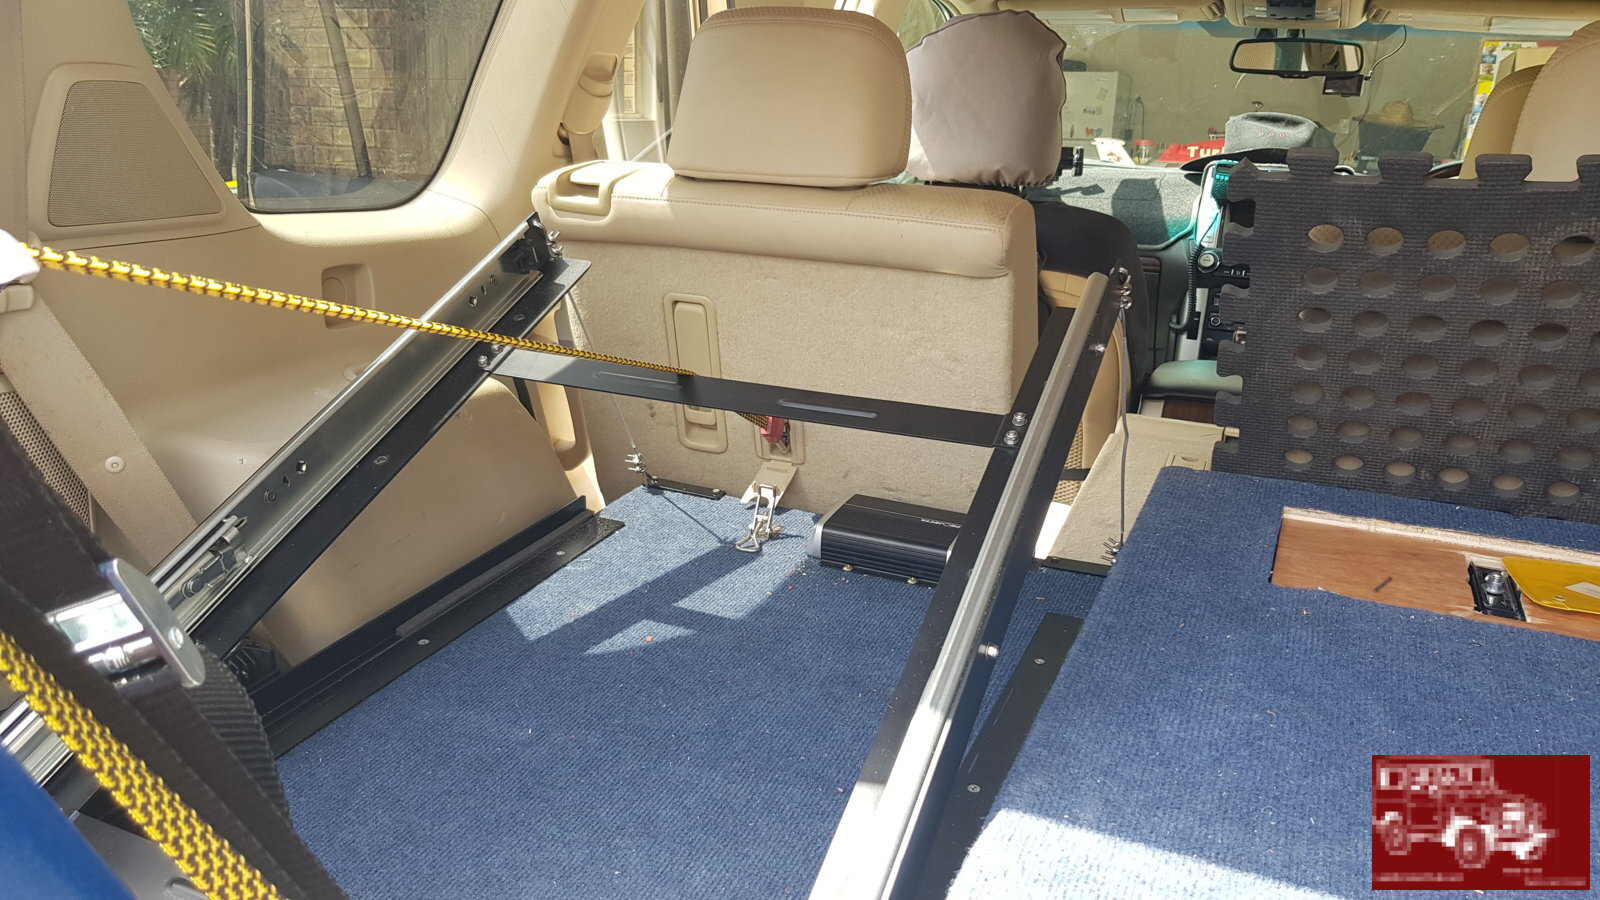
I discovered that with the battery in that position it rubbed on the seat when it was put back up, which led to plan C. The decision was made to sink the battery into the drawer unit. This involved removing the drawers , cutting a hole through the top of the carcass shortening the drawer and shortening the table which turned out to be alot less fun than I had first imagined .
This took me approx 20 working hours to complete
Cost :
Battery (kick ass) $297
Projector plug and play kit $482
Battery tray $31
Fridge (kings) $350 (used)
Fridge slide ( Dunn and watson) $129
Next stage will be solar panel and fuse block for accessorises
I ordered a 100ah kick ass AGM , projecta IDC25 ( all plugs pre installed) and a battery tray. The Plan was to install the battery and charger in the spare battery space under the bonnet. After receiving the battery I soon discovered the warranty on the battery would be void if it was fitted in the engine bay. So plan B was to install it in the rear of the wagon.
I ran the supplied 8Ø wire from the starter battery underneath along the passenger side chassis, up inside the rear ¼ bumper. There was a bung there with other wires running through into the jack compartment which I followed through. The cable was then sent back up inside the rear plastics where I drilled a hole through the cup holder and exited the cable there.
I then installed the fridge slide and discovered there was not enough room to fit the battery behind it, so the battery had to go on top over the opposite draw. I wasn't too keen on this as it took up a lot of use able space there. The charger stayed behind the fridge slide
Plan B
I discovered that with the battery in that position it rubbed on the seat when it was put back up, which led to plan C. The decision was made to sink the battery into the drawer unit. This involved removing the drawers , cutting a hole through the top of the carcass shortening the drawer and shortening the table which turned out to be alot less fun than I had first imagined .
This took me approx 20 working hours to complete
Cost :
Battery (kick ass) $297
Projector plug and play kit $482
Battery tray $31
Fridge (kings) $350 (used)
Fridge slide ( Dunn and watson) $129
Next stage will be solar panel and fuse block for accessorises
Gasmanjc
Well-Known Member
- Joined
- Oct 11, 2016
- Messages
- 201
- Country Flag
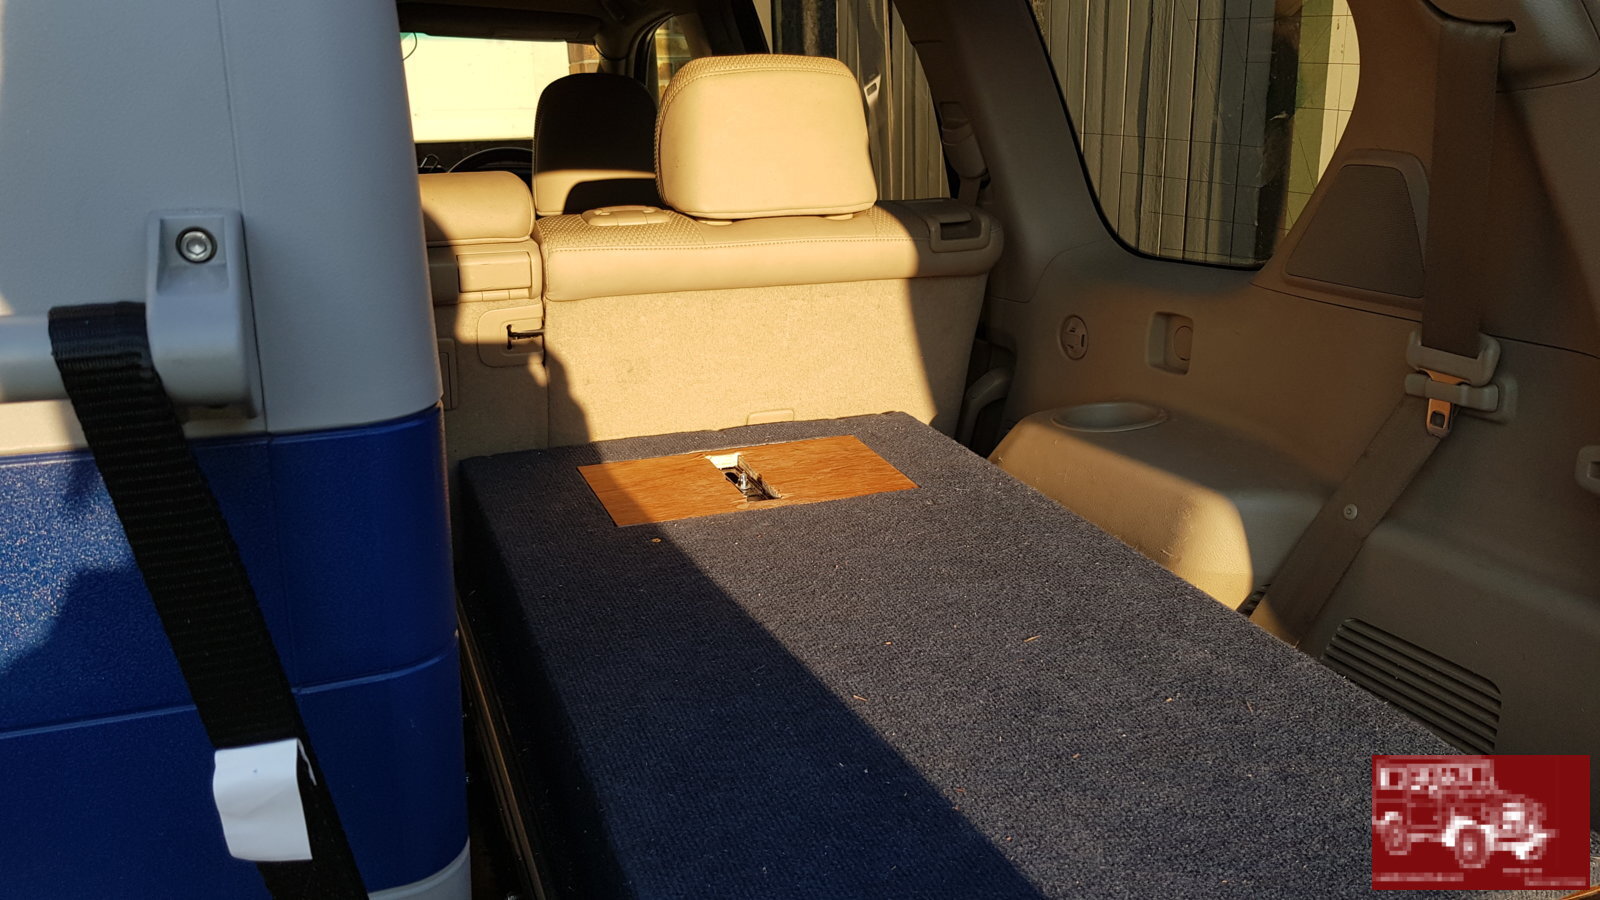
I got to test out the fridge and slide last week and soon discovered It was too high for me too reach into, even with my long gangley arms.
So I embarked on project tilt slide. The tilt works by a bolt on each side at the front acting as a pivot. An elastic strap acts as dampener and 2 wire ropes are used to limit the tilt. Finally an over centre latch stops any movement whilst in transit
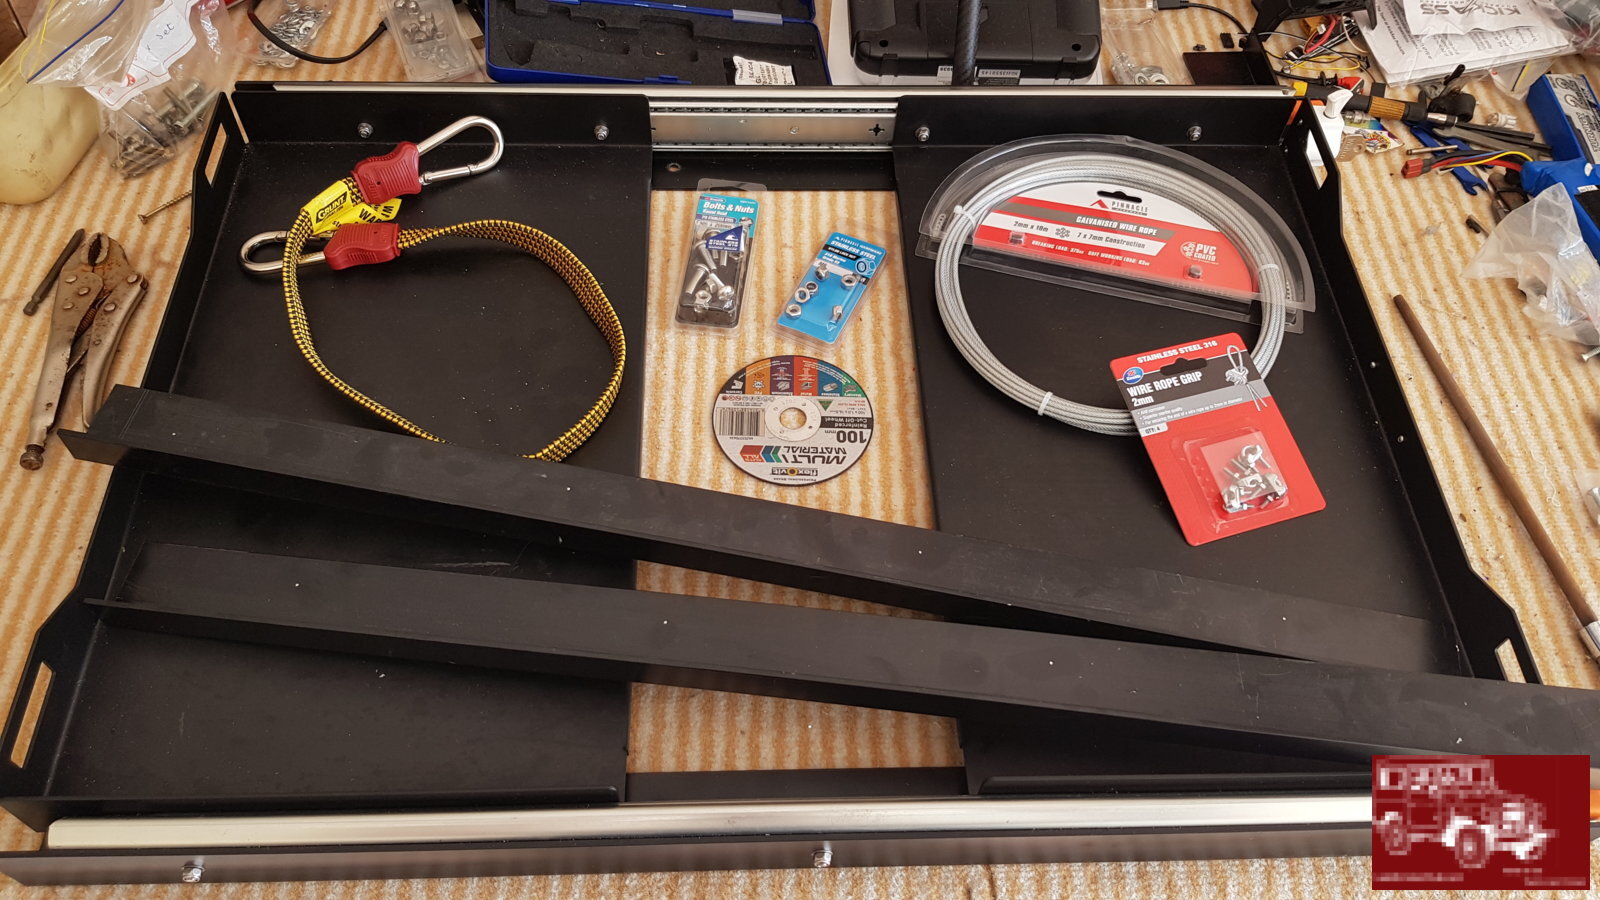
After a quick mock up to prove the concept I headed out to the Hardware
Materials:
40 x 20 3mm Aluminium angle
2 x m6 stainless bolts and lock nuts
8 x T nuts and 4m bolts
2mm PVC coted wire rope
8 x wire rope grips
Heavy Duty Flat Elastic rope
1 x over centre latch
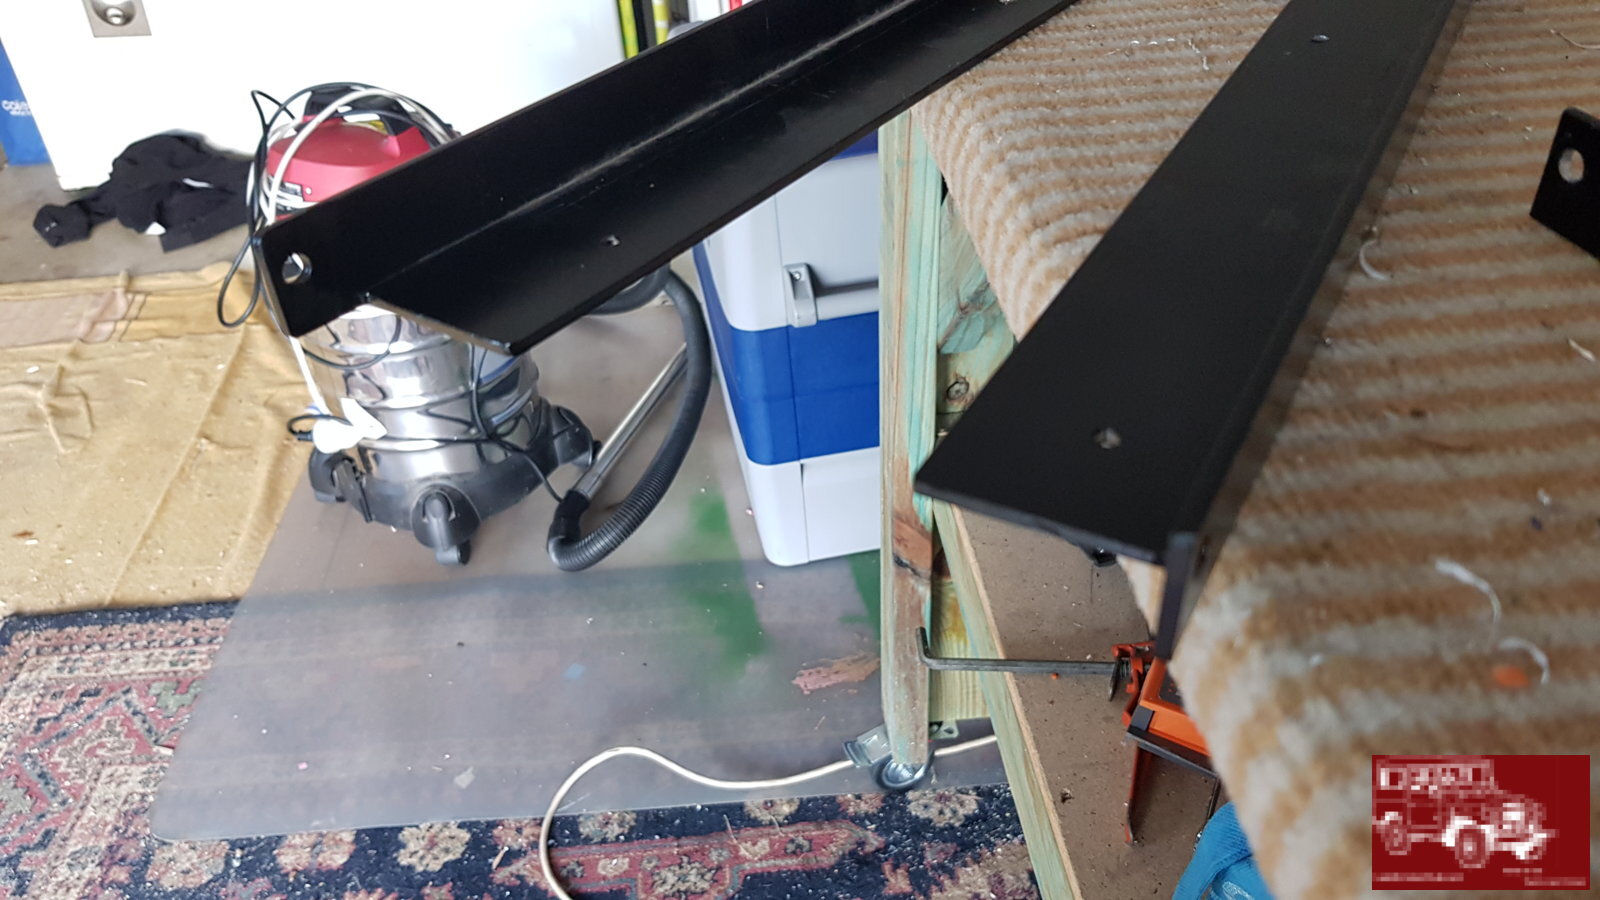
Lengths of angle Cut and drilled
Angle fitted on to drawers with T nuts
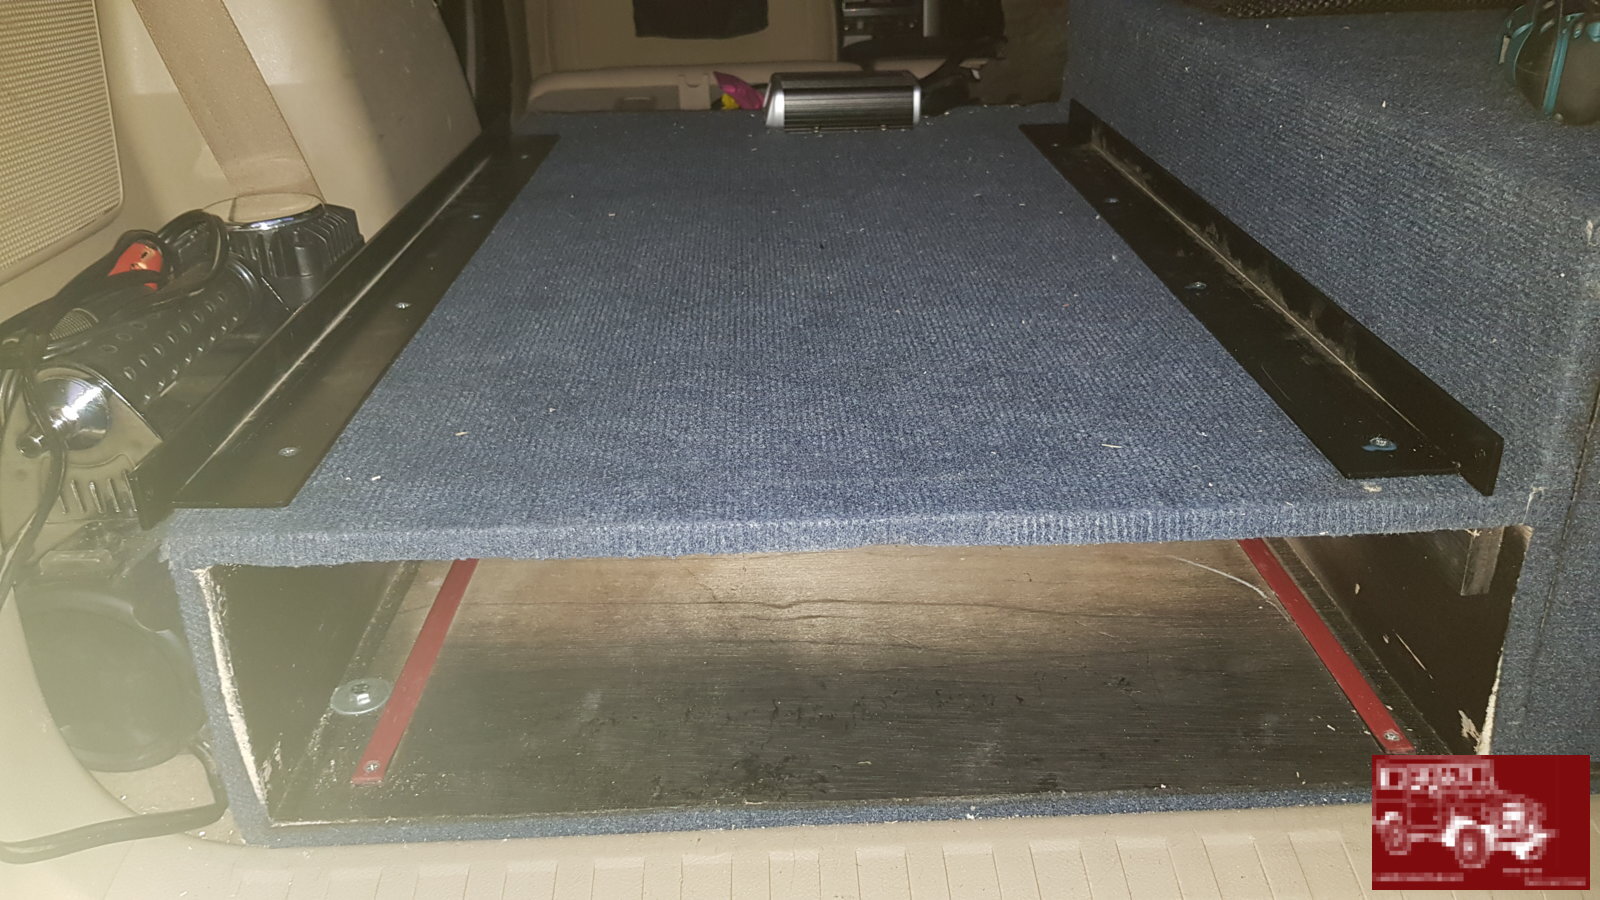
Wire stops and return rope rigged up
Over centre latch to stop movement
Video of operation
So I embarked on project tilt slide. The tilt works by a bolt on each side at the front acting as a pivot. An elastic strap acts as dampener and 2 wire ropes are used to limit the tilt. Finally an over centre latch stops any movement whilst in transit
After a quick mock up to prove the concept I headed out to the Hardware
Materials:
40 x 20 3mm Aluminium angle
2 x m6 stainless bolts and lock nuts
8 x T nuts and 4m bolts
2mm PVC coted wire rope
8 x wire rope grips
Heavy Duty Flat Elastic rope
1 x over centre latch
Lengths of angle Cut and drilled
Angle fitted on to drawers with T nuts
Wire stops and return rope rigged up
Over centre latch to stop movement
Video of operation

Gasmanjc
Well-Known Member
- Joined
- Oct 11, 2016
- Messages
- 201
- Country Flag
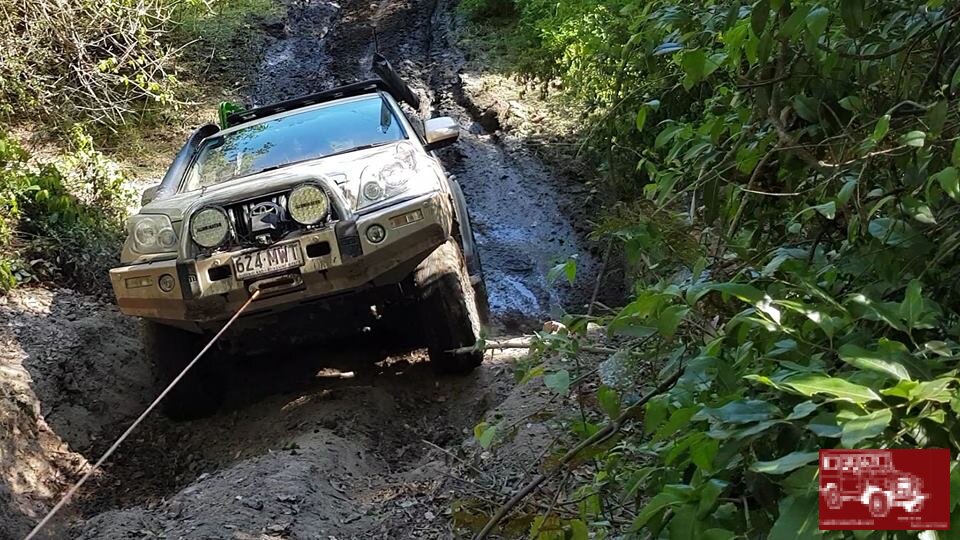
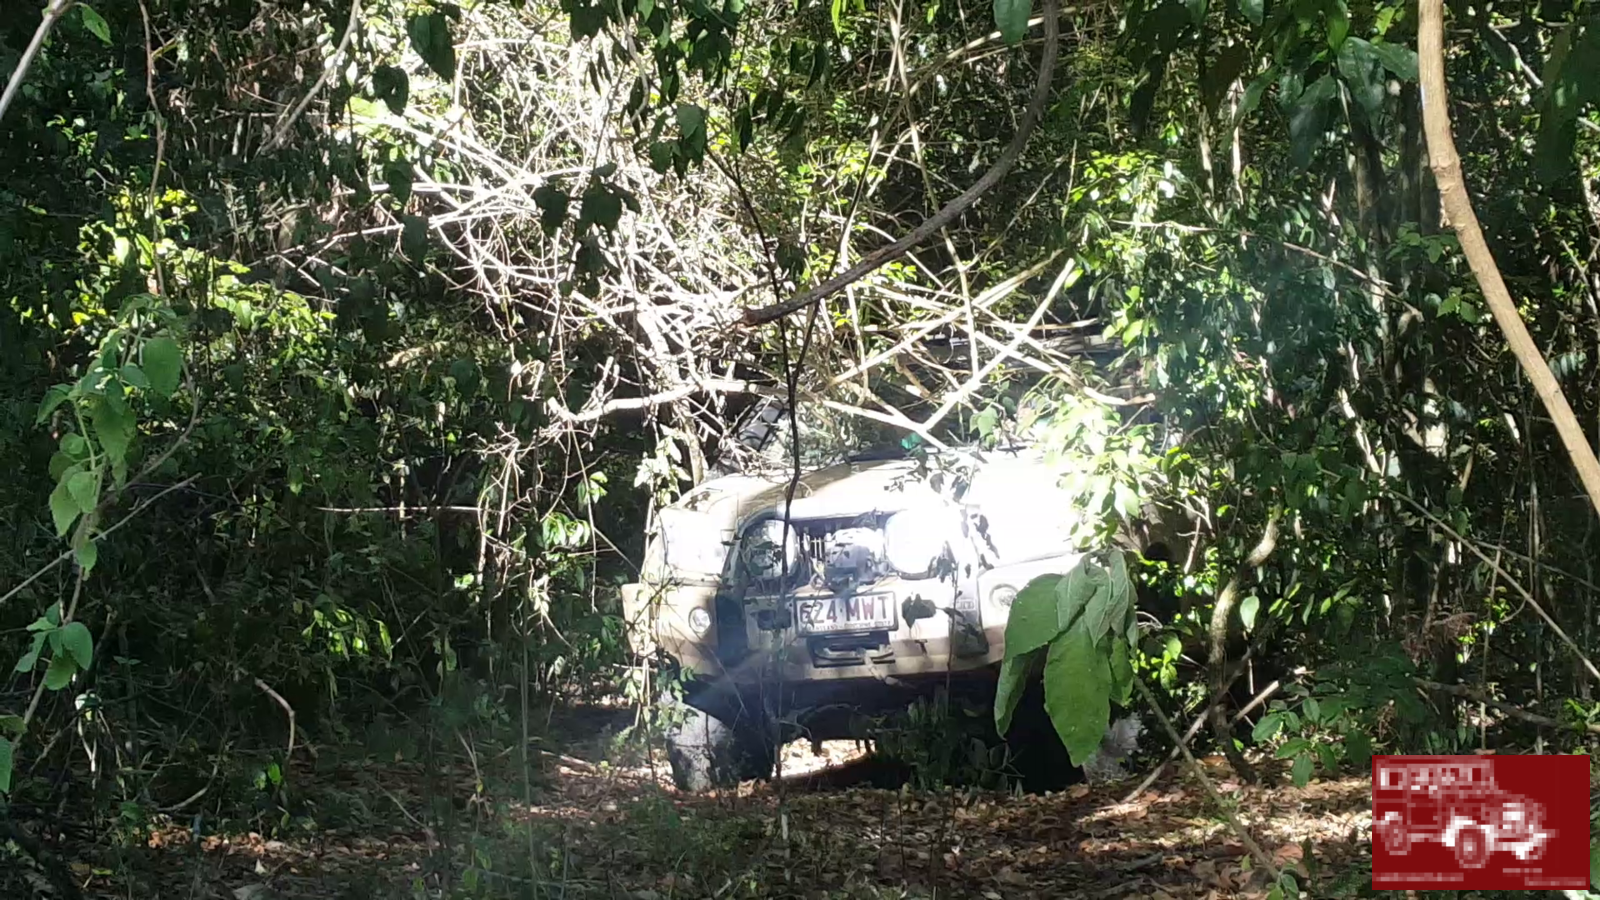
Just completed another 3 day 4x4 camp at Levuka 4x4 park. We have now completed every track in the Park after our 3rd visit.
Got to use the Winch in anger!
End of the track we had to winch up, hadnt been used in years
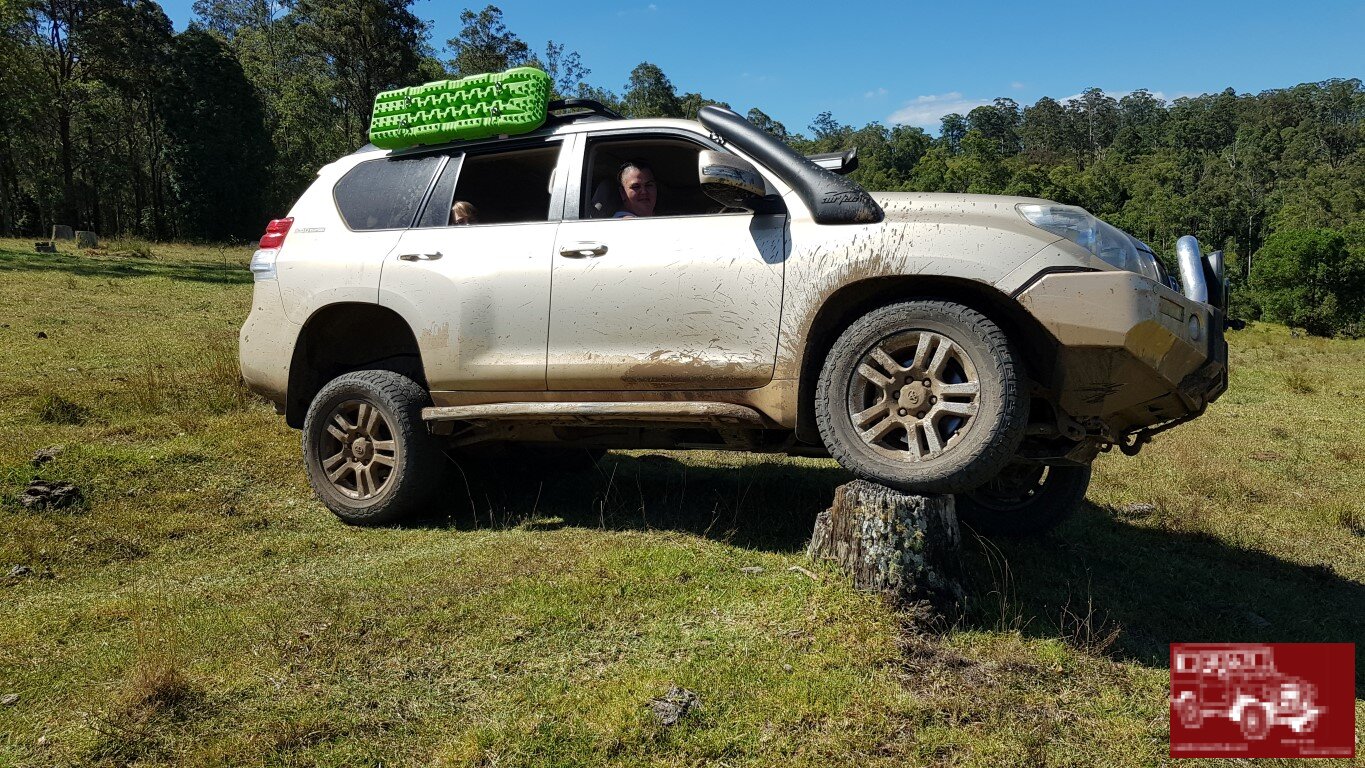
Flexing her Muscle on a Stump
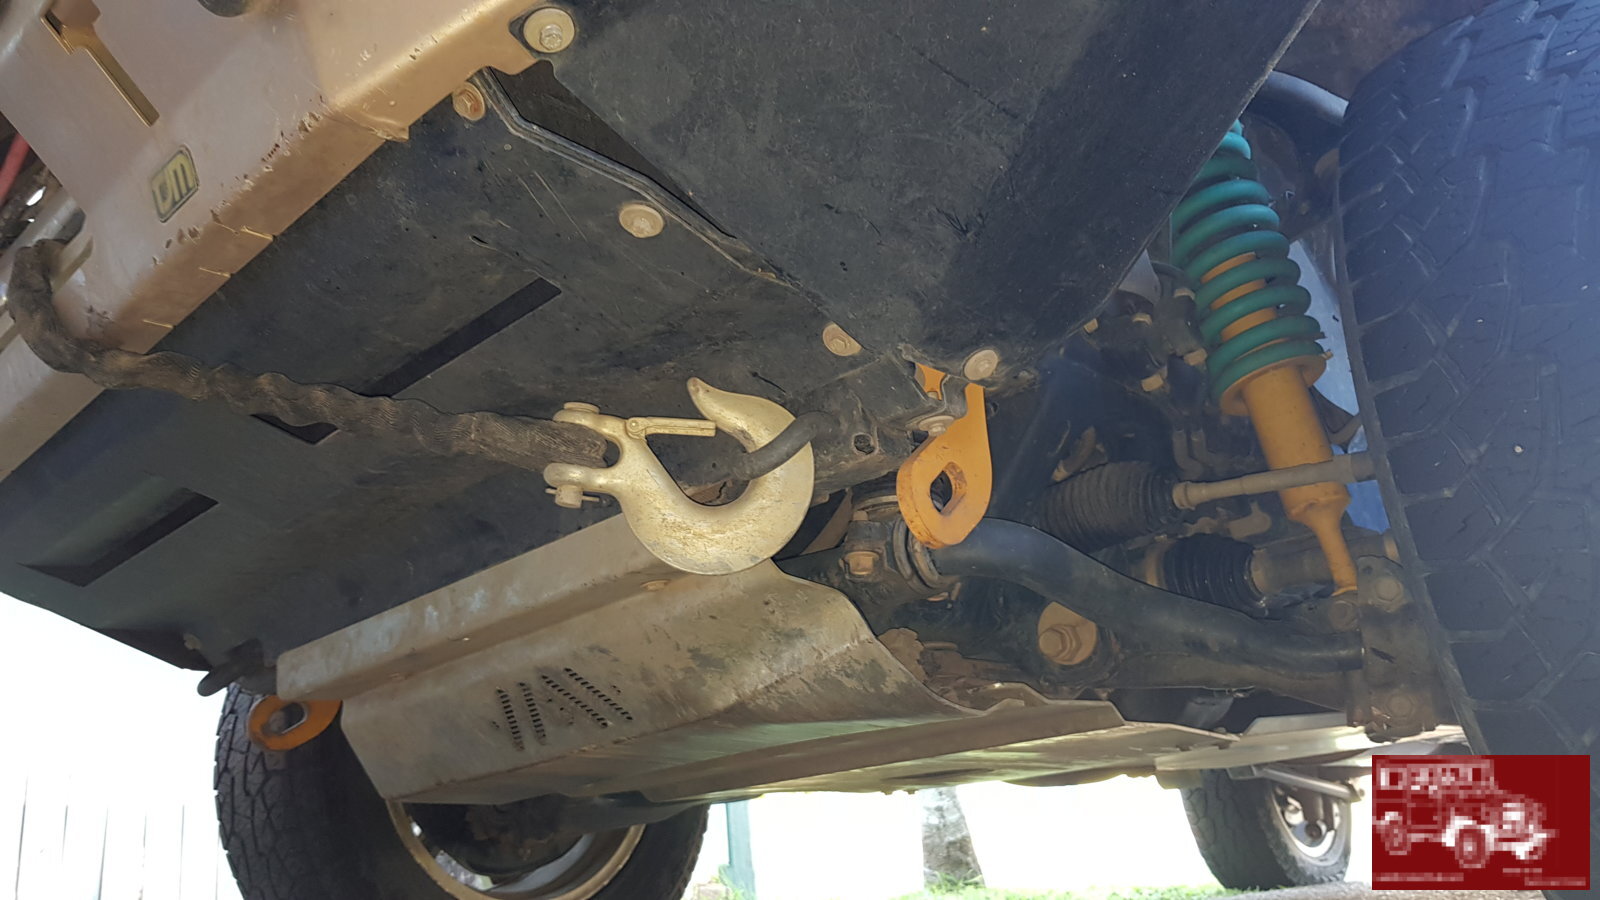
Damged my new bashplate, Bushskinz has offered to replace it with a strengthened one !
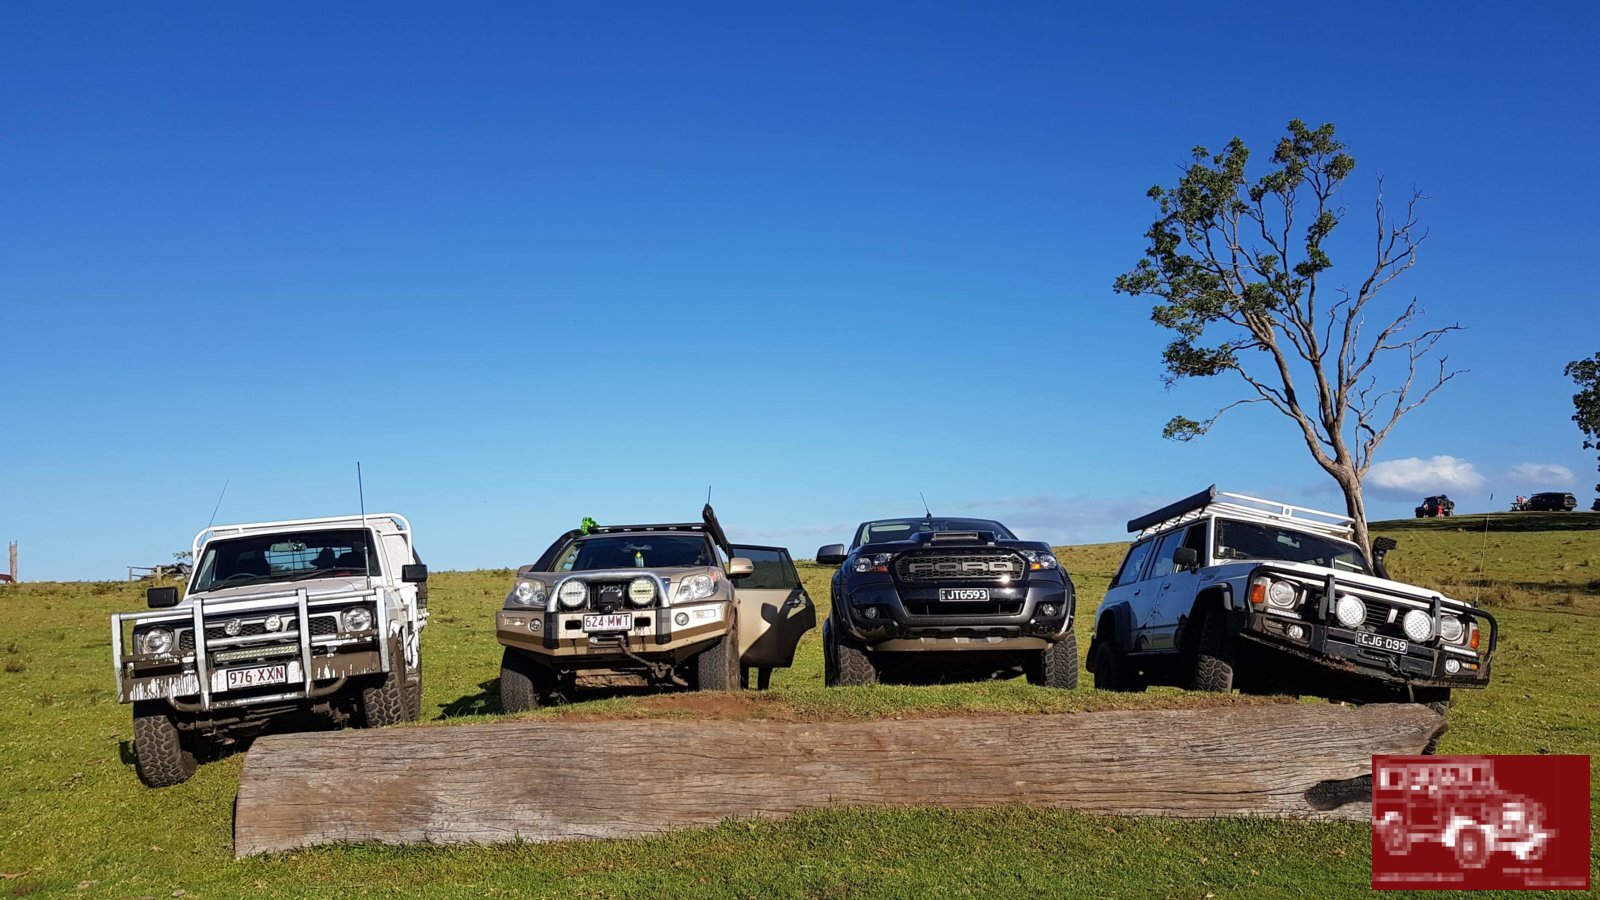
The 2019 Levuka crew. 2 x GQ patrols and a New Ford Ranger accompanied us.
The factory side steps were removed when we got home, not much use when they are the same height as the sills. Great excuse for some sliders
I am working on the videos , I will post when done for those who may be interested.
Got to use the Winch in anger!
End of the track we had to winch up, hadnt been used in years
Flexing her Muscle on a Stump
Damged my new bashplate, Bushskinz has offered to replace it with a strengthened one !
The 2019 Levuka crew. 2 x GQ patrols and a New Ford Ranger accompanied us.
The factory side steps were removed when we got home, not much use when they are the same height as the sills. Great excuse for some sliders
I am working on the videos , I will post when done for those who may be interested.

Gasmanjc
Well-Known Member
- Joined
- Oct 11, 2016
- Messages
- 201
- Country Flag
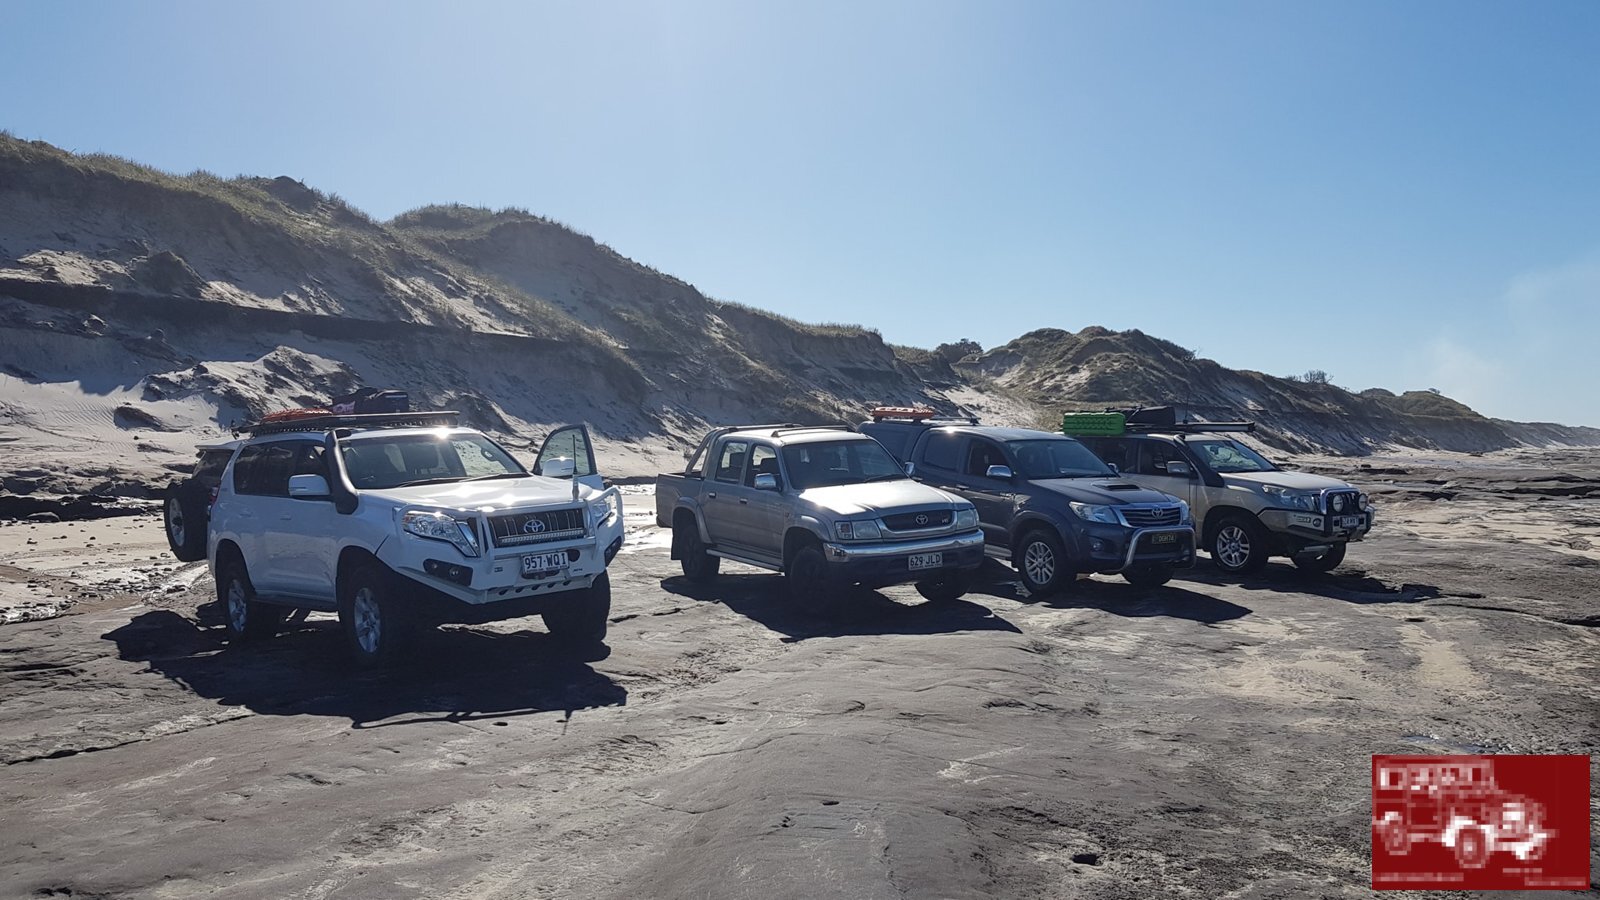
Last picture would have been a good calendar candidate.
Looks like a fun trip.
More pics")
I know I was spewin I missed the calendar. Maybe next year. Too many nissans in that pic mate
Gasmanjc
Well-Known Member
- Joined
- Oct 11, 2016
- Messages
- 201
- Country Flag
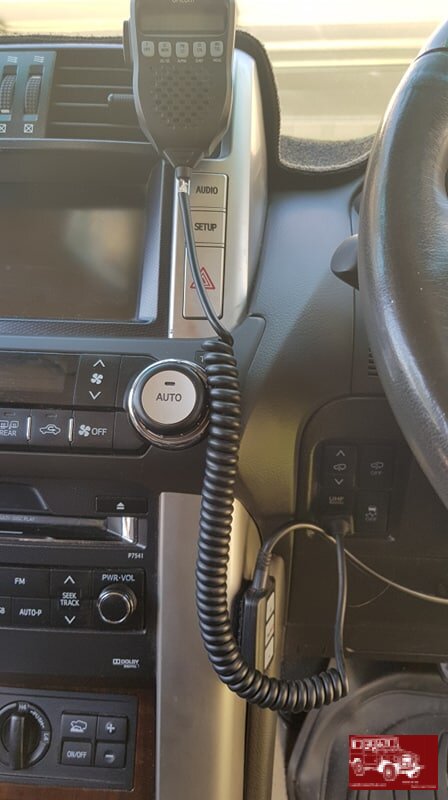
Just a Small Mod. Finally got around to fitting an RJ45 plug into the dash. Previously had the lead coming out of one of the inside kick panels. Light force make this one. It has a spring loaded door for dust resistance when you have the handset unplugged and a backlight that can be wired into the dimmers.

Gasmanjc
Well-Known Member
- Joined
- Oct 11, 2016
- Messages
- 201
- Country Flag
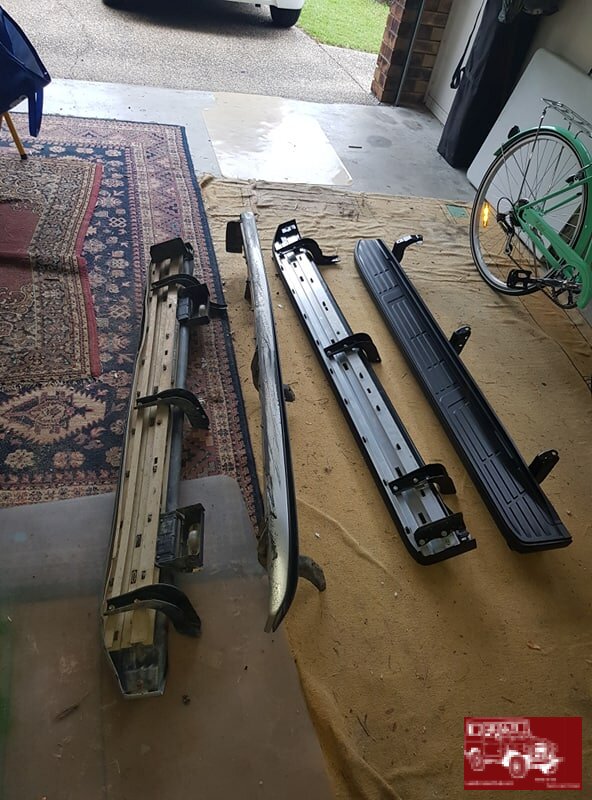
Picked up some almost new steps to replace what is left of the original set. I prefer the Look without , the missus and the kids have a little trouble climbing in. Picked up for $100 and came off a 2019 150. Mine have courtesy lights that will need to be transferred over.
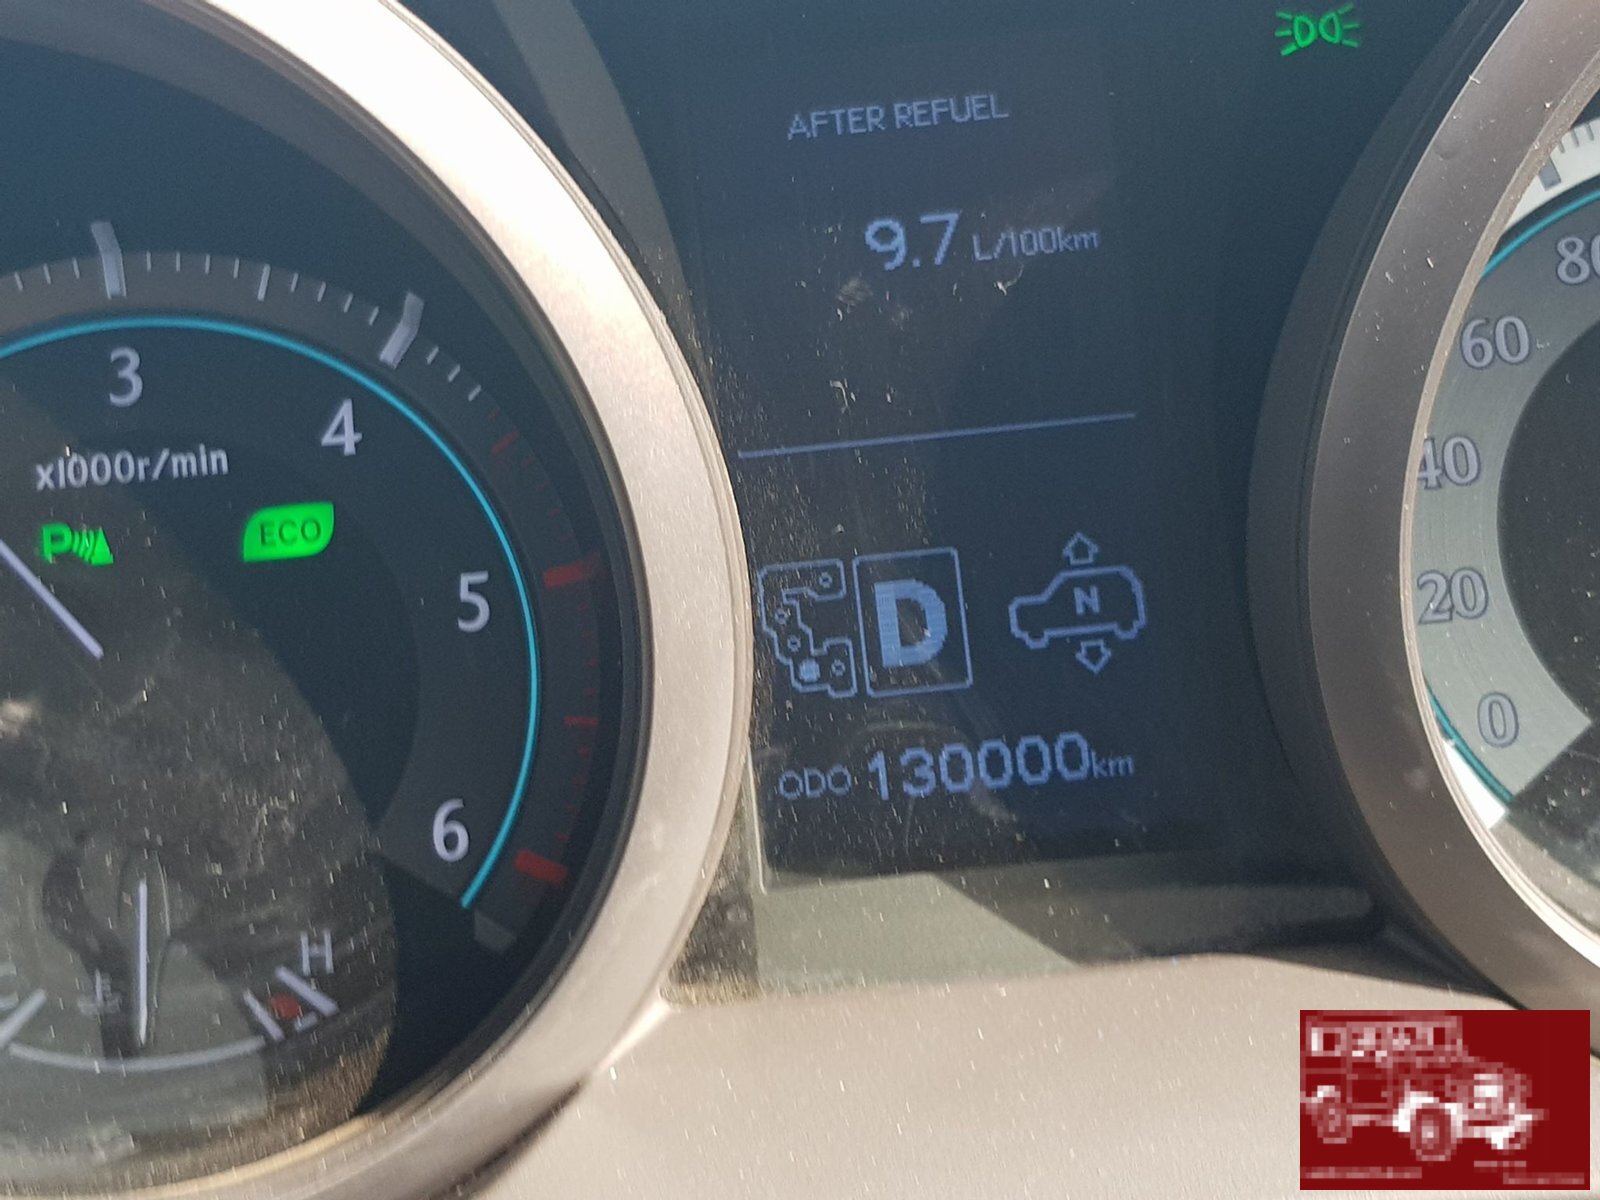
And then this happened . 130k and have only had to replace an alternator and pulley, Not to bad considering the punishment she receives.
And then this happened . 130k and have only had to replace an alternator and pulley, Not to bad considering the punishment she receives.

Gasmanjc
Well-Known Member
- Joined
- Oct 11, 2016
- Messages
- 201
- Country Flag
With the factory difflock pretty capable. Biggest issue is the longer wheel base although rangers have lots of clearance. The older ones had auto issues but has since been resolved. Tough ute but too much wank factor for me.Looks like your havin Fun.. Whats the Ranger like in the off road Stakes... Any good? A mates just bought one dont know weather to start ripping the Piss or keep quiet!
Gasmanjc
Well-Known Member
- Joined
- Oct 11, 2016
- Messages
- 201
- Country Flag
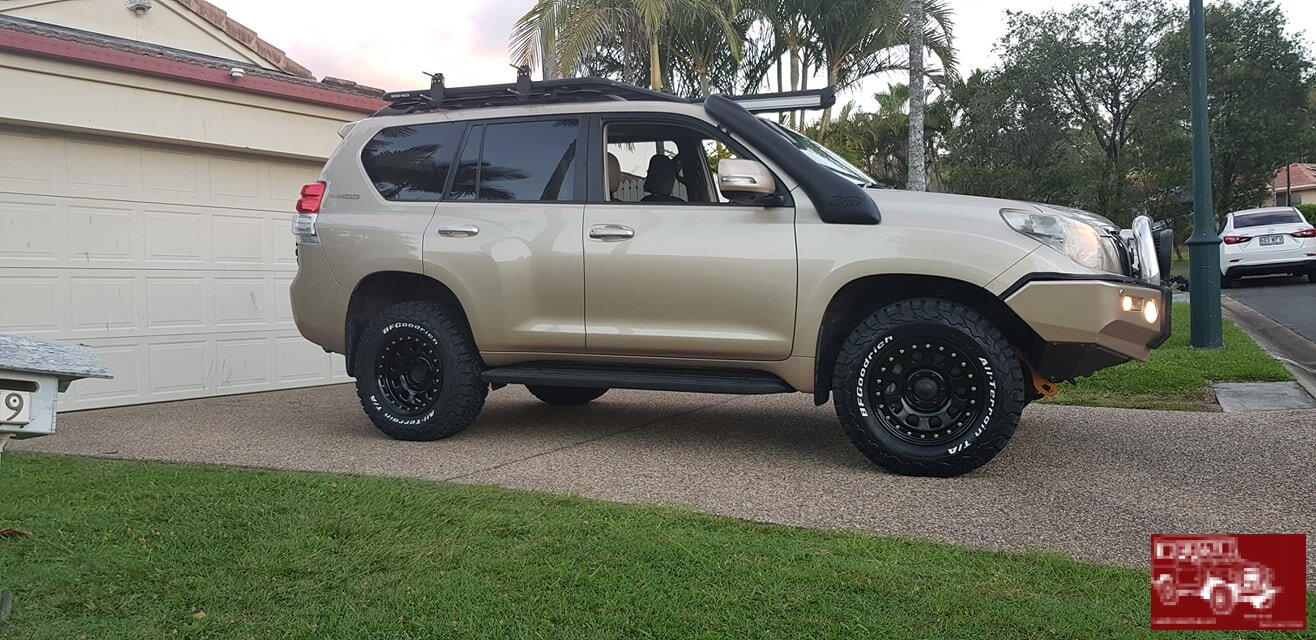
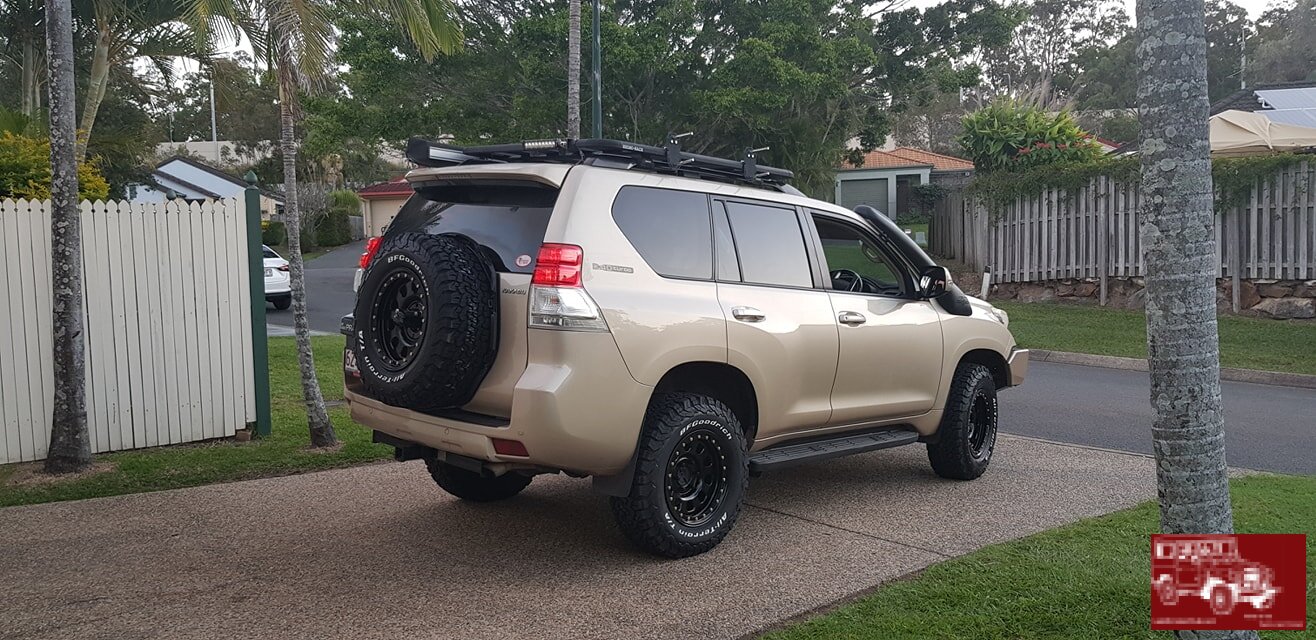
It was almost time for new tyres. I have been wanting to Downsize the rims so I can get a higher profile tyre on more suitable for offroad driving. I had been eyeing off black Steel D lockers for some time now. I also wanted to go up a size in tyre. Originally the plan was to stick with dynapro ATm, when I went into buy, the BFG KO2 was 4 bucks cheaper and the rest is history...
I have to say I am very Pleased with how it looks now.
Rims are King D lockers 17x8 p15. Tyres are LT265x70 r17.
I have to say I am very Pleased with how it looks now.
Rims are King D lockers 17x8 p15. Tyres are LT265x70 r17.
Last edited:
Similar threads
- Replies
- 1
- Views
- 68