jonnyboy54321
Well-Known Member

So the new radio and Bluetooth is now in.
I'm not much of a writer but here goes:-
This is what went in - the cubby/single din thing is for a Rav4

Pop your fascia console off with some trim tools and unbolt old radio

Trim the dash slightly to allow for the extra width (where it narrows a bit top and bottom)

Use the old radio brackets, trim the front of them a bit, here is one done

Then after you have removed all the wings/plastic lugs on the cubby box, hot-glue the brackets to the cubby, to end up like this

Then dash out to Halfords to get the SOT062 loom converter before they close on a Sunday , hoping they have one as they refuse to answer the 'phone...
Adjust the position of the captive-type trim nuts, then bolt the affair in - you need it as low down as you can

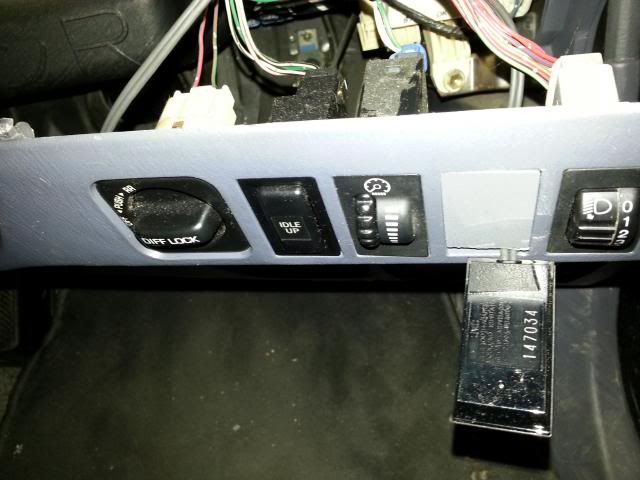
Then run your cables etc in, install the din cage and the likes. In this instance I will use a different DAB aerial to the one that came to me with the unit so it is temp fitted dab-less. I used a switch blank for the Bluetooth button position - I sliced the very bottom of the blank off leaving the sprung clips which just gives enough clearance for the cabling. As the controller is also the microphone, time will tell if it needs to be relocated, but for now it is fine, very subtle

then whack in the radio and smile, slightly.

Then have a well-deserved beer. Or two.
Realise after you have done the write up that you have deleted the final fully-installed picture, and write yourself a note as a reminder to take another.........
Am I happy with it? Not 100% as there is a gap between console and cubby, it all really needed to be even lower, so I may re-do things a tad, will let you know in due course.
Initial reports ont he radio and Bluetooth are very positive though")
{Admin Edit fixed the pics for you}
I'm not much of a writer but here goes:-
This is what went in - the cubby/single din thing is for a Rav4
Pop your fascia console off with some trim tools and unbolt old radio
Trim the dash slightly to allow for the extra width (where it narrows a bit top and bottom)
Use the old radio brackets, trim the front of them a bit, here is one done
Then after you have removed all the wings/plastic lugs on the cubby box, hot-glue the brackets to the cubby, to end up like this
Then dash out to Halfords to get the SOT062 loom converter before they close on a Sunday
, hoping they have one as they refuse to answer the 'phone...Adjust the position of the captive-type trim nuts, then bolt the affair in - you need it as low down as you can
Then run your cables etc in, install the din cage and the likes. In this instance I will use a different DAB aerial to the one that came to me with the unit so it is temp fitted dab-less. I used a switch blank for the Bluetooth button position - I sliced the very bottom of the blank off leaving the sprung clips which just gives enough clearance for the cabling. As the controller is also the microphone, time will tell if it needs to be relocated, but for now it is fine, very subtle
then whack in the radio and smile, slightly.
Then have a well-deserved beer. Or two.
Realise after you have done the write up that you have deleted the final fully-installed picture, and write yourself a note as a reminder to take another.........
Am I happy with it? Not 100% as there is a gap between console and cubby, it all really needed to be even lower, so I may re-do things a tad, will let you know in due course.
Initial reports ont he radio and Bluetooth are very positive though
{Admin Edit fixed the pics for you}
Last edited by a moderator: