
Don't like the adverts? Click here to remove them
You are using an out of date browser. It may not display this or other websites correctly.
You should upgrade or use an alternative browser.
You should upgrade or use an alternative browser.
80 series draw install.
- Thread starter Chris
- Start date

Been busy taking awful pictures again today. Can't find my camera  .
.
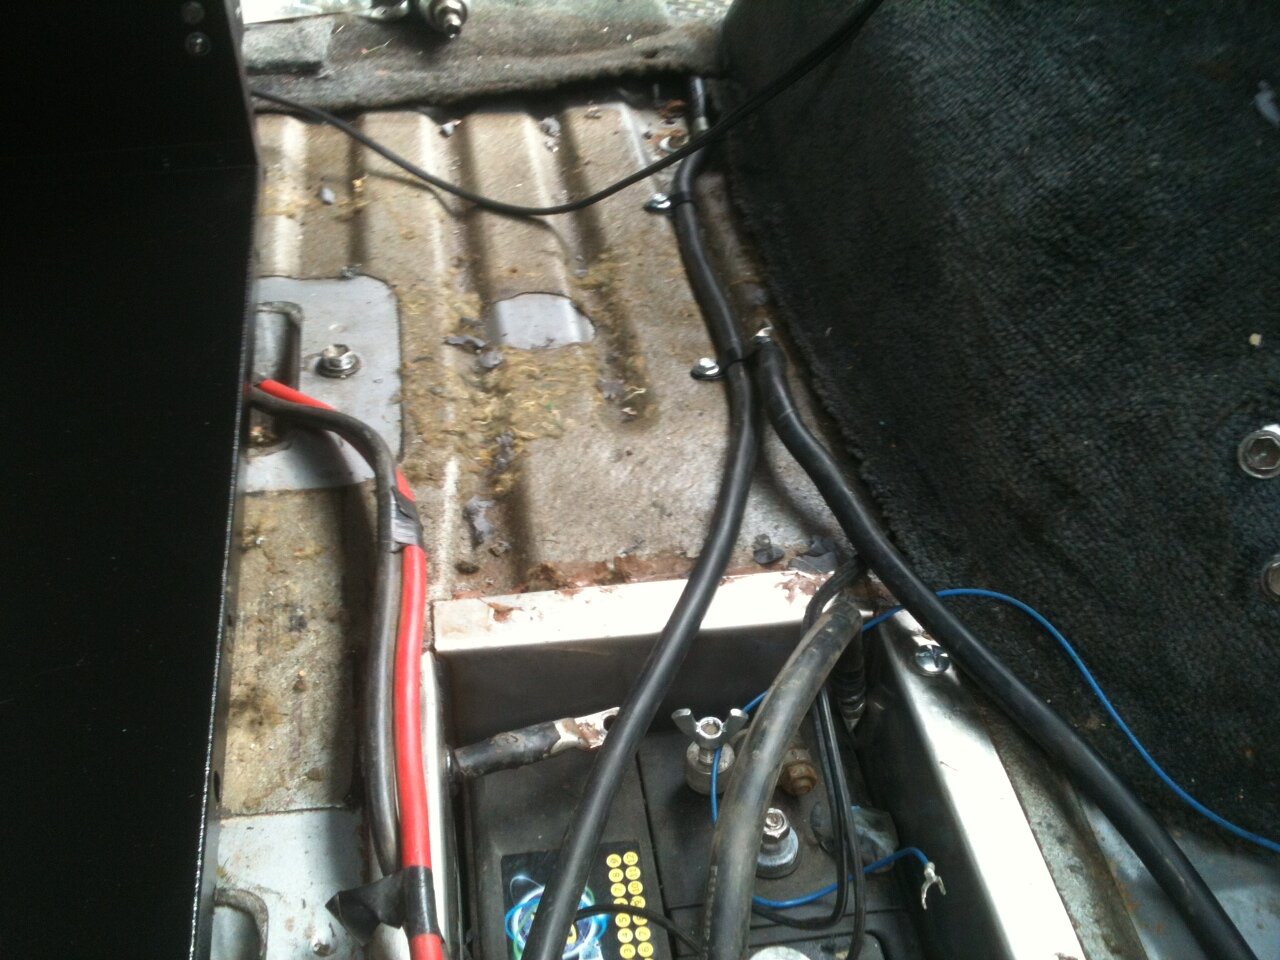
You can throw these drawers in, in an hour, but I really don't want to ever take them out again, so I have been putting all the bits and pieces in for good today. There is quite a lot of cabling. There is room under the drawers but on reflection tonight I am going to run these around the units later in the week. I don't want the drawers to rub on the cables and eventually go through the insulation. It's all going to be well held down with clips etc.
[attachment=5:1c36u9nr]photo 1-2.JPG[/attachment:1c36u9nr]
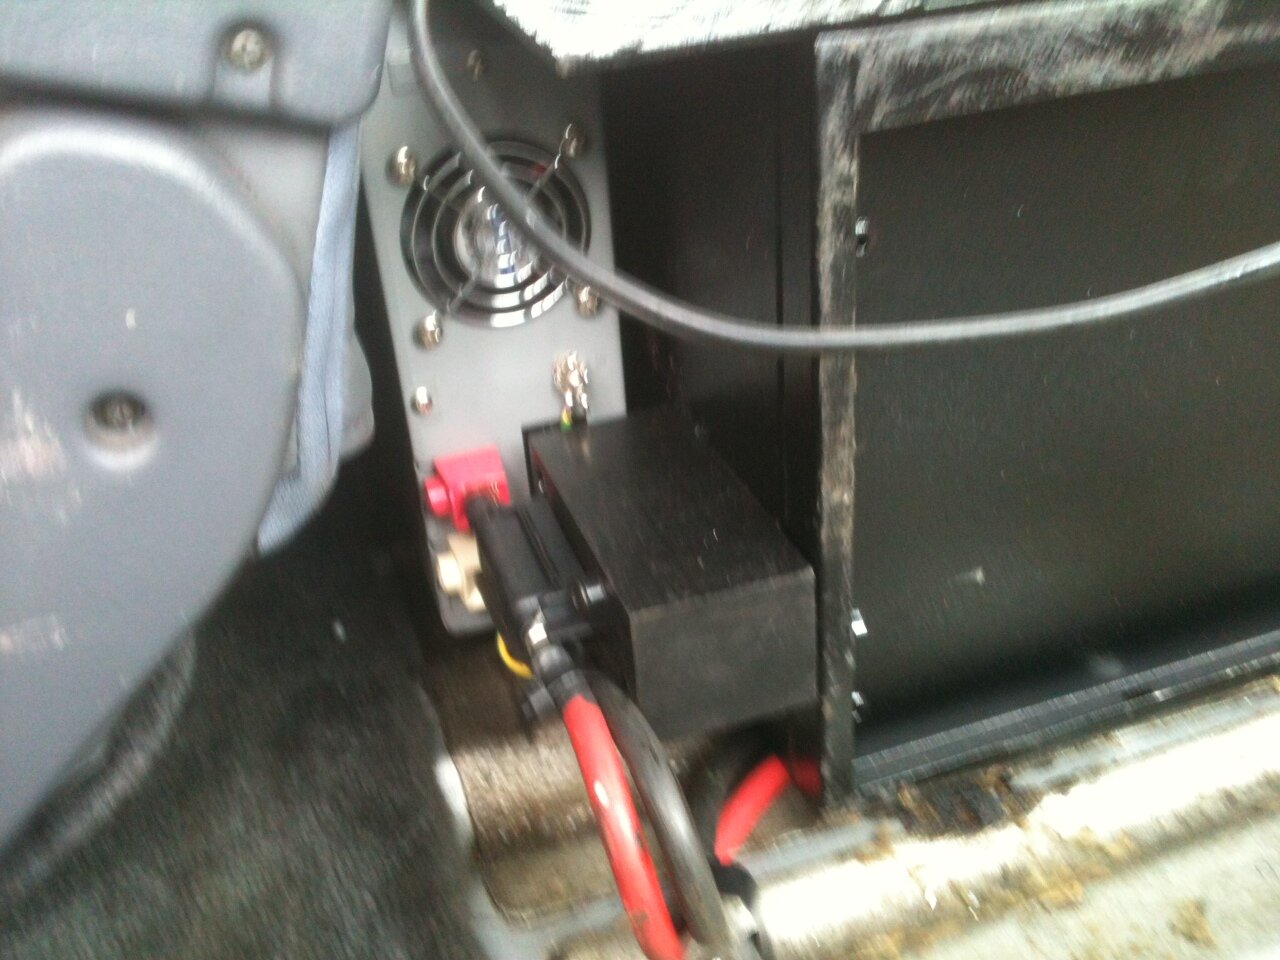
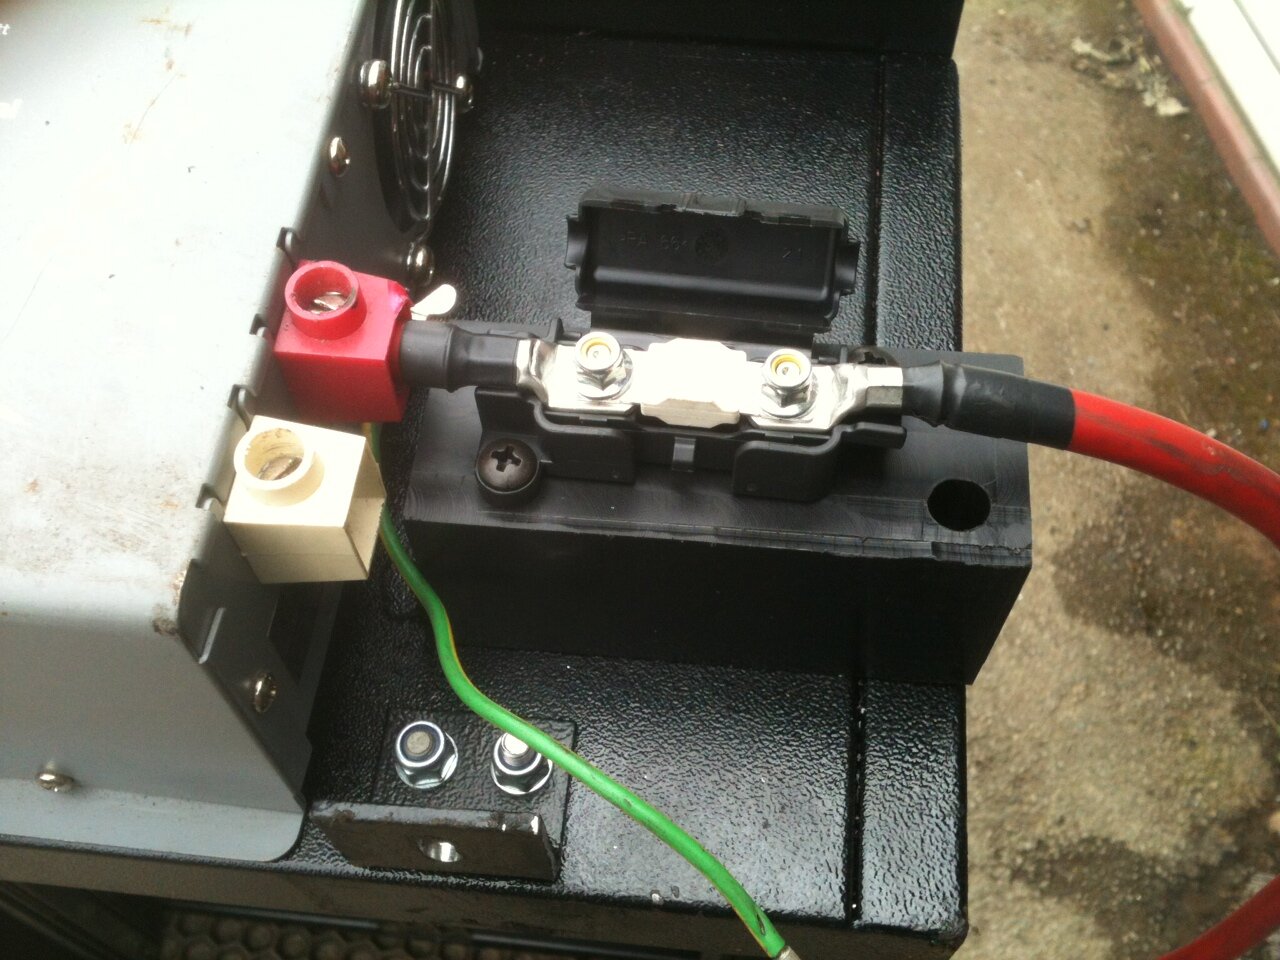
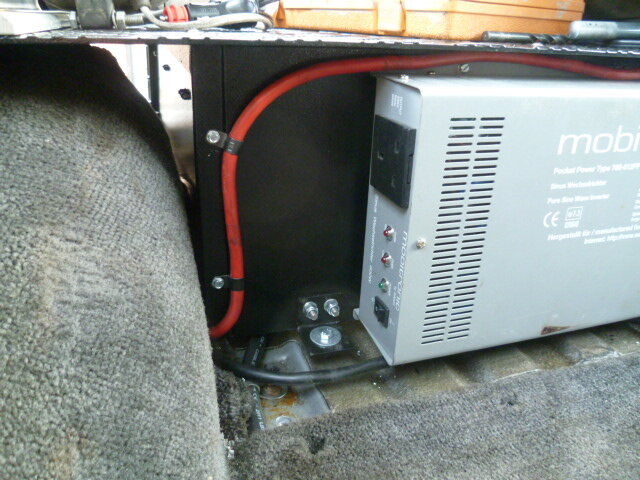
The inverter just fits. Phew. I used a block of Delrin to mount the fuse holder. I don't want anything jiggling around. 'Solid' was today's watchword.
[attachment=4:1c36u9nr]photo 2-1.JPG[/attachment:1c36u9nr]
[attachment=3:1c36u9nr]photo 2-2.JPG[/attachment:1c36u9nr]
Compressors got bolted in on AV mounts. I may need to tip the seat on a long run as they do get quite hot. But if they only run for a minute or two they will be fine. I could duct a fan into there but that's a bit excessive.
[attachment=2:1c36u9nr]photo 3-1.JPG[/attachment:1c36u9nr]
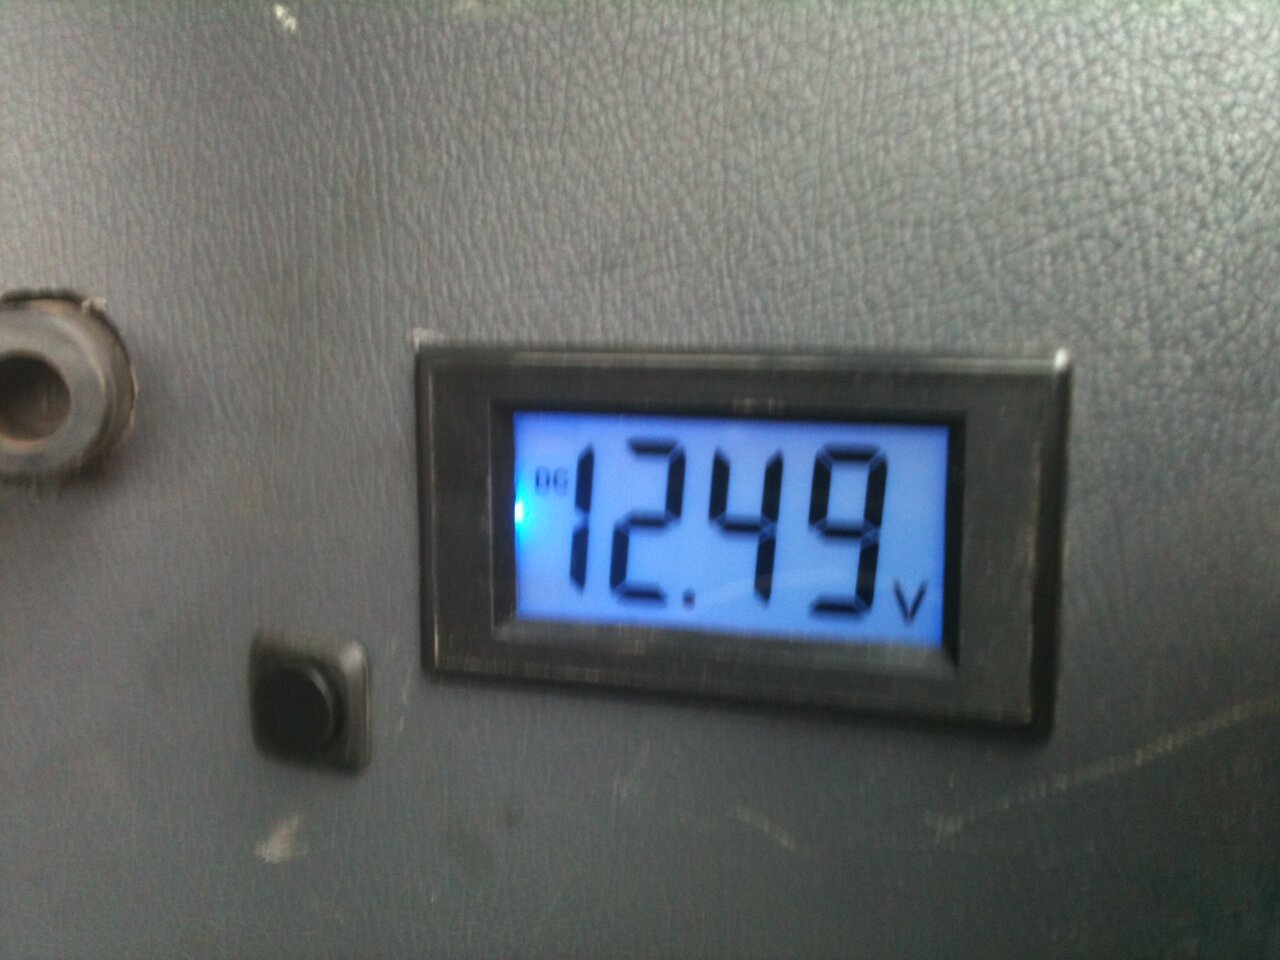
I installed a voltmeter for the leisure battery with a push switch so that it's not on all the time.
[attachment=1:1c36u9nr]photo 1-1.JPG[/attachment:1c36u9nr]
And by supper time, the drawers were going back together.
[attachment=0:1c36u9nr]photo 4-1.JPG[/attachment:1c36u9nr]
Chris
.You can throw these drawers in, in an hour, but I really don't want to ever take them out again, so I have been putting all the bits and pieces in for good today. There is quite a lot of cabling. There is room under the drawers but on reflection tonight I am going to run these around the units later in the week. I don't want the drawers to rub on the cables and eventually go through the insulation. It's all going to be well held down with clips etc.
[attachment=5:1c36u9nr]photo 1-2.JPG[/attachment:1c36u9nr]
The inverter just fits. Phew. I used a block of Delrin to mount the fuse holder. I don't want anything jiggling around. 'Solid' was today's watchword.
[attachment=4:1c36u9nr]photo 2-1.JPG[/attachment:1c36u9nr]
[attachment=3:1c36u9nr]photo 2-2.JPG[/attachment:1c36u9nr]
Compressors got bolted in on AV mounts. I may need to tip the seat on a long run as they do get quite hot. But if they only run for a minute or two they will be fine. I could duct a fan into there but that's a bit excessive.
[attachment=2:1c36u9nr]photo 3-1.JPG[/attachment:1c36u9nr]
I installed a voltmeter for the leisure battery with a push switch so that it's not on all the time.
[attachment=1:1c36u9nr]photo 1-1.JPG[/attachment:1c36u9nr]
And by supper time, the drawers were going back together.
[attachment=0:1c36u9nr]photo 4-1.JPG[/attachment:1c36u9nr]
Chris
Attachments
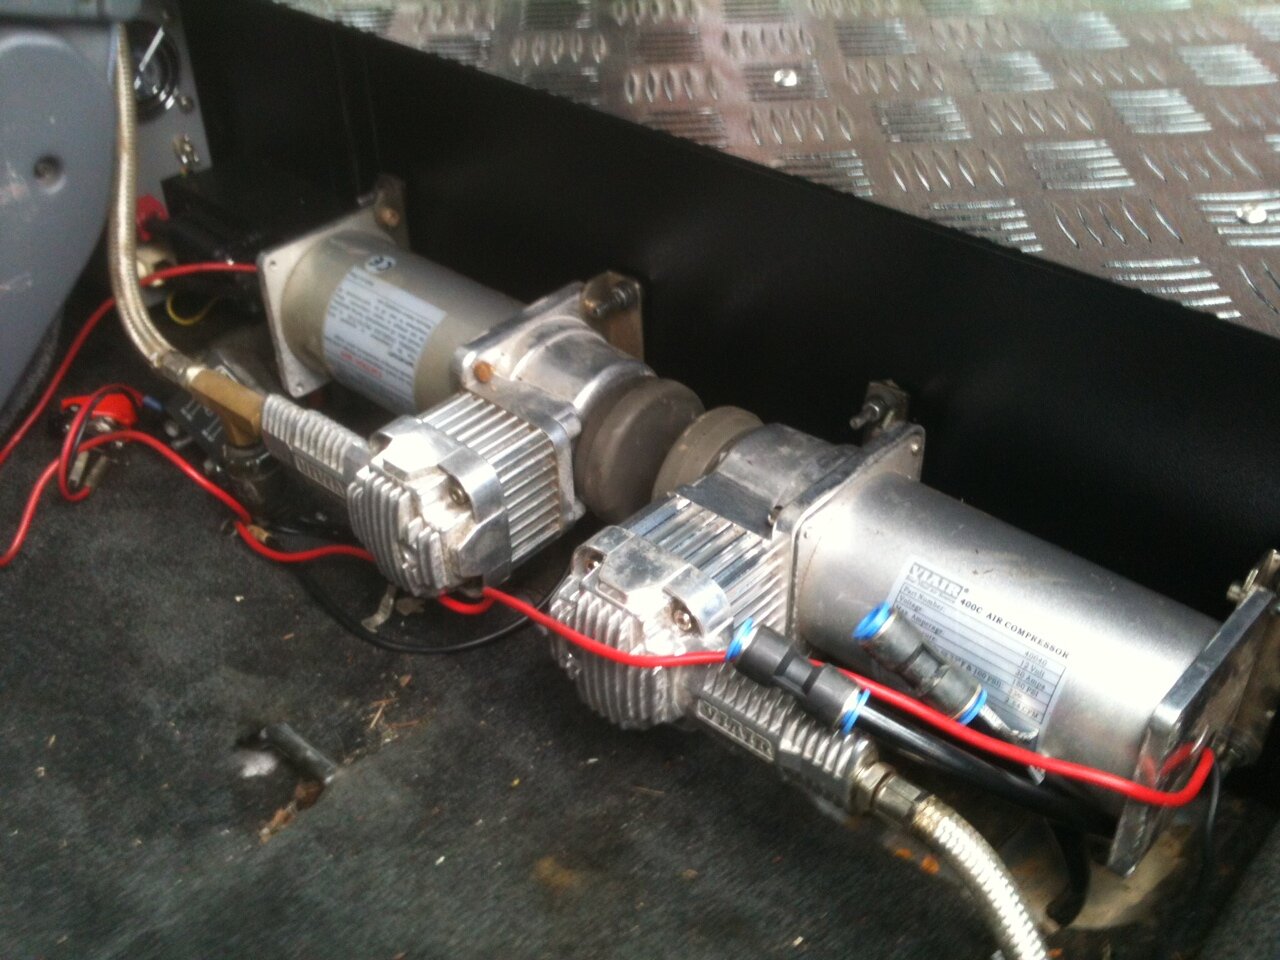


Why 2 compressors? Simple, I couldn't fit three in Chad! 
I run a 2.5 gallon air tank underneath with PCL couplings in the bumpers for running air tools etc. I need to supply around 5 cfm which is difficult from one compressor like these. So I run two, independently piped in, with larger 10 air line. Fills the tank to 150 psi in just over a minute. Pressure cut off switch means I can leave it running as I move around the car doing tyres. If one goes down, I can still fill the tank to run tools. Just a bot slower.
Chris
What I particularly like about the drawers (that I could never have achieved) is the fact that there is very little space taken by the drawers themselves which gives lots more space to put things in them. If I have made them, they'd have been hewn from an oak tree and have the capacity of a shoe box. Being steel, they are strong but light so they drawers themselves don't add much weight in terms of the capacity of the runners. That are also at the same height as the folded back seats so I can stick a mattress in there if I needed to. They don't rattle at all. They might be constructed like a filing cabinet, but once filled they feel really solid and slam shut with a very reassuring thunk.
Chris
Chris
Don't like the adverts? Click here to remove them
Olazz
Well-Known Member
- Joined
- Apr 23, 2010
- Messages
- 1,428
- Country Flag

Hey Christo,
Isn't the mega fuse supposed to be as close to the battery as possible? Before you come back with a quip, just remember this is gleaned from my vast bank of auto electrical knowledge
Anyway, enough about those drawers, I wanna see the LED's !
Isn't the mega fuse supposed to be as close to the battery as possible? Before you come back with a quip, just remember this is gleaned from my vast bank of auto electrical knowledge
Anyway, enough about those drawers, I wanna see the LED's !
Be interested to know the internal dimensions of the drawers Chris, for a comparison. They look well made. I can't remember how much you said they cost, probably not much more than the DIY route I'm going but I don't have much to fiddle with on my 80 so DIY is more appealing on this occasion ")
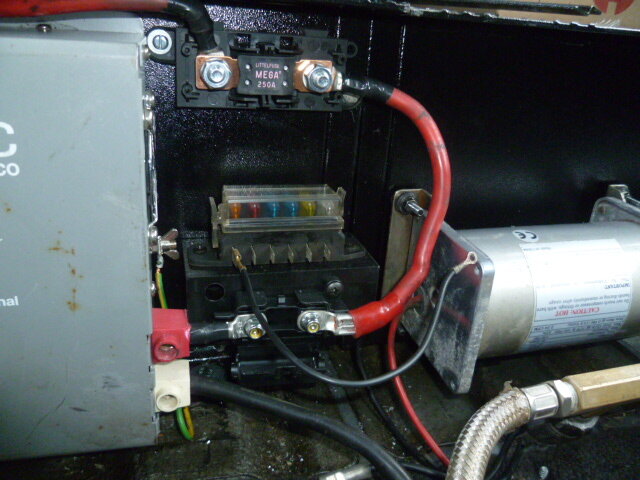
Lazzo, you might well be right me Owd China, but that is the dedicated mini mega fuse for the inverter alone. There are three other mega fuses already in the system at what I consider to be critical points - such as where it passes through body work etc. I am planning a change to that bit tonight actually, where I have decided that running all that cable to each item is just a bit daft, so there will be one cable run to ANOTHER fuse and a mini distribution board so that cable runs to each appliance will only be a few inches. Why did I decide this? Well, I stumbled across a load of cable in the garage last night as I was clearing up and though "Hang on!"
Ok Ok, I shall get the new lighting in as soon as I can. Bit busy as second. And I [strike:3s7fdv9p]want[/strike:3s7fdv9p] [strike:3s7fdv9p]need[/strike:3s7fdv9p] have to make them perfect 'cos I know you'll be scoring them against yours! They ain't cheap but they are very good.
Doh.
Jon will have to get the tape out and measure them up. Don't have anything to hand.
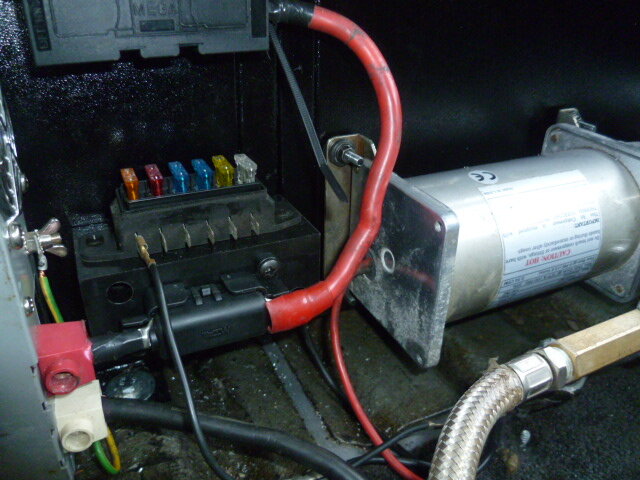
If you haven't, you make want to re-route the positive cables that run on your compressors, especially if it gets hot there - don't want them melting at a crucial moment Otherwise, looking very nice. You should have saved all this work for winter, though, you know - when you can do stuff inside where it's mostly dry Oh - hang on a minute ... 
Otherwise, looking very nice. You should have saved all this work for winter, though, you know - when you can do stuff inside where it's mostly dry Gary, I haven't run the compressor feeds yet. If you are referring to the red wires in that pic, they are just lying there as it was time to pack up. I haven't even laid in the feed yet let alone coupled them up. There is a remote switch, the relay and the earths to go in yet. More spaghetti.
The heads do get very hot that is for sure. All the cables will be tucked away. We wouldn't want a fire would we Not again!
Chris
The heads do get very hot that is for sure. All the cables will be tucked away. We wouldn't want a fire would we
Not again!Chris
Chris said:We wouldn't want a fire would we
Yep - that thought had crossed my mind - glad you've got it all under control
Marius De Kock
Well-Known Member
- Joined
- Nov 17, 2010
- Messages
- 379
- Country Flag

Looking very good. I love it.

Had a good evening on the wiring. All coming together. Completely OTT in terms of gauge I think, but hey, bigger just has to be better.
Ran new power from the battery around the sides of the drawers.
[attachment=2:1tk87kn3]P1000892.JPG[/attachment:1tk87kn3]
Got another fuse in so that I can take supplies from one end to run the appliances etc and put in my mini fuse board which will be used to power the relays and ciggy lighter sockets etc. Had this kicking around for eons. Glad to finally get the thing used
[attachment=1:1tk87kn3]P1000894.JPG[/attachment:1tk87kn3]
The cable is all a bit used, but with the price of copper you can't afford new every time. Well I can't.
The tabs on the back of the fuse box are all soldered together effectively into a bus bar, then they were encased in insulation. I'll stick a decent supply in on one fuse, the 30 amp one, then just pull off what I need via individual fuses. Hope that's not bodging.
[attachment=0:1tk87kn3]P1000895.JPG[/attachment:1tk87kn3]
Will wire up an earth pole tomorrow. I don't want to use the chassis as the earth. Everything here is connected directly to the battery. That way there shouldn't be the possibility of any leaks anywhere. Anything like that will being the original wiring. Well that's my thinking. I went to the same auto electrical classes as Olazz. Well I was supposed to but never made it past the pub.
Chris
Attachments
Got some good work done tonight in the evening sunshine. Wired in the main feed for the pumps - via yet another fuse. Can't have too many fuses. And the relay for them too. Just need to tidy away the thinner wires with some cable ties and we're almost good to go. Need the switch of course and then get the earth return cable laid in. I am making a junction box for all the earths on the miller. It's all in very solid. Cables all secured with P clips. I don't want any lash up jobs that move around this time.
If I can get this sorted I can get my new tail gate lights installed on Sat. Off roading locally on Sunday.
OK lots of little jobs to do and I may even scrap the font bumper and make another, but I can definitely see the end! Time to find a new cruiser......?
[attachment=0:d6keus7q]wiring.JPG[/attachment:d6keus7q]
I don't think soooo.
Similar threads
- Replies
- 30
- Views
- 1K