Don't like the adverts?  Click here to remove them

Baselining My 80 / Overland Build

I was careful to put the magnets back in temporarily and mark them up so they went back in the same way ...........
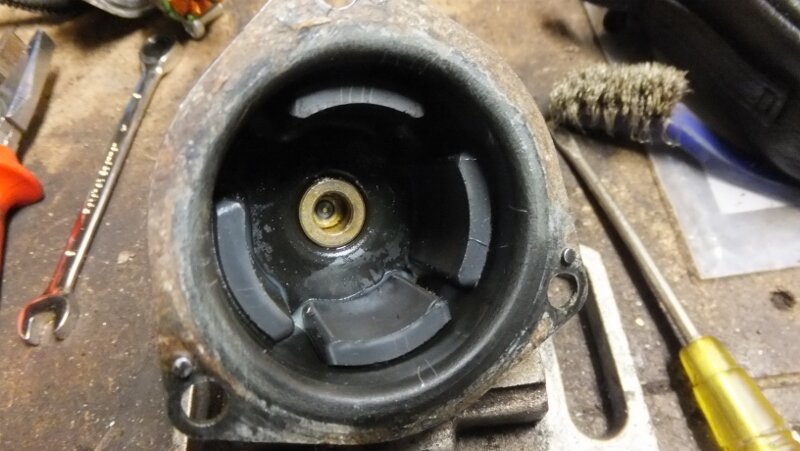
DSCF1016 (800x451).jpg

Having scraped off all the old glue, I re-glued them back using the witness marks as a means to position them correctly.

The pins for testing the operation are the same as those for the rear locker as described above, i.e. pins 3 and 2 on the row where there is an empty slot. To rotate the other way, simply reverse the polarity.

The FSM says use a 1.5v battery and heater relay, but to be honest you don't really need to do this, you can connect a 12v battery direct if you are careful. Pleased to say the motor works fine :dance:. What with this and the rear locker revived, I've saved nigh on a grand for new replacements :icon-biggrin:.
 
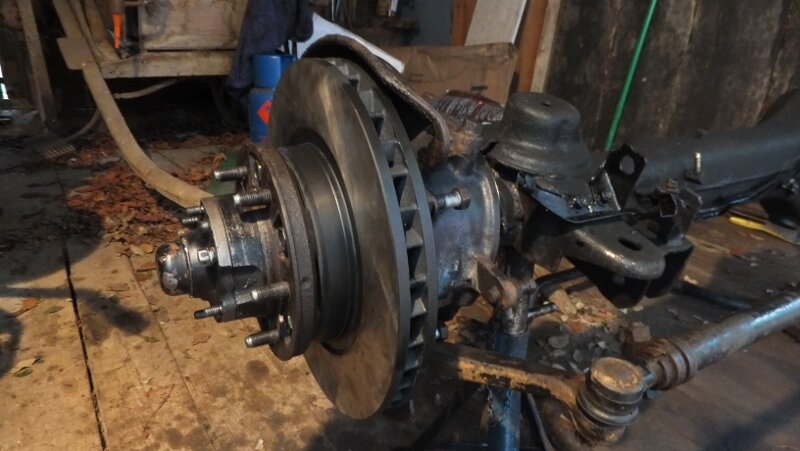
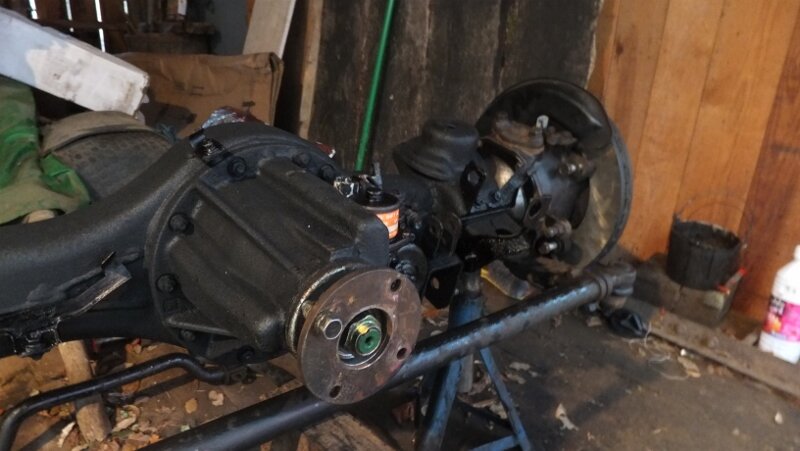
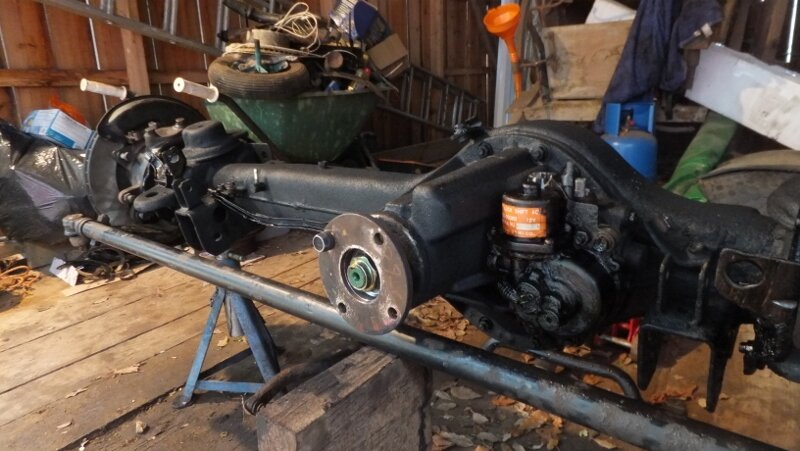
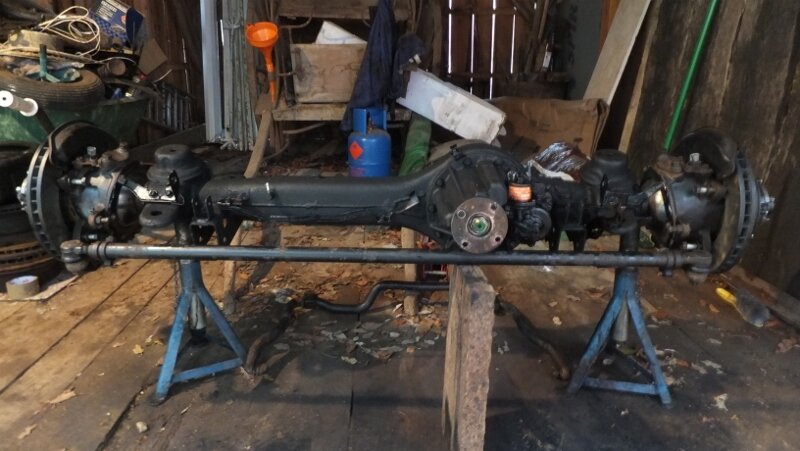
Rebuilt the hubs with new races, bearings, seals and genuine discs and got them all fitted together with all the other 'furniture' on the axle casing for the wires and brake pipes.............

DSCF1017 (800x451).jpg

DSCF1020 (800x451).jpg

DSCF1021 (800x451).jpg

The FSM covers fitting the locker back in quite well and basically requires that you lock the diff by moving the gear in the axle to the left so the last tooth on it aligns with the centre line of the hole you are looking through. If it won't move, simply rotate the pinion shaft by hand until it does.

Then align the mark on the gear on the locker and insert the locker fully. If it doesn't go in, you haven't got either the gear in the axle in the right place or the mark on the locker gear in the right place. I greased up the studs, nuts and bolt to ensure that if in the future I need them to, they will come off easily.

You may notice from the pics that the drive plates are not properly bolted up yet ...... reason is, the person who worked on this axle before was a butcher - every one of the collets had mole grip marks on them, had closed up the gap and could not be got off easily. Even worse, on one side, one of the studs was nearly out and the snap ring on the end of the axle was missing. So, I'm waiting on new studs, collets, washers and nuts to arrive. Brakes are done but I need a new pipe for the front off side as the fitting is seized solid.

DSCF1023 (800x451).jpg

That's it for now, Christmas looms and I need to do other stuff. I almost got to my milestone of completing both axles in time to drive it back to the UK. I reckon I need another couple of days to fit it up and do the brakes.

On that subject, I rather foolishly bought a Gunson's Easibleed kit to do the brakes without checking and yes, you guessed it, the lids don't fit as the reservoir cap is rubber push fit :angry-screaming: . . . . . . is there a kit which does fit and make the job easy or should I just persevere using old tried tested methods :icon-question:
 
I've just bought an ezi bleed too. But having tried the one that you mention , before, I went a different way. This is a vacuum bleeder. You connect to the nipple and the gun goes to your compressor. It pulls fluid though instead of push it. So.....no pumping the pedal. On an old 80 you need to avoid pressing the pedal to the floor. It will rag the seals and you'll end up with no brakes. It was about £30 but you know, the amount of use it COULD have had over the years is a fair indication of how much hammer it's going to get.
 
Yes, looks like vacuum is the way to go ...... pity I didn't think about it more first:doh:
 
Happy new year all :icon-biggrin:

Does anyone know whether there any special procedures to be followed before switching the diff lock switch to on?

I ask as following the rebuild of both axles, the rear is unlocked and the front is locked (as per FSM). Ordinarily this would never happen as its RR then RR FF. I'm tempted to start with the dash switch off, turn on ignition, switch to RR only, unplug the front locker, turn to RR FF, plug the front one back in, then switch everything to off and turn off ignition.

Alternatively, I could put the switch to RR FF, turn ignition on, unplug the rear, turn the switch off, then ignition off.

is this right approach or would there be another way or is not that complex because the system is smart and will reset itself correctly.

Don't know the answer to this ....... Anyone out there done this before?
 
Generally, if I have had an axle apart and or locker too, I plug it in but leave it hanging on the loom and cycle it a couple of times. You know exactly which position it's in then. I don't do this once the motor is in position. It doesn't matter where the front locker is as you can easily synch it up with the motor by sticking yer finger in the hole but the back one needs lining up to get the bolt in and if it's not locked, the bits tend to drop inside from memory. I do get what you are saying, but I've always just found it easier to have the motors hanging, turn the various dials etc so that they are all lined up. I have never messed with this pre tensioning malarky in truth and had motors on and off dozens of times and used them thousands of time with no issues at all.
 
Don't like the adverts?  Click here to remove them
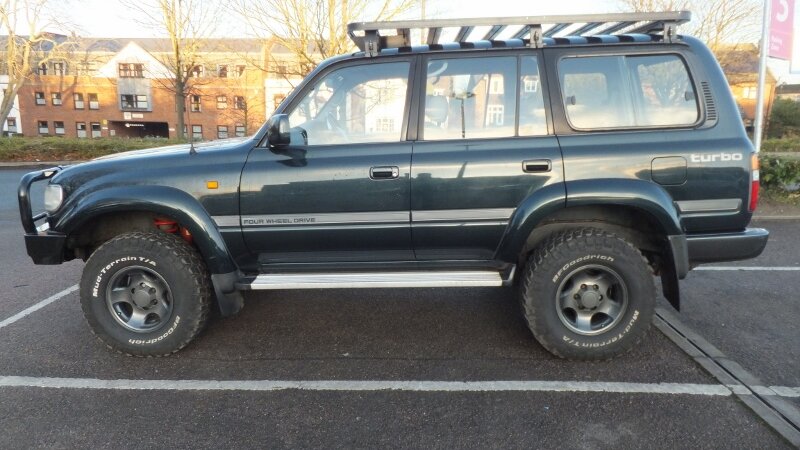
After another 4-5 days work, I got the front axle in, brakes bled and sat on all fours. I've now done about 1500 miles and it just sailed through an MOT :dance: I've got to say, that was a nice feeling :icon-biggrin:

Here it is .............

DSCF1024 (800x450).jpg

DSCF1025 (800x450).jpg

As expected it's about 50mm taller. The ride on the Pedders suspension is brilliant. I was expecting something pretty hard given there's no load in it currently other than the winch bumper, but it's really very comfortable.

My Warrior 12000 winch didn't fit as it was too long. It fitted between the chassis rails fine, but the overhang on one end where the driving gears on was too much to align the holes and it was too off centre to drill new ones, so, looks like a new winch is required.

A word of warning ............. I got some new studs and collets from Roughtrax for the front drive flanges. Spent the time on one side getting the old studs out and putting the new ones in. Then, when I torqued up the first one, I suspected something was wrong as it felt like something was stripping. So, stopped on that one and checked the wrench and did the second one but it was still the same. It turns out, these studs are made of butter and even at a measly 20 odd foot pounds they stripped. So, went back to the original studs and nuts and just used their collets. Might be rogue batch but it's worth being prepared just in case.

I got one of those Clarke vacuum brake bleeders. I did get it to work eventually. First off it consumes loads of air, 8cfm so I needed a new compressor. Then I discovered it leaked like a sieve and wouldn't pull much fluid through at all. So, an I spent an hour applying automotive sealant to all the crap seals and after drying off, it worked pretty well. Don't know where these things are made, but for £80 or so, I expected a bit more. Never mind, it works now.

Only problem now is the exhaust which still knocks a little because the down pipe is at the wrong angle. Other than that, all is good and looking forward to doing the other smaller bits.
 
Looks great, well done :) bumper looks good too. Shame about the bleeder though. French CT or English MOT?

Sent from my GT-P5110 using Tapatalk
 
Looks good.
I got new studs etc from toyota as not that expensive.
 
Looks great, well done :) bumper looks good too. Shame about the bleeder though. French CT or English MOT?

Sent from my GT-P5110 using Tapatalk

Thank you... just chatting to my wife and she didn't even notice that the bumper had been changed despite seeing it on a daily basis for the last couple of weeks :icon-rolleyes: :lol:

English MOT as I'm in the UK for a few weeks and it expired while I was away. Going to get it matriculated later this year as it'll be better for the insurances for our travels.

Bleeding the brakes was the last job and the biggest worry given I was on a deadline, but a least I had an excuse to get a new compressor :lol:. Tried to avoid the brico' models as when I went into Bricomarche there was only one left and that was a display model. So I asked for a demo.....30 minutes later and well into their lunchtime after parts had been cannibalised from other models I lost confidence and went to a proper man's toy shop.
 
Looks good.
I got new studs etc from toyota as not that expensive.

:icon-biggrin:
I should have have done that myself with hindsight, but in the end new collets were higher priority and they looked to be OK.
 
On that subject, I rather foolishly bought a Gunson's Easibleed kit to do the brakes without checking and yes, you guessed it, the lids don't fit as the reservoir cap is rubber push fit :angry-screaming: . . . . . . is there a kit which does fit and make the job easy or should I just persevere using old tried tested methods :icon-question:

Bit late I know seeing as you've done the brakes but there is an adapter kit for non screw type reservoir lids. Had an Eezibleed for years and found it excellent and I've just bought the adapter in preparation for a brake system fluid change. Great truck by the way.
 
Nice job mate! For your warrior winch.. the 9500lb gearbox version is a shorter unit and is interchangeable with the 12000lb gearbox. You can order it from the warrior customer service.

I bought a separate 24volt unit for my 12volt warrior winch. May work out cheaper than buying another winch.. easy job to change over.. hope it helps. .
 
Bit late I know seeing as you've done the brakes but there is an adapter kit for non screw type reservoir lids. Had an Eezibleed for years and found it excellent and I've just bought the adapter in preparation for a brake system fluid change. Great truck by the way.

Thats useful to know, cheers. Have you got a link?
 
Nice job mate! For your warrior winch.. the 9500lb gearbox version is a shorter unit and is interchangeable with the 12000lb gearbox. You can order it from the warrior customer service.

I bought a separate 24volt unit for my 12volt warrior winch. May work out cheaper than buying another winch.. easy job to change over.. hope it helps. .

it does :thumbup:. I'm going to research that.
 
Thats useful to know, cheers. Have you got a link?

There's 2 types:
http://www.ebay.co.uk/itm/Gunson-Mu...039?pt=LH_DefaultDomain_3&hash=item43a555e67f

http://www.ebay.co.uk/itm/Gunson-To...068?pt=LH_DefaultDomain_3&hash=item4d01787fe4

I bought the 2nd one. Had to modify it slightly as the reservoir was midway between 2 sizes (the adapter has 3 steps for different diameters) but now fits perfect. Not cheap really for a bit of plastic. You could probably fabricate something quite similar without much difficulty but I couldn't be bothered.
 
Went up to APB Trading today and ordered an Eezi Awn T Top and a Bat 270 with sides. We're off to Portugal in late May for 2 week shakedown and I'm assured they will be here in time:pray:.

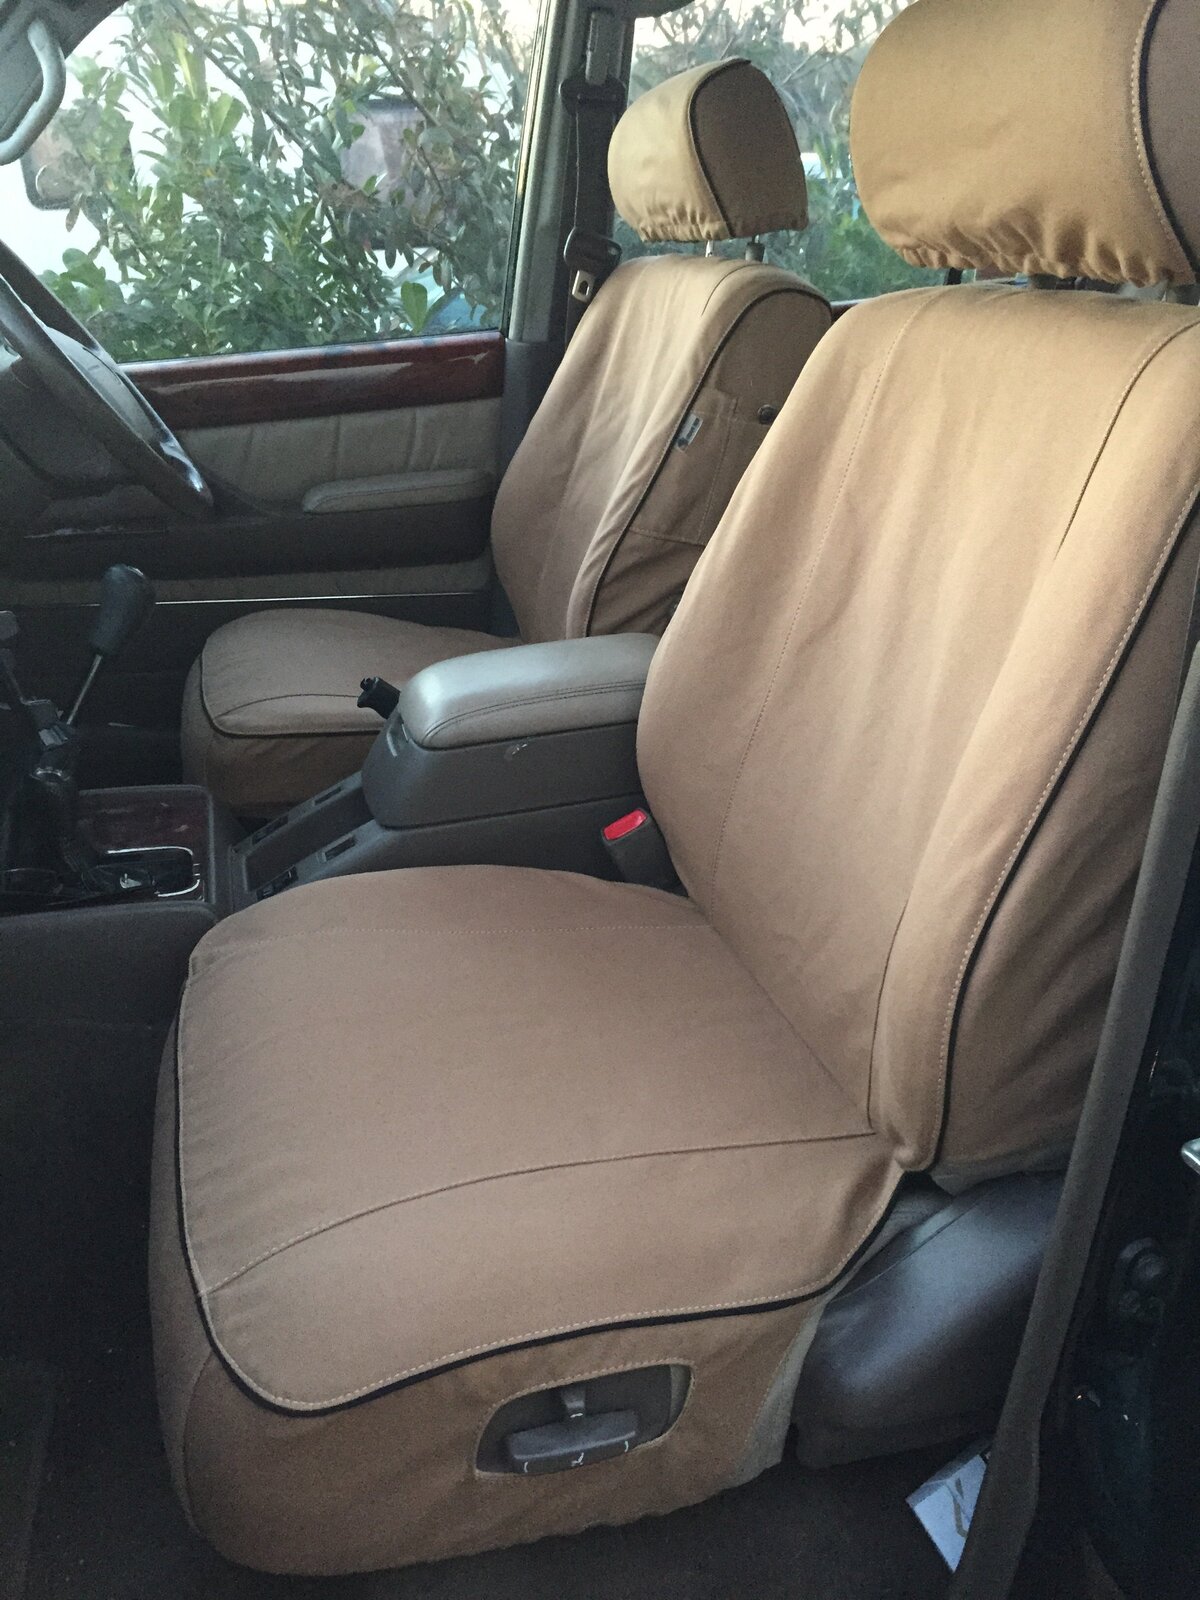
Also picked up some Escape Gear seat covers which are a great fit.

image.jpg

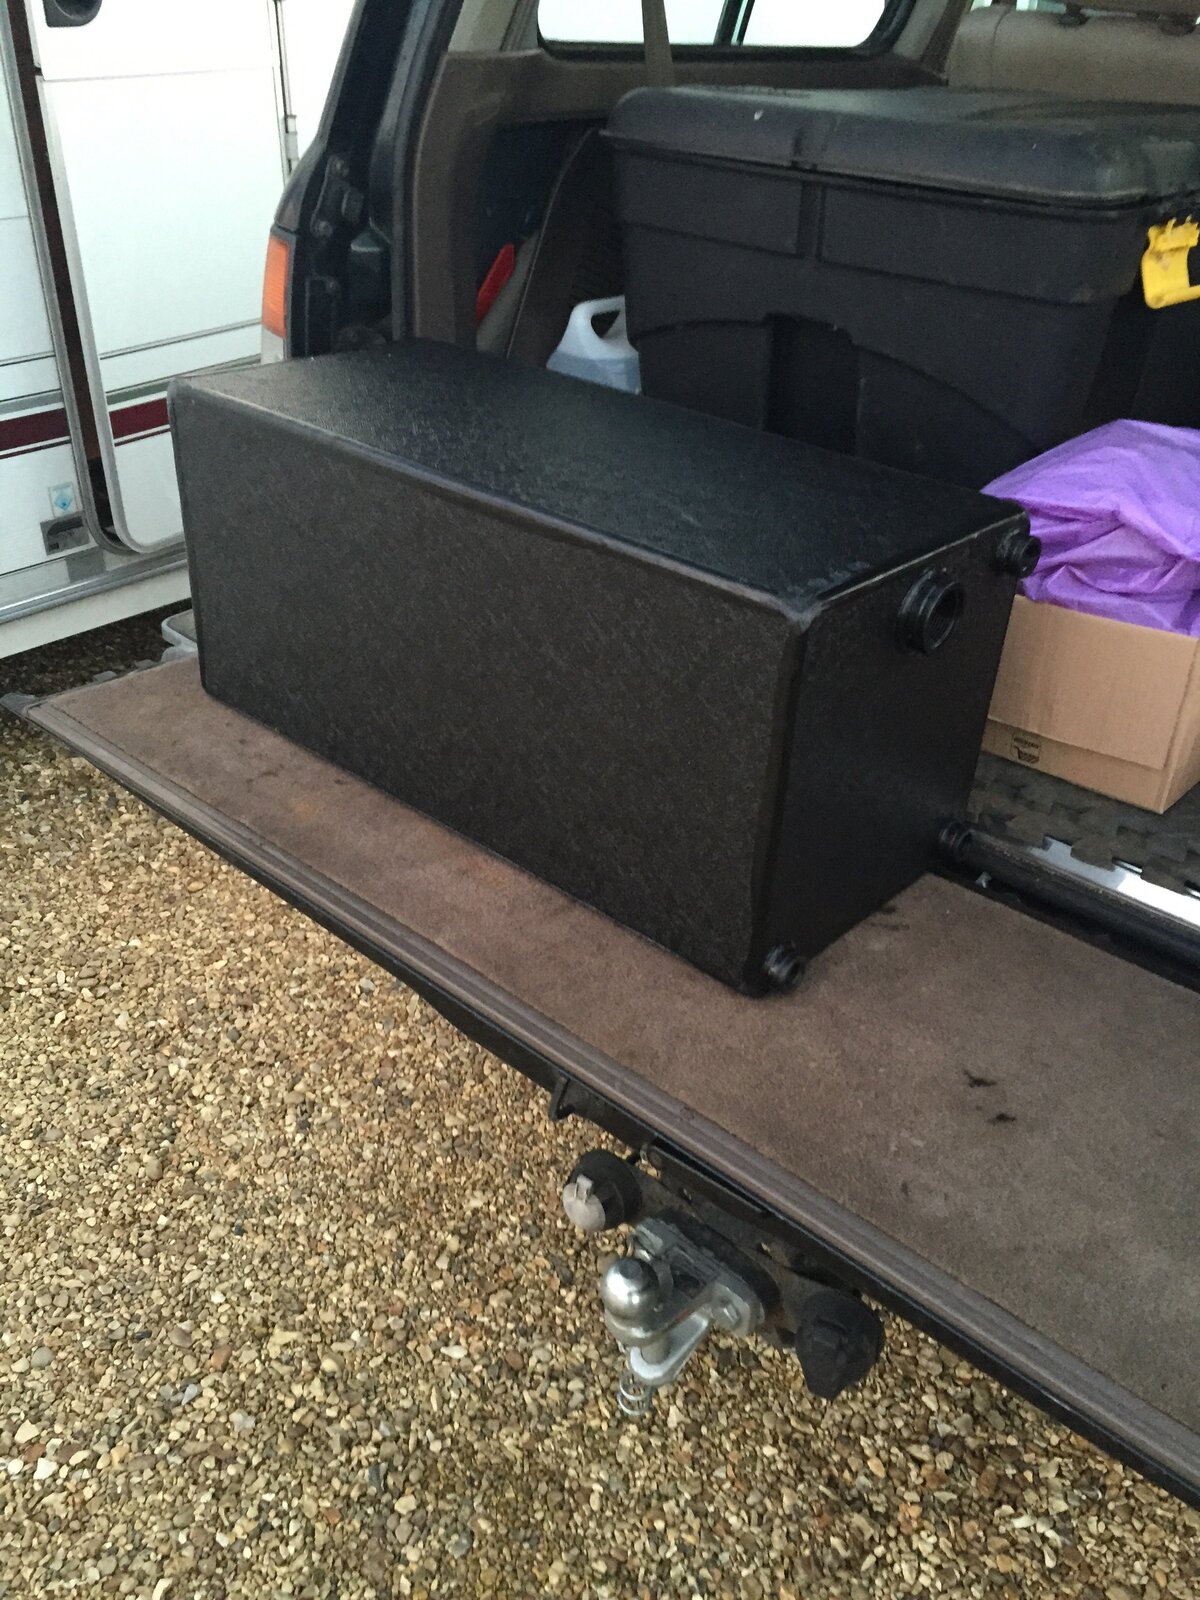
The car is going in on Tuesday to have a drawer system made. It's going to be done in decent plywood with 3 drawers vertically on one side and on the other a slide for the fridge and within that another slide out drawer which is also a table. This stage should be finished by the weekend so will post pictures then. Stage 2 will be to take the rear seats out and fit the water tank ......

image.jpg

....pump and battery etc under a wardrobe system.

otherwise these last few weeks have been about just driving it and enjoying it. I have had the water pump changed for a genuine one while the timing belt was being done, fixed a dodgy windscreen wiper, changed fuel and oil filters etc.

Lately, even following the fuel filter change I notice that after a long motorway session and when I pull off and stop at the first roundabout and pull away, the power disappears for a couple of seconds and then comes back as normal until the next motorway session. Is there another filter somewhere that could be blocked?
 
There's the filter in the tank on the scavenger pipe. Means taking out the rear LHS seat, pulling back the carpet to expose the access plate in the floor. Remove that and you can access the top of the tank. Six or so screws holding on the fuel gauge sensor and when you lift it out, there's a honey coloured filter gauze on the end of the pipe.

A lot of people complain of these strainers being totally clogged, mine came out clean, but you may find a problem there.
 
Got a sneak peak at my drawers mid build last week. Should be finished this week. They were a bit too tall for the hole as the tailgate is a bit higher than the boot floor.

image3a.jpg

image4a.jpg
Now that visibly things are progressing given the drawers and that we are picking the RTT and fridge next week, I'm starting to think about insurance. Anyone got any advice on insuring it with overland things fitted in and on it?
 
Last edited:
Back
Top