Don't like the adverts?  Click here to remove them

Console Fridge Install

Michael Montgomery

Well-Known Member
Joined
Feb 17, 2012
Messages
2,577
Garage
Country Flag
uk
Guys been a while running down the list of jobs to do and now finally found some time to attempt this unknown install progress.
Not knowing what to expect or have a reference point an attemp firstly is to start with the console itself whilst removing the old one it replaces.

Wanting to thank Andy Lomas for the fridge he brought over to Cyprus whilst visiting me and also Byron J for the top armrest storage compartment.

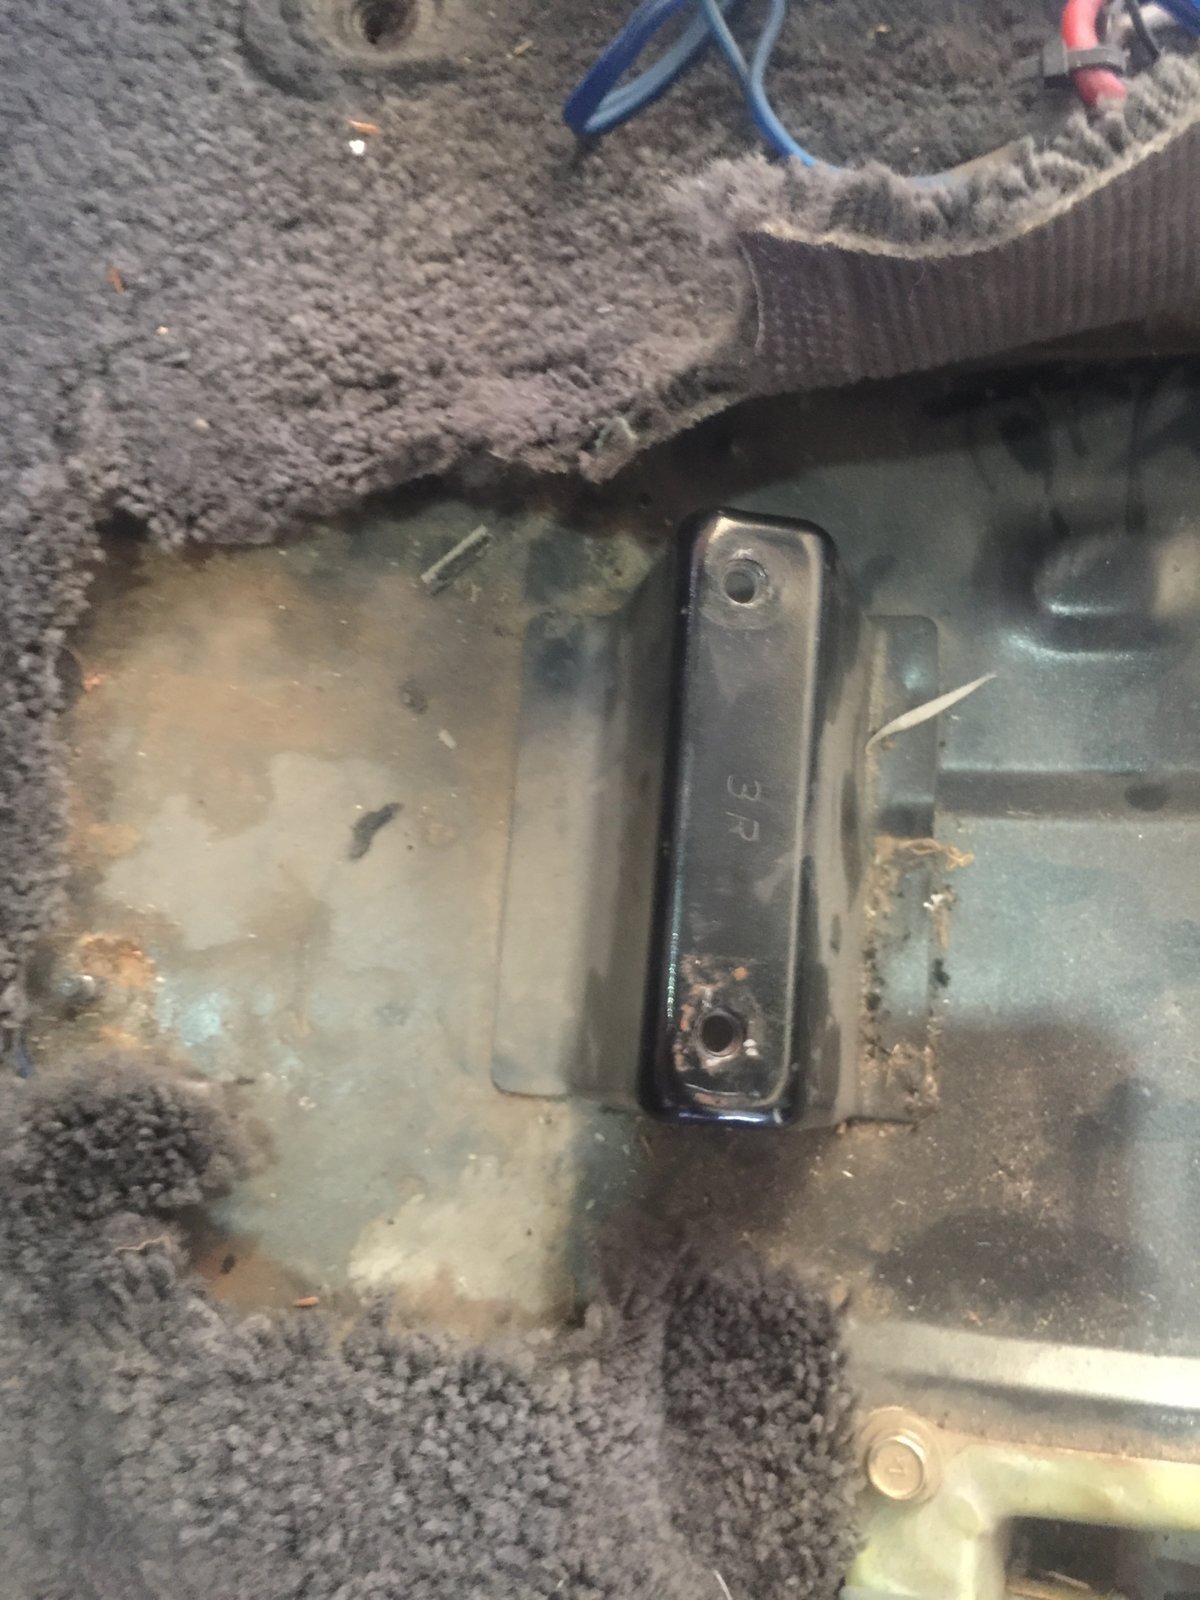
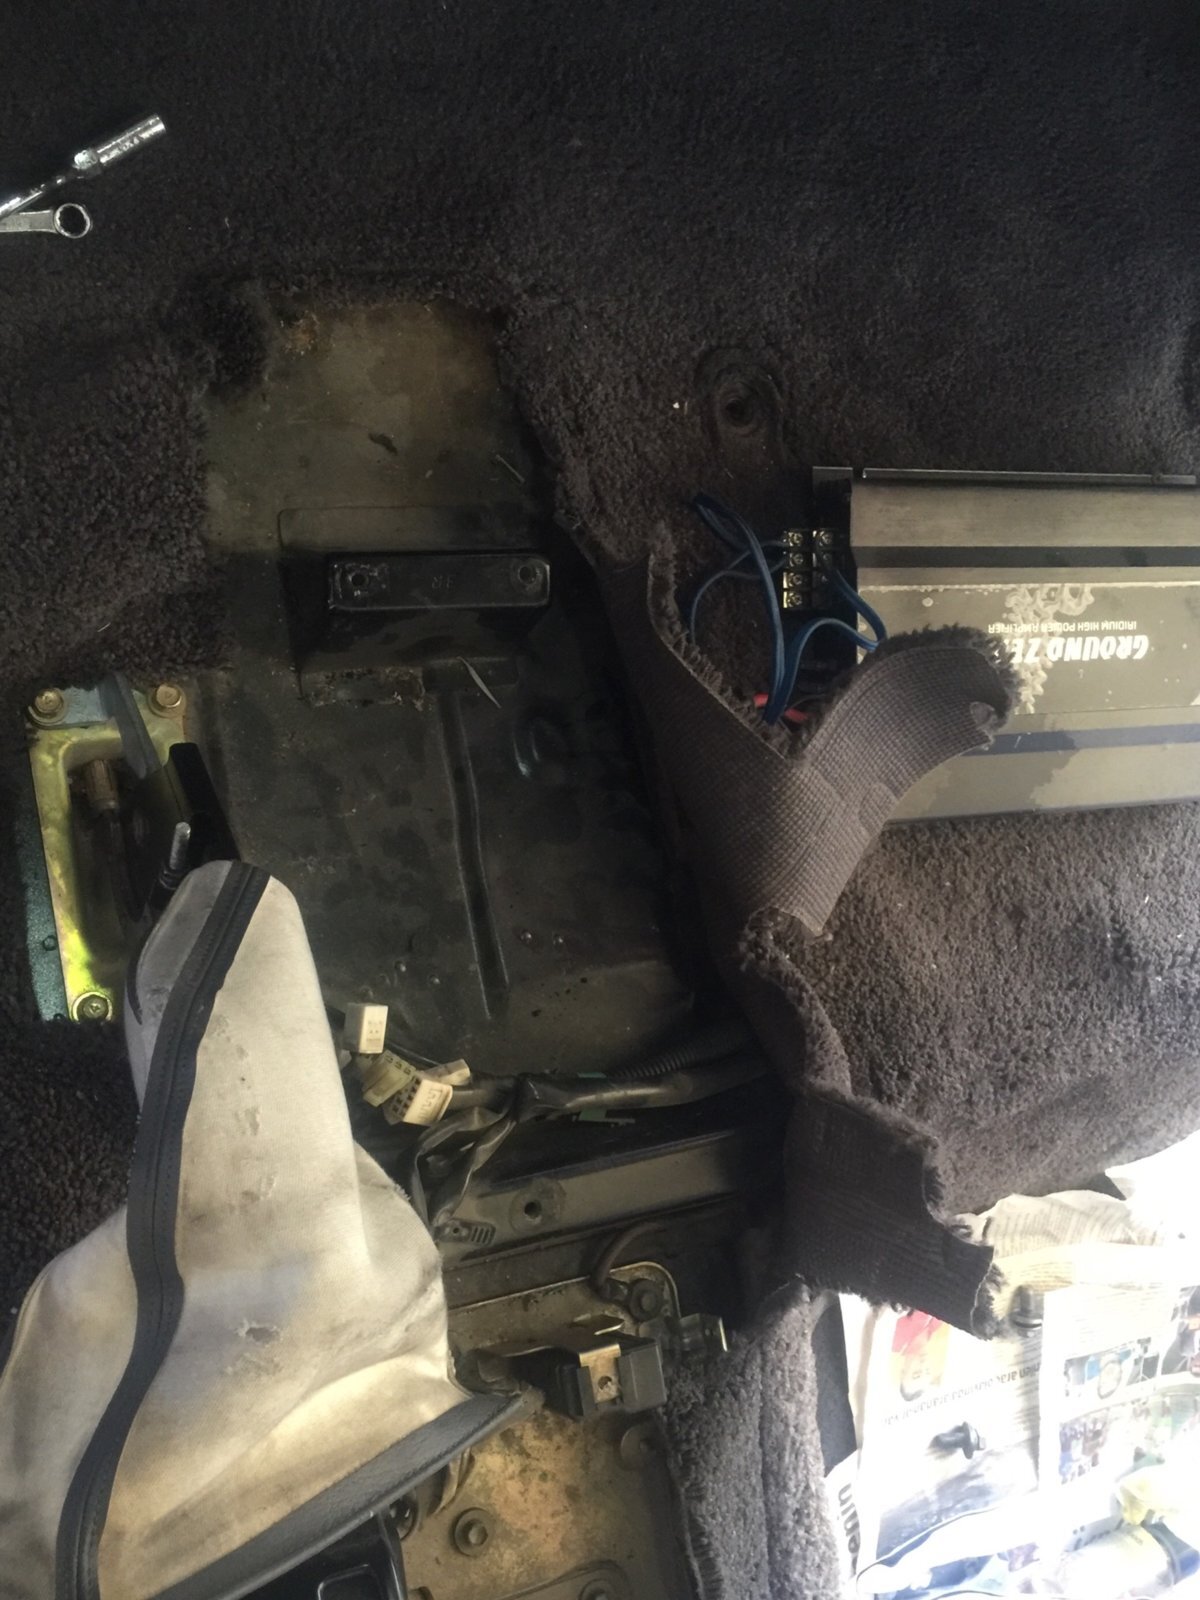
Firstly simple unbolting with three bolts the old console off showed the existing metal bridge support was in the way.

Secondly there was no pre factory hole cut outs for the console pipes to run out from the bottom.
E2C1B33E-8FD2-45E5-A4E5-463D1428E4C6.jpeg
 
Having lifted the truck there was plenty of space at the bottom for the console to cut a hole for the pipes.

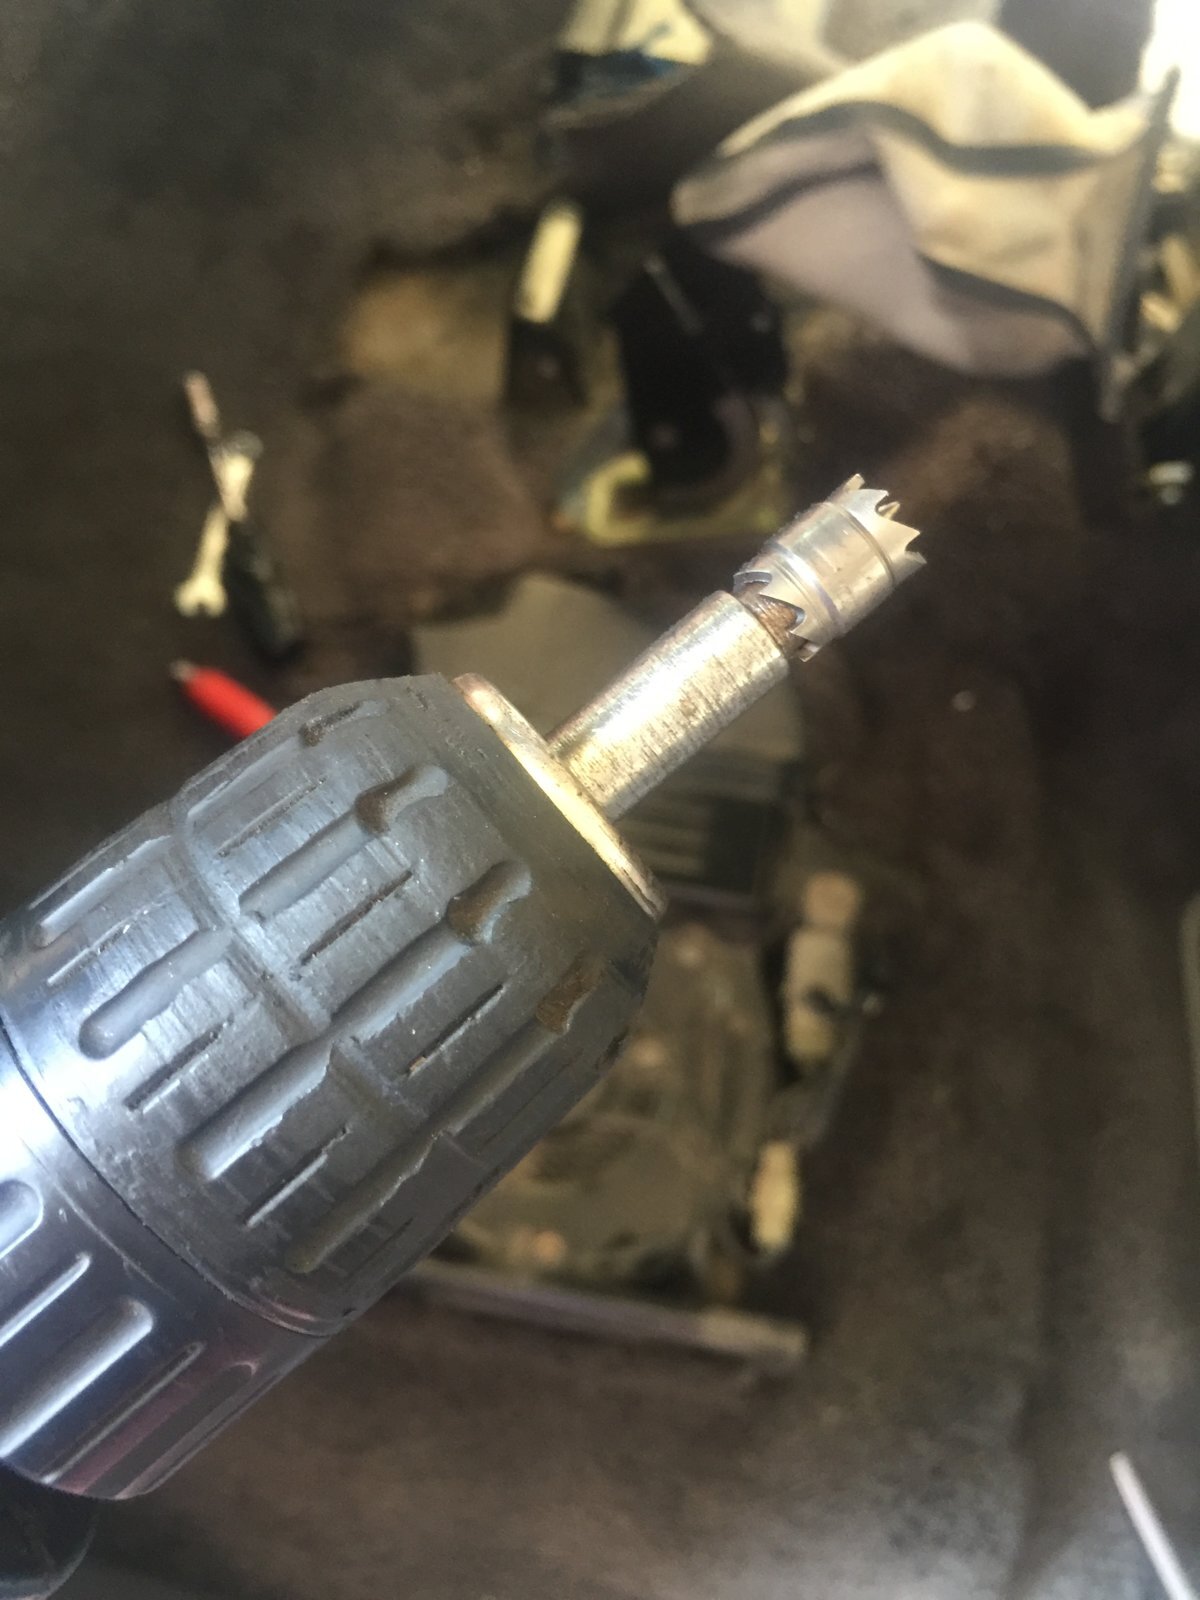
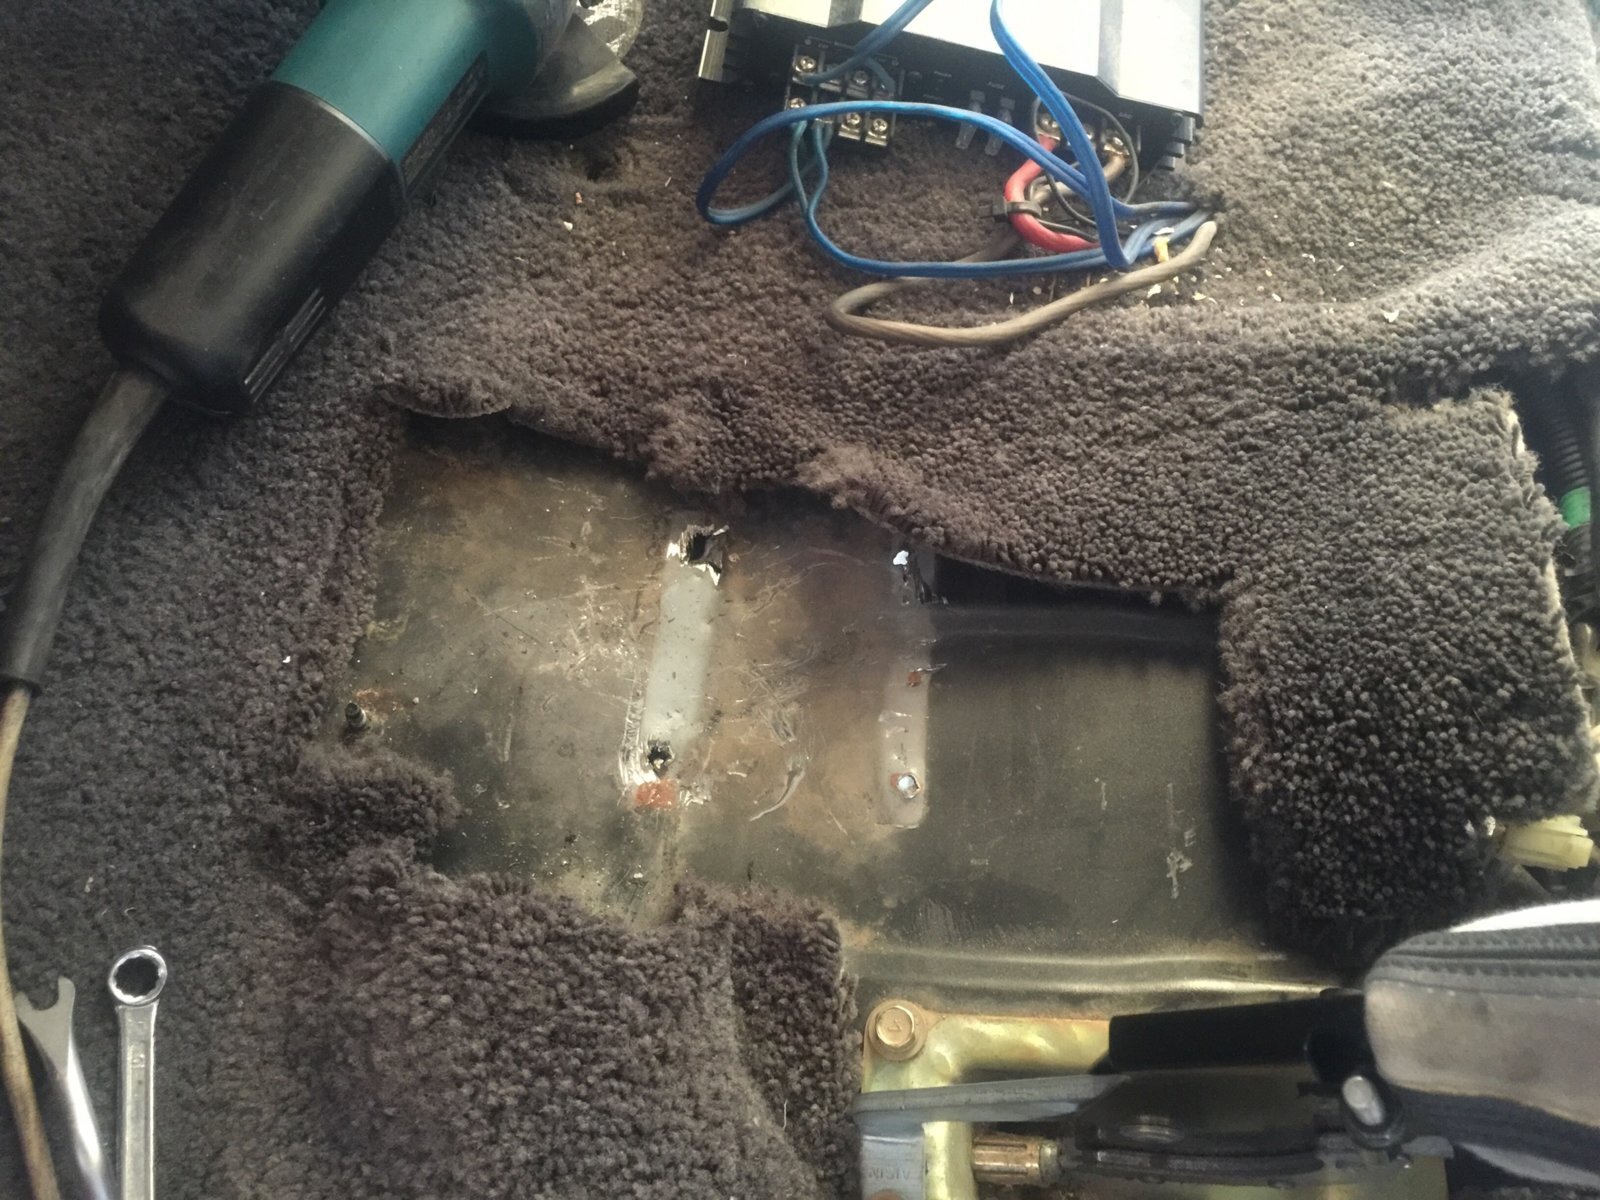
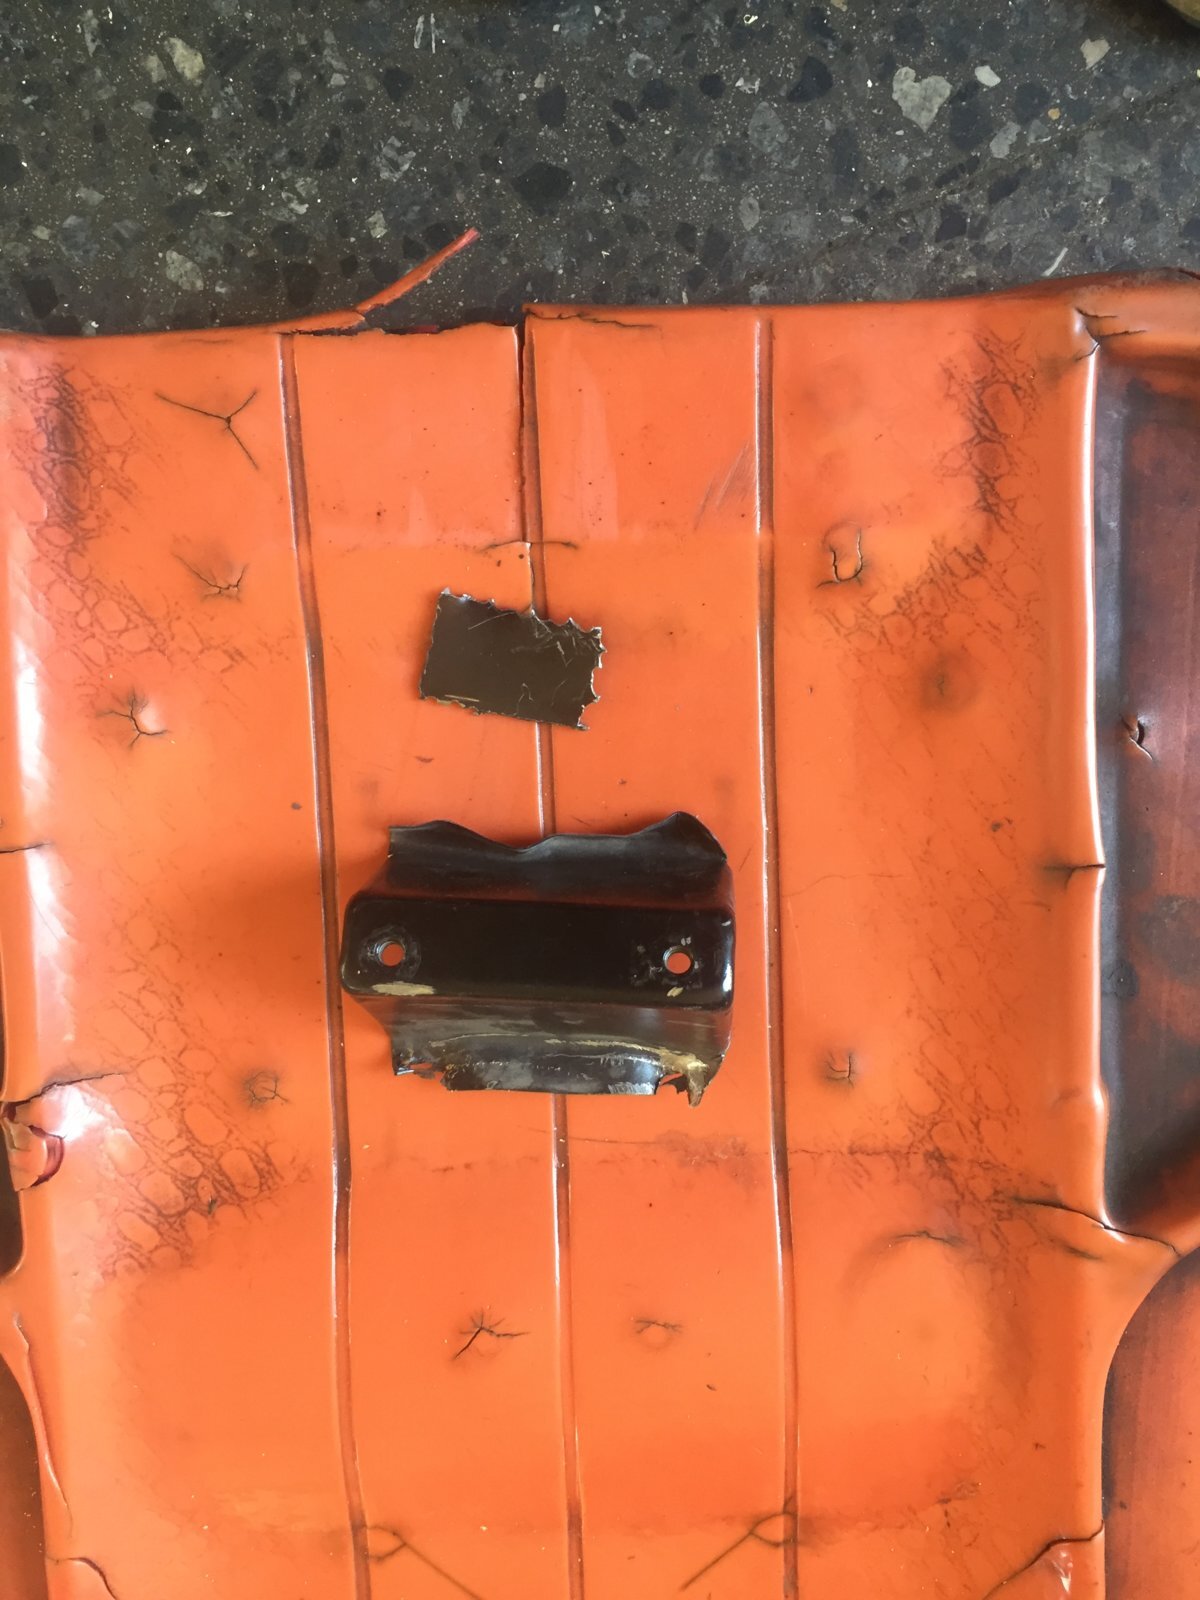
But firstly the metal bridge plate being in the way I tried to untack the factory solder with a drill piece. This proved unsuccessful and so plied it from the sides and middle then used a grinder to cut it away as best as possible.

Before doing this undone all battery connections for safety!!

DDC2AC47-965C-4D00-95FD-A3CCBA01AB83.jpeg
 
Last edited:
Before grinding also got a wet damp towel and some cardboard to best shield the sparks and prevent a fire.

Before and after not too bad with 4 small indentation holes.

78826C9B-3614-4F77-A08D-5B128B91669E.jpeg F0957A27-A90D-4AEE-AC43-1ED2944DFB48.jpeg
 
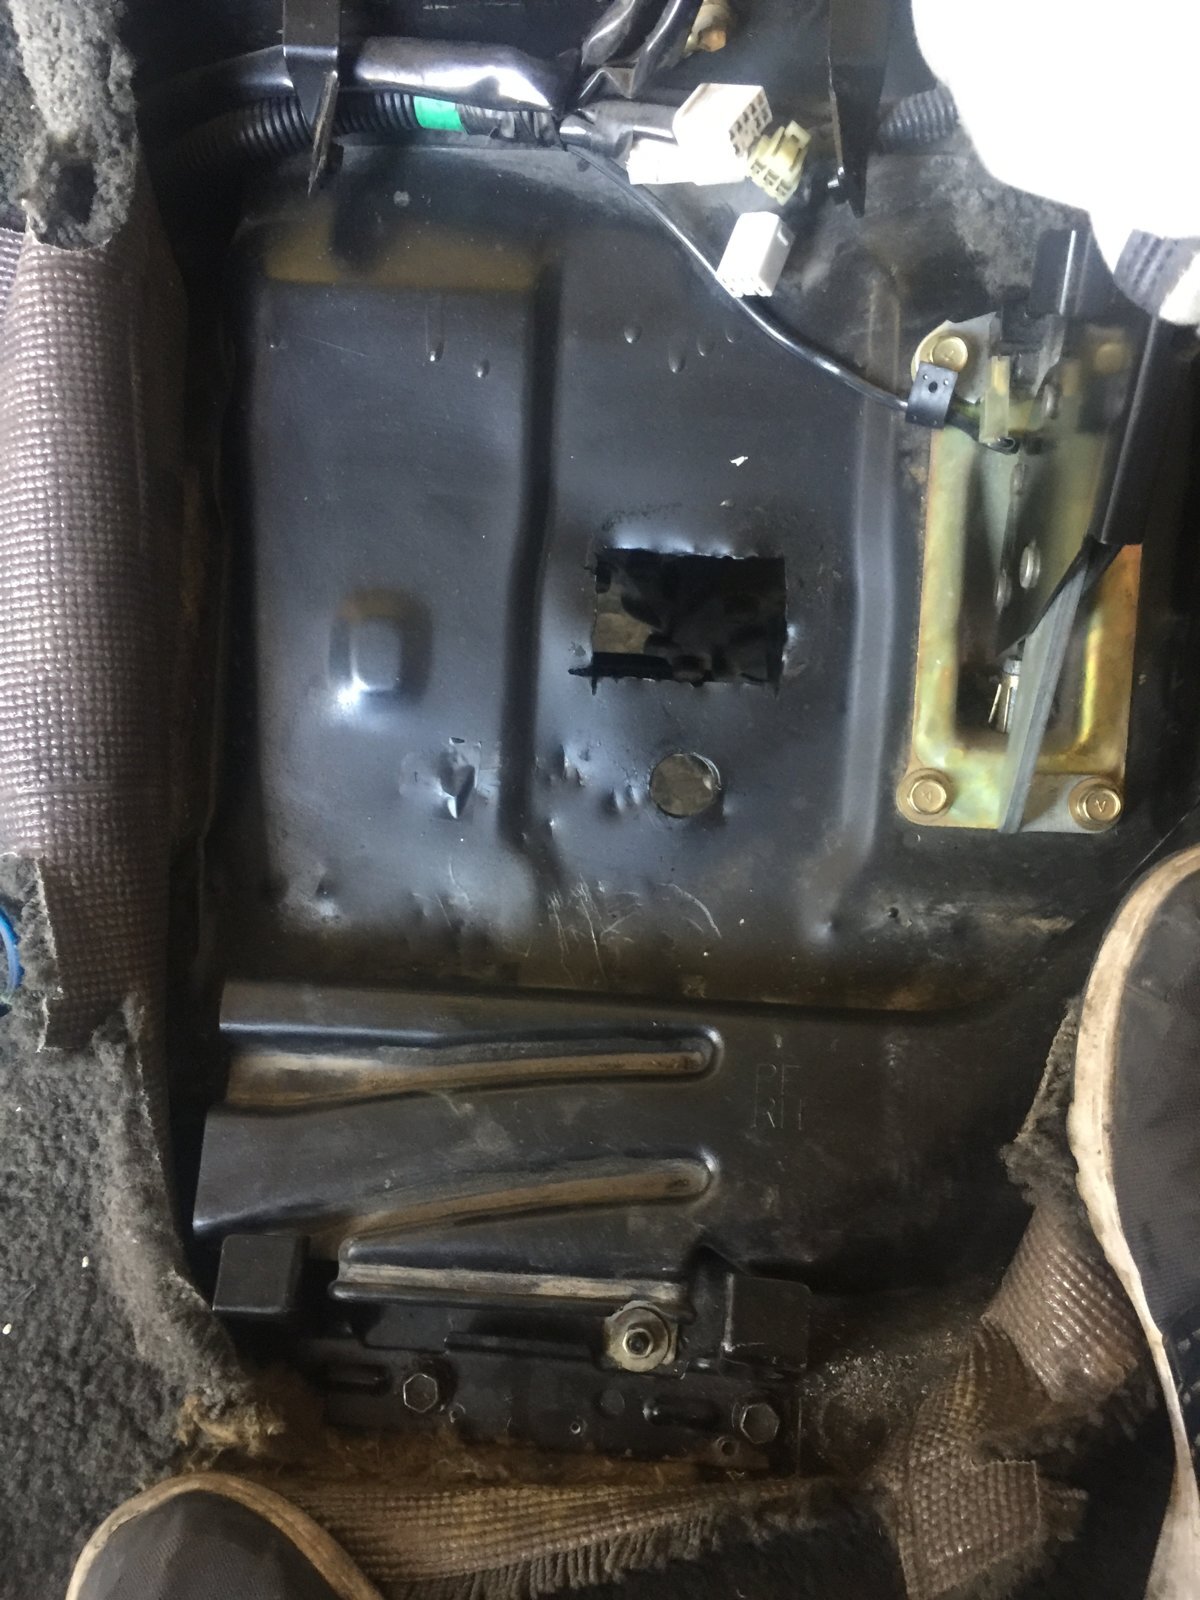
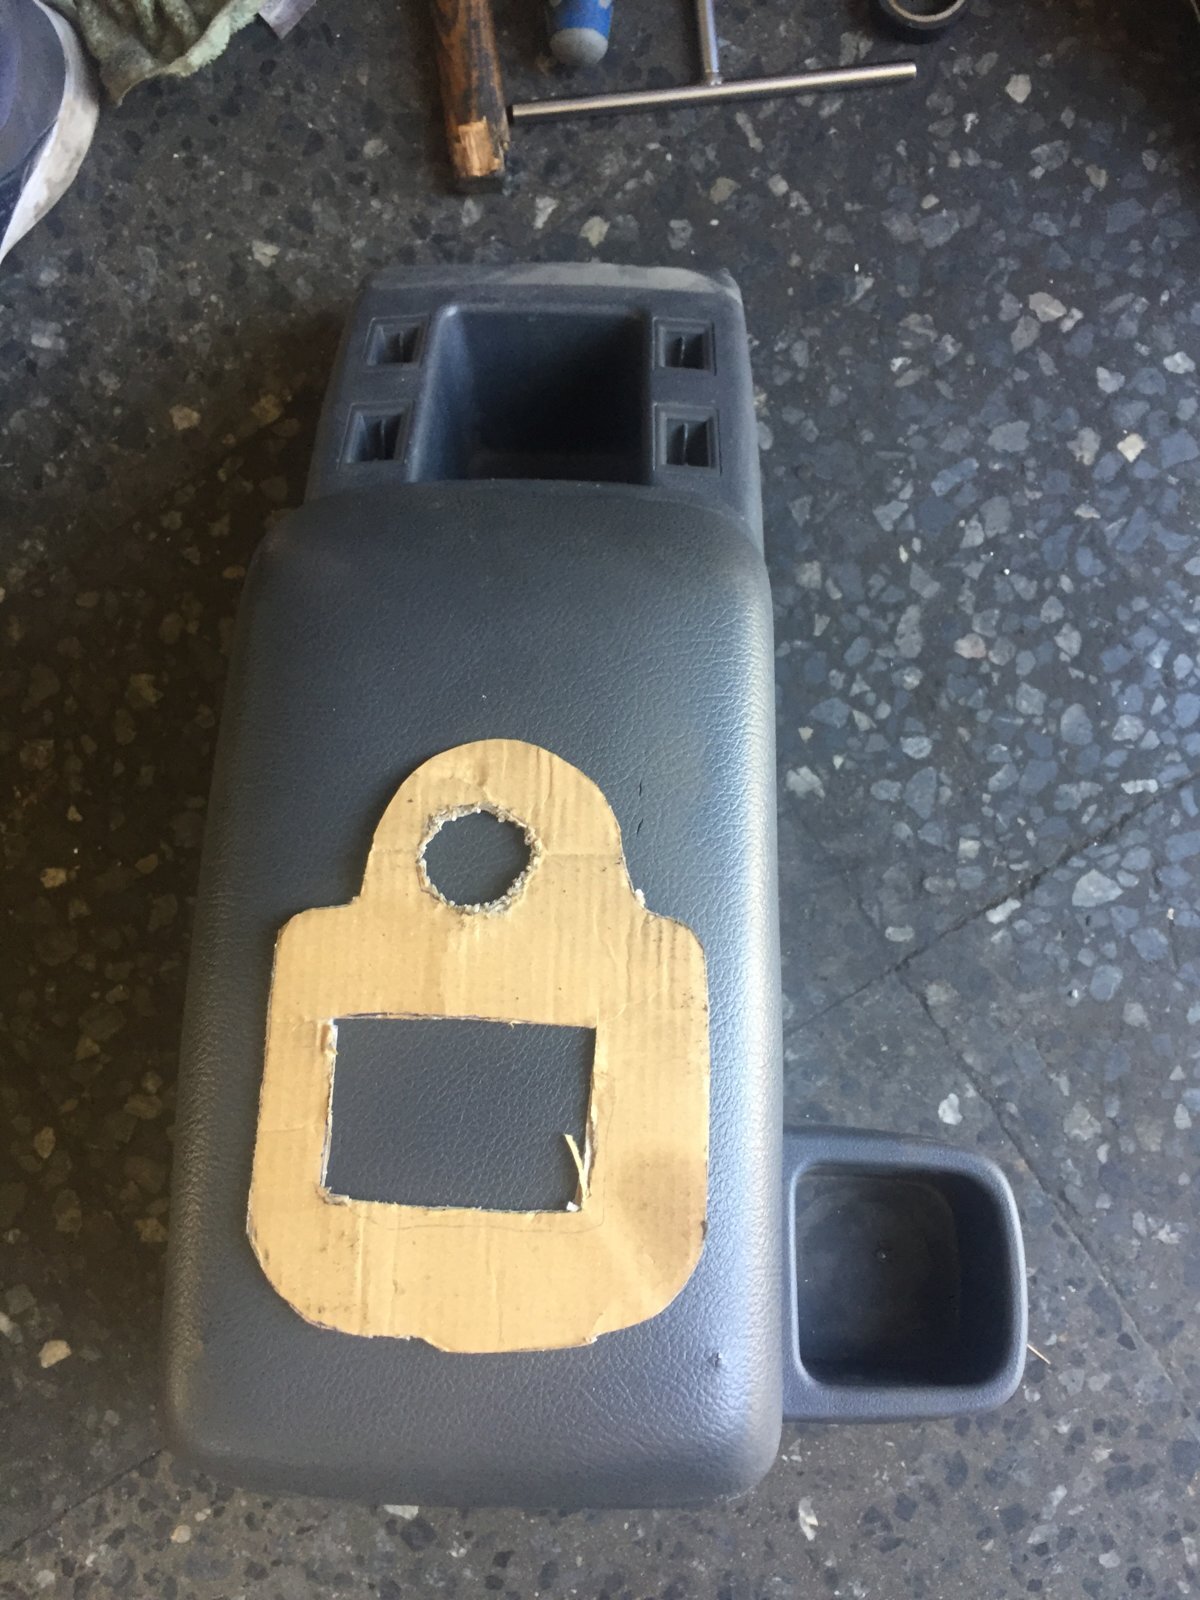
Having used the template the exact space was marked out and now the attemp to cut the holes were made with a drill bit then a chisel and hammer with finally filing the corners down.

The round hole was easier with a round diameter drill bit.

After this the area was sprayed satin black then the existing small holes covered up with black tape to finish it off better.

580DC88E-96F0-47E0-A3C8-76A07EED15A2.jpeg
 
Last edited:
Today work on making progress guys.

Firstly used the existing taped up factory bolt holders thankfully there at the console rear end. This helped to position the console to the exact position rather than guess work..lol

The bracket held firmly with the additional front bracket bolted to the existing holes too have a firm holding.

2536C7C9-49E1-4373-B37D-68F94DC71FCD.jpeg
 
The cut out and the leg base for the old console with also the time consuming gastet traced out prior. Was vital in helping positioning the pipes.

E8E1FCBF-BAAD-49C8-A834-B89C192AE6CB.jpeg D873EDA4-2E9B-473C-91E3-3E1E67893812.jpeg
 
Don't like the adverts?  Click here to remove them
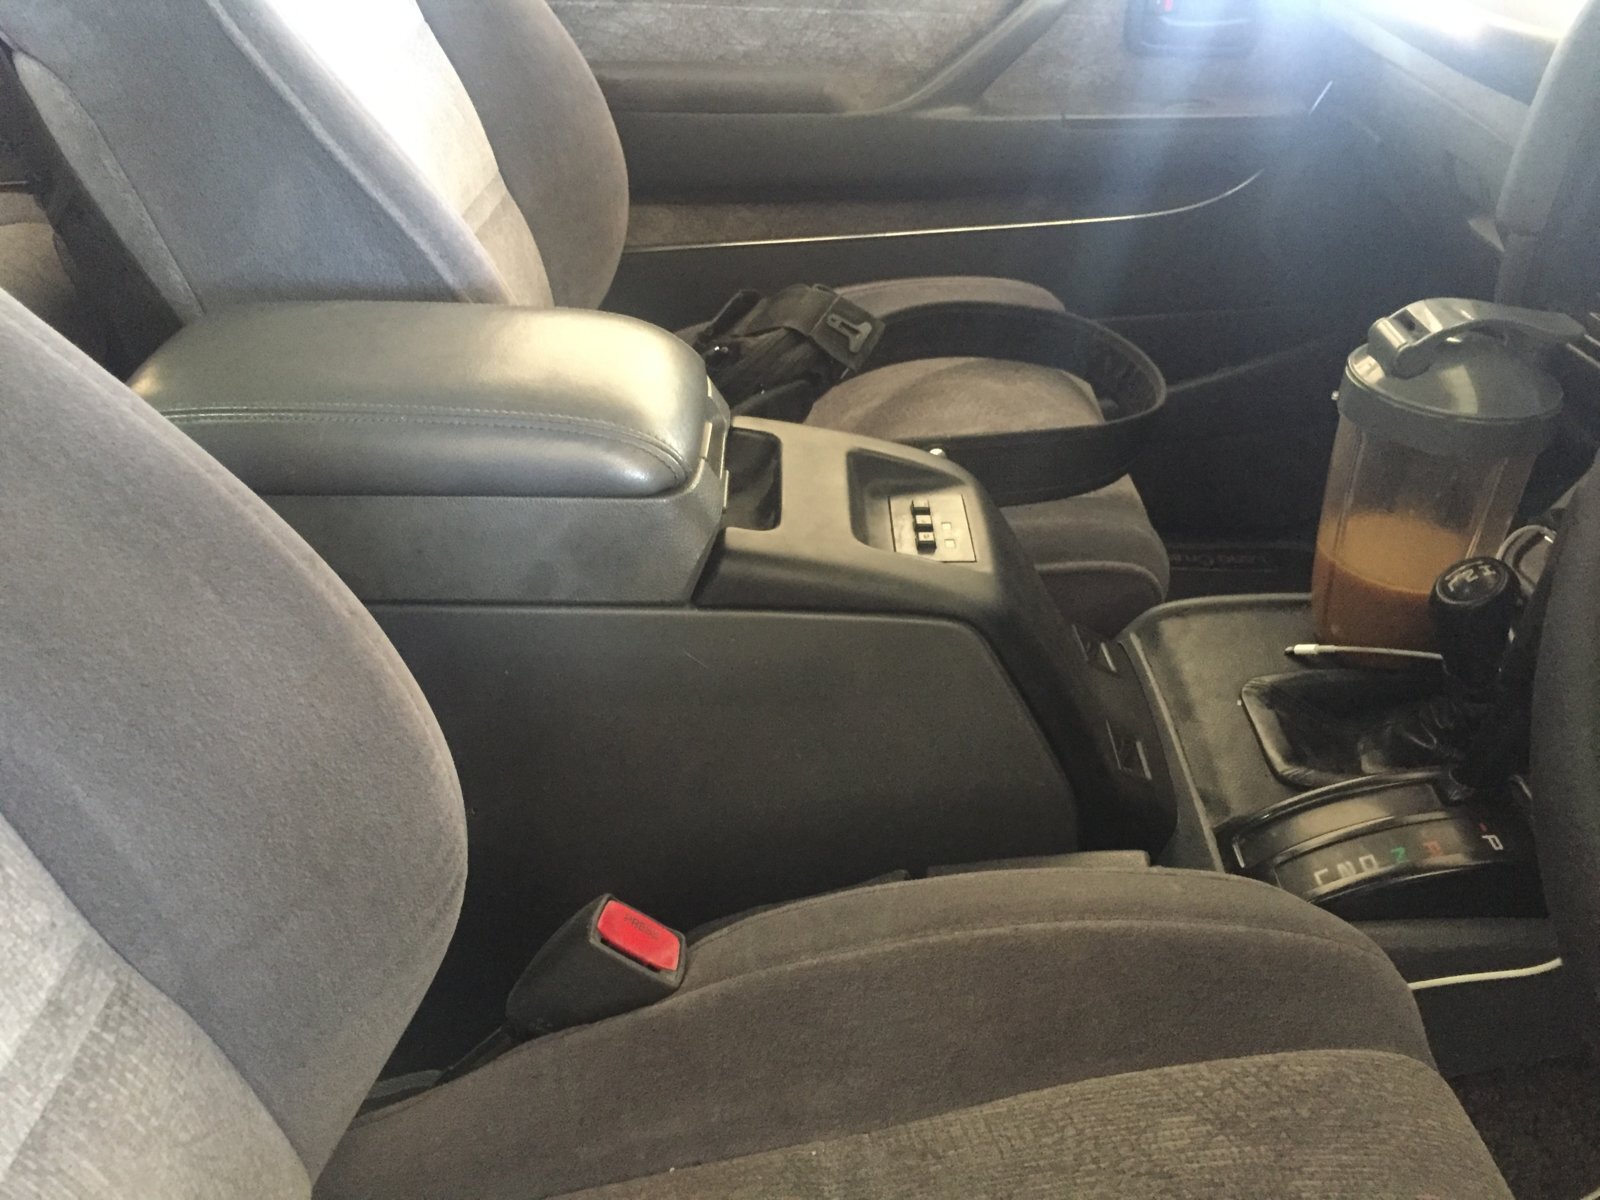
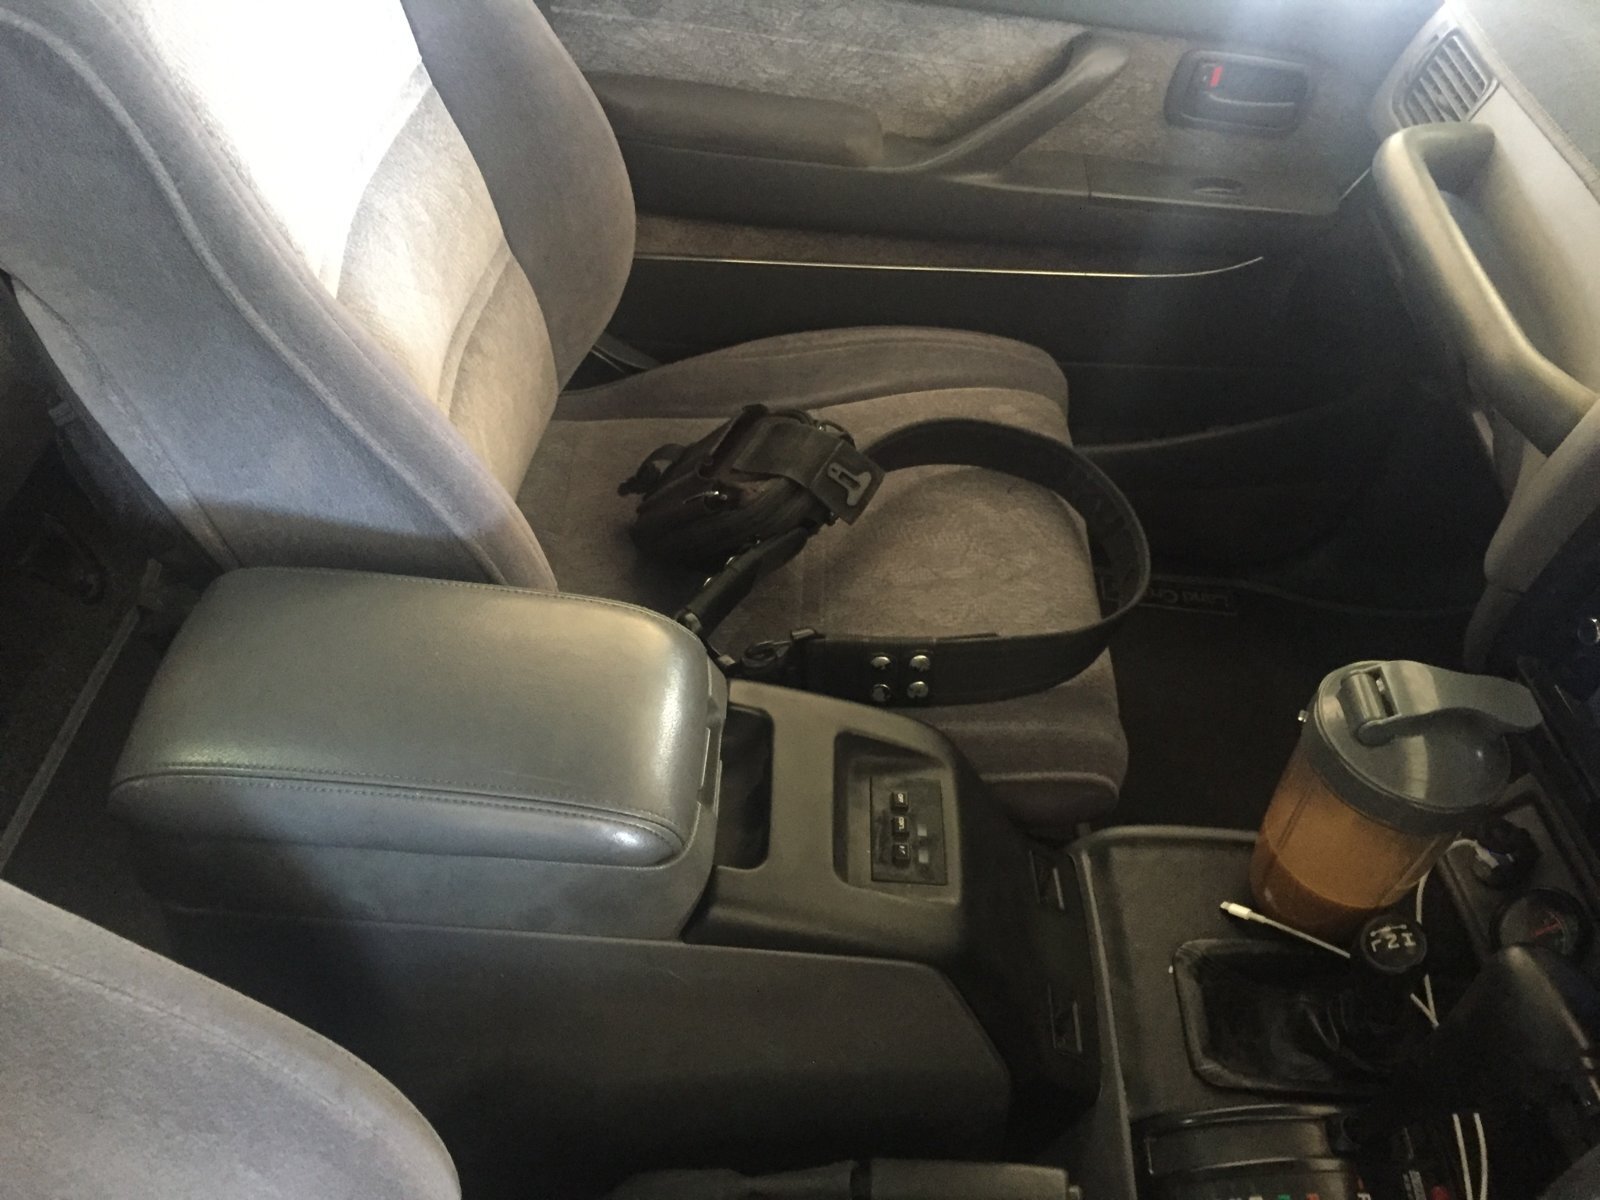
Connected to the existing electrical plug and tested to have power. Just need to fit the cup holder on the side and next week work on the pipes on the underside. That’s phase 2 lol

Got to say I’m please with the new console being higher and better supportive whilst driving. I did have the front sprayed satin black as it was quite scratched up prior. Kinda blends in with the gear stand.

16AB192A-A176-41A9-B0FB-F7A458B9FFA1.jpeg 6B12A713-7287-4509-9866-098023E361AF.jpeg
 
Last edited:
That’s pretty neat Dervis... :lol:

So what’s with the pipes you speak of, are they simple drain pipes, or does it somehow plumb into the A/C system?
 
Clive there’s quite a lot of pipes all factory spec out of another 80 series.
They should connect and plumb in with bolts to the existing AC system just not figured out where and to what as yet.

From what I’ve seen they are similar to the engine bay ones for the A/C system with a good example being the ones on the right hand side of the engine bay bolted to the firewall.

Like I said at the beginning Clive there’s been no other write up to see what is what from anywhere I’ve searched even on IH8MUD.

This is one of the reasons I’ve choosen to do a write up.

Thanks
 
Last edited:
Good work dervis. It will be nice to see them pipes where they belong...:icon-wink:
 
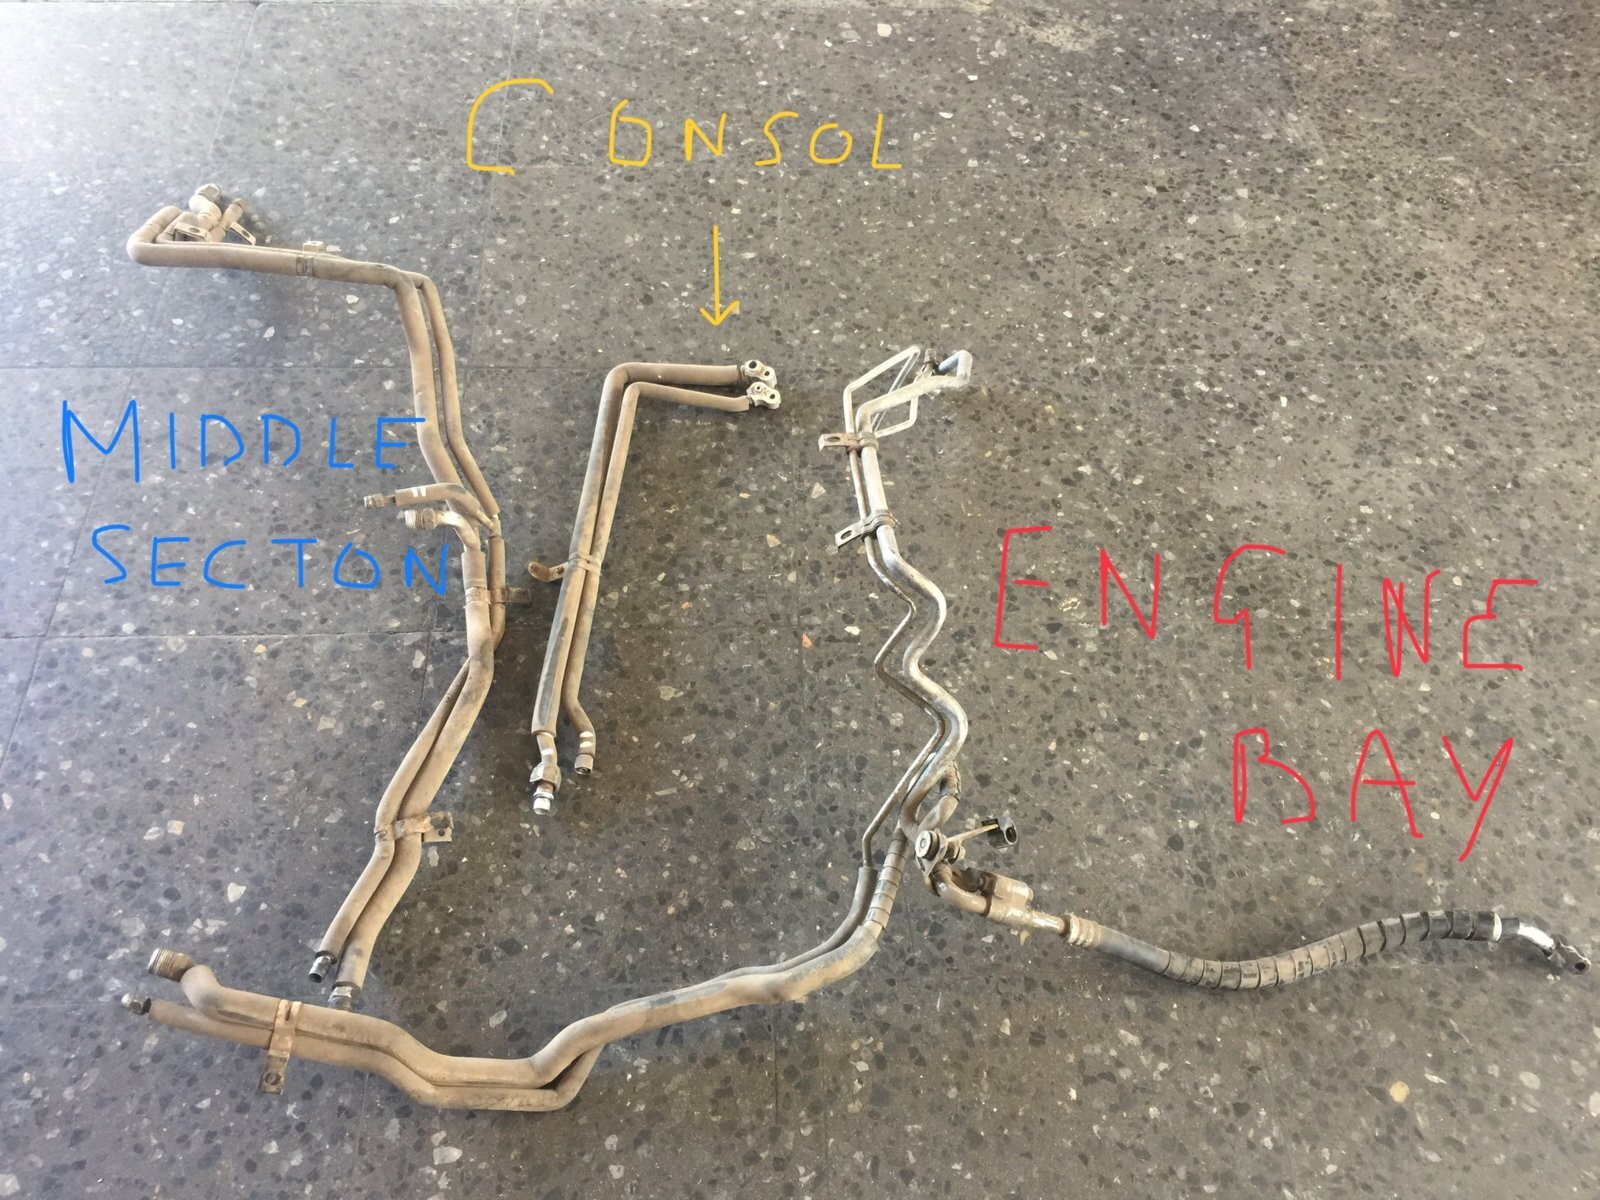
Guys today was a day in the garage again having dived into working out the A/C pipes. Kinda like spaghetti junction I know lol.

Anyways stated with the obvious being the small L shape pipe being the attachment to the underside fridge console itself.

The middle section was hard to figure out so had to take the side exhaust off to free up space. This still didn't help diagnose the exact fitting point and so left that to start on the engine bay.

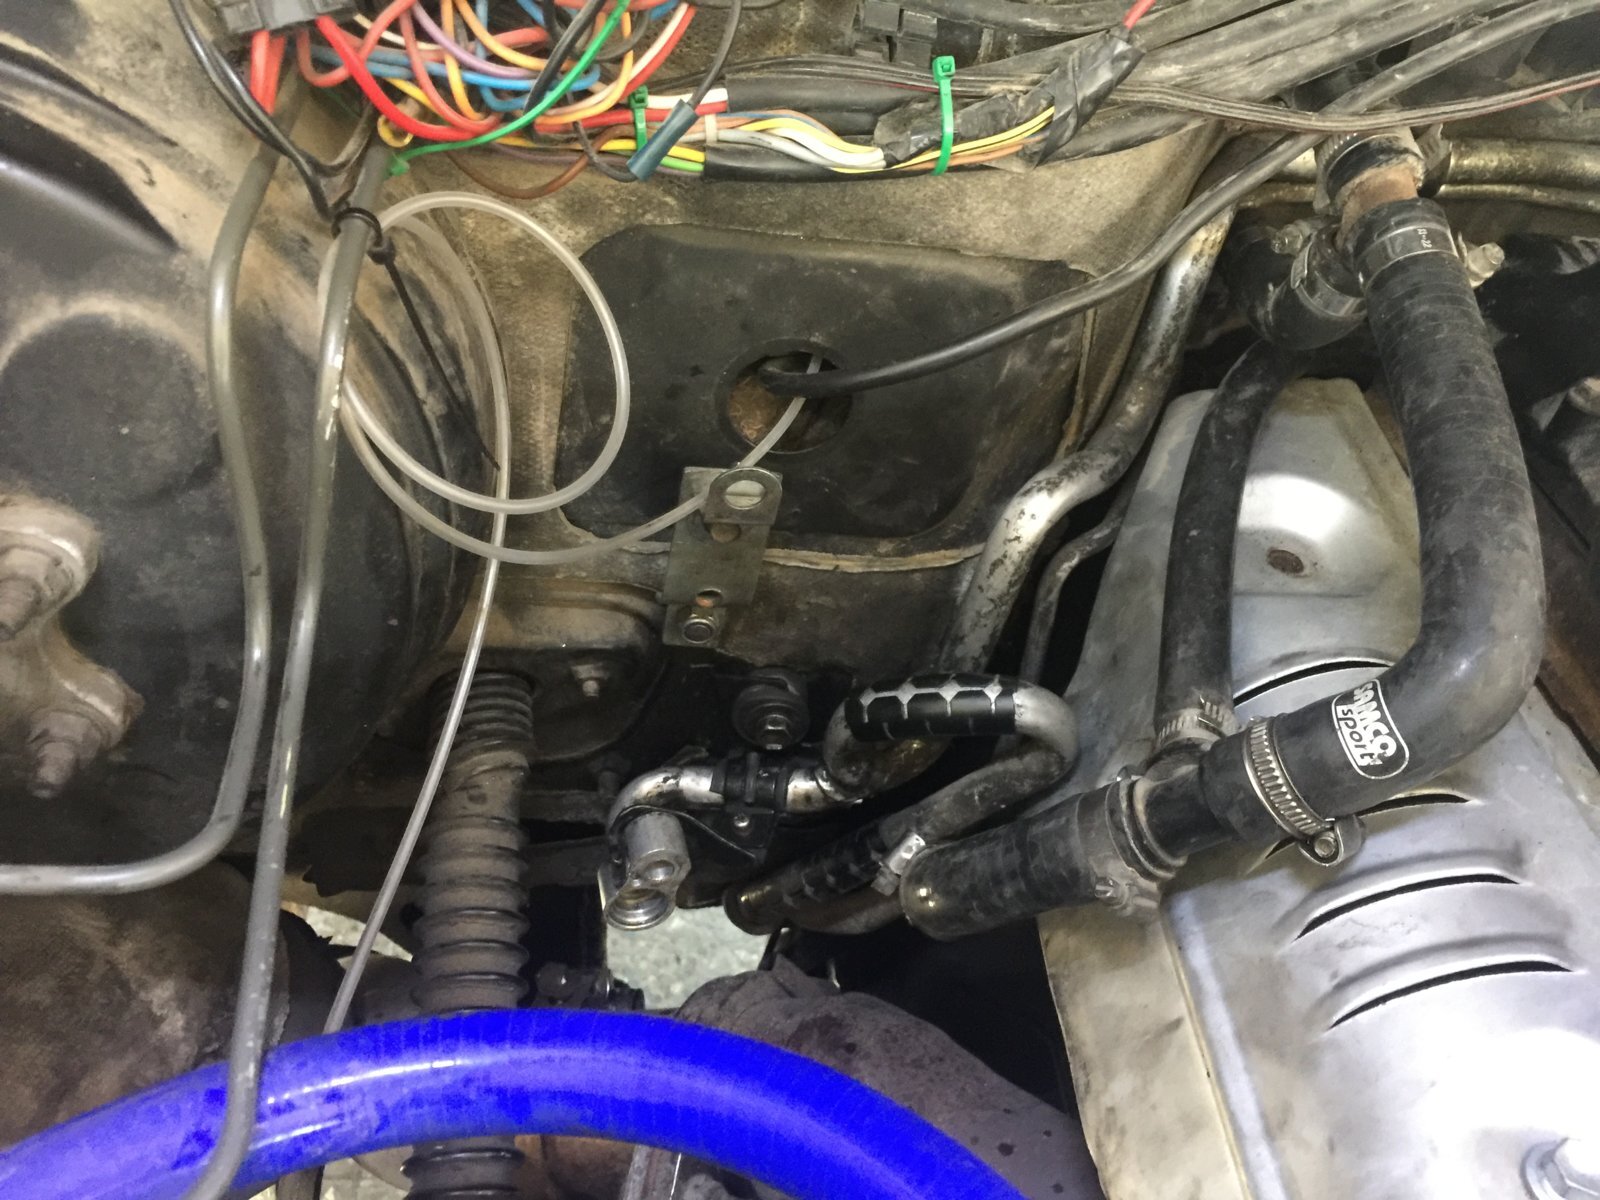
First step start undoing the top mount intercooler and piping.

Secondly undid the antifreeze pipes at the rear top of the bulk head with also the wire cord for the matrix heater.

Thirdly took the manifold heat shield off to free up space to maneuver easier.

Forth was to let the gas out.

Firth was to undo the large top A/C connection on the right side of the engine bay. Then the middle clips.

Lastly the screw holding the piping on the right near manifold whilst also undoing the pipe to the compressor.

BC07815C-6E40-412A-BB17-5131D1BD501B.jpeg
 
Last edited:
Connected to the existing electrical plug and tested to have power. Just need to fit the cup holder on the side and next week work on the pipes on the underside. That’s phase 2 lol

Got to say I’m please with the new console being higher and better supportive whilst driving. I did have the front sprayed satin black as it was quite scrated up prior. Kinda blends in with the gear stand.

View attachment 146466 View attachment 146467
Hi Dervis
The leather armrest adds a bit of class .
 
After taking the old single A/C off preceded to fit the newer double piping to the same locations in the engine bay fire wall. This has a smaller high pressure pipe in addiction the the bigger low pressure pipe that is being replaced.

Also the newer pipe has both pipes extending down the exhaust piping to where it was meets the middle section.

Was hard to take pictures being all greased up today but will try to take pictures more tommorrow whilst it hopefully comes together in finishing.
 
Last edited:
Hi Dervis
The leather armrest adds a bit of class .

Byron J a member here thankfully gave me the top storage compartment with the leather armrest. Thought of changing it over with the one from the previous console but rather liked it more Tony.

Thanks
 
Byron J a member here thankfully gave me the top storage compartment with the leather armrest. Thought of changing it over with the one from the previous console but rather liked it more Tony.

Thanks
Hi Dervis It could be from the Lexus version of the same car (truck) but defo looks better , I have the leather version on mine and it makes for a more upmarket interior , much better than just a plastic vinyl lid .
 
I'm liking this Dervis, hats off to you for your perseverance, I'd have bagged the pipes and bits up and taken it to someone who pretends to know what theyre doing, by now.

Watching with interest...:thumbup:

PS I like the armrest too, I've just got the plastic tray lid.
 
Today guys was a day of fiddling around having not accomplished to much on paper due to stumbling blocks and working out the adaptations with the pipes.

Firstly tightened the pipes from the over hang down the exhaust side to the middle section and then the console pipes. These were a little tiresome as I had to bend and stretch them to fit. Had a little help from the mechanic and this stage was finished so I put the exhaust back with on the rear end pipes being open. This has to be capped of more on that later.

Secondly refitted pipes for the matrix and worked back to the manifold. The space was very tight so much so had to adapt and bend the pipes to both accommodate he pipes, manifold and the fitting for the A/C pipe leading to the compressor. This took a while not being straightforward swap.

It’s work noting that variations of parts and years make things like this. Overall preservence pays off in getting in right.

E7D246F1-8729-4238-9179-BDCC7F7A69DE.jpeg
 
Last edited:
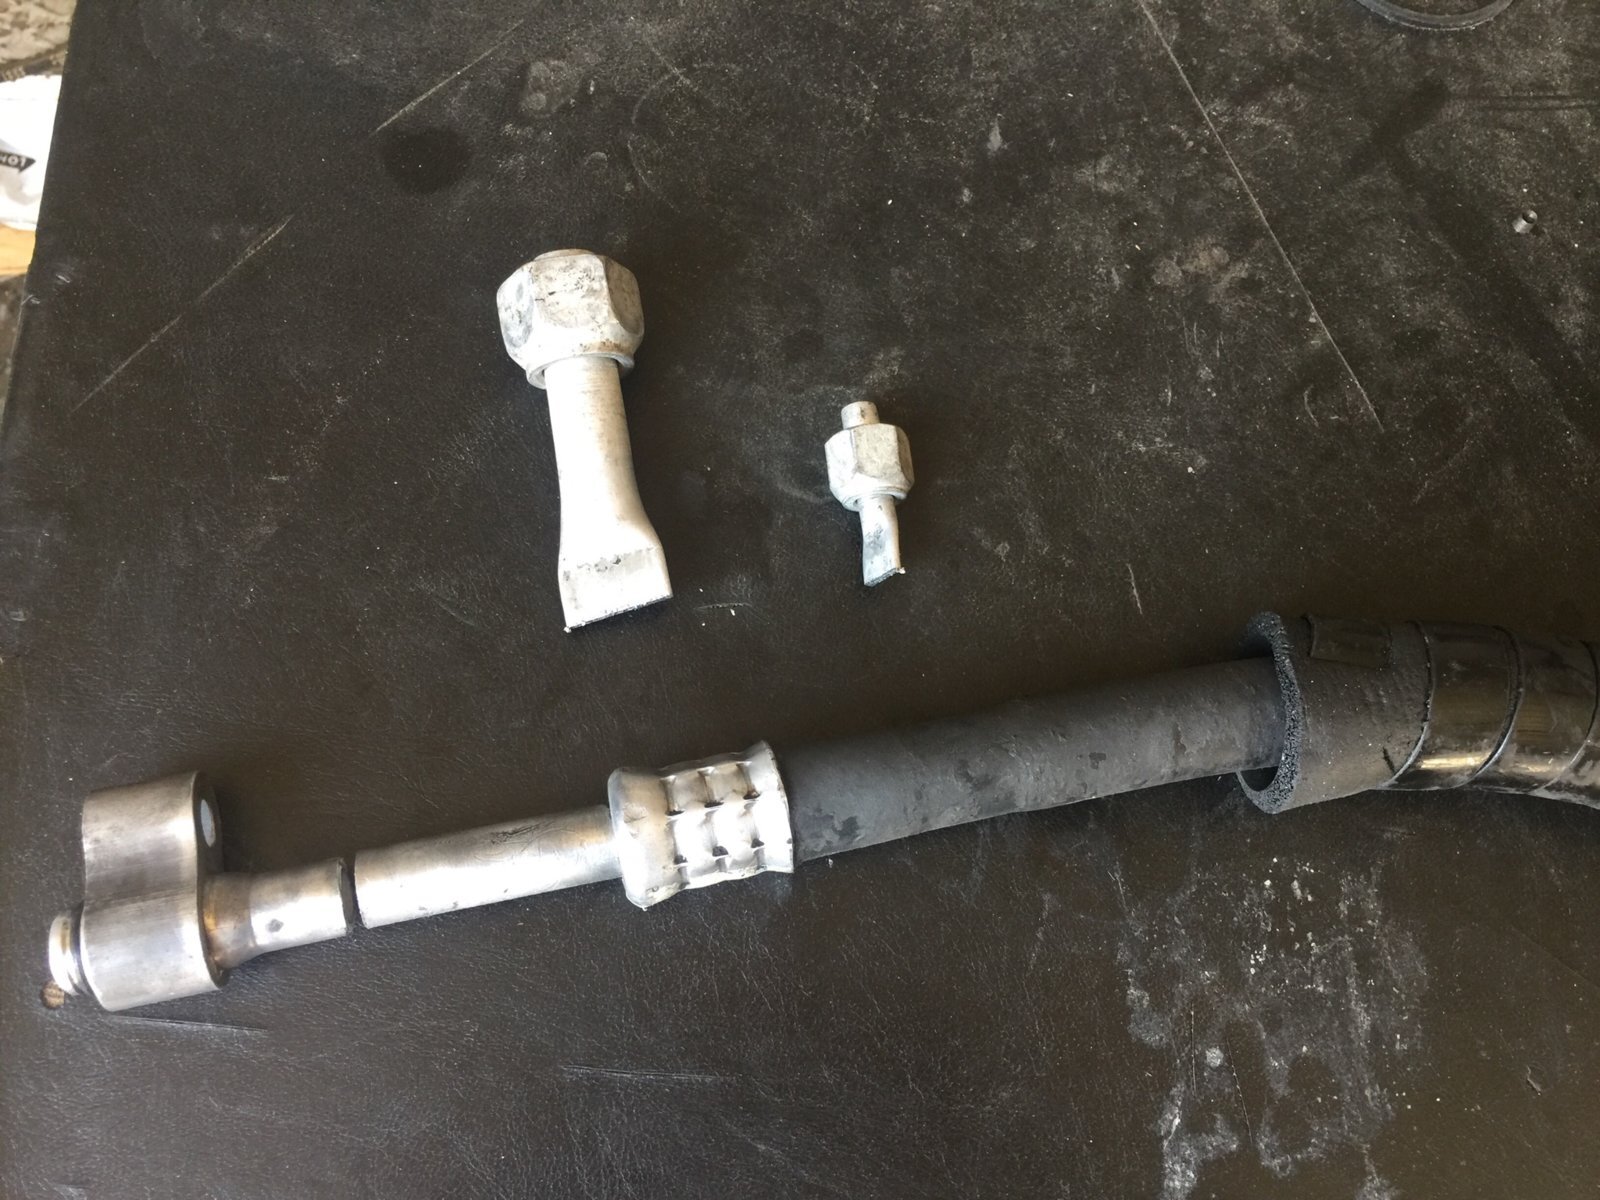
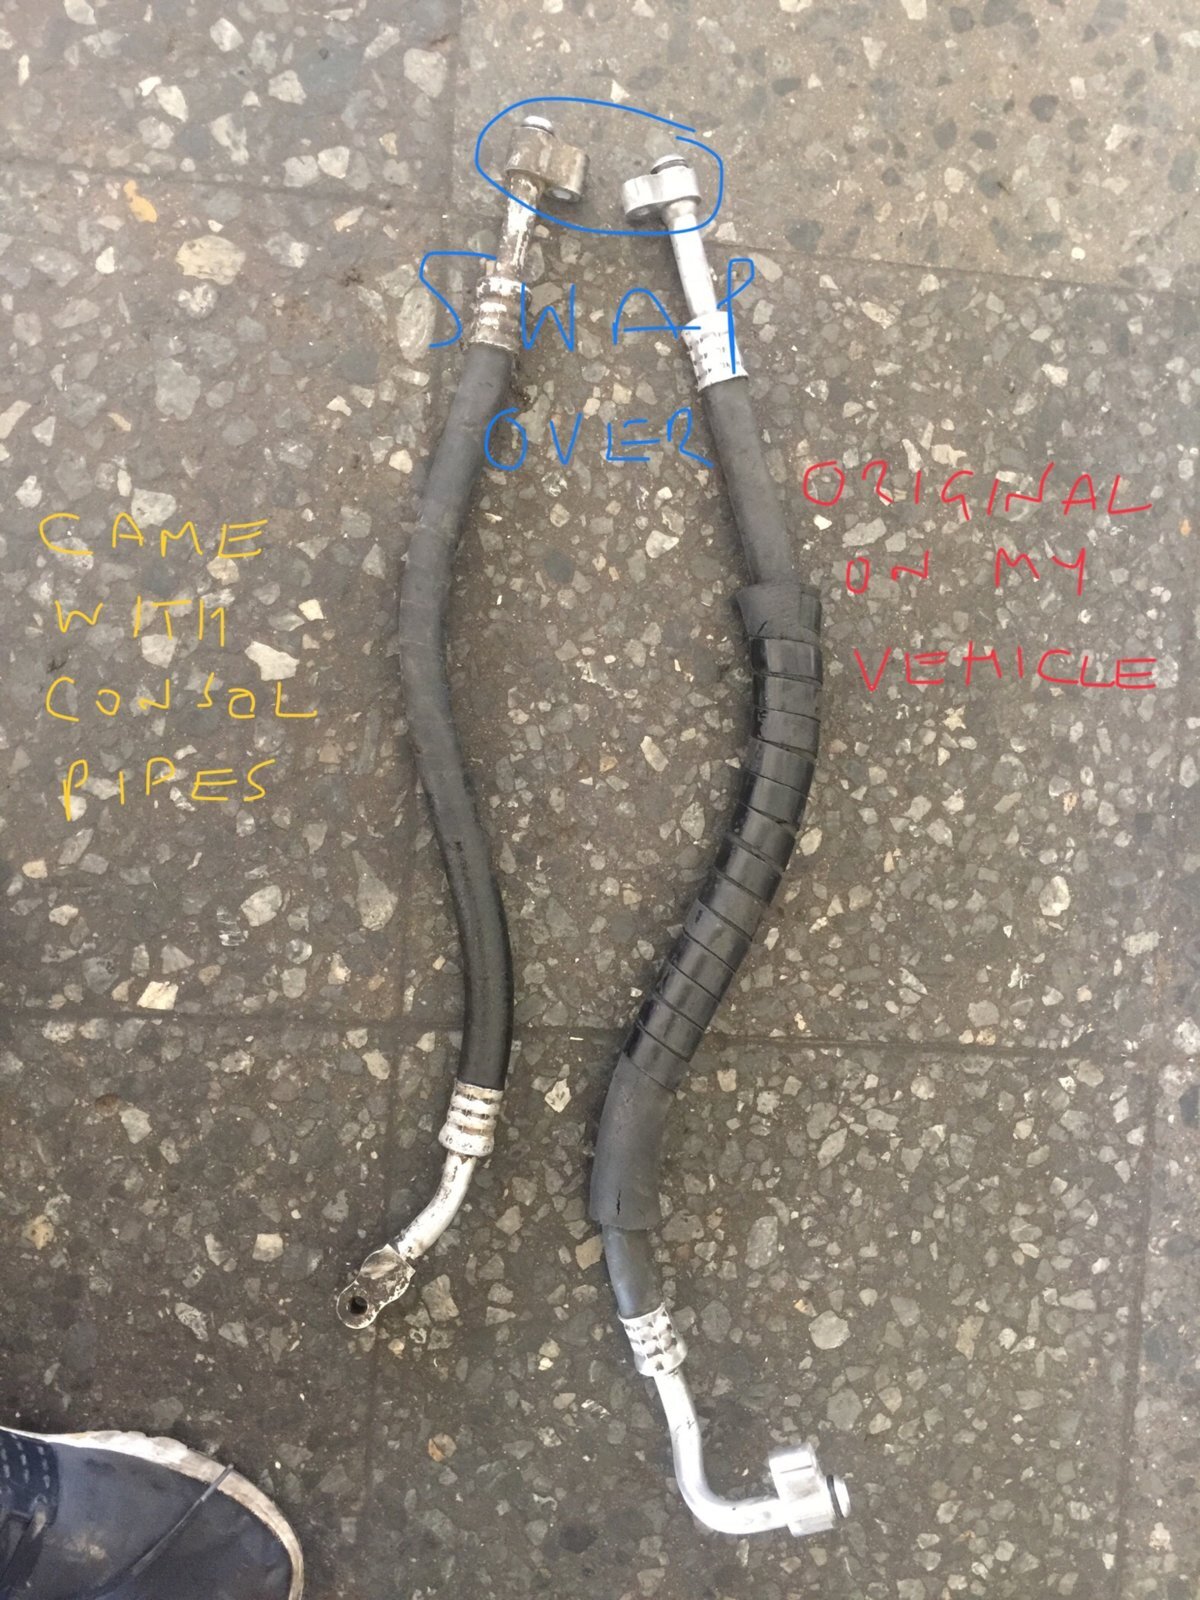
Second issue was that my A/C pipe ending to the bulk head fitting didn’t fit being too large of a head and the one that it came with didn’t fit being also short with the compressor fitting so had to improvise and so cut them both and gonna weild the new part tommorrow.

Also in cutting this gave myself a couple of cm more length to play with. This shown in the first picture. Also seen is the extra black cut off for the rest end of the pipes at the bottom end of the side steps. This would normally extend to the extra A/C pipes for the rear cargo and middle section of the vehicle as a JDM option.

02032DE2-A414-4EFD-A687-5A3754F6AF1B.jpeg 30F64298-3D0B-4085-9F24-56EFDBCC148A.jpeg
 
Last edited:
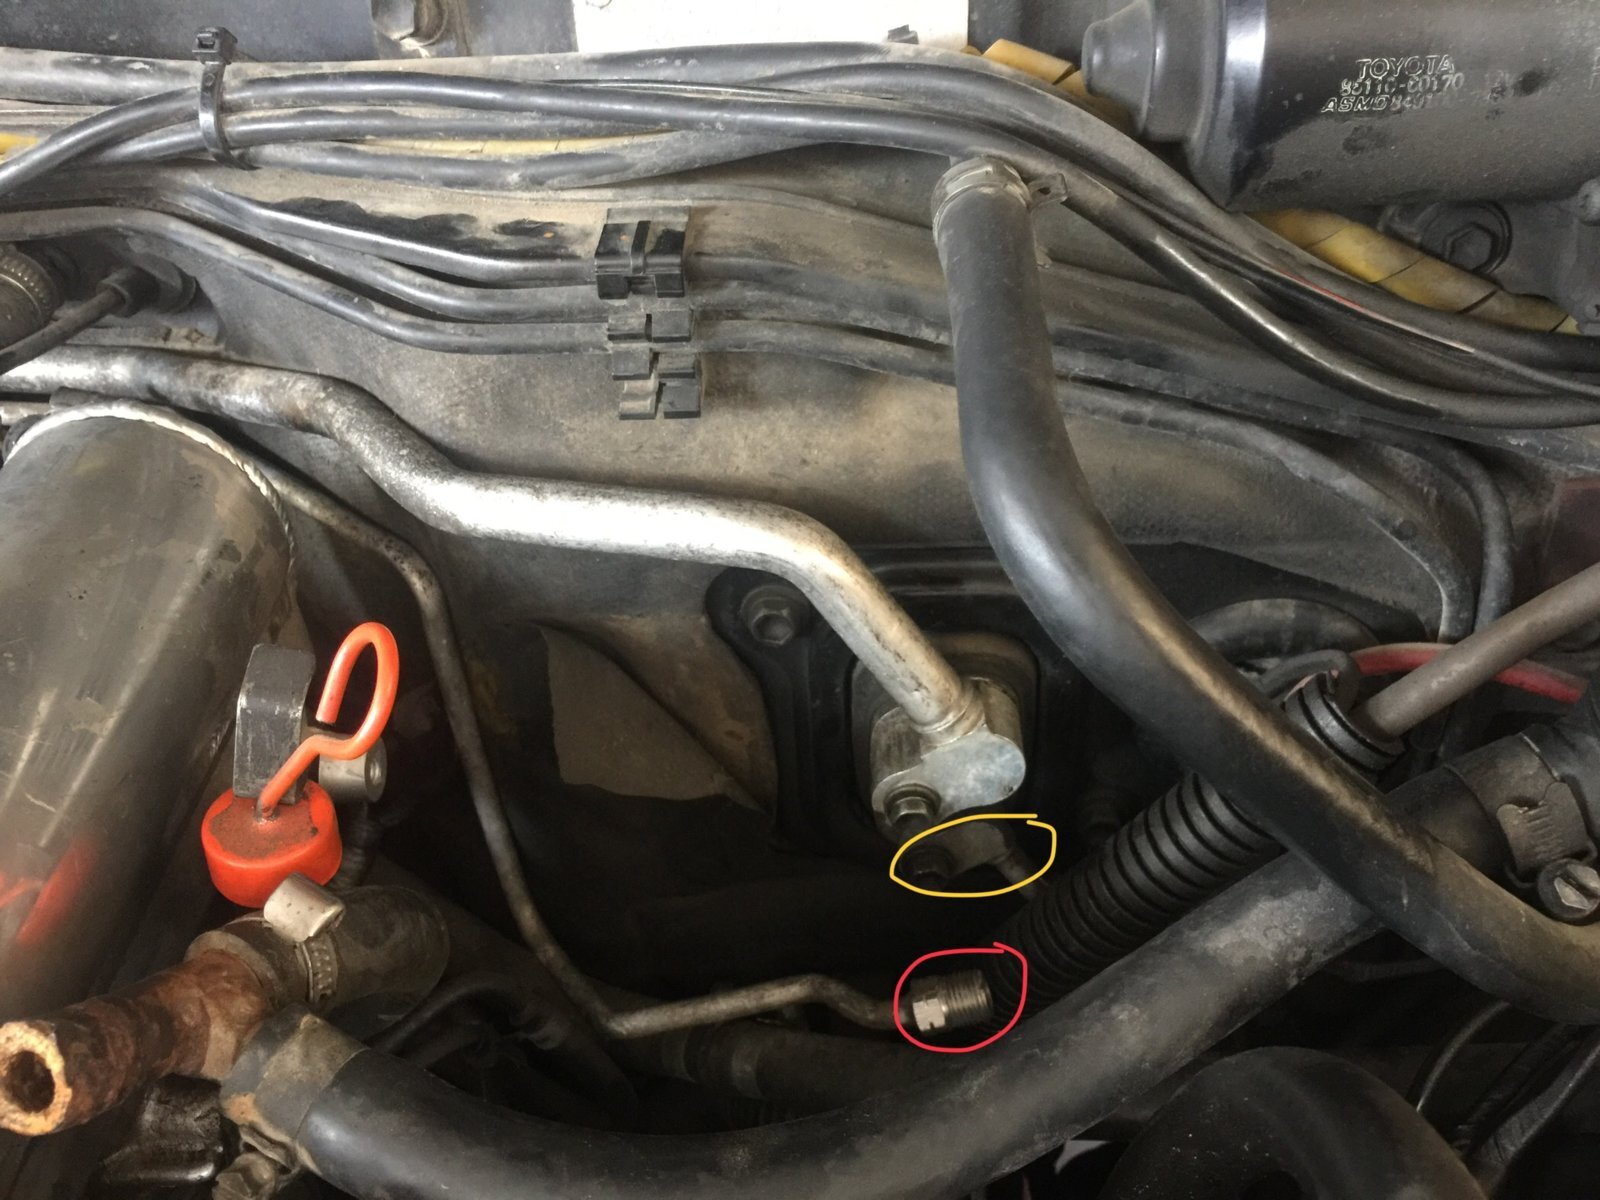
The next job was to undo the high compression pipe labeled in yellow round to the right hand side screw fitting. This was markrd out with the red labeled fitting as to making an extra pipe to connect both together as a T fitting.

These are all that stand in the way now to finishing off the piping and getting the rest of the engine bay out back together readying to regas and test.

Will try and do a video one all done going through the the whole process better explaining more at the end guys.

751A492D-8F8C-4648-99DB-5A7F3DE6F885.jpeg
 
Last edited:
Back
Top