Don't like the adverts?  Click here to remove them

Frankenstein 10PA 17C replaces seized 10PA 15L compressor.

That is the number shown for my chassis on toyodiy and also what appears on my toyo receipt dated July 2015.

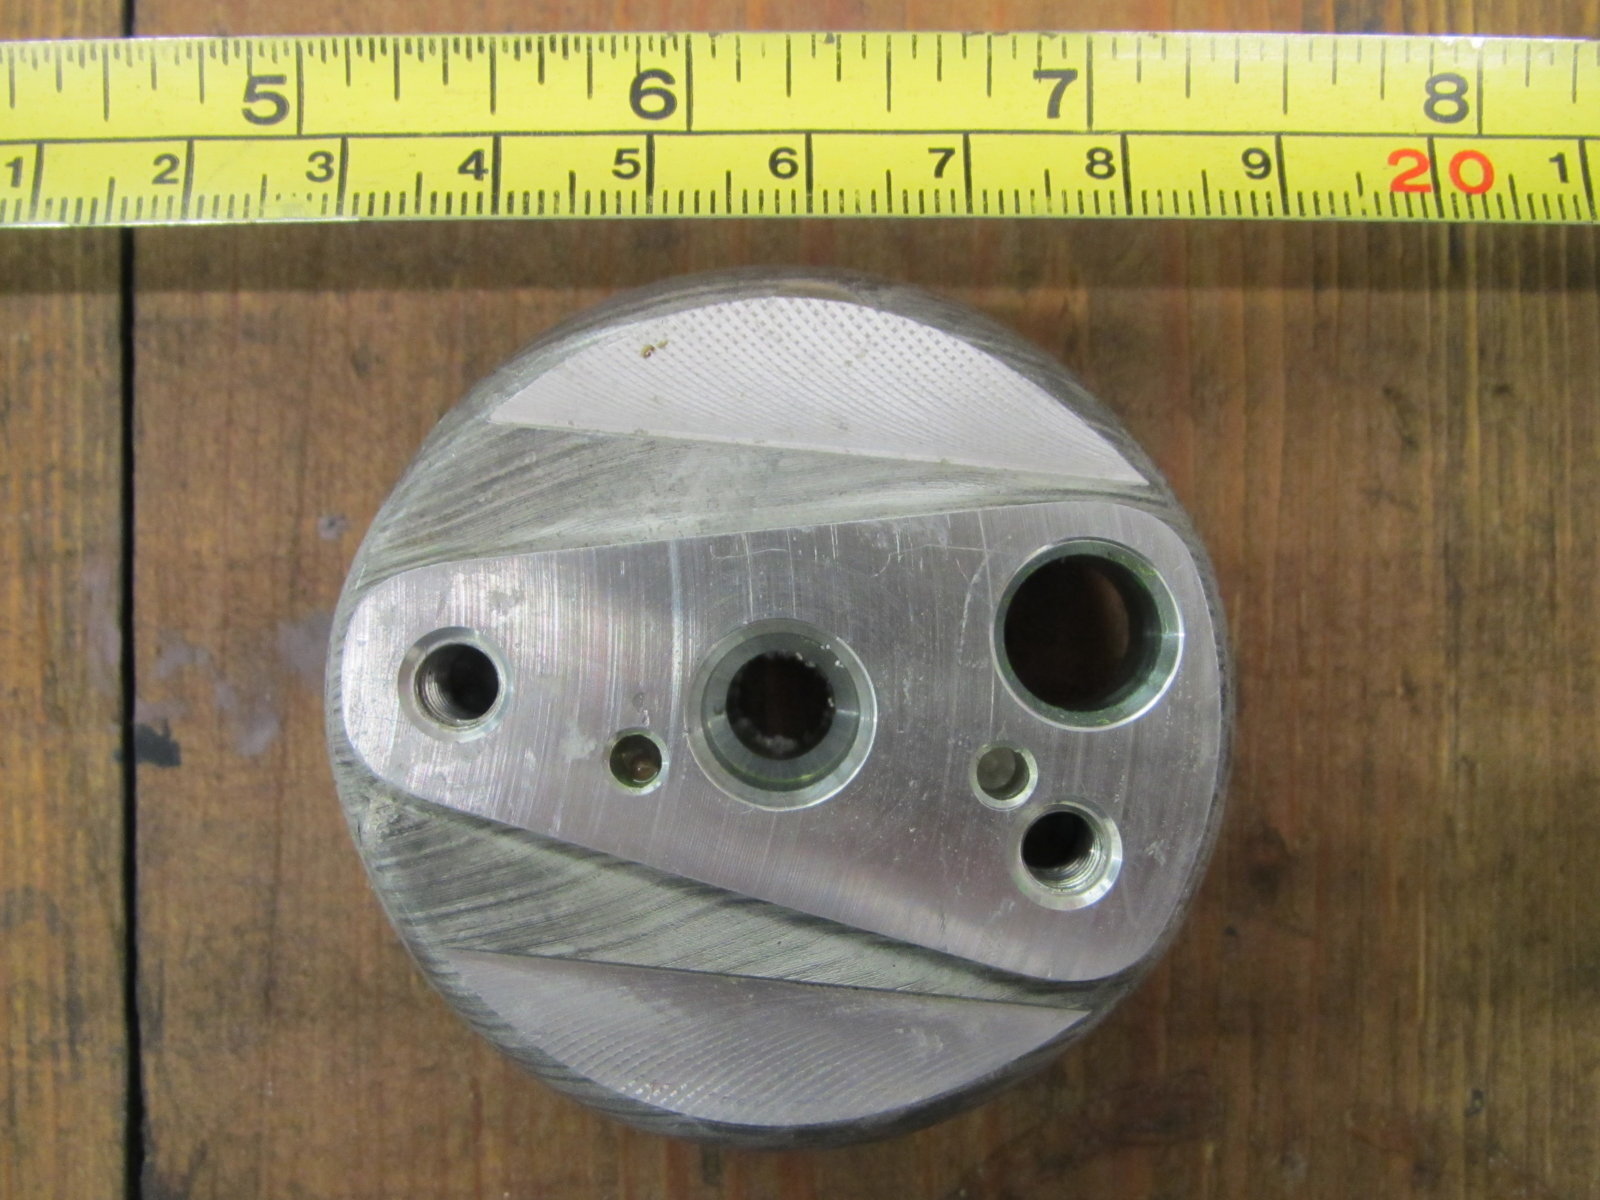
I can send you a scaled technical drawing of the top if you like.

Toyo cost was £45.29 + VAT. This reflects 10% my dealer gave me on this item.

I had trouble getting the right drier through substitute parts before. The first drier fitted OK but was 1 1/2 times longer than the original LOL. It stuck out below the bumper and looked a bit DIY. Also it was not protected and had I ventured off the road I could have hit it.

The drawing could be useful Frank as the tops are different and I now recognise what is different. I think I'm homing in on it.
 
IMG_1153.JPG
IMG_1153.JPG
IMG_1153.JPG
Sorry for delay. I turned my computer on and it said "welcome to windows 10" so I've had to learn how to do the pics.

The 3 pics are identical. don't know why 3 got on there.

The scale woks really well. e.g. The centres of the small holes are 24 mm apart so you can just scale off what you want with dividers. If sharp they go through the screen though.

This is the Pt No_ we were on about.
 
Hello guys
Nice frank hope it all works fine with you just want to ask if all land cruisers come with the same 10pa 20c or is it just gulf specs only because I bought my car from Dubai and shipped it to Libya
 
No Anas, it depends on installed kit, rear AC, fridge, etc. Most have 10pa15c, some a 10pa 17L. Also, this basic number, if you bought the same for instance, doesn't give you the exact same compressor. I believe the internals are the same but the rest, fixing positions, clutch pulley, etc are dictated by the long number. It can be overcome as I have done earlier in this thread.
 
10PA17c and 10PA15l.

I've measured both of these internally. The 17c has a bigger volume than the 15l assuming rpm is the same. The pistons are the same but the waffle plate is at a shallower angle to the shaft which means they travel further. The stroke is therefore longer but the bore is the same. The cylinders are that much longer. I remember that the 17c is about 10% bigger than the 15l.

I have not noticed any difference in operation.

Was the pic OK SC?

Sorry Frank, yes it was, thanks for that, I've passed it on. I have a generic OE quality one coming via my pal the fridge engineer for delivery on Tuesday. They quoted a 31-1006 from Auto Air of Gloucester but they won't deal retail.
 
Don't like the adverts?  Click here to remove them
Got the receiver drier delivered today ! So my pal brought it round, I fitted it, around 20mm shorter than the original and painted black, otherwise fitted perfectly.

It vac'd out well and is now charged with refrigerant and working well.

Showed up no leaks on my mate's brand new leak detector.

image.jpeg


Nice and cold, happy days :)
 
Happy to report that after 24hrs and 3hrs of use, all is well with the AC. :) Nice and cold, even had to turn the temperature up as its not overly hot here at the moment.
 
If I may i am doing the exact same thing replacing my 15 with a 17 having stripped the nose of the 15.

I have all the bits and am ready to install but have one question. It would seem form youtube etc that guys use mineral oil to install is this correct and do i need to keep an eye on the amount i use as they dont seem too. They use it on everything but the plates both front and back should one put a light coating on them?

Lastly i take it 8oz is the correct amount of pag to use after install?
 
Just use the pag oil for assembly on everything. You cant go wrong then. 8 ounces of pag is OK if you just have front A/C. Just pour it into the top of the pump and turn the pump by hand a few times with the pipes connected so it does not lock up when suddenly started. That snap ring on the nose....I clipped it on then closed up the eyes as tight as I could with pliers so it wedged firmly in.
 
Thanks Frank, did you put a smear of PAG on the plates front and back when assembling?

Will keep an eye on that front snap ring
 
Yes. Also make sure there is no corrosion on the ally bodies where those large o rings go and oil them too. My new o rings were smaller cross section so I used the old ones. Make sure there is no corrosion on the pump where the ally washers go on the 5 bolt heads. Polish the spindle where the main seal rubs. I made sure my spindle spun freely just by itself with the 5 bolts done up to make sure there was no preload, also no backlash, but I did make mine from bits and pieces.

Very interesting. Keep in touch.
 
Thanks Frank all back together apart from the clutch as i cant seem to get the gap right. I cant get a feeler gauge in there so its a bit of trial and error. Will bolt it all up this weekend and head off to get it tested and hopefully refilled.
 
Bit of an update on this one after 16 months.

During this summer (well, what was meant to be summer) I started to notice some rusty dust around the General area of the AC compressor and a bit of a swooshing noise. Suspecting the idler pulley to be on its way out, I ordered a new bearing. When I came to pull it off, not bad really, not at all grumbly, just a bit wiggly. So I left it as it was, still wondering what the rust source was. After going to Romania and back, the rust was worse than ever so I phoned an AC compressor supplier (Auto Air of Gloucester) to see if they had a new clutch, thinking mine was worn and slipping. The guy (Paul) was very helpful and said it was almost certainly the coil breaking down and not holding in well enough. He also gave the specs for the coil, 2.8 to 4.4 ohms and the air gap 0.4 to 0.8mm.

So today I stripped the clutch off the nose of the compressor and, sure enough, it looked like the coil had got hot. But there had been a whole lot of rubbing going on. I removed the circlip holding the coil and there it was.

IMG_2543.JPG


The peg holding the coil from turning had worn into the side of its slot and looked like it had pushed the coil into the pulley, causing it to wear, heat up, deposit plastic on the inside of the pulley and (drum roll please) produce the rusty dust. Hooray! :banana-angel:

IMG_2547.JPG


The even better bit is, I saved the new coil from the new compressor, but what to do about the worn peg slot? More good news, the slot was deeper than the pressed peg on the coil so I decided to extend the peg by tapping it to m5 and inserting a stainless cap head screw, suitably turned down to fit in my improvised lathe.

IMG_2552.JPG


IMG_2548.JPG


Once this was fitted, I filed it down so it didn't bottom out in the slot.

IMG_2551.JPG


And reassembled the coil and clutch back onto the compressor.

IMG_2554.JPG


IMG_2555.JPG


Got it all back together, used a socket and piece of ally to seat the pulley bearing fully home as I had to do this with the compressor wedged against the bracket, still connected to the pipework. Bolted it back on then noticed the pulley was rubbing again. :angry-screaming: The coil was moving about and allowing the pulley to rub.

I was tempted to leave it for another day but decided to pull it apart again.

IMG_2557.JPG


It turns out I'd not completely diagnosed the problem. It seems the coil was loose and had waggled back and forth wearing away the Ally at the top of the boss on the nose that it sits on. It had then dropped and made contact with the inside of the pulley and started getting picked up by the pulley. This must have been to do with the circlip being on the wrong way, which I had thought was the right way. :doh:

IMG_2558.JPG


So I cut a tiny piece of steel, coated it with grease to make it stay put, and wedged it between my newly extended peg and the bolt head at the bottom of the slot.

IMG_2562.JPG


Put the coil back on, nice and solid now sitting in the right place, and fitted the circlip the other way up with the centre pointing forwards against the nose and the outer edge against the coil plate. Nice and solid again.

IMG_2563.JPG


Reassembled, tightened everything, fitted and tensioned the belt and all was good.

IMG_2564.JPG


Cut off the connector from the old coil and soldered it to the new coil lead and covered it in heat shrink.

All working again now and, hopefully, no more rusty dust!
 
Frank, a question for you old chap. How do you get the shaft seal out of the front cover? I have poked about at it but then decided to have a go with the scrap compressor in the garage. Effectively, I just destroyed it and was no closer to getting it out. Do you drive it out from the front, or lever it out with an old screwdriver or what? I have the new seals and gaskets ready and the pump really is in excellent condition. I placed the scruffy end cover on a a sheet of W&D 1200 grit and just lapped it until it was fresh so it will seal nicely. But the shaft seal has me defeated. There are two O rings in the shaft tube too which look a devil to get to. I can destroy it getting it out of course but I don't want to score the seat at all. It wasn't leaking through the shaft btw, but it seems daft not to replace it.
 
Looking from the inside out there is a circlip holding the seal. If that is removed the seal should slide out towards you. The seal has an o ring to seal it to the cover. I remember you told me your seal was a different design to mine. A picture might help as I've come across face sealing seals over the years which is what you might have.
 
Yes I saw the circlip Frank, but the seal certainly doesn't just slide out. On my scrap one, in the end, I levered it out just so I could have a look at it. There are felt seals in there too but I'm not messing with those. Mine is the same as yours Frank, it just didn't look it as there weren't any in situ pictures. What a ridiculous price the seal is though. Just need to find one at a decent enough price but they all seem to be around the £50 mark which is just silly.
 
The felt seal is really a dust shield I think. I soaked mine in oil. The Toyota seals are genuine Denso parts which you can't get anywhere else. I got a cheaper seal from America but it was not as robust as the Denso one. I don't think it's possible to get the new seal onto the shaft without a seal spreader. The splines will tear the seal and obviously it's got to be in perfect nick. I'll send you my spreader if you need it. Works like silk.
 
Back
Top