Don't like the adverts?  Click here to remove them

Hedgehog - LC100 build thread

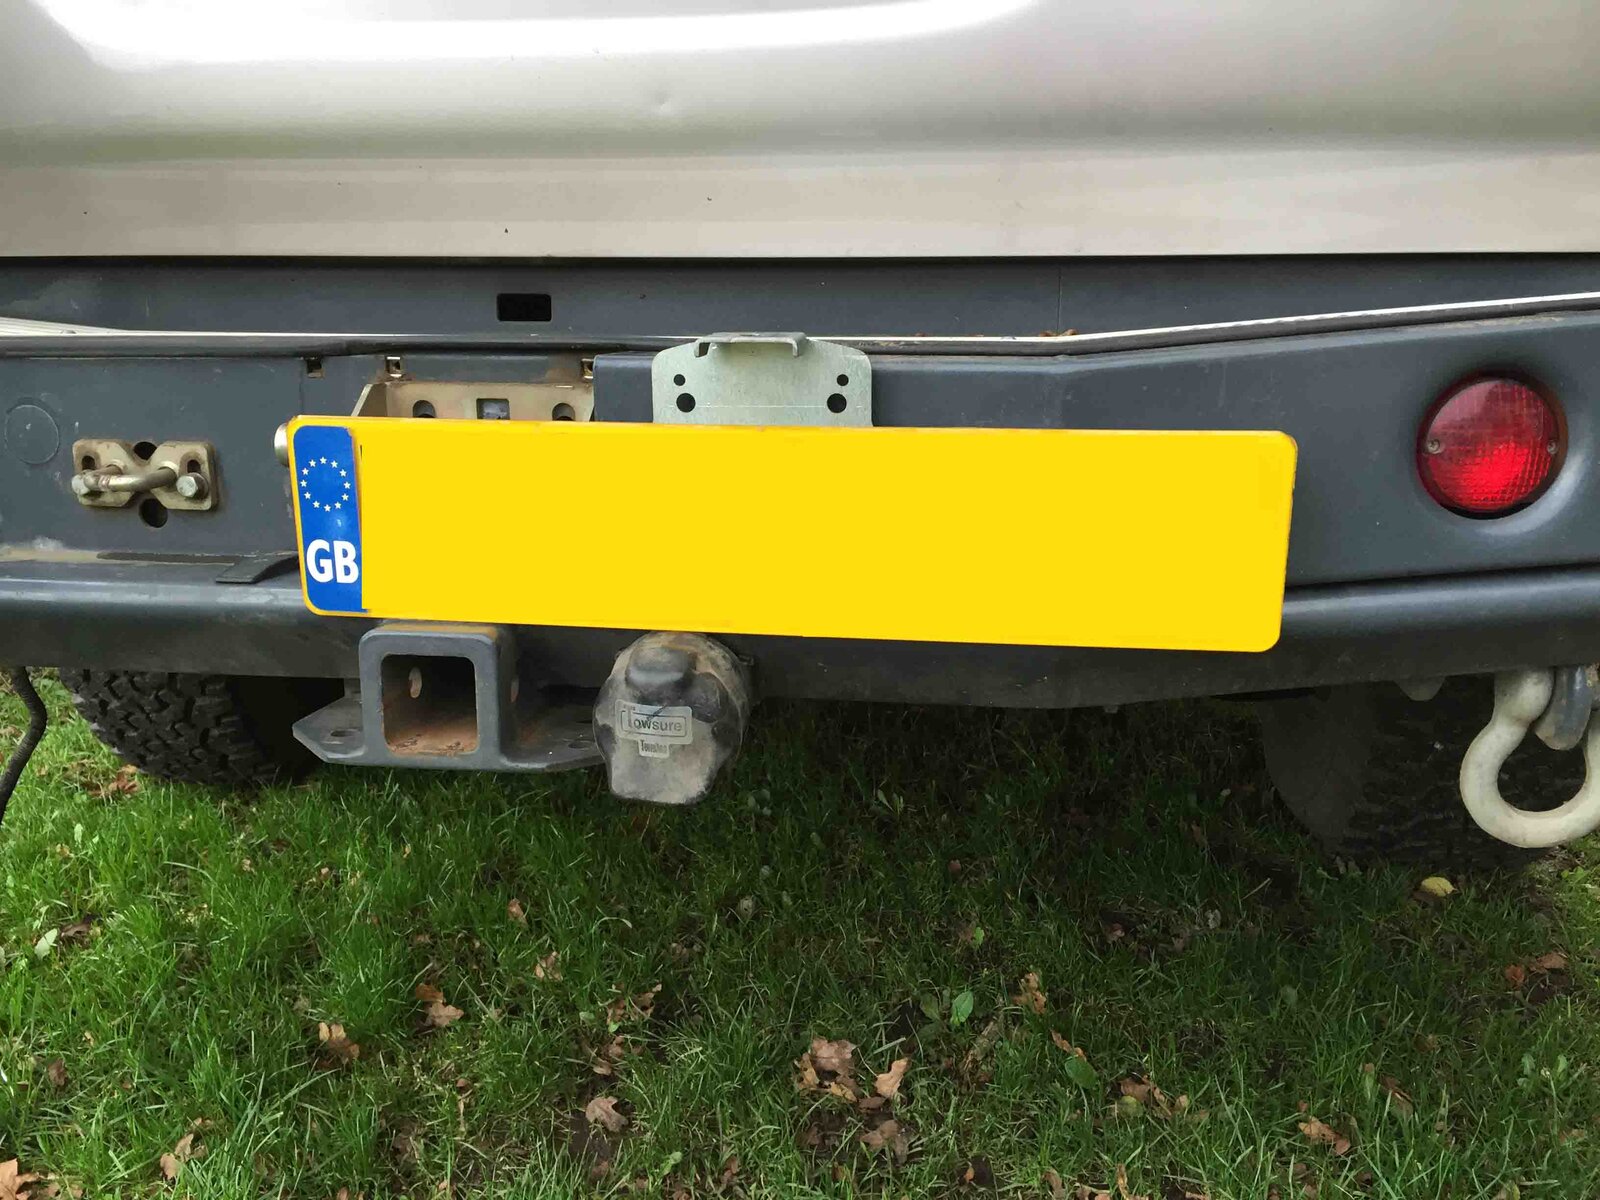
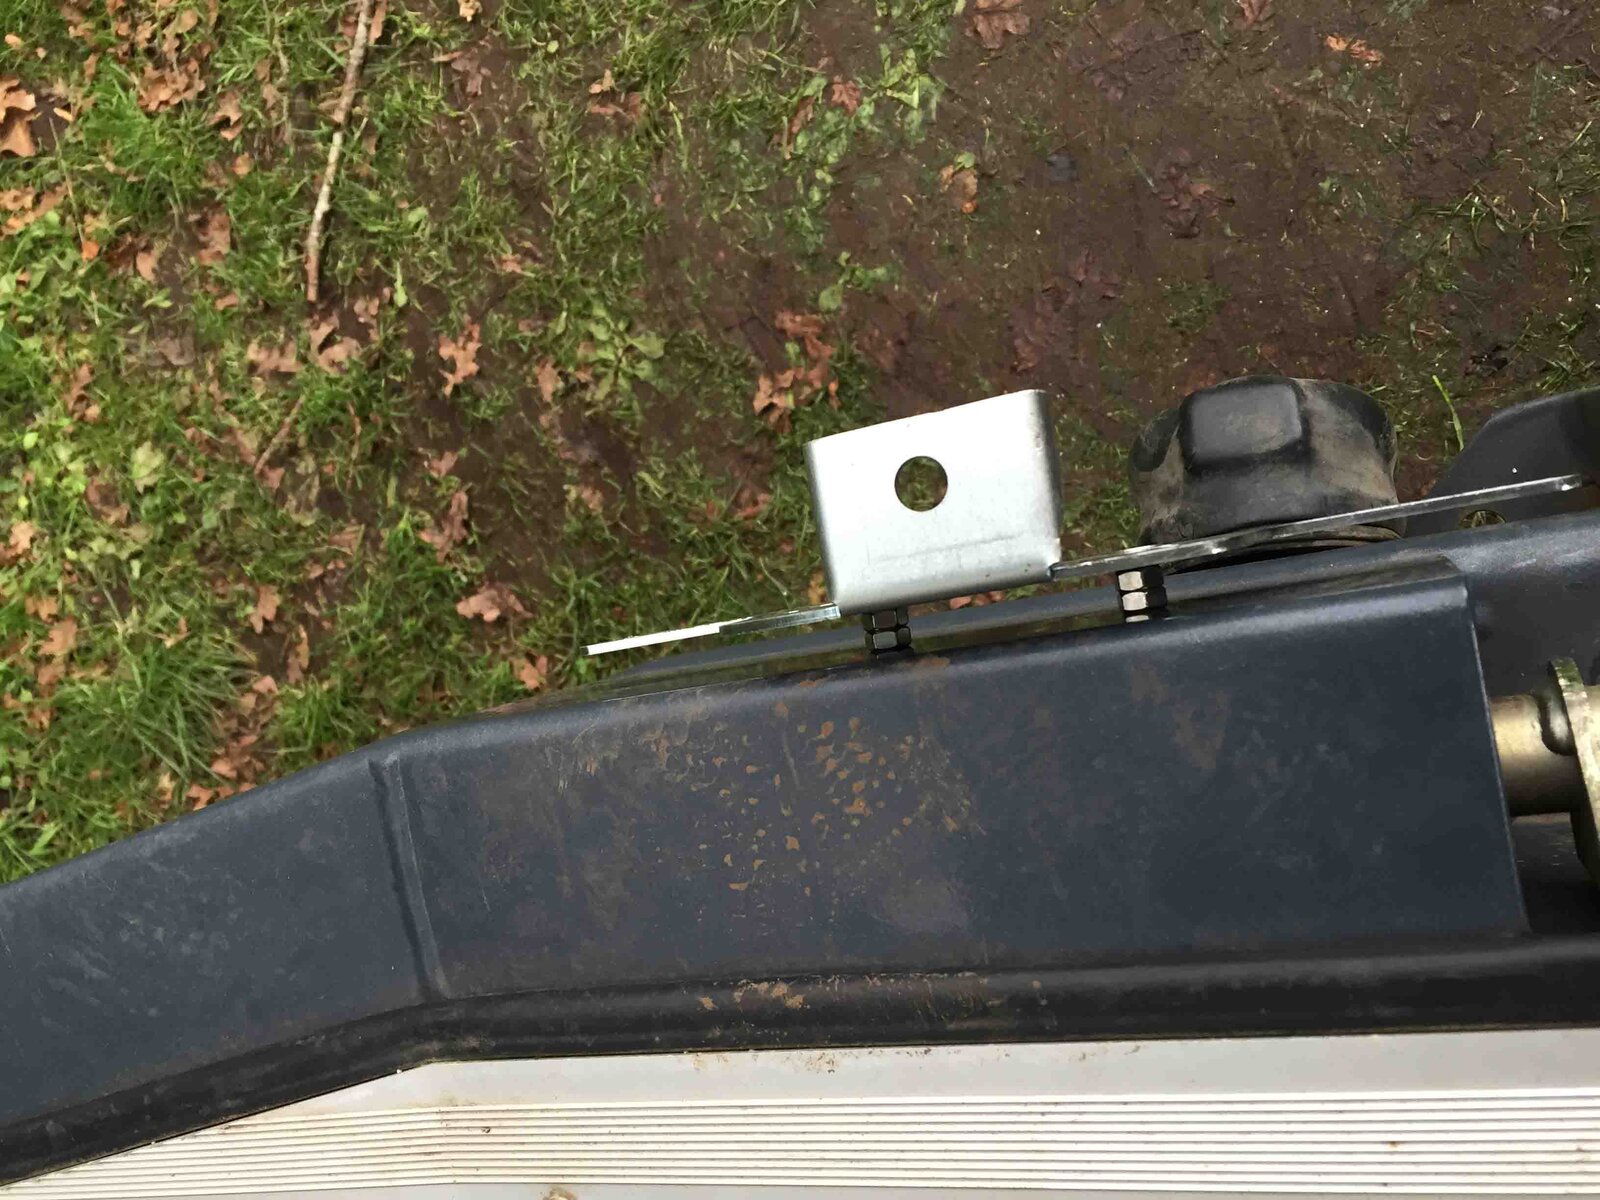
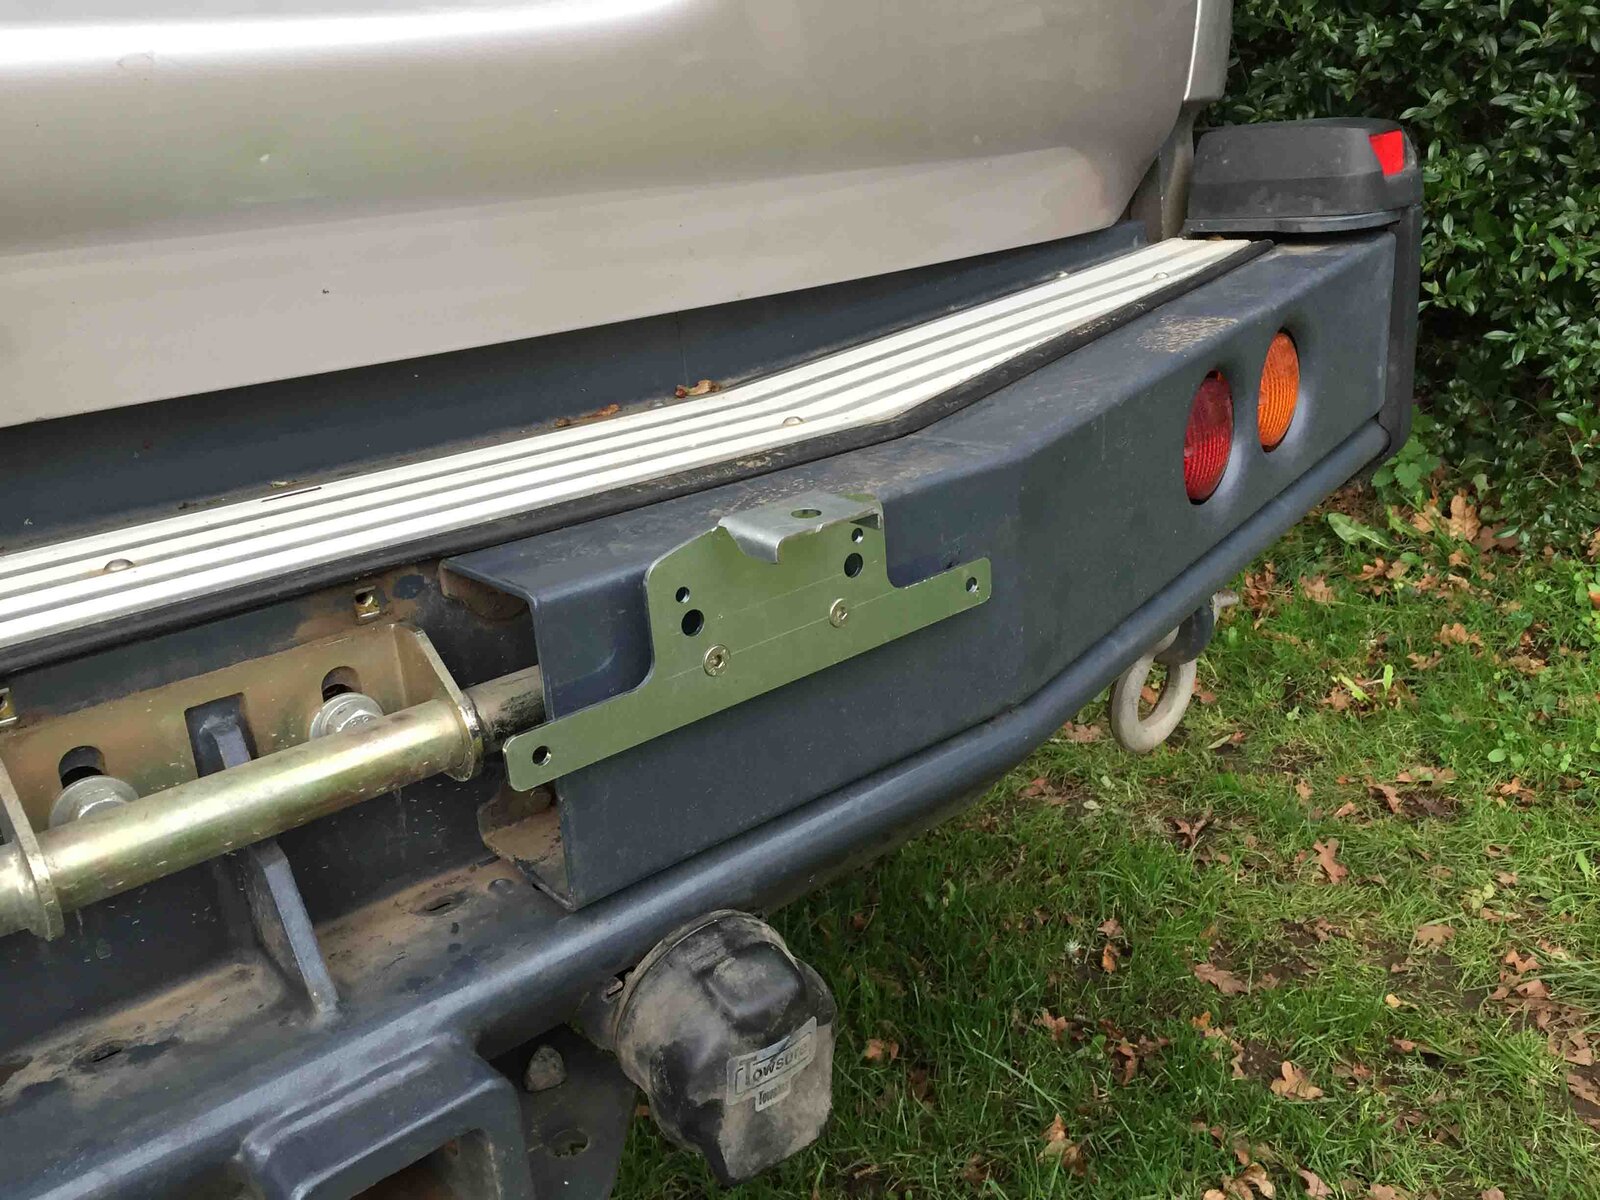
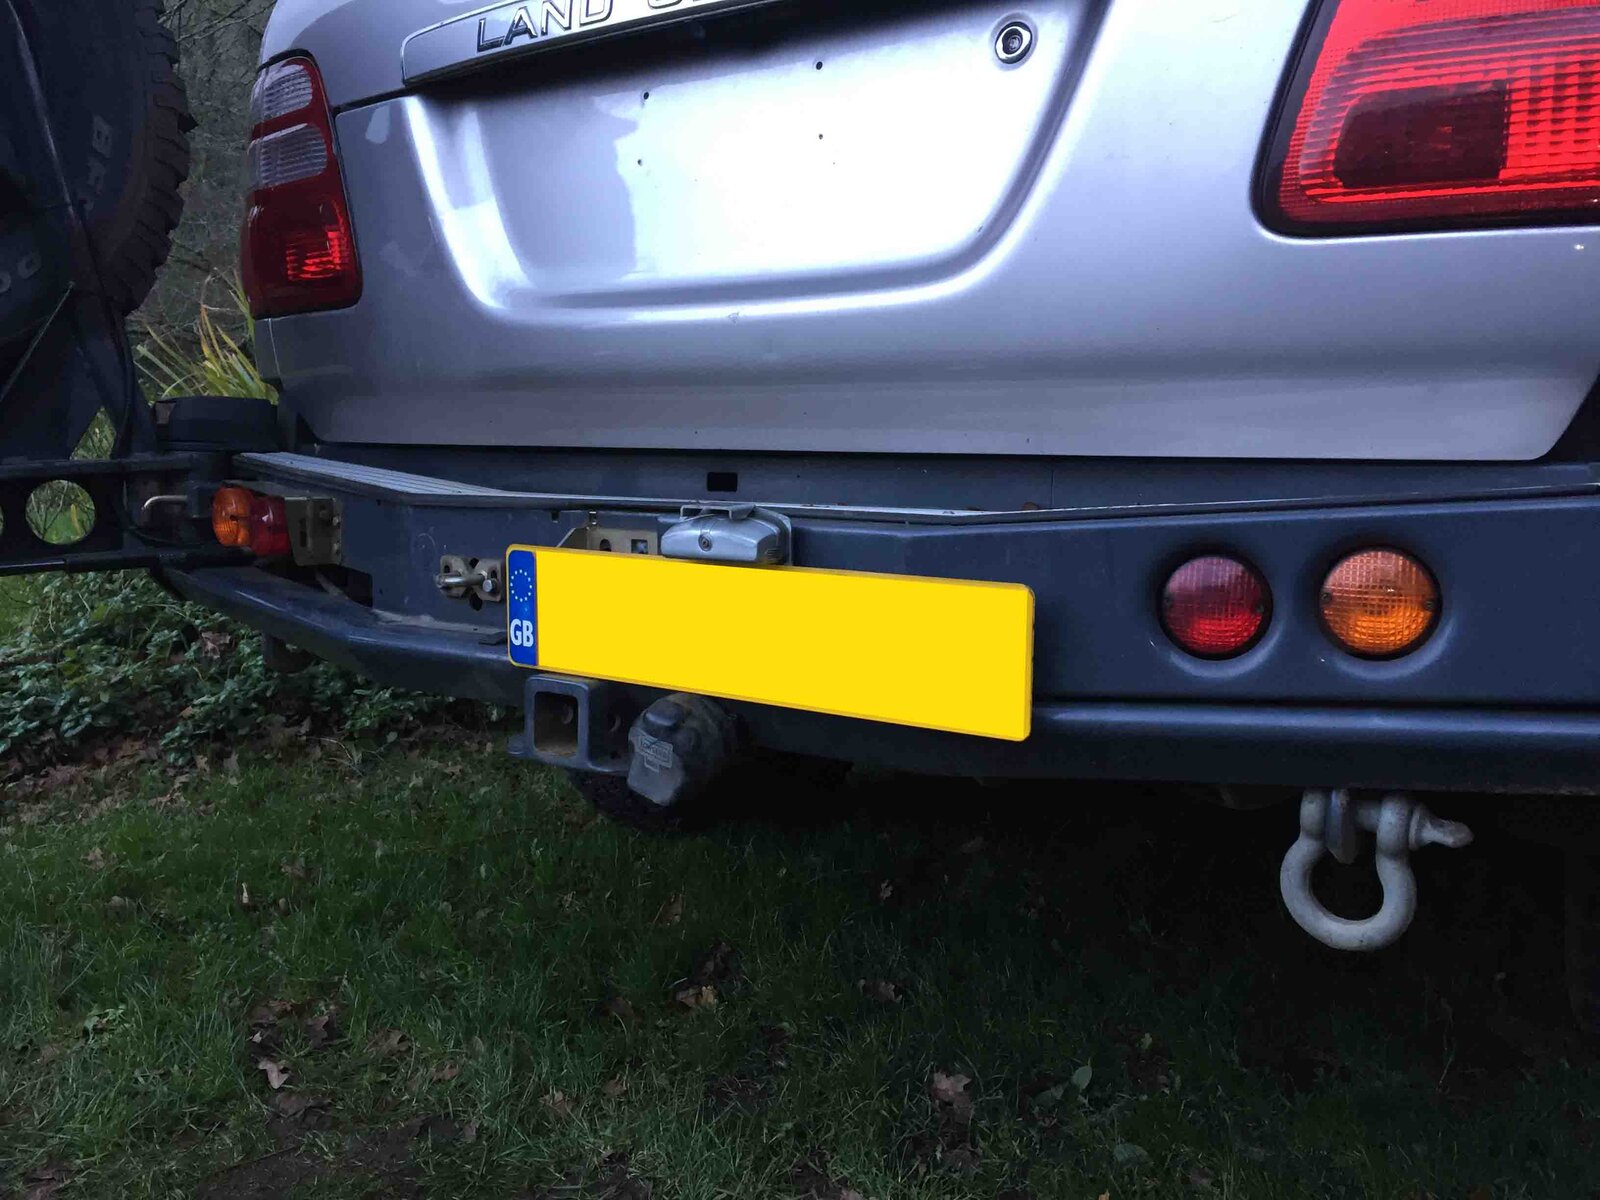
Part of the update is to move the number plate and reversing light off of the swing out carrier and put them elsewhere. This will enable me to put the maxxtrax onto the rear wheel carrier and save a bit of room inside the truck (and dirt too). I have re-sited the number plate to the rear bumper/bar. To do this I have used an ARB wheel carrier number plate bracket (in reverse) to mount up the number plate & light and provide some "step-on" protection to the plastic light cluster as it sticks up above the rear bar foot treads. The reversing light mounting will follow.....not sure where yet. To allow the number plate to mount up, and to re-use the original light assembly I had to make the mounting plate stand-off from the bumper. I also had to cut a section out of the bar centre plate (covering the latch /supporting pin) so it could be returned to its position.
 

Attachments

  • IMG_2837 low res.jpg
    IMG_2837 low res.jpg
    258.5 KB · Views: 454
  • IMG_2836 low res.jpg
    IMG_2836 low res.jpg
    249.2 KB · Views: 446
  • IMG_2834 low res.jpg
    IMG_2834 low res.jpg
    275.8 KB · Views: 461
Number plate light now commissioned
 

Attachments

  • IMG_2853 low res.jpg
    IMG_2853 low res.jpg
    202.9 KB · Views: 418
Extra kitchen/food prep/cooker space now implemented - from our summer trip we decided that we needed to make a bit more practical space when we're cooking out of the back.....this is so we can open the drawers while we're cooking.....there will be a fold down tray off of the wheel carrier when the supplier sends me the correct hinges.....to follow. The stainless sheet on the back now means that we can put the cooker on that (and not melt the nylon drawer carpet) and being stainless it is wipe clean
 

Attachments

  • IMG_2832 low res.jpg
    IMG_2832 low res.jpg
    259.5 KB · Views: 409
I thought that if the stainless got hot enough it would still singe/melt the carpet beneath?

My partner's 80 series has a food grade plastic cutout that bolts onto the rear drop down tailgate for a good food prep surface
 
I thought that if the stainless got hot enough it would still singe/melt the carpet beneath?

My partner's 80 series has a food grade plastic cutout that bolts onto the rear drop down tailgate for a good food prep surface

I peeled the carpet off before putting the stainless down
 
I thought that if the stainless got hot enough it would still singe/melt the carpet beneath?

My partner's 80 series has a food grade plastic cutout that bolts onto the rear drop down tailgate for a good food prep surface

The drop down is next bit of project.....just received the correct hinges from the useless supplier....just need to drill a few holes in the plate, perhaps spray it. My plan is to use the (steel) drop down as a shelf for general use or to put the cooker there as another option from the tailgate or new stainless surface
 
Don't like the adverts?  Click here to remove them
Evening SteveS,

I am new to the 100 series, and have read your post from end to end, very good, and informative. I do have one question though, where does the Toyota Intelligent Tester plug into a 03 100 series?
 
Evening SteveS,

I am new to the 100 series, and have read your post from end to end, very good, and informative. I do have one question though, where does the Toyota Intelligent Tester plug into a 03 100 series?

It plugs into the D-shaped socket under the steering column. There is another 'diagnostic' port in the engine bay but you don't need to use that.
 
Update on the DRLs. Now in and running perfectly. I purchased 1 control unit per light following the burn out of the first unit trying to run both. Although the supplier rated them at 5A current (and my circuit was 3.3A) I noted that it must have been an error on the web-site (most of the competing and similar looking devices were rated at 2A) plus the unit was fused at 2A each too.....anyway both working perfectly now. My only concern is that they're still too bright when the headlights are on (even though they dip to half brightness).....I'll see how many complaints I get :)

I picked off the 12v off of the windscreen wiper motor (ignition position #2) to power the coil for the main power relay for the DRL lights so that they don't come on if I've got the batteries on charge (which they would do as they are voltage sensing). The 'dim' control wire was taken off the side lights so that the dim function works as soon as the side lights are put on

Plenty bright during the day - so no excuses if somebody pulls out in front of me - other than arc-eye :)
 
Hi Steve
Any chance of shrinking your pics a bit so they fit on one page? Lots of scrolling around...
 
Hi Steve
Any chance of shrinking your pics a bit so they fit on one page? Lots of scrolling around...

They come up all right on my laptop......I think I did load one of them at full resolution by accident but most I turn the resolution right down so they load fast for everyone. Suggest you set your browser to 50% if they are too big for your normal settings. I also note that the process of loading them is subtly different between chrome and IE (chrome puts them in as attached images, IE embeds them in the text). Can you let me know which are causing problems and i'll see if I can fix any future ones
 
Right - down to the business of upgrade/update now that we're back from our 3 month road trip. Actually there were no real major issues to report - which is nice.
1 - some clicking on cross axled - suspected anti-roll bar bushes but nothing wrong on roadside/camp inspection. Rear ARBs changed under warranty by Super-pro as a precaution. Also on putting some BIG levers around the suspension there was some slight play in the off-side front upper wishbone bushes. On inspection the bush was intact/undamaged but the steel sleeve was not a press-fit and had some slight play between the sleeve and the wishbone. Replaced upper wishbone (other side was done last year)
2- diffs, transfer box oils replaced. Investigated oil misting on front diff, checked breather open - no fault found. Misting remains a mystery but now dry. Rear diff had small signs of water from all the fording in Iceland. No obvious leaks
3 - replaced windscreen as cracked by flying stone in Iceland
4 - cut access holes in under-belly plates to get to u/j nipple (front prop)
5 - 10,000 mile service

Jobs still to do:

6 - need to reduce background current draw on the leisure/car 12V circuit - add a switch to isolate just the dual USB power socket
7 - replace leisure battery - old age
8 - add permanently-on 12v cigarette socket to rear of truck (alternative solar panel charge point
9 - add fold down cooker shelf to rear wheel carrier
10 - sort out a number of small improvements around the kitchen area including better storage of utensils, additional surfaces to put things on etc
11 - add another 80W solar panel (single 80W panel only just enough)
12 - reposition rear number plate and reversing light to rear bumper to allow maxxtrax to be mounted on rear wheel carrier along with trasheroo
13 - lots of minor bits and bobs

Quick update on the jobs.....will take some photos and add them later
6 - isolating switch added
7 - sized up to add a Odyssey AGM battery (just need to check terminal positions when they get back from Xmas break) - going for a 31-PC2150 or 31M-PC2150
8 - done - have used a Anderson to cigar socket flying lead to make use of the existing Anderson - now I can extend using the camp power lead and also use this to extend the solar panel connectivity too....I like to be able to use the same items to be usable for more than one purpose
9 - fold down cooker plate on rear swing out WIP - just need to drill a couple of holes in the plate/hinges
10 - done, mostly minor
11 - I'm not going to do this as I worked out that I did not locate the solar charge controller very well a) it was measuring the volt drop all along the cable from the panel to the battery and was backing off the pulse width modulating thinking the battery was a higher voltage than it really was and b) the charge controller has a temperature back-off which when left in the sun was assuming the BATTERY was at an elevated temperature. Short answer is that I've moved that to under the bonnet/closer to battery
12 - done. Didn't move reversing light as I figured that in overland mode I could use the existing reversing lights (leave the additional light off the rear wheel carrier) and when I need the additional light on home turf (backing up in dark lanes) then I won't have the maxxtrax and trasheroo on the carrier so I just fit the extra reversing light when I'm in the UK
13 - bits and bobs mostly done
 
Part of the upgrade is to improve storage and use of space to help with day to day camping. I've moved the maxxtrax from inside the car to a much more practical external position hanging off the rear wheel carrier. To do this I cut a bit of heavy duty aluminium treadplate to enable two locating bolts to hang the Maxxtrax on while doing up the ratchet straps: these take the load. Both of the spare wheel spaces will house tow straps and other little used items that can stand being left outside (like fly sheets etc) - some of these are kept dry and clean inside of an Ortleib Dry Bag. This frees up more internal space to use for other things


IMG_2892 low res.jpg
The Maxxtrax hanging off the carrier
IMG_2894 low res.jpg
Detail of the mounting plate and s/s bolts used to locate the Maxxtrax. Need to stop these covering over the stop and indicator lights in the ARB bar
IMG_2895 low res.jpg
A step added using a scrap of treadplate to make the step up onto the roof easier (from off the wheel carrier spare tyre step ring)
IMG_2898 low res.jpg
Just enough clearance so the rear tailgate doesn't snag


After our Summer shakedown in Iceland we realised that me missed having the side-walls/room under the RTT and so we have spent some time moving the tent back/sideways a little bit to allow the tent awning rail to be refitted. This in turn allows the 2nd spare to be moved back a little and thus the retaining plate can be removed as the tyre sits on the rack much better (and the winch fit doesn't need the number plate to be mounted up there). I've taken the opportunity to mount the 2nd spare to the rack with some bolts and a spreader plate rather than a ratchet strap. As we now know the fitted height of the truck just fits inside the envelope of a standard height container I have also removed the quick fitting plates on the RTT (as we thought we may need to remove the RTT to get the truck into a container and needed a quick method to put it back on the roof and leave the port)

IMG_2915 low res.jpg
Utilising another off-cut for a spreader plate - turning the wheel upside down gives a useful space to store little used tarps, recovery items etc

IMG_2912 low res.jpg

Dusting off the RTT side walls to check all is well - provides a decent space away from the wind and rain that we're bound to get in Canada and Alaska in April & May
 
At long last got round to finishing off the fold down table fitted to the rear wheel carrier. The table is tailor made for a coleman stove. I did a mock up with a piece of steel sheet to check the concept first and using this worked out the best method to fix the position of the tray. Essentially I use some marine s/s wire rope and clamp fittings. The tray is some aluminium treadplate (4.5 mm so nice and stiff) and some stainless steel marine hinges. The shelf is fixed to two square section extruded ally box sections (these ones are off-cuts from a Hannibal rack basket) bolted through existing holes on the ARB rear bar. The wire rope is put on a self tapper into the bar top.
IMG_2965 low res.jpg

IMG_2968 low res.jpg

IMG_2970 low res.jpg

IMG_2973 low res.jpg

Haven't yet worked out a way of fixing the tray to the carrier in the up position so using a bungy in the meantime
 
Bit late now, I should of suggested this for your Maxtrax mounting

image.jpg
 
Bit late now, I should of suggested this for your Maxtrax mounting

View attachment 24247

That looks neat but I like the upright style. Generally I don't like drilling holes in the car. Who makes those mounting brackets - N4 Offroad? Some interesting stuff on the website....will keep in mind for later
 
They are a neat option, made by N4 Offroad in france, think there will be a set going on the 80 before long, they have some very nice products, another to have a look at is "Dreamteamcar.com" worth looking at some of the cars they have done preperations to for some ideas. I will be paying them a visit in the summer
 
The rear wash/wipe needs to be removed too......not a major problem, but is handy when going through the muddy stuff
 
Back
Top