Don't like the adverts?  Click here to remove them

iwan's hdj81

Years ago I put an MG Midget engine and box in an Austin A 30. The 1955 A30 had a 3 speed box and long gear lever going close to my left foot, like the old Ford Prefect. Needless to say, the transmission tunnel in the A30 was small compared with that in the later A35, so I chiseled it out and bolted in a replacement chiseled out of an A35.

Probably wouldn't get away with it these days, but it worked flawlessly for eons after...
 
Cheers fella's, I keep forgetting about rivet's! I am also use a longer top mount bolt and go through with a large washer. Seal it well after riveting.

Have been busy on the job yesterday and since 4.30 this morning. Have the 12v and auto box an hour or so off pulling out! Knackered now!
 
So yesterday I got the rocker cover off the 24v and did a well deserved tuneup. The clearances were well out
20170911_145327.jpg

Now thats a fiddly process. I turned and turned the engine over and it was definitely triple checked. All good.
20170911_133917.jpg

Inlet cam lobe has upset me a bit! The motor runs very sweetly, But I think that I'm going to have to change the cam sooner than later.
Ive done the egr delete on the exhaust side.
Also cleaned up the crossover pipe. Typically a horrible job!
20170911_201249.jpg

Decided to clean up the aluminium oxide off the rocker cover. Screwed it to a piece of ply! Worked well. Love the oil breather hump... very 1kzt!
Have bought a cam belt kit for it.
Have ordered an aisin clutch kit as its one is too worn.
With the input shaft on the manual box.. there's way too much play on the bearing. Believe that the part no is 30363-50007 (33311a). When I drove the green 80 with the gear boots off I could hear it going and the noise only went when under power. So goin to be going in there soon! Have been scanning the H151f rebuild thread here. Its good info! Have done the input shaft bearing on the R150f before so hopefully wount be a complete crash course!
Today a 10 hour hit on engine and autobox removal prep! Ive enjoyed it except for snapping 6 out of the 8 headlamp mount bolts! :?
 
So yesterday I got the rocker cover off the 24v and did a well deserved tuneup. The clearances were well out
View attachment 132981
Now thats a fiddly process. I turned and turned the engine over and it was definitely triple checked. All good.
View attachment 132983
Inlet cam lobe has upset me a bit! The motor runs very sweetly, But I think that I'm going to have to change the cam sooner than later.
Ive done the egr delete on the exhaust side.
Also cleaned up the crossover pipe. Typically a horrible job!
View attachment 132987
Decided to clean up the aluminium oxide off the rocker cover. Screwed it to a piece of ply! Worked well. Love the oil breather hump... very 1kzt!
Have bought a cam belt kit for it.
Have ordered an aisin clutch kit as its one is too worn.
With the input shaft on the manual box.. there's way too much play on the bearing. Believe that the part no is 30363-50007 (33311a). When I drove the green 80 with the gear boots off I could hear it going and the noise only went when under power. So goin to be going in there soon! Have been scanning the H151f rebuild thread here. Its good info! Have done the input shaft bearing on the R150f before so hopefully wount be a complete crash course!
Today a 10 hour hit on engine and autobox removal prep! Ive enjoyed it except for snapping 6 out of the 8 headlamp mount bolts! :?

The headlamp bolts are notorious Iwan, I managed to break 3 of mine replacing the units!

You're doing well with the transplant though:thumbup:
 
Ive steadily taken the cases off the gearbox.
20170913_163156.jpg

Luckily the gears and syncros are in pretty good shape for the milage. But the slop in the bearings is quite incredible!
So am doing a lot of unexpected research on how to change the bearings and processes/tooling etc. Using a pdf of the FSM.
This is going to take a bit of time now and will update at some stage!:thumbup:
 
Hi Iwan big job good look with it good to take keep up the good job and kee0 the pics comeing love looking at the pics:mask: from Tony.
 
Don't like the adverts?  Click here to remove them
If I was doing this, it would be on a par with me performing open heart surgery, scary and inevitably ending in a fatality :scared-eek:

Brave man Iwan!
 
If I was doing this, it would be on a par with me performing open heart surgery, scary and inevitably ending in a fatality :scared-eek:

Brave man Iwan!

Thanks guy's! I understand the process of the job, I've been studying the FSM guide step by step over and over. I think that if you look at it as a whole picture it's very daunting but after following the step by step guide. It's all in sections of processes which breaks the job down.

After talking and sending pictures to my good friend at Cruiserworld in Holland, he said that generally if the gears and syncros are good as they are then they just change the bearings like I aim to. So terrain tamer do whats called a maintenance kit witch comprises of bearings and seals etc and he can supply me with parts of the kit. So am waiting to get the parts before I take it apart any more.

My neighbor is going to assist. He has a large press and has been rebuilding volvo truck gearboxes so have an extra set of eyes!

Steady approach and to triple check before moving on the next procedure is my thinking!:think:
 
Ive been really busy with the 81. After taking the motor and auto box out. I decided to take a look at the cracked power steering chassis mount and a good job I did cause it was shot!
20170924_145228.jpg

The panard mount was real loose in a way only attached by the lower bolt holes. When I hit it with a club hammer it really sounded unsolid!
20170925_150539.jpg

So I decided to go slightly overkill with 6mm plate! As at times driving this as the death wobble was scary and very unsafe!
20170925_150600.jpg

You could see where the steering box had rusted between the chassis and made it thin. Hence the steering box was twisting the mount! Not the prettiest welds but but when you give the repair a good smack with the club hammer. ... proper solid now and fit for purpose!

After a long wait for the gearbox kit... it arrived yesterday so onwards and upwards! :thumbup:
 
Hi Iwan that looks a big job but a very good one top job keep up the good job and the pics coming from Tony .
 
I love the way you get stuck in Iwan :clap:

I guess you could save someone a lot of grief by passing the templates around so there's a few copies in the club , be nice to have the plates ready and waiting if you get what i mean .
 
Hi Iwan that looks a big job but a very good one top job keep up the good job and the pics coming from Tony .

Hey cheers as always my old mate (as in a long time!) The steering problem has been there since day one of driving it. I read somewhere a while ago the JDM imports are known to be clocked cause this one says 153k and this problem appears to be old, possible misuse or high km/mileage (more of a problem in Australia) or just that it's an early 80. This repair took me all of Sunday and a half day yesterday really. Definitely an engine out job and not very easy otherwise! But do able IMO.


I love the way you get stuck in Iwan :clap:

I guess you could save someone a lot of grief by passing the templates around so there's a few copies in the club , be nice to have the plates ready and waiting if you get what i mean .

Cheers Shayne man! It's quite a mission goin on and at times and have felt quite overwhelmed to be honest. But giving up is not an option cause the project will sit and not happen for months ++, if pulled out of the workshop it will be a failure!

Yes good to highlight to keep and share the template, no charge and free postage! (dont agree with profiteering on someones misfortune!):thumbup::thumbup:

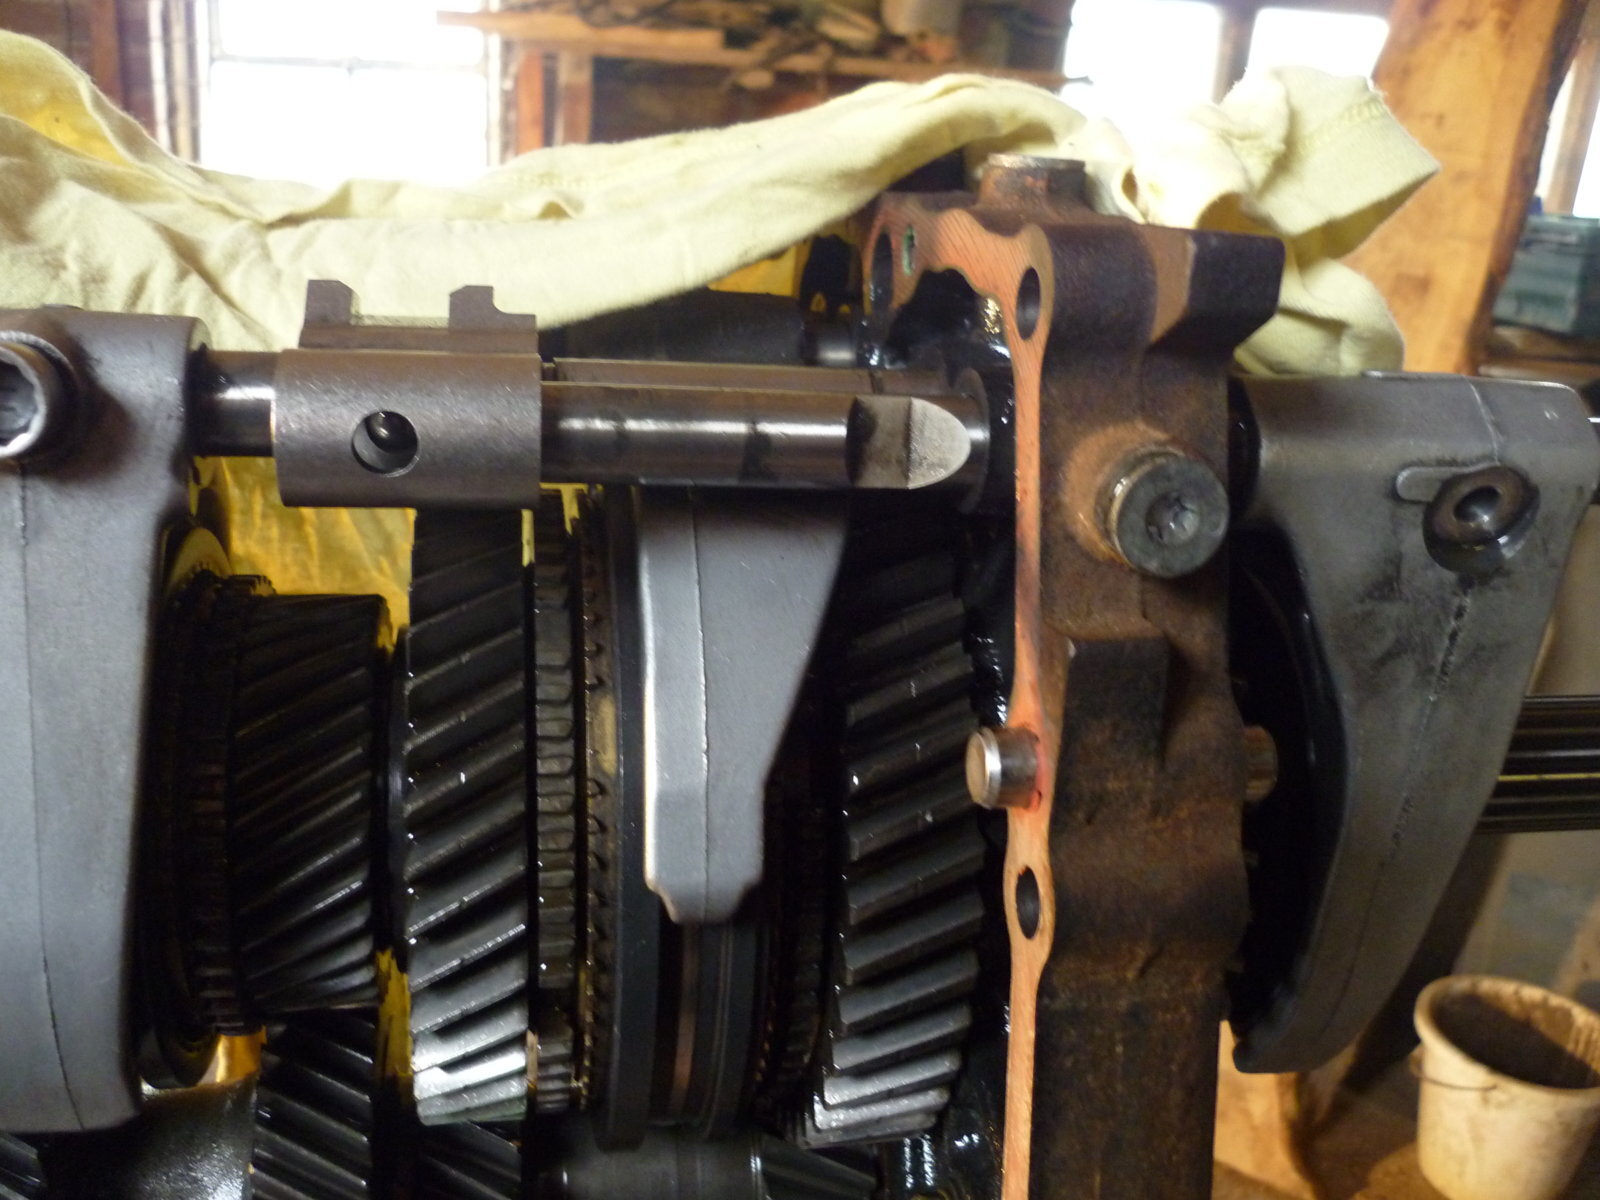
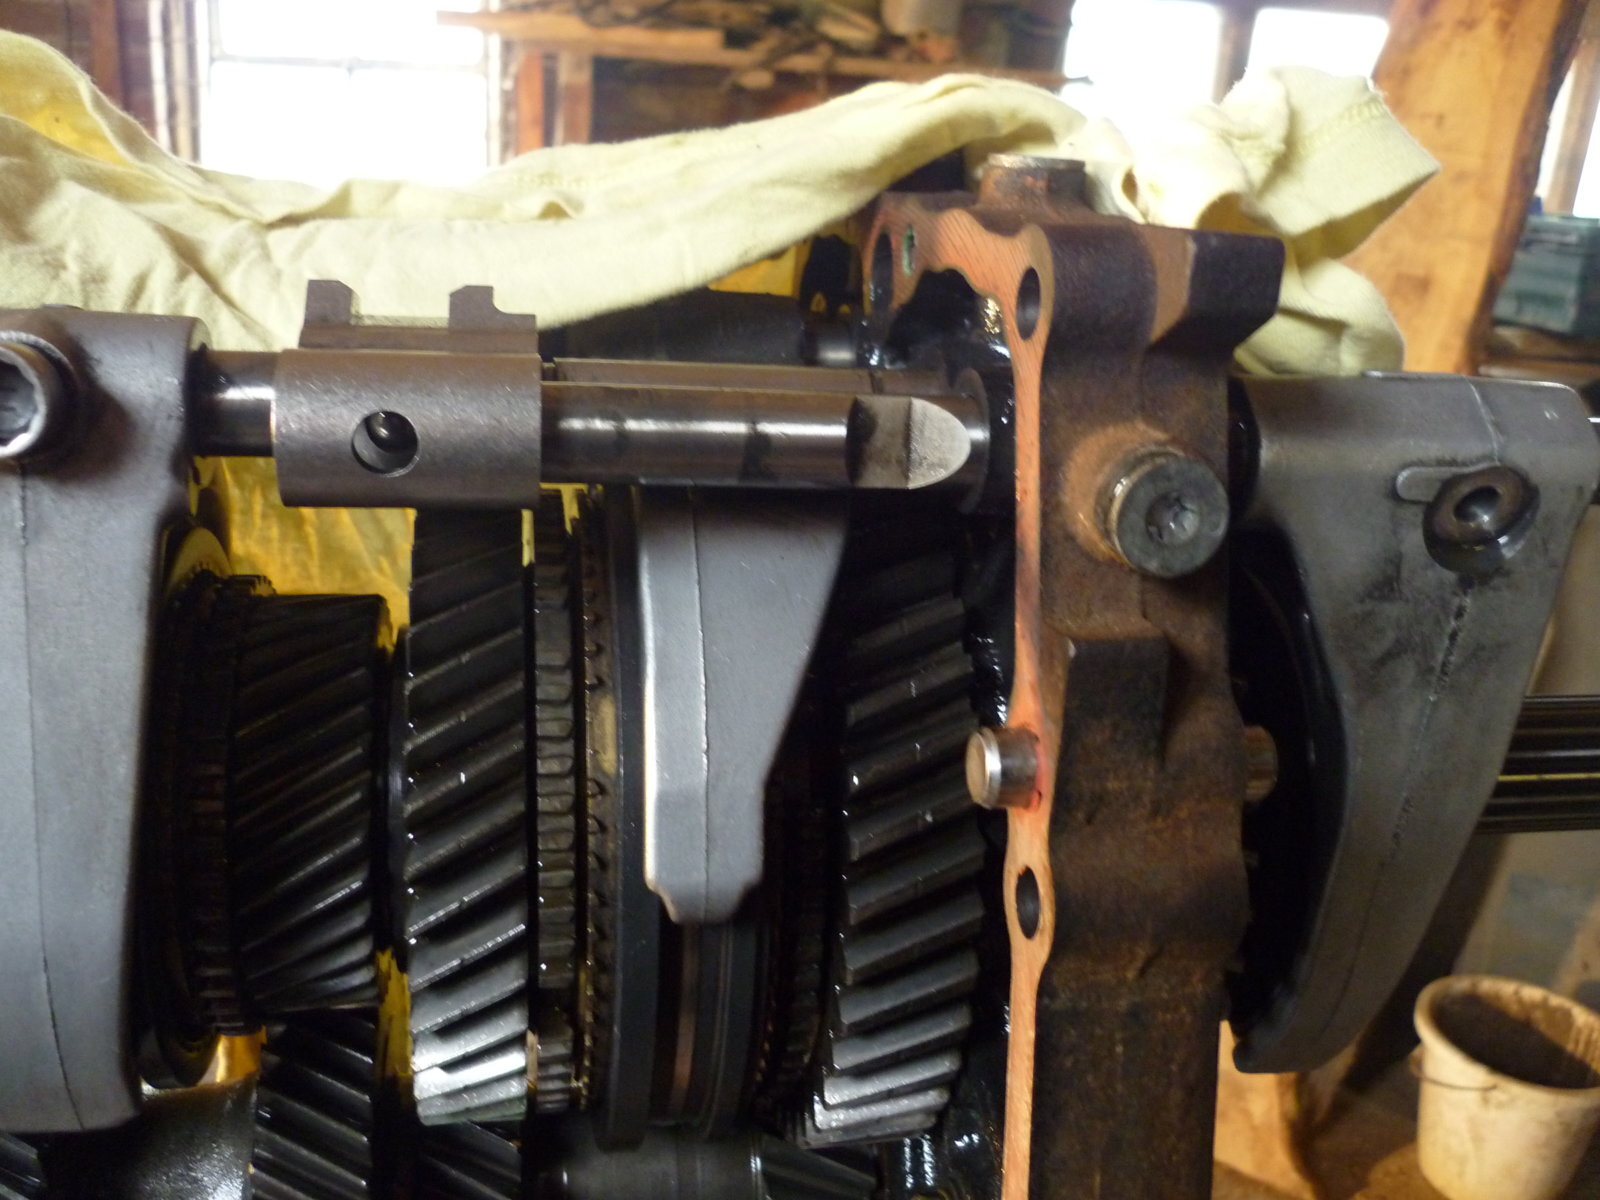
Had a really good day on the transmission today... some pics to see
P1010250.JPG


P1010250.JPG

When removing the cir clips for the selectors be prepared to be looking on the floor for them as they really ping off!!
P1010252.JPG


P1010253.JPG

A few photos for orientation purposes.
P1010256.JPG

This pin fell on the floor too!
P1010258.JPG

Quite a lot of detail with removing the selectors, says in the FSM that you need a pin magnet! I found this magnet in the bottom of my toolbox and just about got by! LOL
P1010259.JPG

Another follower pin in no2
P1010260.JPG

Missed taking a picture of getting to this point but.... there's seriously light at the tunnel when you get to here!!!
To remove the reverse gear clutch hub I had to gas axe a big washer out of the 6mm steel about 110mm dia with a 45mm hole in the centre..setup 12mm spanner size bolts to use with a Beta heavy duty puller, a breaker bar and a 3ft gorilla bar through the puller threads! I really thought the threads were going to strip in the puller! F***in tight!! When I put it back together tommorow I'll post a pic.

Went around to my neighbours this evening and we pressed the 3 bearings in and it's all ready to reassemble carefully.... and time to get the engine and box in time!! Whoo hoo well happy!

NOTE this is not a guide. It's write up of what to expect if you delve into this!:think::icon-biggrin::thumbup: Cheers all! P1010251.JPG P1010251.JPG
 
Good to see you again Geert! I saw your pictures of the repair you did and based my repair from that!

Thanks for sharing the procedure you did! :thumbup:

Had a very intense day reassembling the gearbox, slow and steady.
P1010261.JPG

The ultimate clutch alignment tool
P1010264.JPG


P1010265.JPG

That worked well!

20170927_114345.jpg

Triple checked and happy!
P1010266.JPG

Getting the cases back on was quite a tricky task, but all went well except for the fact that I got plastered in sealant!
The cir clip on the input shaft was a challenge, many attempts then I noticed the small hole thats in it and thats why its there!!
P1010267.JPG

And that took me to the end of the FSM and bang on 5pm was truly enough for the day.
This has been a great but intense experience, really glad that the input and output shafts have no play in them! Definitely interested in buying another H151f that is in need of attention. But will need to do a good couple of thousand miles on this box just to make sure I've been correct with it!!

Going back on the job now first job is to hole saw a 3 3/4 hole in the floor for the gear shifter and am aiming to get this in today..
 
A pic of the part's that I changed.
20170928_095756.jpg

Before I box them up and store..
 
Hi Iwan wot a top job a big thanks for the pics love all the jobs it's looking a big job but you have got it right good to take with you hope to see you seen keep it up good man :triumph:.
 
Wont be as intense as my phone issue. Locked out of fb all my contacts and old messages lost bla bla bla. What a nightmare day.

Youve done well with the box build. Talk money mate im sure i can find you a box ;)
 
Hi Iwan wot a top job a big thanks for the pics love all the jobs it's looking a big job but you have got it right good to take with you hope to see you seen keep it up good man :triumph:.

Cheers Tony, been a mission and not goin to give up... this isn't going to get the better of me! Lol.. I'm a big fan of couch mechanics!! :laughing-rolling: Gonna fire in some more pics of the job for you. Been busy!:thumbup:

Wont be as intense as my phone issue. Locked out of fb all my contacts and old messages lost bla bla bla. What a nightmare day.

Youve done well with the box build. Talk money mate im sure i can find you a box ;)

Bugger on the phone scene man! I regret calling you now! But the phone still worked after dropping it.. so I find it hard to believe that all is lost... from experience my Mrs used to break a screen on average once every 2 months! New screen unit from ebay and get your techy head on and get it fitted! Got quite quick at it in the end! lol:lol:!!
 
Back
Top