Don't like the adverts?  Click here to remove them

iwan's hdj81

Anyone any thoughts on the back axle being kicked over when the trucks lifted? When I had mine tracked this was mentioned as the truck is actually crabbing as it goes done the road
 
Great lakes pics, done a bit of mountain biking there but not familiar with the area really. Have you got a copy of the route you did? No problems with the camping or walkers waving there sticks at you?

It was a memorable time the 10 day break last summer.. Over all we were tolerated but a few instances of disapproval. Some walkers not impressed plus a farmer who thought that I had left a gate open which I hadn't touched or been through! To be honest quite hard to find a place to park up at night.. A real problem if in a group really. We stopped mostly on the tracks but high up in the mountains, we were up early and of course leave no litter.

Well worth a vist recommend it... I bought the 4 OS pathfinder maps over the time and just marked the maps of the trails that my Mrs and I found!

I would like a copy of the route or it's location please if possible.

I can send you guys the set of maps as they're just on paper.. am trusting to send tho and would want them back! If you buy the same pathfinder maps and copy the trails over... but beware a couple of the routes are very extreme and my Mrs temporarily left me .... I was pretty scared as the rocks were pinging out from under the wheels! F***ing steep and loose!

Good up north it is!:p :thumbup:
 
Anyone any thoughts on the back axle being kicked over when the trucks lifted? When I had mine tracked this was mentioned as the truck is actually crabbing as it goes done the road

I measured mine after fitting new bushes to the rear and before the lift and it was 10mm offset from Centre. After the lift it was 10mm offset the other way :lol:

So yes, I'm crabbing by 10mm.
 
My issue is that the truck is geared up for weight. I said to the guy doing the tracking really I have to run around with half a tonne in it all the time to make the truck run true. Then when its empty its an inch out. Doesn't make alot of sense really. If I adjust it with an adjustable arm it means its then out the other way.
 
Don't like the adverts?  Click here to remove them
I would use 2x 80 series front panard rods made adjustable just using the top secions of the two. Then you have a solid rear adjustable bar. As the rear is hollow as you know for sure. Then 1/2 load the truck and centre the rear axle. Should be 50 per cent out either fully loaded or empty. Should be a winner!:thumbup:
 
I would use 2x 80 series front panard rods made adjustable just using the top secions of the two. Then you have a solid rear adjustable bar. As the rear is hollow as you know for sure. Then 1/2 load the truck and centre the rear axle. Should be 50 per cent out either fully loaded or empty. Should be a winner!:thumbup:

Sounds good to me :thumbup:

I've heard there's a guy on this forum sells s/h bits for 80's, now what's his name?... Ermmm... :think:
 
Sounds good to me :thumbup:

I've heard there's a guy on this forum sells s/h bits for 80's, now what's his name?... Ermmm... :think:

Just give me the order and ill sort it some time this year ....... Shouldn't really joke about how shite I can be at times.
 
Update time coming up! Have dug the very solid 81 out and have been painting!

It's been a long time and now its getting full on attention! Need to crossover from the the laptop to the mobile to get the pics off it!:icon-biggrin:

Really happy with the progress so far!:thumbup:
 
20170908_085448.jpg

It's back in dock and fortunately from the previous effort that was done it was a reasonably quick process.

I bought the 2 pack paint at least a year and a half ago. I ordered satin black but it appears to be gloss.. I don't mind either way as it's nearly one colour! !

A member here who I believe to be Salem? He painted his 80 with deck liner and I quite liked it. So I decided to take a similar approach but I used a sponge roller. Never tried it before and with having a very dusty workshop... with limited spraying skils.. I thought why not! The finish is like orange peel.. proper rugged finish! Not afraid of scratches or shine provided its one colour!

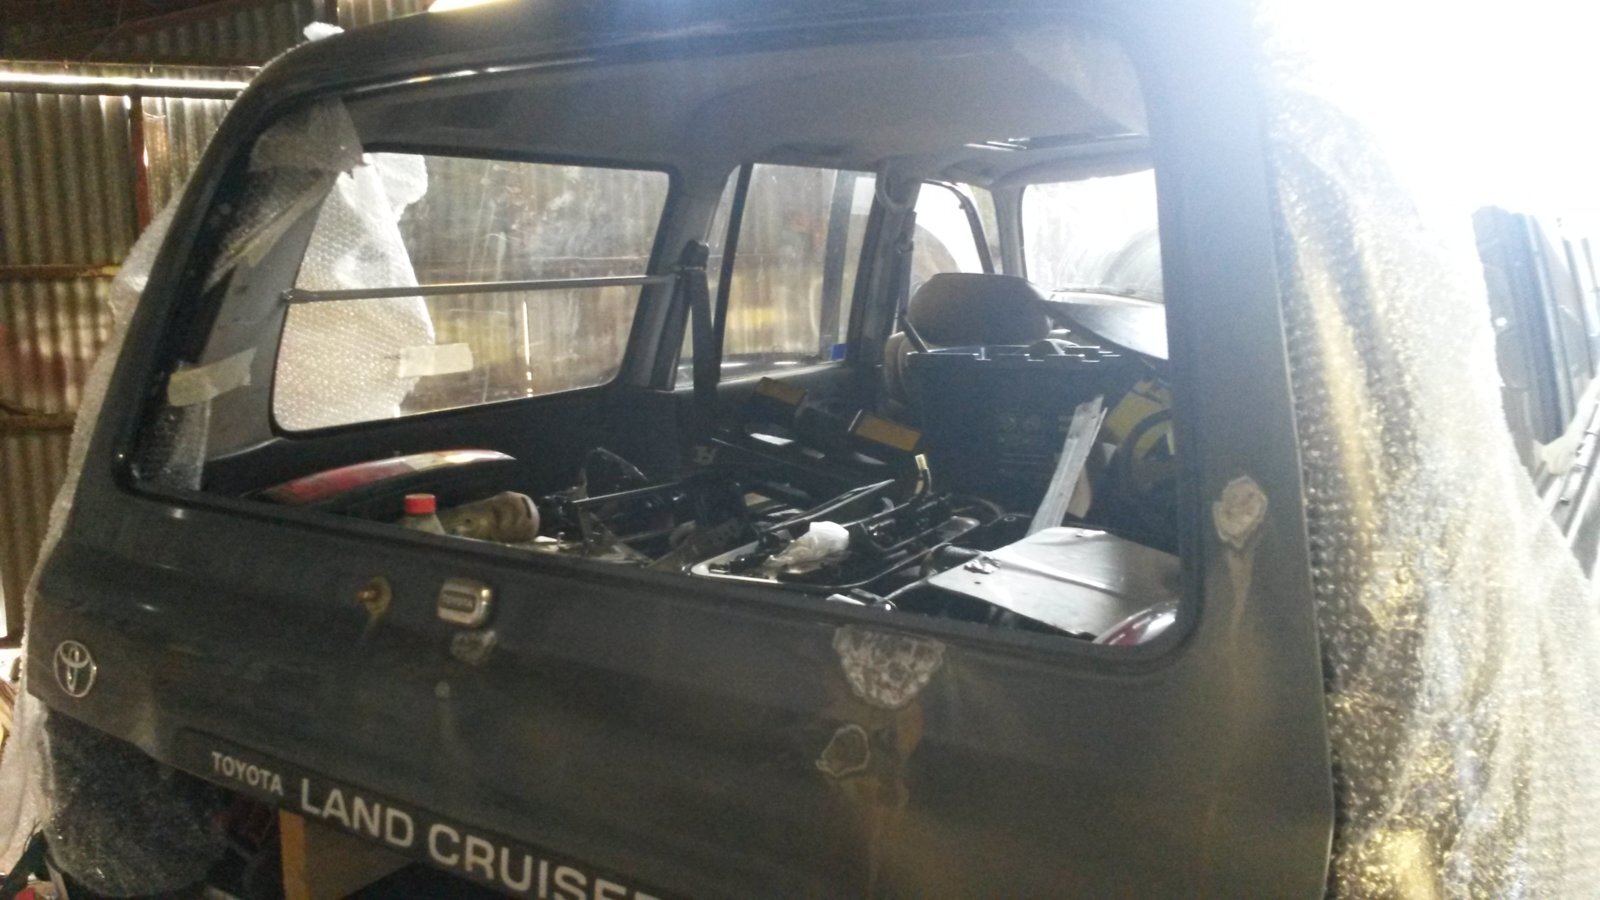
Have done some minor rust repairs on the part that I previously painted earlier in the thread. The worst rust was on the front passenger side wing.. well about the size of a £2 coin.... This 1991 81 is a proper sold old girl! Both sides and the roof were flatted and rolled yesterday and today Ive worked on the rear, hadn't touched previously, have the rear screen out to get the rust which is under the rubber. Glad that I did as the rust was there.
20170908_120011.jpg

All the same still a very good tailgate with all the inner components rust free. When it comes to rust you're talking time to sort out! Shame on me for not having an end of day pic! There's always tomorrow!

The auto box has always been a problem since day one... hence the initial purchase price. So I have this....
20170903_141314.jpg
20170828_151745.jpg

From a p plate 1995? 1hdft and manual box with 265000 miles shockingly rotten. A neighbour of mine bought it with a view to fit it in a 2011 swb land rover. ... but the straight part of the rear prop was going to end up being about 200mm long! Expensive way to find out. .. Lol!! So it wasnt a planned thing but it a definite way to sort my 81 out!

Will update as I go along! :thumbup::thumbup: Cheers guys! 20170908_120011.jpg
 
Hi is an it's looking good thanks for the pics keep it up good to talk .
 
Cheers Tony!
20170909_103852.jpg

Here's the state of play with the rear. All rust treated and etch primed. Ive masked the badges that I want to keep. The others were a pain to get rid of the sticky residue!
20170909_103958.jpg

I thought to add this pic as this 80 has rusted severely below the windscreen. What a bastard to repair that!

I think that owners should take preventative measures and check the condition of their 80 in this area!

Remember prevention is better than the cure!:think:
 
20170909_204849.jpg

Must say I'm really pleased with the result of the masking off of badges and the general look of the rear of the truck!
Have finished the painting of all the panels today.
Time to get on with the conversion job now!!:icon-cool::icon-biggrin:
 
Hi Iwan that looks a good job you have done but you got a big Job with the conversion have fun with it and lot's pics thanks from Tony .:)
 
Yeah looks well iwan, good shed hidden away in the depths of wales too.Its that secret you only work under the cover of darkness....
 
Yeah looks well iwan, good shed hidden away in the depths of wales too.Its that secret you only work under the cover of darkness....
Hi Iwan that looks a good job you have done but you got a big Job with the conversion have fun with it and lot's pics thanks from Tony .:)

Cheers Tony! Thanks for the comment. All is well... have been busy with it today, but have hit a snag with the upper clutch pedal mount. There isn't one there!! I'm on the case tho! Will keep the pic's rollin!:thumbup:

Yeah looks well iwan, good shed hidden away in the depths of wales too.Its that secret you only work under the cover of darkness....

Nice one man thanks. Yeah the 1960's cattle shed that my Grandfather built is good, the roof leaks in places and it shouldn't really have 2 cruisers init! Got until the end of the month to clear them the hell out of there! Lol

I'm a morning person but my Mrs is playing up again at the moment, I think I've said enough about that!!!:laughing-rolling:
 
So I got the auto gear out and got it all the manual bit's ready to install.
20170910_133632.jpg

After sorting out the alarm wiring and rear fog light wiring that had been fitted through the bung that blocks off the clutch master cylinder area. I found the issue that the top mount for the clutch pedal assembly is missing.
20170910_164107.jpg


20170910_161203.jpg

This is it on the parts truck. It wasn't an issue to remove but fitting it to mine is an issue in more ways than one.

To weld it in is quite frankly a fire hazard! Unless I remove the conbustable items like the carpet and under carpet etc.

The other way is to bolt it in but it means to drill and then seal the holes in the area below the scuttle panel where the wiper mech is. Its a bit of a water way above there and dont fancy driving around with a wet left foot.
1505067028761.jpg

There's not much to it, But without it, it wouldn't be long before the pedal mech goes through the bulkhead. Really flexy and reliant on the upper mount.

20170910_164228.jpg


Looks good with the missing part in there and with the extra pedal in there. But no good if its not reliable. Any thoughts? Bolt it in I am prefering..
 
So I got the auto gear out and got it all the manual bit's ready to install.
View attachment 132952
After sorting out the alarm wiring and rear fog light wiring that had been fitted through the bung that blocks off the clutch master cylinder area. I found the issue that the top mount for the clutch pedal assembly is missing.
View attachment 132954

View attachment 132953
This is it on the parts truck. It wasn't an issue to remove but fitting it to mine is an issue in more ways than one.

To weld it in is quite frankly a fire hazard! Unless I remove the conbustable items like the carpet and under carpet etc.

The other way is to bolt it in but it means to drill and then seal the holes in the area below the scuttle panel where the wiper mech is. Its a bit of a water way above there and dont fancy driving around with a wet left foot.
View attachment 132955
There's not much to it, But without it, it wouldn't be long before the pedal mech goes through the bulkhead. Really flexy and reliant on the upper mount.

View attachment 132951

Looks good with the missing part in there and with the extra pedal in there. But no good if its not reliable. Any thoughts? Bolt it in I am prefering..
Blind rivets and a good quality adhesive/sealant.
 
Back
Top