Don't like the adverts?  Click here to remove them

LJ70 Build Thread!

Interesting that the aircon control is on the knob. I always thought it would have been a switch that went in the blank at the end of the heater controls. I wonder what goes in that blank then?
 
hey Ben,
It will be there. It's just one wire with a round grey connector. I also found it in my HZJ75.

Awesome, thanks mate. :thumbup:

Interesting that the aircon control is on the knob. I always thought it would have been a switch that went in the blank at the end of the heater controls. I wonder what goes in that blank then?

Yeah not sure whats meant to go in the blank Dave, all the 70's I've ever seen always just have a blank there. I'm thinking thats where the carling switch will go for my fuel pump. :think:
 
Did u find ur turbo sensor Ben?? It wires up to the loom that runs near the batteries and to big plug at the bell housing
 
No not yet Craig but I'm going to this weekend. I've got all weekend free to work on LJ, so planning on getting heaps done! [emoji41]

I will probably pull the batteries out to give me more room and have a proper look then. :thumbup:

I've got a bit of a nightmare in that when the auto electrician did all my wiring he ran all the wires through the rubber bung where the aircon pipes go, so I now need to move them all. :thumbdown:


Sent from my iPhone using Tapatalk
 
Thanks. [emoji3]

No got it made in Birmingham and got completely f****d over! They did a terrible job, charged me a fortune and took 4 times as long to do it as they said they would! [emoji107]

Wish I'd had known about the place in Cardiff that everyone raves on about, back then.

It's stainless steel 2.5" and at some point I want to replace it with 3", but until I find some one I think I can trust to do a good job I'm reluctant to throw more money at it!

If I had my own exhaust pipe bender/access to one id do it myself. :think:


Sent from my iPhone using Tapatalk
 
Don't like the adverts?  Click here to remove them
Hmm yea I see what u mean I like the sound of the one in Cardiff but seems too pricey to me so might have ago at making my own obviously not as good a welder as u Ben haha

try and run same place as the 2.4 exhaust runs so that it's out of the way.
Need to take dump pipe off first tho to see what I can do with that
 
Phone Charlie Craig if you will send him your dump pipe he will make another using that as a template . The dump is the important bit what goes on after it doesn't matter much at all so why not just get a price at least .
 
I would have but the only prob I have is I use my truck every day for work so I'm quite limited really
 
Portugal Holiday.

Given how terrible the UK summers are, I like to have at least a week in the sun some where in Europe. :icon-cool:

Last year was Ibiza this year I chose Portugal for a bit more of a relaxing holiday! :icon-biggrin:

We stayed at a beautiful 5 star hotel in Albufeira in the Algarve region.

IMG_0899_zpssxlrkvni.jpg

IMG_0905_zpsy17iq18x.jpg

IMG_0910_zpswgahhp7m.jpg

IMG_0911_zps9ex0n8yb.jpg

IMG_0922_zpsawf2tq4t.jpg

As beautiful as the beaches were we were keen to get out and explore a little.

So we hailed a tuk tuk!

IMG_0931_zpsb6sprpbr.jpg

IMG_1011_zps9adjqcsi.jpg

Our driver, Francesco, was a great guy and showed us all around the old town area of the city.

I asked him about his tuk tuk and he told me he had to wait 2 months for it to be hand built in Italy by Piaggio.

It was interesting how the design has changed so little in over 50 years and they're still made from pressed tin. :icon-cool:

IMG_1034_zpsowq5pmhd.jpg

We were keen to avoid the new town and "the strip" as we wanted to experience the real Portugal and avoid the many English and Irish pubs, restaurants and clubs.

Francesco our tuk tuk driver showed us all the restaurants and bars that the locals go to where we could avoid the tourists and taste the best Portuguese food.

Our favorite restaurant was one he showed us which sits high up on the cliff over looking the beach.

IMG_1043_zpsdsp8umtr.jpg

IMG_1044_zpsih5dy6fj.jpg

The sea food was incredible!

IMG_1050_zpsvvnycl3a.jpg

IMG_1077_zpsad8p2k2h.jpg

IMG_1078_zpsbuancdod.jpg

I always look out for LandCruisers when I go to different countries and sadly I didn't see too many in Portugal. :thumbdown:

I spotted a beautiful bright yellow 40 being driven around one day, another 40 looking very sorry for itself rotting in some ones front yard and then this nice KZJ73. :icon-cool:

IMG_1160_zpsiwntz4jq.jpg

IMG_1161_zps7jzm6grg.jpg

IMG_1164_zpsywzejyoe.jpg

IMG_1166_zpsy9pvtke3.jpg

It was a nice one but was rusting quite badly below the windscreen.

IMG_1171_zpsyoysl9jx.jpg

IMG_1172_zpsfguibijg.jpg

Francesco was our driver for the entire holiday, if we needed to go anywhere we would call him and he would come and get us.

IMG_1174_zpsfcltwv0o.jpg

IMG_1175_zpswfzlzgrh.jpg

IMG_1177_zpsc6agx18r.jpg

IMG_1179_zpslxhnbrtt.jpg

IMG_1180_zpsr9ngrojj.jpg

IMG_1187_zpskmkdoqgt.jpg

After a day on the beach we returned to our favorite restaurant over looking the beach for drinks and dinner!

IMG_1206_zpsdagvvprp.jpg

IMG_1198_zps9t0renwm.jpg

IMG_1200_zpsptv6rwzo.jpg

IMG_1202_zpsxdrqkvu9.jpg

We chose our fish.

IMG_1203_zpsmikn5wp0.jpg

IMG_1204_zpsdud1tp94.jpg

And had cocktails.

IMG_1213_zpsclmv8jxu.jpg

We went on a coach on a day trip to the capital city Lisbon, or Lisboa as the Portuguese spell it.

It is a beautiful old city with lots of fine old buildings, many of which are now looking a bit sorry for themselves and are in need of a good paint, but they are still stunning.

It was quite clear that once this city was very wealthy, rich off all the gold and treasures taken from the new world and what is now known as Brazil!

We stopped just outside the city.

IMG_1231_zpsgsmzwbeu.jpg

IMG_1274_zpsgs9iumg7.jpg

This trippy paving is every where in Portugal and is all made from small pieces of black and white stone.

IMG_1228_zpss5zjriy2.jpg

IMG_1229_zpschvmw5m8.jpg

IMG_1237_zpsu7nbtn3k.jpg

IMG_1239_zpsocl0injf.jpg

IMG_1240_zpsbvhrtvuz.jpg

IMG_1241_zpsw10zq0oh.jpg

IMG_1242_zpsndlasvjg.jpg

IMG_1243_zpsxtacashi.jpg

IMG_1232_zpsp9vomwco.jpg

Looking back up the river towards the huge bridge we crossed on our way up from the Algarve.

IMG_1233_zpsizazzqd6.jpg

And the huge statue of Christ the Redeemer.

IMG_1236_zpsahjjvzgu.jpg

IMG_1245_zpszfij4qt8.jpg

IMG_1246_zpsgytyczxw.jpg

IMG_1247_zpsohe5srjs.jpg

IMG_1248_zpstmpiboqr.jpg

I liked the old French built crane in the harbor.

IMG_1249_zpsorzgznth.jpg

IMG_1251_zpsmhauuoqw.jpg

IMG_1252_zpsxzvpisa4.jpg

IMG_1253_zpsa18ztlfd.jpg

IMG_1255_zpsx8iponl3.jpg

IMG_1257_zpsnnbg4zbt.jpg

IMG_1261_zpscrkn9uvs.jpg

IMG_1263_zpsmdgzy80d.jpg

IMG_1264_zpsgzziolwc.jpg

IMG_1266_zps4nbo8oy5.jpg

IMG_1269_zpseovmd6zb.jpg

We would see lots more tuk tuk's.

IMG_1227_zpsygjyitxd.jpg

IMG_1277_zpsop52ozjx.jpg

IMG_1278_zps4iluhnos.jpg

IMG_1279_zpsjhon5vh4.jpg

IMG_1280_zpszpvptw0c.jpg

IMG_1281_zps7kr1lal0.jpg

We got back onto the coach and were driven into the city and dropped off with 3 hours to explore.

We immediately found some where for lunch and I had some amazing salmon!

IMG_1290_zpstwxjpsva.jpg

We then walked around and explored this beautiful old city.

IMG_1292_zpszdc2zi27.jpg

IMG_1298_zpspot0xfto.jpg

IMG_1300_zpszmuw8rx6.jpg

IMG_1301_zps6wmvqxai.jpg

IMG_1303_zpsml7wuipd.jpg

IMG_1305_zpsnzv5qsle.jpg

IMG_1306_zpsco4dgxur.jpg

IMG_1307_zpsyfe94gra.jpg

IMG_1311_zpsqmv5qf4x.jpg

IMG_1312_zps5blcd2df.jpg

IMG_1313_zpswgucw36z.jpg

IMG_1314_zpsptthnqc6.jpg

IMG_1316_zpscycx9nyc.jpg

Ceramic tilling entire buildings seemed popular, not something I've ever seen before.

IMG_1318_zpsdzxs87lk.jpg

We walked through the banking quarter and I was most impressed with Santander's building.

IMG_1321_zpsod7dlmga.jpg

Guarded with lions.

IMG_1323_zpsqf3zuqvz.jpg

IMG_1325_zpsaejqhat0.jpg

IMG_1326_zpsasnpkv4q.jpg


There was a protest going on but not like one I've ever seen before!

Here they come down early in the morning and set all the signs and banners up for the day and then go home!
icon_lol.gif


Human statues.


On the way back to the Algarve we went over what we were told is the second longest bridge in Europe, at 10km/6miles long. It was very impressive but difficult to get pics of.

We went on another day trip to a big outdoor market in a little town.


I was most impressed with, and made full use of the man chairs that were dotted around. Some where for the men to sit while the women shopped! :lol:


Really yummy pizza for lunch!


On the way back the coach driver said over the microphone in a Borrat style accent "If you look to the right, you see Portugease Ferrari! That is the old model, only 2wd." :lol:


Our hotel had 4 swimming pools, each positioned with a group of apartments around it.

This was ours and was about 30 meters from our apartment.


More cocktails with dinner.


And the best lasagna weve ever tasted!


As Bec and I were going to a night club that night I asked for a double vodka and lemonade.

I got given over half a pint of straight vodka and a bottle of lemonade. :icon-surprised:


The next day we saw some awesome sand sculptures.


And that was our week in Portugal. :icon-biggrin:

No more holidays for a little while now. :thumbdown:

But I am going to Bathhurst for 5 days in October to watch the car racing. :auto-nascar:

Then in November Bec and I are going on holiday to Byron for a week. :cool:

Then in December I will get 3 weeks off for Christmas, so I'm hoping to get away then, hopefully for a week or 2 of 4wding and camping. :dance:
 
Last edited:
I had a busy few days back at work this week.

My boss was back from the world record attempt which had proven to be an absolute disaster! :icon-rolleyes:

The trailer which was being towed behind his 80 with the Solar Suzuki on got destroyed on the dirt roads and corrugations!

They had to make temporary repairs on it after ripping one of the axles off, shearing the leaf springs and bending the mud guards badly. They got new springs fitted at Mount Dare and then the 80 blew a front diff which was so bad its taken the housing/axle out with it. :thumbdown:

He attempted the world record attempt crossing and all went well for the first day but then the sun ran out and it was forecast to be cloudy and overcast for then next 3-4 days and as the crossing has to be done in less than 10 days they had to abandon it. :doh:

They are planning on going back to try again next year after I've designed and built a heavy duty off road trailer capable of carrying the solar Suzuki. :icon-cool:

So my first job this week was to assess the damage of the trailer and make repairs.

DSCN1829_zpsh5a2rqzk.jpg

DSCN1830_zpspbttfcix.jpg

I found lots of cracks in all the welds for the leaf spring mounts, so opted to flip it over to ensure good welds, rather than welding overhead.

DSCN1832_zps5cr20nep.jpg

One of the mud guards was badly damaged and I couldn't hammer it straight.

DSCN1833_zpsdpxwqdrh.jpg

DSCN1834_zpsor1yjuda.jpg

I bent up a new section using my awesome new folder that got delivered while I was away.

DSCN1835_zpsgwlrxyur.jpg

DSCN1836_zpsfz3vi7qd.jpg

Its a great bit of kit and as it has fingers I can now fold up boxes and fuel tanks etc.

I also like the digital angle guide.

DSCN1837_zpslqsvoix9.jpg

Welded it on.

DSCN1841_zpsuz2uqzlb.jpg

DSCN1840_zpss1mkbpwv.jpg

Re-sprayed the entire trailer as the front was very badly sand blasted from being towed behind the 80 on dirt roads.

DSCN1842_zpsoiz6nojl.jpg

DSCN1843_zpsymesygnh.jpg

DSCN1844_zpsmhzpv0gc.jpg

My boss got a Suzuki in for parts which he says is the rustiest Suzuki hes ever bought!

DSCN1845_zpsg2srdura.jpg

While I was away the guys got the wheels on the tip truck shot blast and powder coated and fitted the mud tyres.

DSCN1846_zpsfaik04ll.jpg

DSCN1847_zpsok20pskt.jpg

DSCN1848_zpsujheviza.jpg

The spacers we had laser cut have worked well and have given us some clearance between the tyres.

DSCN1849_zpswxtlttwa.jpg

DSCN1850_zpsartudwlb.jpg

Pulled the body off the rusty Suzuki.

DSCN1855_zpsdie99rmg.jpg

DSCN1857_zpsljqbqm0v.jpg

Took the chassis outside to pressure wash the engine, transfercase, gearbox, axles and fuel tank before removal.

DSCN1858_zps16doglcl.jpg

DSCN1859_zpsz4tesnxi.jpg

Then made a start pulling it all apart.

DSCN1860_zpsyod5u0ig.jpg

OK......................

Back to LJ.

I drilled the other hole for the fuel gauge in the alluminium fascia.

DSCN1839_zpsg61cijm7.jpg

I removed my burnt out oil pressure gauge and the new one.

DSCN1851_zpscdgyep61.jpg

You can see how badly melted my old one is.

DSCN1854_zpsvmg9ebdg.jpg

Re-assembled the instrument cluster.

DSCN1861_zpswtlwjmdg.jpg

DSCN1862_zpsq5bn2wmj.jpg

ToyoDIY has once again proven invaluable in helping me with the aircon install in LJ. :clap:

I ordered all new O rings for all the joints that I've undone.

diag_1CEwDrF_zpswttnlpws.png

New O rings.

DSCN1863_zpssvcjbdmq.jpg

I picked up some HZJ75 front brake discs which are the same as KZJ70 ones.

DSCN1864_zps3wl1o71s.jpg

DSCN1865_zpspezf8oxs.jpg

DSCN1866_zpsyn3ek1wu.jpg

Fitted the aux fuel tank gauge.

DSCN1868_zpsn9jlp0cg.jpg

DSCN1870_zps26esjb1l.jpg

Made a start nice and early today on LJ.

DSCN1873_zpsctimzsy4.jpg

First job was to move all the wires that were through the hole in the bulkhead where the aircon pipes need to go.

Removed the batteries and one of the trays.

DSCN1874_zpsv7g4wbiu.jpg

The wiring was a bloody mess! :thumbdown:

DSCN1875_zpsamkelzhc.jpg

DSCN1876_zpsprditjo7.jpg

I looked inside the passenger side wing as Craig had mentioned and I found the turbo pressure sensors!

DSCN1877_zpsffzna8uf.jpg

Not sure how I have missed them before, I can only imagine I poked the hose inside the wing years ago when I was pulling the old engine out and completely forgot about it. :think:

Thanks Craig. :thumbup:

Back to the wiring mess.

DSCN1879_zpsuzas9kxm.jpg

I needed to move about 20 wires running through the bulk head where the aircon pipes will go.

DSCN1880_zpsubysxiif.jpg

DSCN1881_zpszzmctabo.jpg

I needed to pull everyone of the colored wires out going to the fuse box.

DSCN1882_zpsw6kfdv4s.jpg

As well as all the control wires going to the winch.

DSCN1887_zpscxaiwbnj.jpg

Eventually I'd disconnected everything and could pull all the wires back through the bulk head.

DSCN1889_zpskp31kyil.jpg

DSCN1890_zpsf2kfsaml.jpg

I decided to re-route all the wires through a rubber grommet right in the top corner of the bulk head.

DSCN1892_zpsl0d7kyut.jpg

DSCN1895_zpspy15p8kh.jpg

The auto electrician who did all my wiring did an OK job but rather than running one length of 20mm split tubing with all the wires inside he ran three or four and so everything looked very cluttered and messy.

So I spent the next 3 hours sorting it all out and getting it nice and neat in one length of split tubing.

I had lots of wired to sort out and push inside the split tubing.

DSCN1896_zpswnzmnrqp.jpg

I had to remove the fan unit to allow me access for re-routing the wires and so I thought I'd explain exactly where I'm adding the new aircon evaporator.

This is the standard, no aircon setup with the fan unit on the left and a section of ducting which connects it to the heater matrix.

DSCN1898_zpsvwttyxyj.jpg

DSCN1900_zpsnnn0rio5.jpg

DSCN1901_zpssrszr7lc.jpg

On models with aircon the aircon evaporator sits between the fan unit and the heater matrix.

So this duct section is now redundent.

DSCN1902_zpsvuwdrfh5.jpg

DSCN1903_zpszjyqdnhl.jpg

DSCN1904_zpsdf7rnemk.jpg

Fan unit re-fitted.

DSCN1905_zpshno5znrz.jpg

DSCN1906_zpsnuxcr4zy.jpg

Followed by the aircon evaporator.

DSCN1907_zpsjnn3yeki.jpg

DSCN1907_zpsjnn3yeki.jpg

DSCN1908_zpsko7dz3xv.jpg

Connected the electrics to the evaporator.

DSCN1910_zpsxlj8yoqs.jpg

Re-fitted the glove box.

DSCN1911_zpsi5vxyyjt.jpg

A small loss of passenger foot room but not much.

DSCN1912_zpsvkx7wicu.jpg

I now had the aircon pipes sticking through in to the engine bay.

DSCN1913_zpsirhdbfag.jpg

DSCN1914_zpsevnkkd9f.jpg

I re-fitted the batteries and the wiring was now a lot neater.

DSCN1915_zpsycmhmwyg.jpg

I still need to tidy up the loom around the engine but I've been waiting to get the new oil pressure gauge fitted so the auto electrician can finally work out which wires go where.

With the batteries back in I re-fitted the instrument cluster and could then start the engine and see if everything worked.

DSCN1916_zpst547afvz.jpg

All worked well including the new aux fuel gauge.

DSCN1918_zpsux2li1ac.jpg

DSCN1922_zpsaatheeci.jpg

By connecting the hose from the boost sensors that Craig told me about I now have working turbo lights again! :dance:

The green currently eluminates at just over 2000.

DSCN1921_zps8rs6w2px.jpg

Not sure at what rev the red light comes on at, will have to test drive it to find that out.

I had been trying to work out which wires to connect to this turbo pressure sensor on the 1KZ-T engine and had never managed to work it out before, hence no turbo lights before today.

DSCN1923_zpskwxky02m.jpg

DSCN1926_zpsruopzqzz.jpg

I still need to do some more electric and finish wiring and plumbing up the fuel pump but I decided to do some on the brake upgrade.

DSCN1928_zpslwsf3hqj.jpg

First I checked the new discs against standard LJ70 discs.

DSCN1930_zpsxz6d32ep.jpg

Exactly the same height.

DSCN1931_zps0nlbv1yt.jpg

DSCN1932_zps8rvenzcd.jpg

And exactly the same width.

DSCN1933_zpscifofyam.jpg

DSCN1934_zpspdpuszbi.jpg

It also looked like the dust guard would only need a tiny bit of trimming.

DSCN1935_zpszo0dph5l.jpg

DSCN1936_zpsb3yynv2s.jpg

Pulled the hub off.

DSCN1938_zpsqrnt3b8j.jpg

DSCN1939_zpsfcmsk39l.jpg

Removed the 2 M8 bolts, knocked all the wheel studs out and prised the disc off the hub.

DSCN1940_zpshiq9ned6.jpg

DSCN1941_zpspqjahnxu.jpg

Fitted the new disc.

DSCN1942_zps7bcgrqxq.jpg

Set the wheel bearing preload exactly to the FSM.

DSCN1943_zpsuowvezqf.jpg

DSCN1944_zpszs9gy41h.jpg

DSCN1945_zpskkyqveow.jpg

Marked what needed cutting off the dust guard.

DSCN1947_zps6j15llwc.jpg

And fitted the caliper.

So this is the setup LJ would have had had she left the Toyota factory with the 1KZ-T engine. Obviously there must have been a reason why the 3 litre 70's got bigger brakes.

DSCN1948_zpsd3lmwwmw.jpg

Slight technical question now............................

Ignore the bolt currently pushed through holding the pads in, that will get replaced with the proper pin.

The disc is flush against the inside of the pad but on the outside of the disc there is a 3mm gap between the disc and the pad.

Do I need to space the caliper out with some washers?

I think the pads will just get pushed to where they need to be once the brakes are applied and the pistons push out? :think:

DSCN1949_zps7mbovq7k.jpg

DSCN1951_zpscbidvegs.jpg

DSCN1952_zpsmlf0xfjx.jpg
 
I think you shbrakesget the caliper body central for the brakes to work properly. Does the manual or parts list show washers? there doesnt seem to be much clearence between the top of the caliper and the disc?

I changed the brakes on my 80 to the later ones and refitted the washes that were already tbere and tbe caliper was spot on.
 
Ben i give it to you mate u do get a lot done in a day lol
also yes is put a 1mm spacer between caliper just to get it more central
the more the caliper is central the better they will work.

That 1kzt turbo pressure gauge u have on the inlet pipe, i never bothered with that took it off as I wired it up and got a green light on from it but was on as soon as I started it so gave up a threw it away after that
I'd like to see if ur red light comes on once uve drove it
mine comes on once up to temperature and wen under load in 3rd 4th and 5th it comes on at around 3000ish now
I'd like to see if it does just as I've copied what uve done with installing engine and upping fuel so will be interesting

also going to clean my actuator and waste gate tomorrow just to be sure

keep it up mate
 
Thanks guys. :thumbup:

Going out to make a start shortly so will look at spacing it out with washers.

It does look close to the disc in the pic above but its not bolted in place, just sat there so it may have dropped slightly.

I havent checked the manual/Toyodiy to see if there is washers, will have a look now.

Will let you know regarding the turbo lights Craig.

I'd be interested to know where abouts on your loom you found the wires/connector for the oil pressure and low oil warning light sensors?

I've got a bunch of wires on the passenger side that arnt connected to anything and a few more on the drivers side.

Once I get them connected and working I can finally get all the loose wires taped up and tidy all the loom up and run it neatly in split tubing. :icon-biggrin:
 
No mention of washers/spacers on Toyodiy. :think:
 

Attachments

  • brake.png
    brake.png
    21.8 KB · Views: 193
Ok well as for the oil pressure sensor I used the 2.4 and wired up one to earth I believe and one to a live I'll trace them tomorrow for u mate
 
As for low oil warning light I haven't got one

the eh oil sensor on the 1kzt sump I took the wires out the plug and filled with silicone
 
Thanks mate. [emoji106]

Just trying to build up the courage to brave the frost outside. Dam it's cold here! [emoji33]


Sent from my iPhone using Tapatalk
 
Really it's nearly 30 here lol I'm up pub at the mo need make exhaust up tomorrow hope I can see straight haha
 
I had a busy week at work.

I've been doing more work on the airboat.

DSCN2000_zpsbywbvzdc.jpg

This was going to be the donor vehicle.

DSCN2001_zpslujxde7d.jpg

The engine is just under 100bhp.

DSCN2002_zpsp46g6pks.jpg

I worked out the height and position of the front 2 passenger seats.

DSCN2003_zpsxeocqrik.jpg

DSCN2004_zpsuuocehgb.jpg

Cut some alluminium.

DSCN2018_zpsbqxa7amg.jpg

And tek screwed it in position, it will be bolted on with M6 bolts into rivnuts at some point.

DSCN2019_zps3agv6hjf.jpg

DSCN2020_zps9n3ivy5w.jpg

Fitted another one.

DSCN2021_zps9cj2ixs7.jpg

DSCN2022_zpsdccgbbto.jpg

As we were going to use the Suzuki engine, we decided it would make sense to also use the Suzuki fuel tank.

Removed the tank.

DSCN2024_zpsutwutqhz.jpg

It fitted quite nicely behind the bulkhead at the front of the boat.

DSCN2025_zpsay6e8oce.jpg

DSCN2026_zps7wyrpfla.jpg

DSCN2027_zps3myk8m5m.jpg

We thought about fitting twin tanks to give us more fuel range.

DSCN2043_zpshvkcbomm.jpg

DSCN2044_zpsffinyr4g.jpg

The new folder bent a piece of 3mm alluminium beautifully! :clap:

DSCN2053_zps36cnzvkp.jpg

DSCN2054_zpsviiszmxr.jpg

DSCN2055_zpsekbio6hy.jpg

Worked out the height this section needed to be welded on.

DSCN2058_zpsxamjruof.jpg

DSCN2059_zpsugczodpu.jpg

Got the TIG setup.

DSCN2065_zpswn3bbl6f.jpg

And tacked it in place.

DSCN2066_zps7kowi8ef.jpg

DSCN2067_zps2zyr4uwy.jpg

We got lent a brand new boat seat by our local upholsterer/boat guy, so I could get some measurements for how big to make the frame that 2 of these seats will mount on to.

DSCN2063_zpswez0q8kf.jpg

The frame of the seat is fiberglass.

DSCN2064_zpsssyjjwla.jpg

DSCN2061_zpso476g8rf.jpg

DSCN2062_zpscppovzqz.jpg

A slight change of plan..........................

My boss has acquired a 250bhp Subaru Impreza engine that he wants to use instead of the 1.6l 100bhp Suzuki lump! :icon-twisted:

DSCN2095_zpsnhdiqd6f.jpg

DSCN2096_zpsgmhckd4b.jpg

DSCN2097_zpssf47g0pj.jpg

So with that I decided there was no point using the Suzuki fuel tank.

So I decided I would build a tank from scratch.

Cut a template of the shape/size of the tank.

DSCN2103_zpsgmcshqjm.jpg

DSCN2104_zpsu0hxcd1s.jpg

DSCN2105_zpshj3qtxbp.jpg

Folded some 2.5mm thick alluminium.

DSCN2106_zpsyl6xovrq.jpg

DSCN2107_zpsebqo5miv.jpg

Cut and folded up a baffle.

DSCN2108_zpsruicpmjn.jpg

DSCN2109_zpsb2dc11yh.jpg

DSCN2110_zpss55cnqwy.jpg

Welded it in place.

DSCN2111_zpsfc65ne3y.jpg

Thats as far as I got on the main body of the tank.

I found a low millage 2L Suzuki tank.

DSCN2099_zpsguakzfcw.jpg

Removed the pump which has the fuel level sender and fuel flow outlet and return built neatly all into the one unit.

DSCN2100_zpsdnjoasn1.jpg

Next I started making the boss that the fuel pump unit will mount to.

I got a 15mm thick off cut from a piece of 150mm solid bar.

DSCN2112_zpsgguriudf.jpg

Cut the center out on the lathe using a hole saw.

DSCN2113_zpsqyihcewu.jpg

DSCN2114_zpsoy3jm435.jpg

DSCN2115_zpstzq0nfph.jpg

DSCN2117_zpsajlqwdow.jpg

DSCN2118_zps2bkfjna6.jpg

It will need the mounting holes drilling and tapping into this alluminium boss, then it can be welded into the center of the top of the fuel tank.

I made a start on what will be my main job for the next week, making alluminium frames to mount the most efficient solar panels in for the solar Suzuki in preparation for next years attempt at the world record.

Started welding a frame up.

DSCN2068_zpsmm297ceo.jpg

Out of channel.

DSCN2069_zpswdlpiqwn.jpg

DSCN2074_zps92w17tvv.jpg

Slid the flexy solar panels in.

DSCN2078_zpse4ks73dp.jpg

DSCN2079_zps18jl0k0n.jpg

Made up a frame out of 40mm tube for the first frame to mount inside of.

DSCN2080_zpswtjrd2ft.jpg

DSCN2083_zpshquxwaxl.jpg

Welded in some corner braces.

DSCN2084_zps8tlhqcud.jpg

DSCN2085_zpsfkk3phby.jpg

And some tabs to bolt the other frame down with.

DSCN2086_zpsp2pa065y.jpg

DSCN2087_zpse3kzkv01.jpg

Bolted the other frame in position.

DSCN2088_zpsourndweq.jpg

DSCN2089_zpsa627khsj.jpg

It weighed just under 24kg.

DSCN2090_zpsp3wz980u.jpg

Trial fitting it on the roof of the car.

DSCN2091_zpsfolryotz.jpg

DSCN2092_zpsfdojqspa.jpg

And finally the tip truck is now completely finished and ready to be put to work on the farm.

We had some stickers put on this week which I think finish it off nicely.

DSCN2048_zpsgwopeo4g.jpg

DSCN2050_zpsu8oe5s4e.jpg

DSCN2051_zpswkf9aahj.jpg

OK...........................
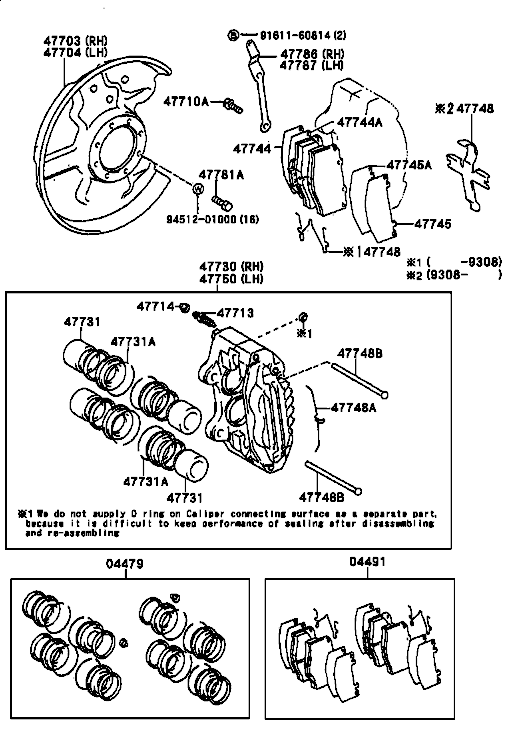
Finally LJ. :dance:

I finished fitting the passenger side brake caliper.

DSCN1954_zpst0pbpjcr.jpg

DSCN1955_zpsg0dnnbul.jpg

I had to grind a chunk out of the bottom of the caliper which I wasnt too happy about but I dont think it should matter.

DSCN1956_zps0rlxzlok.jpg

DSCN1957_zpsc6y11ti6.jpg

DSCN1960_zpspmln6pkv.jpg

DSCN1961_zpse8gmor9l.jpg

Spaced it out with some washers to ensure the disc sat perfectly center in the caliper.

DSCN1962_zpslamwar2p.jpg

DSCN1963_zpsrtfp7v4d.jpg

DSCN1964_zpszp5lxqtw.jpg

DSCN1967_zpsic6xthuk.jpg

DSCN1968_zpsjhhtbypd.jpg

With that side done.

DSCN1974_zpsrqiqmwak.jpg

I moved on to the other side.

DSCN1976_zpsxfb7yqhd.jpg

DSCN1977_zps8mulnwsr.jpg

DSCN1978_zpsbwmrdvxp.jpg

DSCN1980_zpsdw0mccpw.jpg

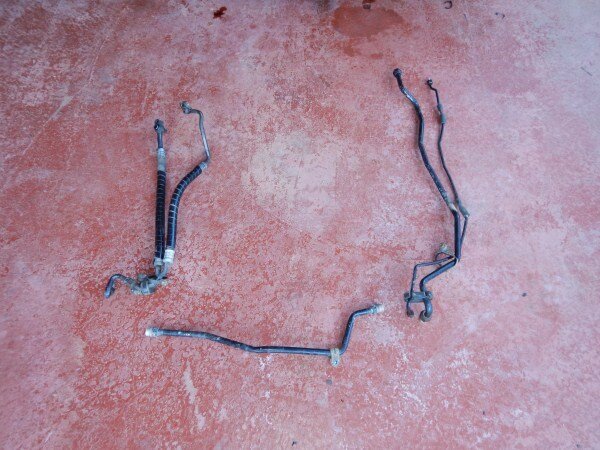
I decided to replace the brake hoses as after 23 years the rubber was a bit cracked and perished.

DSCN1987_zpscdswmjxg.jpg

I was going to get stainless steel braided hoses made but I couldn't justify the price.

DSCN2005_zpsjddephgd.jpg

Fitted them.

DSCN2006_zpszxurazml.jpg

DSCN2007_zpsxerjxmcm.jpg

And bled the brakes.

DSCN2008_zps1zgygemm.jpg

Aircon next.

DSCN1988_zpsea1xl6bb.jpg

The drier will be getting replaced as thats standard procedure when getting an old setup working again.

DSCN1989_zpsxbatpdma.jpg

Removed it.

DSCN1990_zpsjr7vnzkf.jpg

And the brackets.

DSCN1991_zpsajngkiwl.jpg

Wire brushed it.

DSCN1994_zpsqw5tg9qa.jpg

And rust killed the condenser surround and brackets.

DSCN1996_zpsskwymhsq.jpg

Then painted it black.

DSCN1998_zpswdincrr3.jpg

And painted all the brackets.

DSCN1999_zpsqkxgxuv7.jpg

DSCN2009_zpsyiwb8ecr.jpg

Bolted all the brackets back on.

DSCN2010_zpsxd3ybvaj.jpg

Started fitting it.

The space it would fit into.

DSCN2011_zpsiamg3qyz.jpg

The 2 metal power steering pipes would need moving and the horn and bonnet catch would need unbolting to allow me to swing the condenser in.

DSCN2013_zps5hptrqv3.jpg

DSCN2017_zps1gc6e23n.jpg

Power steering pipes disconected and twisted up out of the way.

And condenser in.

DSCN2028_zpsnxabfb9g.jpg

DSCN2032_zpsp5mxzphw.jpg

DSCN2033_zpsarqoxrvm.jpg

The brackets lined up with existing holes in the body and everything bolted up nice.

DSCN2034_zpsamqtgisc.jpg

DSCN2037_zpsnh5tn82m.jpg


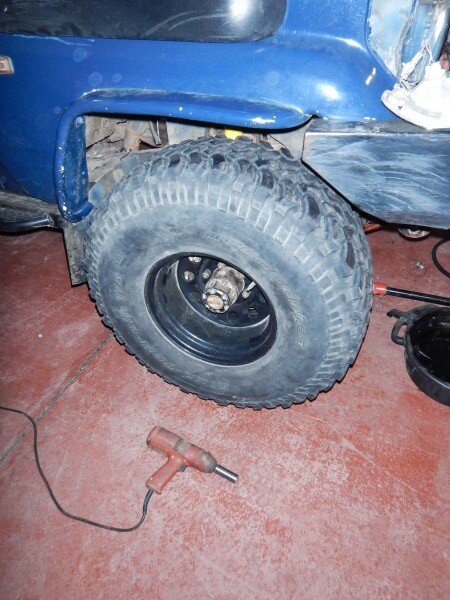
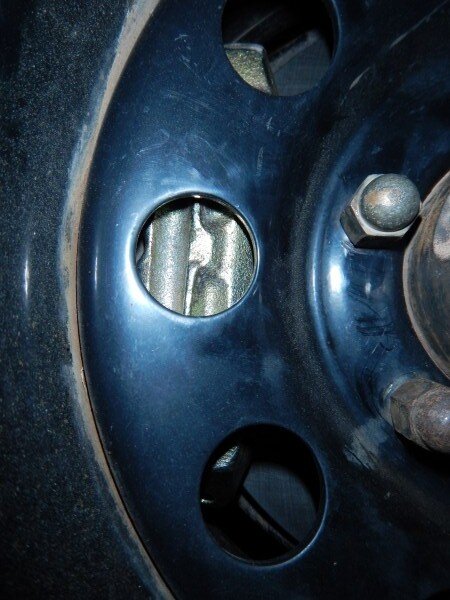
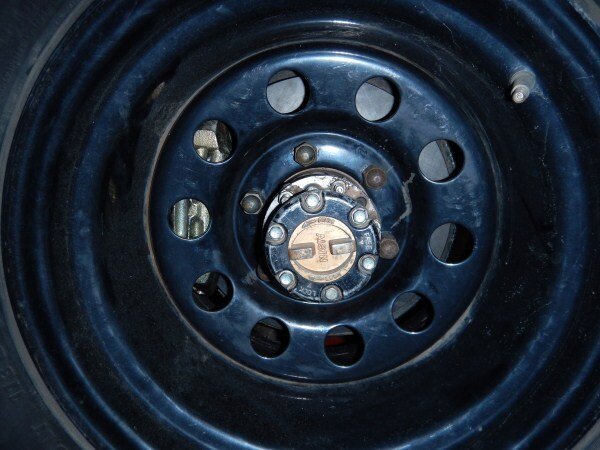
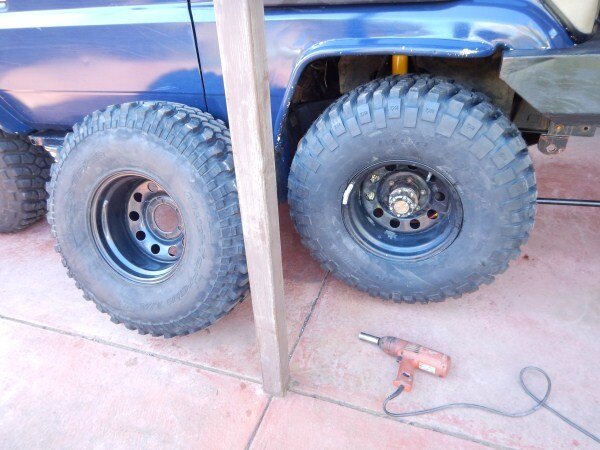
I re-fitted the front wheels.

DSCN2038_zpsfbcdkcqw.jpg


And the wheels cleared the new bigger calipers nicely.

DSCN2039_zpsu0ubxrwt.jpg


DSCN2041_zps1bhrabb6.jpg


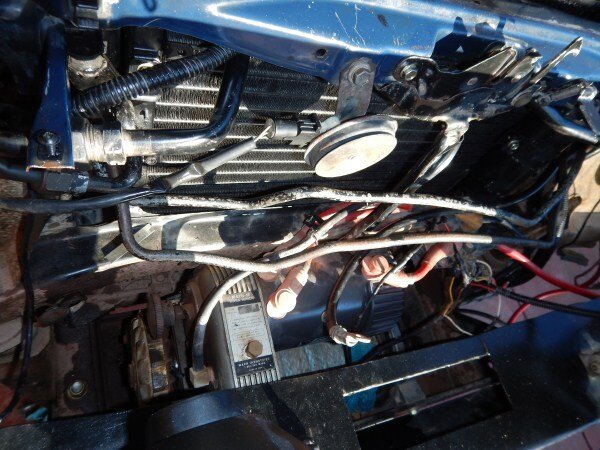
Back to the con install.

DSCN2076_zps6amsintg.jpg


I needed to fit the pipe work next.

DSCN2077_zpsvs0zhc63.jpg


I'd fitted the power steering pipes in front of the radiator years ago when I did the engine conversion but I really wasnt happy with their position, they were in the way and looked shit.

DSCN2093_zpskgqgpan2.jpg


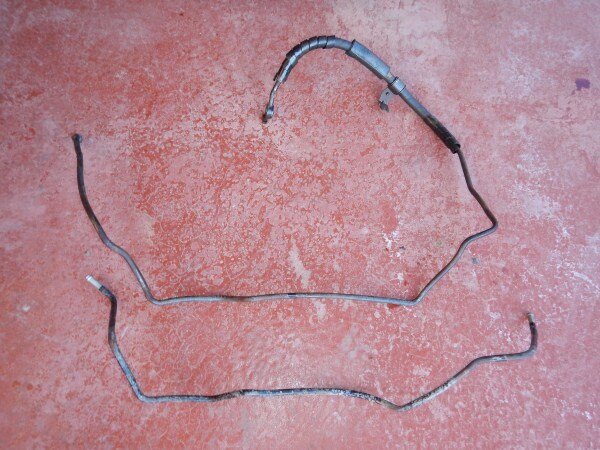
I removed the pipes.

DSCN2094_zps0ybfb4ul.jpg


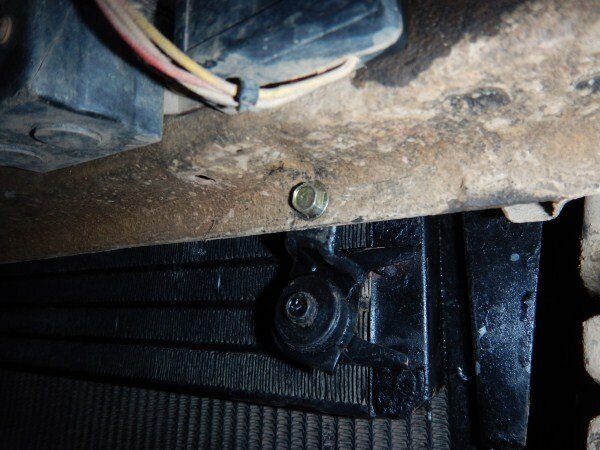
I managed to run them neatly along the front cross member instead, behind the winch, in a much better position.

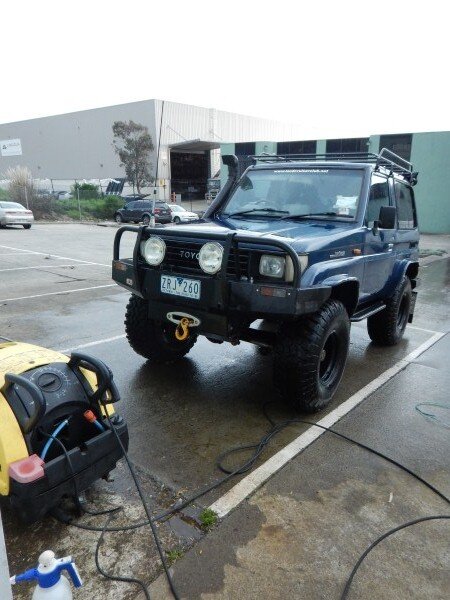
I took LJ to work on Friday and after work I de-greased and steam cleaned the engine and underneath.

DSCN2119_zpskmhlx8mi.jpg


I have a confession that I did something really really stupid and that was why I needed to steam clean the engine. :oops:

After bleeding the new brakes, I thought I will just drive backwards and forwards a few times and test the brakes. Only issue was the power steering pipes were not connected and were sat up in the air. :icon-rolleyes:

So I ended up with a power steering fluid fountain that went f*****g every where! :angry-screaming:

Anyway..............

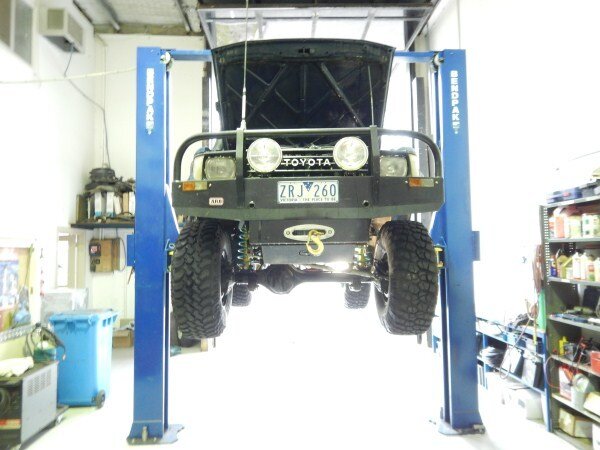
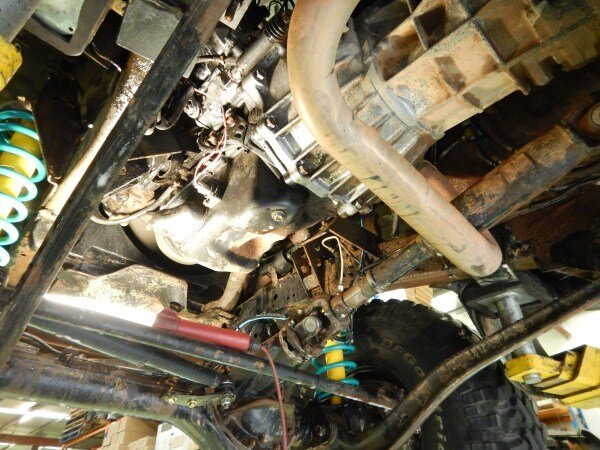
After cleaning LJ I got her on the hoist for a full check over and to try and diagnose an engine oil leak.

DSCN2125_zpszzpwcma6.jpg


DSCN2126_zpswt7zvhcb.jpg


There were no noticeable leaks with LJ on the hoist with the engine running but I believe I've traced it to the top of the engine on the turbo intake pipe, so I will order a new gasket.

DSCN2129_zpsno0nd9yi.jpg


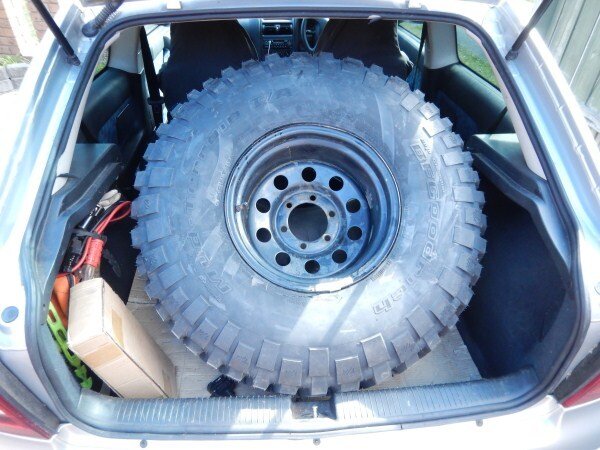
I went out and saw the guys at Huntsman on Saturday for a replacement KM2 tyre to replace the damaged one.

They gave me an absolutely awesome price and wearing my Piranha shirt helped as they know my boss and come in from time to time for Suzuki parts. :dance: :clap:

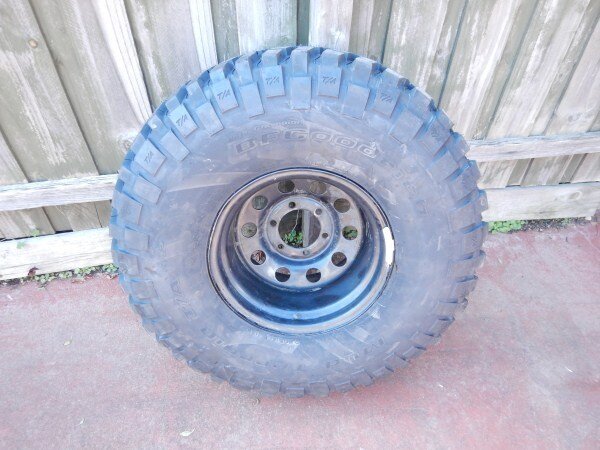
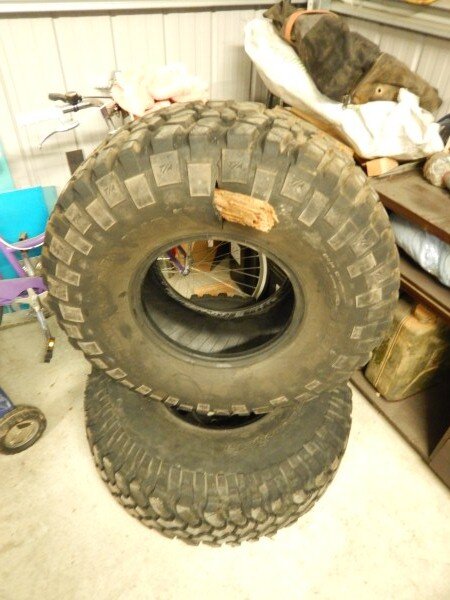
New tyre fitted on my rim.

DSCN2130_zpsrcig09v0.jpg


DSCN2131_zpsagsgyuek.jpg


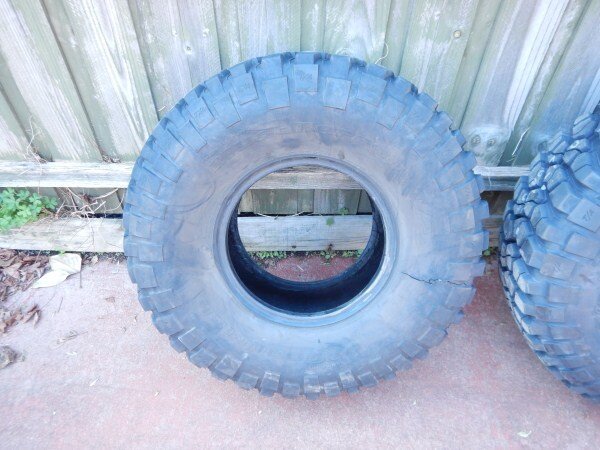
Old tyre which I have a seriously cool use for. :shhh:

DSCN2132_zpsbrbggfrs.jpg


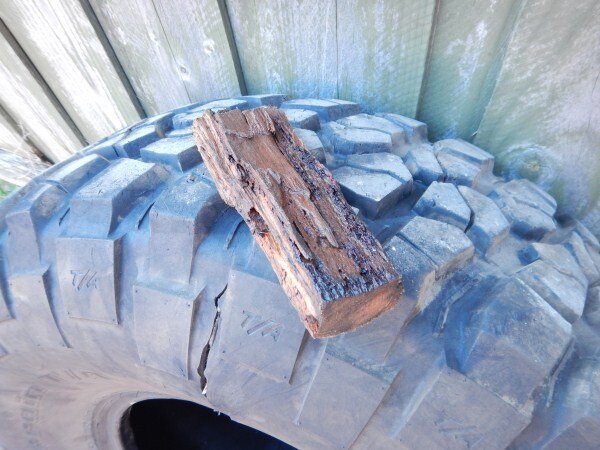
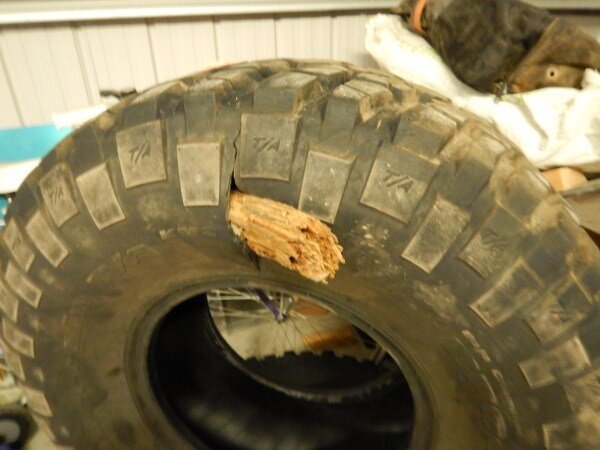
While fitting the new tyre the guy shouts over to me from the tyre machine "I've found what caused your puncture"!

He had found a massive chunk of hardwood inside the tyre! :wtf:

DSCN2133_zpse0ee2mge.jpg


Removed my spare which is a KM1, purchased from Tony Toyota many years ago, and fitted the new tyre.

DSCN2136_zpszvgtlfk0.jpg


Still cant get over that chunk of wood! Crazy! :crazy:

DSCN2140_zpsrrdcxygm.jpg


DSCN2141_zpsgslysg0o.jpg


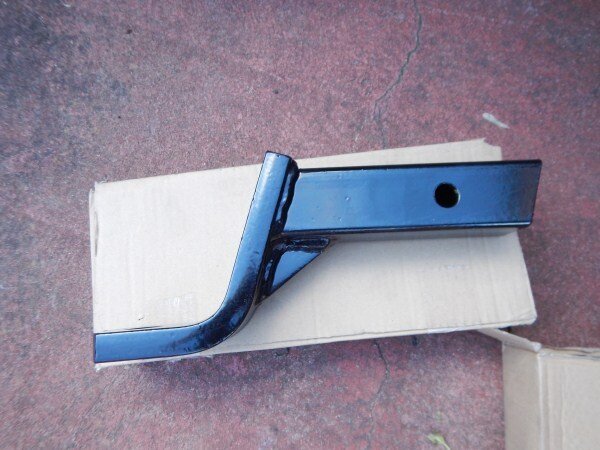
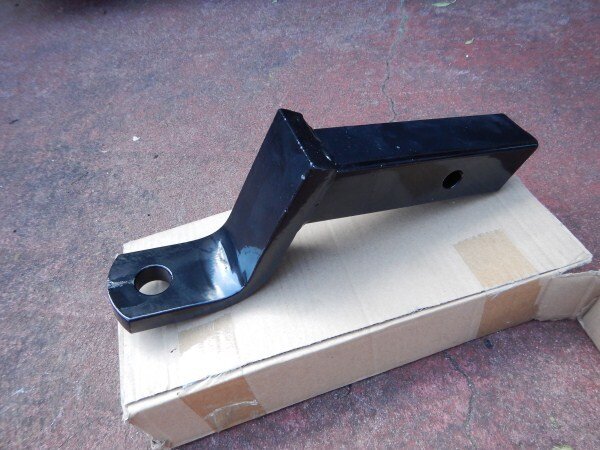
I also picked up a drop hitch as I'm going to add a receiver hitch to LJ's rear bumper.

DSCN2134_zpsgyec6lwm.jpg


DSCN2135_zpswujfupp1.jpg


As its going to probably be a few years until we can afford a 79 series ute, we will instead buy a big trailer for the property renovations were planning on getting into next year when we buy the first property to fix up and sell on. So LJ will become chief tow vehicle to enable us to pick up materials and drop off rubbish at the tip. :icon-biggrin:

I also got a sticker from them for my tool box. :icon-cool:

DSCN2142_zpsope5iodw.jpg


Bec is on nights this week meaning I should get plenty of time each evening to get lots done on LJ.

The grill needs to come back off so I can finish a little bit of wiring and fit the support/securing brackets to the aircon pipes.

I need to source the mounting brackets to mount the air compressor onto the 1KZ-T(E) engine as that is one thing the guys at All 4x4 dont have.

Looking at pics of 1KZ-T aircon compressors I suspect I may need to make/source some pipes to connect the new pump to the rest of my system as I dont believe the ends I've currently got fitted will bolt to the 1KZ-T pump.

I also need to finish wiring and plumbing up the fuel transfer pump.

Modify my rear bumper to add a receiver hitch for towing.

Once all thats done I want to turn my attention to the rear end regarding the disc brake conversion and 3 link suspension conversion.

I also need to fit a modified quick release anti roll bar. :think:

So making progress, but lots still to do. :thumbup:
 

Attachments

  • DSCN2037_zpsnh5tn82m.jpg
    DSCN2037_zpsnh5tn82m.jpg
    68 KB · Views: 40
  • DSCN2038_zpsfbcdkcqw.jpg
    DSCN2038_zpsfbcdkcqw.jpg
    103.2 KB · Views: 42
  • DSCN2041_zps1bhrabb6.jpg
    DSCN2041_zps1bhrabb6.jpg
    86.3 KB · Views: 39
  • DSCN2039_zpsu0ubxrwt.jpg
    DSCN2039_zpsu0ubxrwt.jpg
    63.1 KB · Views: 51
  • DSCN2076_zps6amsintg.jpg
    DSCN2076_zps6amsintg.jpg
    102.5 KB · Views: 52
  • DSCN2077_zpsvs0zhc63.jpg
    DSCN2077_zpsvs0zhc63.jpg
    81.9 KB · Views: 34
  • DSCN2093_zpskgqgpan2.jpg
    DSCN2093_zpskgqgpan2.jpg
    86.7 KB · Views: 40
  • DSCN2094_zps0ybfb4ul.jpg
    DSCN2094_zps0ybfb4ul.jpg
    83.5 KB · Views: 51
  • DSCN2125_zpszzpwcma6.jpg
    DSCN2125_zpszzpwcma6.jpg
    58.1 KB · Views: 41
  • DSCN2119_zpskmhlx8mi.jpg
    DSCN2119_zpskmhlx8mi.jpg
    90.6 KB · Views: 47
  • DSCN2126_zpswt7zvhcb.jpg
    DSCN2126_zpswt7zvhcb.jpg
    55.5 KB · Views: 43
  • DSCN2129_zpsno0nd9yi.jpg
    DSCN2129_zpsno0nd9yi.jpg
    94.6 KB · Views: 48
  • DSCN2130_zpsrcig09v0.jpg
    DSCN2130_zpsrcig09v0.jpg
    76.6 KB · Views: 46
  • DSCN2131_zpsagsgyuek.jpg
    DSCN2131_zpsagsgyuek.jpg
    68.9 KB · Views: 42
  • DSCN2132_zpsbrbggfrs.jpg
    DSCN2132_zpsbrbggfrs.jpg
    69.1 KB · Views: 40
  • DSCN2133_zpse0ee2mge.jpg
    DSCN2133_zpse0ee2mge.jpg
    73.6 KB · Views: 45
  • DSCN2136_zpszvgtlfk0.jpg
    DSCN2136_zpszvgtlfk0.jpg
    68.6 KB · Views: 48
  • DSCN2140_zpsrrdcxygm.jpg
    DSCN2140_zpsrrdcxygm.jpg
    85.6 KB · Views: 44
  • DSCN2141_zpsgslysg0o.jpg
    DSCN2141_zpsgslysg0o.jpg
    54.7 KB · Views: 47
  • DSCN2134_zpsgyec6lwm.jpg
    DSCN2134_zpsgyec6lwm.jpg
    63.9 KB · Views: 39
  • DSCN2135_zpswujfupp1.jpg
    DSCN2135_zpswujfupp1.jpg
    71.1 KB · Views: 41
Last edited:
Back
Top