Don't like the adverts?  Click here to remove them

Member converts to Bio-diesel

Nathan can you tell us more about the chemicals that needed to be added to the cleaned & filtered WVO please.

Where do you purchase them from and how much do they cost? :think:


Ben... r u thinking of doing this in Aus? I've shipped loadsa centrifuges to Aus, WVO, bio or to fit on Diesel engines?? I'd imagine that you'd need to be in a well populated area to get the WVO.
 
Hi Nathan,

I'm thinking of running on WVO in OZ. :icon-cool:

I'm confident that getting the used oil will be easier over there than here. From what I can tell not many people run on veg oil or bio over there, certainly not compared to here anyway. Maybe its because the regular fuel is roughly half the UK price, or at least was last time I was there.

Their is no limit over there on the volume you can make and use, the only thing you cant do is sell it on as fuel. :think:

I'm going to take a load of filter bags with me and start filtering and running on WVO. :icon-cool:
 
Hi Nathan,

I'm thinking of running on WVO in OZ. :icon-cool:

I'm confident that getting the used oil will be easier over there than here. From what I can tell not many people ru :oops:n on veg oil or bio over there, certainly not compared to here anyway. Maybe its because the regular fuel is roughly half the UK price, or at least was last time I was there.

Their is no limit over there on the volume you can make and use, the only thing you cant do is sell it on as fuel. :think:

I'm going to take a load of filter bags with me and start filtering and running on WVO. :icon-cool:

Half priced fuel :) is always nice. When I've been in the Emirates working (years gone by), I hired 100 series V8's . I was sure out there it was less than a tenner to fill (about 9 dirhams to the pound from memory).

When I first started to make bio I reckon it must have been less than 90ppl. It all started when one of my kids asked me what our carbon foot print was :oops:

I was running a V8 LC at the time and a 2.8 '93 saab :oops: . So the bio was just a token gesture at first. After driving on the first tank in an old banger I bought, I kinda got addicted to it. Great feeling to drive on your own fuel.
 
Last edited:
Personally, I'd use a PIC processor and develop a simple circuit board for it (done that for a clock for my rally car allowing me to measure speeds, distances and avg speed, as well as keeping an eye on the time down to the second - cost around £30 in parts)

Solenoids and coils need a bit of thought as they have nasty back-emf going on that can easily wreck input boards, motors can do similar things, inputs are pretty easy (digital or analogue - I've done both). Would need some sort of large scale timer (done that - got a working clock design already ;) ) then the rest is pretty simple. As for prototyping boards, I've done that at home with my laser printer, but pro-boards can be done at around £100 for 10 in small batches, or I can scale up and save some more moolah

The tough part is controlling valves - been looking at some linear actuators, they're a nice solution as you can use ball-valves and just connect the actuator to the handles and you've automated a manual process. The problem with valve control is that they are what make everything expensive, I don't think you'll get away with the small orifice solenoid actuated valves. Even the air operated valves aren't cheap (and you'll need to supply air to them, so you need a compressor....) but looking at some of the data sheets for the linear actuators, might be able to get something to open and close a valve for around $110 per actuator.

Might be missing something totally here but as far as I can see (But I haven't got my specks on) The system uses 22mm valves so what would be wrong with one of these http://www.screwfix.com/p/horstmann-f222-2-port-motorised-valve/94189 Not penuts but far less than £110 each.
 
That's an interesting link, was looking at some CH type components and wasn't sure about their suitability (most seemed to be based on three-way valves) but that looks like a useful piece of kit!

Trouble is, I work in industry so I look at industry components - they are over-rated (ie, oversized, overengineered, over-specced!) to improve reliability and durability, but come with a high price tag. I'm also used to working at 24V (none of this wiggly 240V stuff!) but with some relays in place, there's no reason I can't drive 240V motors from a 5V circuit (which they normally get stepped down to)

Yes, I think I can say with a little bit of buffering and some better datasheets on the valves, I can come up with a control board to drive relays (which drive the motors) for those types of valves. Awesome, might start the core design for that!
 
Last edited:
Exciting stuff. There's another home brewer (and oddly enought Fiat 500 nut), who is an engineer in the pharmaceutical industry, who reckons he can get stainless tanks at a good price - he can also stainless weld!

If I can get weaving on this in the next couple of weeks and get some of the automation components bought maybe we could meet up & work out the art of the possible. If we can document each part of the build, there could be automated bio processors all around :dance:
 
Don't like the adverts?  Click here to remove them
Well ive just done the third batch.

This time ive done it totally on my own from start to finish.

The truck is running great on the bio. Far cleaner and seems to go better. Starts up great. Really happy with the whole process.

Anyone standing on the fence should really seriously think about doing this. I wish i had started years ago.
 
Spent most of yesterday with my mate Steve (another home brewer), building a new polishing tank. I'll pull it out of the garage and take some pics later.

I've got four 45 gal drums of bio sat in the garden full of fuel. I'm not convinced of how water tight they are, most of it was made when ambient temp was higher, so it's possible that HMPE's have formed (high melting pot esters - see pic on 1st page), plus it's not winterised.

So my new tank will basically do what wash / dry tank does, but without the wash.

Pull in fuel from a drum via the tank's suction, push fuel through hardwood shavings in dry wash tower (the last couple of batches before my set up went off to Karl were rushed through polishing), centrifuge, dry any water that's got in via the spray bar / ring (new experimental), add Coldflow 350 and mix, dispense with a pair of polish pots into the car. Still got to weld three brackets, one for each of the two pumps (Tam 105 / Gear pump for fuge) and one for the polish pots.

I'm planning to put the whole thing on a skid, so that I can take it to the processor at the back of the garden and also take it into the garage to fuel the cars.
 
Sounds interesting Nathan.

Had no 2 heater go down last night in the prcessor :icon-cry: lucky that it went down once i had enough heat in it to do the second converstion. Left it on a timer for 1hour 45 so it turned off after mixed and had settled ready for this morning.
 
Sounds interesting Nathan.

Had no 2 heater go down last night in the prcessor :icon-cry: lucky that it went down once i had enough heat in it to do the second converstion. Left it on a timer for 1hour 45 so it turned off after mixed and had settled ready for this morning.

Hi mate

Is it defo the element and not the thermostat? I've never nailed an immersion before but I've gone through thermostats. I'm getting some in from BES in the next few days - can send you one up.

Also I should have mentioned that you have to ensure that when you dispense or drain from any of the tanks that the immersions are switched off. It's something that will get sorted with a bit of automation.
 
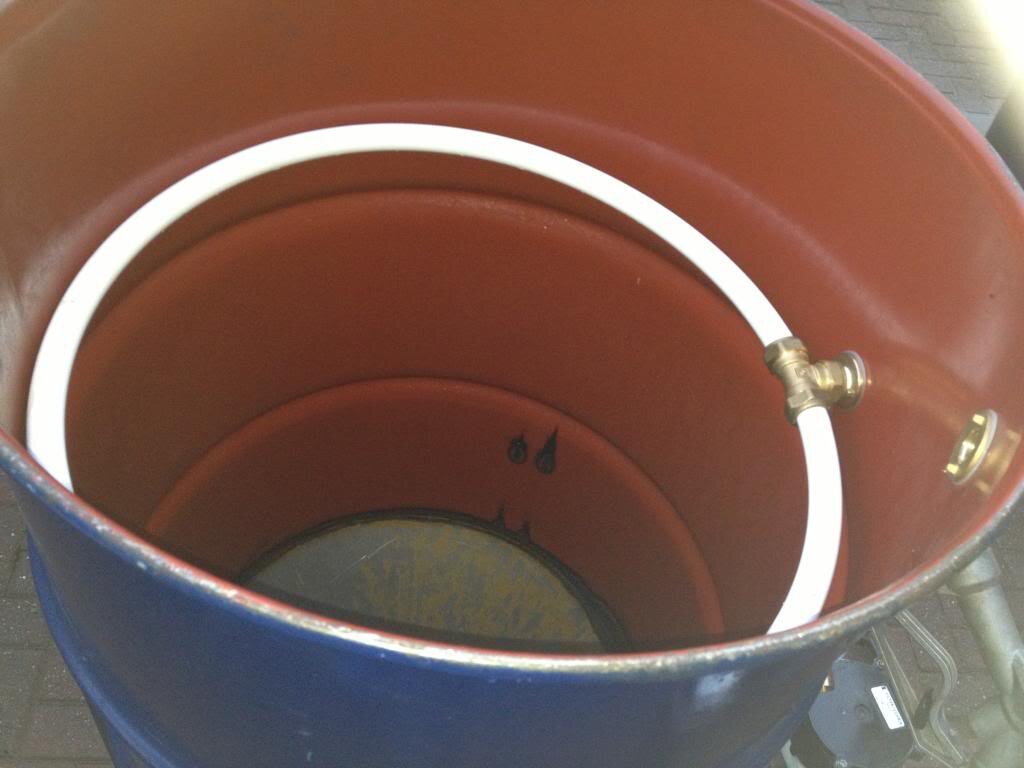
It's probably worth pointing out that with a sealable (vented) lid and a tee into the pipework below the elbow where the pipework goes through the 22mm tank connector for the spray bar, plus another ball valve, you could shut of the spray bar and have an eductor (creates turbulence for better mixing) set higher up in the tank, and a pump with a greater flow >60lpm, you could turn this very easily into an all in one processor.

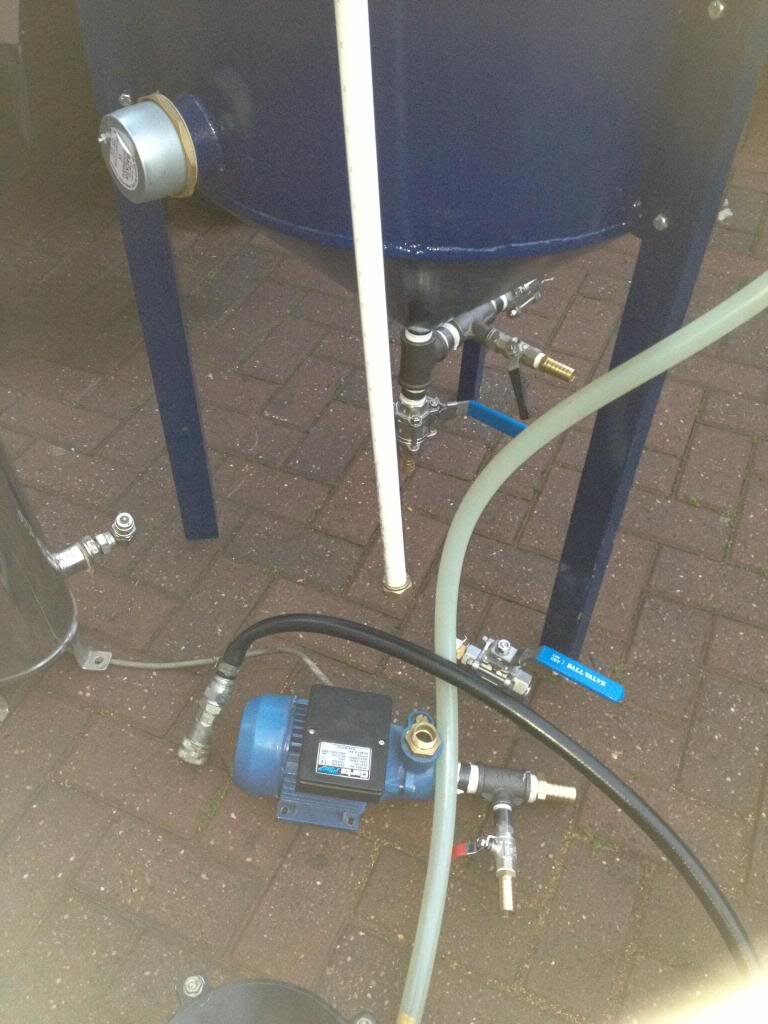
Bracket to be welded between legs for Tam pump which then connects to vertical plastic 22mm pipe


IMG_2462_zps625b1ea5.jpg

Gear pump on RHS to be mounted on the other side - temp gauge is imperative, but could come with pcl panel


IMG_2469_zpsda48d763.jpg

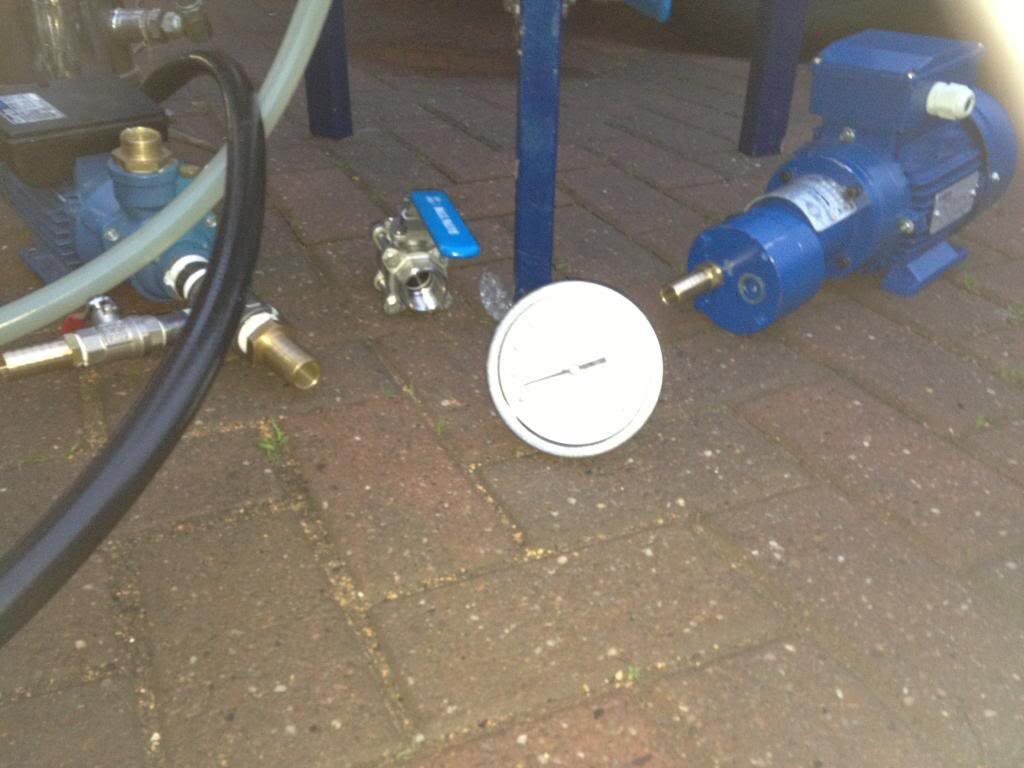
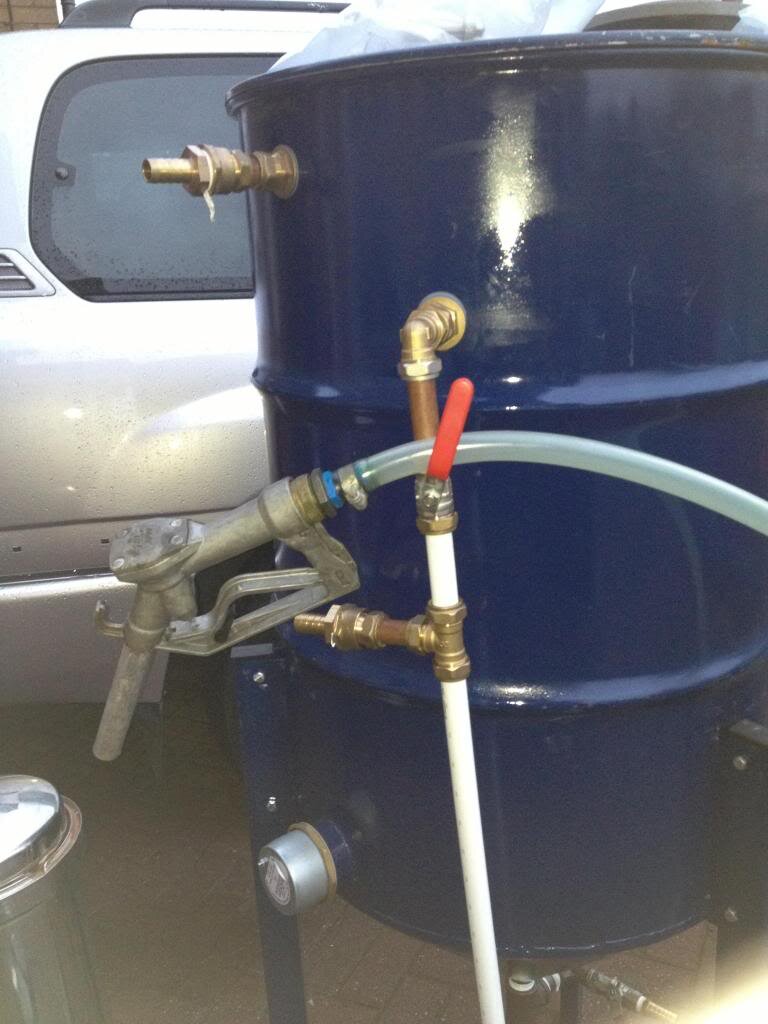
Spray bar / ring mounted through 22mm tank connector

IMG_2465_zps75a6daa4.jpg

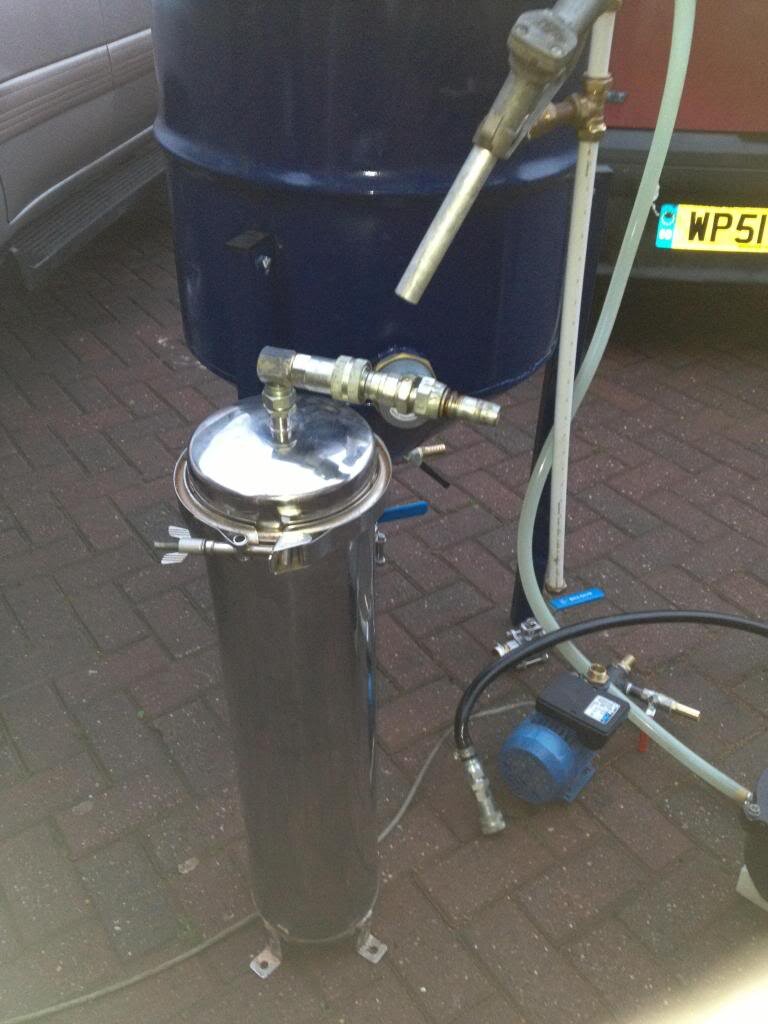
Polishing / final drying pots in foreground will be mounted to a third bracket between legs - but stainless tower will either remain on floor (quick release connectors) or might stand on a mobile skid which the tank would also be mounted to.
IMG_2460_zps03586de7.jpg

Tee will go to the hardwood shavings tower and back pressure on the tam 105 pump will be controlled with the valve to the spray bar. A ball valve will also be fitted on the tower side (run out of them)

Also the top tank connector 22mm to 1" adaptor with 1" - 3/4" hosetail is for the return from the stainless tower.
IMG_2461_zpsb180e7bf.jpg

Heating element in the bottom of the tank

IMG_2466_zps424c2ad2.jpg

Dispensing nozzle (hope it has viton seals)

IMG_2463_zpsc9351ae8.jpg

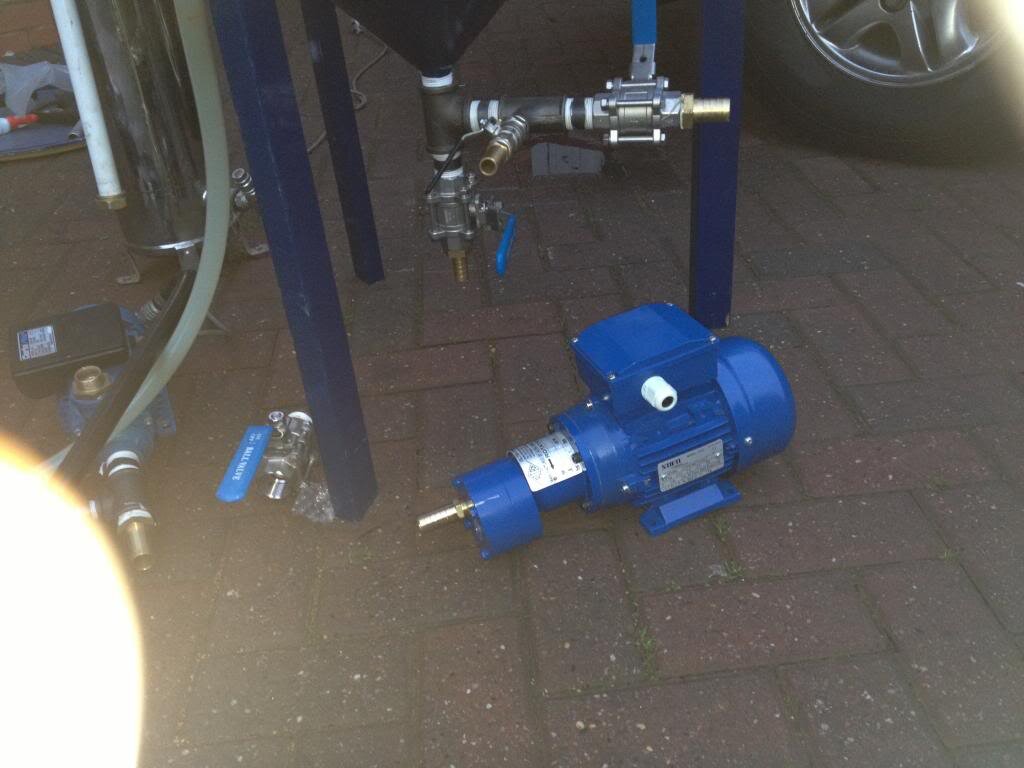
Ball valve arrangement - smaller hose tail will provide 'flooded suction to the centrifuge' larger lockable ball valve will provide suction to the tam 105 pump but can be slowed (you'll notice a Tee on the tam 105 allow fuel to be pulled into the tank from other drums). The lowest ball valve will allow any HMPE's that form in very cold weather to be dropped out before polishing with the centrifuge
IMG_2468_zps6bc4ff72.jpg

Ah & I forgot to mention the beautiful silver thing in the background...
 

Attachments

  • IMG_2462_zps625b1ea5.jpg
    IMG_2462_zps625b1ea5.jpg
    89 KB · Views: 29
  • IMG_2469_zpsda48d763.jpg
    IMG_2469_zpsda48d763.jpg
    75.5 KB · Views: 16
  • IMG_2465_zps75a6daa4.jpg
    IMG_2465_zps75a6daa4.jpg
    56.1 KB · Views: 9
  • IMG_2460_zps03586de7.jpg
    IMG_2460_zps03586de7.jpg
    89.5 KB · Views: 20
  • IMG_2461_zpsb180e7bf.jpg
    IMG_2461_zpsb180e7bf.jpg
    73.8 KB · Views: 19
  • IMG_2466_zps424c2ad2.jpg
    IMG_2466_zps424c2ad2.jpg
    46.9 KB · Views: 14
  • IMG_2463_zpsc9351ae8.jpg
    IMG_2463_zpsc9351ae8.jpg
    78.3 KB · Views: 20
  • IMG_2468_zps6bc4ff72.jpg
    IMG_2468_zps6bc4ff72.jpg
    69.1 KB · Views: 7
Last edited:
Looks Great Nathan.

How come the Spray bar is that far down? A question i was going to ask but i forgot untill now is when im drying a the end (with the lid off) :lol: Im getting alot of spraying out the top of the tank even with the pressure turned down.

Ive sorted the heaters.You were night it was just the thermostate goosed. Do you need this old meth tank as i may make a dewater tank so i can do 180L from the start. There again it may be worth me holding fire and just weilding the whole thing onto the top of yours to save me having to make the complete thing. Depending if you make a new one or not.

Had issue last night pulling the 2nd stage meth and KOH last night as well. Do the pumps go weak with use and have a affect on what suction it can pull. When ive been trying to pull the gliss in for the gliss wash process its been struggling pulling it in.

As for the heaters they have always been off when ive emptied the tanks mate:icon-wink:
 
Looks Great Nathan.

How come the Spray bar is that far down? A question i was going to ask but i forgot untill now is when im drying a the end (with the lid off) :lol: Im getting alot of spraying out the top of the tank even with the pressure turned down.
Mate that't the reason.

Ive sorted the heaters.You were night it was just the thermostate goosed. Do you need this old meth tank as i may make a dewater tank so i can do 180L from the start. There again it may be worth me holding fire and just weilding the whole thing onto the top of yours to save me having to make the complete thing. Depending if you make a new one or not.

mate, you're welcomed to it.

Had issue last night pulling the 2nd stage meth and KOH last night as well. Do the pumps go weak with use and have a affect on what suction it can pull. When ive been trying to pull the gliss in for the gliss wash process its been struggling pulling it in.

The pumps shouldn't go weak quickly, although I guess a venturi would be an easier way to pull the methox in. Ref the glyc it might be sensible to mix in the glyc and the oil in the dewatering tank but at maybe 45 or 50 deg. would be okay to do this - just leave it mixing.

As for the heaters they have always been off when ive emptied the tanks mate:icon-wink:
 
Got the brackets welded today, just need cleaning, painting and drilling - Also decided to mount the hole thing on a bund tray, with pneumatic tyres... If I have the tray so that it just clears the ground by 20mm or so, it won't have a big impact on height of the unit.

Can anyone think of where to go to get a tray that can be adapted for this (want to avoid fabricating something special).

For those that want to have an all in one this could be useful, you could take the tank right up to the car for dispensing.

http://bracketswelded_zpsd76a60d0.jpg
 

Attachments

  • bracketswelded_zpsd76a60d0.jpg
    bracketswelded_zpsd76a60d0.jpg
    69 KB · Views: 20
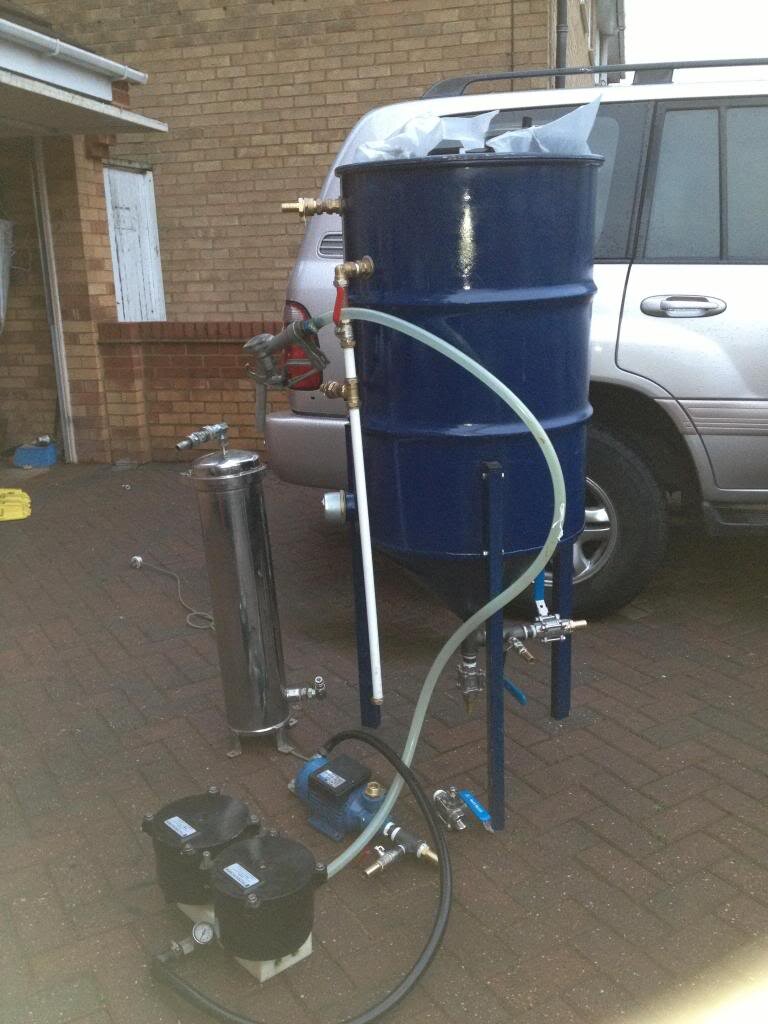
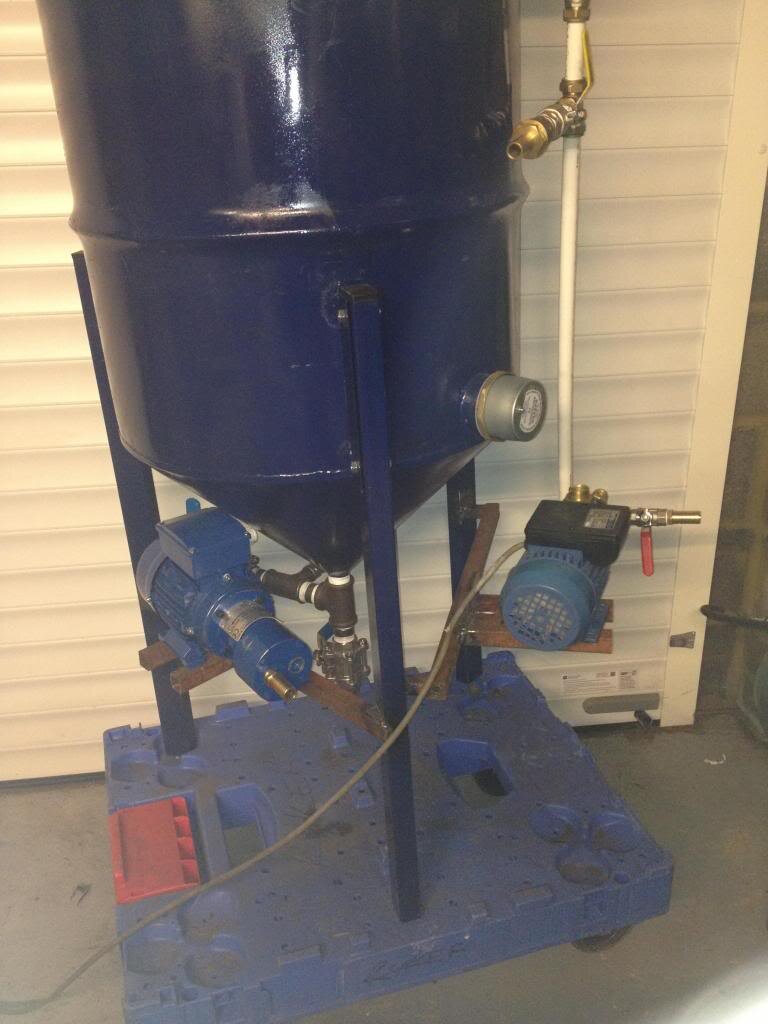
The finished dispense tank finished (haven't used it yet)

Very little needed to convert this to an all in one processor with proper polishing. Might look complicated, but if you follow the pipework, there's a pump that is used for pump fuel through spray bar for drying, this can be slowed and some of it bled off to the hardwood shavings in the stainless tower by opening the ball valve to the twr and closing the BV to the spray bar. Air drying is simply done with the lid off. An extractor could be fitted with would prevent any fine mist getting on things in your work area.

The centrifuge is driven by the more industrial looking (gear) pump, this pump is also used for dispensing via the polishing / final drying pots.

The heater element allows you to add winterising additive at the correct temp.

As mentioned earlier if you wanted this as an all-in-one you either use the tam105 pump to supply an eductor or diffuser in the top. Sorry about all the photos, but somebody might want to look at the detail:

polishtankfrontview_zpse901717d.jpg


polishtankfrontveiwtowerpots_zps4ad95cb2.jpg


dispensetankanddrywashtower_zps8d89695b.jpg


rearofdispensingtank_zpsf25e0c84.jpg


centrifugeonpolishdispensetank_zps20bf17f2.jpg


dispensepolishpotrearofgpump_zps88f02c4d.jpg


polishtankgearpumpview_zpsefda5734.jpg


Some home brewers will say that this kind of polishing may be over the top, and they'd be right when it comes to most cars. But remember we are trying to produce something at home that works as well as something produced using 10's or 10's of millions of pounds, as in BP, Esso etc.
 
I want one. Where do I sign up and how much.

I'd gladly tell you how to do it and where to get all of the stuff (coned tank, pumps etc)! Off the top of my head, I'm not sure of the cost (just try to keep it all below the wife's radar).

Did you want something ready built though?
 
Nathan

I am sure I would be able to build one, but not sure i have the time to do it so yes a pre built ready to go "kit" would certainly be of interest depending on price.
 
I'd gladly tell you how to do it and where to get all of the stuff (coned tank, pumps etc)! Off the top of my head, I'm not sure of the cost (just try to keep it all below the wife's radar).

Did you want something ready built though?

Mate,

I'll try to work out some costs with different options in the next couple of days.
 
Back
Top