Don't like the adverts?  Click here to remove them

my grey 80

Gary Stockton said:
Where do the ones that are on the 80 with the OEM wheel carrier on from factory go?
They don't, no fogs required in their country of origin ...
[attachment=1:2xphvgvw]IMAG1025fog4.jpg[/attachment:2xphvgvw]
[attachment=0:2xphvgvw]IMAG1025fog5.jpg[/attachment:2xphvgvw]
 

Attachments

  • IMAG1025fog4.jpg
    IMAG1025fog4.jpg
    122.4 KB · Views: 324
  • IMAG1025fog5.jpg
    IMAG1025fog5.jpg
    122.1 KB · Views: 316
Yep - I like that - and if the one on the tailgate is removed it will look super.
 
You need something to cover where the fog light is, if you move it. Oc course a number plate does that nicely, but what else could we have there. I need to remove mine.

There has to be something neat we could put there. Glove dispenser?

Chris
 
Which comes on if it's foggy.

C
 
If I put the plate there I'd remove the fog light and fiddle the wiring to bring the side light feed out there for the plate light

[attachment=1:2b67ggjo]IMAG1025fog6.jpg[/attachment:2b67ggjo]
I could just cut a thin plate the shape of the fog lamp to blank it off, and use it to mount a reversing camera :idea:
[attachment=0:2b67ggjo]IMAG1025fog7.jpg[/attachment:2b67ggjo]
 

Attachments

  • IMAG1025fog6.jpg
    IMAG1025fog6.jpg
    122.4 KB · Views: 435
  • IMAG1025fog7.jpg
    IMAG1025fog7.jpg
    122 KB · Views: 306
Don't like the adverts?  Click here to remove them
Reversing camera, yes. I like that. I shall blank mine and then put a Union Flag sticker over it
 
Personally, I prefer the number plate in the middle of the spare everytime...

The fogs on the bumper look neat too. A bit of effort to achieve but defo the most aesthetically pleasing to me.

Looking good JW
 
Like the camera idea, and also prefer the number plate on the spare.

Cheers
 
Thanks guys, no shortcuts for me then :smile:

Sent from my HTC ChaCha A810e using Tapatalk 2
 
My vote goes for the number plate and fog light in the centre of the spare wheel. The reason being that it keeps the non standard bits together and the rest of the vehicle looking standard, and therefore cleaner and tidier.

I must say I was surprised to see you've added a spare wheel carrier to this 80, may I ask why? Is it to make it much easier to access, plus give it a lot cleaner/easier life. Or are you planning on carrying two spares? Either way it looks like your getting a dab hand at installing spare wheel carriers. Is it a OEM carrier or a Direct 4x4 one?

Also the drawers are looking good too :thumbup: They don't look to have been to much hard work either, I suppose it's the age old thing of when you've done a job before, you refine the design, and it takes half the time.

Keep up the good work, it gives the rest of inspiration to get on with ours!
 
Scott said:
My vote goes for the number plate and fog light in the centre of the spare wheel. The reason being that it keeps the non standard bits together and the rest of the vehicle looking standard, and therefore cleaner and tidier.
Good point, I am trying to keep it looking like a fairly ordinary one and reason that there are plenty of 4x4's with a spare wheel hanging off the back :)

Scott said:
I must say I was surprised to see you've added a spare wheel carrier to this 80, may I ask why? Is it to make it much easier to access, plus give it a lot cleaner/easier life. Or are you planning on carrying two spares? Either way it looks like your getting a dab hand at installing spare wheel carriers. Is it a OEM carrier or a Direct 4x4 one?
It's a 3rd hand Direct 4x4 one using an OEM lower bracket and home bent 6mm plate for the top, 2nd one I've installed on an 80. I did have to think hard about this but for a few reasons I went ahead. Better access to the spare, easier and more likely to check the spare is ok, much nicer putting a dirty knackered wheel and tyre onto the carrier than groping around on the floor again. All of that doubly so with a caravan in tow and generally getting in the way of things. Then there's the small matter of the 166l Long Ranger fuel tank that will fit much better with the spare out of the way which helped clinch it :lol:

Scott said:
Also the drawers are looking good too :thumbup: They don't look to have been to much hard work either, I suppose it's the age old thing of when you've done a job before, you refine the design, and it takes half the time.
I'm quite pleased with how the drawers have turned out and it's gone pretty smooth and avoided a lot of previous mistakes :)
 
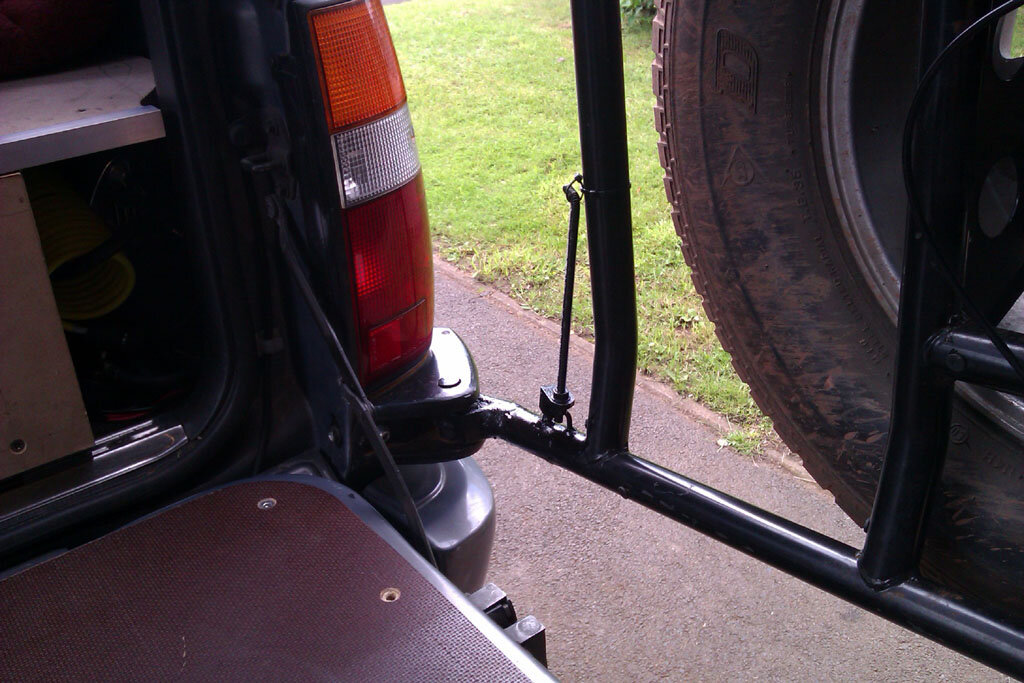
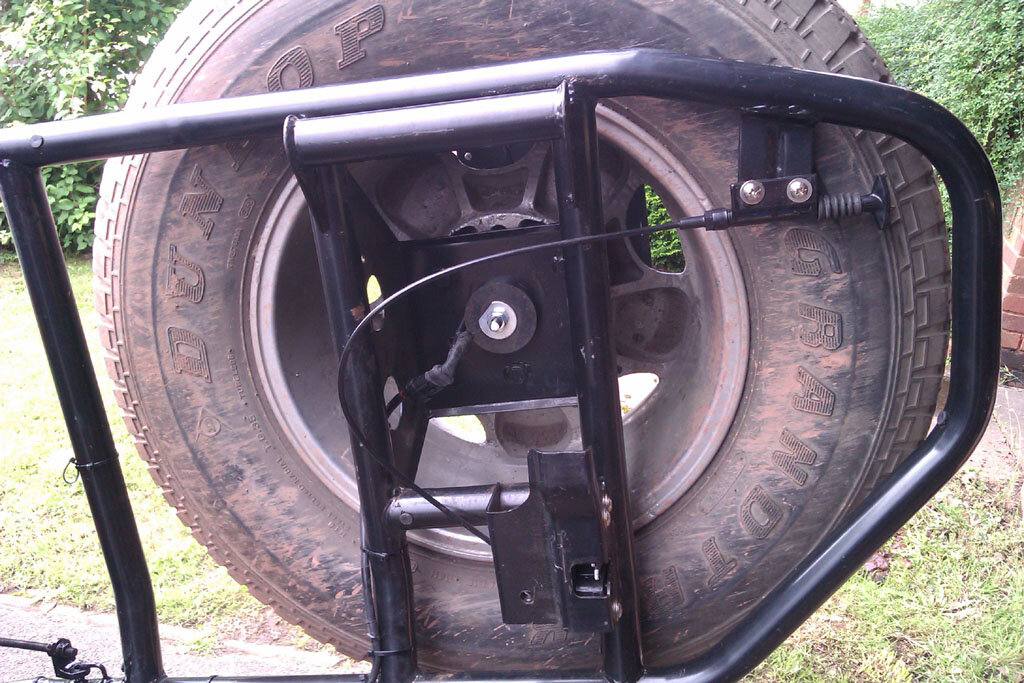
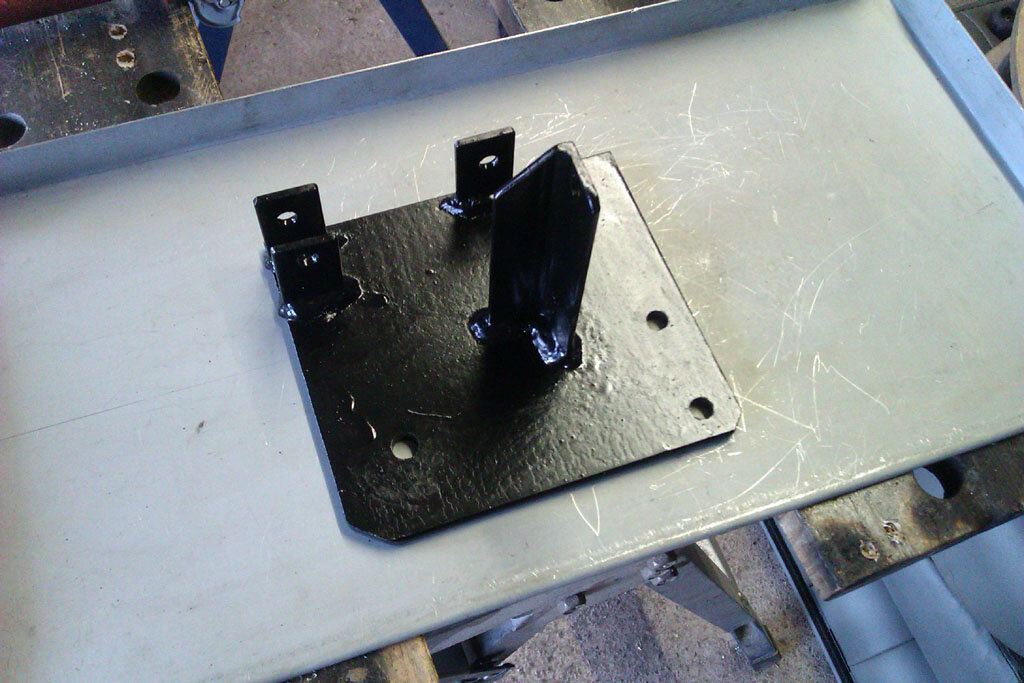
Been fiddling with the wheel carrier jobs again today. Made a mount for the number plate to put it on the wheel carrier and while I was waiting for the paint to dry I had an experiment with something to hold the wheel carrier open. Previously I've drilled a hole in the bottom casting and dropped a pin through but I wanted to try something that would stop the carrier opening too far as well as holding it open. That's not normally a problem but can be if you're in a tight space and have to keep moving the carrier out of your way because it's opened all the way. Came up with this, bit like you can buy to hold doors open, just a bit of all thread bent to hook into a hole I drilled and a small bracket to give some adjustment.
[attachment=7:2o3v993t]IMAG1028.jpg[/attachment:2o3v993t]
[attachment=6:2o3v993t]IMAG1030.jpg[/attachment:2o3v993t]
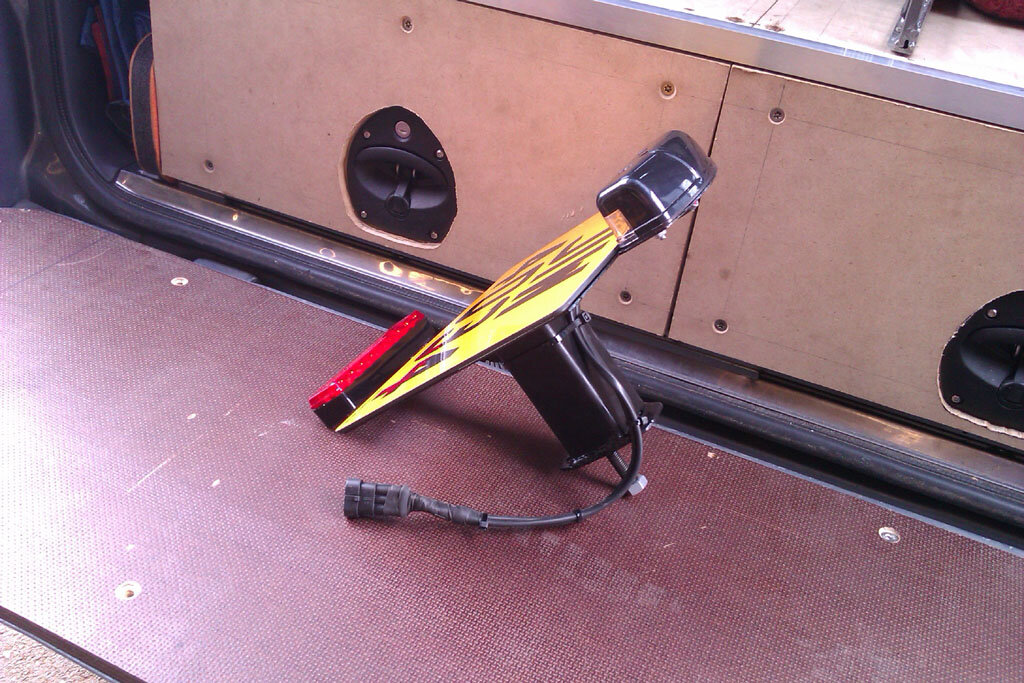
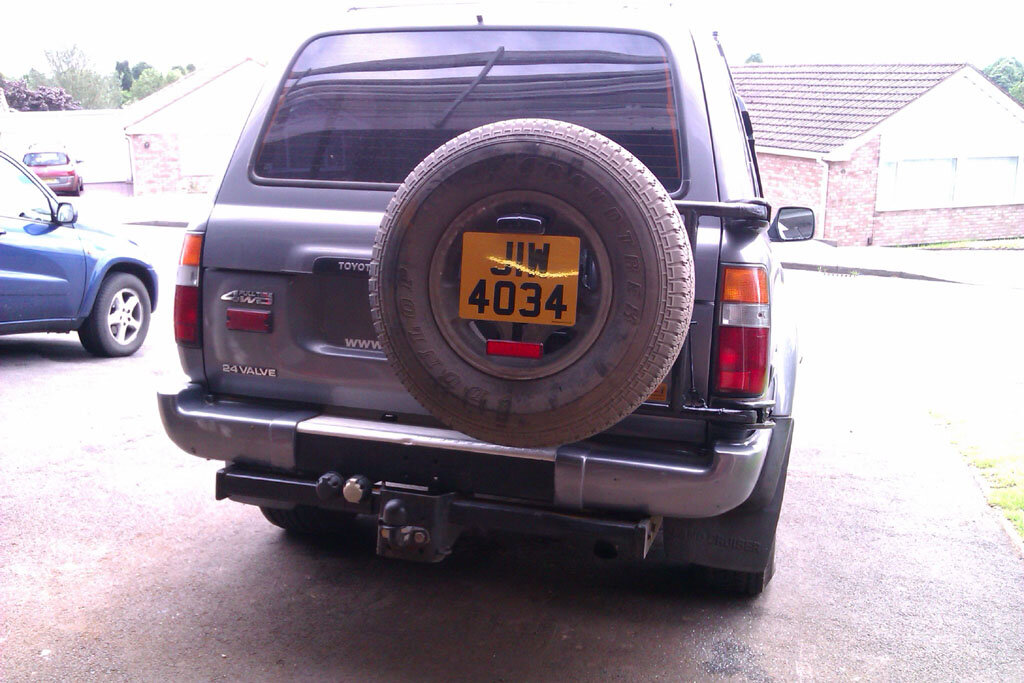
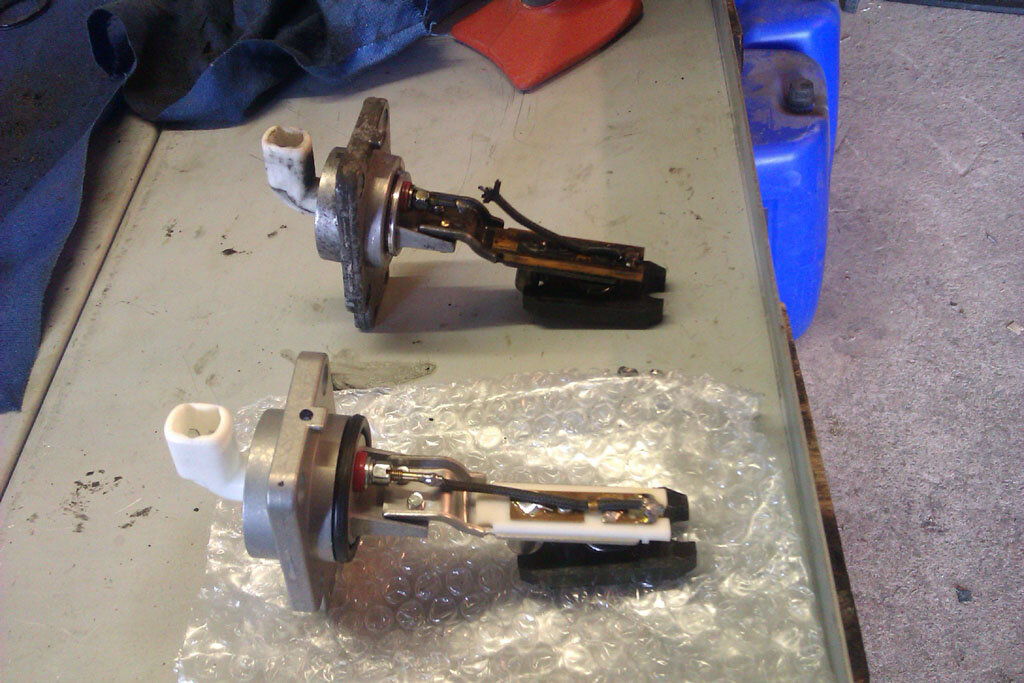
Paint dry on the number plate holder I put the lights and plate onto it
[attachment=5:2o3v993t]IMAG1041.jpg[/attachment:2o3v993t]
I'd welded a bolt onto the end of the mount and I just put a plastic spreader / spacer, washer and nut on the other side to hold it on
[attachment=4:2o3v993t]IMAG1043.jpg[/attachment:2o3v993t]
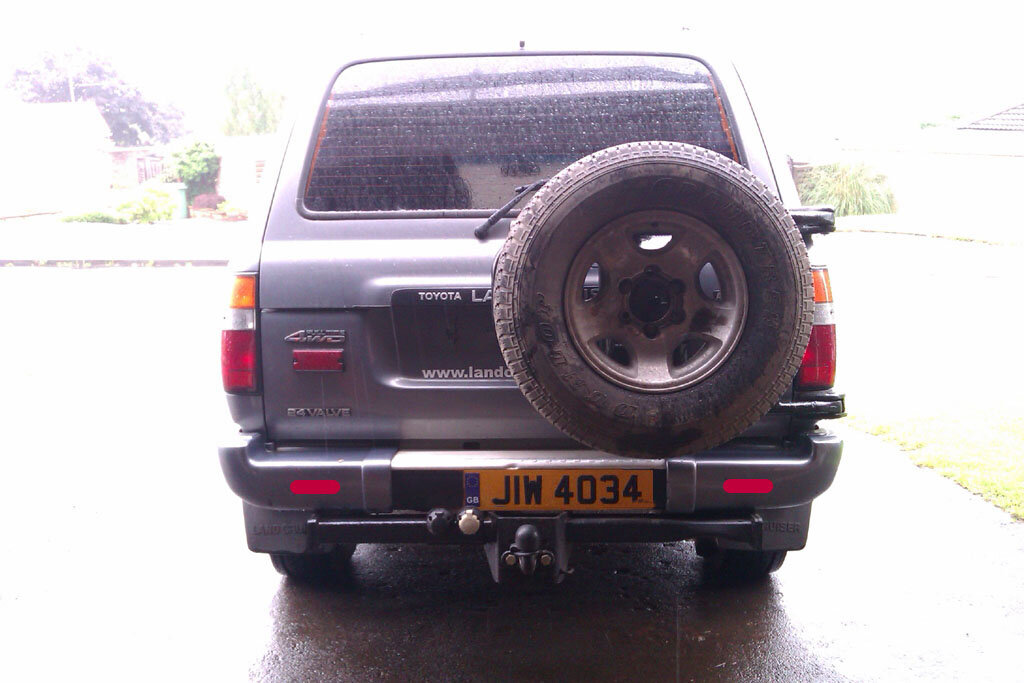
Finished up like this
[attachment=3:2o3v993t]IMAG1034.jpg[/attachment:2o3v993t]
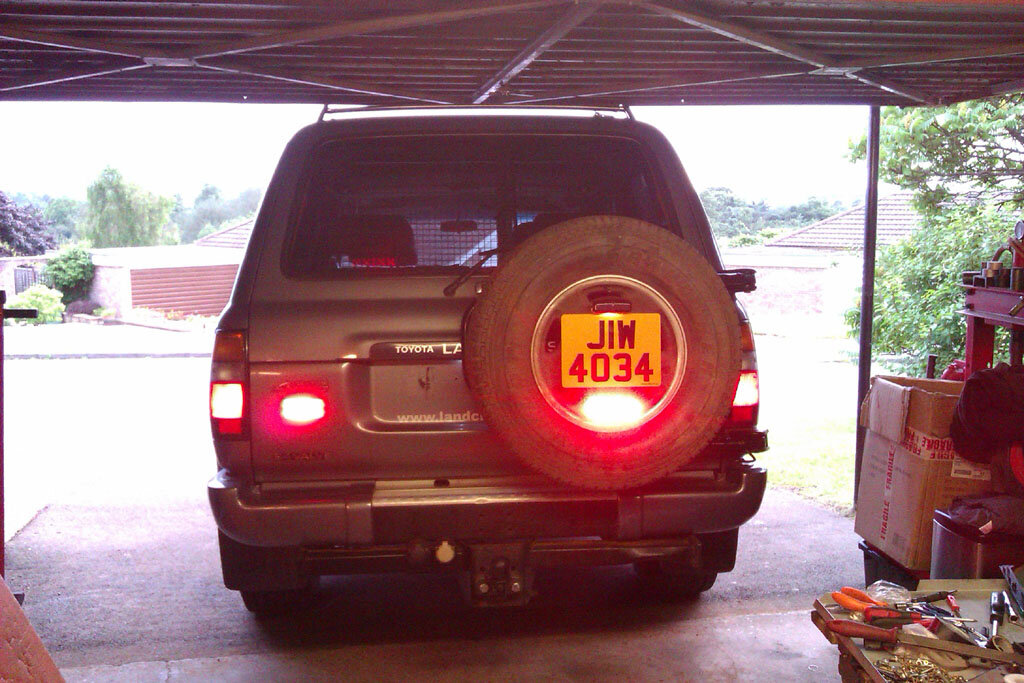
testing :)
[attachment=2:2o3v993t]IMAG1052.jpg[/attachment:2o3v993t]
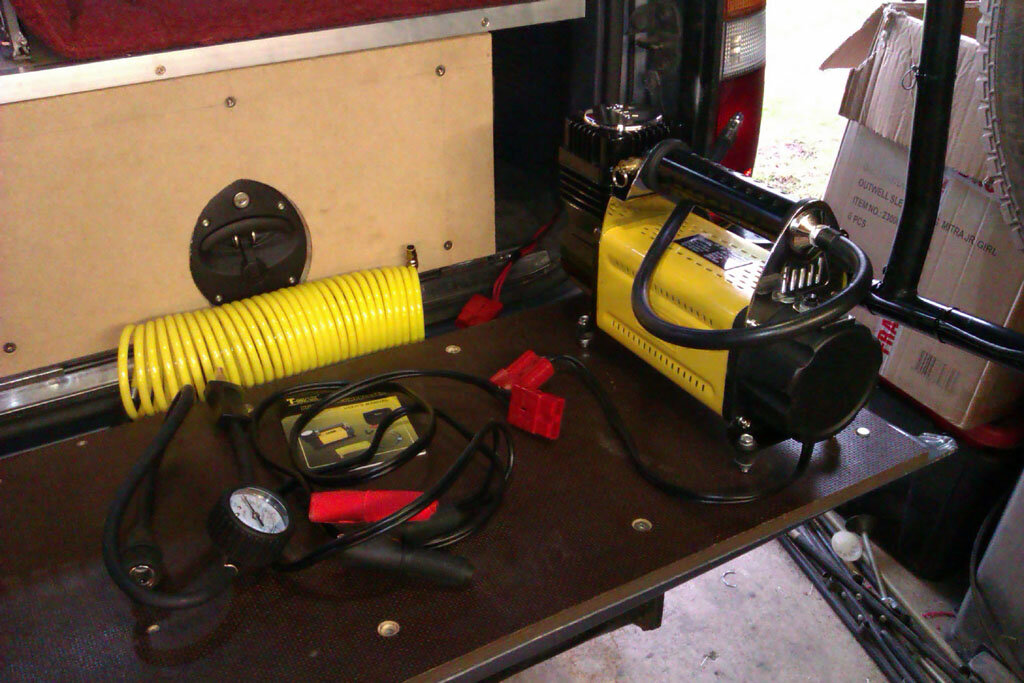
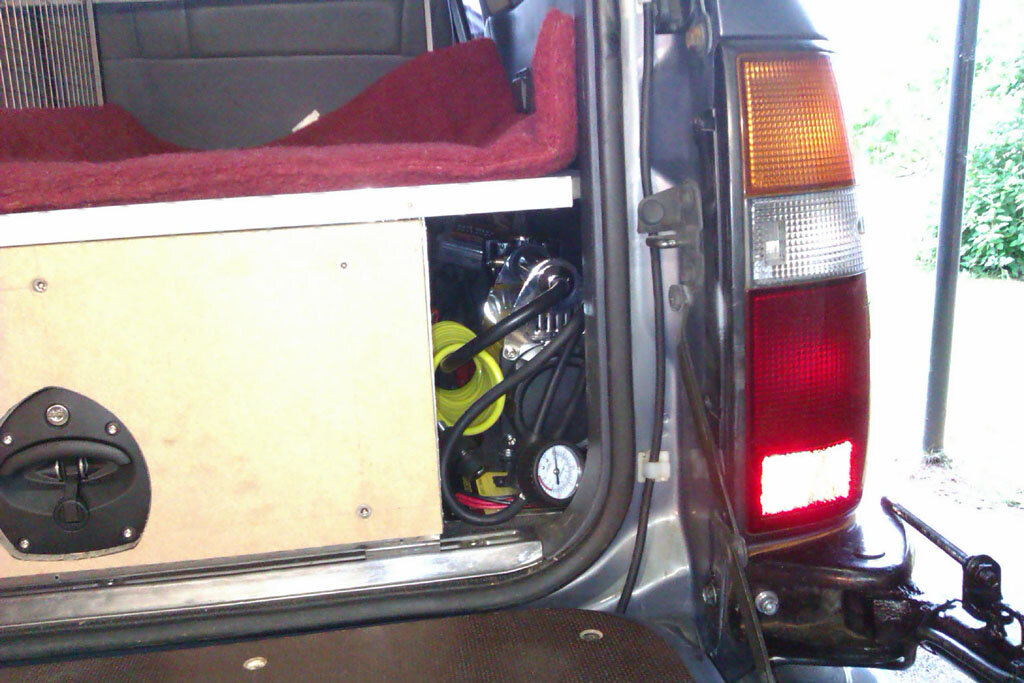
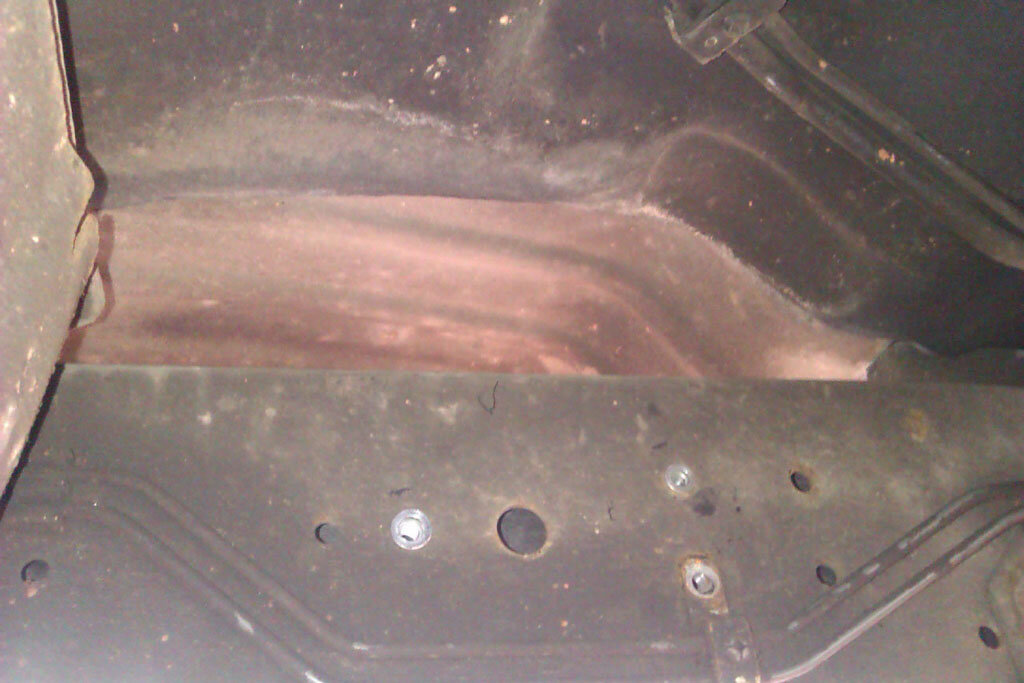
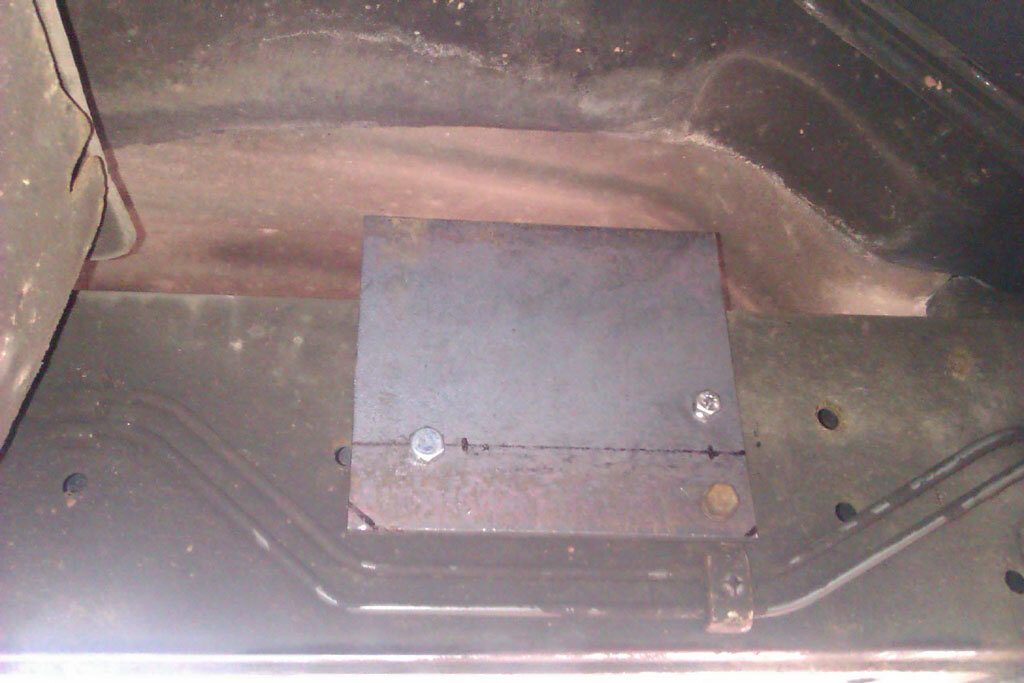
Also decided where to put the monster size compressor and sorted out wiring for that with Anderson connectors so it can be used in its hidy hole, pulled out onto the tailgate so it gets more air, or unplugged from the dedicated connection and plug the remains of the cable it came with back on and use the croc clips so it's still portable.
[attachment=1:2o3v993t]IMAG1045.jpg[/attachment:2o3v993t]
I did have to remove the bottom plate for it to fit through the gap and just left the bolts so it still sits off the floor a bit. At some point I plan to make another base for it that will fit through the hole.
[attachment=0:2o3v993t]IMAG1049.jpg[/attachment:2o3v993t]
 

Attachments

  • IMAG1028.jpg
    IMAG1028.jpg
    185.1 KB · Views: 481
  • IMAG1030.jpg
    IMAG1030.jpg
    172.6 KB · Views: 487
  • IMAG1041.jpg
    IMAG1041.jpg
    215.9 KB · Views: 489
  • IMAG1043.jpg
    IMAG1043.jpg
    220.5 KB · Views: 490
  • IMAG1034.jpg
    IMAG1034.jpg
    159.9 KB · Views: 483
  • IMAG1052.jpg
    IMAG1052.jpg
    197.2 KB · Views: 489
  • IMAG1045.jpg
    IMAG1045.jpg
    177.1 KB · Views: 490
  • IMAG1049.jpg
    IMAG1049.jpg
    170.8 KB · Views: 486
Been working at the other end today. One of the PS pipes across the front cross member was leaking when I bought it and although I was pretty sure it would just be corrosion and a pin hole it needed fixing. Simplest thing to do is fetch the radiator out of the way, those pipes don't want to come out otherwise.
[attachment=3:2b7i07dy]IMAG1055.jpg[/attachment:2b7i07dy]
Sure enough there were a couple of patches of corrosion, one with a pin hole. This is where the pipe goes over the top of the cross member under the radiator and is surrounded by foam which must hold the winter salty water against the pipe quite well!
[attachment=2:2b7i07dy]IMAG1058.jpg[/attachment:2b7i07dy]
Quick blast with the TIG welder and the pin hole was patched up and I built up the other corroded area a bit as well
[attachment=1:2b7i07dy]IMAG1059.jpg[/attachment:2b7i07dy]
Cleaned up both pipes and gave them a coat of paint to keep the corrosion at bay a bit longer.
[attachment=0:2b7i07dy]IMAG1061.jpg[/attachment:2b7i07dy]
While the paint was drying on those and as I'd drained the coolant anyway I bypassed the rear heater. Putting it back together I replaced the bottom hose and a new top hose with the coolant loss sensor inserted, more to come on that later, plus a new condenser and dryer to make the most of having the front off :) Also been having a play with the spaghetti of vacuum pipes, valves and sensors on the engine slowly working out how to connect it up so the valves are bypassed and am getting good results, again more to come on that later when I've tried a few more tweaks :)
 

Attachments

  • IMAG1055.jpg
    IMAG1055.jpg
    149.5 KB · Views: 446
  • IMAG1058.jpg
    IMAG1058.jpg
    186.4 KB · Views: 444
  • IMAG1059.jpg
    IMAG1059.jpg
    182.4 KB · Views: 449
  • IMAG1061.jpg
    IMAG1061.jpg
    145.8 KB · Views: 459
Changed various oils today including the engine oil so I could fit a new oil level warning sensor in the side of the sump. Old one out, wire was broken, rubber gasket is still in the side of the sump at this point. Reunited the sensor with the gasket and soldered the wire back on. Decided as I've already spent the money I might as well fit the new sensor even though the old one should work ok with the wire fixed.

[attachment=0:2sgxkdll]IMAG1069.jpg[/attachment:2sgxkdll]
 

Attachments

  • IMAG1069.jpg
    IMAG1069.jpg
    175.3 KB · Views: 622
Spent today treating the underside rearwards of the back axle to some Dinitrol because that will all soon be hidden by an aux tank and there were a few patches of surface rust that needed sorting out first. Everything got a liberal coating of rust converter and wax and next dry day I'll squirt cavity wax into anything resembling a cavity back there :) I didn't think pictures of black stuff would be very interesting but I did take a picture of how I have the engine vacuum / boost hoses configured now. The flat spots and delayed response are now gone so it drives much smoother now.

Inlet to boost compensator via the original filter
[attachment=1:2u0qmbc0]IMAG1071.jpg[/attachment:2u0qmbc0]
vacuum pump to BACs and PCS. If it smokes when I get to high altitude I will get a mechanical BACs valve but I suspect I won't notice. Having the PCS turned off is quite noticeable reversing up our steep drive.
[attachment=0:2u0qmbc0]IMAG1072.jpg[/attachment:2u0qmbc0]
One of the EGR valves was weeping oil so I've had to remove them temporarily while I repair it :shifty:
 

Attachments

  • IMAG1071.jpg
    IMAG1071.jpg
    191 KB · Views: 344
  • IMAG1072.jpg
    IMAG1072.jpg
    205.8 KB · Views: 348
Done a bit more towards the aux tank install this evening by measuring up and making a bracket to mount the two fuel valves and pusher pump I will be installing. The valves are OEM and an OEM install would place them in what looks like a tricky spot to retrofit so having chatted to a few people I will mount them on the passenger side chassis rail just forwards of the main fuel tank. After staring at the chassis rail for a while and working out what wouldn't interfere with slider legs or the OEM transfer 'bash' plate and would still work for valve and pump placement I used 2 existing holes in the chassis to fit nutserts, an M6 and an M8 just using the holes as they are, plus the handily placed M8 brake pipe clip mounting hole.

[attachment=3:1ogotc84]IMAG1075.jpg[/attachment:1ogotc84]
Got a bit of 6mm plate from the scrap pile and drilled holes to suit
[attachment=2:1ogotc84]IMAG1078.jpg[/attachment:1ogotc84]
Welded some mounting brackets on and gave it a coat of paint
[attachment=1:1ogotc84]IMAG1082.jpg[/attachment:1ogotc84]
test fitted the valves and pump
[attachment=0:1ogotc84]IMAG1085.jpg[/attachment:1ogotc84]
I'm waiting on a few parts to be delivered before I can sort out the piping and wiring so I can get this installed and operational.
 

Attachments

  • IMAG1075.jpg
    IMAG1075.jpg
    127.8 KB · Views: 281
  • IMAG1078.jpg
    IMAG1078.jpg
    131.5 KB · Views: 291
  • IMAG1082.jpg
    IMAG1082.jpg
    170.6 KB · Views: 282
  • IMAG1085.jpg
    IMAG1085.jpg
    139.4 KB · Views: 290
Hi Jon, I can't quite see the set up there, but have you mounted the actual pump on bobbins? They tick pretty loudly and can transmit that though the chassis. Don't know if it's a Walbro like mine, but when I struggled to get NPT fittings, I found that polypropylene BSPT ones tightened in quite nicely.

Is that just a transfer pump between the tanks or a pusher to the main IP as well?

Chris
 
Love the draw system Jon.

:clap:

I'd not stick the number plate on the spare personally, as I mite use the spare wheel for hanging a mountain bike rack from.
 
Back
Top