Don't like the adverts?  Click here to remove them

my story; removing the cylinder head 80 series 1HD-T

Your need to do that before anything else as if you do have a crack there's no point buying bits or proceeding. A short block is then needed or more than likely a good used engine.

Besides, I'd like to uncross my fingers sooner rather than later. :)
 
You may as well take out the pistons and check that crank journal first. That way you can then fill the block up with antifreeze and see if there is a leak in one of the bores. Much easier with pistons out of the way. In case you need to reuse some pistons mark their tops at the front so that you know which bores they came out of and which way round they go. If you reuse you'll still have to glaze bust the bores as the rings will not go back exactly the same position.
 
P.S. Don't feel inferior if you think the engine is getting the better of you. On a scale of 1-10 on weight and complexity these are 9 or 10 for car/4x4x engines. The shear size and weight of them overwhealms one mentally. Back in the day one could rebuild an engine including block out and rebore in 3 days and if something went wrong you had enough energy to do it all again straight away . lol.
 
Pistons and other relevant parts shoudl be available through Aussi shop TERRAIN TAMER are a very reasonable price.
If You replace a single piston, it is vital that the replacement parts weight the same. Thats the very short version...
If You pull a piston, a MUCH better way to test/inspect the liner is to use penetrating crack dye test. It comes as a set with 2 spray cans.
As for cleaning the bore; At this stage You may just as well pull all pistons & replace the piston rings. In order for this to have its best value, You can easily hone the liner(s) Yourself with abit of ease. I have done this so many times on different engines, I have stopped counting.
As for measurung the clearence on bearings etc, look for a descent set of plastigauge....
 
Plastigauge is essential for refitting the BEBs but no substitute for checking the journal with a micrometer. It's basic engineering and even if you decide whatever happens the crank isn't coming out, you have the information to hand to make that decision wisely.

Plastigauge comes from a company in Ford UK. About 3 miles from where I live. :) And its dirt cheap and accurate.
 
Don't like the adverts?  Click here to remove them
IF You want to adress the conrods 100%, You must also measure the BEB bore on the conrod. If this is out of shape, then even a new bearing & a healthy journal will suck You in.
Thats going to require an internal micrometer.
Certainly all diameters should be measured, recordeded & taken into the equation.

I rebuilt an engine years ago & did not have the internal micrometer at hand. I had 3 different workshops give the conrod a clean bill of health... The engine still faild 20minutes into the run in process due to an oval bore in the conrod. It took out the new cranck while it was breaking in the bearing...
So believe me, I have payed the price for such mistakes.
 
Hi there all I'm lockie's older brother his truck is in my shed I have a good back ground in mechanics and understand all the advice everyone is giving us we will be using all of it because it's all great advice, we haven't done anything this week because I was in the process of servicing my wife's Subaru Forester to sell (and if something could go wrong it did snapped wheel stud due to being done up by the tire place with rattle gun and other annoying things) anyway that's done and sold we now have a 100/105 series cruiser. So in the next couple of days we'll be pulling the damaged piston, check the block for cracks if no cracks then we'll move on we'll keep you all informed on what's going on so you can keep the great advice coming
 
Trouble with the dye is it won't go into a wet crack so best to see a water leak first then dry block out and treat with dye if no crack found with water.

Plastigauge assumes a dead round pin and dead round bearing bore. It tests running clearance not ovality.
 
  • Like
Reactions: uHu
anyone know what size plastigauge ill need?? im guessing the green one?

im sure it'll say in my workshop manual, but unfortunately that's at my brothers, and i was hoping to order them today.

thanks again everyone for all the input, very helpful!
 
You need to change the pistons, you will need to set the valves, you need to do the "sleeves" (not sure if correct word for it) on the block, also DO NOT forget the "shims" at the top of the valves...also...unless you are NOT putting your head to be rectified, I would use the gasket that has 5 half holes in it, as opposed to the one you had that has 3
 
I think the plastigauge I used was pink iirc.

Why the 5 gasket and not the three bb? Or, for that matter, the same one that came out?
 
Last edited:
Got my head back yesterday.
All serviced and clean.... and crack free!!

Cleaned and had a very very close look over the old gasket. Can definitely see where/how the pressure was getting to the water jacket.

So hopefully this weekend I'll be measuring everything and maybe even starting to put it back together!
 
Great news Lockie. Post up a photo of rhe suspect part of the head gasket to educate us more than anything and help those unfortunate few that have the same problem in the future. Check your bores, just to be sure and give you peace of mind. I always find if there's an unknown it plays on the mind.
 
Got my head back yesterday.
All serviced and clean.... and crack free!!

Cleaned and had a very very close look over the old gasket. Can definitely see where/how the pressure was getting to the water jacket.

So hopefully this weekend I'll be measuring everything and maybe even starting to put it back together!

Hey, the best news!

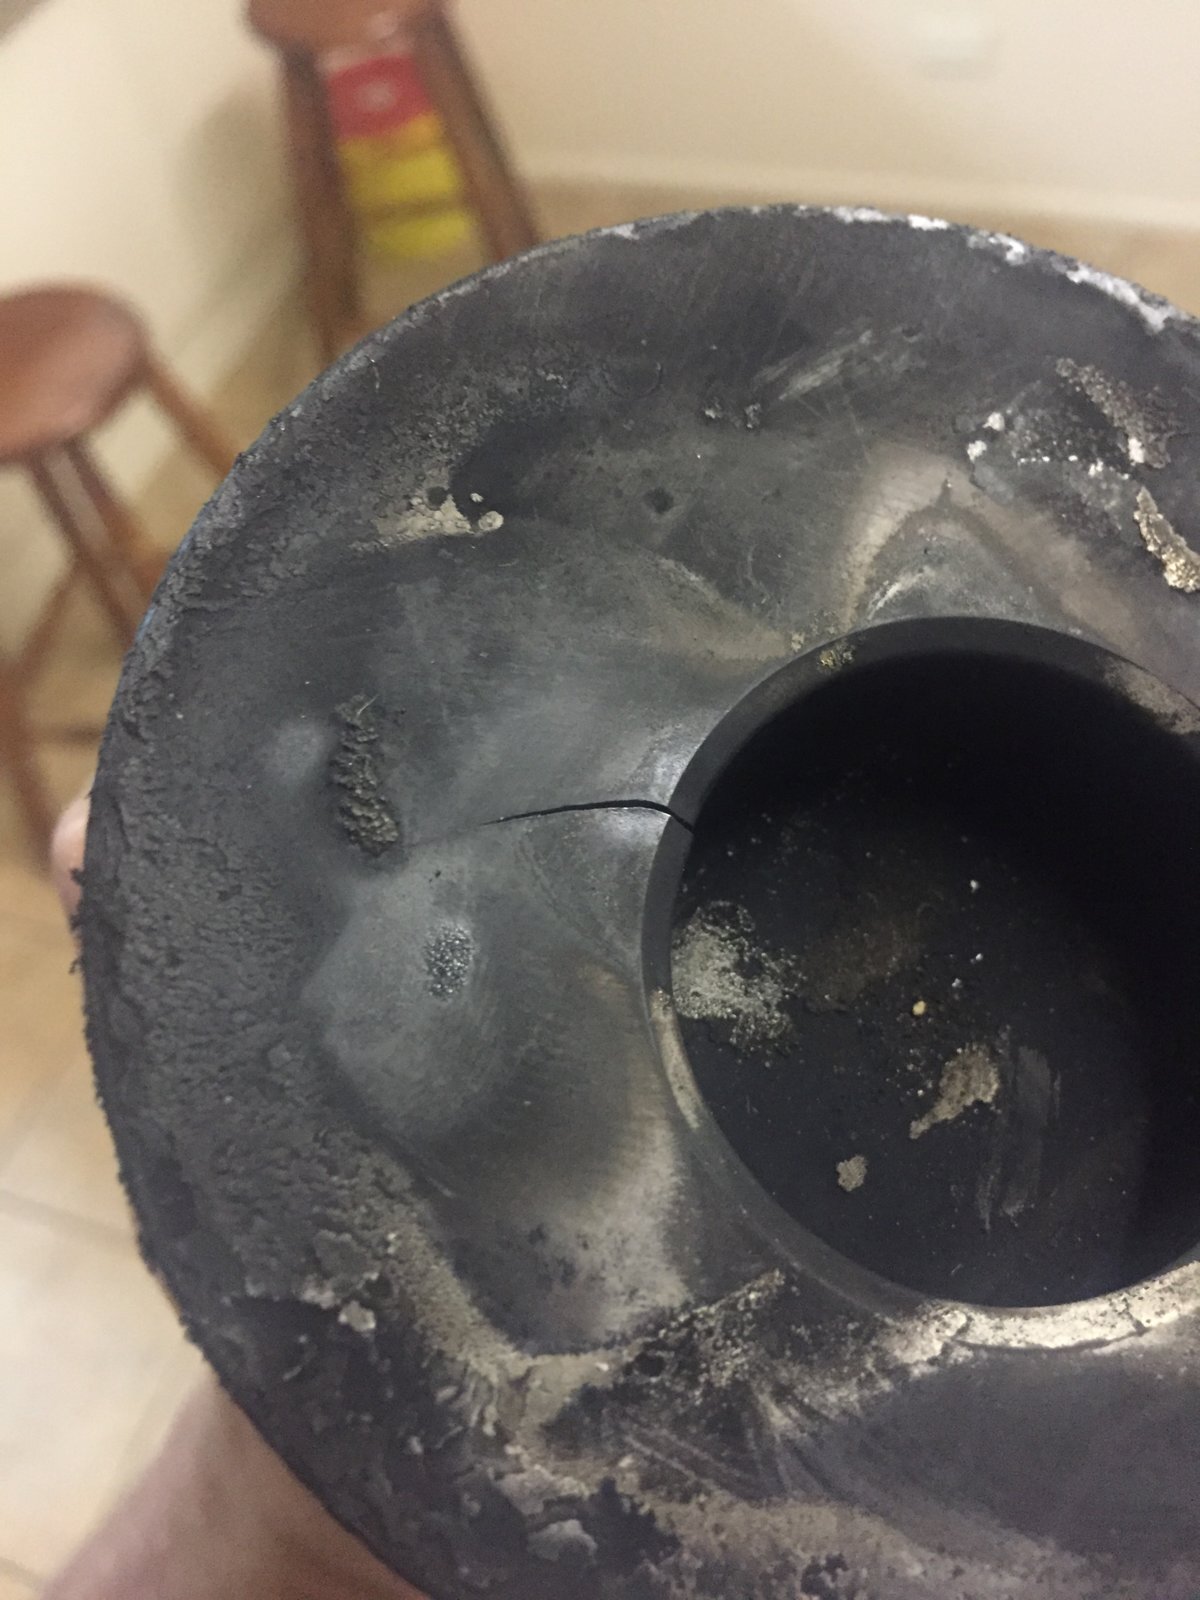
Still run a crack test on the bores though, while it's open and sort that piston out, it doesn't look too good.

Good news, please keep us posted on the assembly...
 
I would put a straight edge across the block and head where the gasket has blown. There might be a small depression there. Unlike old gaskets which were soft and filled up little imperfections these are dead hard and need totally flat even surfaces to seal.
 
so, finally some progress... this afternoon I got my sump off and B.E.B's out along with my pistons.
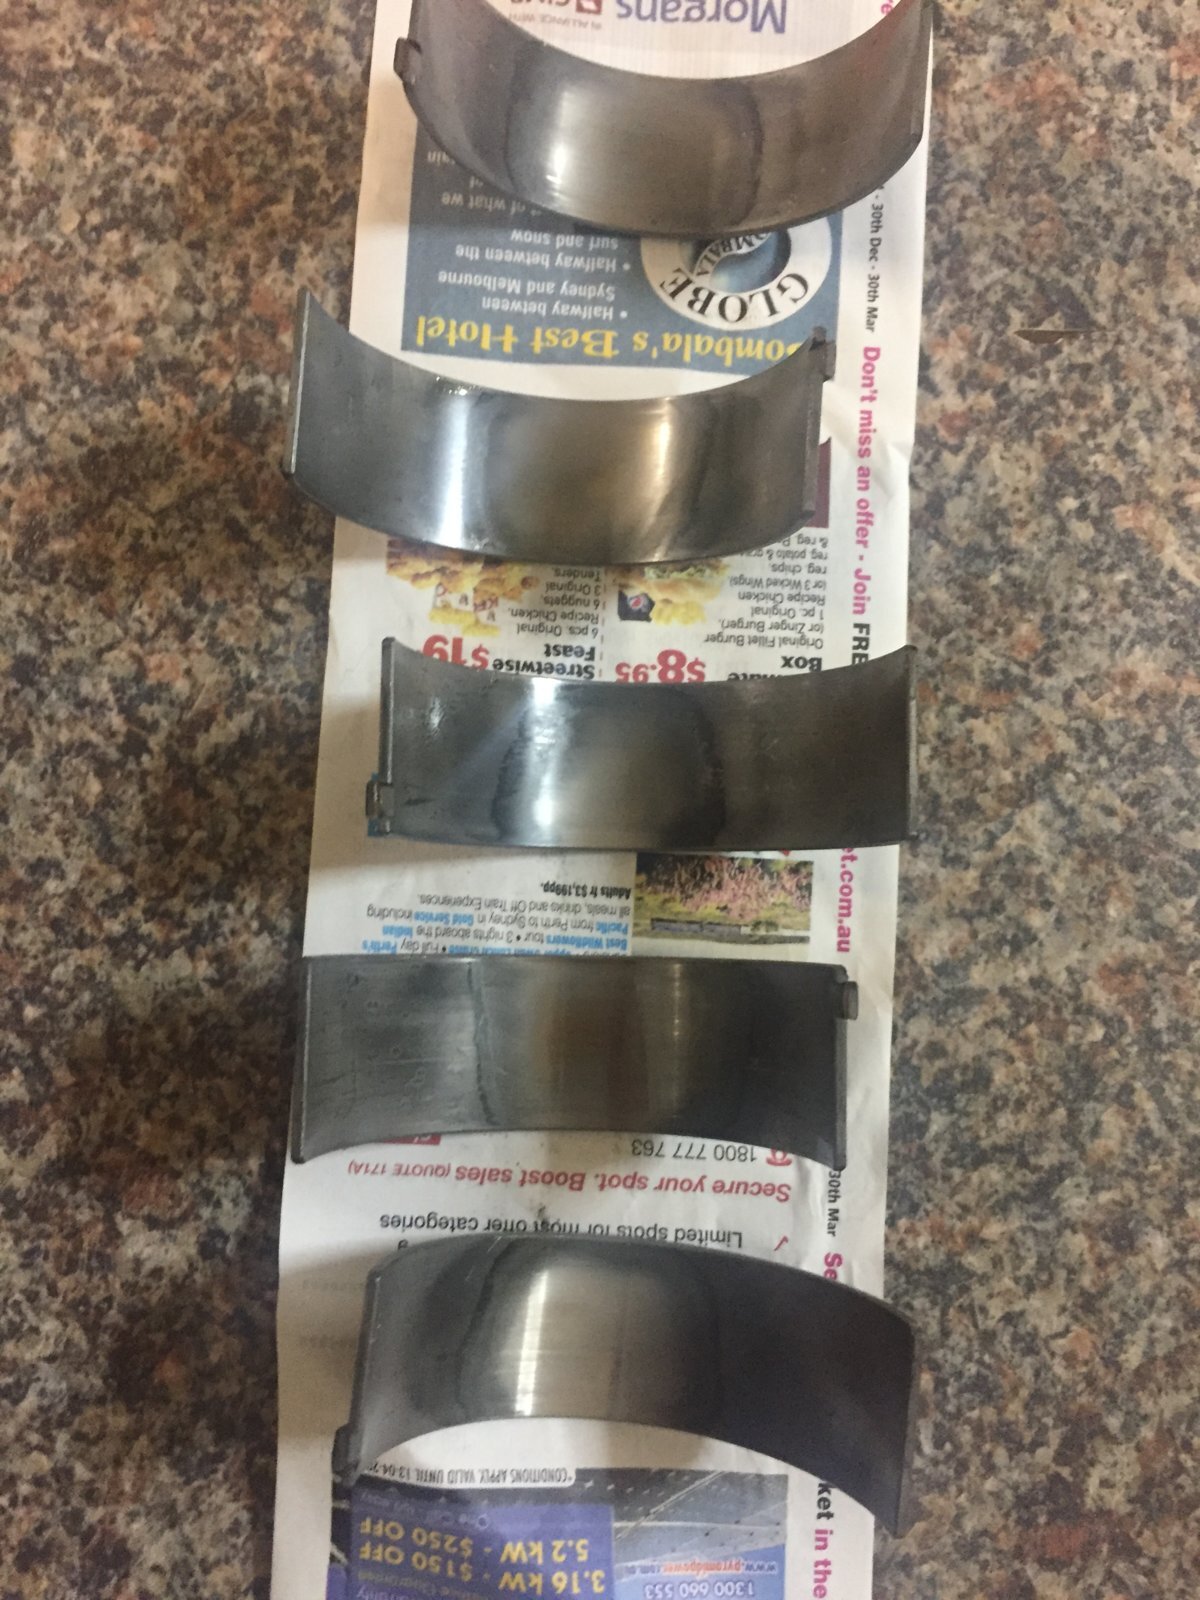
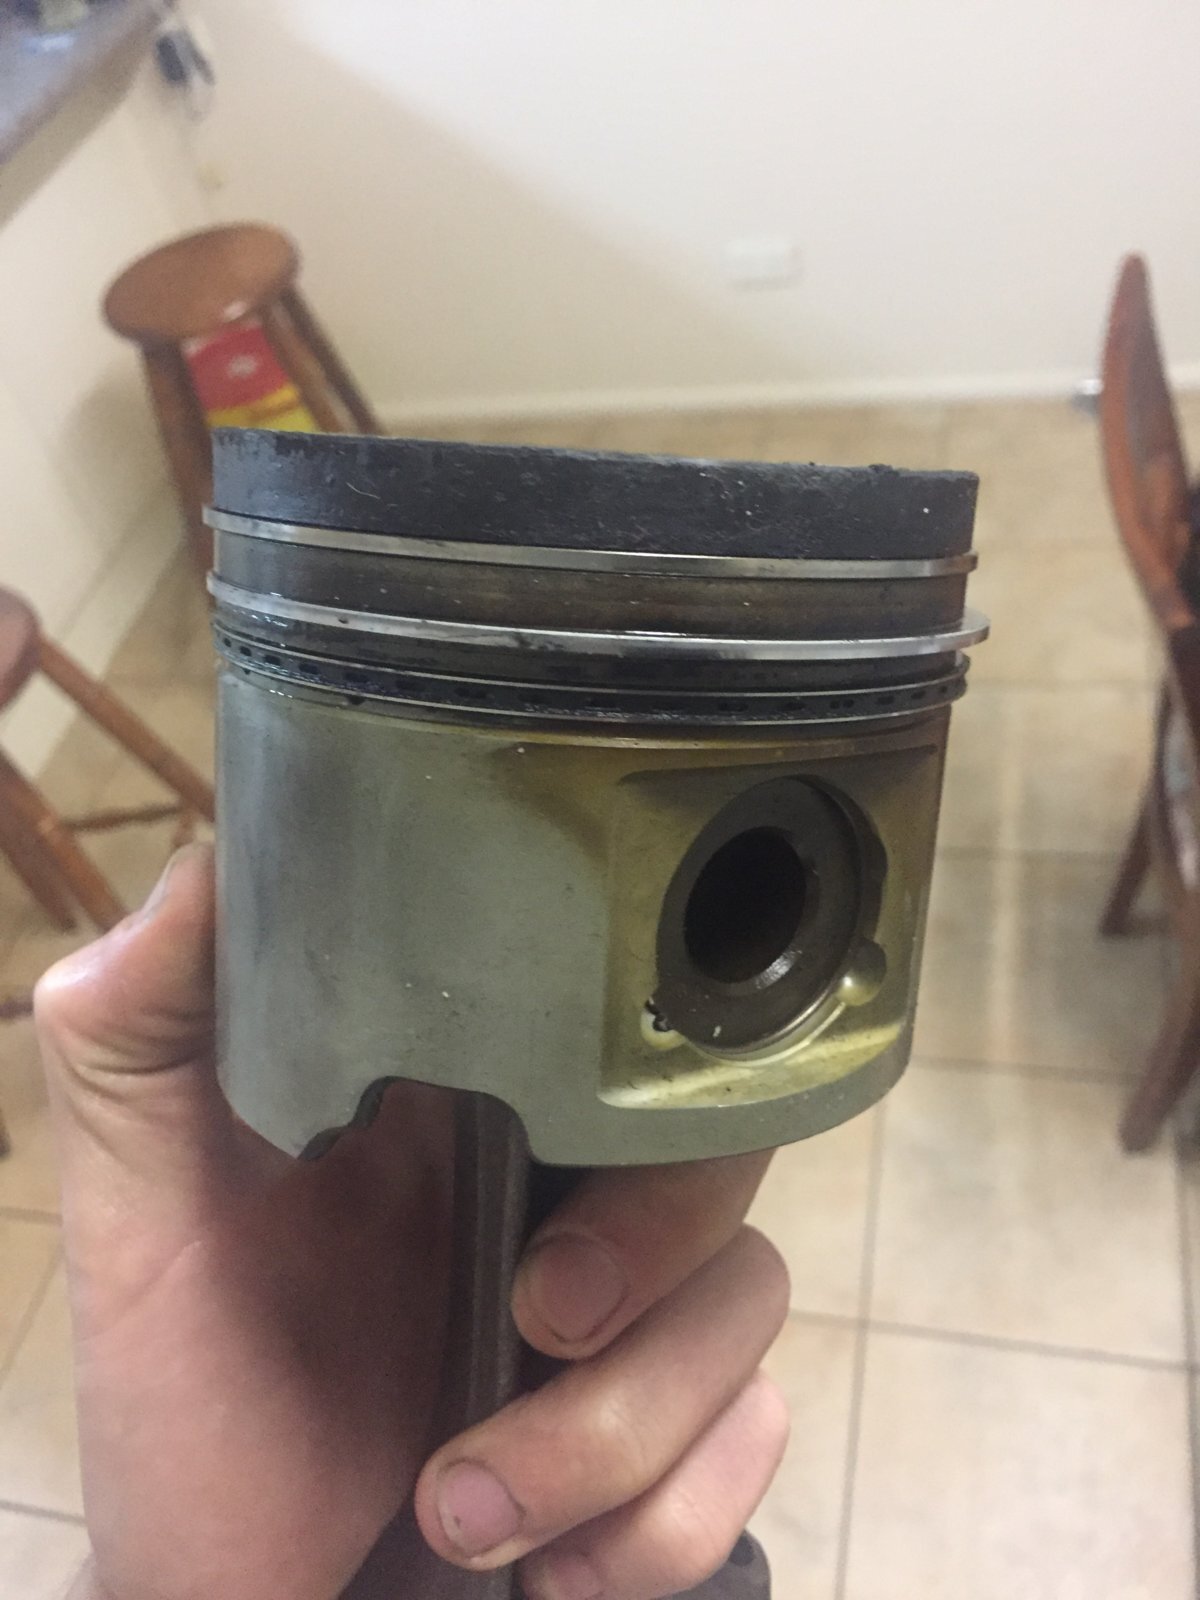
the big end bearing looked pretty worn. I've included a photo of the bad ones, along with another snap of the cracked piston.
i also got a bit excited last night and ordered a new 3" straight through exhaust!

bad big end.JPG big ends.JPG piston 6.JPG piston.JPG pistons.JPG
 
  • Like
Reactions: uHu
Looks like you've been lucky! I expect it was knocking quite a bit.
 
Blimey, those BEBs must have been bouncing. I've seen them delaminated and scored, but yours are simply worn out.

Looks like someone's run it dry or with paraffin instead of oil...

Just in time, as Rich says...

Have you been able to measure the crank journals yet, it's likely they may be out with so much wear. Fingers crossed otherwise though.
 
Last edited:
That damage in the top of the piston possibly stressed the valve gear so I'd have a careful check for cracks on No 6. The crank is rock hard so may be OK. Looking at the piston that's high mileage or poor lubrication. Also check the oil pressure with a mechanical gauge off the place where the electric sensor goes in the block for the electric gauge. Interesting stuff. Thanks.

Over revving together with weak valve springs may have caused a piston to hit a valve. Normally an exhaust valve as with a weak spring they can't get out of the way in time. If the inlet trails off the cam the piston's on it's way down. If the engine was not ticking the big end was unlikely to be the culprit. But yes they are worn well beyond spec.

Sometimes under the big end bearing surface there is a layer of copper plating. If this is not worn through the crank should be OK.
 
Back
Top