Don't like the adverts?  Click here to remove them

Steering rack bushes

Rob Cowell

Well-Known Member
Joined
Nov 15, 2011
Messages
1,643
Country Flag
wales
Has anyone changed their 120 rack bushes? Got through 2 sets on my old 90, and plenty of threads about those, but even PP seems devoid of 120 bushes going.

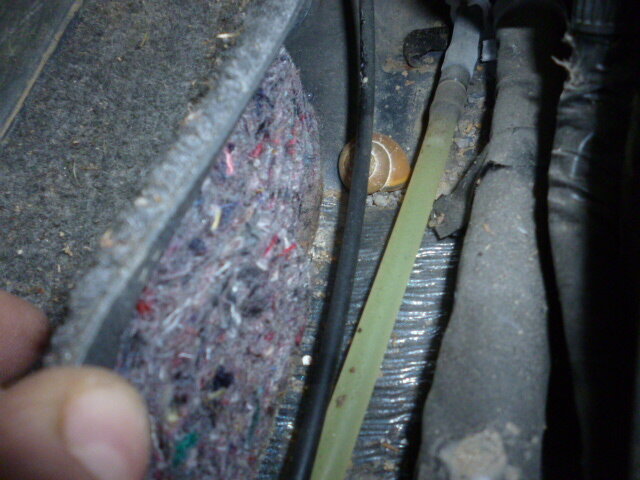
Ive got a 2005 LC3, 95K miles. Drives some rough tracks in daily use. Noticed last week that coming off the throttle on the motorway caused a small veer to the right. Today noticed on some twisty roads something slightly "rolly" (more rolly than usual!) about the ride. Have had a lay underneath with the bash plates still on and had Mrs Cowell turn the wheel while I held the mounting points for the rack. There does seem to be a very small bit of movement between rack and chassis, so I assume bushes. I can see Roughtrax stock replacements. Just can't see anywhere what's involved in replacing them. Did the 90 a couple of times so I reckon I'm up to it! But always nice to see someone else's attempt in writing first.
 
I haven't seen anyone on here changing them but i could of missed this, and i reckon the 120's are getting to that age now were we see this sort of problem. if you do have a go at this remember take plenty of pics.:icon-biggrin:
 
Should be doing this next weekend - weather permitting. Does anyone have the torque setting for the two rack mounting bolts? Save me 3 euros on toyota-tech. Thanks.
 
Have a look on the manuals tab on the forum for that info Rob.

Cheers


Sent from my iPad using Tapatalk HD
 
Thanks. I did try that first but I get a not found error. Graham has (or did have) the same issue and has posted as such there.
 
Yep but it's fixed now ;-)


Sent from my iPad using Tapatalk HD
 
Don't like the adverts?  Click here to remove them
Well, I've made a start. Bought SuperPro bushes from Roughtrax. Suitable for 120 and Hilux post 2005. They come with installation instructions. And I quote, "The O.E. bushes can be removed without the rack having to be removed". Hmm.

So, bash plates off. You can just make out the rack mount castings above the front axle mounts.

P1040229.JPG

Nuts are underneath the cross member. 17mm. Quite snug! A minute with a blow torch and then breaker bar.
P1040230.JPG

With bolt heads on top braced with a ring spanner.

P1040231.JPG
All good so far. But. Drivers side bolt wont come out. It's lose. But there isn't clearance to lift. First of all it hits some pipes. The clamp for those can be easily accessed via the wheel arch inspection flap by a small Japanese child's hands. But even with those out of the way the bolt still fouls on the alternator and cant be removed.

P1040232.JPG

I've popped the passenger side tie rod, but still not enough movement. Will try drivers tie rod tomorrow and see if that does it. Even if it does the old bushes are a sod to get at. The fitting instructions don't mention tie rods, but do suggest you can remove the bushes by ramming in a chisel on either side. I have tried that with one of them, and the bushes, like the mounting bolts, are snug too.

I fear it may be a rack-out job. But Mrs Cowell has steak and chips on the go and there's a bottle of Ribero del Duero with my name on it. So it's a job to continue tomorrow.
 
Good luck - keep the pics coming! Looks like a bit of a bugger. Before you go crazy, is there any way of checking whether the bushes are actually stuffed at the stage you're at?
 
Not really sure how you would tell if bushes are knackered from where they are. I've had rear axle control arm bushes look fine from the outside. It's when you remove them you see where they're gone. There was some play in that area. Did have a good shake of the wheels before I started today. Make sure it wasn't play somewhere in inner or outer tie rods. Just been on toyo tech - looks like disconnect steering column, power steering pipes and tie rods, then rotate rack so you can clear the bolt! Bugger. So got to come out I think. Looks like kids won't be goint to their party tomorrow!
 
It's official. This is a complete bugger to do.

Thought I'd bite the bullet and take the rack out. Bit worried about cracking the hoses, but needs must.

So that hasn't gone well. Removed the bolt holding the secondary shaft to the steering gearbox. Bit fiddly, one flat at a time. But done. Now, can I get the joint of the splines? Err, no. If there is a technique, I don't have it. Have exhausted my extensive repetoire of swinging a hammer at various angle and no joy.

P1040236.jpg

Removed the other tied rod so got a bit more rack movement. And went back to trying to prise the bushes out with a couple of big screw drivers. Then had a go with mole grips, and, ladies and gentleman, at around 10:00 this morning, I remove one half of one bush.
P1040240.JPG

Just dropped the anti roll bar. Really should have done this last night. Lot more room to work in now. The fitting instructions suggest driving out the top bush with an air chisel. I don't have an air chisel. I've tried whacking the bush from underneath with a punch and big hammer, but it's not moving. Coffee now, and then back out to attack the top of the bush with the screwdrivers. I suspect a 12mm rawl bolt might prove useful here to grip the bush from the inside. Of course I only have 10mm, and 16mm rawl bolts 'in stock.
 
I'm beginning not to enjoy this job. So yesterday all I removed was the insides of each bush. Don't know why I didn't realise this at the time. They're the same construction as every other rubber bush I've seen. Metal collar, rubber, and inner metal tube. So all I had taken out was the rubber and in the inner tube. The collars were still in the rack. They started to come out easily enough with some cold-chisel work.

P1040243.JPG

And then took me about 3 hours to get to the stage where I could pull it out with mole grips.

P1040244.jpg

Top part of the bush was easy. No air chisel, but a big hammer, a socket and a cold chisel. Just drift the top collar up and out.

P1040245.JPG

So that's the passenger side bush completely out, and its taken me less than 17 hours, so hey, I'm WRC mechanic material. The drivers side, unfortunately is making that one look easy. There's a little bit less room to work in, and when I worked the flange of the collar out to start loosening it up the metal split and the mole drips just puller the metal way. So now I have the bottom collar, I think moving, but only upwards. I can't see why it wont just push the top collar out. But it's raining now and this job is touching about 20 hours, so that's it for today.

Have read the rack removal instructions properly and it looks like the top of the intermediate shaft needs to be removed, and to do that the steering wheel has to come out. Special tools listed.

So. Has anyone had the steering wheel off. Can you just pull it off by hand like on the 90?
And anyone know how to remove these hose fittings? They're on the power steering hoses. Do they just twist off with gently gripping mole grips? Think these are on the 90 too. I just never had to remove them.

P1040247.JPG
 
what a horrible looking job
hope you get it sorted

changing the bushes was no where near that hard on my colorado
there was one of rear bushes that was hard to extract, i had to cut off a flange.
but i didnt need to pop any balljoints, undo any pipes

i did remove the antiroll bar though
 
What a SOB. My 120 had a bit of play at the steering shaft/ rack clamp joint thingy. I was planning to replace it but then an altercation with a solid stone wall put play to that idea....:icon-cry:
 
Some good news at last. Got the bushes out. Blimey Rob, how did you achieve such a feat, I hear you say. Well, I'm glad you asked. Decided to follow the extensive (and blurry) rack removal screen shots I purloined from Toyota Tech over the weekend.

Now, I think a number of these aren't needed, but as I've done them hopefully it will give someone else the encouragement to try steering related fixes in future.

Step 1. Remove battery negative lead. No, really. Apparently it makes the air bag less likely to go off in your face.

Step 2. Remove the steering wheel. To do this you need to loosen two T30 torx bit screws either side of the wheel. To find them you have to prise off the covers on the surround. One is around the cruise control lever. The other is on the opposite side.


P1040249.JPG P1040250.JPG

Next lift off the horn push bit. Not too quickly, there are wires attached to the air bag.

P1040251.JPG

To get those plugs off, you need to lift the little yellow tabs with a screwdriver.

P1040252.JPG

Pull those off, while praying the air bag doesn't go off. And then a third connection. An earth, I think.

P1040254.JPG

Whip off all the connectors from the indicators, and what-not (to be continued...)


P1040257.JPG
 
And do not break that spiral switch assembly - you could send a child to a private school for a year for the price of that. Well, almost ... And it makes the truck really irritable, and not much works properly. As I found out :lol:


Sent from my iPad using Tapatalk HD
 
(.. .continued)

And these connectors too. The little white one on the bottom, in the middle, wasnt connected to anything. I assume there is a swankier wheel on the LC4 or LC5.

P1040258.JPG


Next remove the plastic sill trim, and kick plate thingy. The manual screen shots weren't very clear here. They didn't mention what to do with the snail.

P1040256.JPG

Take the lower fascia, trim panel off.

P1040259.JPG


And the shroud that surrounds the sterring column as it goes through the floor. Little plastic nuts, finger tight.

P1040260.JPG

And the correspoding shroud under the car. Bit fiddly to get a ratchet in here. And I dont think I needed to do this. (Picture should be rotated 90 degrees right. Or rotate your head 90 degrees left). This is through the drivers side inner wing inspection flap.

P1040263.JPG

Then remove the bolts holding the steering shaft to the sliding shaft. Again through the inner wing inspection flap. Head rotation required here too.

P1040264.JPG

Then, back inside the car, pull the steering shaft up, and it slides out of the clamp you just loosened, and the steering shaft is split.

But, I still cannot get the shaft off the rack gear box! I've hit it pretty hard. Dunno.

P1040266.JPG

But, splitting the shaft has given me enough movement in the rack to get a better angle with the cold chisels. And with just a couple of hours more banging away, the drivers side bush collars are out! Hooray.

All I need to do tomorrow is put it all back together. And then discover the wandering steering is still there, and it must be something else.
 

Attachments

  • P1040255.JPG
    P1040255.JPG
    154 KB · Views: 164
Last edited:
Forgot to mention, in a post that started with removing the steering wheel. Removing the wheel is very easy. No need for the documented special service tool. The retaining nut wasnt particularly tight (or big). And the wheel wobbled free. Having applied "match marks" of course.
 
Also forgot to say. I don't think removing the steering wheel and indicator bits is necessary. I reckon all this would work just with the cowl on the floor around the column removed. Loosen the clamp under the car that attaches to the sliding bit, and I reckon it would split. But dont blame me if your air bag goes off and your indicator stalk falls off if you try that.
 
Back
Top