Don't like the adverts?  Click here to remove them

Transfer box

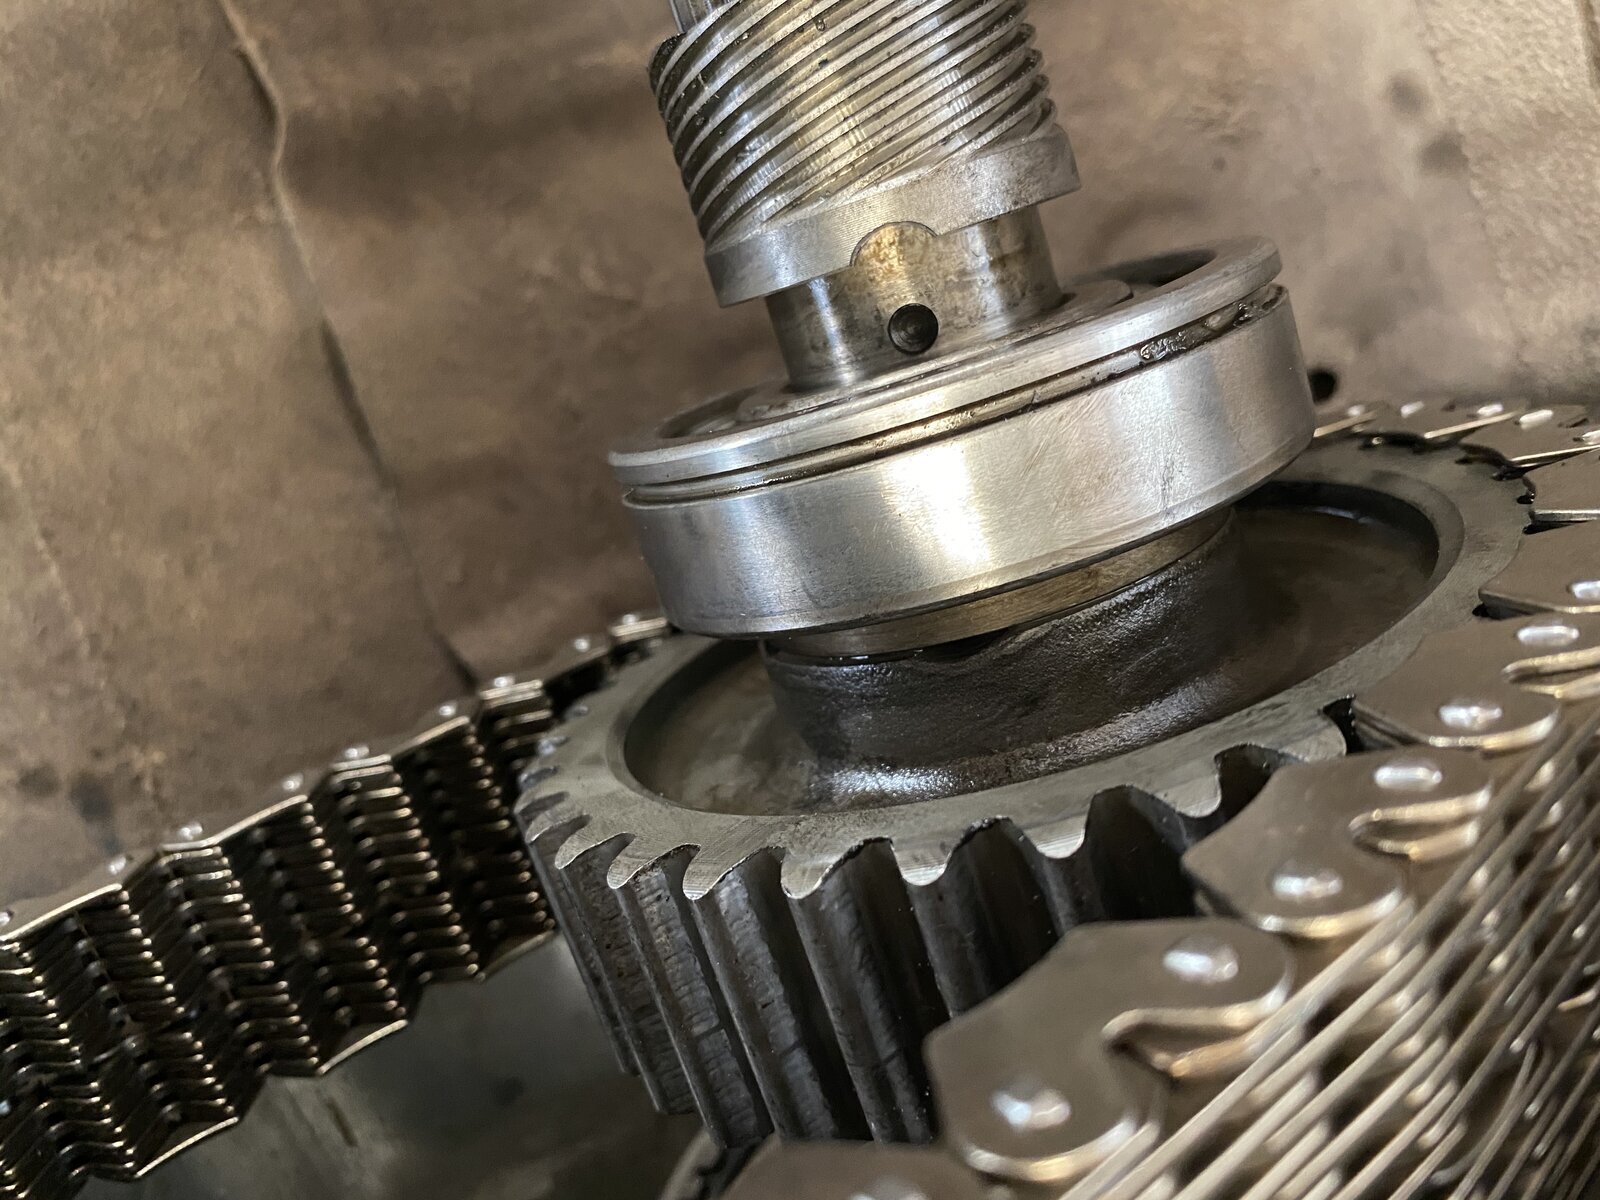
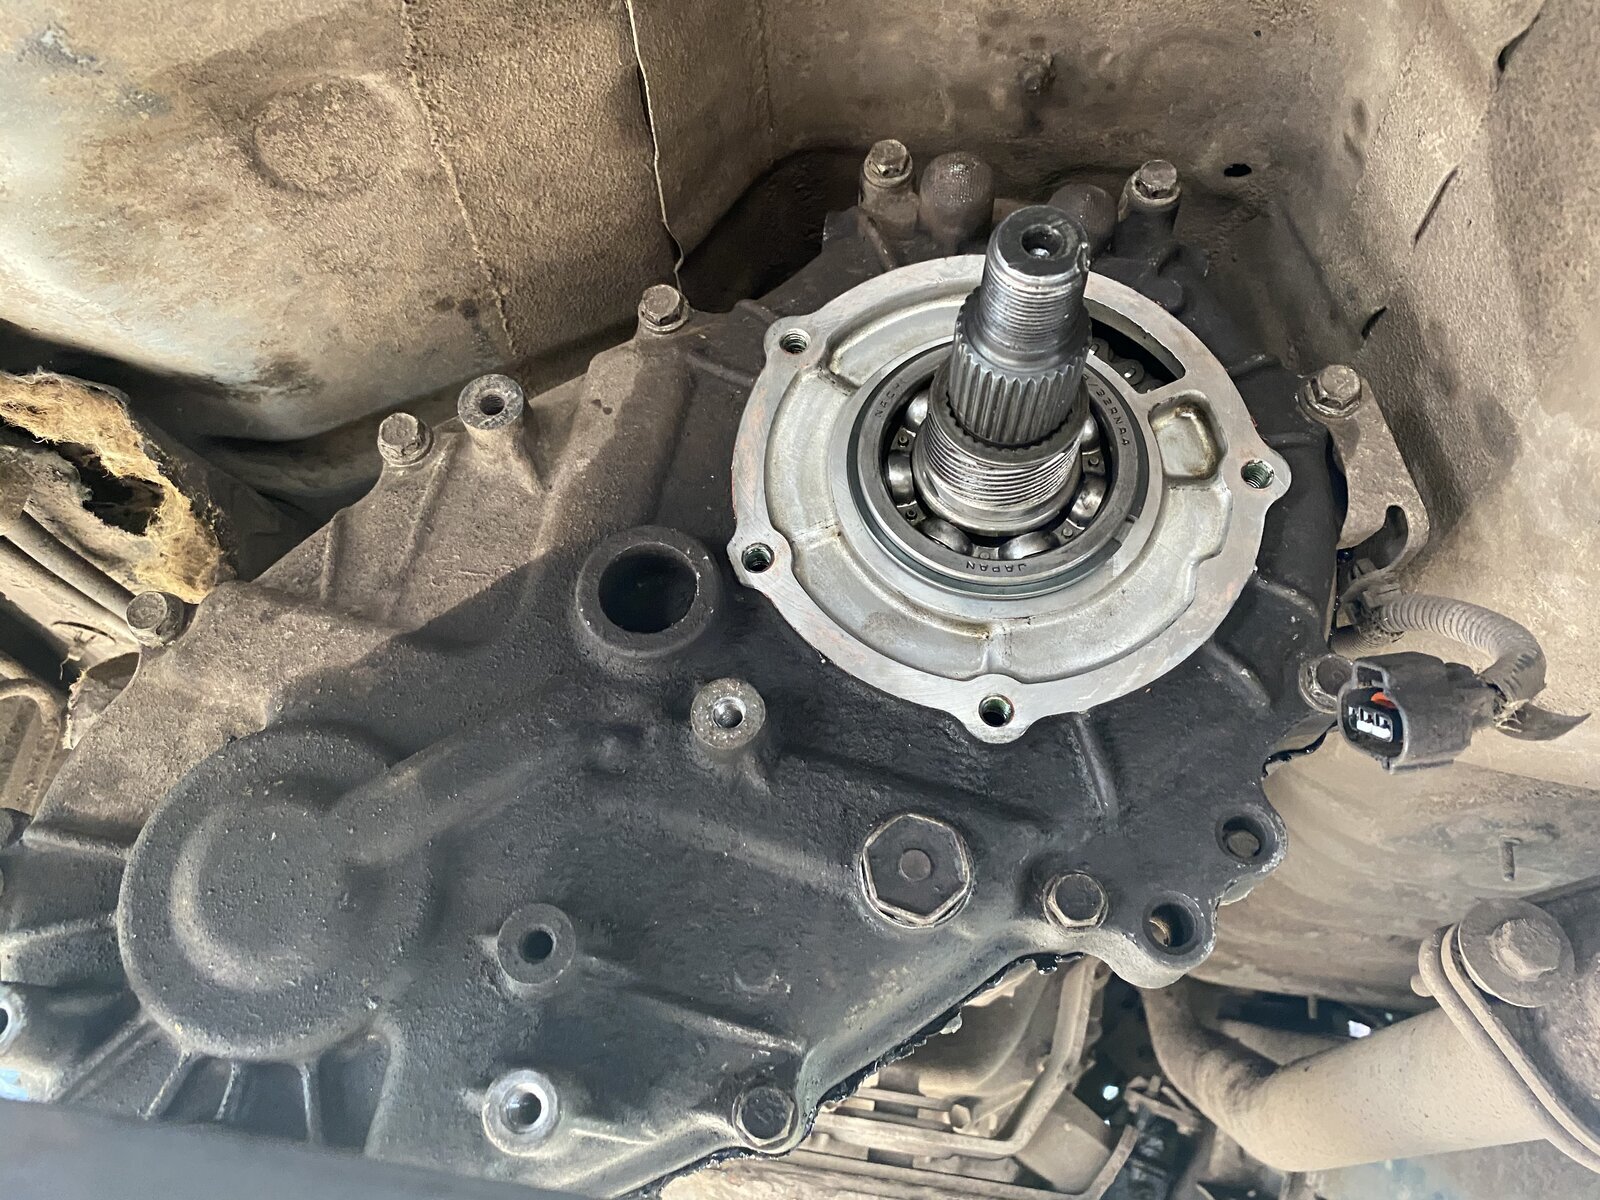
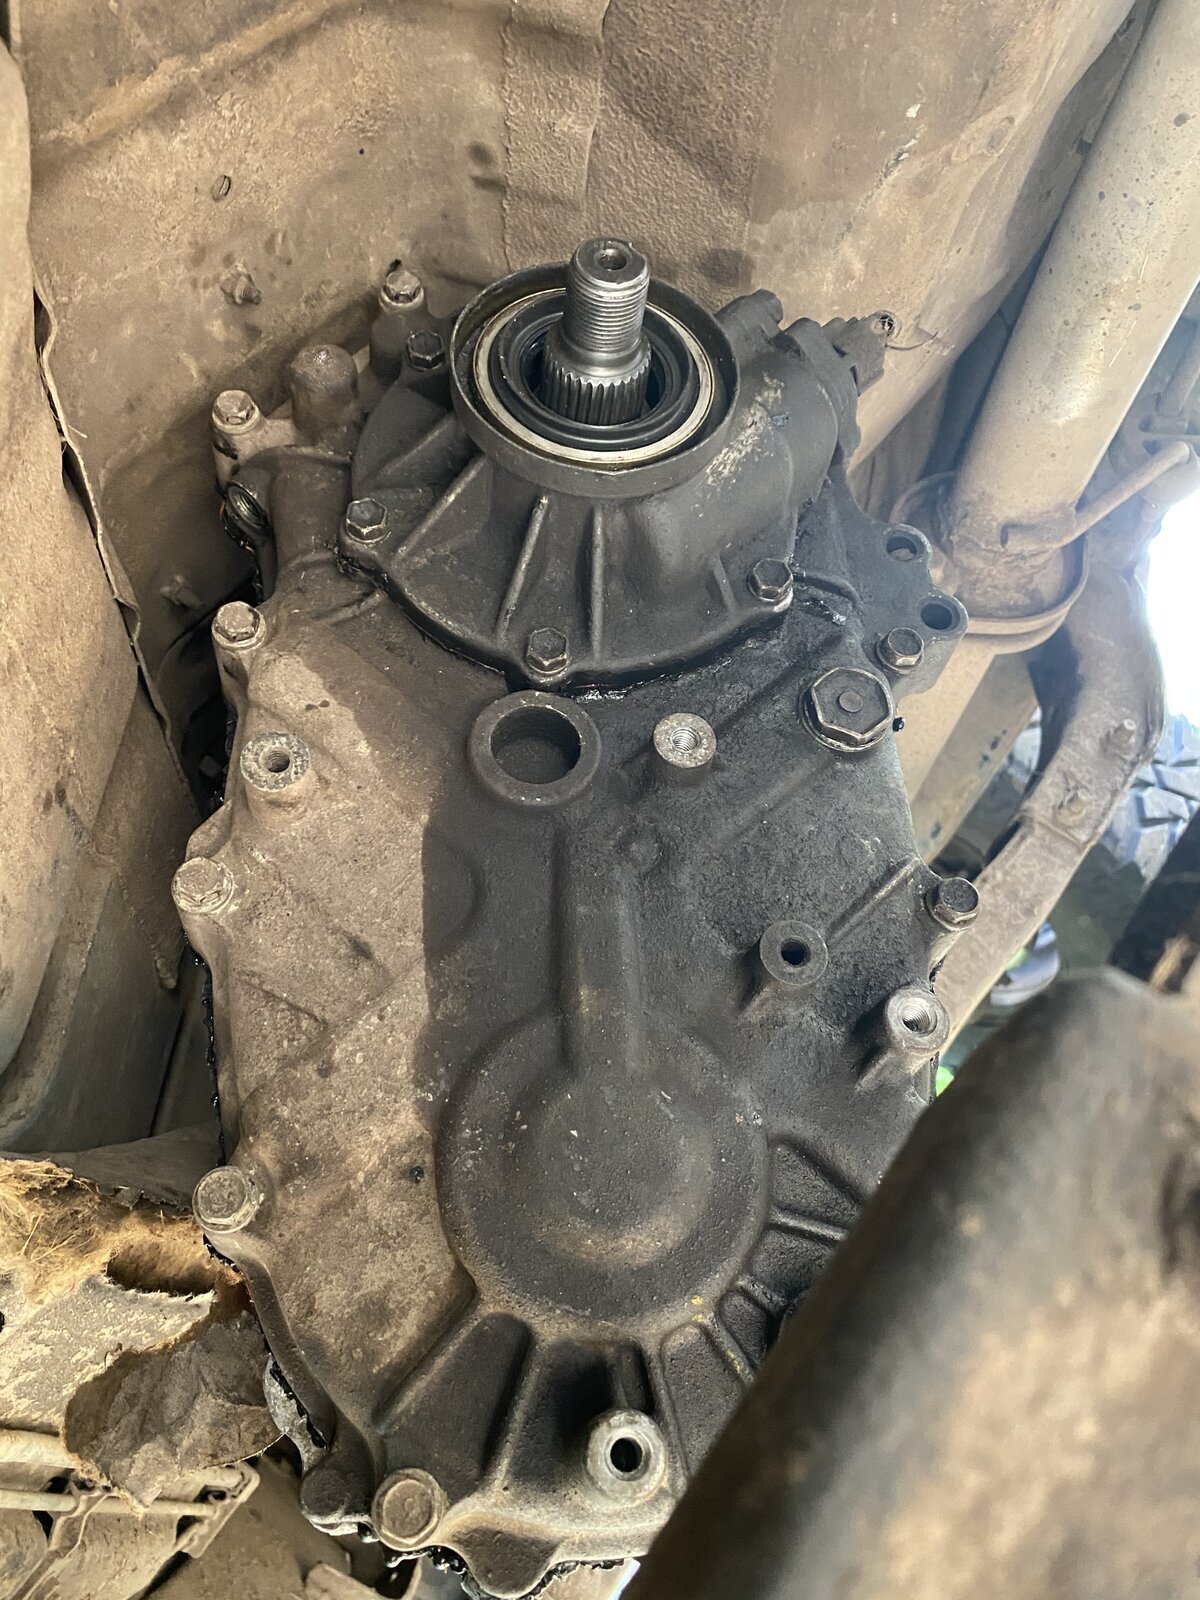
A bearing with an outer circlip groove will be fine - but they are expensive, the standard bearing (of a reputable make) would be more sensible. The rear output shaft bearing has a circlip - are you using the correct one there ??

Bearings have to be pulled off and pushed on, a 'Sealey' bearing puller works for me, but I do have an enormous Sykes-Pikavant hydraulic puller and a 30-ton press to show them who's boss if necessary.

DSCN4879.JPG


DSCN5043.JPG


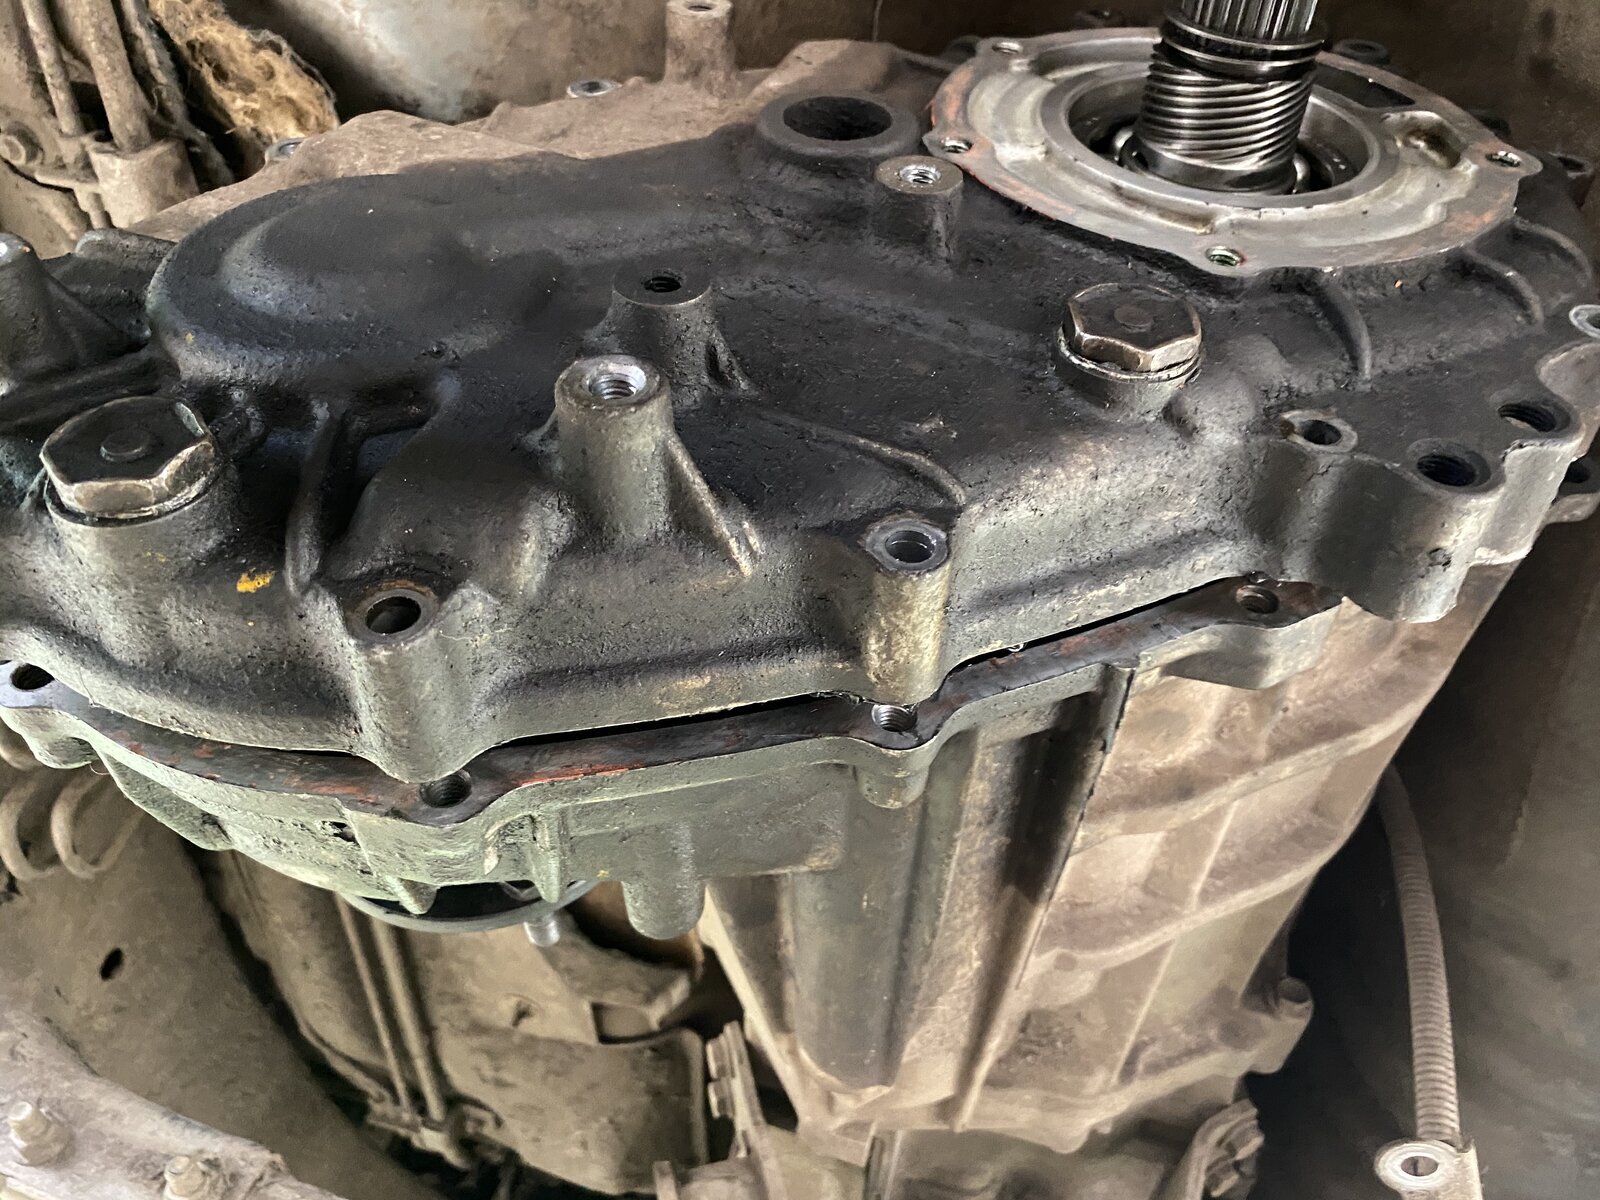
DSCN5053.JPG


It sounds as though you're making good progress - keep the pictures coming :thumbup: .

Bob.
 
Bit more of an update, correct bearing sorted from another local bearing supplier, so that’s one thing sorted!

new bearings all pressed on..

now the hard bit, rebuilding it :tearsofjoy: :tearsofjoy:

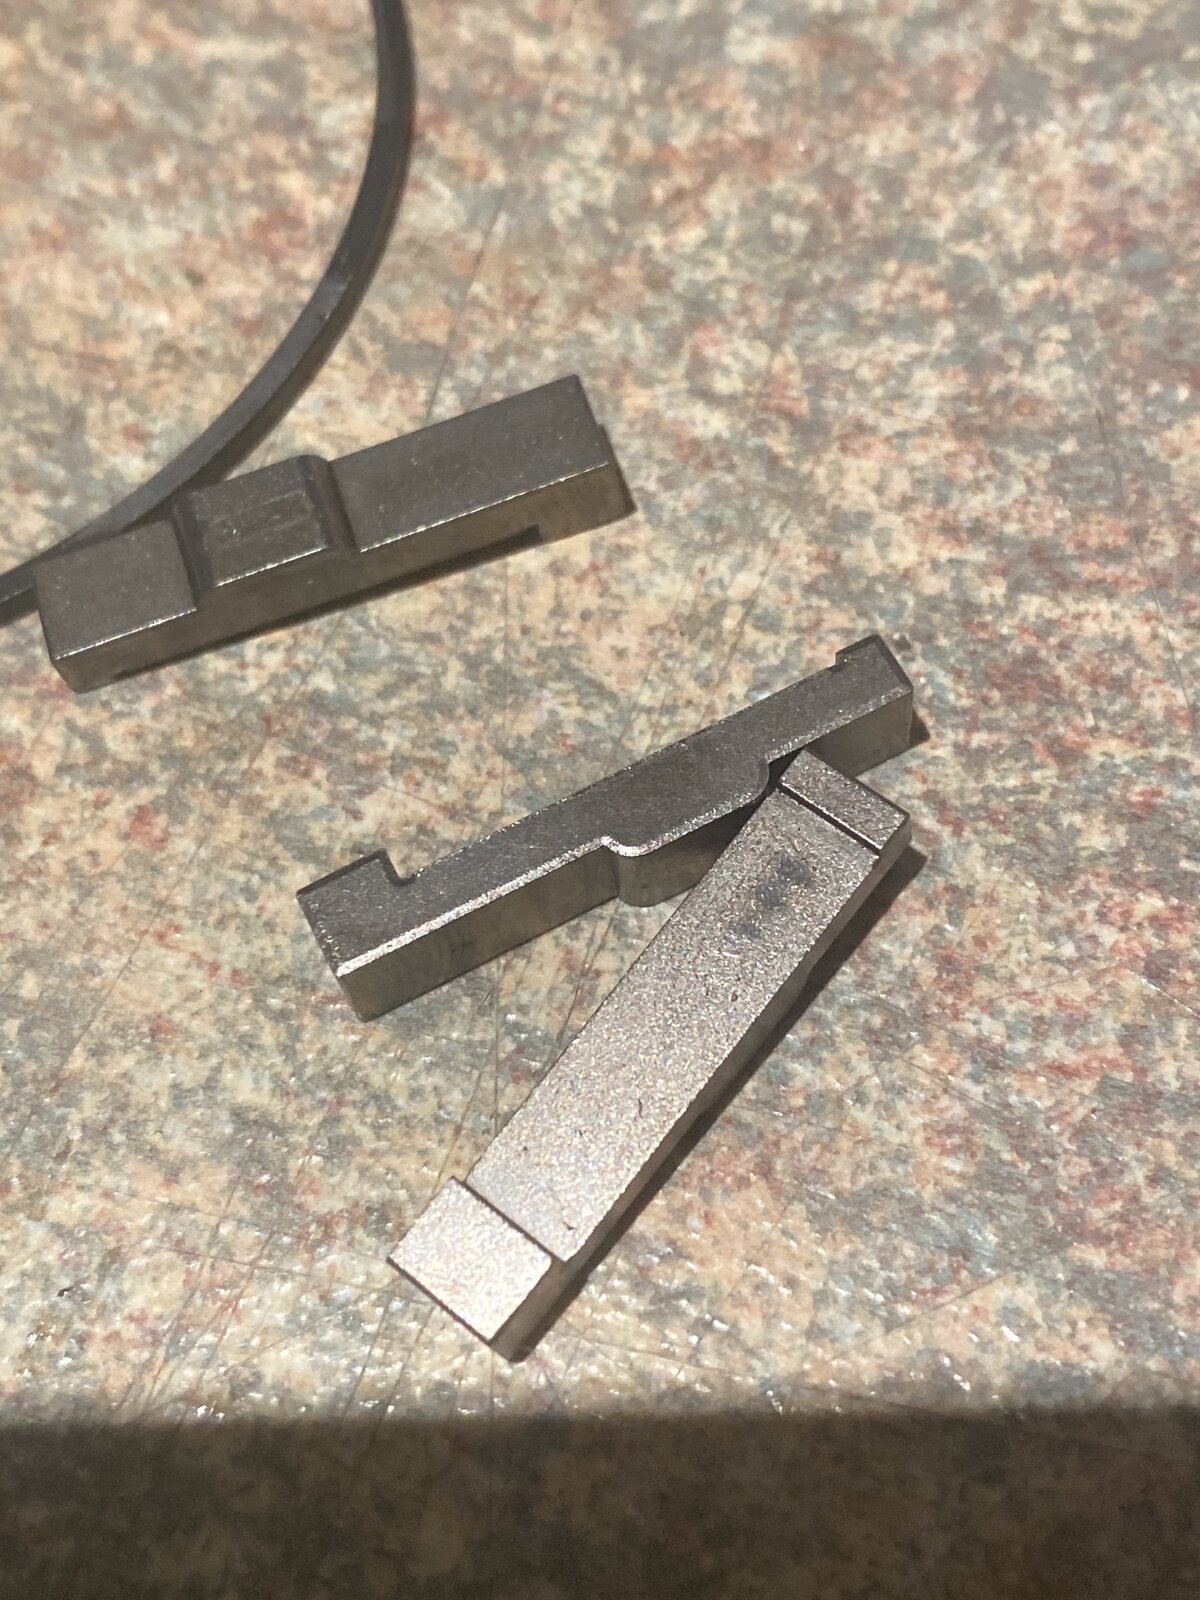
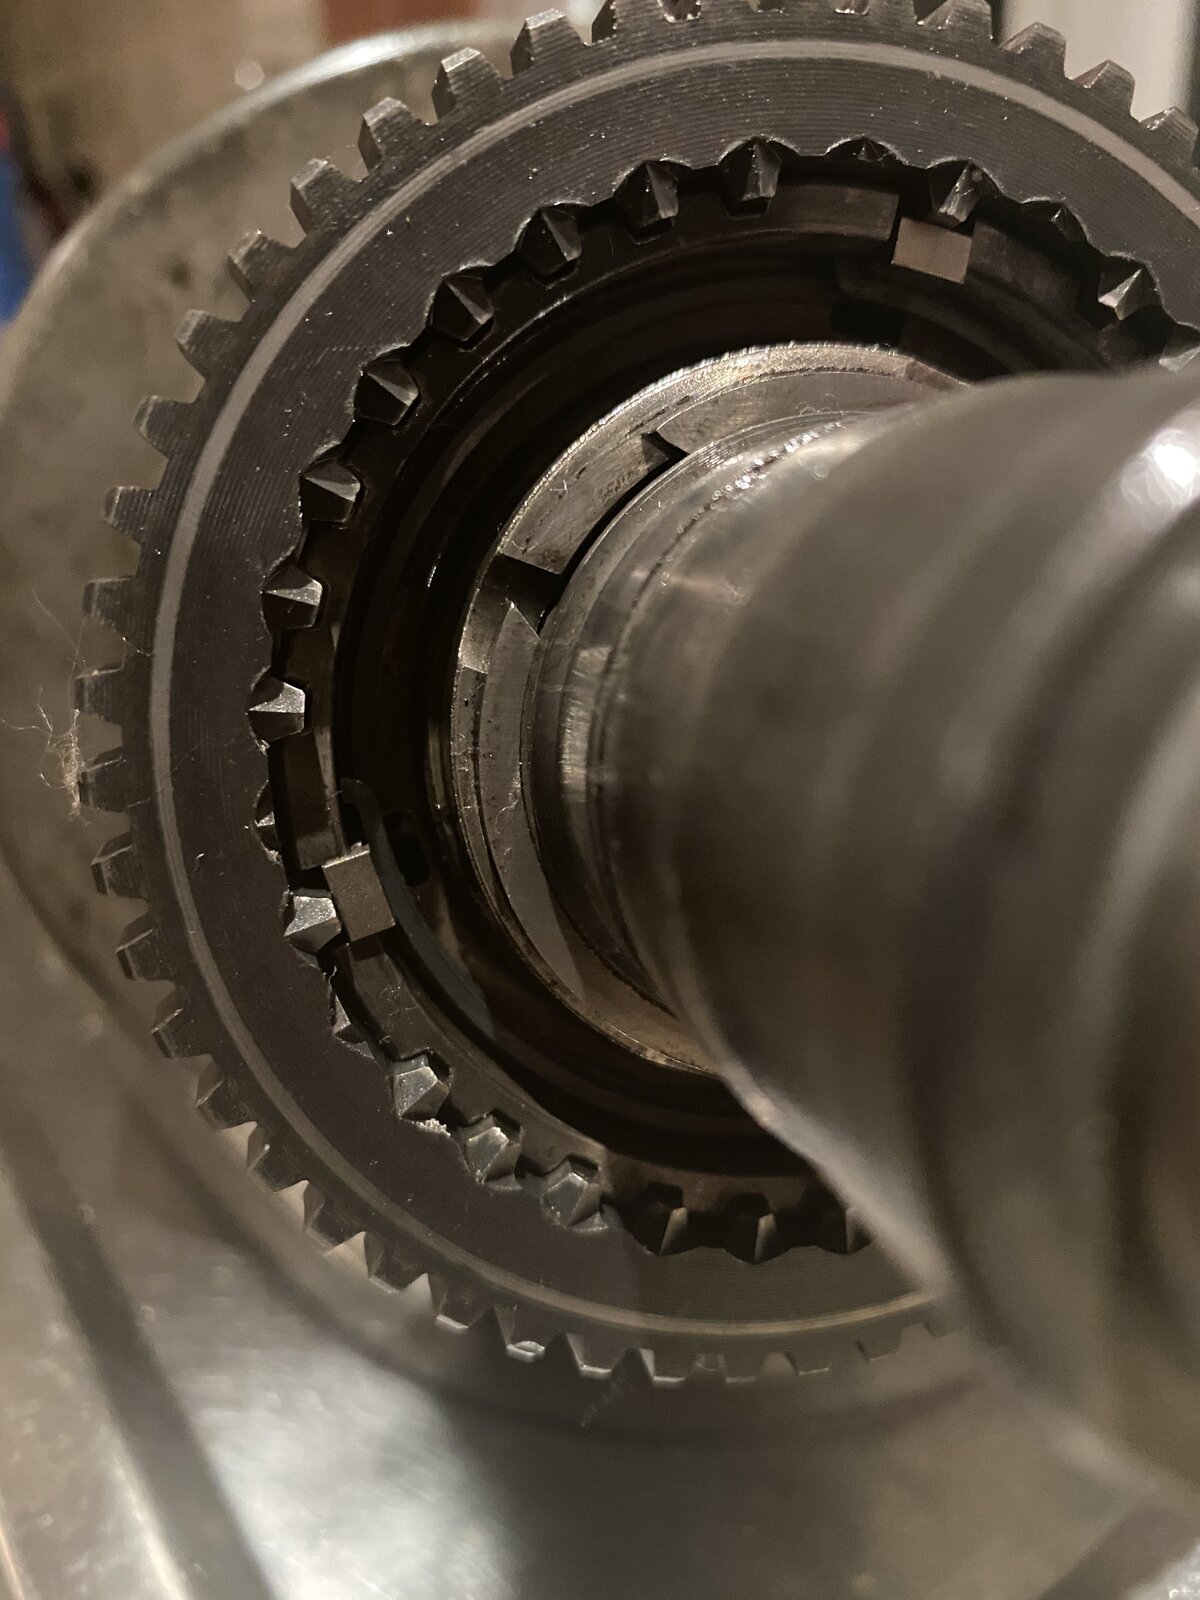
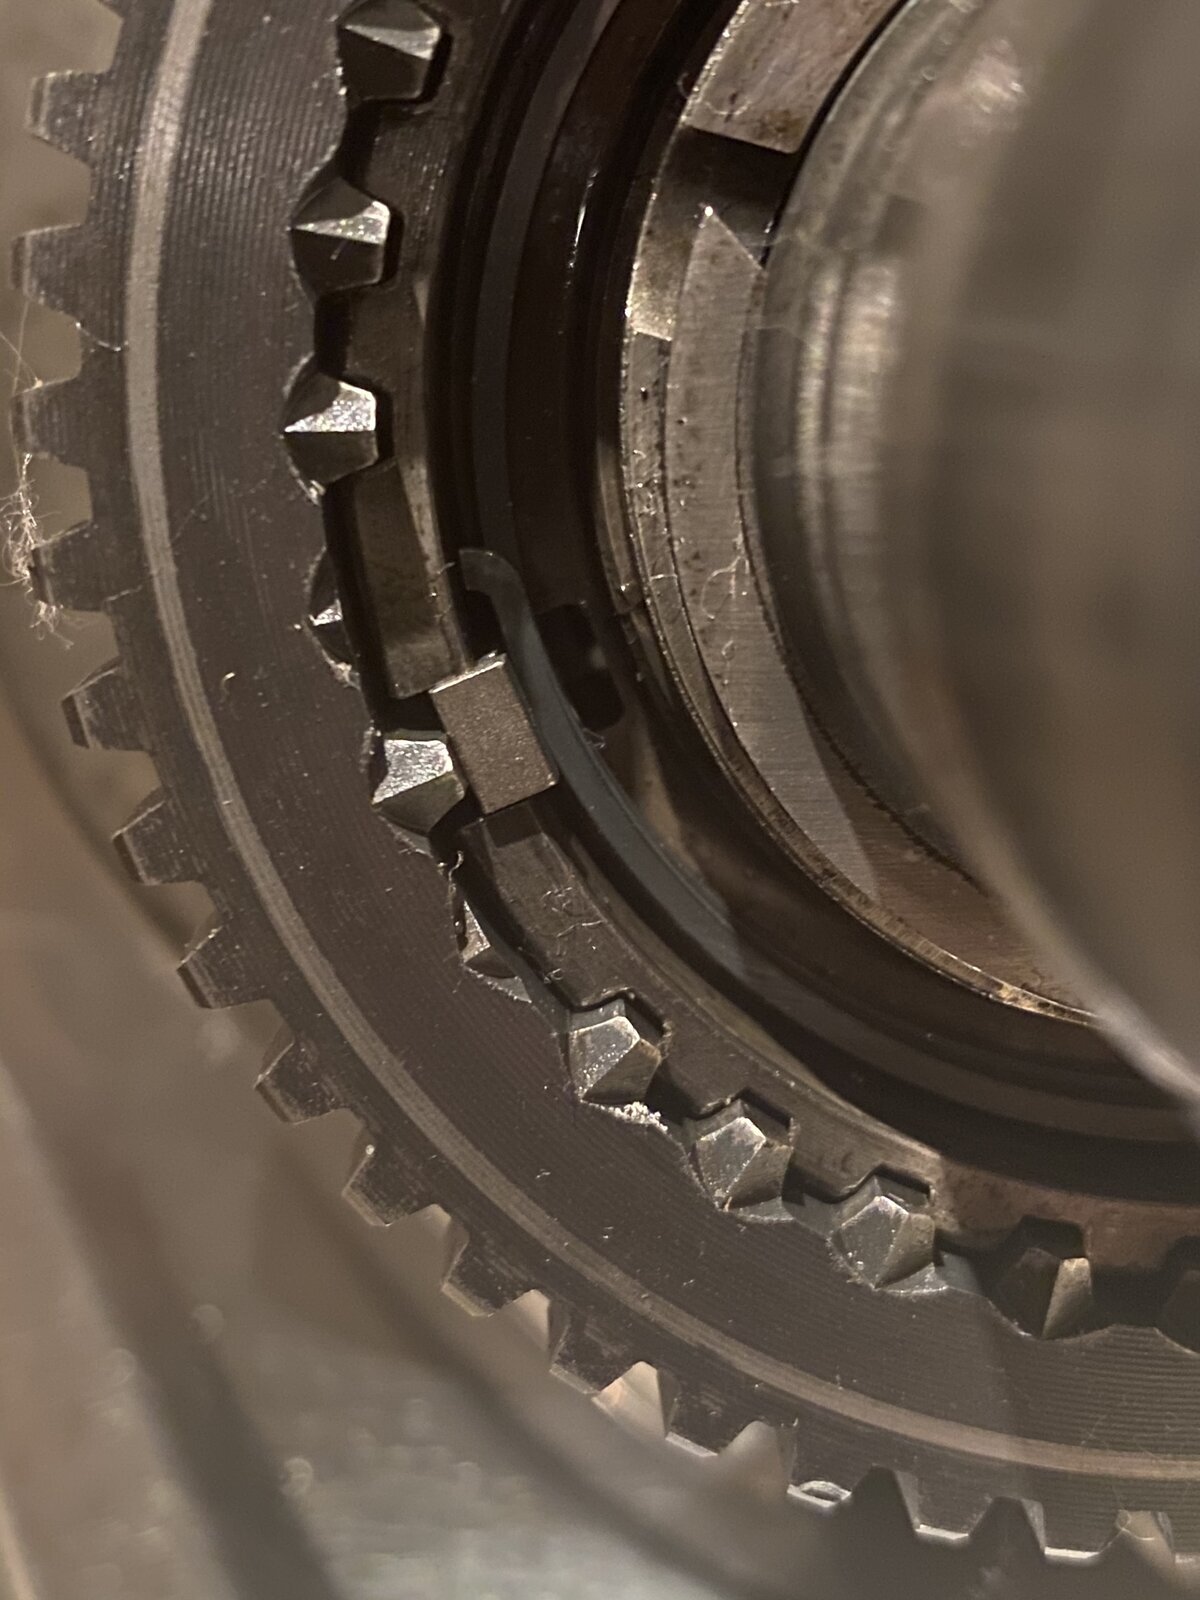
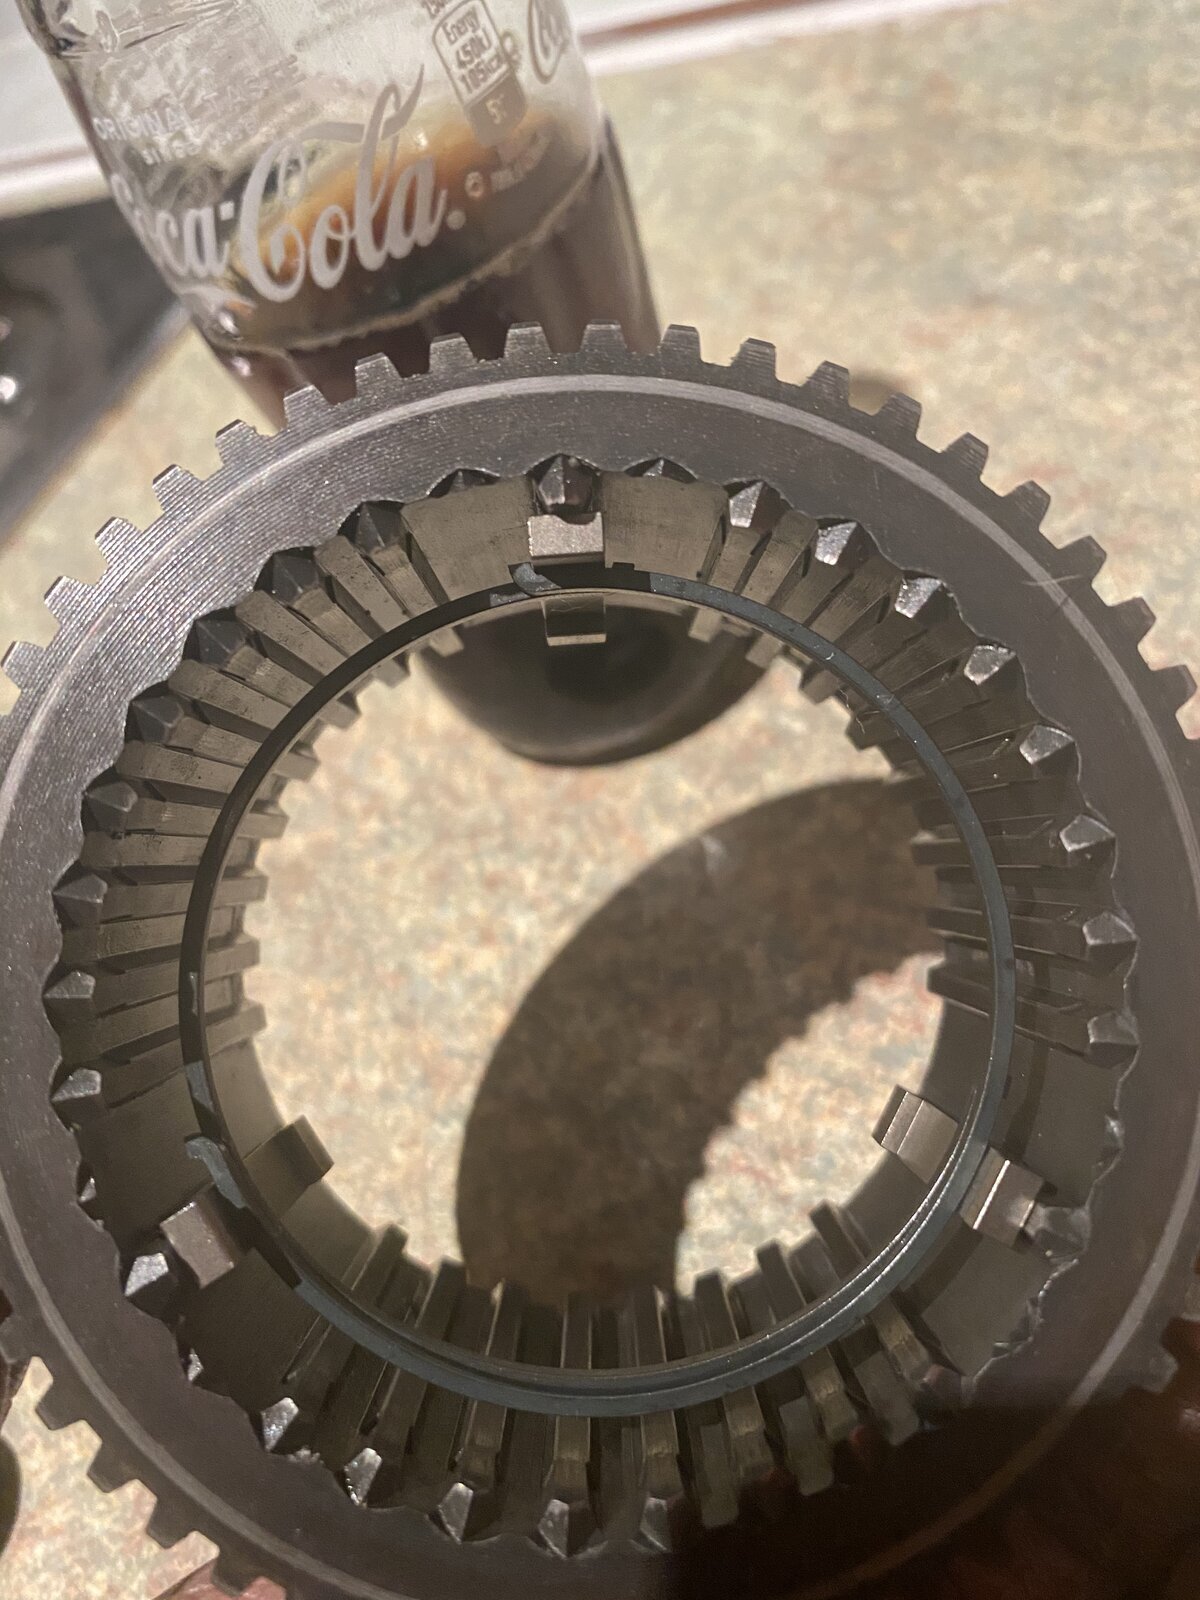
@BobMurphy them little clips that slot in the syncro you mentioned...

most stressful thing ever! Can I glue them on?!:tearsofjoy::coldsweat: Also sorry to be so icky but does the bigger end bit go at the top or bottom? Lol there’s a sticky out but that’s a bit bigger on one end than the other haha
 

Attachments

  • image.jpg
    image.jpg
    364.2 KB · Views: 47
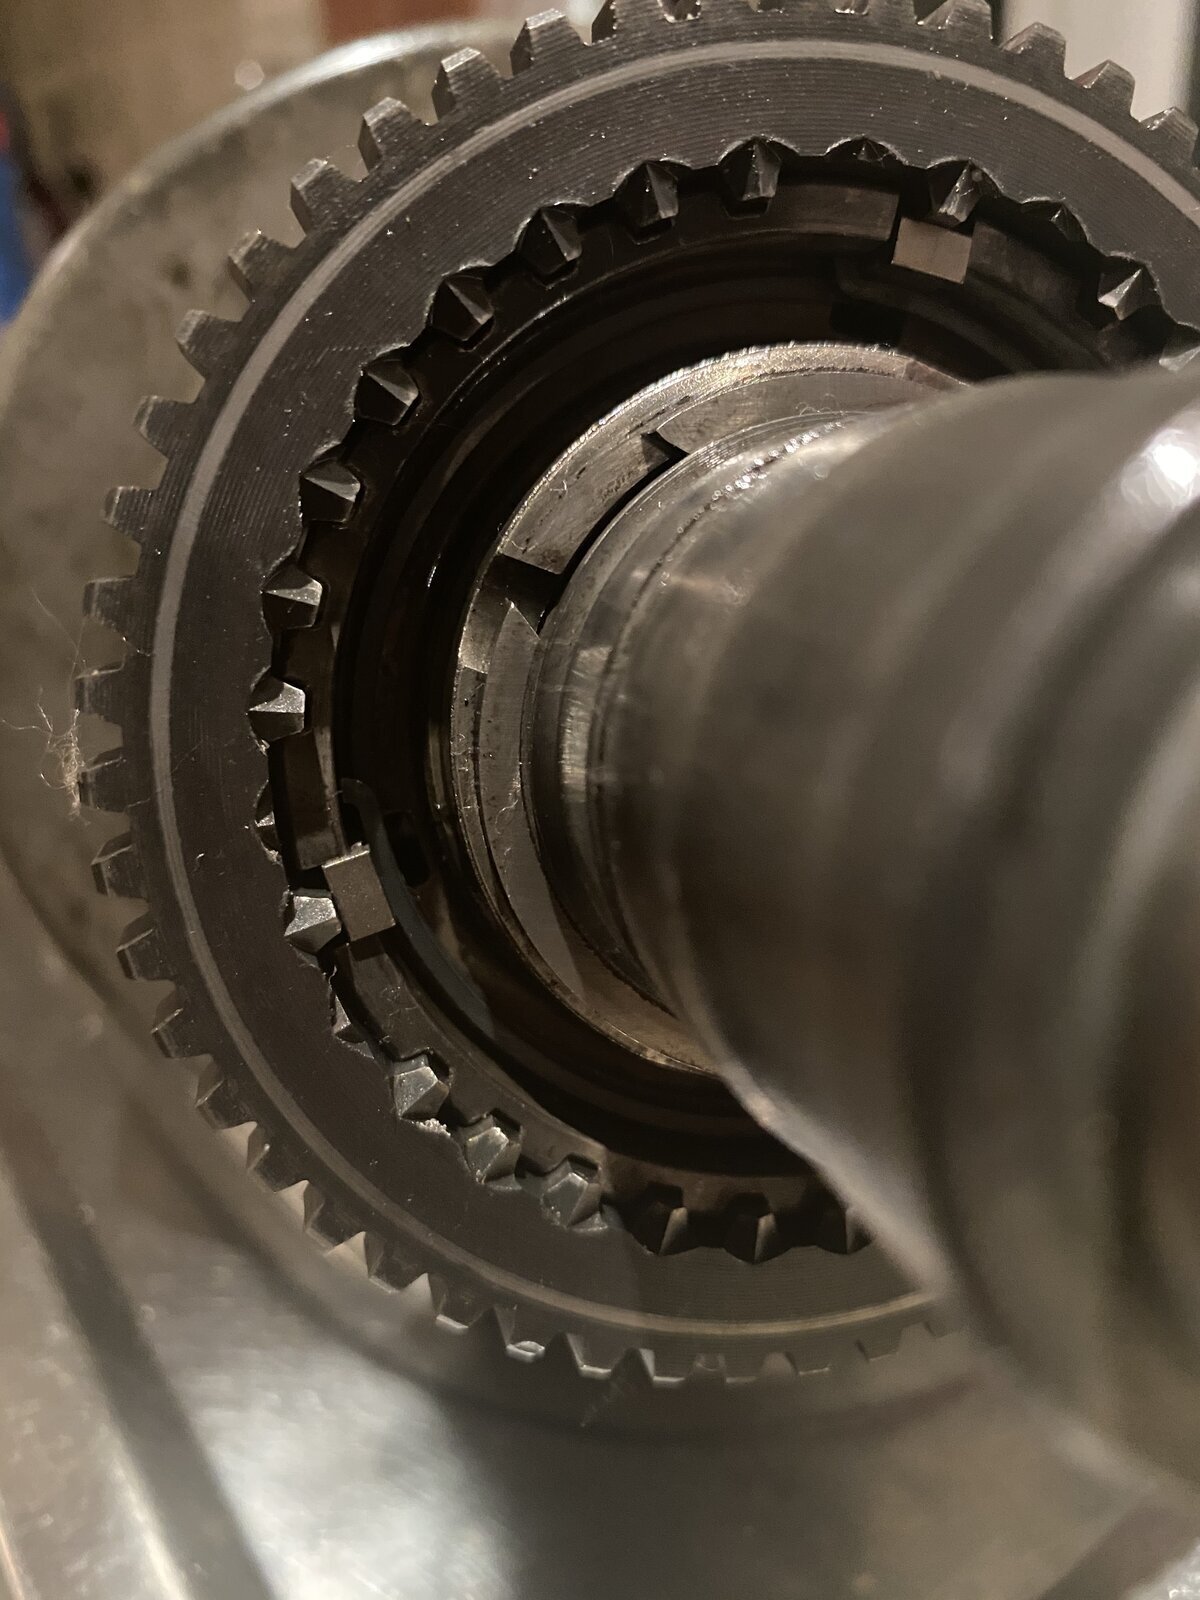
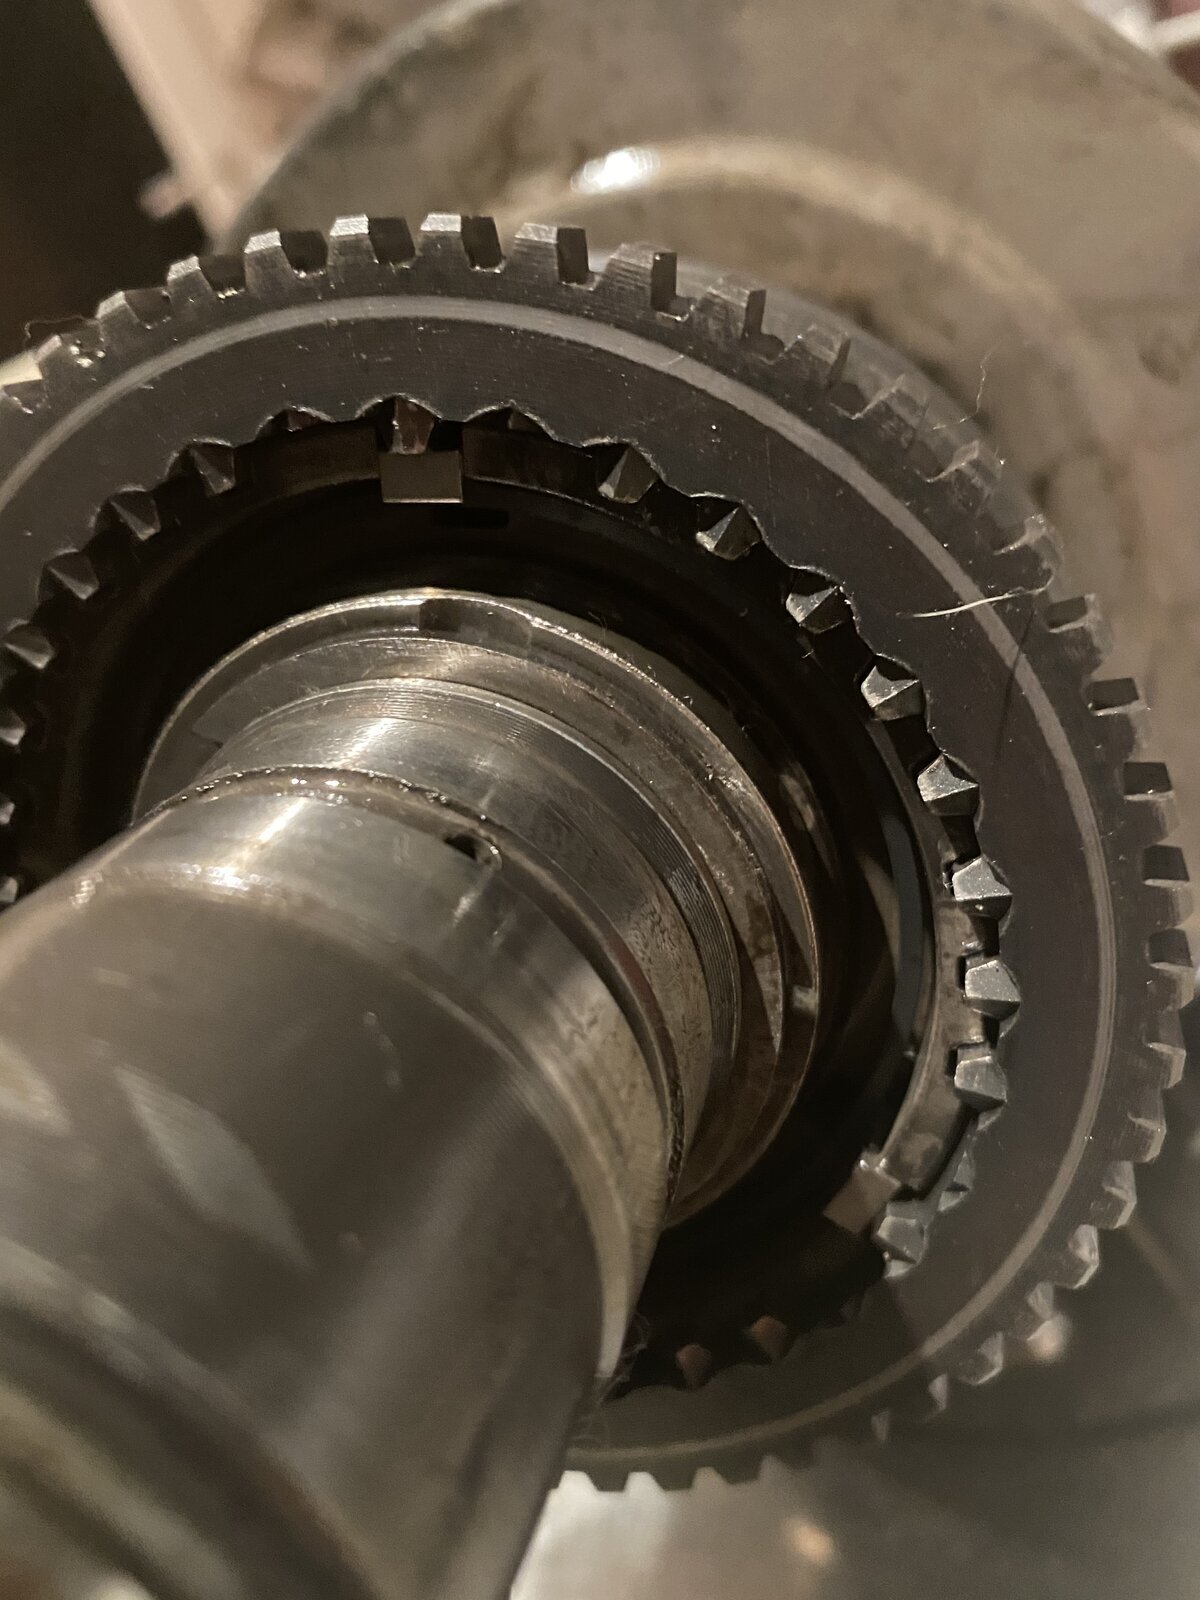
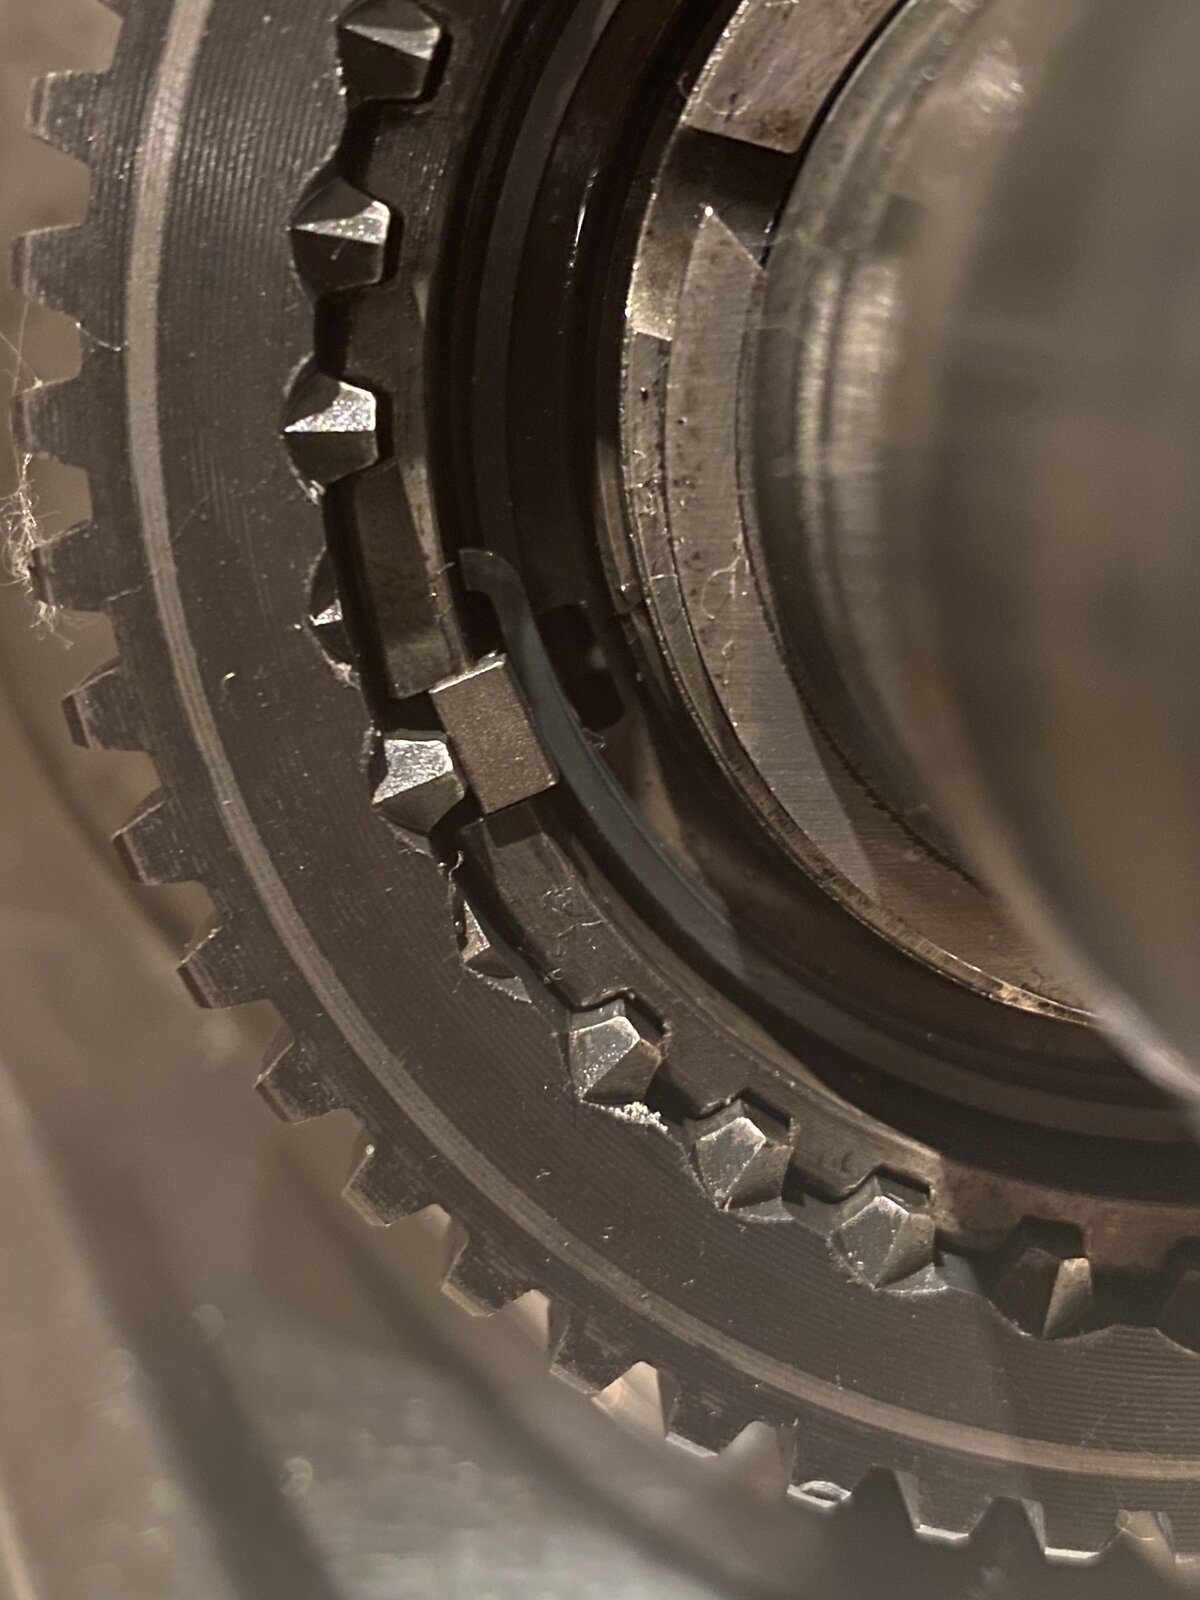
Well I think I did it? :coldsweat: :tearsofjoy: Over an hour.. I don’t think I could ever do that again.. I’ve said some swear words in the time it took me hahah

does it just slide on till the clips reach it? Or am I completely going the wrong way doing this haha
 

Attachments

  • 0CD06FF2-72D2-4A00-99FB-ADBE1984CBE3.jpeg
    0CD06FF2-72D2-4A00-99FB-ADBE1984CBE3.jpeg
    241.5 KB · Views: 45
  • F7242202-6550-42DE-A84D-77981227DAB6.jpeg
    F7242202-6550-42DE-A84D-77981227DAB6.jpeg
    240.3 KB · Views: 40
  • 78B93046-A139-4746-9EFC-2886586B16B5.jpeg
    78B93046-A139-4746-9EFC-2886586B16B5.jpeg
    223.9 KB · Views: 39
  • A759FCF9-7E22-48DC-B5DF-806A01E2C8B0.jpeg
    A759FCF9-7E22-48DC-B5DF-806A01E2C8B0.jpeg
    241.5 KB · Views: 39
  • 042ABA89-7519-407D-8603-5821E2857F9A.jpeg
    042ABA89-7519-407D-8603-5821E2857F9A.jpeg
    223.9 KB · Views: 40
  • ACB37E1D-38A4-4FA2-9429-0D3D7816093A.jpeg
    ACB37E1D-38A4-4FA2-9429-0D3D7816093A.jpeg
    284.8 KB · Views: 35
Also I’m struggling to keep the bronze piece on the end.. if it’s meant too, it just falls off if I try slide it on:confused:
 
As I understand it, the Synchro Cone sits proud of the gear behind it. As Low Ratio is engaged the cone engages first and is pushed back against the three wedges that cause the gear around them to adjust its speed before the gear teeth are fully engaged. The wedges (or whatever they're called) have to move in and out on the ramp on the inside of the surrounding gear against spring pressure.

This allows a manual TB to be changed into 'LOW' as slow speed. on my Auto '100' I have to be in neutral before I can get into LOW (or it complains, loudly). Auto TBs don't have Synchro.

I think you have it right. Its a long time since I assembled one and I don't have one in bits at the moment so can't check. Looking at my pictures . . . .

I think this is right, but the picture was taken before it was assembled so I can't be sure:

(Rather over-exposed, but it shows the ramp inside the Low Ratio gear that the back of the wedge goes into)


DSCN4872.JPG


It looks like the short-block end sticking out of the end (before the bronze cone is fitted).

DSCN4883.JPG


You have to be careful when assembling the complete shaft, I have done it 'vertically' to keep everything together in the past.

You also need at least four hands :icon-wink: .

DSCN7610.JPG


DSCN7611.JPG


It takes time to get your head around the assembly - but you'll get there :thumbup:

Keep us informed.

Bob.
 
Thank you @BobMurphy reallly really appreciate your help with this! :grinning:

I really hope I don’t fit it wrong I don’t want to fit them metal wedges and clips wrong i

I haven’t removed the selector shafts from the transfer case, should I remove them before refitting that shaft with the gears or can it all clip together when fitting?

thanks again bob for your time and help with this, I bit off way more than I can chew hahah
 
Don't like the adverts?  Click here to remove them
I think you will find it easier to get it all together with the selector shafts out. Its a bit of a juggling act but quite do-able.

The oil pump goes in AFTER the main shaft (and selector forks) are in the case.

DSCN7614.JPG


DSCN7626.JPG


Don't forget the magnetic oil filter that goes in behind the oil pump pick-up plate :doh:.

Cleaning it can be a challenge :lol: .

DSCN4810.JPG


There is a bigger 'fiddle' waiting for you when you come to put the rear cover on - there is an interlock plunger running between the ends of the selector shafts that only fits when one end is in its notch in one of the shafts.

One shaft is longer than the other at the back, you have to get it started in the hole in the rear cover then drop the plunger down its hole before the second shaft can go in. once both shafts are located and the (HOT !) rear cover is bolted on the two detent balls, springs and screwed plugs can be fitted.

DSCN7710.JPG


DSCN7712.JPG


Don't expect this process to work first time :icon-wink: .

You learn a lot on your first foray into Transfer Boxes !

Bob.
 
Sorry for the slow replies been full of flu haha

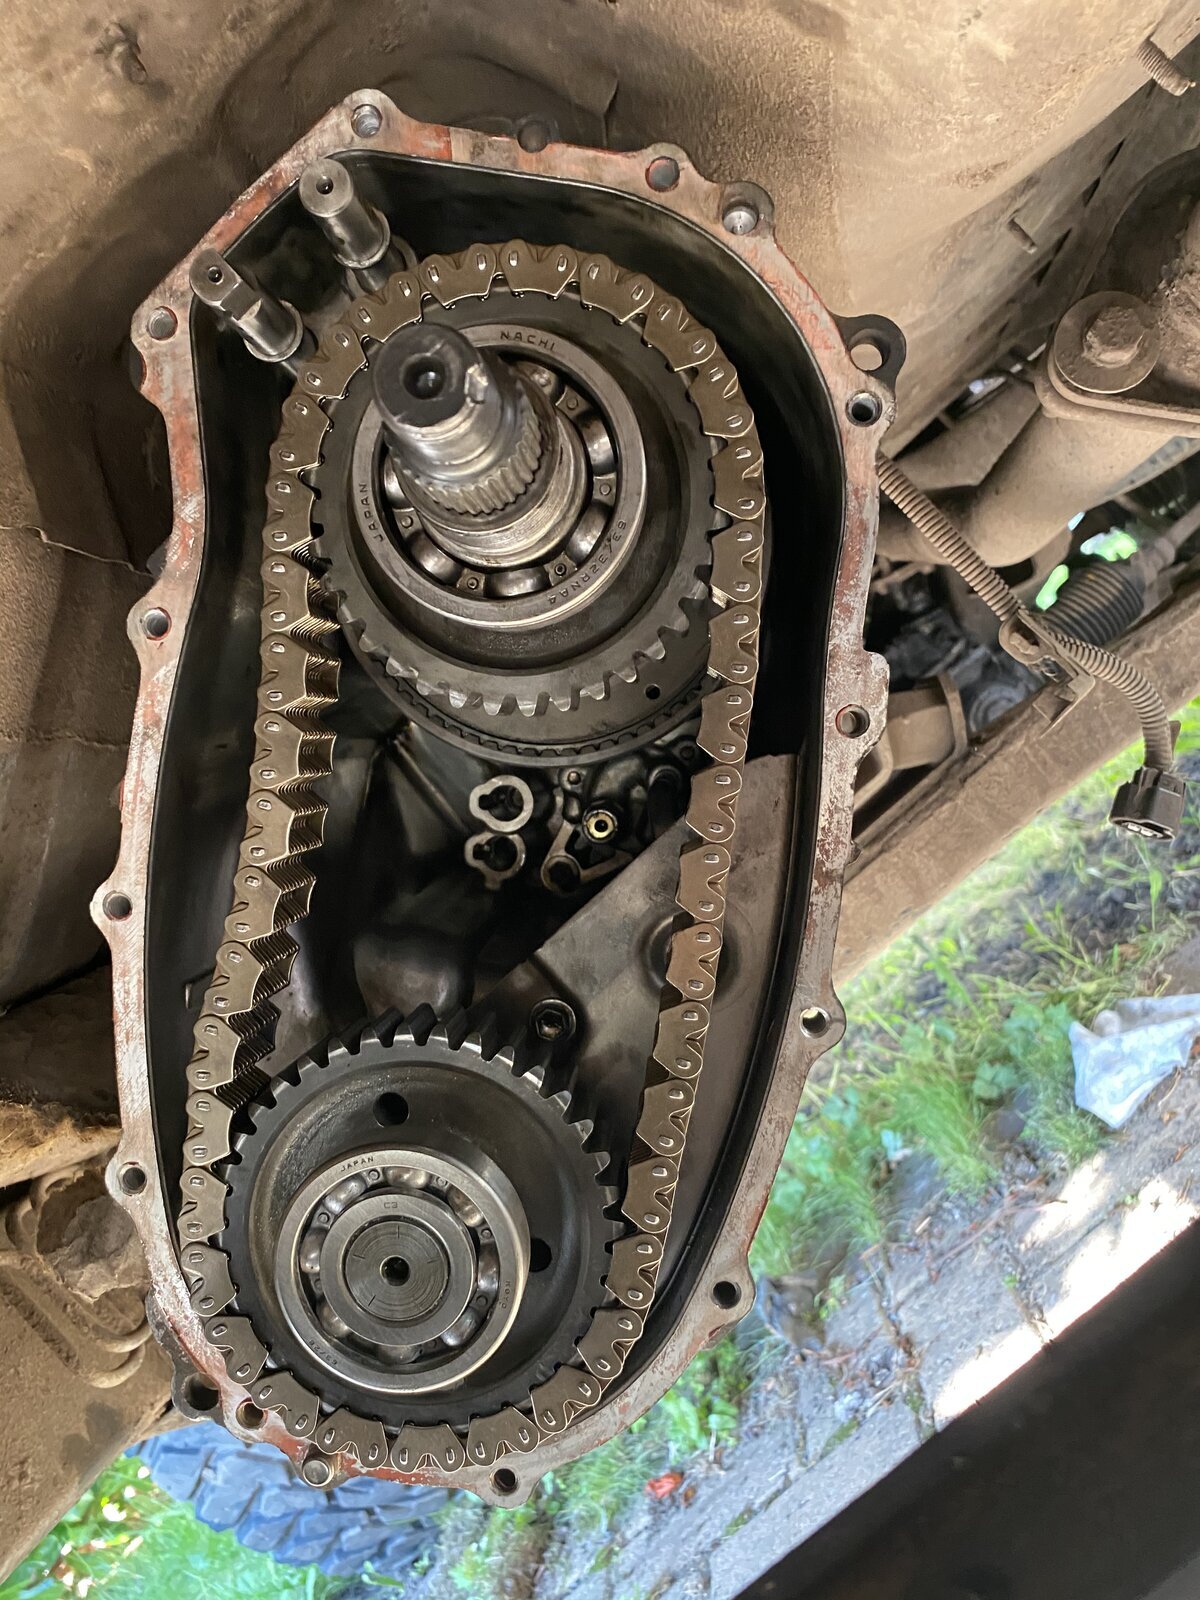
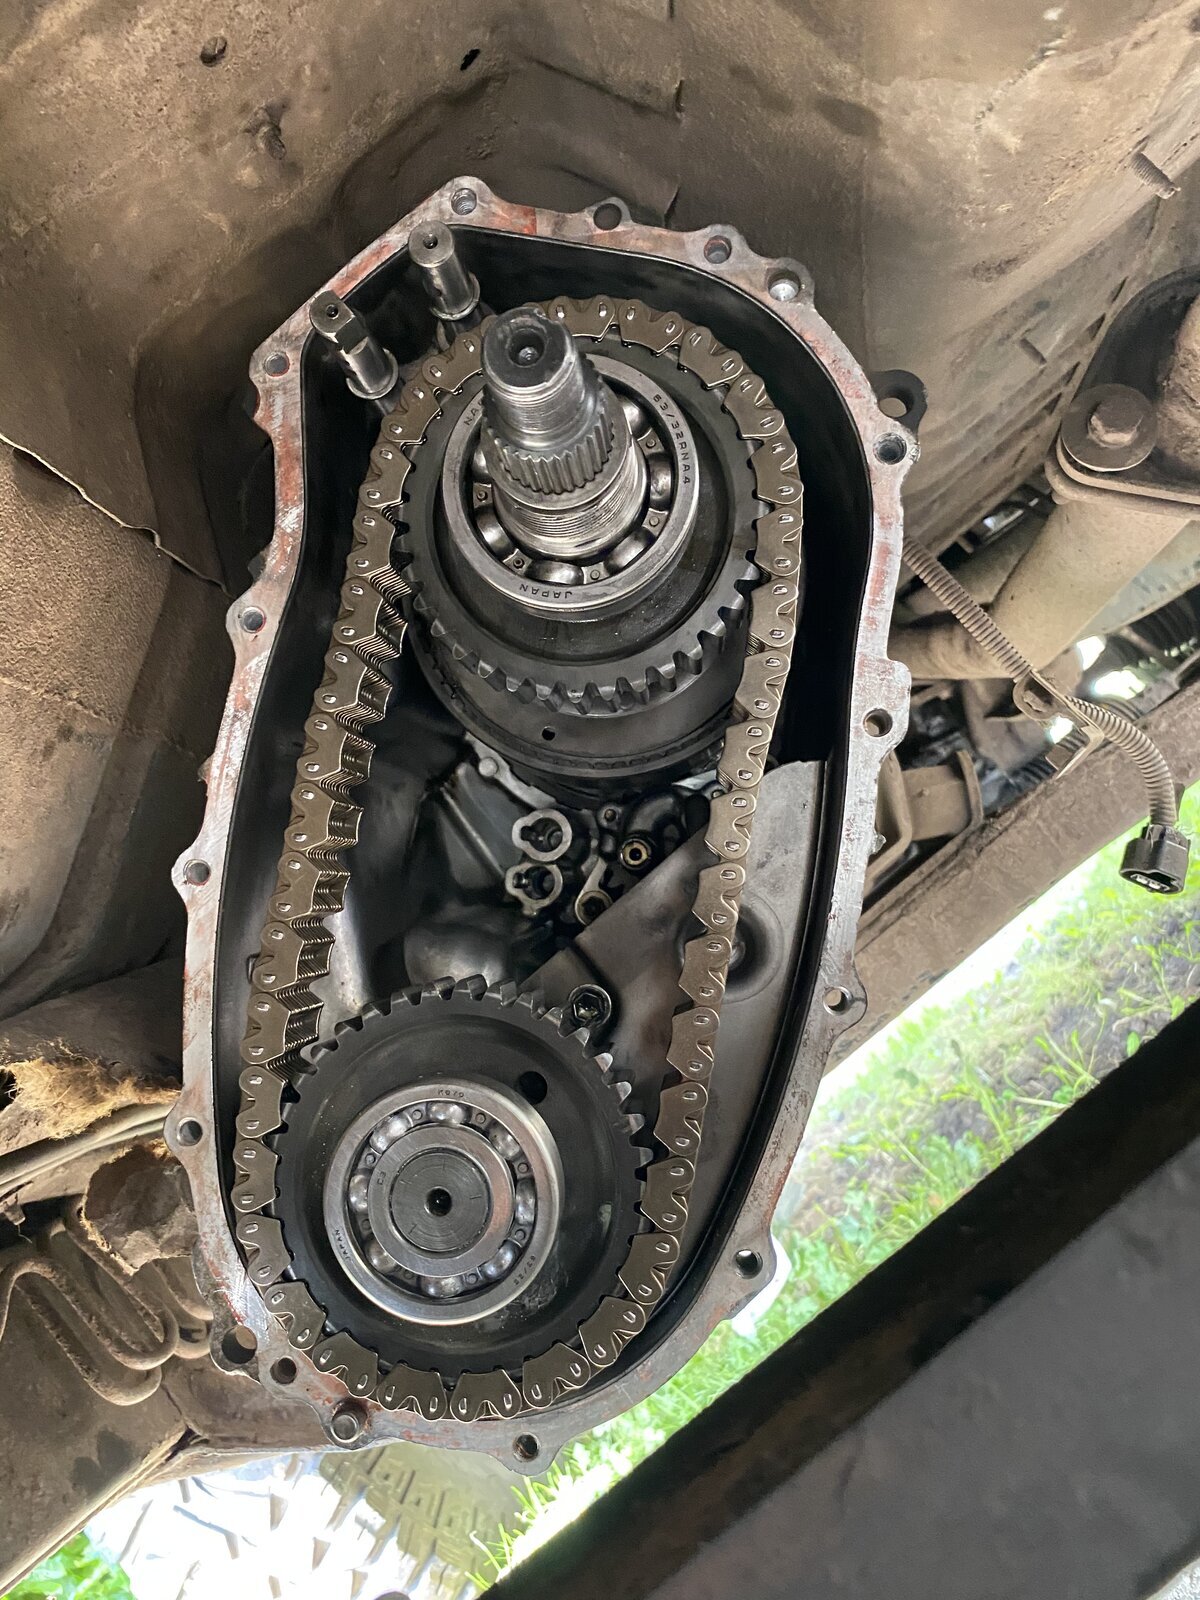
sunny day today so I’ve got the selector arms in and main gear shaft, new seals fitted and cleaning up magnet an oil pipe as we speak,

the 2 balls I have are the ones forthe indent? Bolts with the springs, should I have any others as if so I haven’t got them :coldsweat:

mid this little shaft/ rod the thing you pictured above @BobMurphy

thank you again lads I wouldn’t have got halfway to here without your help haha
 
More or less back together now! Lost the little ball bearing for the worm drive you mentioned

but the new chain is in so now I need to try find a ball bearing from somewhere:disappointed: don’t think it’ll be easy to find! Will one for an air rifle/bb gun work? Lol

so I’m done for now till I can sort that unfortunately but I’m getting closer!
 

Attachments

  • E3338A55-A8B1-4BB8-B4D7-69E217EA5BCC.jpeg
    E3338A55-A8B1-4BB8-B4D7-69E217EA5BCC.jpeg
    326.7 KB · Views: 52
  • 44D630DE-3C18-4995-901C-80CD7C2EC75C.jpeg
    44D630DE-3C18-4995-901C-80CD7C2EC75C.jpeg
    413.6 KB · Views: 45
Lost the little ball bearing for the worm drive you mentioned

No balls - No drive (as in life). Its a Toyota part so if all else fails get one from them.

I have a couple of spares and I'll measure one later and give you the size.

The part Number is:

33481Q (90360-05012) - KEY OR BALL, SPEEDOMETER DRIVE GEAR (FOR TRANSFER).

Around £1.10 ea.

You're getting there - good job !

Bob.
 
Thank you @BobMurphy I was close to leaving it out and thinking it’ll be fine haha but I’ve got this far I want to do the best job I can lol

a local bearing shop sells the ball bearings from 1mm up to 10mm but don’t sell a assorted back, my little girl is in nursery forthe day so I may pop down shortly and buy a few packs, 4mm 5mm and 6mm? Bound to be one! I hope haha

I’m so impatient I want to get it together and see if I’ve fixed her :tearsofjoy:
 
Managed to get the little ball- well a pack of 10 hahah

when fitting it does it go in the hole on the shaft or rest against bearing and sit in the recess on the gear? I’m not the brightest I just wanted to double check what you meant on the pics haha
 
Well, the official Toyota ball is 6.34mm diameter, but I guess a 6mm one would do the trick just as well.

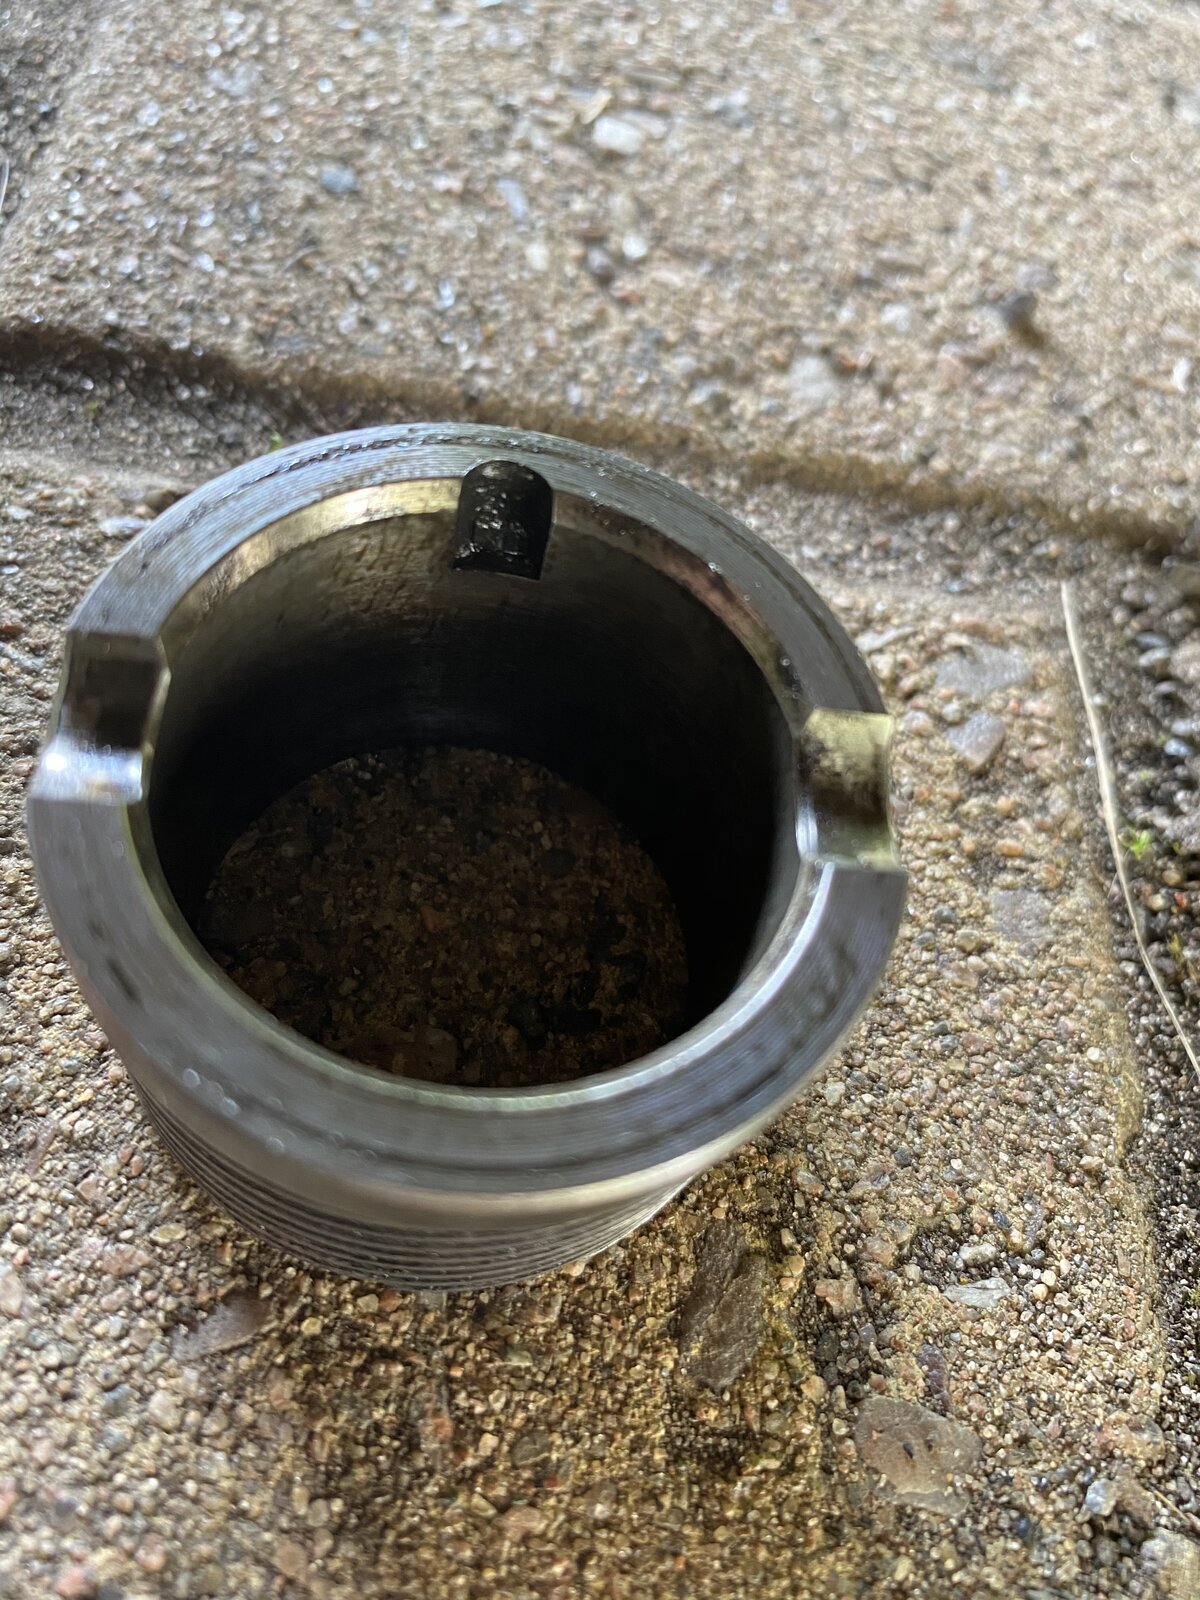
There is a semi-circular recess on the end face of the worm gear - that is NOT the one to use.

The ball fits into the second cut-out that is against the inner bearing face (makes sense really); the ball cannot be seen when its all bolted-up.

If you use the wrong hole you will crush the ball and the worm gear won't sit properly (DAMHIK :doh:).

I've just looked through all my Transfer Box pictures and I don't have one showing the ball recess. The next time I strip a TB I'll remember to take some suitable pics :thumbup:.
I hope you get it all sorted OK.

Bob.

Crushed ball !

DSCN6249.JPG
 
Thank you @BobMurphy thats no problem! I appreciate your help and advice anyway!

so there’s the bearing, then the worm gear sleeve then the little washers go on the end to lock it on..

The ball slots in one of the worm gear cut outs on the sleeve between that an the bearing? Or is there a washer that holds the ball in next to the bearing like the one by the gear cog? I’m really sorry if I’m being stupid I just don’t want to mess up hahah

thank you again
 
Also does the little hole in the shaft have nothing to do with the ball then? I assumed I stick it in there :tearsofjoy:
 
The ball(s) sit in the hole(s) and then lock:

A: The spacer that sits between the output shaft bearing and the Hi-Vo chain sprocket (there is a cut-out in the spacer:

DSCN7704.JPG


B: The Speedometer Drive Worm Gear that goes on after the grooved bearing:

DSCN7486.JPG


There are two thrust washers - with splined centres - that go on after the Worm Gear. The assembly is held together by the output Companion Flange that is done-up to 85 Ft/Lbs.

The balls HAVE to be in the holes in the shaft, otherwise they won't impart any drive.

I hope this helps.

Bob.
 
Thank you @BobMurphy will have a play today, I’ve not messed with the ball by the gear I’m presuming that one should still be in as the bearing and gear are pressed on so shouldn’t fall out?

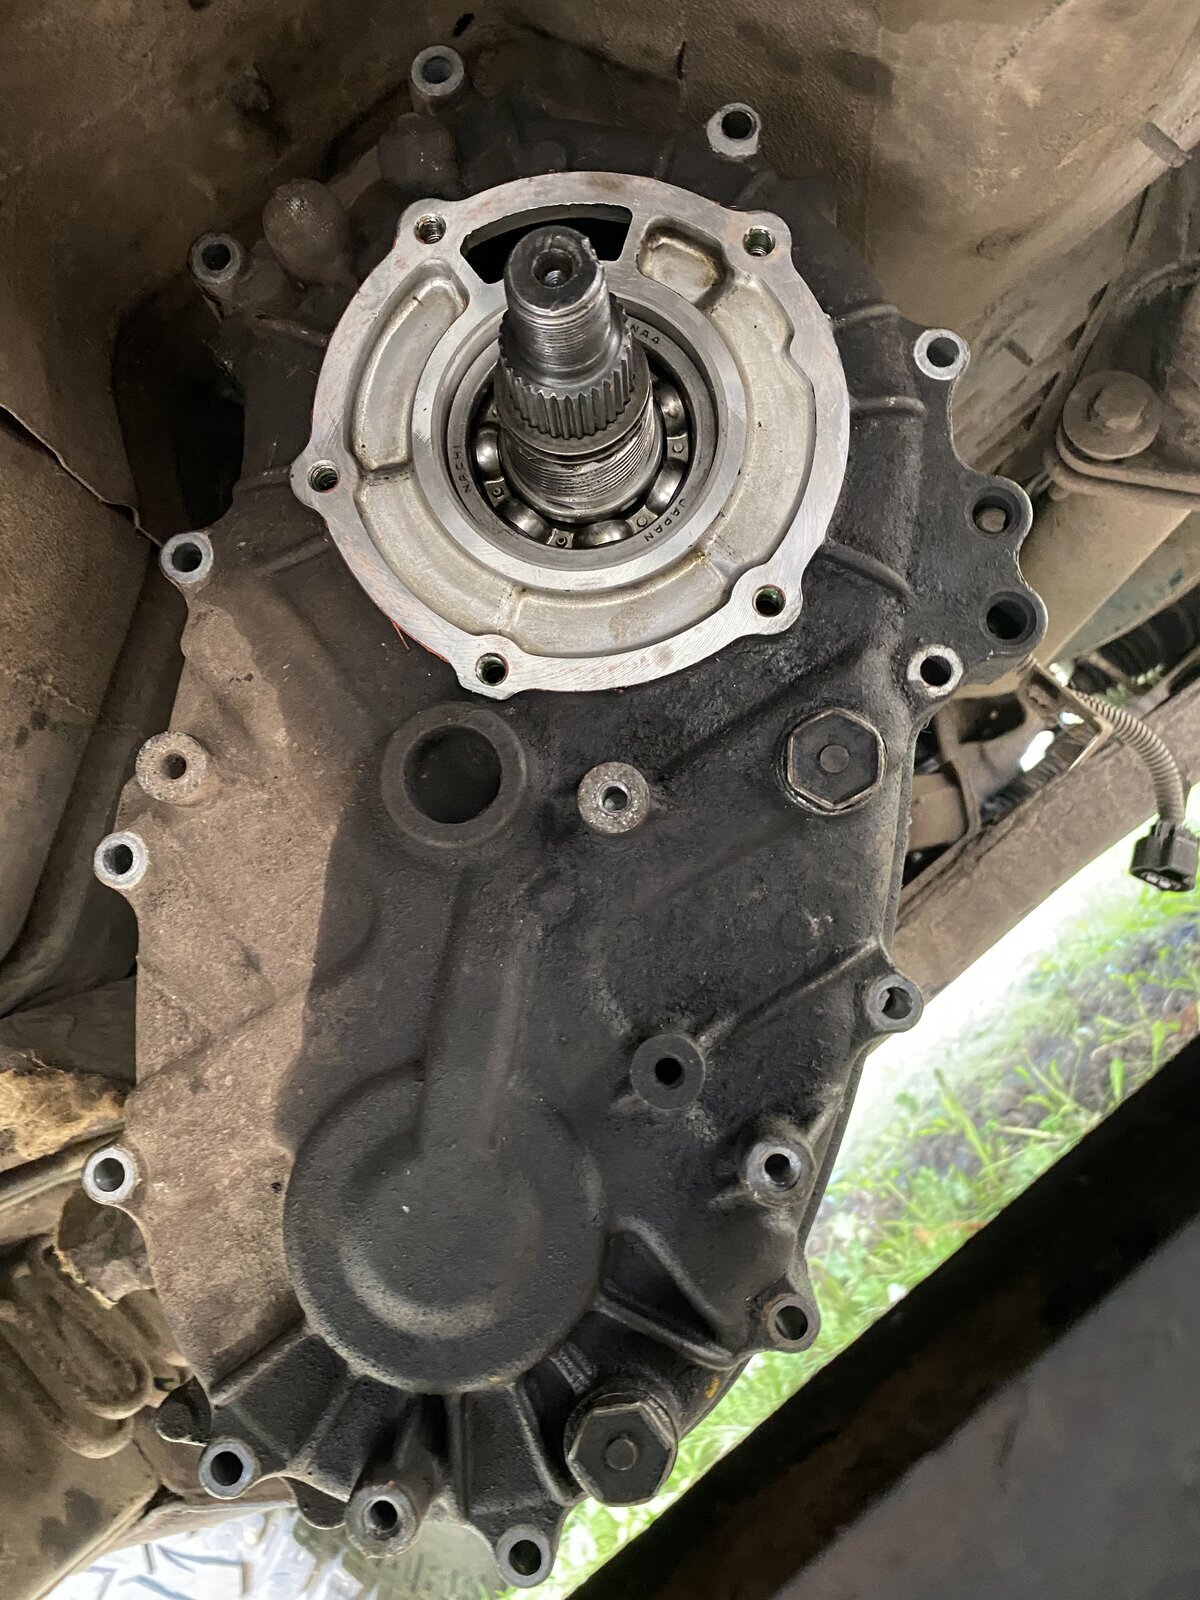
I’m dreading fitting the case with the little rod that has to slot in and then the indent balls and springs :grin: :tearsofjoy:

I see why you all strip the transfer case off the car, I kinda wish I did it that way but too late now hahah
 
I’m guessing this is where it goes? :) The small slot on the inside of the gear
 

Attachments

  • 97503A61-674A-4886-91EA-F7948C612E1B.jpeg
    97503A61-674A-4886-91EA-F7948C612E1B.jpeg
    444.9 KB · Views: 47
Big problem!!!:disrelieved::cry:

transfer lever won’t move! Can’t get it in high or low, diff lock light is on the dash

there’s no oil in it yet could that be my issue?
 

Attachments

  • D18E7055-B0E8-4219-8B9C-E256DB8D988E.jpeg
    D18E7055-B0E8-4219-8B9C-E256DB8D988E.jpeg
    418.6 KB · Views: 48
  • 8E306CFB-B172-46C7-8FD9-4D90832ED95C.jpeg
    8E306CFB-B172-46C7-8FD9-4D90832ED95C.jpeg
    378.8 KB · Views: 48
  • D0768528-37D5-4DE4-923D-140BF4520685.jpeg
    D0768528-37D5-4DE4-923D-140BF4520685.jpeg
    456.2 KB · Views: 44
  • 7E7FCC5E-5FFC-4231-BA79-A4FF32A52F59.jpeg
    7E7FCC5E-5FFC-4231-BA79-A4FF32A52F59.jpeg
    417.6 KB · Views: 49
  • C37A2CAB-C115-4707-9F54-72147DB46963.jpeg
    C37A2CAB-C115-4707-9F54-72147DB46963.jpeg
    402 KB · Views: 43
Back
Top