Don't like the adverts?  Click here to remove them

Who is doing what maintenance today?

I used to grip them in the vice after getting enough showing to grip.

I don't remember drifting them all the way out, but it was a long time ago. :character-oldtimer:

Not a chance Clive i can only imagine the bearing pins have melted to weld everything together . I went out to cut it but the mrs arrived home with a broken exhaust so i ended up messing with that . Got a phonecall informing me that my trailer canvas will NOT be done ready for Romania and even my 20 odd year old Zippo lighter packed up sp not a good day really :| nevermind i've got spare lighter flints here somewhere so all is not lost :icon-smile:
 
Finally got round to replacing the handbrake shoes.
They were well stuffed by PO owner running the cruiser with one side seized on.

All serviced now and no more meaningless handbrake.:dance:

Dave.
 
Not maintenance per se, but having my bonnet resprayed over the next few days.

Truck was starting to look a little sorry for itself the last few months...so bit the bullet and went for a proper respray as opposed to trying a vinyl wrap etc.
 
Dammit :angry-screaming: I cut the UJ out and the new one popped in no bother at all - but while pissing about making sure i could get to the new grease nipple i completely forgot about the alignment marks :doh:I really am pushed for time here i need to get a ferry a 4 and half drive away at 2am tonight for a funeral tomorrow so what do you reckon folks shall i take a chance and put it in as is or .........
 
Last edited:
UJ%20002_zps3pytyrky.jpg

UJ%20004_zpsfeuibrw3.jpg

UJ%20003_zpsc0sze19h.jpg

I didn't bother taking it apart to line up my paint marks but a half hour run suggests its fine i just wish i didn't have to test it properly on a 4 hour motorway journey tonight .
 
Guys i just found all the 10mm bolts on my head cover loose :wtf: you know the black bit with the turbo diesel badge on it , is that just a cover or what ? :pray: Rocker cover .
 
Last edited:
Don't like the adverts?  Click here to remove them
It's just the rocker cover buddy if it's the same as mine,My daughters Clio was like that when she got it,tightened them up never come loose since.
 
Hi , Just fitted new 2" lift heavy duty struts to the front of my 95 series RV6 , the previous owner had fitted a steel front bar , winch and dual batteries but didn't think it prudent to beef up the front end and as a result it had sagged 70mm , it now sits level but will now need the camber adjusted to re align , the before and after photo's show a marked difference.. tried loading images but as usual a total failure .. cheers Mick
 
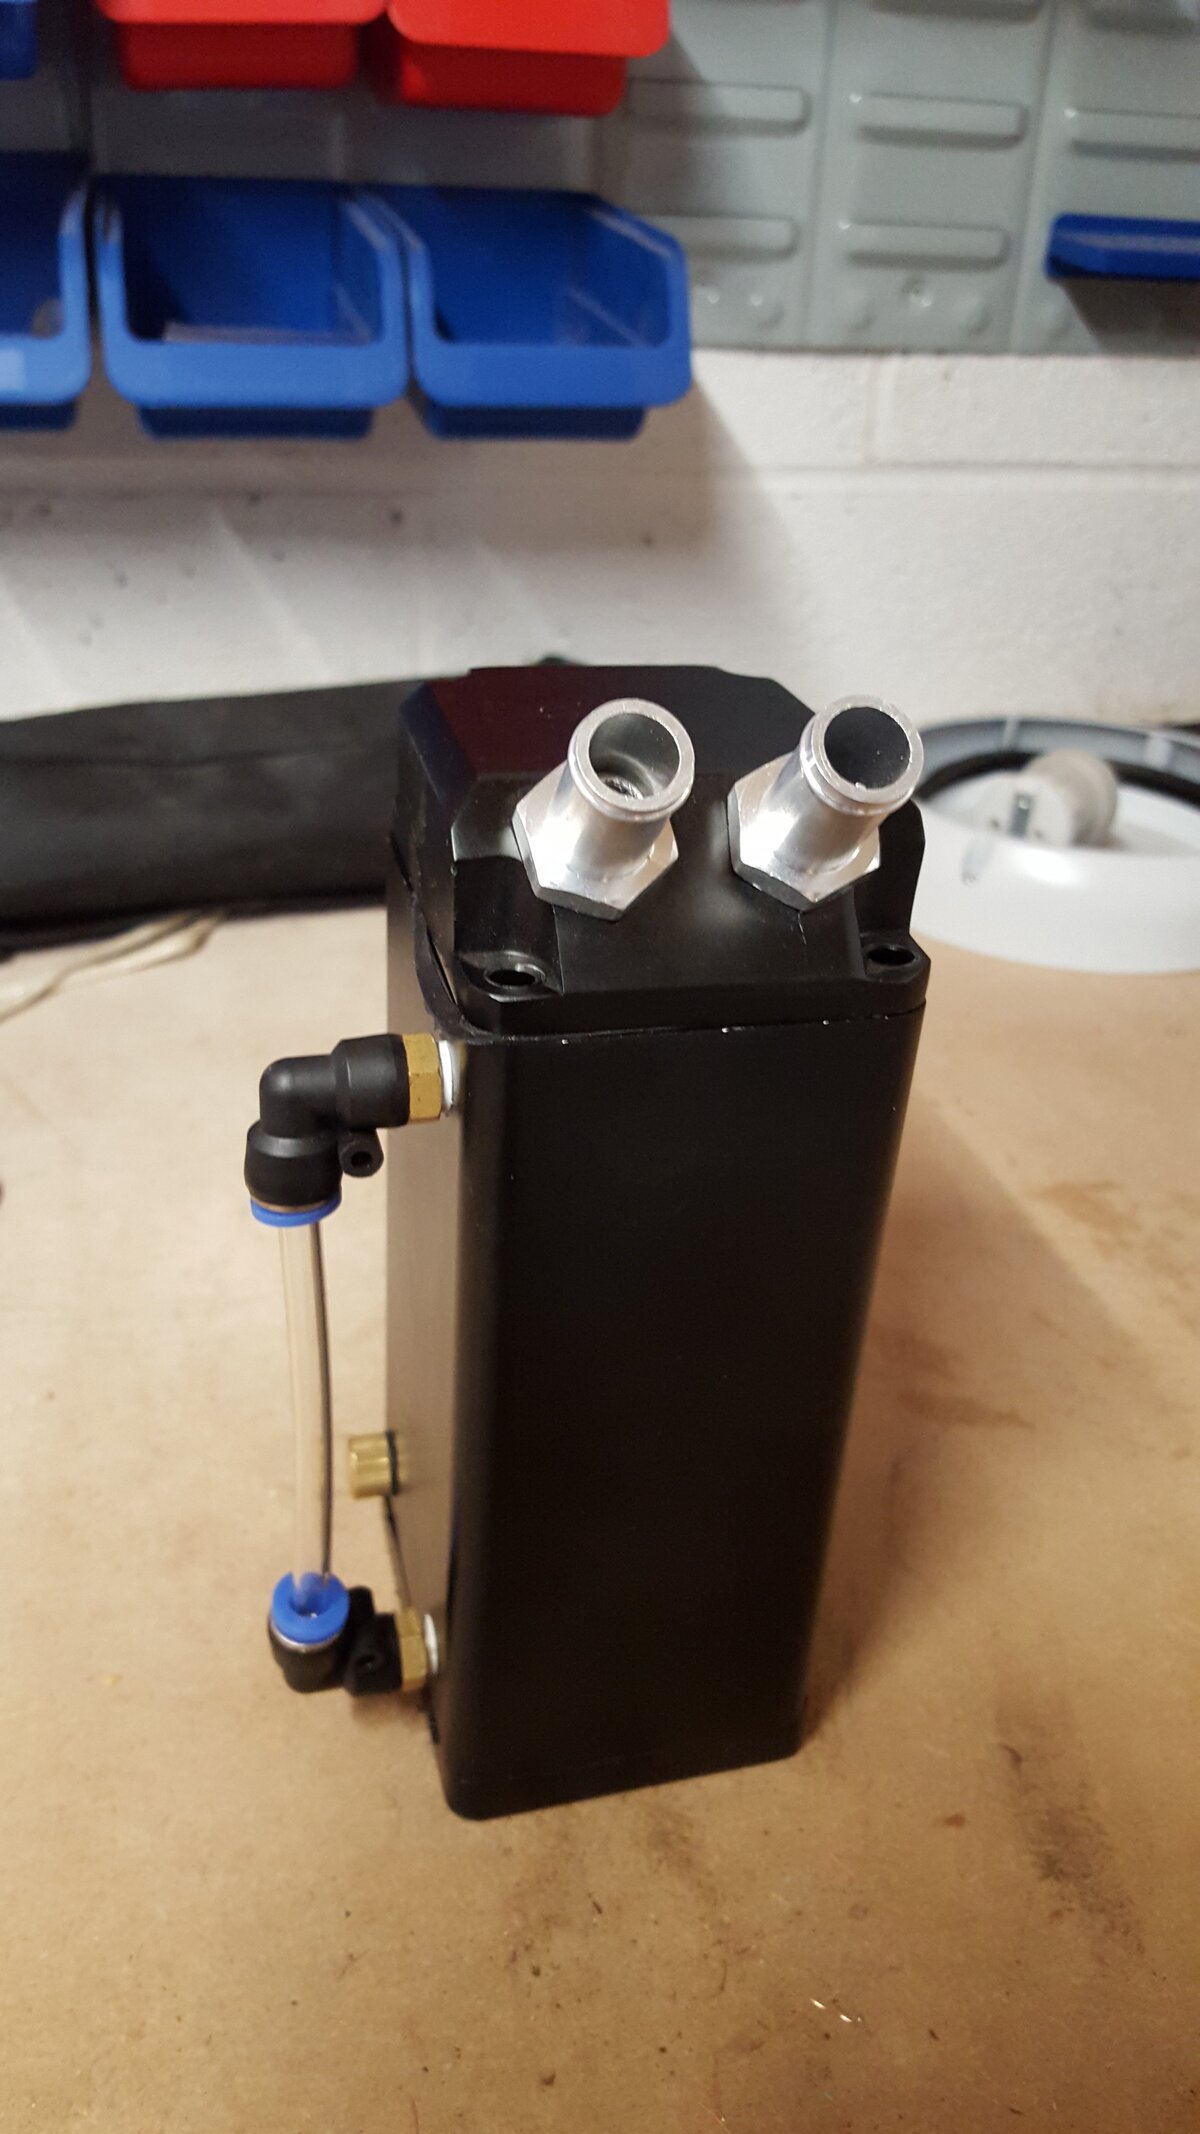
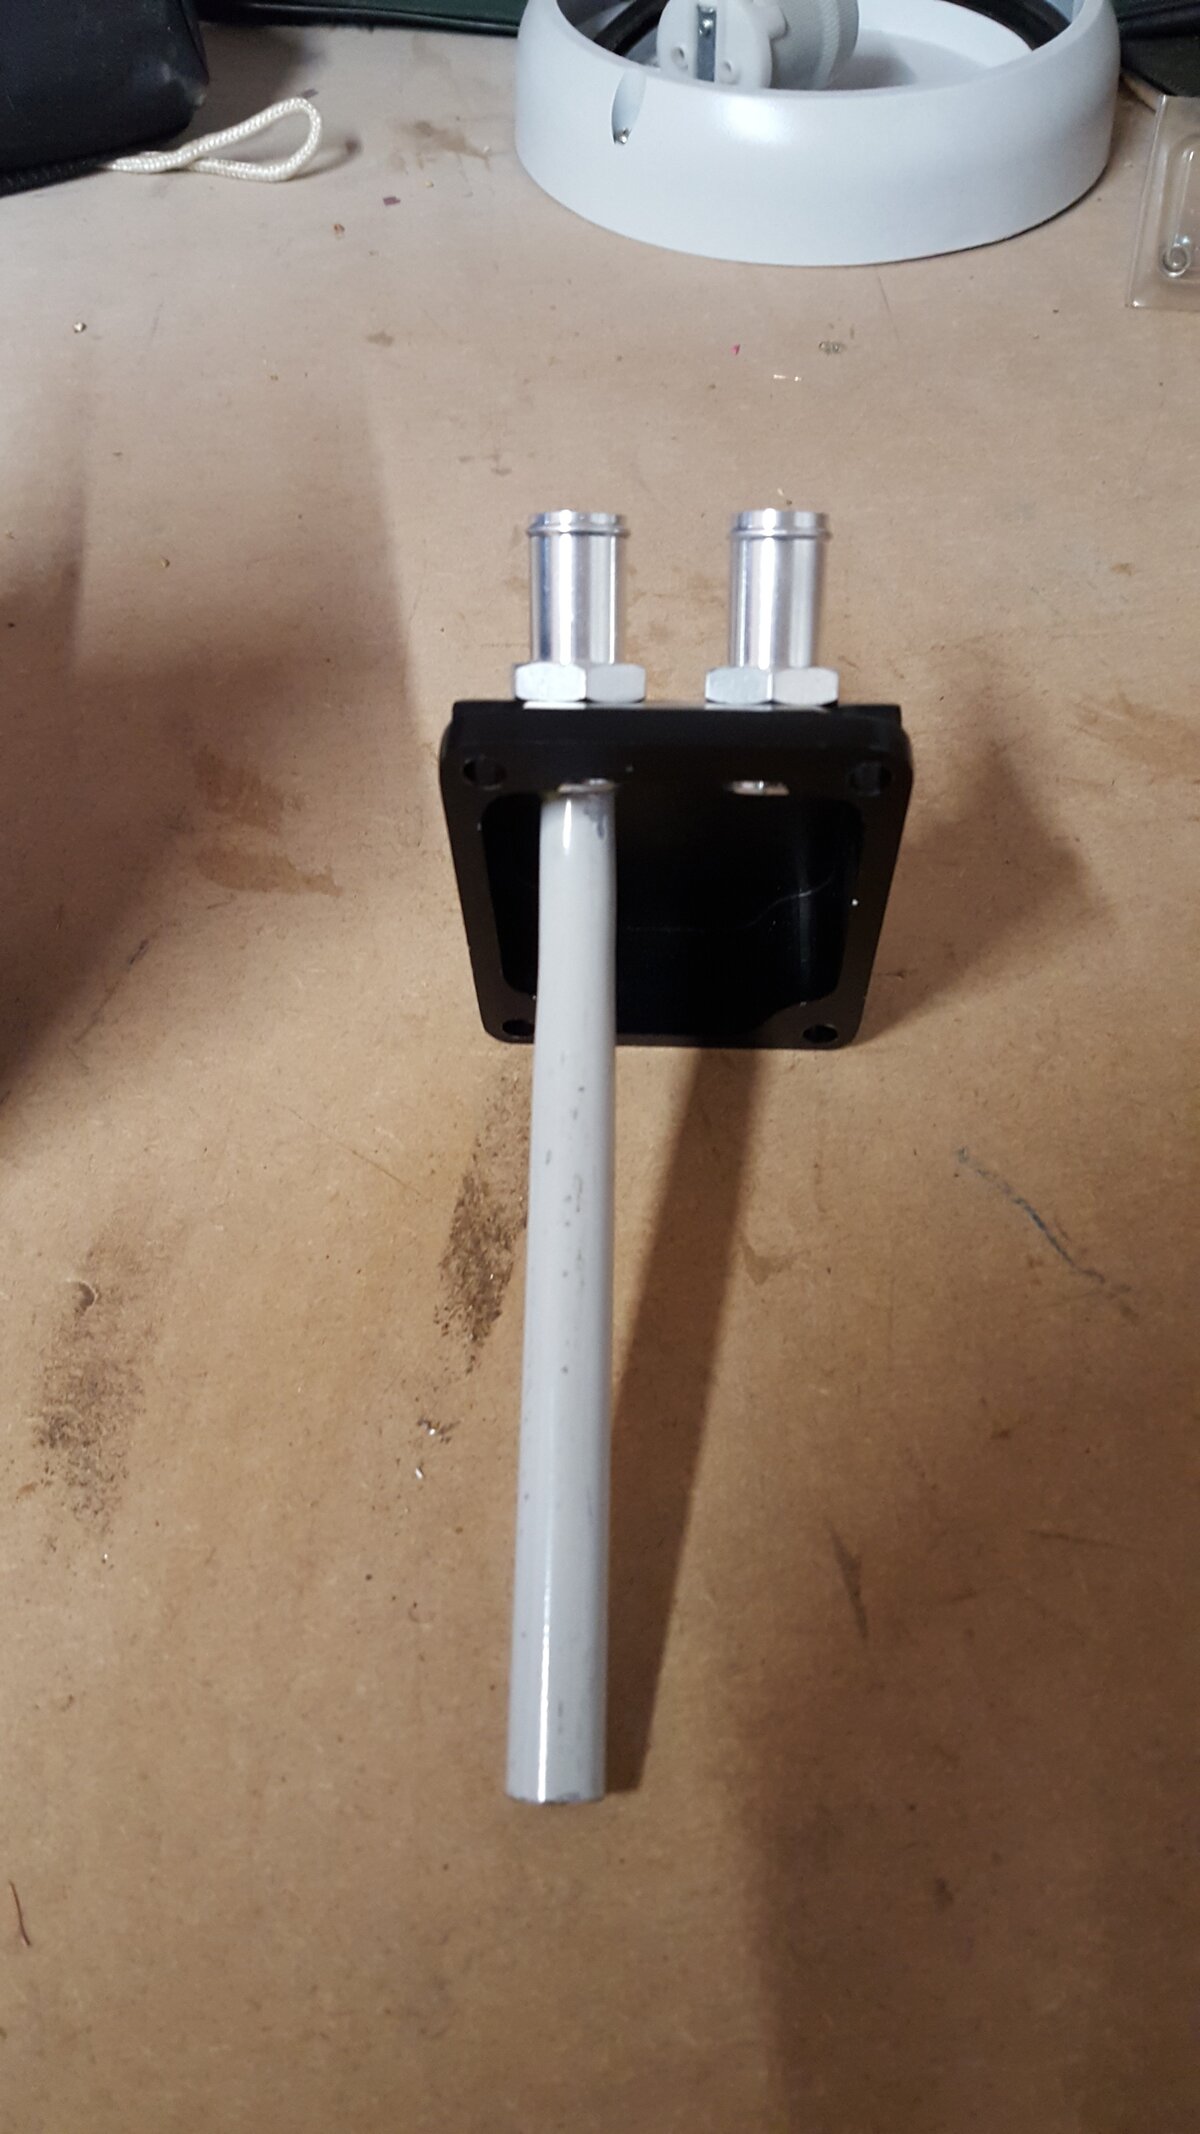
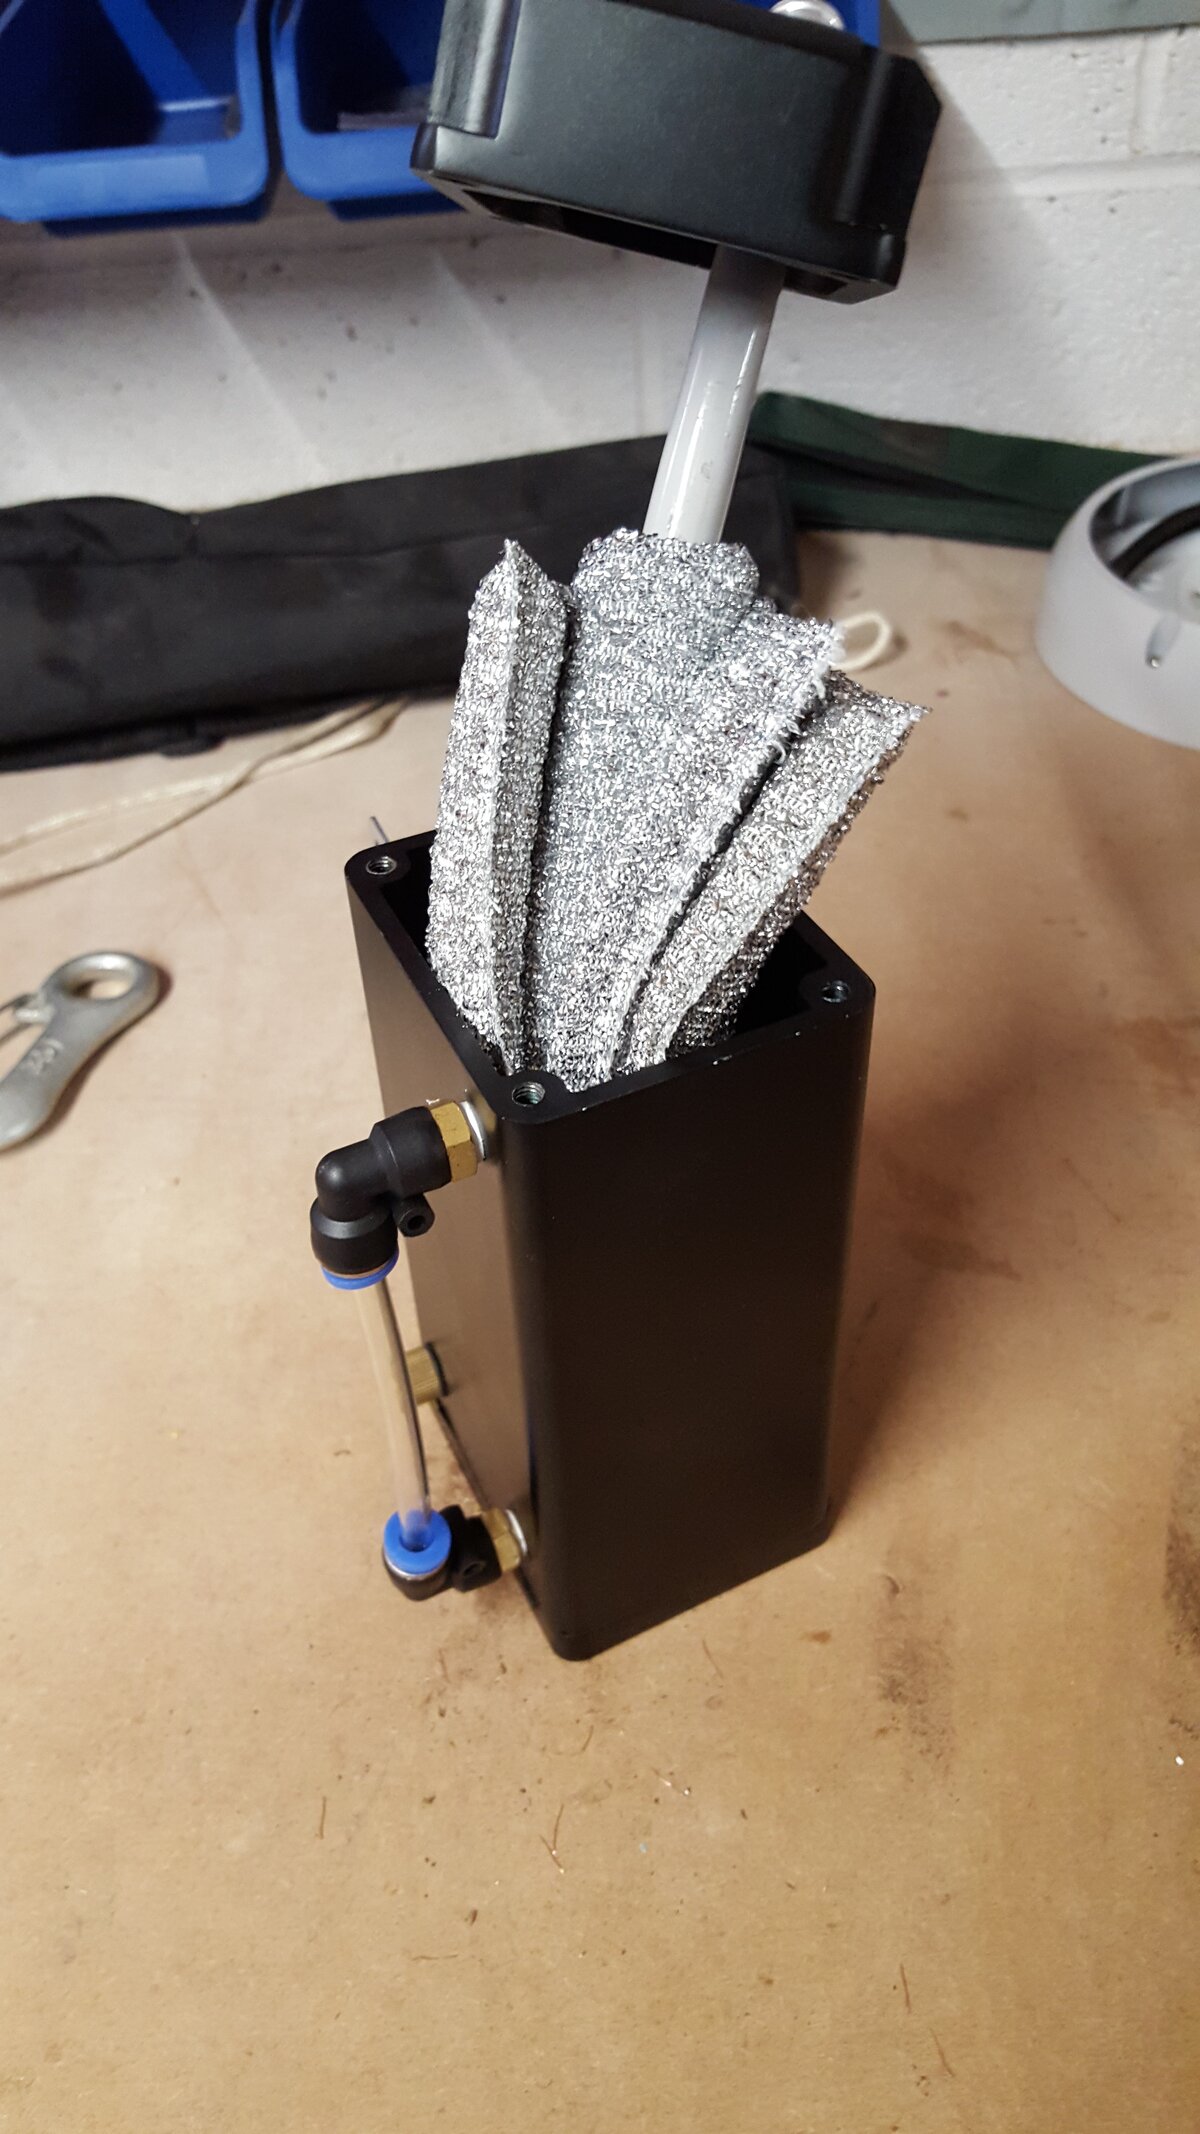
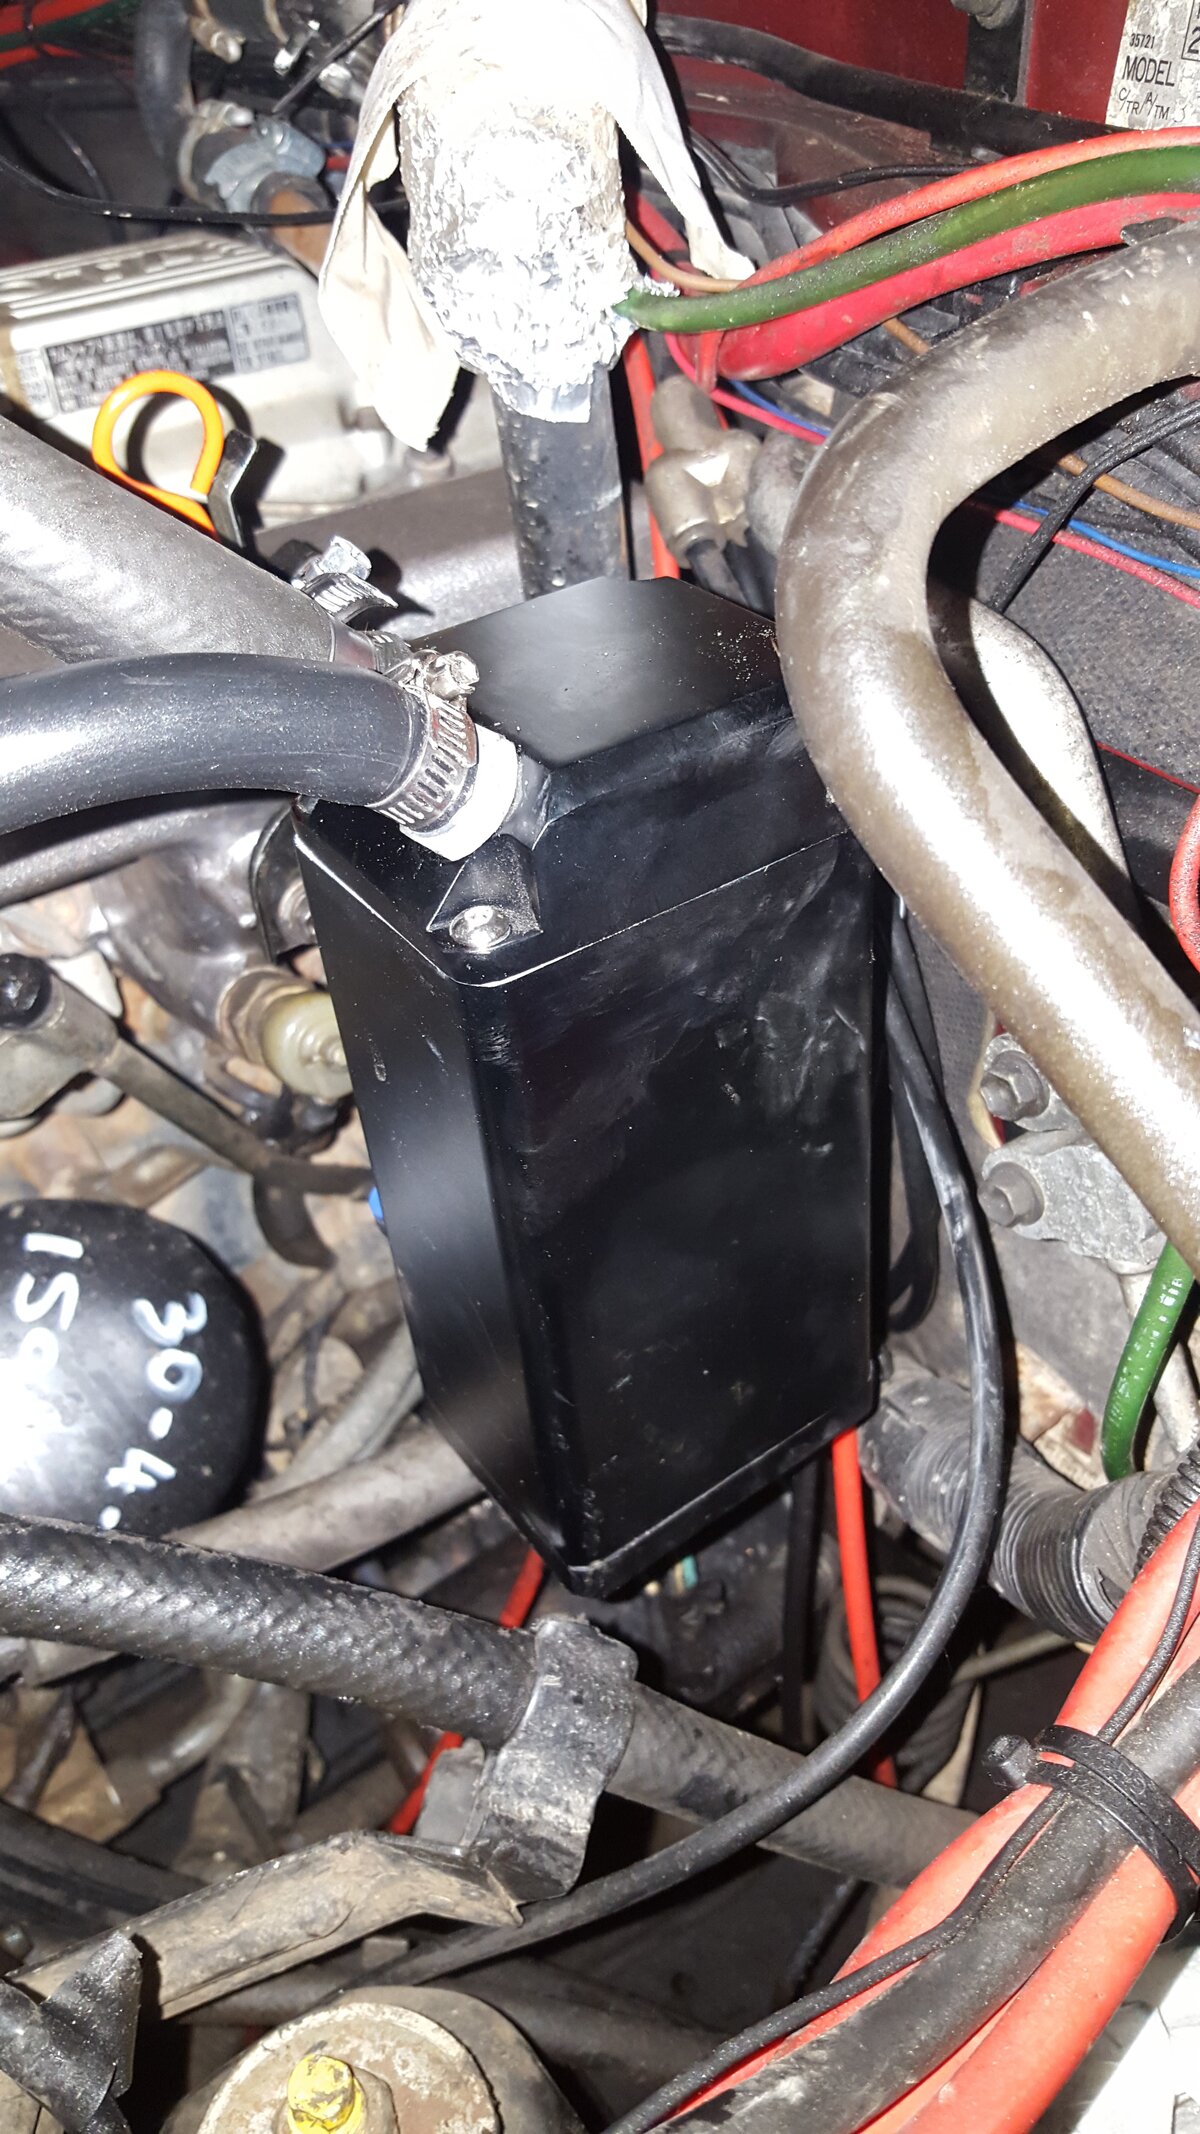
Today I finally fitted that oil catcher that has been sitting on the workshop bench for ages. The intake and exit pipes were next to each other on the inside so I fixed a tube to the intake to extend to the bottom and wrapped a brillo type pad around the end hoping that would allow the fumes to condensate and catch more oil.
On the first picture you can see the rubber gasket that seals the joint, I got peed off trying to keep it in place while trying to screw the top down so I used some gasket goo instead.

20150713_163727.jpg

Pipe attached

20150713_163736.jpg

Brillo pad

20150713_163907.jpg

and fitted

20150713_182034.jpg
 
Fixed the AC on the 100, never worked when I got it. Needed new belt and clutch bearing, local bearing supplier had one at £24 which was far more palatable than Mr T's £220 plus VAT for the pulley. System doesn't even need regassing, nice and chilly now.
 
Swapped back to the 35's and bolted the bash plates back on :icon-biggrin: that means play time is around the corner. Taking Lily for a weekend of camping and laning next weekend so all the gear to sort out too.
 
Removed and replaced the Harmonic balancer as the rubber was starting to flog out on it; only took 90mins to get to the stage where I discovered that a hose clamp had given up the ghost, just before I refilled it with coolant, so $2 later we were sorted again... all before going to university for today. Feel nice and awake and motivated after that, as well as strangely relaxed.
 
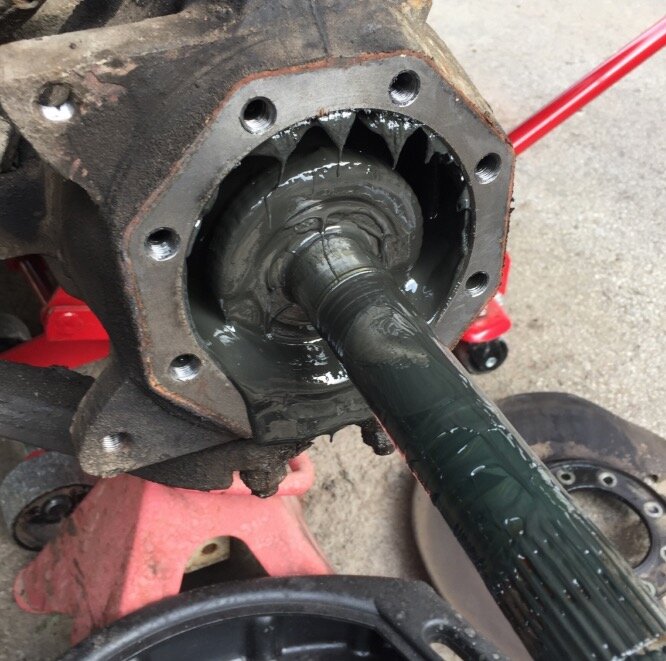
Noticed the off side swivel looking a little wet on the green 80. Wiped it clean and left it a while. With the MOT coming up soon and time for a good look around, I pulled the axle this evening assessing that the seal had gone.

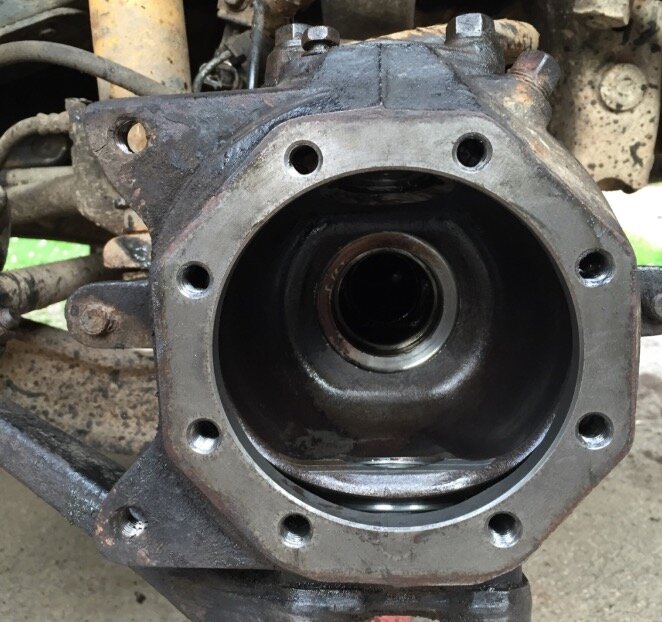
Have to say that the pre load was perfect and the whole hub was in perfect condition. No play, smooth. Excellent. Like factory fresh really.

Screen Shot 2015-07-16 at 21.00.30.jpg

Came apart like new but when I pulled the stub axle....... CV soup. Utter sludge. it just poured out.

Screen Shot 2015-07-16 at 21.00.20.jpg

Didn't take much more than an hour and it was all cleaned and washed through ready for reassembly. probably the filthiest one I have ever done though.

Screen Shot 2015-07-16 at 21.00.01.jpg

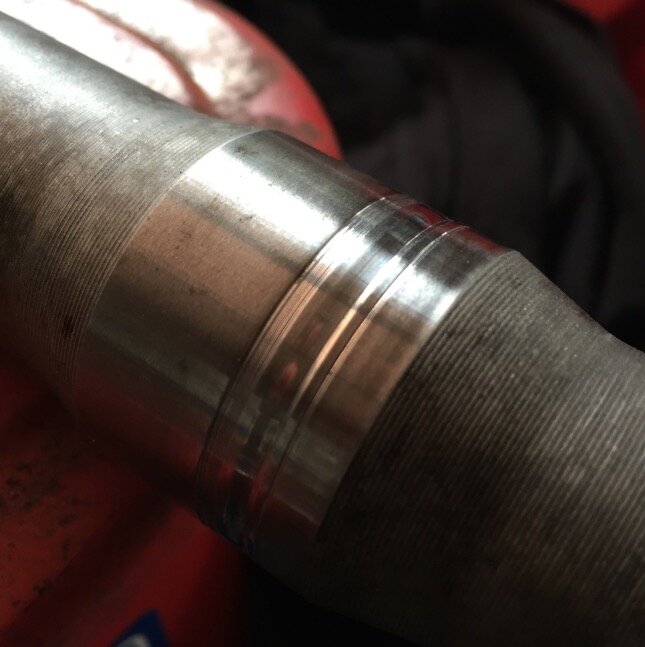
Thing is, the shaft was marr-tacked and the snap ring omitted. I have done this myself in the past and for field stripping it's a great idea. But the seal section on the other end of the shaft was in pretty poor condition with two large deep grooves worn in it. Not having a spare shaft to go in, I am going to Speedisleeve it.

More when I get round to that bit.
 
Here's the damage on the shaft. Never really shows up in photos very well, but it's worn quite deeply in 2 clear places. Normally there's only one wear ring. As there are two, I am guessing that one was pre rebuild, ie original and the second is newer wear associated with the new shaft position post marr-tacking. Not happy with that. I can see that maybe this has been ragging the seal over the miles and had lead to early failure of what was otherwise a simply perfect hub. The surface is flat across the wear/ Tempting to put some levelling compound in there first and smooth it back in the lathe with wet and dry. The Speedisleeves will take up the contour a little. Ordered a pair of sleeves from my local stockist. Here at 14.00 today.

Screen Shot 2015-07-17 at 08.53.41.jpg
 
Jeez, those are quite deep and sharp looking. Do you know the seals that were used Chris, and how many miles it took to get that sort of damage? I often wonder whether super tight aftermarket seals are a good idea, yes they stop leaks, but if they do that sort of damage, it's at a high price.
 
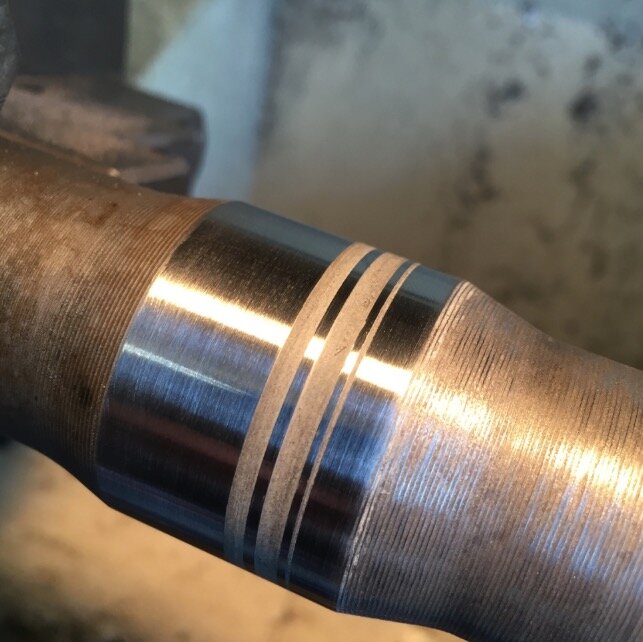
This was Scott's old truck Clive and well maintained. The axle rebuild was done properly by Overland and IIRC Scott together. Genuine seals were used. I am sure of that. They aren't genuine CVs but neither are they HDK. I am just not sure that doing the marr-tacking mod is necessarily good for long term wear, especially if there are grooves to start with. The shaft can't move as much and it could be the case that the lip of the seal gets dragged into an old groove accelerating wear. We'll never know. I mixed up some liquid metal, put the shaft in the lathe on 70 rpm and pushed the compound into the grooves. Before it set, I scraped off the excess. Then with fine cloth polished off the smears. It's like a new one. Ready for the Speediseal to slide over without leaving bumps in it.
 
So here's the filled shaft.

Screen Shot 2015-07-17 at 15.24.28.jpg

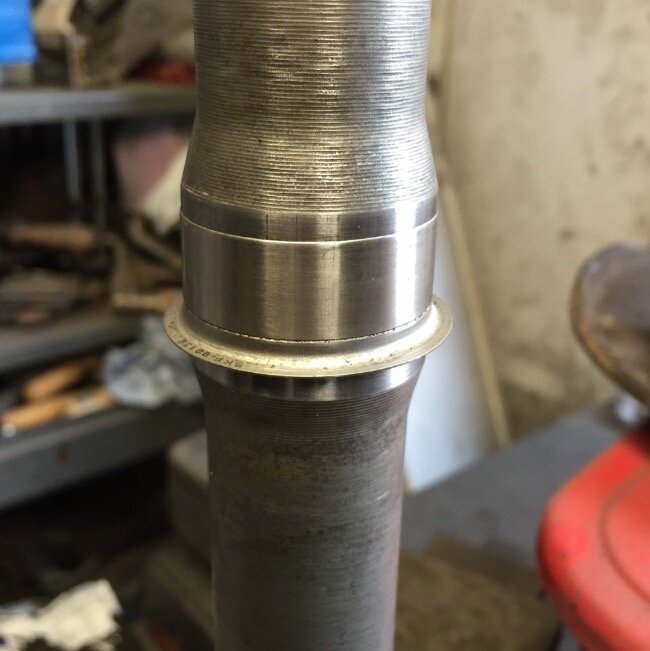
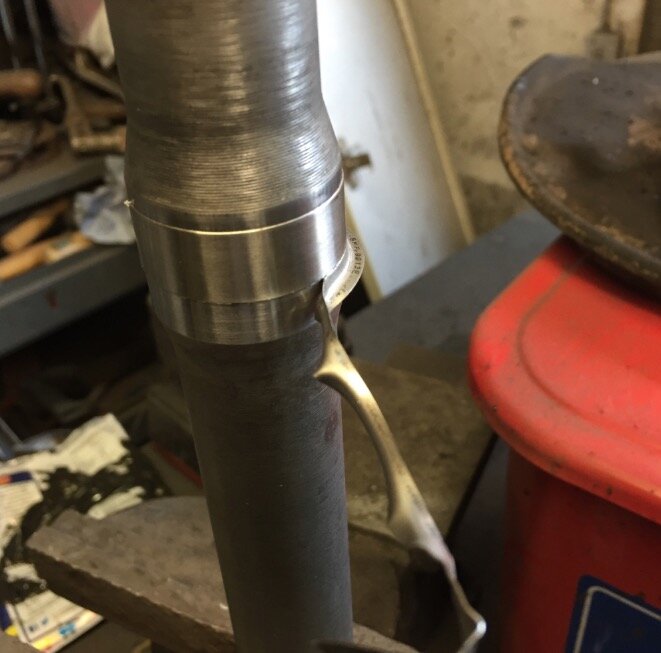
Then you slide the Speedisleeve on and tap it into position being mindful of exactly where the seal will be running

Screen Shot 2015-07-17 at 15.24.38.jpg

Then you peel off the installation flange

Screen Shot 2015-07-17 at 15.24.48.jpg

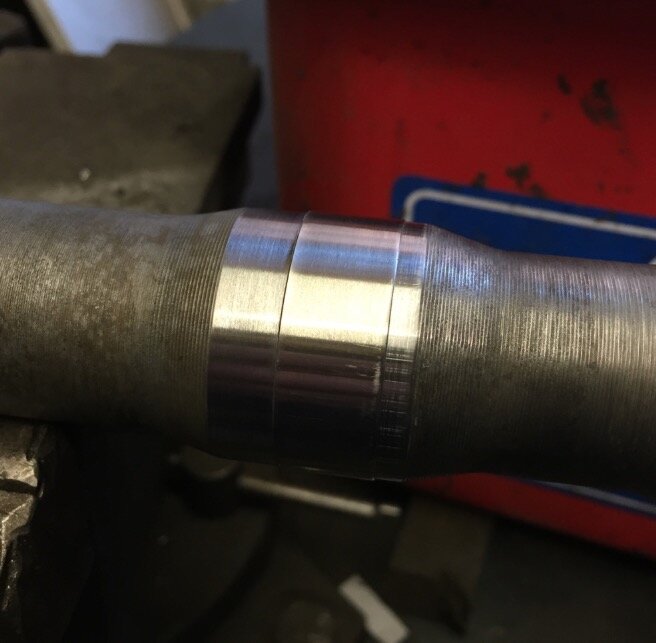
And there you biz. Repaired shaft. Good to go.

Screen Shot 2015-07-17 at 15.24.56.jpg
 
They're hard material too so they won't just wear away and make things worse. These are for industrial applications. OK so two cost me £45 but cheap for essentially 2 new shafts and peace of mind.I got the SKF CR 99139 as my shaft dia measured out at 34.95 mm
 
Back
Top