Don't like the adverts?  Click here to remove them

Beau's official Cruiser Story

I've got monroe shocks too and they seem pretty good. Not too expensive, nothing flashy but they do the job.

As for the fronts compressing the springs even a little bit, I really don't think so. You add the spacer at the top of the spring, between the fixed spring seat and the top of the spring. In order for this to result in any compression of the spring the bottom of the spring would also have to be fixed - i.e. you'd be adding a spacer to a spring sandwiched between two fixed points... but it's not! The bottom of the spring is the lower suspension arm, designed to droop with minimal resistance so all that happens is that your (say) 1" spacer results in the lower suspension arm moving down by 1". The spring stays the same length, and is compressed to exactly the same degree as if you had no spacer. That's my understanding anyway :) I think I understand this stuff, but am happy to be corrected!

All that said, my truck is lifted with spacers all round. It rides harshly! But that is more to do with the cheap springs I used than anything to do with the use of spacers. I'm pretty sure that in general the cheaper the springs, the stiffer they are. Since spacers are the cheapest form of lift, there might be a correlation between the use of spacers and the use of cheap springs....
 
what kind of springs are you running? I haven't decided on front springs/shocks but over here in the states there so much to choice.
 
Why change the springs at all if you have spacers to extend them 2 inches ?

You have nothing to lose and everything to gain by trying the spacers Beau im quite confident you will be happy with the result .

Not sure what you did with the rears but I just had spacers made that sat in and on the conical bumpstop there is a couple of pics of them on here but no point in me looking for it while I'm on an iPad :icon-rolleyes:
 
well I'm just covering my options if I decide to use an actual lift instead of the spacers. As mentioned before as well, the spacers are 2" which will give me more than that.

Did you not use longer shocks at the rear as well? I would use a spacer but my springs need changing at the rear quite badly. With no load, it sits a little lower than the front as it is.
 
I didn't change shocks I wasn't into modifying then I just felt the standard wheels and tyres looked to small .

A machine shop will bring your spacer down to an inch thickness no problem at all and the rear being a solid axle can be lifted as much as you like .

If you can give the machine shop one of your cone bumpstops just tell them you want the top bit however much deeper and that will level things up on a standard size spring .

Sounds like your rear springs are long past due replacement and like for like takes the guesswork out of it .
 
I replaced my springs when I did my lift because they needed replacing, but Shayne's obviously right that you don't need to with a spacer lift. For me it's one of the advantages - you can use whatever springs you want and aren't limited to the lifting springs that are available

You won't need longer shocks at the front with a spacer lift because the spacer is between the mount and both the spring and the shock, so standard is ok. Most people recommend no more than a 2" lift to avoid stressing the CV axles too much (althugh there are ways round that with a diff drop)

At the rear your lift is theoretically unlimited but in practice is limited by brake cables and if you go mad the panhard rod will start to pull your axle sideways. 2" is fine on both counts (in my experience). If you are leaving the anti-roll bar attached (recommended - though some remove it for greater articulation) then you won't bottom out standard length shock absorbers and they should be fine. I had standard shock absorbers on mine for a year with a 2" suspension lft, doing plenty of off-road work, with no ill effects. I did actually fit 2" extended shocks in the end because I toyed with removing the anti-roll bar, before evenually deciding against it.
 
Don't like the adverts?  Click here to remove them
Thanks guys! My main concern was if I needed longer shocks for the rear due to lifting. I wouldn't want the shocks binding at full extension over dips ect But it looks like I will get away with keeping them there. I do have some slightly longer bilstien shocks off a TRD 4runner so I might stick those on anyway. The idea of using a rear spacer is great, but I still need replacement shocks and the cost for a +2" lift and regular size spring is pretty much the same.... Plus I was even toying with the idea of finding some 7 coiled 80 series front springs to use as well.

Regarding the front, I 'll probably try out the spacer and measure the lift and check out the CV angle, and then determine how much I want to lathe off. Got a lathe at school so shouldn't be a issue.
 
Good luck with it Beau. There are many routes to reach the same end, and LCs look and work better with a suspension lift.
 
Its a minefield I reckon so unless you have driven an identical truck with alternative suspension and then copied the set up you don't really know what you will get until your money is spent and everything is fitted . I imagine few will admit even to themselves after spending a wad of cash on their best calculations that they are unhappy with the result so reviews should be cross referenced to .

As for fitting the 2" spacer at the front to help you work out how much to trim , that's going to be a complicated on off process mate .

1" equals a 2" lift doesn't mean 2" will result in a 4" lift , I can only guess but I expect your 2" spacer to give you a 5.5 maybe 6 inch lift and a half inch spacer may only give you a 3/4 inch lift if you get what I'm saying .

If it's a process your determined to follow I'm reasonably confident that a 1.5 inch spacer will be pushing the limits of extreme .
 
You might be right shayne considering the the diff drop kit that came for it are 2" thick, so the lift would have to be around 4+ inches.

After some more research I think I have a plan of action. Here me out.

Front:

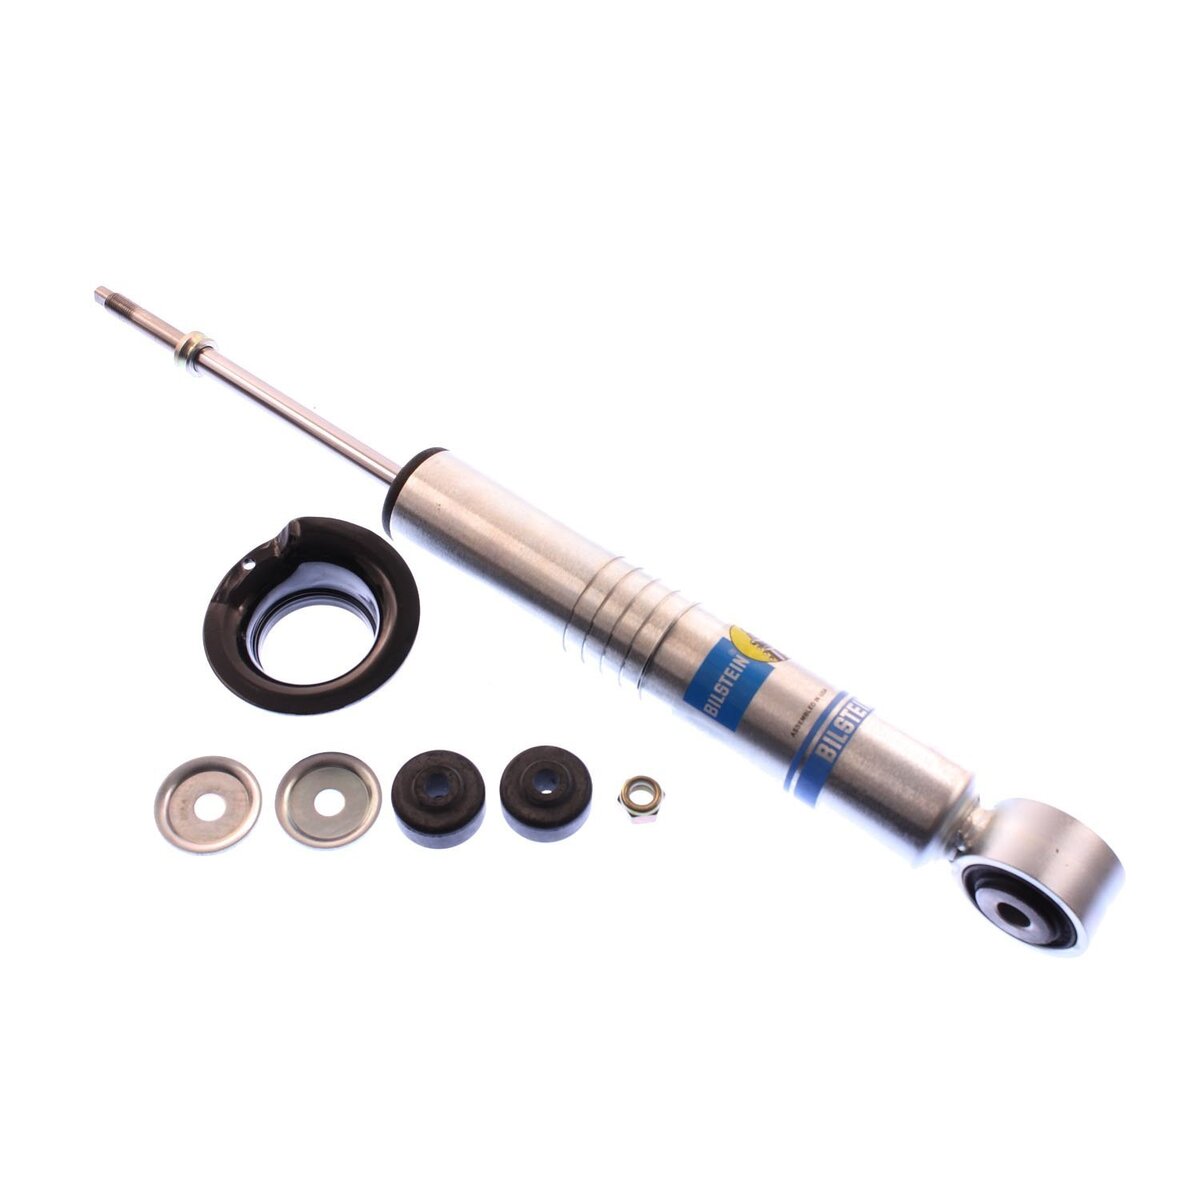
I'm going to get some new or used 2000-2006 Toyota Tundra TRD Bilstein 5100 shocks and springs. These shocks are actually adjustable so I can have the truck sitting exactly where I want it. They are a straight swap, except from the top strut hat. From what I've read, these give a awesome ride because the springs are progressive.

61MXRG6htQL._SL1500_.jpg

Rear:

Currently looking for some 7 wrap 80 series front springs (used) which should yield about 3 inches of lift + Some Bilstien TRD shocks made for a 4runner 2" lift. (Already have these)

Whilst I'm at it, I'll most likely change out the LCA bushings as they're a bit worn. Anyone changed them before, I've read they're a pain!
 
Maybe I misunderstand it but I thought adjustable shocks related to firmness of ride i.e. The spring is a bouncy thing that holds you up and the shock is a damper that makes the spring behave and without a shock/damper you would be traveling like Zebedee .

I also don't understand your want to put 80 series front springs in the rear , how often are you going to carry an equal weight to that 6 cylinder lump those springs are designed to support ?

From what I have read about the lower wishbone bush I decided I would rather spend a few quid on new bones than spend days fighting to refurb the old .
 
If you look closely at that shock you'll see that it has ring grooves on the body, I believe this is where you adjust where the lower spring strut sits therefore adjusting the height of the overall strut.

Well after reading many 4runner guys doing it and having a good ride it seems like the way forward. The thing I'm trying to achieve is a decent ride when unlanden but also a capable spring when I do put some load on the back. In my opinion you either need a really good progressive spring (cant find) or airbags along with a oem kinda spring (too expensive). The 80 series front spring at the back give me a lift, it'll probably give me a little rake as well. And they'll ride smooth but also take some weight before sagging badly.

I looked at that but for $45 for a complete set, I thought it might be worth a try! I'll do a write up when I get round to it. Might also do the LBJ whilst I'm there...
 
Makes sense i suppose , both 80's i have ridden in felt like they were riding on inner tubes compared to my 90 and given the weight of those trucks i guess the springs have to be more progressive than others .
 
Update time! I've got my front lower arm bushes to replace soon, but thought I might as well wait for all my suspension pieces to come before doing them. I'm now just waiting for a pair of LC80 springs and I'll be good to go!

It's been just under 20,000 miles since the Un-warped head has been in and all is going well, but as I had some time I wanted to see/check the top side under the valve cover just to make sure things looked well. I was pleasantly surprised to see the engine so clean. I'll for sure continue using the oil I'm using and changing it every 5000 miles.

So whilst I had the top off I thought why not check the valves. And this is where I ran into some potential issues. It seems as though my valve clearance is tighter than it should. In some cases it's 0.140mm where it should be between 0.20-0.30mm. This is pretty similar along all of them, either being bare minimal of spec or below. After some thought it clicked with me why... stay with me on this.

During my head-rebuilt process, I re-seated the valves thinking "why not" to myself. In doing so I removed some material from the head seat making the valves themselves "longer". With them longer they push the bucket shims up a little from where they were before now making the clearances tighter. I haven't noticed any problems with the engine running and power, but I have noticed since doing the re-build how quiet the engine has been, especially for a diesel. No ticking ect. And then the findings here correlate it's because the valve lash is tight and the valves may not be seating 100% or when they should timing wise.

So with all this said I have two options. Buy the correct shims and have them replaced, which should be a fairly easy job. Or I've heard it's possible to actually grind down/glass sand them down to the suitable thickness. It's a shame I didn't find out earlier because I have about 2 lots of buckets and shims sitting in a box in my london garage! At around $20 a shim from toyota + shipping, I'll be looking at well over $100! I'm quite inclined to remove them and sand them down to the correct width, does anyone see any problems in doing so? Other than being extremely cautious. I must say I've learnt quite a lot throughout this re-build procedure!

I should also point out that the compression still remains good, however one cylinder has somehow gone up a little and one down. readings are 420, 380,350,490. Readings cold. I'm not a fan of the variance here... but think maybe the valves are to blame.

Some pictures of the top end. Notice how clean the intake is - the catch can is working well.

IMG_9445.JPG
IMG_9446.JPG
IMG_9447.JPG
IMG_9448.JPG
IMG_9449.JPG
IMG_9450.JPG
IMG_9451.JPG
IMG_9453.JPG
IMG_9455.JPG
 
Oh, Totally forgot to put, engine's done 205,000 miles ^^^
 
Finally got a chance to update things! Upon my last alignment a year ago one of the adjustments cams were stuck and no amounts of penetrating oil could free it so I knew bushes had to be replaced but put it off. As time went on I knew it was getting worse as the front would want to steer slightly when breaking hard... Vibration were coming through the steering wheel too.

So last week I ordered up some Whiteline Bushes, after looking at various reviews. These come complete with new inner sleeves, but need the old outer bushing sleeves pressed/hammered out.

whiteline-w53377a-large-1.jpg


So first things first, you'll want the car jacked up. Either one at a time, or raise both sides and stick some jack stands in there. You'll need them for the hours you'll be under there. Before I even got here, I've been soaking the cam bolts down for a good few weeks prior. (made life very easy)

Here's a quick procedure of how I went about doing this.

- Wheel off.
- Shock/strut out - bottom bolt and three top bolts. (removed it for space but doesn't actually need to fully come out. You could just remove the bottom bolt)
- Remove ARB completely as you'll need space to slide steering rack back later on...
- My tie rod ends ball joint didn't want to seperate so I wound out the tie rod ends out of the inner rod (easy and saves time)
- 4 bottom Lower ball joint bolts - 14mm. or the actual ball joint - Whilst it's out check for any wear/movement in this important ball joint.

Now the rack - Remove all rack bolts. There's one big 22mm bolt/but. Two 19mm ones on the left, and one middle vertical run bolt too. All should come out pretty easily. Then remove the 12mm bolt holding the lines onto the steering rack body. Now you should be able to slide the rack out a good few inches with everything in place. You don't need to physically remove it.

Now the make it or break it phase begins...

Undo the cam bolts. 22mm socket on the bolt. Once loose, you should be able to slide it out fairly easy. You may need to shuffle your rack/steering boots to remove the bolt fully.
Now the inner piece which is the cam guide needs coming out. 3 of mine tapped out pretty easily but that one I mentioned before was seized and no amounts of twisting or hitting helped.

IMG_1754.jpg


I managed to twist it so much that I completely destroyed the rubber.

So out came the sawzall but the blade just wasn't up to the job. Toyota didn't skimp out with material on this one... So out came my angle grinder with a thin cutting disc and I cut both sides off enough to wiggle it out of place. It's not time consuming, but you need to be careful you don't damage the sides.

Now that it's out you have a few options at hand with removing the bush. Either take it somewhere and have them press it out. Burn/melt the bush. Destroy and hammer it out ect ect you get the idea. People also stick a bottle jack inbetween and push them out but that didn't work for me.

I tried my schools 30 ton press but it just didn't have the guts. So brought it home and cut the inner sleeve out with the sawzall. (Worked well) I then made a slit in the outer sleeve all the way through. Be careful not to actually cut the arm. Then took a chisel and hammered the sleeve out. It came out so easy! Out of all the bushes only two were showing signs of wear and looseness.

With that done, pressing in the new ones was pretty simple. I used my table clamp and squeezed them in. Don't put grease in between this sleeve and arm. Only the inner sleeve.

Putting them in is pretty straight forward. You need to use the supplied washers to cup the outside of the arms once they're in place. So it goes " Bolt > body bracket > Washer > Bushing > Washer > Body bracket and then the bolt/camber adjuster on the other side. Pics below will help explain a bit better.

IMG_9848.JPG
IMG_9849.JPG
IMG_9850.JPG
IMG_9851.JPG
IMG_9852.JPG
IMG_9853.JPG
IMG_9854.JPG
IMG_9855.JPG
IMG_9856.JPG
IMG_9857.JPG
IMG_9858.JPG
IMG_9859.JPG
IMG_9860.JPG
IMG_9861.JPG
IMG_9862.JPG
 
Did some cleaning and painting whilst I had the arms out. She's back together and I have a good 3.5 degree of Caster so I'm happy now!
IMG_9910.JPG
IMG_9911.JPG
IMG_9912.JPG
IMG_9913.JPG
IMG_9914.JPG
IMG_9918.JPG
IMG_9920.JPG
IMG_9921.JPG
IMG_9922.JPG
IMG_9923.JPG
 
LIFT FINALLY INSTALLED!

Front and rear shocks/struts from a 2008 Toyota Tacoma TRD. Front shock taller by about 2-3 inches overall, and by about 1.5 inches on the mounting position. This gave me a good 3 inches of lift from where I was sitting. Used back by original springs on this setup.

Rear shocks are about 3 inches longer over stock and as they were made for a pickup truck I thought they'd suit the landcruiser's weight very well. Springs are from the Lexus 80 series (lx570?). They are 8 wrap coils, and had about 150,000 easy apparent miles on them. Raised the back about 4 inches - I would say about 2-3 inches over stock height. They're as soft as the Milner 20% unrated springs I had there. I expect them to sag when weight is the back but I'm ok with that as the truck is light most of the time. I may look into some air bags to combat those heavy hauling occasions.

Haven't drove it much but it seems pretty solid and the rear isn't too stiff. Truck is spot on leveled, though I was hoping the front wasn't going to be as high to allow for a little rear end rake... and I doubt the front will settle at all hmm.

Will get some measurements tomorrow to compare with other peoples lift. It's hard to tell how much I've gained because my original springs were in bad shape!

P.S Whoever designed the rear shock top bolt design should be shot...
IMG_9902.JPG
IMG_9900.JPG

IMG_0665.JPG
IMG_9901.JPG
IMG_0673.JPG
IMG_0674.JPG
IMG_0675.JPG
IMG_0676.JPG
IMG_0677.JPG
IMG_9972.JPG
IMG_0678.JPG
IMG_0679.JPG
IMG_9390.JPG
IMG_0680.JPG
IMG_0682.JPG
IMG_9391.JPG
IMG_0681.JPG
IMG_0685.JPG
IMG_0684.JPG
IMG_0686.JPG
IMG_0687.JPG
IMG_0688.JPG
IMG_0689.JPG
IMG_0690.JPG
View attachment 127841
 
Last edited:
Back
Top