Don't like the adverts?  Click here to remove them

LJ70 Build Thread!

I'd give Gearing Dynamics a call; they're likely to close at 12.30 if they open on a Saturday at all.

Looks good... were you not tempted with a Marks Adaptor for a big GM diesel instead (or is that a different Mark's Adaptor?)

The CV Joints look good.


My progress is that I'm waiting for some pics of a 4Runner that a friend of a friend is selling with a rebuilt engine; we'll see what it looks like and go from there.
 
OK little update....................................

I went to Toyota yesterday and picked up the other axle oil seal I was after as they only had one in stock before.

Nice 70 duel cab parked outside. :drool:

They sell a lot here without the tray and then you can choose between steel or aluminium genuine trays, or take it some where and get your own built.

I'm not really a fan of the red/maroon colour and we all know how badly red cars seem to be effected by the sun over time. :thumbdown:

I think I'd go for either the Midnight Blue (the same as LJ) or the Silver. There is only about 6 colours to choose from. :think:

P1040229_zpsce5ca851.jpg

P1040230_zps657f84d4.jpg

Next I went to the bearing shop, which is right next to the Kaymar factory.

P1040231_zpsb18229e0.jpg

It worked out cheaper to buy the complete kit, rather than just the 4 Koyo bearings that I need. They wanted $270. So I asked is that the best p[rice you can do? I can buy the same kit on ebay for $217.

The price then dropped to $210. :dance:

P1040233_zpsbff4a441.jpg

P1040234_zps2ba84c5f.jpg

Then last night I realized its for a diff with a Toyota diff lock. :doh:

P1040236_zpsa1d1ce03.jpg

I should have 2 carrier bearings which should be the same, but I've got 2 different ones. :thumbdown:

Will have to try and change the kit/swap the one bearing today.

Needed to strip and clean the air locker.

It is held together by 2 small allen key headed bolts. (once its assembled the 10 bolts holding the crown wheel on hold it together).

P1040237_zps91f0af5d.jpg

P1040238_zps63e769b1.jpg

P1040239_zps7f962490.jpg

P1040240_zps37c2878a.jpg

P1040241_zpsefc820fc.jpg

A few small bits of swarf inside.

P1040242_zpse560640e.jpg

P1040243_zpsd5c58d83.jpg

P1040244_zpsebc940c9.jpg

P1040245_zps8f4ba7d3.jpg

P1040246_zps1cc17153.jpg

P1040247_zps6eee033b.jpg

P1040248_zps7c19285c.jpg

I got it all cleaned and reassembled and then took it and all the other new parts to the guy who is going to build the diff for me. He works from home and gets all his work form word of mouth.

He seems to really know his stuff and worked at ARB headquarters for 10 years, which is where he learnt to build diffs. Fingers crossed he does a good job. :pray:

Also got the new air actuator for the transfercase yesterday!

Super fast delivery as I only ordered it yesterday from another state! :clap:

P1040251_zps5cfa20af.jpg

P1040252_zpseb7c4281.jpg


Oh....................I also bought the breakdown cover that I should have bought weeks ago. :oops:

I've gone for the highest cover possible. So LJ is covered anywhere in Australia, on any 2wd road (can be dirt). So thats LJ with anyone driving, and then I'm covered for any other vehicle I'm in. :dance:
 

Attachments

  • P1040229_zpsce5ca851.jpg
    P1040229_zpsce5ca851.jpg
    59.1 KB · Views: 29
  • P1040230_zps657f84d4.jpg
    P1040230_zps657f84d4.jpg
    77.8 KB · Views: 37
  • P1040231_zpsb18229e0.jpg
    P1040231_zpsb18229e0.jpg
    60.4 KB · Views: 38
  • P1040234_zps2ba84c5f.jpg
    P1040234_zps2ba84c5f.jpg
    72.8 KB · Views: 33
  • P1040233_zpsbff4a441.jpg
    P1040233_zpsbff4a441.jpg
    61.8 KB · Views: 33
  • P1040236_zpsa1d1ce03.jpg
    P1040236_zpsa1d1ce03.jpg
    23.4 KB · Views: 29
  • P1040237_zps91f0af5d.jpg
    P1040237_zps91f0af5d.jpg
    58.6 KB · Views: 34
  • P1040238_zps63e769b1.jpg
    P1040238_zps63e769b1.jpg
    56.6 KB · Views: 34
  • P1040239_zps7f962490.jpg
    P1040239_zps7f962490.jpg
    59.9 KB · Views: 31
  • P1040240_zps37c2878a.jpg
    P1040240_zps37c2878a.jpg
    67 KB · Views: 42
  • P1040241_zpsefc820fc.jpg
    P1040241_zpsefc820fc.jpg
    69.7 KB · Views: 34
  • P1040242_zpse560640e.jpg
    P1040242_zpse560640e.jpg
    57.8 KB · Views: 32
  • P1040243_zpsd5c58d83.jpg
    P1040243_zpsd5c58d83.jpg
    67.7 KB · Views: 39
  • P1040244_zpsebc940c9.jpg
    P1040244_zpsebc940c9.jpg
    84.5 KB · Views: 32
  • P1040245_zps8f4ba7d3.jpg
    P1040245_zps8f4ba7d3.jpg
    67.9 KB · Views: 30
  • P1040246_zps1cc17153.jpg
    P1040246_zps1cc17153.jpg
    86.9 KB · Views: 48
  • P1040247_zps6eee033b.jpg
    P1040247_zps6eee033b.jpg
    75.4 KB · Views: 25
  • P1040248_zps7c19285c.jpg
    P1040248_zps7c19285c.jpg
    55.6 KB · Views: 39
  • P1040251_zps5cfa20af.jpg
    P1040251_zps5cfa20af.jpg
    75 KB · Views: 30
  • P1040252_zpseb7c4281.jpg
    P1040252_zpseb7c4281.jpg
    76.4 KB · Views: 35
Good update Ben.

Did your diff guy have any thoughts on why you've had your rear failures?
 
Took the bearings back and swapped them for the correct ones, they also gave me $40 back is this set was cheaper. :icon-biggrin:

P1040264_zpscb52d344.jpg

P1040262_zps4ce013f5.jpg

P1040263_zpsb6f34c74.jpg

Then tonight I took them over to the guy who is going to be building my diff. :icon-cool:

Good update Ben.

Did your diff guy have any thoughts on why you've had your rear failures?

Thanks Grant. :thumbup:

I had a good chat with the guy tonight and he said the normal reason for failures on these Toyota diffs is the pinion bearings failing/wearing and allowing the pinion to move forward until it comes into contact with the ring gear.

He said that some of the comp guys drill a hole and then weld a nut onto the the diff casing and put a bolt in. They then wind the bolt in until the end of the bolt is just past the end of the pinion. So that the pinion hits the bolt before hitting the ring gear. :think:

I explained that I've always used second hand/old diffs with 100,000+ miles on and havnt changed any of the bearings. He reckons this is the most likely cause of the failures.

He said he will do a really god job building them and guarantees his work will be spot on. He said if I have any more failures I need to look at changing the axles to something stronger like the heavy duty 70 series axles, or even Nissan Patrol ones which are stronger than all Toyota ones. :icon-biggrin:
 

Attachments

  • P1040264_zpscb52d344.jpg
    P1040264_zpscb52d344.jpg
    54.2 KB · Views: 32
  • P1040262_zps4ce013f5.jpg
    P1040262_zps4ce013f5.jpg
    71.3 KB · Views: 41
  • P1040263_zpsb6f34c74.jpg
    P1040263_zpsb6f34c74.jpg
    64.2 KB · Views: 40
Sounds like you've found your guy then and sounds like a very sensible explanation of what has been going wrong.
 
Don't like the adverts?  Click here to remove them
Dropping to see the guys at All Four x 4 soon to pick up all my parts too :icon-biggrin:
 
I've been very impressed with them Paul. :clap:

What you getting for your 80? :think:

I'm trying to resist the temptation to buy an 80. :shifty:
 
I keep looking out for an 80 with knackerd bodywork for the right money. I really would love to shorten the Chassis and drop a SWB 90 body on it. I really love shorties and like the look of the 90 over here. Plus SWMBO Isn't keen on how the 70 is a bit "boxy" as she likes to put it.
 
I'm replacing the second battery tray with a genuine one, $200 for the whole set up including the clamps!
 
Don't resist Ben,:angry-nono: you know you really want to. :icon-cool:


:lol:

I'm trying to save up to get my own place, and I also need a winch and a fridge. So I've got to be sensible and wait. :think:

I keep looking out for an 80 with knackerd bodywork for the right money. I really would love to shorten the Chassis and drop a SWB 90 body on it. I really love shorties and like the look of the 90 over here. Plus SWMBO Isn't keen on how the 70 is a bit "boxy" as she likes to put it.

That would be an interesting project Chris, I'd like to see that. :thumbup:

I'm replacing the second battery tray with a genuine one, $200 for the whole set up including the clamps!

I was very impressed with there price aswell. :icon-biggrin:

You know yourself parts can be expensive out here. Id have probably paid double what the charged me. :think:
 
Another little update.......................

Tonight after work I rolled out the prayer mat and climbed under the cruiser and unbolted the damaged front prop.

P1040272_zps16529970.jpg

The new TJM torch proved to be very good. :clap:

P1040277_zps920914cd.jpg

So this bit poking out of the transfercase is what switches between 2wd and 4wd. By pulling it out both prop flanges become locked together. Push it back in and the front ones become free. So the switch on the dash controls an air actuator that actually pushes the rod across and thats what I needed to replace.

P1040274_zps0c9aa116.jpg

P1040275_zpsb8f525a0.jpg

Bolted the first piece on.

P1040279_zps3ca51f16.jpg

The piece Id just bolted on changes the movement from an in and out movement to an up and down movement, ready for the air actuator (diaphragm) to be bolted on above it.

P1040280_zpsd955b35b.jpg

P1040281_zps3e071547.jpg

This is the air actuator which needed to be bolted on next.

P1040284_zpsa0651b08.jpg

The air pressure in the 2 hoses moves the diagram, which then pulls the rod up and down.

P1040285_zps93cd0056.jpg

P1040286_zps10ce7dd8.jpg

Bolted back in place, its clear to see how exposed it is in the event of the UJ failing like in my case.

P1040287_zps14028312.jpg

When the prop let go hit the underneath of the body and also the gearbox.

P1040289_zps242c1d42.jpg

P1040290_zps75a66785.jpg

Vacuum/air hoses connected.

P1040288_zps69983e2e.jpg

With the new part fitted I started the engine and pressed the 4wd button and then jumped underneath to check I couldn't turn the 2 prop flanges in opposite directions. I then pressed the button again, jumped underneath and checked that the front prop flange was now free which it was.

P1040291_zps2e65ebfd.jpg

Damaged UJ.

P1040294_zps02a7362c.jpg

As Dave (Modelmakerman) rightly said, the props are both the same length. Slightly different shape, but definitely the same length. :think:

P1040295_zpsd80739ca.jpg

I picked up 10 litres of oil today, enough for both diffs, and the gearbox and tranfercase.

P1040296_zps2c4068bf.jpg

Also picked up some Cambelt cover clips from Toyota. These had been missing from the engine ever since I bought the donor 4-runner. I noticed last time I took the cambelt cover off that there was some dirt/dust behind the cover down the side where the clips are missing.

P1040297_zpsac75b623.jpg

P1040298_zps45ecd60b.jpg

I'm hoping to pickup my freshly built diff tomorrow night, and will get it re-fitted Saturday morning. Then I'm off to Geelong to pickup a pair of prop shafts. :icon-smile:

I'm thinking that maybe spending £2000 on ARB air lockers and then not spending another few hundred on all new bearings was maybe a bit short sighted of me. :think:

When I get the front diff out and get the front locker fitted I will get all new bearings again. :icon-cool:

I'm thinking of totally rebuilding the front axle at the same time, replacing all bearings and seals. :think:

The places I'm planning on taking LJ and the adventures I want to have, I need her to be as reliable as possible. :icon-twisted:
 

Attachments

  • P1040272_zps16529970.jpg
    P1040272_zps16529970.jpg
    75.3 KB · Views: 24
  • P1040277_zps920914cd.jpg
    P1040277_zps920914cd.jpg
    81.7 KB · Views: 39
  • P1040274_zps0c9aa116.jpg
    P1040274_zps0c9aa116.jpg
    53.4 KB · Views: 24
  • P1040275_zpsb8f525a0.jpg
    P1040275_zpsb8f525a0.jpg
    74.7 KB · Views: 37
  • P1040279_zps3ca51f16.jpg
    P1040279_zps3ca51f16.jpg
    56 KB · Views: 31
  • P1040280_zpsd955b35b.jpg
    P1040280_zpsd955b35b.jpg
    56.4 KB · Views: 31
  • P1040281_zps3e071547.jpg
    P1040281_zps3e071547.jpg
    55.9 KB · Views: 30
  • P1040284_zpsa0651b08.jpg
    P1040284_zpsa0651b08.jpg
    67.3 KB · Views: 29
  • P1040285_zps93cd0056.jpg
    P1040285_zps93cd0056.jpg
    40.3 KB · Views: 25
  • P1040286_zps10ce7dd8.jpg
    P1040286_zps10ce7dd8.jpg
    65.7 KB · Views: 32
  • P1040287_zps14028312.jpg
    P1040287_zps14028312.jpg
    72 KB · Views: 30
As Dave (Modelmakerman) rightly said, the props are both the same length. Slightly different shape, but definitely the same length. :think:

P1040295_zpsd80739ca.jpg

Not sure what you mean by different shape Ben? If you mean the yokes are offset differently thats just due to them being taken apart at some point and not being re-assembled correctly (always mark both sides of the slip joint before disassembly and re-assemble parts in the same orientation. Props are balanced, putting a part on the wrong way round can put them out of balance.). The slip joint can be re-assembled any way round. Im 99% sure mine are identical though if they arent on yours it could be a weird LJ70 vs KZJ70 thing? Or one could have been swapped for a different one by a previous owner? Might explain the nipple-less UJ (all the UJs should have nipples, dont buy aftermarket as the nipples tend to be in the wrong orientation meaning you cant get a grease gun in there whilst the prop is fitted! :doh:).

Interesting pics of the 4x4 actuator, its good to see all the bits that make it work. Out of interest; have you done the 2WD Lo mod?
 
Last edited:
Not sure what you mean by different shape Ben? If you mean the yokes are offset differently thats just due to them being taken apart at some point and not being re-assembled correctly (always mark both sides of the slip joint before disassembly and re-assemble parts in the same orientation. Props are balanced, putting a part on the wrong way round can put them out of balance.). The slip joint can be re-assembled any way round. Im 99% sure mine are identical though if they arent on yours it could be a weird LJ70 vs KZJ70 thing? Or one could have been swapped for a different one by a previous owner? Might explain the nipple-less UJ (all the UJs should have nipples, dont buy aftermarket as the nipples tend to be in the wrong orientation meaning you cant get a grease gun in there whilst the prop is fitted! :doh:).

Interesting pics of the 4x4 actuator, its good to see all the bits that make it work. Out of interest; have you done the 2WD Lo mod?

If you look closely there slightly different shapes. The one is more cylindrical, where as the other tapers in more. :think:

Quite possible it was swapped by one or more of the previous 10 owners.

No never done the 2wd low mod mate. Dont really see the point. If I want 2wd low, which is very rare, I just make sure the front hubs are unlocked. :icon-smile:

I promised not to tease you any more Ben, but I couldn't resist... :lol:

:lol:

I was talking to my boss last night and said I'm tempted to get an 80. He said there getting cheap now, especially if you get a povety spec model with vinyl floors and barn rear doors. :think:

Sounds like you've found your guy then and sounds like a very sensible explanation of what has been going wrong.

Thinking about the whole diff failure thing............................ I was thinking this morning (lying in bed after getting woken up at 4.30am by a bloody possum jumping on the roof. :icon-evil:) and I remembered what the guy said:

I told the guy I think I must have rebuilt the diff wrong, and thats why its failed.


He then said was it noisy?


I said no, not at all. Also I'd driven atlest a few thousand km's before it failed.


He then said well I doubt you built it wrong then. It will be a pinion bearing failure,
which allowed the pinion to move forward very slightly, just enough so that the teath
were no longer meshing perfectly and bang!

So maybe I didnt f*** it up after all. :think:

I'm still glad I'm getting it professionally built up though after going to so much expense buying quality replacement R&P, Koyo bearings, and genuine seals. :icon-biggrin:
 
I was talking to my boss last night and said I'm tempted to get an 80. He said there getting cheap now, especially if you get a povety spec model with vinyl floors and barn rear doors. :think:

I've noticed that as well; I've been looking at 'Cruisers and compared to when we got ours in November 2011 the range of sub $8k (even $5k) is quite different; lots of 80's (even HJ80's, not just FJ80's) and even a few VZN95's. Even HJ7x's are cheaper; I've seen a couple of HJ75's for $5k which is unusual, but a xJ70 or xJ73 is still very strong money compared to a ute or Troopy.

I was thinking this morning (lying in bed after getting woken up at 4.30am by a bloody possum jumping on the roof. :icon-evil:)

We had a possum in our roof; it was a truly inept possum though as it could jump from the water tanks, aiming for the gap between the roof and the wall where there was a space it could get through... problem was in a comedy fashion it would splat into the wall and then scrabble up the wall.

I caught it once in a possum trap in the roof, but she had a joey with her, so we let her out again. NSW they're protected as well, which makes it harder to rehouse them... They don't like camfor, pepper or chilli powder; if you can set some chilli powder on it's route so it has to lick it off it's paws...

We also thought that the possum was good training for one day having teenagers... and so we thought of it as a teenager coming home in the small hours...
 
Forum is pretty quite as most club members are at Lincomb having fun. Really wish I was there. :(

Anyway..................... thought I'd update my thread. :dance:

Yesterday morning I got a few bits done before work.

First job was fitting the clips on the cambelt cover.

P1040299_zps830358ce.jpg

P1040300_zpsd1955cf2.jpg

P1040301_zps5be30b01.jpg

P1040302_zps3ca4630b.jpg

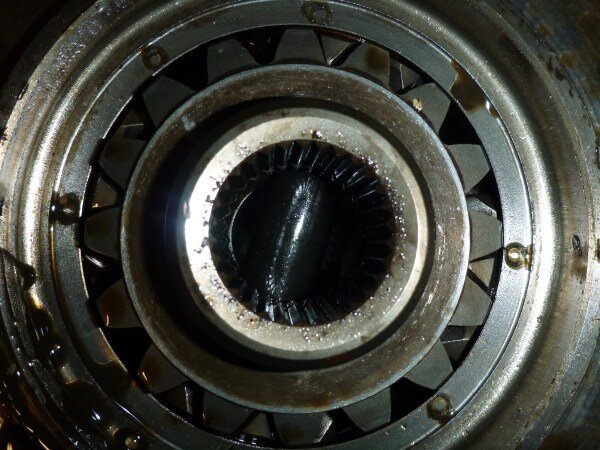
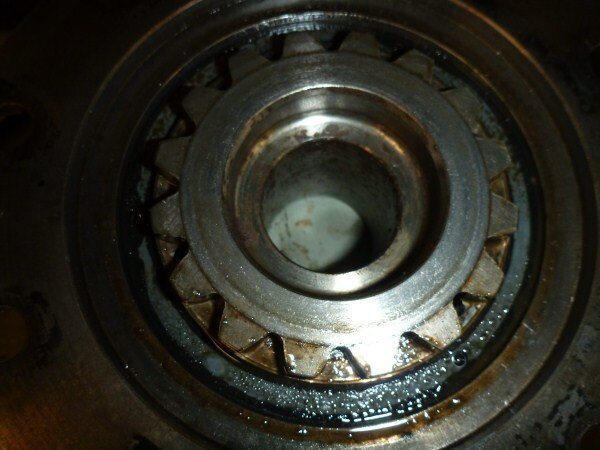
Cleaned all the swarf and chunks of metal out of the rear axle next.

Telescopic magnet worked well.

P1040303_zps67eefd6b.jpg

P1040304_zpsa91d00a6.jpg

The TJM torch proved very useful again.

P1040305_zpsc175b0a5.jpg

Found a magnetic tipped screw driver also worked well at getting the swarf out of the tighter spots.

P1040308_zps77ab1a83.jpg

P1040310_zps96c215d2.jpg

Loads of metal came out in the drained oil. :icon-rolleyes:

P1040311_zpsbf6a6391.jpg

I pushed a rag down the axle to clean all the old oil and any swarf out.

P1040312_zps4647e55a.jpg

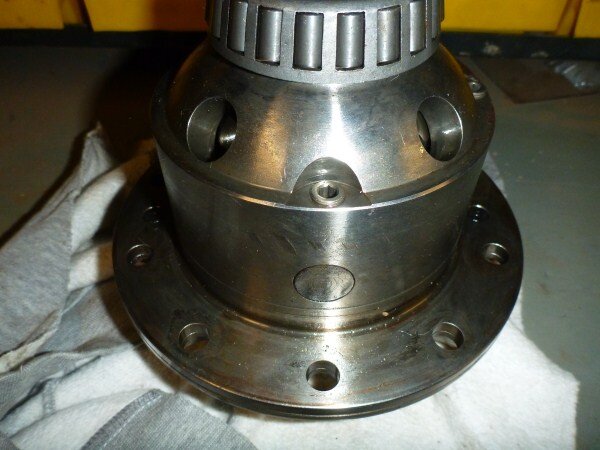
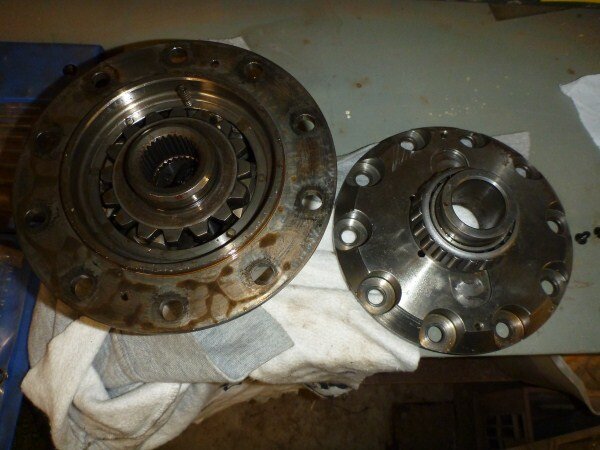
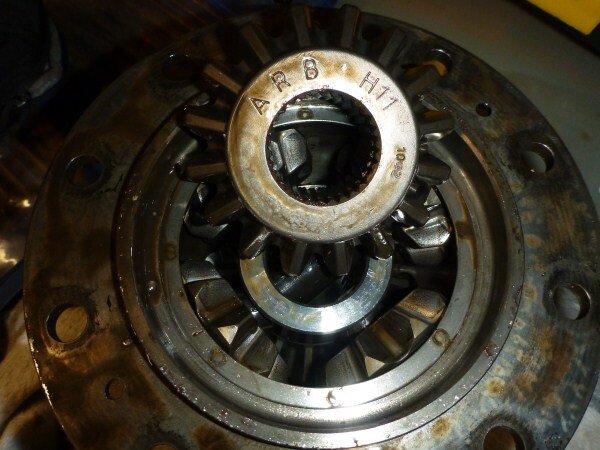
Picked up the freshly built diff this morning.

P1040313_zps1e7f9962.jpg

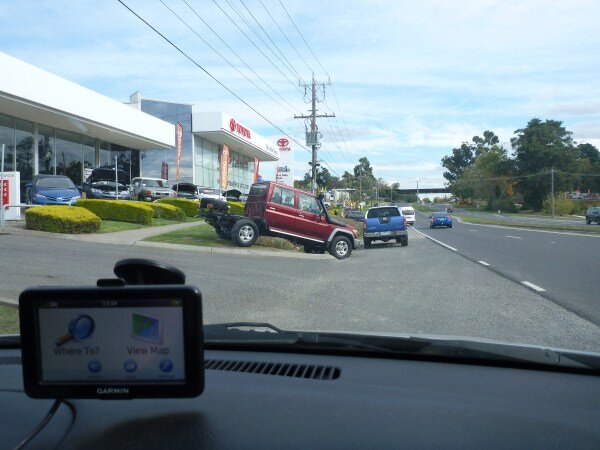
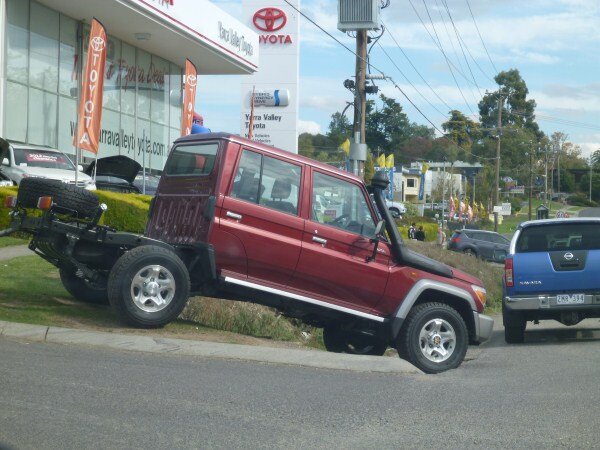
Then set off for Geelong, pronounced J-long.

Satnav took me through the city, so thought I'd take a few pics.

P1040314_zpsac2e1275.jpg

P1040317_zpsfbe6ecb6.jpg

One of Melbourne's main land marks, Flinders Street train station.

P1040318_zpse10d0e12.jpg

P1040319_zps56f5672a.jpg

Another thing Melbourne is known for, its vintage trams.

P1040321_zps77367a54.jpg

Australia invented the ute (car derived pick up truck) and the police use them a lot.

P1040320_zps228456d9.jpg

I actually ended up in the back of one once. :oops:

P1040325_zps6cf5f5f1.jpg

P1040327_zpsa59951b8.jpg

Got to the guys house and had a good chat with him, nice chap.

Bought both props for $60 (£40). :icon-biggrin:

P1040329_zps6df44c8e.jpg

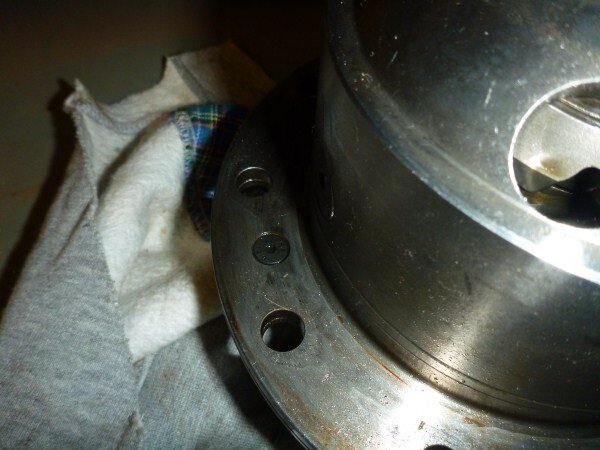
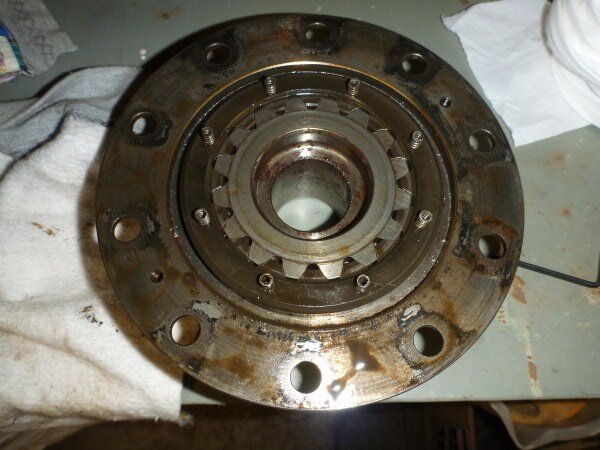
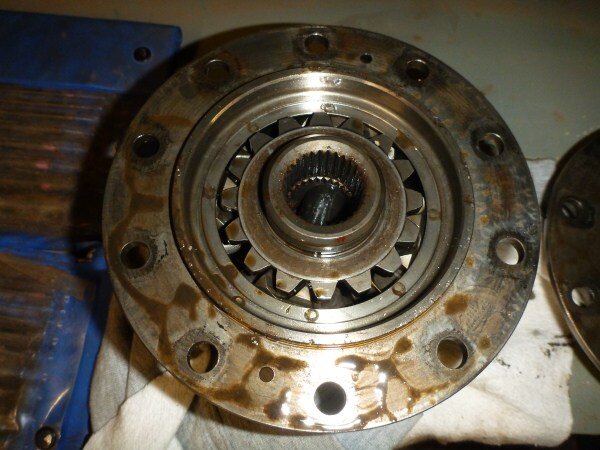
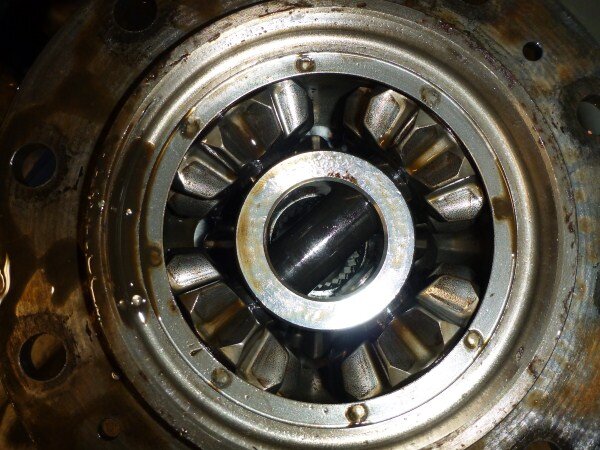
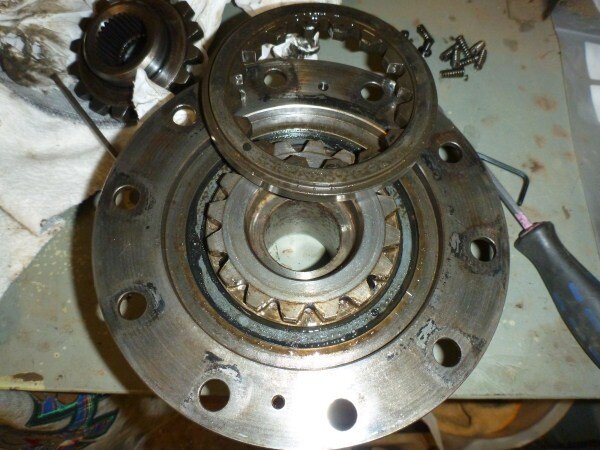
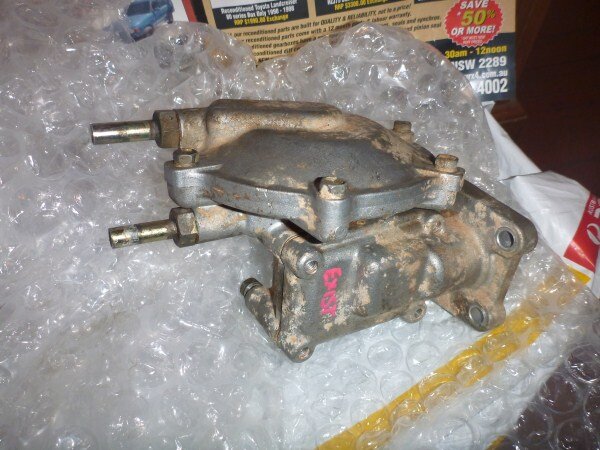
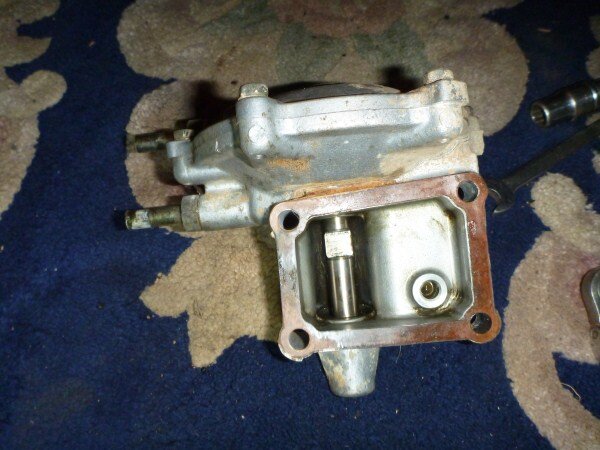
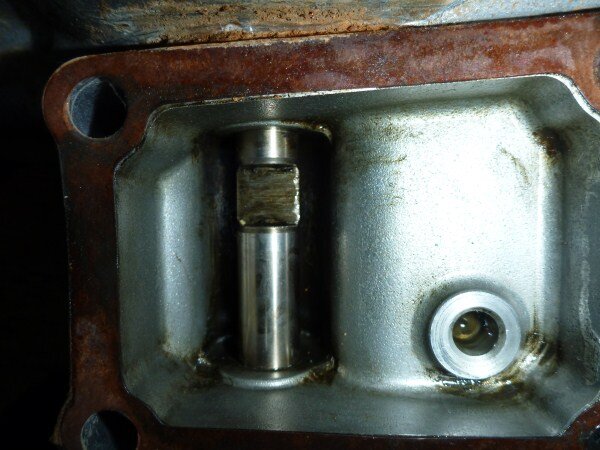
Got back and unwrapped the diff.

P1040330_zps94e6d478.jpg

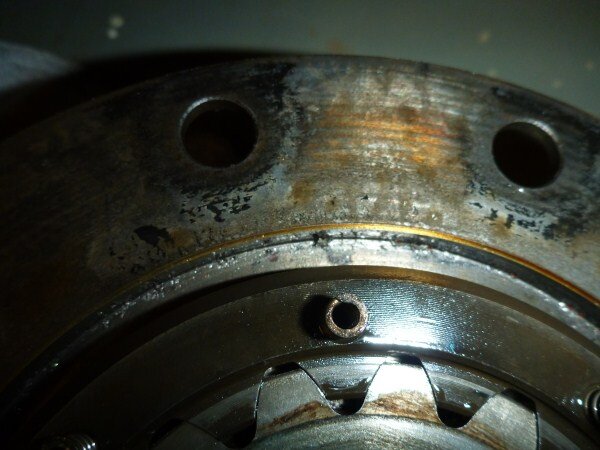
Evidence of the use of engineers blue, used to setup the ring and pinion.

P1040331_zps118512c9.jpg

Hed done a great job routing the air line, very neat.
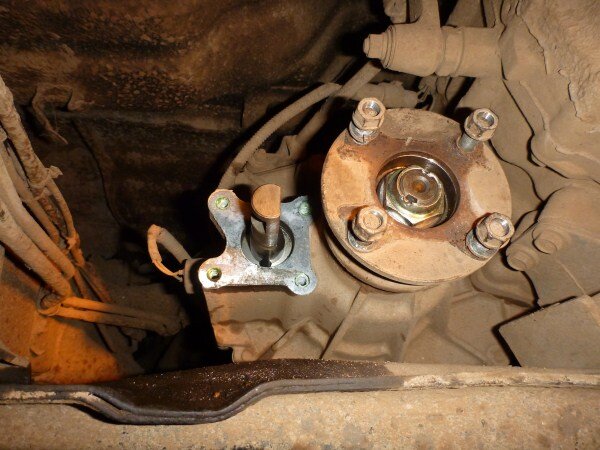
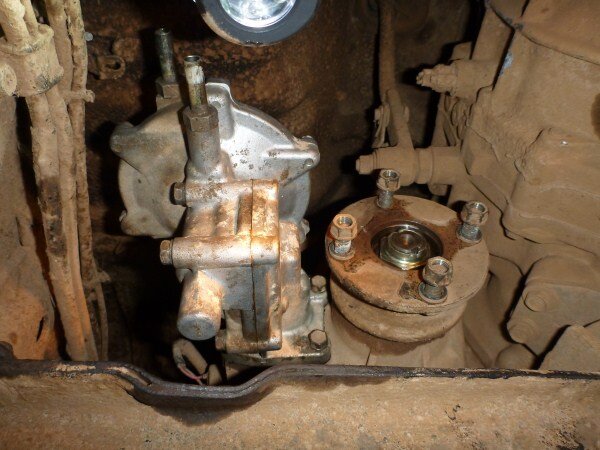
P1040333_zpse9fa7bc7.jpg

P1040334_zpsb84e4d35.jpg

Diff in.

P1040335_zps5aea41f4.jpg

P1040336_zps8cb6c5bb.jpg

Connected the airline.

P1040337_zpsa60df799.jpg

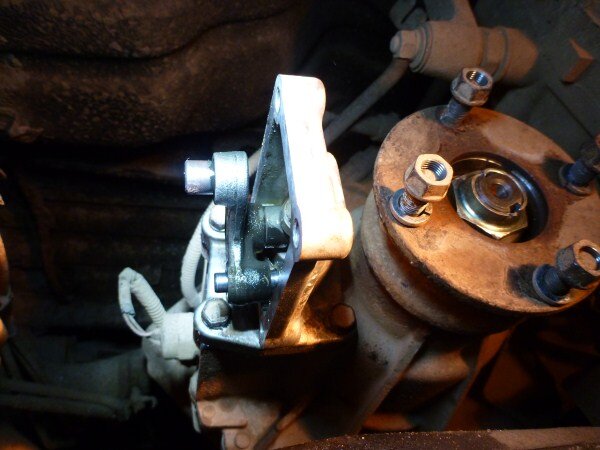
Tested the rear air locker was working OK, which it wasnt. :thumbdown:

The compressor kept running after flicking the locker switch, where as normally it stops. It had been doing this intermittently for a while now. :icon-rolleyes:

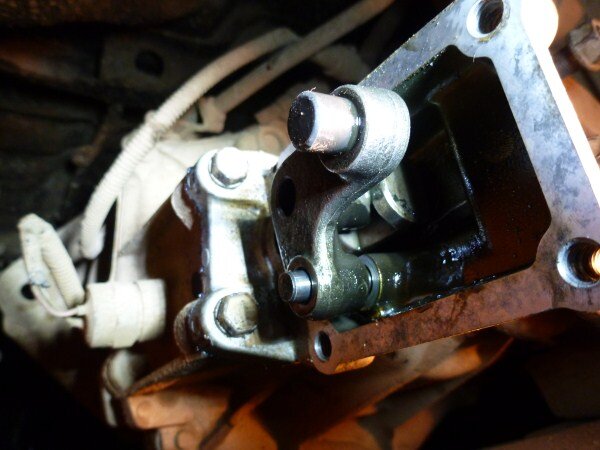
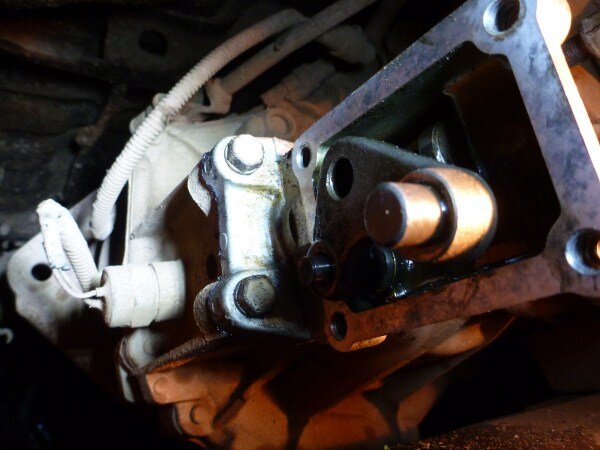
Kept the compressor running and jumped underneath for a look. Quickly spotted the air hose was split and leaking.

P1040339_zpsd49cd00a.jpg

P1040340_zpsf8737d05.jpg

Fortunately I'd left a bit of slack in the hose when I fitted it, so was able to cut out the damaged section and reconnect it.

P1040341_zps48427957.jpg

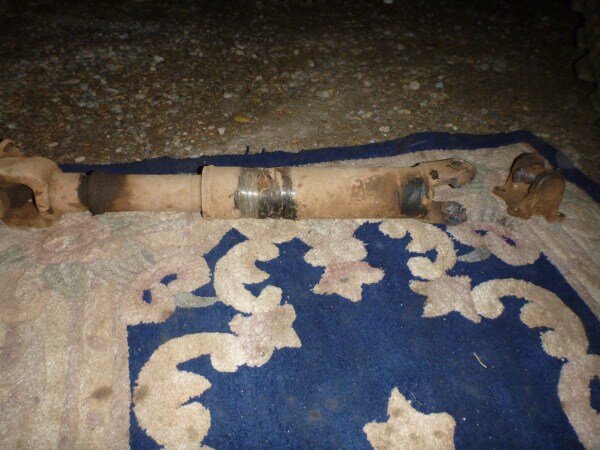
Fitted the rear prop.

P1040342_zpseab3eb32.jpg

Came to fit the front one and after looking at the 2 props I picked up, there was still a UJ without a grease nipple on the new front prop. This time it was the axle end though and not the transferbox end like mine. :think:

So decided to fit the rear one on the front. So I'm now running LJ70 rear props on the front and back. :icon-cool:

P1040343_zps5925dc58.jpg

P1040344_zps0b3165d8.jpg

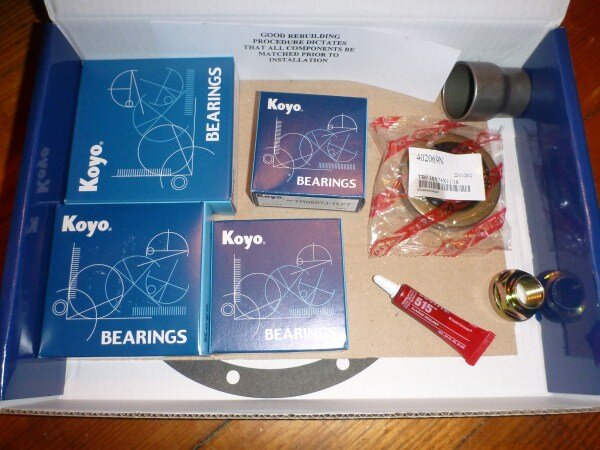
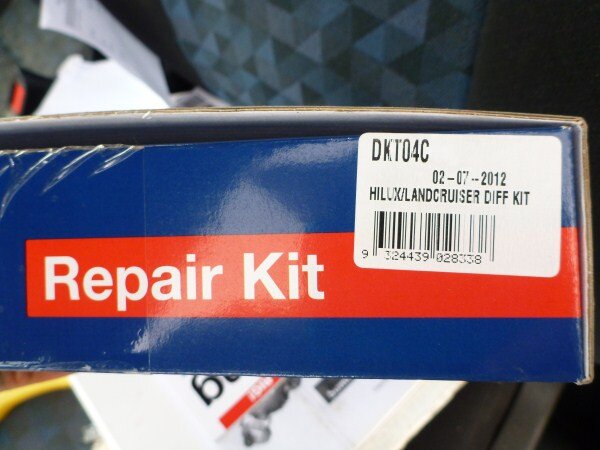
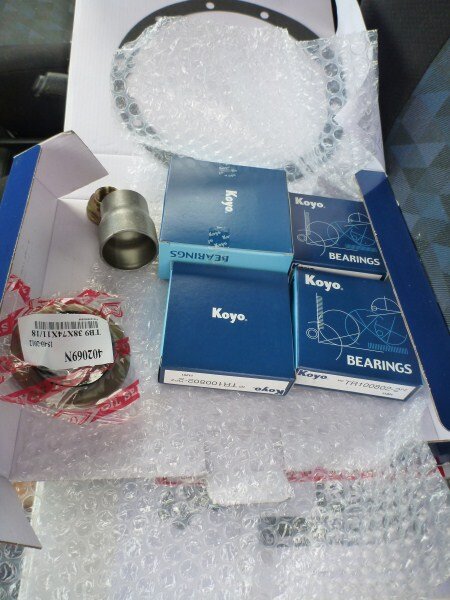
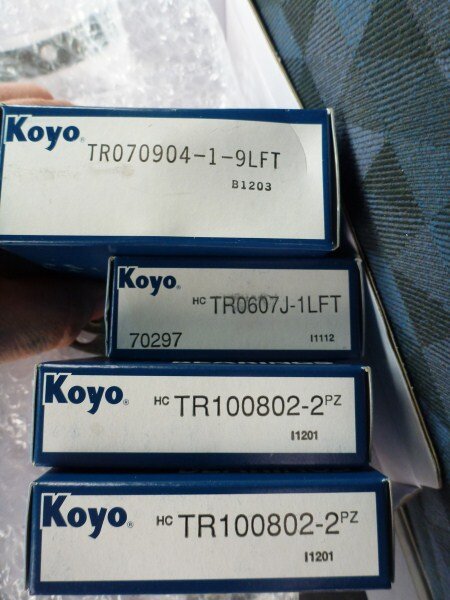
Oil seals next for the rear half shafts.

P1040345_zps5f49a458.jpg

Genuine of course.

P1040346_zps80f19ca6.jpg

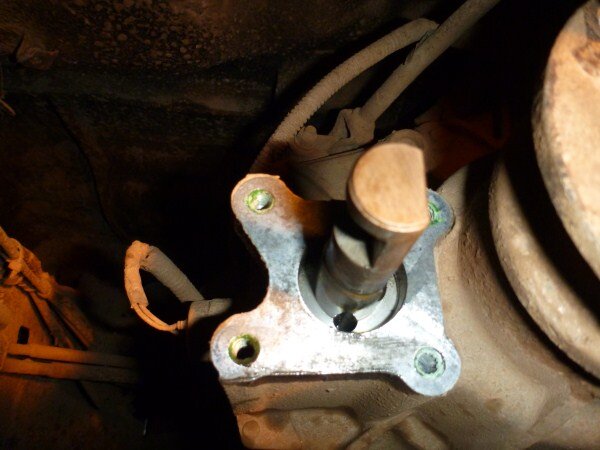
I didn't take anymore pics as I was in a rush trying to get the job finished before it got dark. But I cleaned up the ends of the axle, applied fresh silicon, slid the half shafts in and bolted them in place. Reconnected the brakes and bled them, then filled the diff with fresh oil and checked the oil level in the gearbox and transferbox.

I put the 35"s on the back, and then drove it round to the workshop ready to be cleaned and have the other 35"s put on the front.

P1040347_zps50a0379f.jpg

P1040349_zps3baf002d.jpg

P1040350_zpsae10ab40.jpg

No pics of it cleaned and with all the 35"s on as it got dark.

Tomorrow I need to give it a more thorougher clean, and re bleed the brakes as they feel spongy. Thinking I might have to change all the brake fluid, after I cooked the brakes. :think:

Really pleased with the job Ian did rebuilding the diff. :clap:

The guy really seems to know his stuff and is very confident that hes built it perfectly. :icon-biggrin:

He said that they put a special coating on the new ring and pinions, and to run it for 500km (300 miles) then change the oil. Then do 1000km and change the oil again. He said it will probably come out quite grey and dirty looking. :icon-smile:

When I've got some more money, I'm going to get him to fit the front locker for me with all new bearings. :icon-cool:
 
Oh yes, 80's are now a reasonable price, that's why I got mine over getting a 105 which are still holding their money for what is essentially an 80 with a different interior. Because of this it lets me spend loads on the good stuff :)
 
Back
Top