Don't like the adverts? Click here to remove them
You are using an out of date browser. It may not display this or other websites correctly.
You should upgrade or use an alternative browser.
You should upgrade or use an alternative browser.
LJ70 Build Thread!
- Thread starter Ben
- Start date
- Joined
- Oct 13, 2010
- Messages
- 6,058
- Country Flag

If I wasnt living in OZ then yes maybe I would, but down here I have to be careful running big tyres as its technically illegal. 
35's you can just about get away with if your careful and lucky, but 37"s just look ridiculously big!
Speaking of 37"s............................
I've put mine on and they are miles inside the new arches/flares. Obviously the 10J rims my 35"s are on have got a lot more off set. So I'm thinking ideally I need another set of 16 x 8J rims with a lot more off set, I'm thinking -80mm!
There is a company near me which will make steel wheels with whatever off set you want so I might go down that route.
- Joined
- Oct 13, 2010
- Messages
- 6,058
- Country Flag
This is the place:
http://www.easternwheelworks.com.au/index.htm
I might see if they can cut the centers out of my wheels and re-weld them on with more negative off set.
http://www.easternwheelworks.com.au/index.htm
I might see if they can cut the centers out of my wheels and re-weld them on with more negative off set.
Paddler Ed
Well-Known Member
On a more positive note.............................
Just been and seen my accountant and done my tax return and I'm getting a Lot back!
So when I get back I can order my new tyres, OZTent RV3, awning and all my electrical bits!

I've got to do my tax returns this week really... my standard return, my ABN and then the same for Delz! That'll keep me amused for a bit; this year I might go to an accountant to get them sorted out a bit more properly.
Paddler Ed
Well-Known Member
Thanks for the heads up on the wheel place; in my alter-ego I know a couple of guys who want to run flipped 17" steelies on a road car...
Don't like the adverts? Click here to remove them
- Joined
- Oct 13, 2010
- Messages
- 6,058
- Country Flag
If I'd got my welding tickets I'd be applying for a job here for sure.
http://cmg.nga.net.au/cp/index.cfm?event=jobs.checkJobDetailsNewApplication&returnToEvent=jobs.listJobs&jobid=e43a062c-7761-4b6c-b8b4-a23a00140acd&CurATC=CKJVGorgon&CurBID=4e0de5be-1fd8-4fa8-c680-6e0e63e48cd9&JobListID=fdd661ba-3746-d6da-7535-6dfb8caadb55&jobsListKey=7d96f749-58c7-40ee-a47d-614923d9a345&persistVariables=CurATC,CurBID,JobListID,jobsListKey,JobID&lid=68047260120
The Chevron-operated Gorgon Project is Australia’s largest single resource development and the CB&I Kentz Joint Venture (CKJV) has been awarded a contract by Chevron Australia to carry out the Mechanical, Electrical, Instrumentation and Commissioning work. CKJV is looking for skilled people who can make this opportunity of a lifetime a reality. We’re currently recruiting so act now or you could be disappointed, big time.
Employment options available to best suit you! Live and work locally at the Perth Head Office or the Australian Marine Complex Henderson, or FIFO to Barrow Island on a 26/9 roster.
http://cmg.nga.net.au/cp/index.cfm?event=jobs.checkJobDetailsNewApplication&returnToEvent=jobs.listJobs&jobid=e43a062c-7761-4b6c-b8b4-a23a00140acd&CurATC=CKJVGorgon&CurBID=4e0de5be-1fd8-4fa8-c680-6e0e63e48cd9&JobListID=fdd661ba-3746-d6da-7535-6dfb8caadb55&jobsListKey=7d96f749-58c7-40ee-a47d-614923d9a345&persistVariables=CurATC,CurBID,JobListID,jobsListKey,JobID&lid=68047260120


- Joined
- Oct 13, 2010
- Messages
- 6,058
- Country Flag
You'd be alright Victor. 
Found out today I can get all the centers cut out of my wheels and re-welded to increase the negative off set for about $200 (£100 ish) for the 5! So think I will do that.
Made a bit more progress on LJ this week and should get some more done tomorrow. Update on Sunday all being well.
Found out today I can get all the centers cut out of my wheels and re-welded to increase the negative off set for about $200 (£100 ish) for the 5! So think I will do that.
Made a bit more progress on LJ this week and should get some more done tomorrow. Update on Sunday all being well.
- Joined
- Oct 13, 2010
- Messages
- 6,058
- Country Flag
I had a busy week at work.
I'm designing a new product and its going really well. I've just finished making prototype number 2 and the next step is to get it fitted in a 4wd and test it properly.
Once it goes into production I will post some pics up, until then its top secret.
I've also done some more work on the world record attempt project, so I will update that thread shortly.
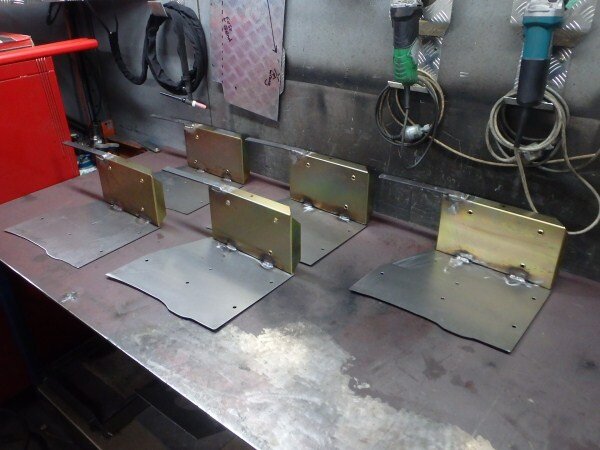
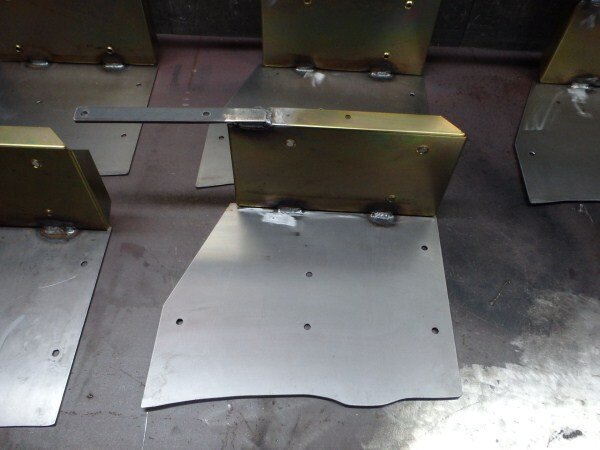
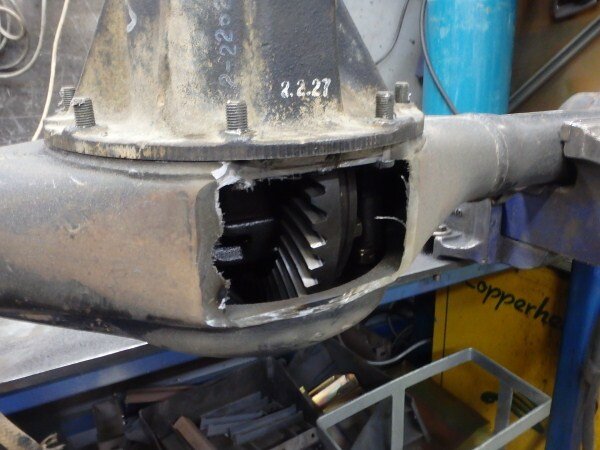
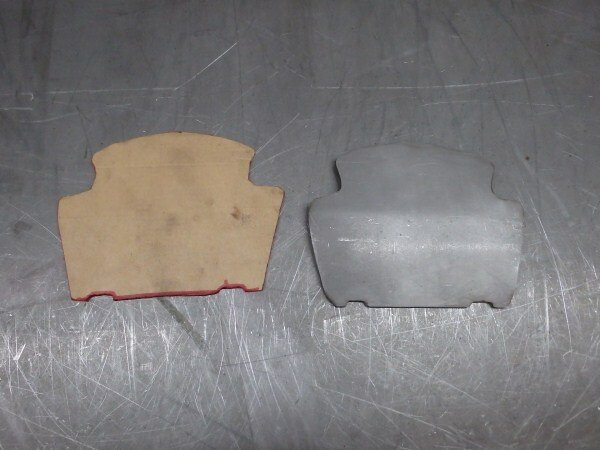
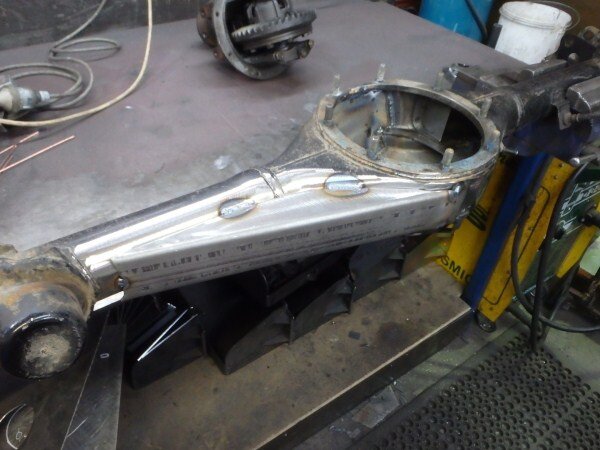
I made a few more Wrangler trays.


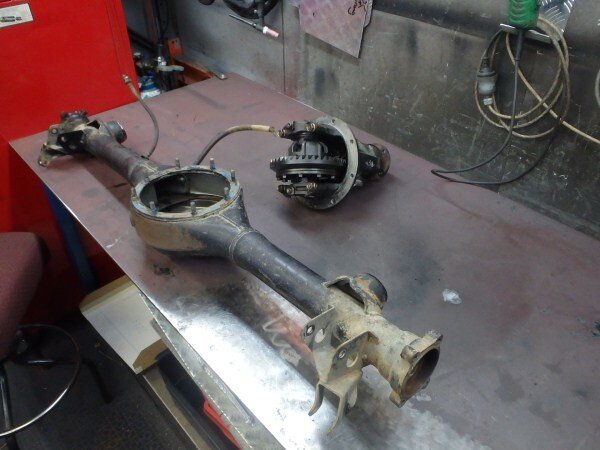
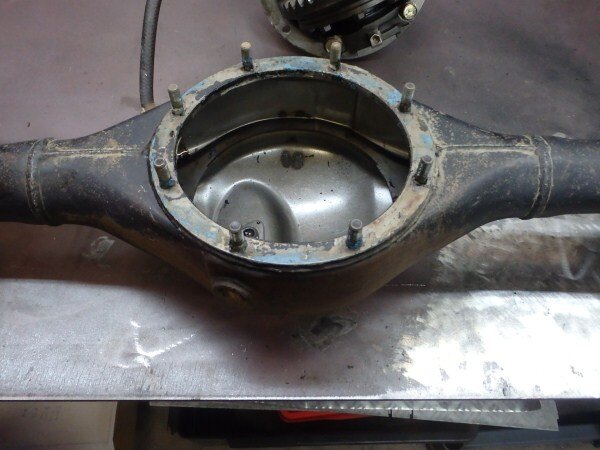
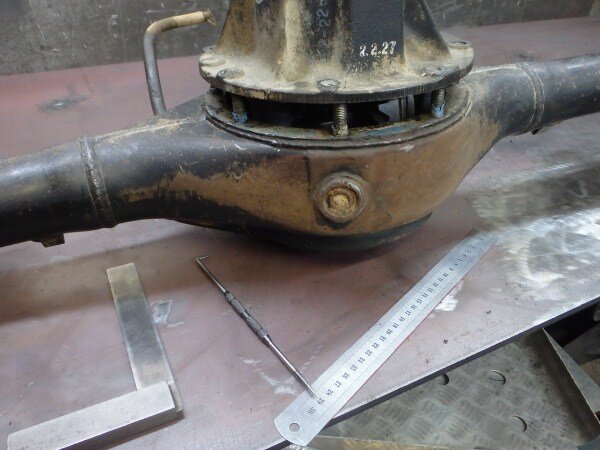
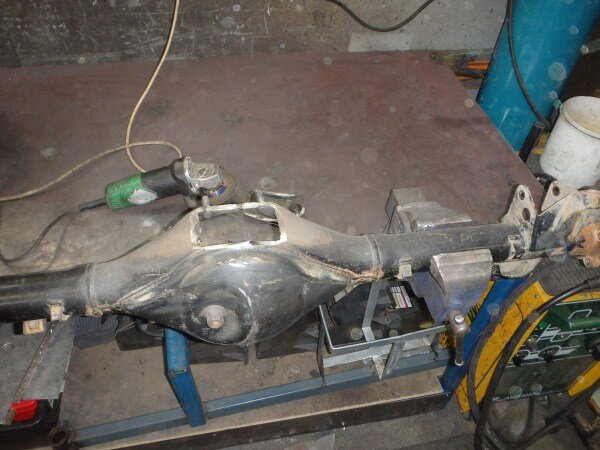
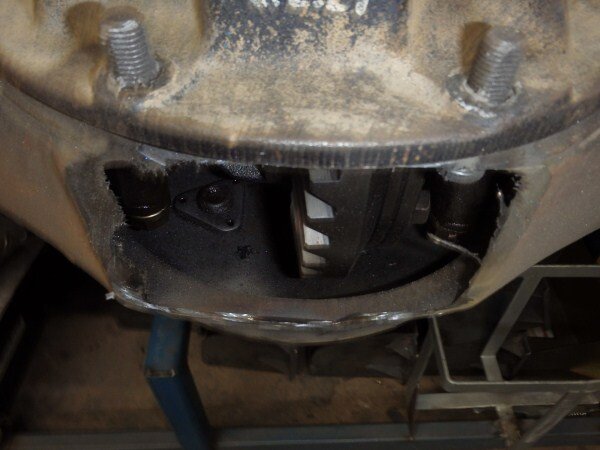
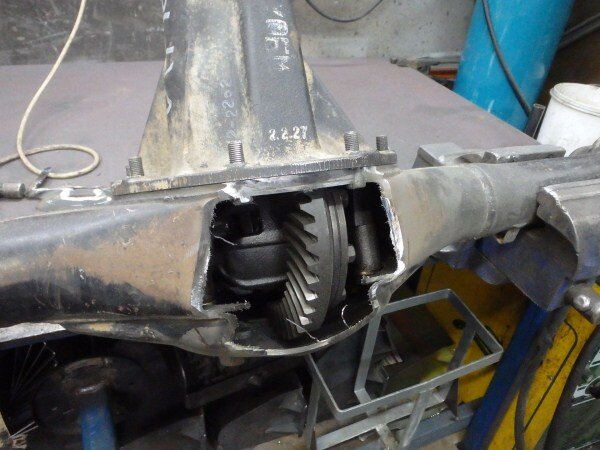
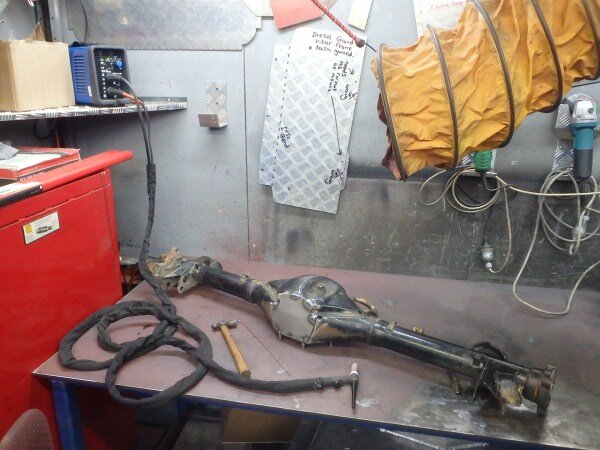
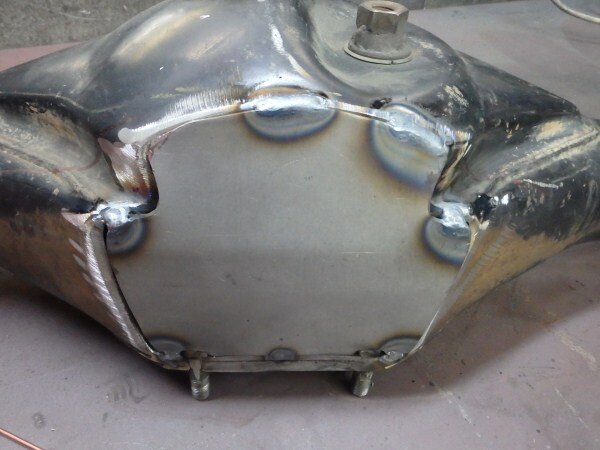
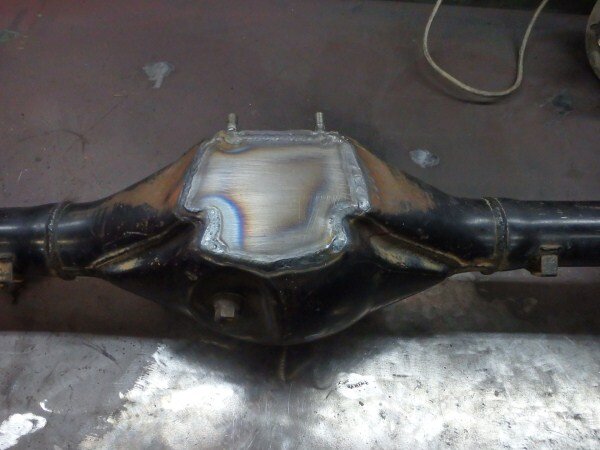
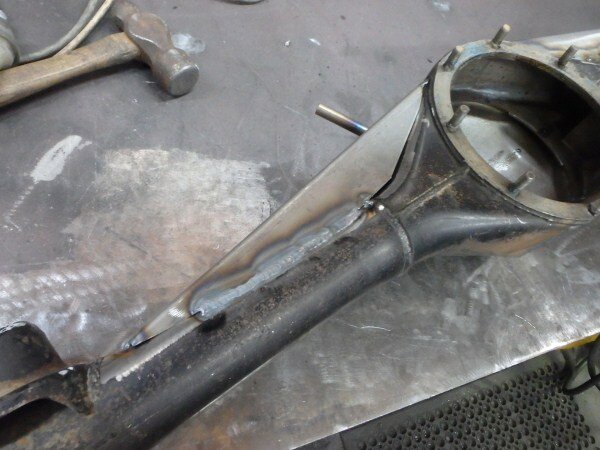
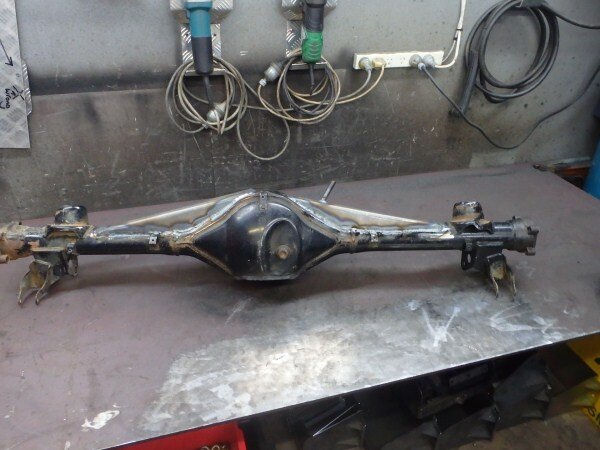
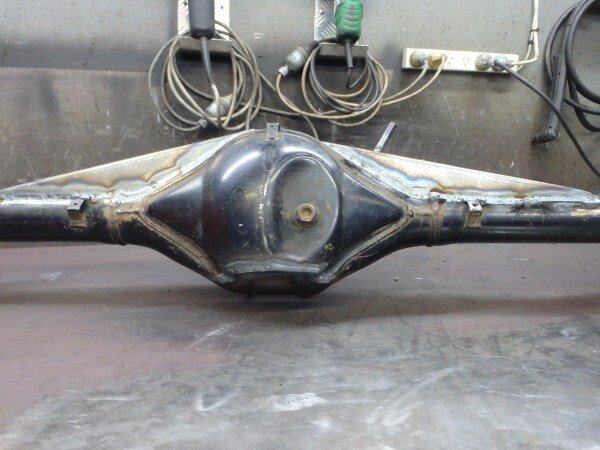
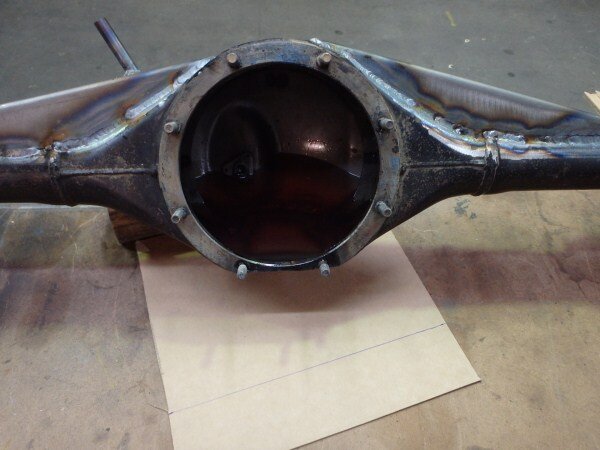
We sell the diffs out of the Suzuki's we strip, but the casings dont normally sell and rather than just scraping them my boss wanted me to shave and brace a few.

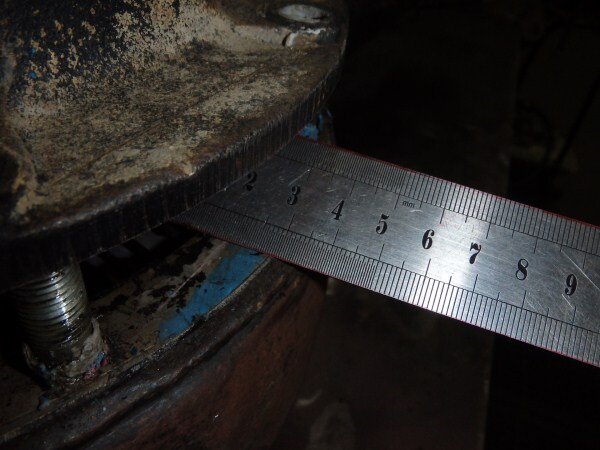
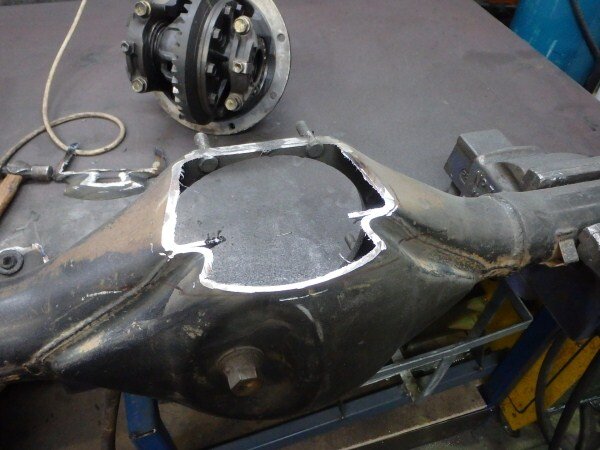
I measured how much I could cut off.


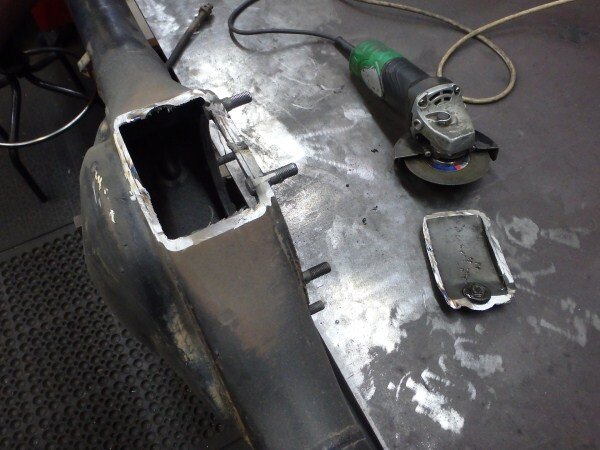
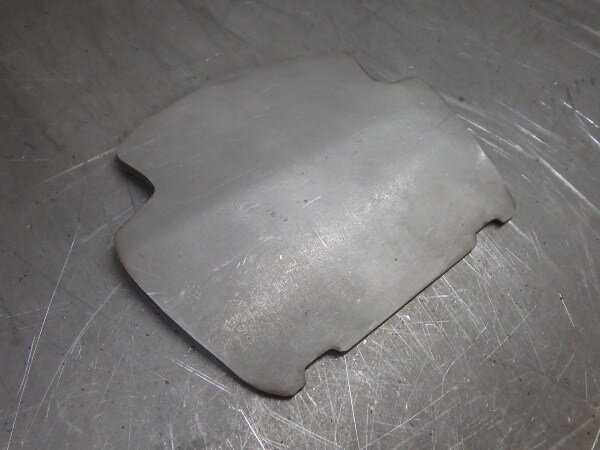
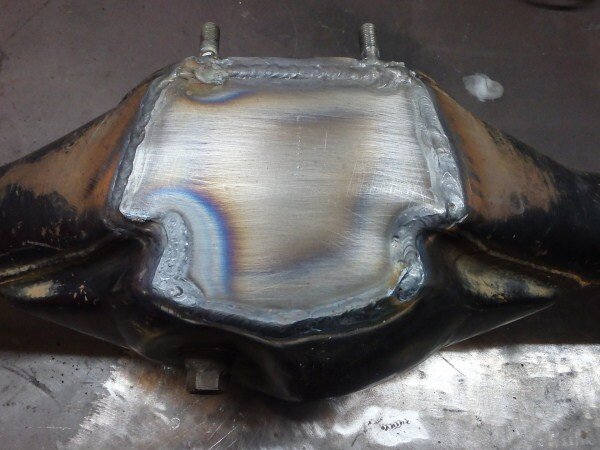
I cut and bent a piece of steel.


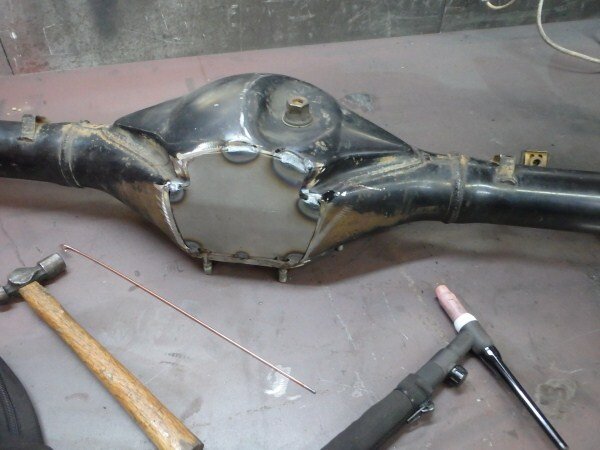
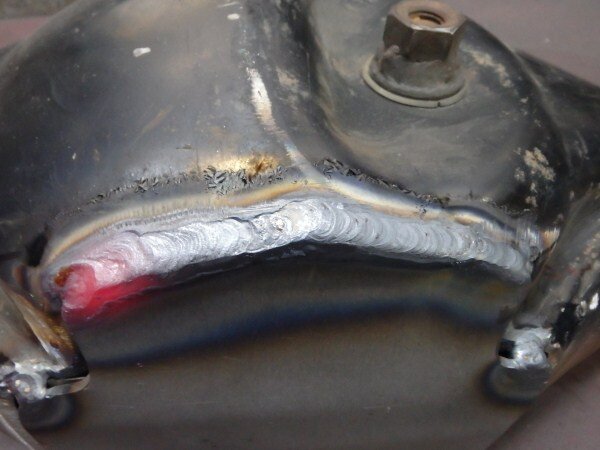
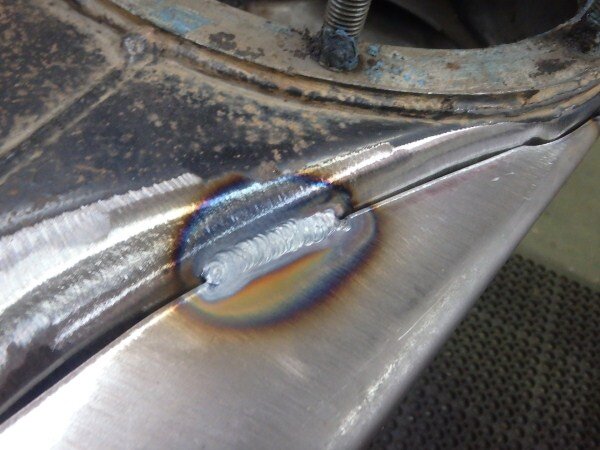
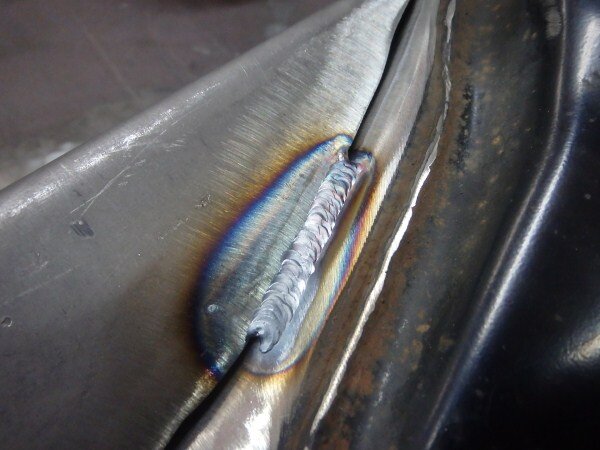
I decided to TIG weld it as it needs to be oil tight!


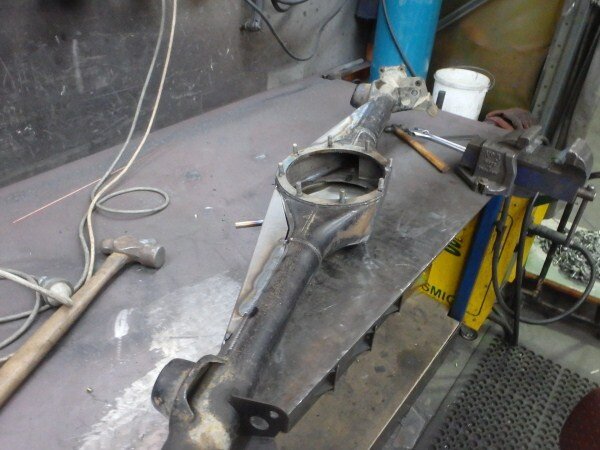
Cut and bent some steel.


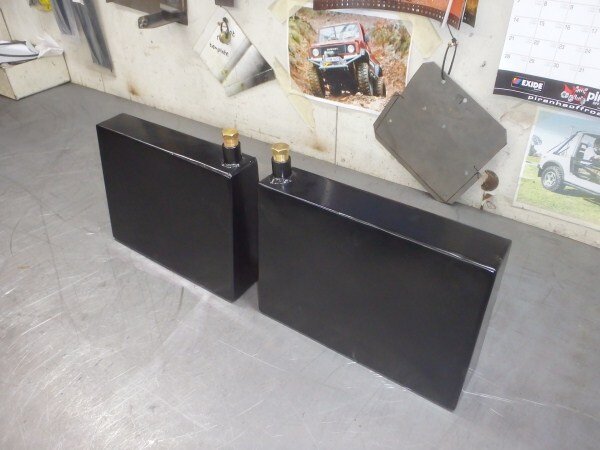
I filled it full of petrol and left it overnight to see if it would leak, which it didnt.

I got the tanks back from the powdercoaters.

And filled them up to check for leaks.

LJ......................................
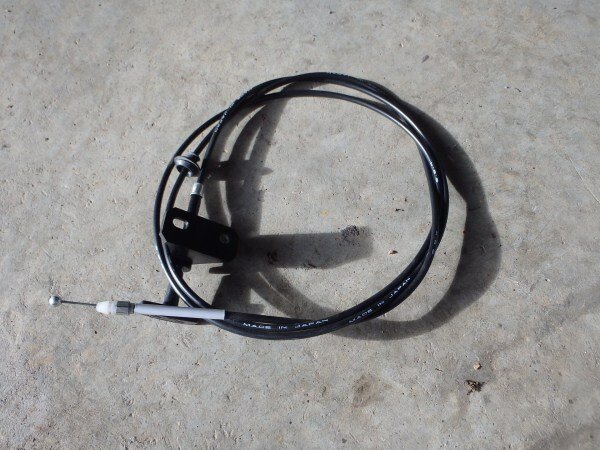
I fitted the new bonnet release cable.

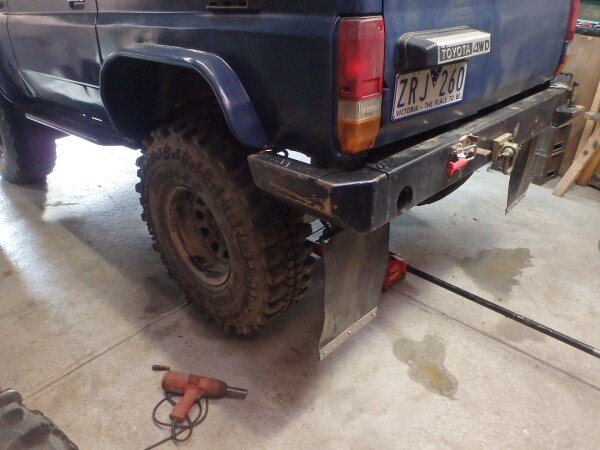
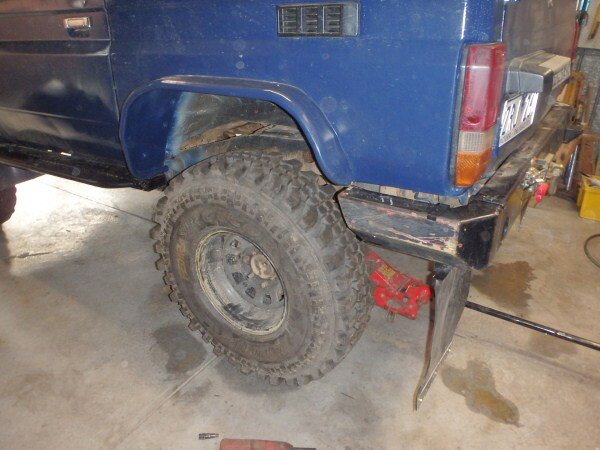
Fitted the 37"s.

The tyres are sticking too far inside the guards so I'm hoping to get the wheels banded and push them out another 50-60mm. Will look heaps better and should make LJ more stable off road.

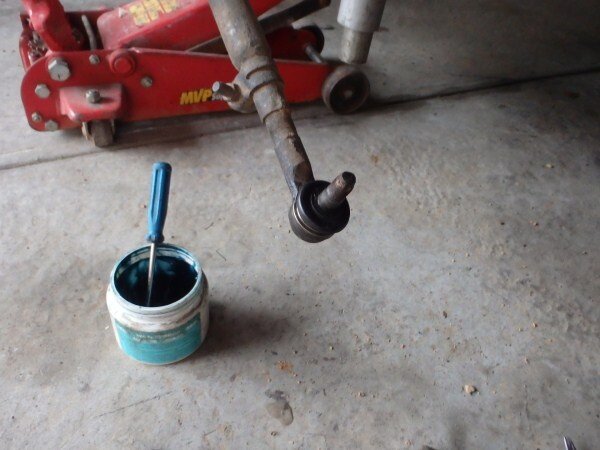
While changing the front wheels I wanted to replace a split rubber on one of the tierod ends.


On closer inspection the ball joint was badly worn.

I filled it full of grease and fitted a new rubber for now.

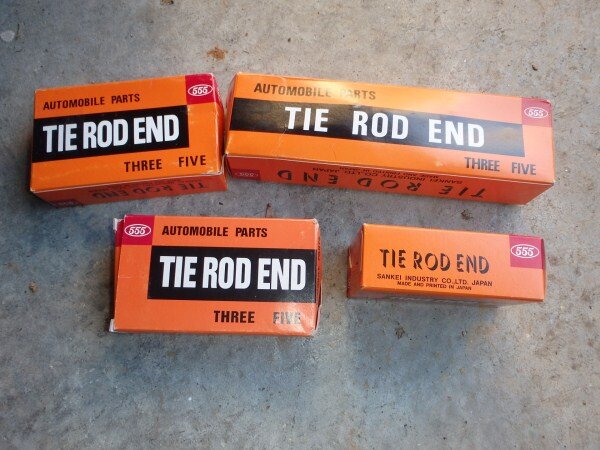
And my boss sourced me these:

But before I fit them I want to source some adjustable panhard rods and then I can get the wheel alignment done.
Superior Engineering make them but there for the earlier LJ70's which have a slightly different suspension setup and I'm not sure if they will fit my later model.
Anyone know?
I also found Dobinsons make a front one but its only for left hand drive LJ/KZJ70's.
Now I might just make one, but with it being such a critical component it needs to be really strong. So if I go down that route I will get some chromoly and come up with a welding procedure.
In order to come up with a weld procedure I will have to weld some test pieces and then do some destructive testing on the welds to see how strong they are and to check for any defects. This will take time and time really isnt on my side at the moment. I've got heaps still to do on LJ before the big trip and time is running out.
I wanted to replace my tatty old rear door trims with some alluminium and as weve got heaps of checkered plate I decided to use that.


I then decided I wasnt quite happy with them and wanted to make a few changes.
So I made a new set. (We will come back to this shortly)
Rear bumper next........................
I've decided to try using a Kaymar style latch on the swing away wheel carrier.
I'm going to make my own, so I took some pics of the Kayamar one.


I made a start building one.


Thats as much as I got done on that project this week.
Drawers next...............................
When I built my drawer system I built the drawer boxes out of 4mm alluminium and this made them very heavy.
So after looking at some BlackWidow ones last week in a customers car I decided I'd make some new ones.
I bought some 1.6mm galvanized sheet.


I also got some galvanized box section as well as the alluminium box I used as drawer runners on the last set had got a bit distorted in places so I decided steel would be better.

Cut it to size and marked out where it needed bending.


Folded the sheet.


I realized at this point that I had cocked up slightly and made one of the drawers 100mm too long.
Thats due to the fact I made them in my 30min lunch break and so was rushing to get them done.


I also folded up some pieces to close the oped ends off with.

I brought the whole lot home and yesterday I did some more.

The old heavy drawers.


The actual frame is nice and strong and I'm happy with it, it was just the drawer boxes that wernt great.

First job was to trim the one drawer to length.


The next job was to close the ends off.


M5 bolts and lock nuts to bolt the ends on.


The impact driver was useful for doing all the bolts up with.

Runners next.

Marked where the runners needed bolting on.

Marked, center punched and drilled some 6mm holes all the way through them.

I then enlarged the holes on one side of the box section using a step drill. (Step drills are awesome for things like this and heaps quicker than a hole saw/big drill bit)


M6 bolts to hold them on with.


One done.


Other one.

I also cocked up again when I cut and folded the sheet to cap off the ends of the big drawer as I had intended on making them longer than I needed so I could fold and bolt it through the sides as well.
I was able to do this with the smaller drawer.
Adding the other 2 folds.


Done!

I'm going to make some fronts for them out of alluminium and I cant decide whether to carpet the inside of them with marine carpet like the BlackWidow ones.
Next I wanted to look at the panels for the sides.

I was keen to make full use of the space inside the gaurds.


I needed to cut the bottom of the alluminium to the contour of the wheel arch.


I was considering cutting out this upright to allow me to have even bigger storage boxes.


I marked the back of the sheet where the storage box will be.


And also where the vent is, which I will drill some holes through for.

I layed the old card on top of the alluminium and drilled through the holes where the plastic push in fastener were to mark my new one. I will drill and bolt it on using rivnuts inserted into the body.


And that was as far as I got. Today has been a bed day due to a very messy night out in the city last night.
I'm hoping to get a bit more done Monday and Tuesday nights, then Wednesday night is TAFE then its holiday time!
So I need to finish the drawers, build the storage boxes and weld them to the back of the alluminium side panels and bolt them in.
I need to finish building the latch for the swingaway wheel carrier then the rear bumper can get shot blast, electroplated and powder coated.
I need to source/make the adjustable panhard rods.
Design some bottom shock mount adapters for the rear shocks and then order and fit new shocks.
Order the awning which will be mounted above the back doors and then weld mounts onto the roof rack for it. I'm also thinking I will weld a tube above it to make sliding the OZTent over the top of it easier. Then the roof rack can be powder coated and fitted.
I also want to make a new center console out of alluminium.
I need to order a Pyro and EGT gauge, LED light bar for the bull bar, 2 x LED work lights to be mounted on the swing away wheel carrier, and a super loom. Then the auto electrician is going to pull every bit of aftermarket wiring out and rewire the whole car.
I want a nice, clearly labeled fuse box in the engine bay and an anderson socket on the bull bar. I'm then going to cut the power cord off my compressor and make a new, longer one up with an anderson plug on the end to make inflating the tyres a bit quicker and easier.
I've also been thinking a nice big isolator switch would work really well between the 2 batteries. So if I'm ever parked up for a few days I can disconnect the 2 batteries and leave the fridge running off one battery, knowing that the other battery will stay charged ready to start the car when it comes time to move on.
As always I welcome your thoughts and opinions.
I'm designing a new product and its going really well. I've just finished making prototype number 2 and the next step is to get it fitted in a 4wd and test it properly.
Once it goes into production I will post some pics up, until then its top secret.
I've also done some more work on the world record attempt project, so I will update that thread shortly.
I made a few more Wrangler trays.


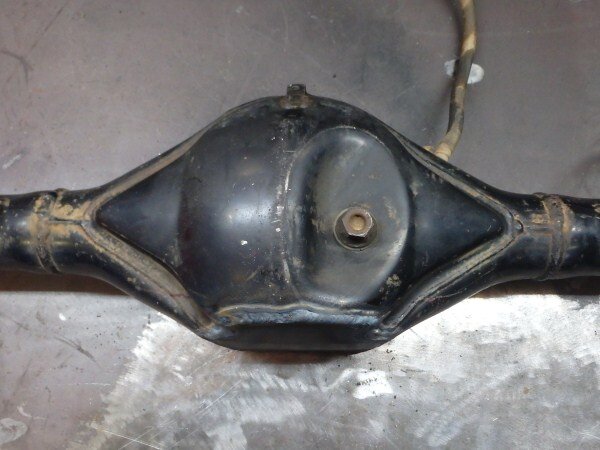
We sell the diffs out of the Suzuki's we strip, but the casings dont normally sell and rather than just scraping them my boss wanted me to shave and brace a few.

I measured how much I could cut off.


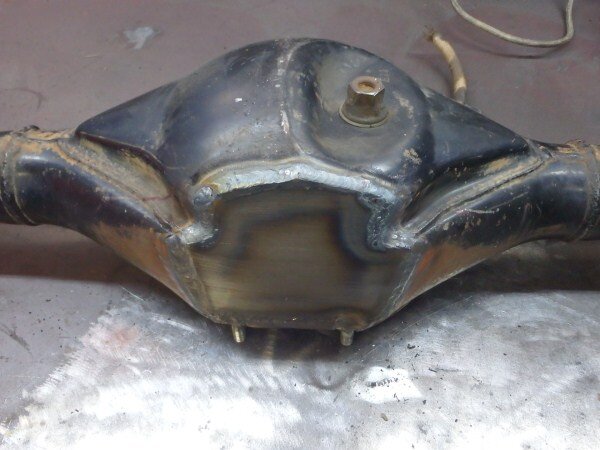
I cut and bent a piece of steel.


I decided to TIG weld it as it needs to be oil tight!


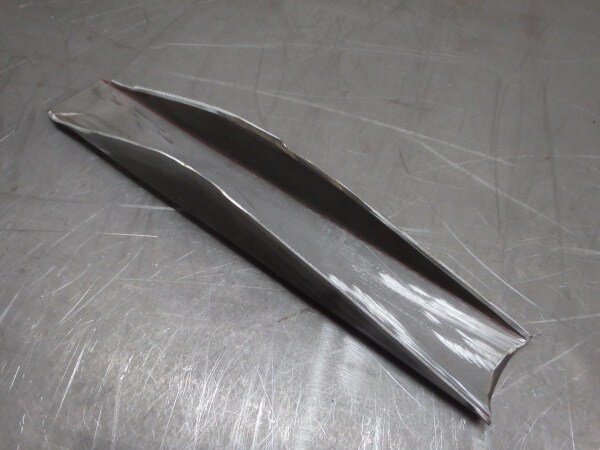
Cut and bent some steel.


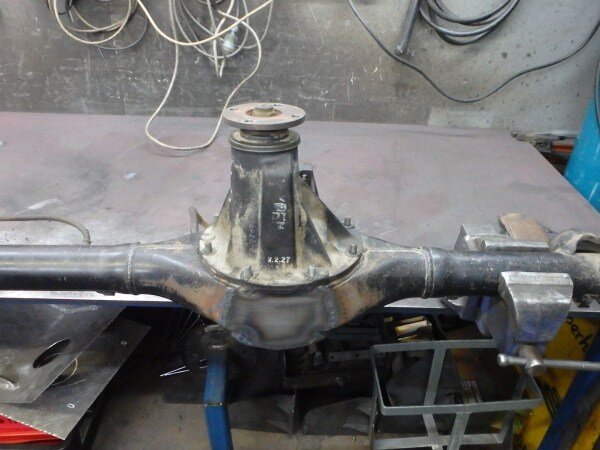
I filled it full of petrol and left it overnight to see if it would leak, which it didnt.

I got the tanks back from the powdercoaters.

And filled them up to check for leaks.

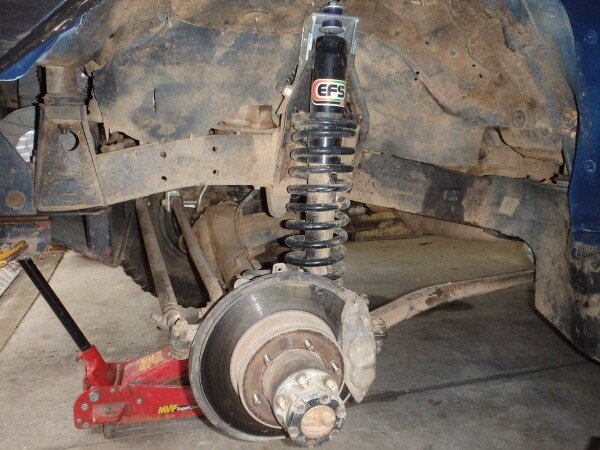
LJ......................................
I fitted the new bonnet release cable.

Fitted the 37"s.

The tyres are sticking too far inside the guards so I'm hoping to get the wheels banded and push them out another 50-60mm. Will look heaps better and should make LJ more stable off road.

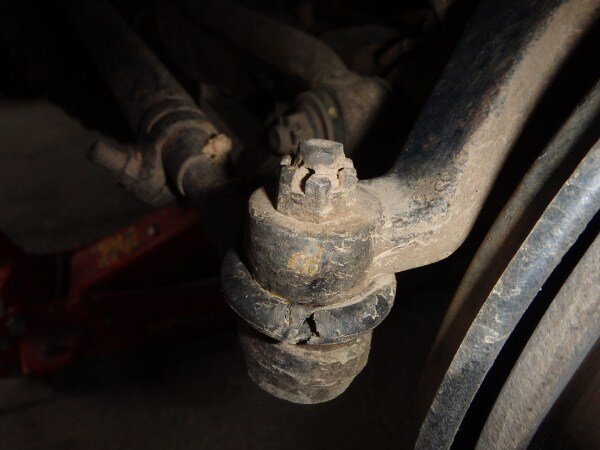
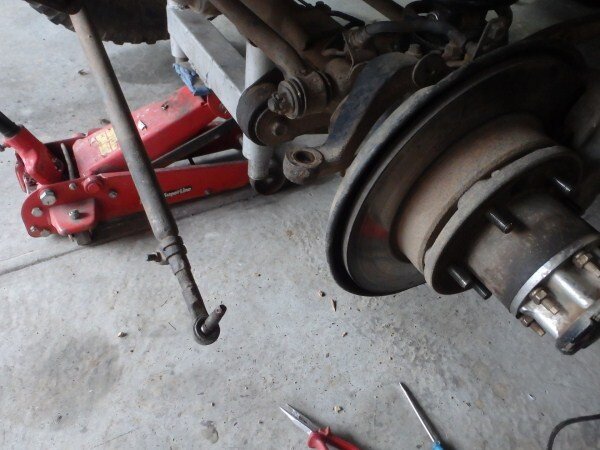
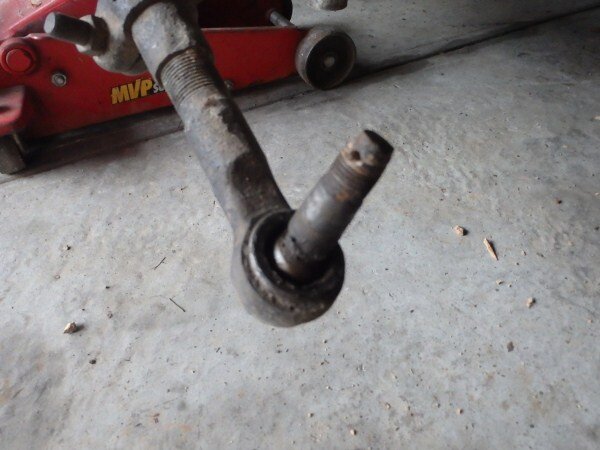
While changing the front wheels I wanted to replace a split rubber on one of the tierod ends.


On closer inspection the ball joint was badly worn.

I filled it full of grease and fitted a new rubber for now.

And my boss sourced me these:

But before I fit them I want to source some adjustable panhard rods and then I can get the wheel alignment done.
Superior Engineering make them but there for the earlier LJ70's which have a slightly different suspension setup and I'm not sure if they will fit my later model.
Anyone know?
I also found Dobinsons make a front one but its only for left hand drive LJ/KZJ70's.
Now I might just make one, but with it being such a critical component it needs to be really strong. So if I go down that route I will get some chromoly and come up with a welding procedure.
In order to come up with a weld procedure I will have to weld some test pieces and then do some destructive testing on the welds to see how strong they are and to check for any defects. This will take time and time really isnt on my side at the moment. I've got heaps still to do on LJ before the big trip and time is running out.
I wanted to replace my tatty old rear door trims with some alluminium and as weve got heaps of checkered plate I decided to use that.


I then decided I wasnt quite happy with them and wanted to make a few changes.
So I made a new set. (We will come back to this shortly)
Rear bumper next........................
I've decided to try using a Kaymar style latch on the swing away wheel carrier.
I'm going to make my own, so I took some pics of the Kayamar one.


I made a start building one.


Thats as much as I got done on that project this week.
Drawers next...............................
When I built my drawer system I built the drawer boxes out of 4mm alluminium and this made them very heavy.
So after looking at some BlackWidow ones last week in a customers car I decided I'd make some new ones.
I bought some 1.6mm galvanized sheet.


I also got some galvanized box section as well as the alluminium box I used as drawer runners on the last set had got a bit distorted in places so I decided steel would be better.

Cut it to size and marked out where it needed bending.


Folded the sheet.


I realized at this point that I had cocked up slightly and made one of the drawers 100mm too long.
Thats due to the fact I made them in my 30min lunch break and so was rushing to get them done.


I also folded up some pieces to close the oped ends off with.

I brought the whole lot home and yesterday I did some more.

The old heavy drawers.


The actual frame is nice and strong and I'm happy with it, it was just the drawer boxes that wernt great.

First job was to trim the one drawer to length.


The next job was to close the ends off.


M5 bolts and lock nuts to bolt the ends on.


The impact driver was useful for doing all the bolts up with.

Runners next.

Marked where the runners needed bolting on.

Marked, center punched and drilled some 6mm holes all the way through them.

I then enlarged the holes on one side of the box section using a step drill. (Step drills are awesome for things like this and heaps quicker than a hole saw/big drill bit)


M6 bolts to hold them on with.


One done.


Other one.

I also cocked up again when I cut and folded the sheet to cap off the ends of the big drawer as I had intended on making them longer than I needed so I could fold and bolt it through the sides as well.
I was able to do this with the smaller drawer.
Adding the other 2 folds.


Done!

I'm going to make some fronts for them out of alluminium and I cant decide whether to carpet the inside of them with marine carpet like the BlackWidow ones.
Next I wanted to look at the panels for the sides.

I was keen to make full use of the space inside the gaurds.


I needed to cut the bottom of the alluminium to the contour of the wheel arch.


I was considering cutting out this upright to allow me to have even bigger storage boxes.


I marked the back of the sheet where the storage box will be.


And also where the vent is, which I will drill some holes through for.

I layed the old card on top of the alluminium and drilled through the holes where the plastic push in fastener were to mark my new one. I will drill and bolt it on using rivnuts inserted into the body.


And that was as far as I got. Today has been a bed day due to a very messy night out in the city last night.
I'm hoping to get a bit more done Monday and Tuesday nights, then Wednesday night is TAFE then its holiday time!
So I need to finish the drawers, build the storage boxes and weld them to the back of the alluminium side panels and bolt them in.
I need to finish building the latch for the swingaway wheel carrier then the rear bumper can get shot blast, electroplated and powder coated.
I need to source/make the adjustable panhard rods.
Design some bottom shock mount adapters for the rear shocks and then order and fit new shocks.
Order the awning which will be mounted above the back doors and then weld mounts onto the roof rack for it. I'm also thinking I will weld a tube above it to make sliding the OZTent over the top of it easier. Then the roof rack can be powder coated and fitted.
I also want to make a new center console out of alluminium.
I need to order a Pyro and EGT gauge, LED light bar for the bull bar, 2 x LED work lights to be mounted on the swing away wheel carrier, and a super loom. Then the auto electrician is going to pull every bit of aftermarket wiring out and rewire the whole car.
I want a nice, clearly labeled fuse box in the engine bay and an anderson socket on the bull bar. I'm then going to cut the power cord off my compressor and make a new, longer one up with an anderson plug on the end to make inflating the tyres a bit quicker and easier.
I've also been thinking a nice big isolator switch would work really well between the 2 batteries. So if I'm ever parked up for a few days I can disconnect the 2 batteries and leave the fridge running off one battery, knowing that the other battery will stay charged ready to start the car when it comes time to move on.
As always I welcome your thoughts and opinions.
Attachments
-
 P7070013_zps572780a2.jpg59.4 KB · Views: 56
 -
 P7070014_zpscd5f643b.jpg45 KB · Views: 57
 -
 P7090036_zps2222e50f.jpg57.9 KB · Views: 67
 -
 P7090037_zps785b1e57.jpg57.2 KB · Views: 58
 -
 P7090038_zpsea0de4e0.jpg61.9 KB · Views: 63
 -
 P7090039_zps931bd937.jpg57.4 KB · Views: 65
 -
 P7090040_zpse3e598ad.jpg69 KB · Views: 64
 -
 P7090041_zpsab31e3b2.jpg64.7 KB · Views: 43
 -
 P7090042_zps1e16634a.jpg61.3 KB · Views: 60
 -
 P7090043_zps369f48c8.jpg49.9 KB · Views: 66
 -
 P7090045_zps040fad5d.jpg59.9 KB · Views: 56
 -
 P7090046_zpsa3f7e822.jpg65.4 KB · Views: 70
 -
 P7090048_zps2c6aee7a.jpg61 KB · Views: 42
 -
 P7090049_zps25de870b.jpg50.1 KB · Views: 56
 -
 P7090050_zps73d43ccd.jpg50.1 KB · Views: 56
 -
 P7090051_zpsba147bba.jpg71.1 KB · Views: 65
 -
 P7090052_zps1ccbe1cb.jpg52.3 KB · Views: 62
 -
 P7090053_zpsbbc61612.jpg52.6 KB · Views: 52
 -
 P7090055_zpsac5f930b.jpg48.3 KB · Views: 52
 -
 P7090056_zps0f5e9748.jpg50.8 KB · Views: 57
 -
 P7090057_zpsaedc3386.jpg58.6 KB · Views: 48
 -
 P7090060_zps5e974107.jpg55.3 KB · Views: 55
 -
 P7090062_zpsd2bdf1fa.jpg55.5 KB · Views: 141
 -
 P7090063_zps78fb691d.jpg63.1 KB · Views: 65
 -
 P7100067_zpsab812821.jpg50.6 KB · Views: 53
 -
 P7100068_zps2e689027.jpg61.8 KB · Views: 43
 -
 P7100069_zps666ad91f.jpg61.5 KB · Views: 56
 -
 P7100070_zps2a500f98.jpg54.9 KB · Views: 52
 -
 P7100078_zpsf05f5442.jpg63.9 KB · Views: 49
 -
 P7100079_zps57cfe311.jpg61.6 KB · Views: 55
 -
 P7100080_zpsc8301e0b.jpg61.3 KB · Views: 49
 -
 P7100082_zpsd5047edf.jpg62 KB · Views: 67
 -
 P7100083_zpsdc644cb8.jpg51.7 KB · Views: 48
 -
 P7090044_zpsd2221a9c.jpg50.5 KB · Views: 66
 -
 P7100084_zpseac68e0e.jpg58.5 KB · Views: 68
 -
 P7060001_zpsf3aedada.jpg76 KB · Views: 72
 -
 P7060002_zps50d26dab.jpg59.8 KB · Views: 53
 -
 P7060003_zps7c00fb8e.jpg63.9 KB · Views: 90
 -
 P7060005_zpsda5fad00.jpg78.5 KB · Views: 56
 -
 P7060007_zpsa137ba96.jpg48.2 KB · Views: 51
 -
 P7060009_zpscc798943.jpg63.5 KB · Views: 67
 -
 P7060010_zpsb14619f3.jpg55 KB · Views: 62
 -
 P7060011_zps267273e5.jpg54.6 KB · Views: 56
 -
 P7120174_zpsc74a2b6b.jpg75.3 KB · Views: 60
 -
P7080015_zps38eacec6.jpg94.8 KB · Views: 0
Last edited:
warrenpfo
Well-Known Member
- Joined
- Jul 21, 2010
- Messages
- 2,895
I don't know where you find the time and the money for all the material used.
If I can spend 4 hours a week that's a lot and I have to plan weeks ahead.
Once again great work and I would not remove that upright to increase the box but rather extend the box behind the brace if that makes sense.
If I can spend 4 hours a week that's a lot and I have to plan weeks ahead.
Once again great work and I would not remove that upright to increase the box but rather extend the box behind the brace if that makes sense.

Gary820
Well-Known Member

Great work.
I'd put carpet inside the drawers, bit less noise from stuff rattling around. I don't like stuff rattling away for hours while off road though.
now if you can knock a set of drawers up for the back of a 80 and put them in your suitcase
I'd put carpet inside the drawers, bit less noise from stuff rattling around. I don't like stuff rattling away for hours while off road though.
now if you can knock a set of drawers up for the back of a 80 and put them in your suitcase
Paddler Ed
Well-Known Member
I know that it's overkill for the compressor, but have a look at setting up that front Anderson plug for use with a set of jump leads... so much easier than openning the bonnet and hooking them up, plug in and go! Then once it's started, just pull the Anderson plug out, and off they go. We had them on the work utes when I worked on the Coast, the twin battery Troopy made jump starting a cinch; fast idle, connect jump leads to other car, plug into the Anderson plug, leave for long enough to walk round to the cab and the other car would be ready to start. We tended to use it for jump starting other vehicles, rather than jumps starting the one with the Anderson (but that was often because we were using something else with an Anderson as the "good" vehicle)
- Joined
- Oct 13, 2010
- Messages
- 6,058
- Country Flag
Thanks guys.
Another good use for the anderson plug is being able to put my batteries on charge without lifting the bonnet, as I will wire an anderson plug onto my battery charger.
As LJ is just a toy, sometimes it can be weeks without me driving it so its nice to keep the batteries topped up.
Another good use for the anderson plug is being able to put my batteries on charge without lifting the bonnet, as I will wire an anderson plug onto my battery charger.
As LJ is just a toy, sometimes it can be weeks without me driving it so its nice to keep the batteries topped up.
Last edited:
Paddler Ed
Well-Known Member
What size Anderson are you going for? I want to set mine up with a jump start plug, but I'm not sure what to go for... I'd be looking at getting mine from these guys, but I suspect you may have an alternative source  I think that either the 175 or the 350A would be the right rating, but I'm not sure... I don't understand electricity well enough
I think that either the 175 or the 350A would be the right rating, but I'm not sure... I don't understand electricity well enough