Don't like the adverts? Click here to remove them
You are using an out of date browser. It may not display this or other websites correctly.
You should upgrade or use an alternative browser.
You should upgrade or use an alternative browser.
LJ78 Build Thread
- Thread starter Ben
- Start date
- Joined
- Oct 13, 2010
- Messages
- 6,058
- Country Flag
Thanks guys. 
Thanks Owen.
Not sure exactly yet, my Czech friend Jiri and his partner (who I met through this club recently) is coming round in a few weeks for beers and dinner and we are going to plot the route.
We will certainly be in that area though, so I think will probably do it.
I want to do the Crooked River track again and I'd like to camp there so I can try some gold panning. I'd also like to head to Dargo for a beer and we will probably do both Billy Goat and Blue Rag Range tracks.
It will be almost 3 years since I last visited The High Country and I cant wait to get back!
Great work Ben, as ever. Where you going in the High Country? You doing the Billy Goat track?
Owen
Thanks Owen.
Not sure exactly yet, my Czech friend Jiri and his partner (who I met through this club recently) is coming round in a few weeks for beers and dinner and we are going to plot the route.
We will certainly be in that area though, so I think will probably do it.
I want to do the Crooked River track again and I'd like to camp there so I can try some gold panning. I'd also like to head to Dargo for a beer and we will probably do both Billy Goat and Blue Rag Range tracks.
It will be almost 3 years since I last visited The High Country and I cant wait to get back!

- Joined
- Oct 13, 2010
- Messages
- 6,058
- Country Flag
Will do mate. 
Plan is to leave Thursday night and head towards Lake Eildon/Mansfield. It would be night to make it as far as say Woods Point and camp round there some where but we will have to see. (Camping with a baby might complicate things slightly/slow us down)
Then drive all day Friday and stop to camp around 3-4pm. Then the same the next day then head home on the Sunday.
I cant wait!!!!!!!!
Plan is to leave Thursday night and head towards Lake Eildon/Mansfield. It would be night to make it as far as say Woods Point and camp round there some where but we will have to see. (Camping with a baby might complicate things slightly/slow us down)

Then drive all day Friday and stop to camp around 3-4pm. Then the same the next day then head home on the Sunday.
I cant wait!!!!!!!!

Scott
Well-Known Member
- Joined
- Mar 17, 2010
- Messages
- 1,046
I remember Dargo, lovely area. Loads of rural firefighting Land Cruisers rocked up when we were there.....I'd also like to head to Dargo.....
Have a great trip.
Don't like the adverts? Click here to remove them
- Joined
- Oct 13, 2010
- Messages
- 6,058
- Country Flag
Tiny update................
I tried the baby capsule in the middle of the car and it fits a lot better as it means both front seats can slide all the way back. Where as before the passenger seat would only go back half way.
It will also mean little Sammy is in the safest position in the car, right in the middle!
I hadnt fitted it in the middle before because the rear seat is a split seat the top tether strap would have slipped down the split between the seats as I was mounting the top tether to where the rear seat mounts to the floor pan.
Where as now I can fit a restraining point to the roof section above the rear doors (like the new V8 76 wagons) and have the baby capsule in the middle of the car.
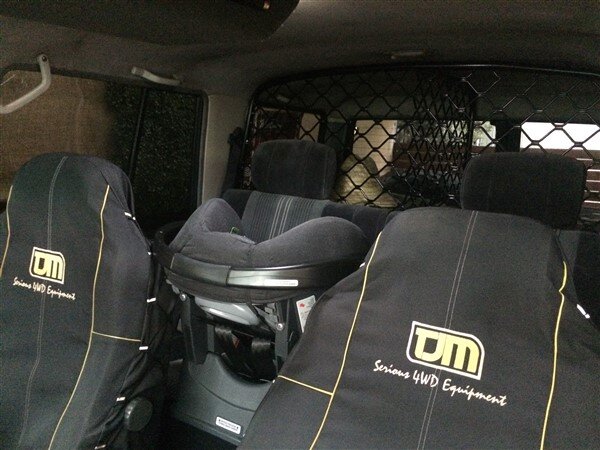
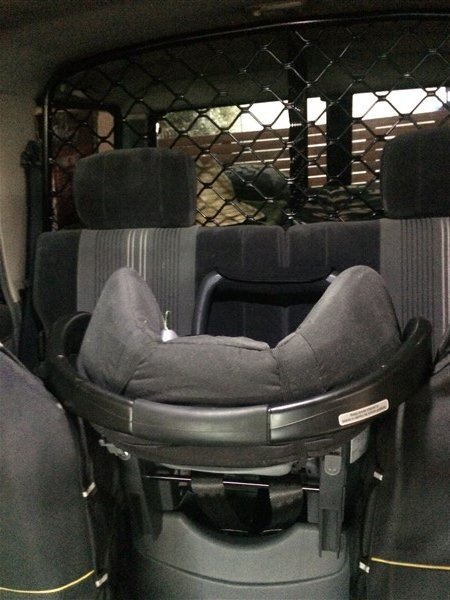
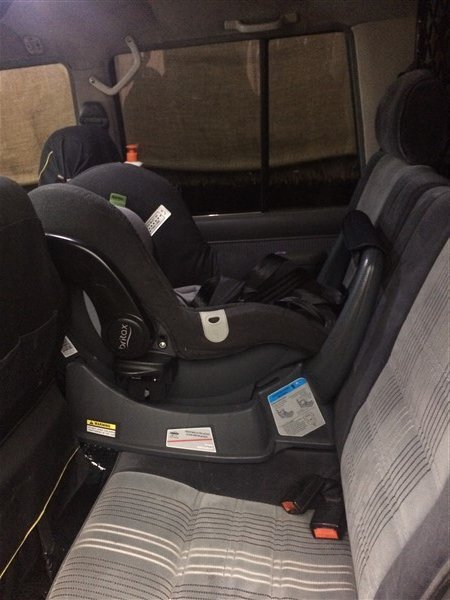
The top tether will come through the new alluminium cargo barrier.
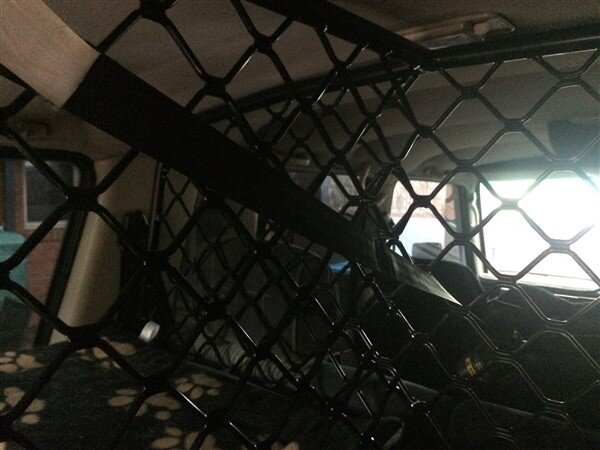
And currently stops 300mm short of where the restraining point will be bolted.
So I will order an extension strap.
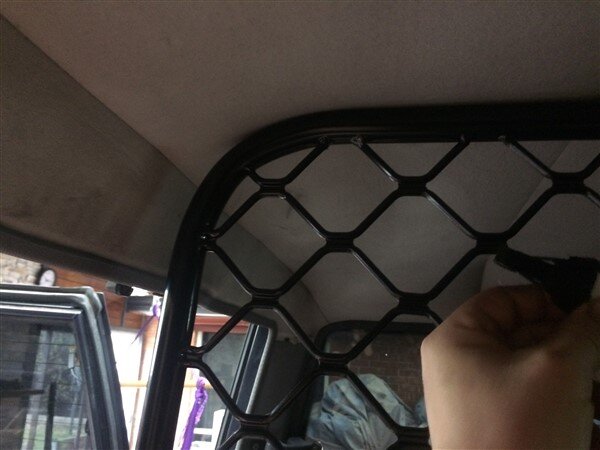
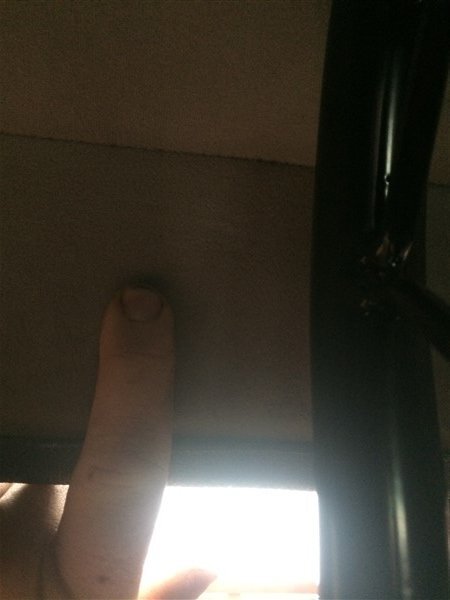
The hole in the body where the restraining point will mount is about 50mm in from the edge of the barrier, which should work well.
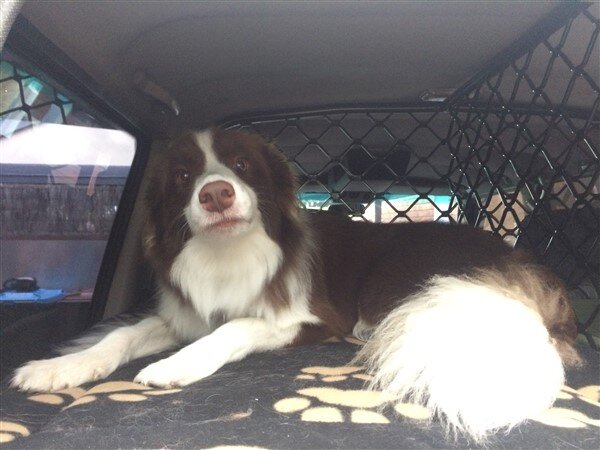
Lexi is in love with the new setup and cant wait to go camping!
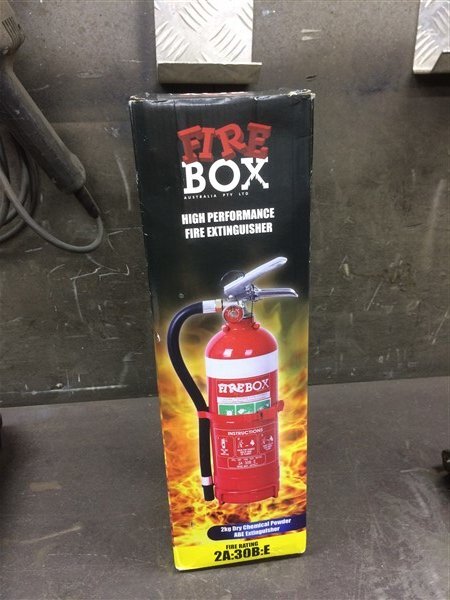
My new fire extinguisher turned up this week and this time I ordered the correct size!
This one is a 2kg one where as the last one was a 2.5kg and wouldnt fit.
Got it mounted to the side of the drivers seat.
The seat still moves fully and the door closes fine.
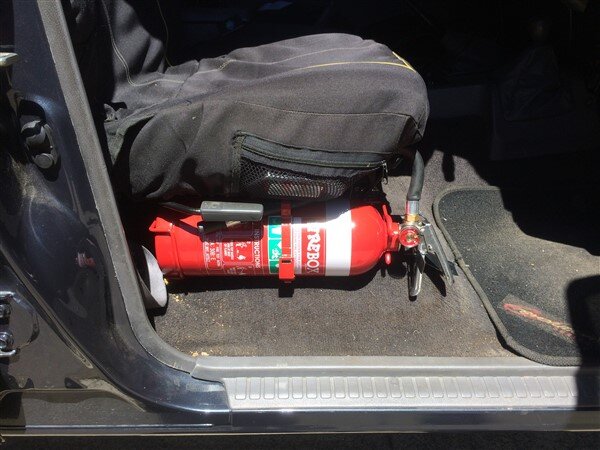
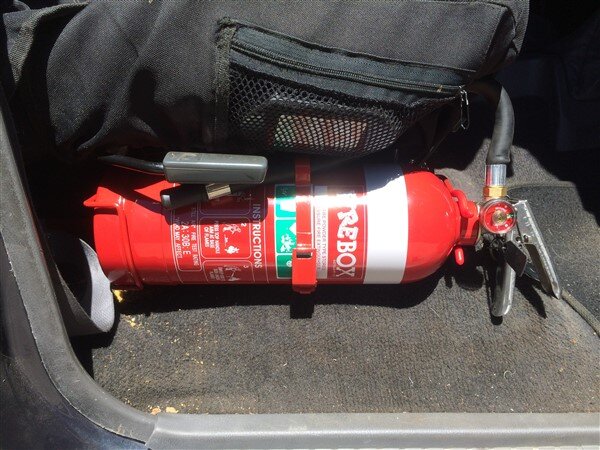
And finally I picked up some of the supplies I will need for wiring everything up!
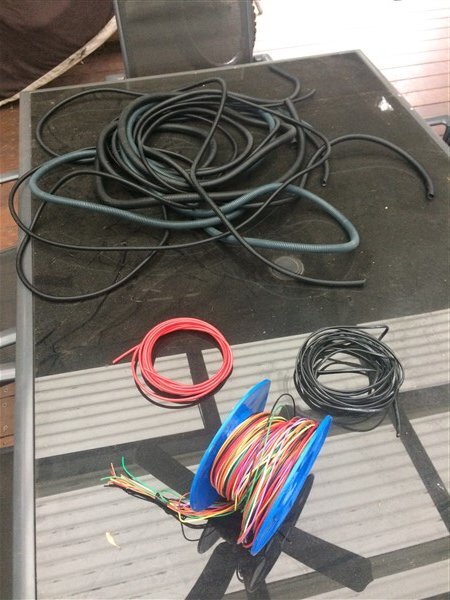
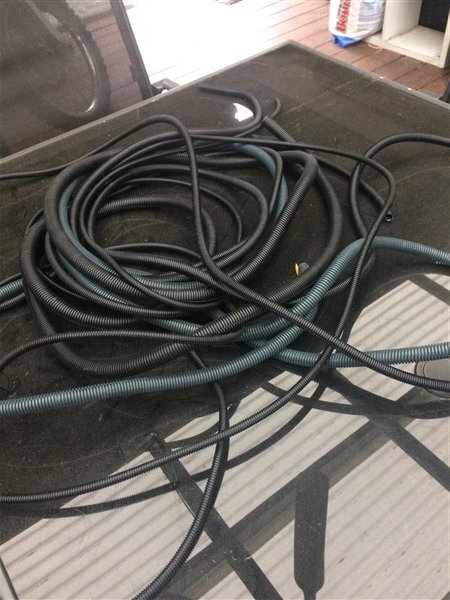
A load of split tubing.
Some 2mm twin core for the EGT sensor and hose for the boost gauge.
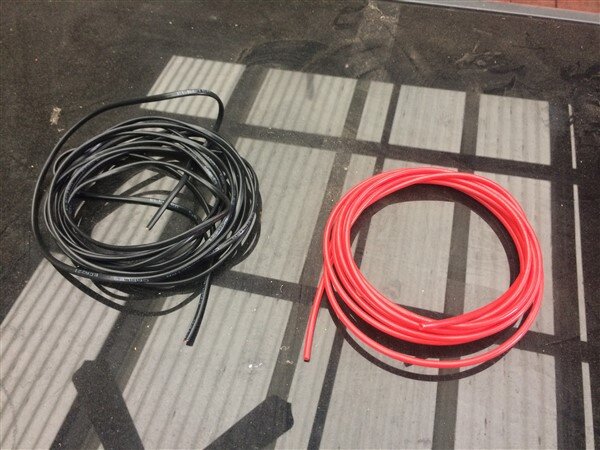
And 5 meters of wire for my loom.
10 different colours of 2mm which will mainly just be going from switches to relays and 3 different colours of 3mm which will be supplying power and earth from the battery and ignition live up to the roof console.
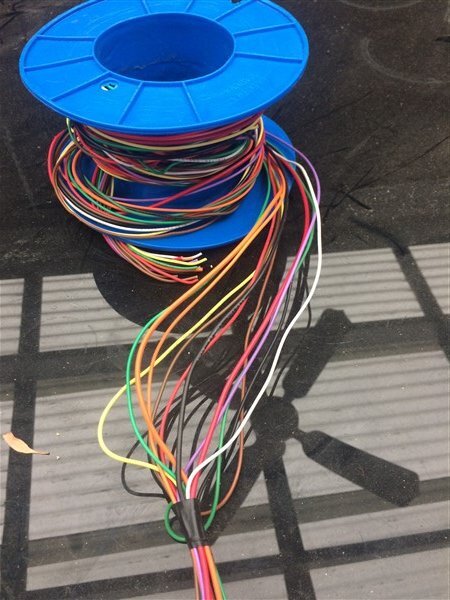
The fuse/relay box should be here any day now.
I need to nip to work and pick up the sliding tie down rails for the back of the car (off work this week as I have my parents visiting)
And today I'm going to have a look at a standard 4:8 ratio Hilux/Bundera diff which will hopefully fit my axle.
If it does I will grab that and get my E locker built into it with a solid pinion spacer.
If its no good I will take a chance and order a new 4:8 ring and pinion from the US and hope it fits my diff.
I tried the baby capsule in the middle of the car and it fits a lot better as it means both front seats can slide all the way back. Where as before the passenger seat would only go back half way.
It will also mean little Sammy is in the safest position in the car, right in the middle!
I hadnt fitted it in the middle before because the rear seat is a split seat the top tether strap would have slipped down the split between the seats as I was mounting the top tether to where the rear seat mounts to the floor pan.
Where as now I can fit a restraining point to the roof section above the rear doors (like the new V8 76 wagons) and have the baby capsule in the middle of the car.


The top tether will come through the new alluminium cargo barrier.

And currently stops 300mm short of where the restraining point will be bolted.
So I will order an extension strap.

The hole in the body where the restraining point will mount is about 50mm in from the edge of the barrier, which should work well.

Lexi is in love with the new setup and cant wait to go camping!

My new fire extinguisher turned up this week and this time I ordered the correct size!
This one is a 2kg one where as the last one was a 2.5kg and wouldnt fit.

Got it mounted to the side of the drivers seat.
The seat still moves fully and the door closes fine.


And finally I picked up some of the supplies I will need for wiring everything up!

A load of split tubing.

Some 2mm twin core for the EGT sensor and hose for the boost gauge.

And 5 meters of wire for my loom.
10 different colours of 2mm which will mainly just be going from switches to relays and 3 different colours of 3mm which will be supplying power and earth from the battery and ignition live up to the roof console.

The fuse/relay box should be here any day now.
I need to nip to work and pick up the sliding tie down rails for the back of the car (off work this week as I have my parents visiting)
And today I'm going to have a look at a standard 4:8 ratio Hilux/Bundera diff which will hopefully fit my axle.
If it does I will grab that and get my E locker built into it with a solid pinion spacer.

If its no good I will take a chance and order a new 4:8 ring and pinion from the US and hope it fits my diff.

alexy
Active Member
- Joined
- Oct 2, 2015
- Messages
- 90
- Country Flag
Hi Ben,
I just bought the forward facing seat for our little one and instructions say only attach with a 3 point seat belt (no isofix option of course).
Did you check if your baby seat is ok with only the two point belt? looks it would get wedged between seats somehow, but guess it must not move much once you clip it in.
Hi Ben, might be an idea to mount another identical fire extinguisher in the same location on the passenger side, I’m guessing it wasn’t too expensive.
When I had my leccy fire, I was so glad I had 2 to hand... they were smaller than yours in all fairness, but when there’s still flames and no powder left, goodness knows the feeling...
When I had my leccy fire, I was so glad I had 2 to hand... they were smaller than yours in all fairness, but when there’s still flames and no powder left, goodness knows the feeling...
- Joined
- Oct 13, 2010
- Messages
- 6,058
- Country Flag
hi Ben
ITO additional fuel. What about the small rear door external jerrycan mount? An OEM Toyota idea. you would need to modify the rear door hinges and re-configure the numberplate plus light.
cheers
Thanks Rob, thats a good idea.
I really want to keep the outiside looking reasonably standard though.
I was looking underneath and there is a huge space between the chassis rail and gearbox on the passenger side. I think I could easily get a 40-50 litre auxiliary tank in there.

So maybe I will build one.
Hi Ben,
I just bought the forward facing seat for our little one and instructions say only attach with a 3 point seat belt (no isofix option of course).
Did you check if your baby seat is ok with only the two point belt? looks it would get wedged between seats somehow, but guess it must not move much once you clip it in.
Yes ours can be secured with just a lap belt and obviously the top tether. It also wedges beautifully in place between the front seats so it really cant move far!
In my wifes Subaru XV I found the 3 point belt securing the capsule in place was always working loose, even with one of these 3 bar gated slides fitted.
https://www.ebay.com.au/itm/Safe-n-...511690&hash=item33dd035713:g:KNcAAOSwc7RaLk34
Then I bought one of these last week and its been a game changer!

The capsule is now secured beautifully and doesnt move an inch!

https://www.ebay.com.au/itm/Adjusta...188764&hash=item466ba35d73:g:LKAAAOSw2FxZu5km
Sadly obviously Isofix isnt an option in our old 70's!
Hi Ben, might be an idea to mount another identical fire extinguisher in the same location on the passenger side, I’m guessing it wasn’t too expensive.
When I had my leccy fire, I was so glad I had 2 to hand... they were smaller than yours in all fairness, but when there’s still flames and no powder left, goodness knows the feeling...
Yes good thinking!
Wasnt much money, came in less than $50!
alexy
Active Member
- Joined
- Oct 2, 2015
- Messages
- 90
- Country Flag
cool!
how you secure the belt? is your capsule isofix compatible? can you secure the belt into the bench frame?
now that you are set, dont forget to get a large mirror so Sammy could check on you guys. and you could check on him. mind you, most mirrors are poor little things and you cant see much. I ended up getting the biggest rectangular one I could find and the child used it as a "mini" tv to check on her mother.
rob rule
Member
- Joined
- Feb 23, 2011
- Messages
- 160
hi Ben
ito fuel -also look at 79 series pick ups - they have dual tanks, dual fuel gauges on the drivers' clocks and a cross-over switch....but they have 2 filler points
ITO overlanding dual (separate) tanks are probably better than 1 large tank (rupturing one or filling with a contaminated product)
and they do add weight (with all those pros and cons) and more things to potentially go wrong
Keep up your masterful work
rgds
- Joined
- Oct 13, 2010
- Messages
- 6,058
- Country Flag
Work is progressing well on this build in the 2 key areas I'm currently focusing on, the rear diff and electrics! 
Update soonish.
The capsule isnt Isofix. We didnt buy an Isofix one as we wanted to be able to also fit it into the LandCruiser's.
The Isofix belt I bought replaces the normal seat belt used to secure the capsule, instead using 2 of the Isofix sockets in the rear seat.
Yeah got a nice big mirror, although since putting the capsule in the middle of the rear seat I find I cant really see him as I just get the light/reflection from the windscreen shining in the mirror.
I havent, but thanks for the suggestion.
The diff situation should all be resolved very soon as I've enlisted an expert who as we speak is building me a diff!
I will explain more in my next update.

Thanks Rob.
Yeah I do like those instrument clusters with the 2 fuel gauges on them!!
If I end up going duel tanks I will fit one of those for sure!
Not sure where I would put the filler neck if I mount a tank on the passenger side next to the gear box.
One of the guys I know on the Facebook page has an LJ78 up in Bribane and he has cut the tool box off that is built into the floor pan at the back of the car and fitted a 130 litre standard VDJ76 tank. Because the new V8 70's with this body ( the VDJ76's) dont have that tool box in the floor pan and with it not there there is much more room for a bigger tank.
But I quite like that quirky feature of the LJ78's/KZJ78's so would like to keep mine!
Update soonish.
cool!
how you secure the belt? is your capsule isofix compatible? can you secure the belt into the bench frame?
now that you are set, dont forget to get a large mirror so Sammy could check on you guys. and you could check on him. mind you, most mirrors are poor little things and you cant see much. I ended up getting the biggest rectangular one I could find and the child used it as a "mini" tv to check on her mother.
The capsule isnt Isofix. We didnt buy an Isofix one as we wanted to be able to also fit it into the LandCruiser's.
The Isofix belt I bought replaces the normal seat belt used to secure the capsule, instead using 2 of the Isofix sockets in the rear seat.
Yeah got a nice big mirror, although since putting the capsule in the middle of the rear seat I find I cant really see him as I just get the light/reflection from the windscreen shining in the mirror.
As for the diff ratio, have you tried euro4x4parts? They sell loads of stuff, and good customer service!
I havent, but thanks for the suggestion.
The diff situation should all be resolved very soon as I've enlisted an expert who as we speak is building me a diff!

I will explain more in my next update.


hi Ben
ito fuel -also look at 79 series pick ups - they have dual tanks, dual fuel gauges on the drivers' clocks and a cross-over switch....but they have 2 filler points
ITO overlanding dual (separate) tanks are probably better than 1 large tank (rupturing one or filling with a contaminated product)
and they do add weight (with all those pros and cons) and more things to potentially go wrong
Keep up your masterful work
rgds
Thanks Rob.
Yeah I do like those instrument clusters with the 2 fuel gauges on them!!

If I end up going duel tanks I will fit one of those for sure!
Not sure where I would put the filler neck if I mount a tank on the passenger side next to the gear box.
One of the guys I know on the Facebook page has an LJ78 up in Bribane and he has cut the tool box off that is built into the floor pan at the back of the car and fitted a 130 litre standard VDJ76 tank. Because the new V8 70's with this body ( the VDJ76's) dont have that tool box in the floor pan and with it not there there is much more room for a bigger tank.

But I quite like that quirky feature of the LJ78's/KZJ78's so would like to keep mine!
- Joined
- Oct 13, 2010
- Messages
- 6,058
- Country Flag
OK, update time! 
Rear diff first.
My boss put me in touch with a master diff builder who after speaking with on the phone I decided I would see if he can fix my factory locked rear diff and if he can then I can fit the E locker into my front diff.
So I decided to pull the entire rear axle off so that I could make a few repairs to the axle and change the rear bushes in the trailing arms.
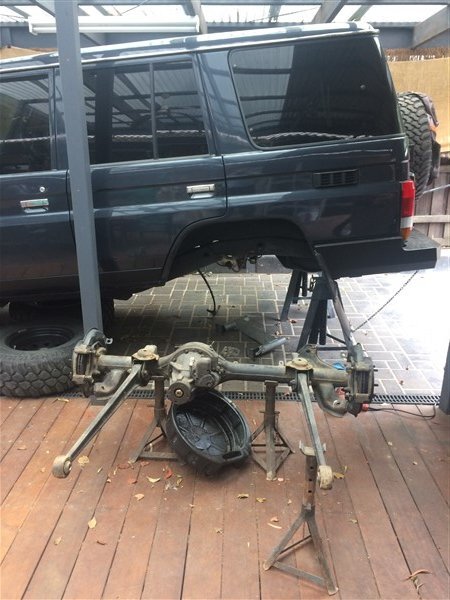
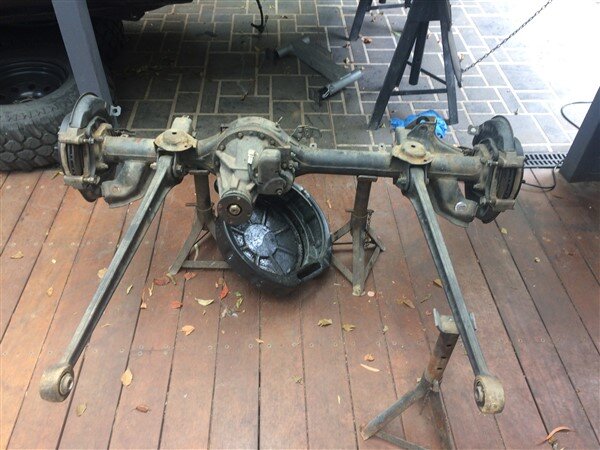
Drained the oil.
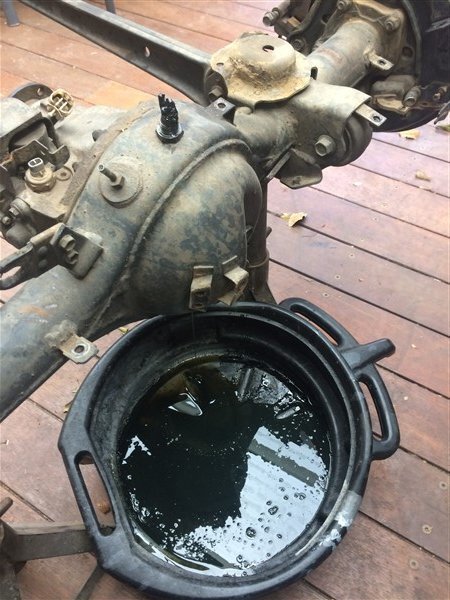
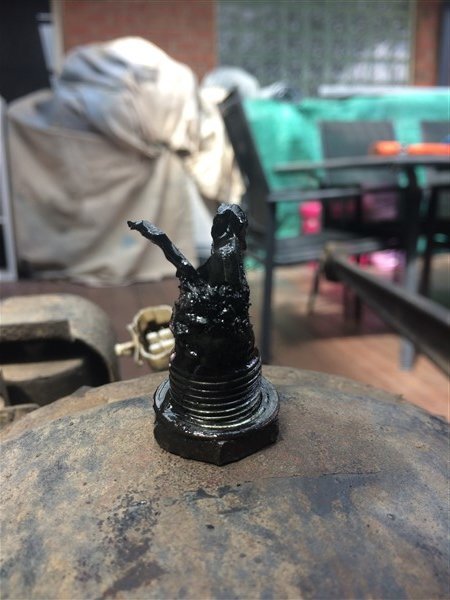
And unsurprisingly the magnetic drain plug looked like this.
I pulled the half shafts and diff out.
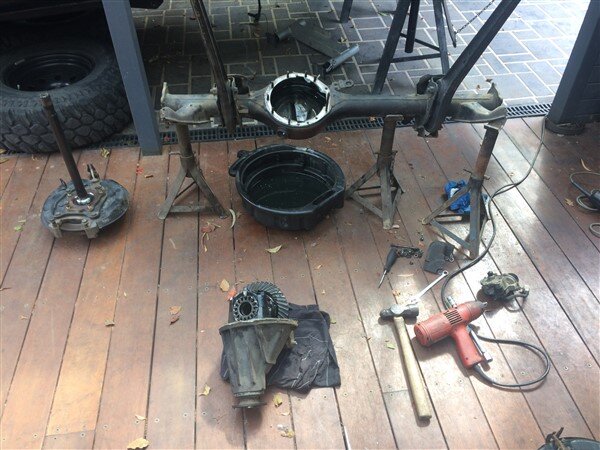
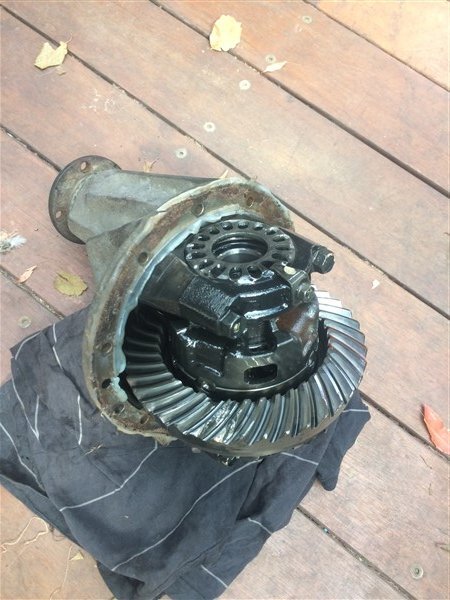
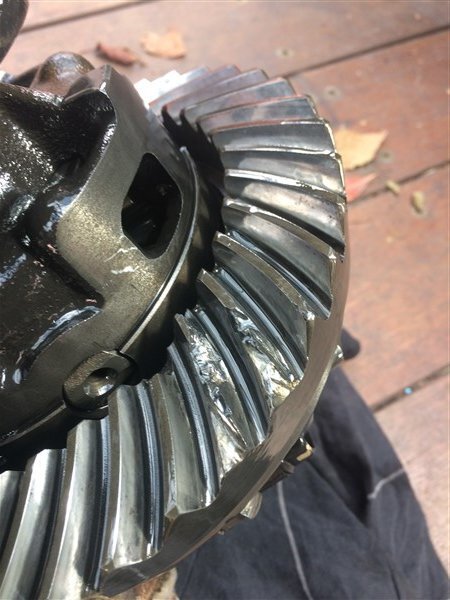
As suspected much more teeth damage to when I had the diff out last year.
Then I took the broken diff, the KZJ78 diff, the KZJ78 axle housing and the new E locker to the diff guy.
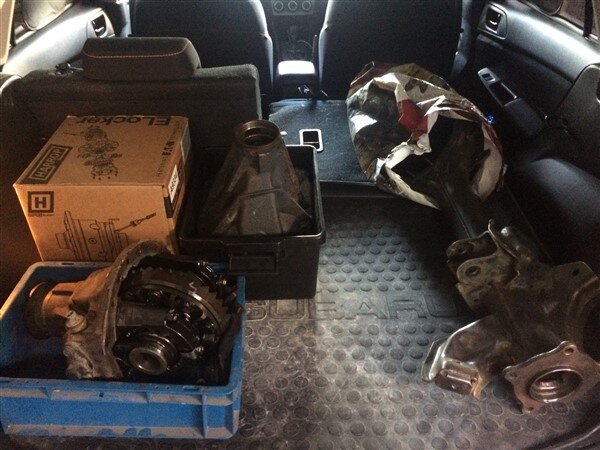
The reason I was taking the diff casing was because he had a 4:8 Hilux diff he was willing to give me, if he couldnt fix the factory locker and he was going to rebuild it with a solid pinion spacer and the E locker. And I wanted to confirm the Hilux diff would indeed fit my KZJ78 axle.
But as it turned out he was quite confident he would be able to fix it using the Hilux aftermarket ring and pinion that a guy in Brisbane had fitted to his factory locked LJ78 diff.
I pulled the trailing arms off.
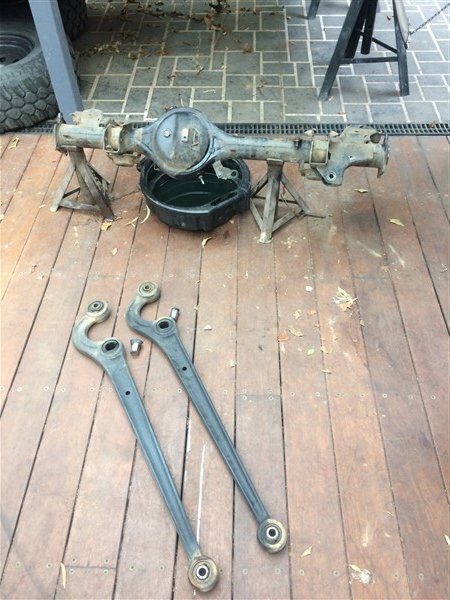
The bushes in each arm were completely knackered but I had a spare set with just one knackered bush in each arm that I chose to replace them with.
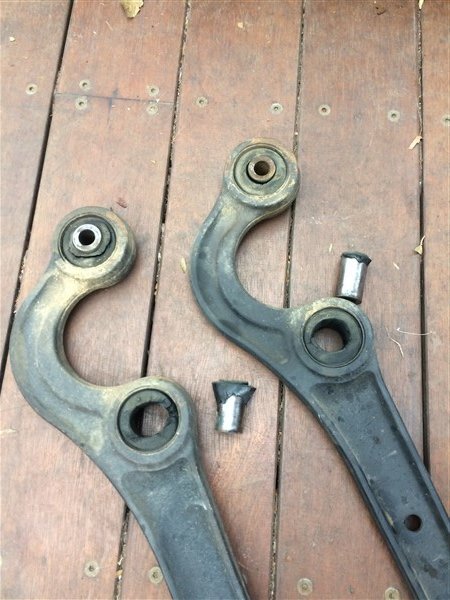
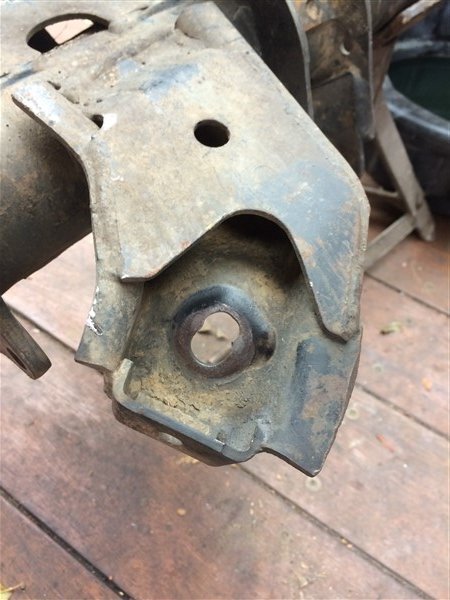
The axle casing was also damaged where the shocks mount as obviously at some point the bushes had completely worn out and the pin on the shock had flogged the holes out.
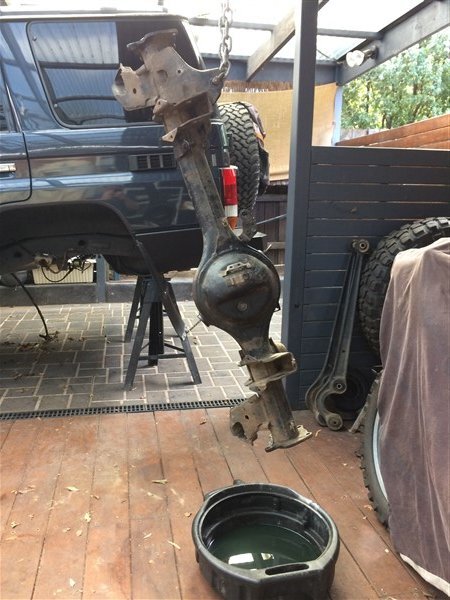
I hung it up to fully drain all the oil out.
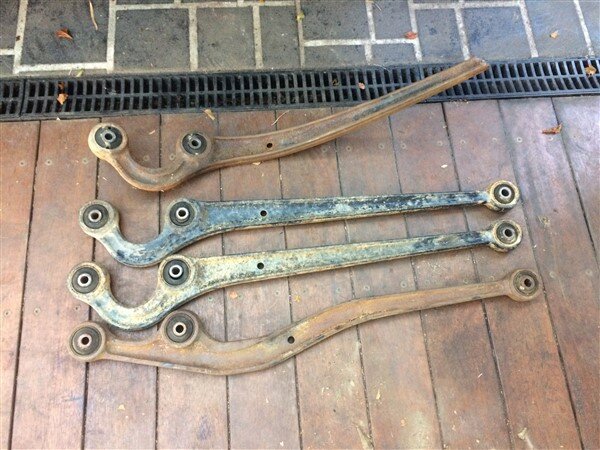
I dug out some spare arms with decent bushes.
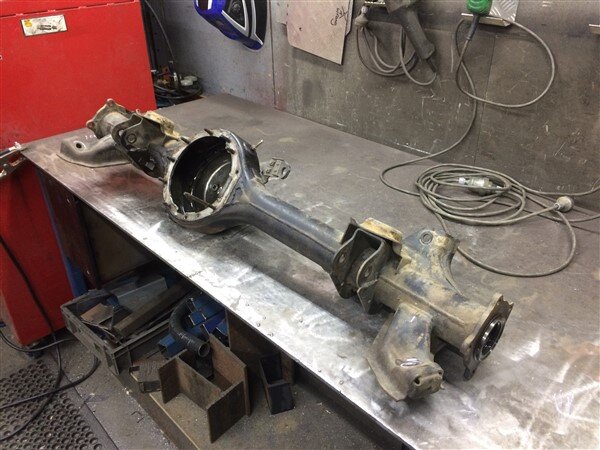
And took the whole lot to work.
Where I repaired the axle first.
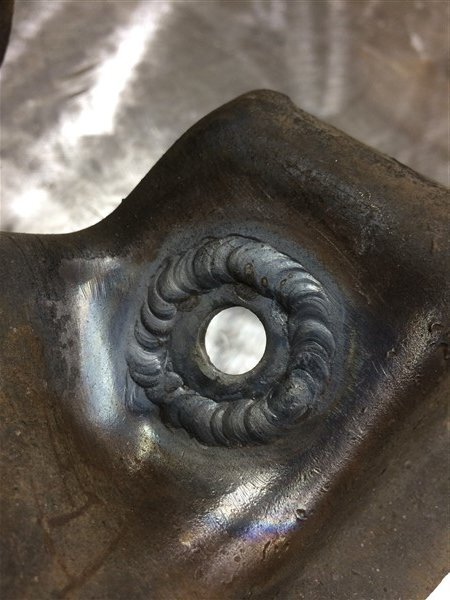
Marked around the thick 5mm thick repair washers I chose to weld into the axle.
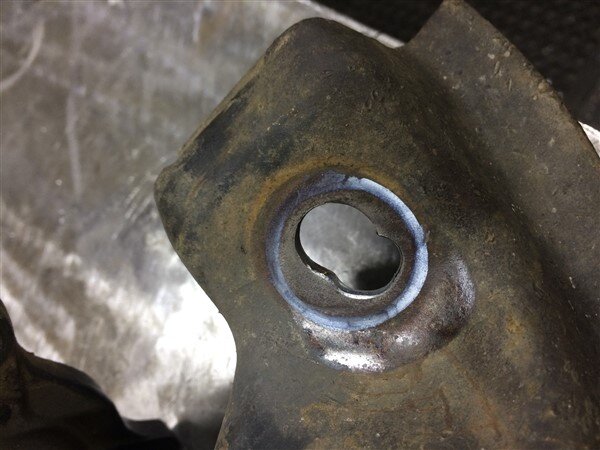
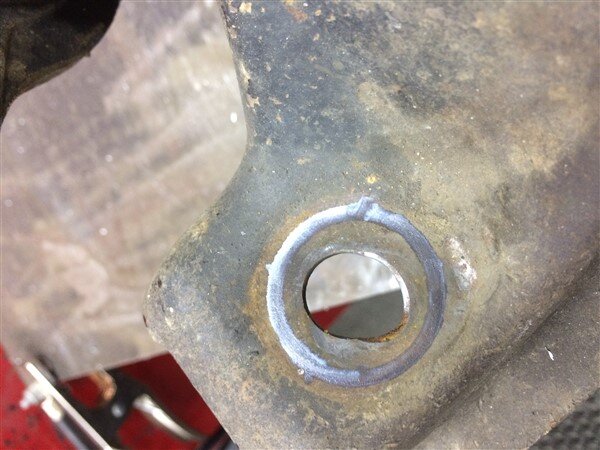
Die ground the holes out and tapped the washers in place.
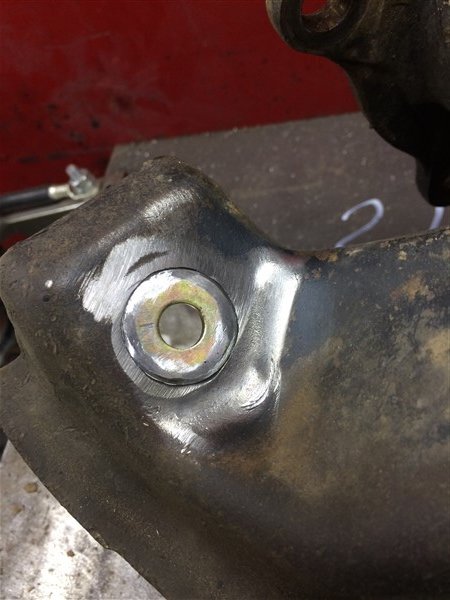
And TIG welded them in.
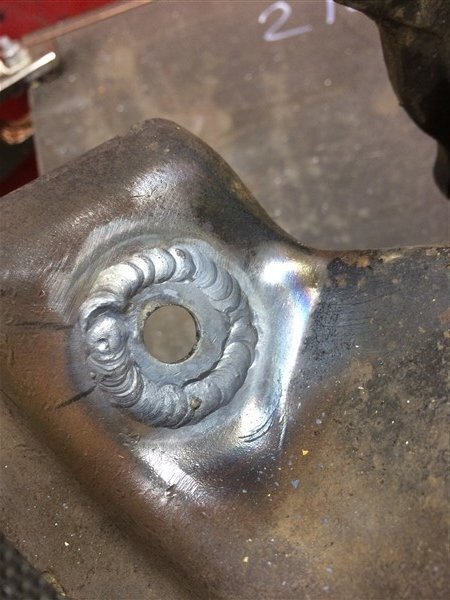
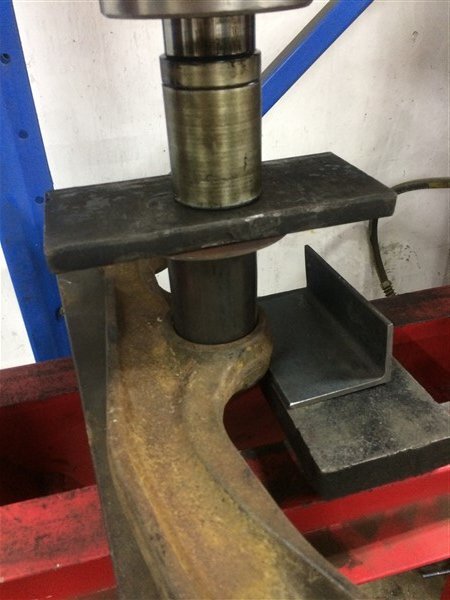
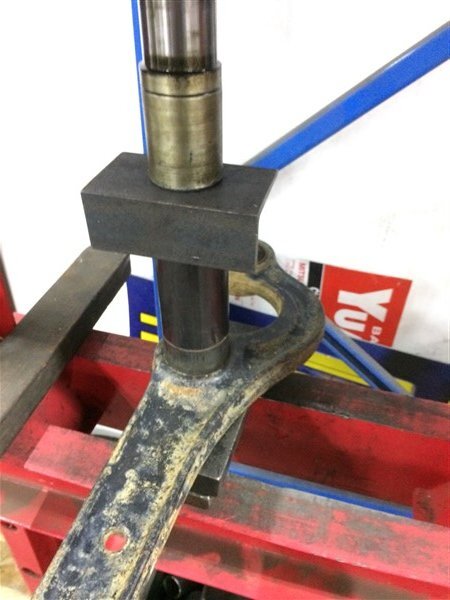
With that done, I pressed the old bushes and replacement bushes out.

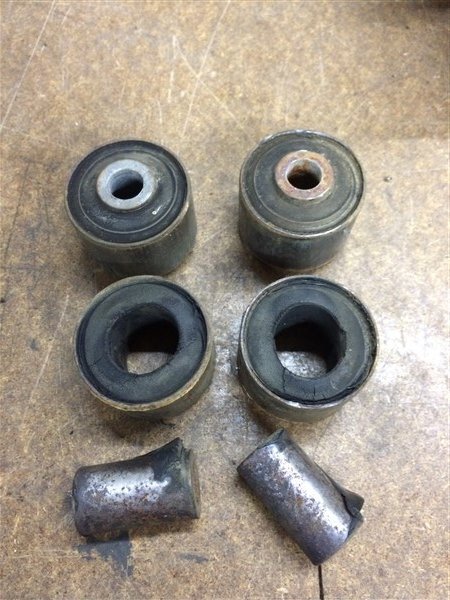
Old versus new.
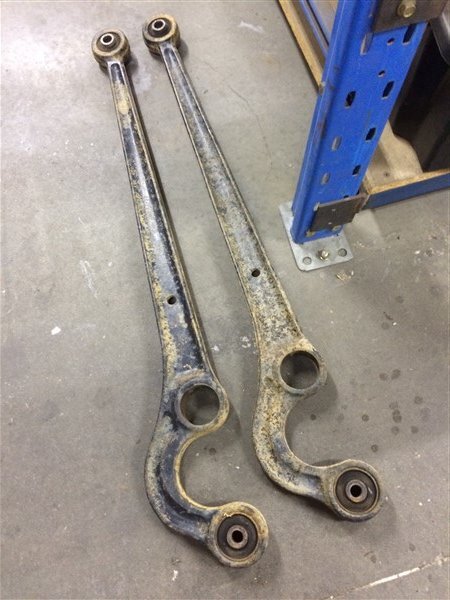
Arms all ready for the new bushes to be pressed in.
And in they went.
I brought it all home and today I picked up some paint.
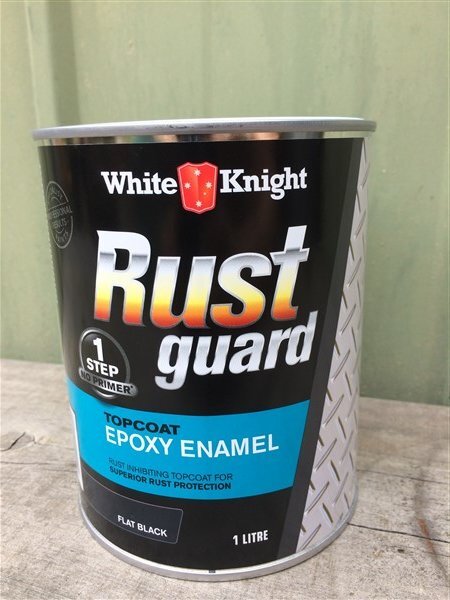
I cleaned everything up and hung them up in the workshop ready to paint.
I also hung the KZJ78 casing up as I had obviously already repaired it and cleaned it all up with a wire wheel in the grinder so to preserve it until I need it I figured I should probably paint it too.
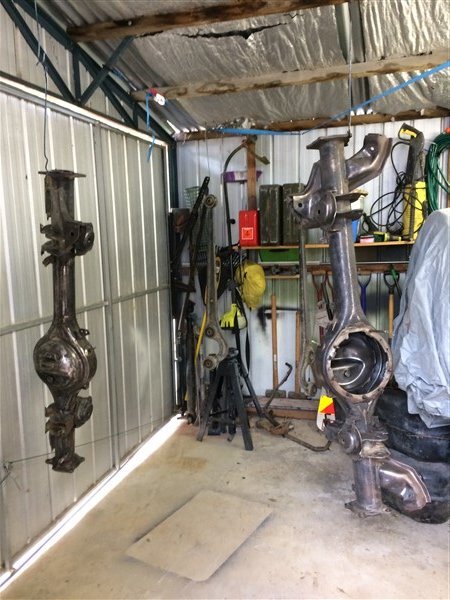
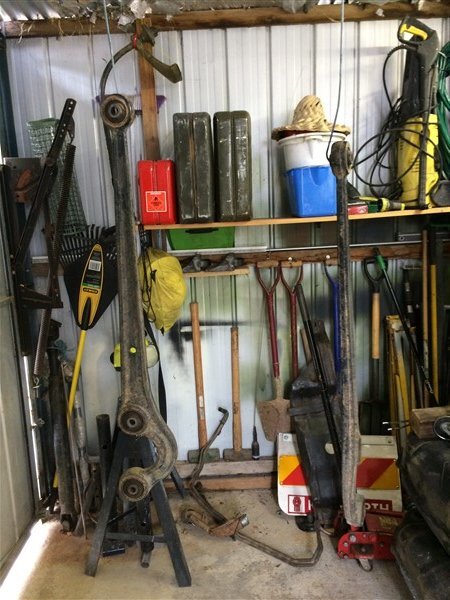
And hit it with a good coat of paint.
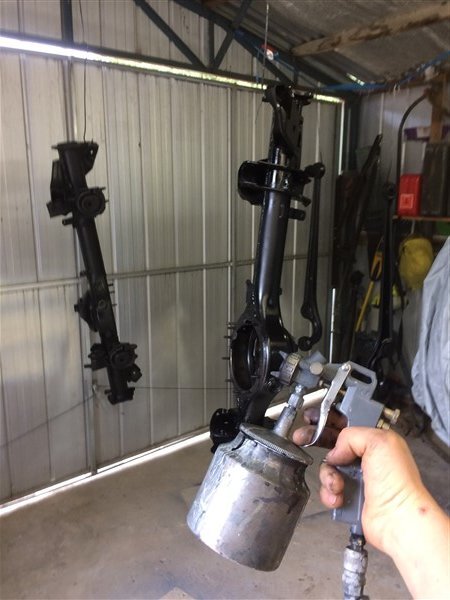
Tomorrow I will give them a second coat and then the LJ78 axle casting and arms can go back on.
*Next update coming shortly.

Rear diff first.
My boss put me in touch with a master diff builder who after speaking with on the phone I decided I would see if he can fix my factory locked rear diff and if he can then I can fit the E locker into my front diff.

So I decided to pull the entire rear axle off so that I could make a few repairs to the axle and change the rear bushes in the trailing arms.


Drained the oil.

And unsurprisingly the magnetic drain plug looked like this.


I pulled the half shafts and diff out.


As suspected much more teeth damage to when I had the diff out last year.

Then I took the broken diff, the KZJ78 diff, the KZJ78 axle housing and the new E locker to the diff guy.

The reason I was taking the diff casing was because he had a 4:8 Hilux diff he was willing to give me, if he couldnt fix the factory locker and he was going to rebuild it with a solid pinion spacer and the E locker. And I wanted to confirm the Hilux diff would indeed fit my KZJ78 axle.
But as it turned out he was quite confident he would be able to fix it using the Hilux aftermarket ring and pinion that a guy in Brisbane had fitted to his factory locked LJ78 diff.

I pulled the trailing arms off.

The bushes in each arm were completely knackered but I had a spare set with just one knackered bush in each arm that I chose to replace them with.

The axle casing was also damaged where the shocks mount as obviously at some point the bushes had completely worn out and the pin on the shock had flogged the holes out.


I hung it up to fully drain all the oil out.

I dug out some spare arms with decent bushes.

And took the whole lot to work.
Where I repaired the axle first.

Marked around the thick 5mm thick repair washers I chose to weld into the axle.


Die ground the holes out and tapped the washers in place.

And TIG welded them in.


With that done, I pressed the old bushes and replacement bushes out.


Old versus new.

Arms all ready for the new bushes to be pressed in.

And in they went.

I brought it all home and today I picked up some paint.

I cleaned everything up and hung them up in the workshop ready to paint.
I also hung the KZJ78 casing up as I had obviously already repaired it and cleaned it all up with a wire wheel in the grinder so to preserve it until I need it I figured I should probably paint it too.


And hit it with a good coat of paint.

Tomorrow I will give them a second coat and then the LJ78 axle casting and arms can go back on.
*Next update coming shortly.
Last edited:
- Joined
- Oct 13, 2010
- Messages
- 6,058
- Country Flag
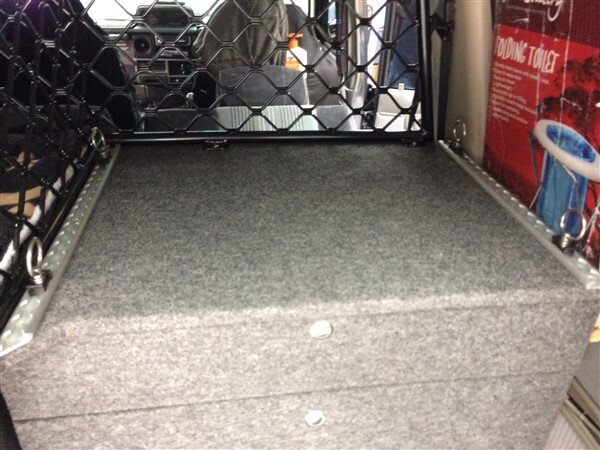
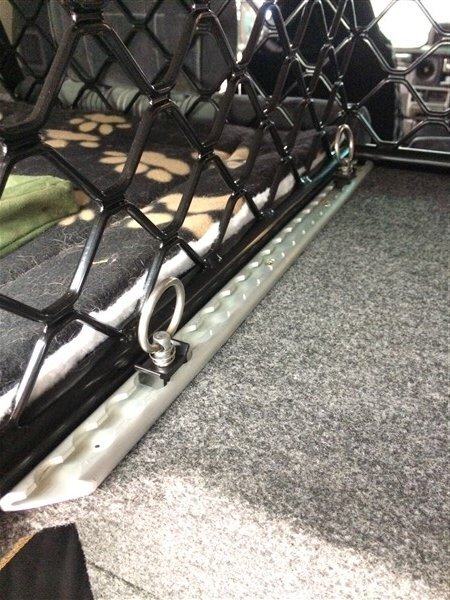
The alluminium tie down rails arrived.
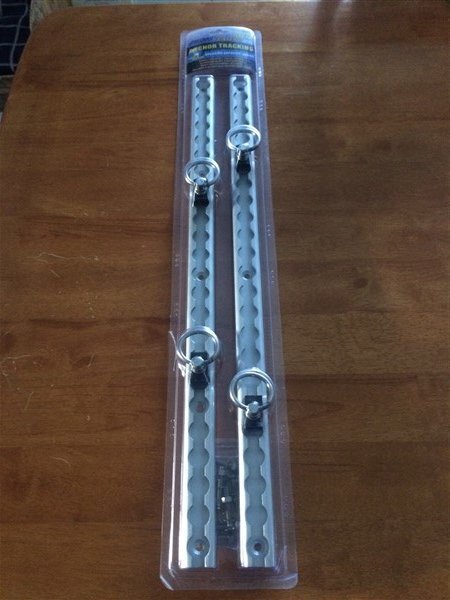
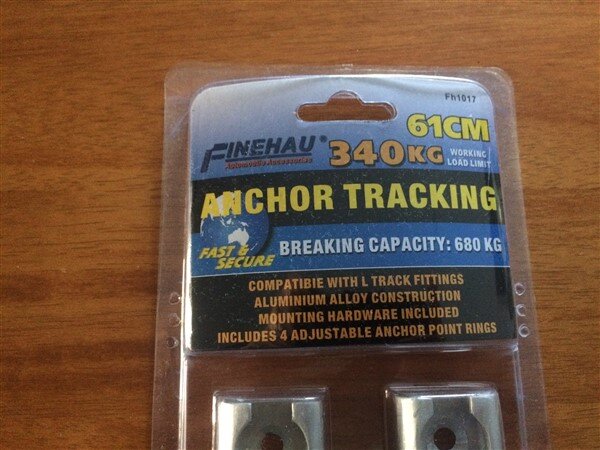
They needed cutting down.
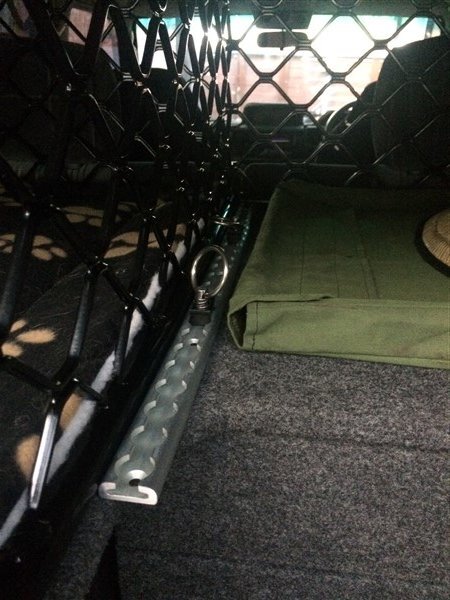
I took them to work and cut them down.
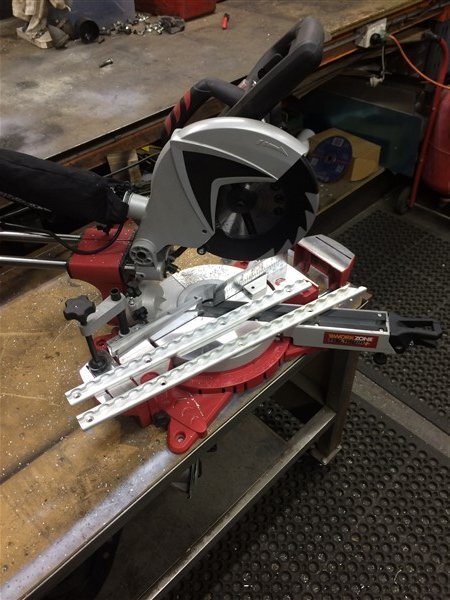
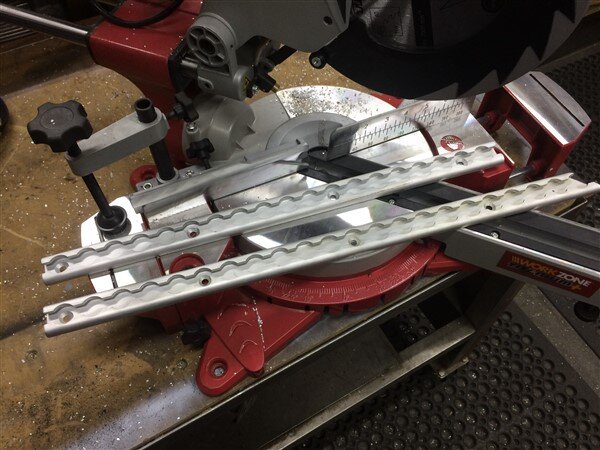
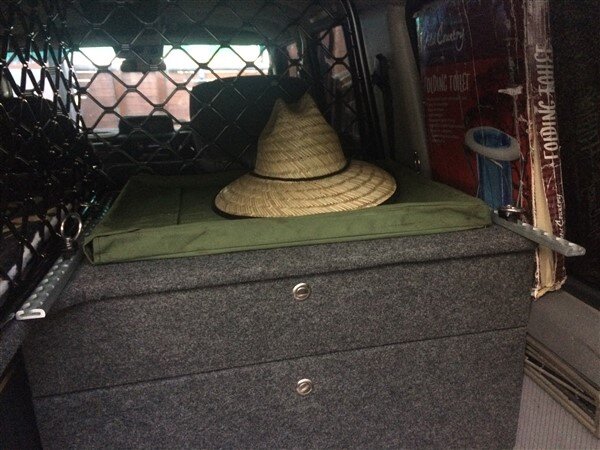
Brought them home and removed the top drawer and layed an old towel down to catch all the sawdust.

I found some M6 bolts and T nuts.
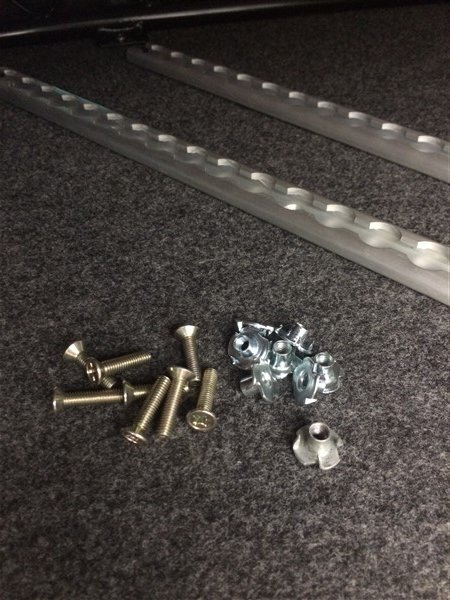
And drilled and bolted them in place.
Next I fitted the top tether child restraint point.
I gave this a lot of thought to come up with this solution................
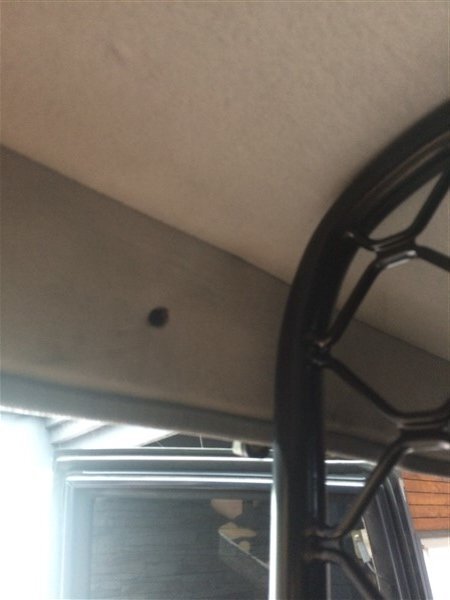
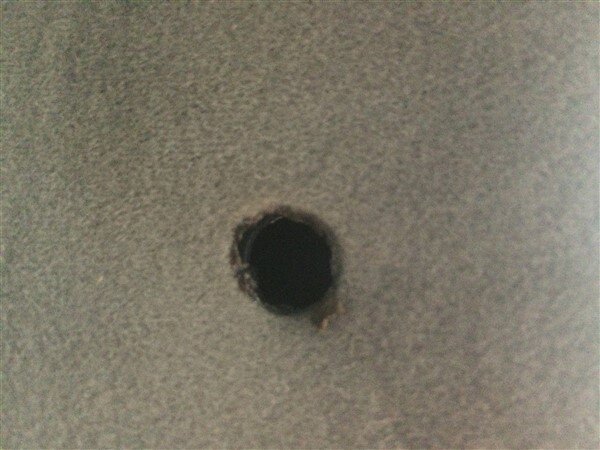
Firstly I used a soldering iron to burn through the head lining exactly where the existing hole was.
Next I pulled the pinch weld trim off and carefully pealed back the head lining to reveal the big access hole in the body.
I carefully fed a wire coat hanger through the hole I made with the soldering iron and pushed it through the body cavity towards the big access hole.
And pulled it through the access hole.

I taped some 2mm electrical wire onto the coat hanger.
And pulled it through.
Next I threaded the washer with captive M8 nut up the wire and tied a knot below it.
I had to make sure the knot was high enough up the wire to give me a long enough tail, to pull it back out once the nut was in position.
Then I could pull the other end of the wire to pull the captive nut into position and to hold it in place while I bolted the restraint in position I used a really strong rare earth magnet.
I then pulled the wire out, leaving the captive nut in place held by the magent.
Putting the bolt in was actually pretty tough because the magnet was so strong it kept trying to pull the bolt and socket into the magnet.
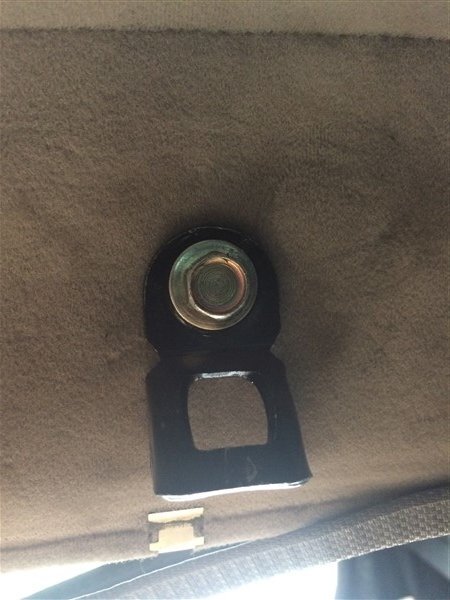
But eventually I got it to take thread and then whizzed it up with the impact driver, before giving it a final tighten by hand with a ratchet.
All done!
Thats it for now as I'm out of time.
I will do the electrical update next time.


They needed cutting down.


I took them to work and cut them down.


Brought them home and removed the top drawer and layed an old towel down to catch all the sawdust.

I found some M6 bolts and T nuts.

And drilled and bolted them in place.


Next I fitted the top tether child restraint point.
I gave this a lot of thought to come up with this solution................
Firstly I used a soldering iron to burn through the head lining exactly where the existing hole was.


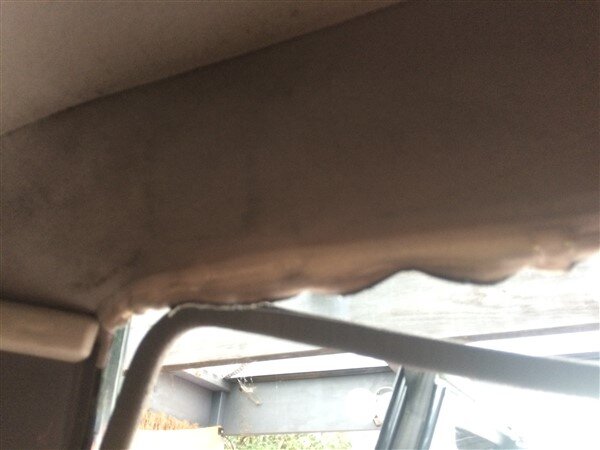
Next I pulled the pinch weld trim off and carefully pealed back the head lining to reveal the big access hole in the body.

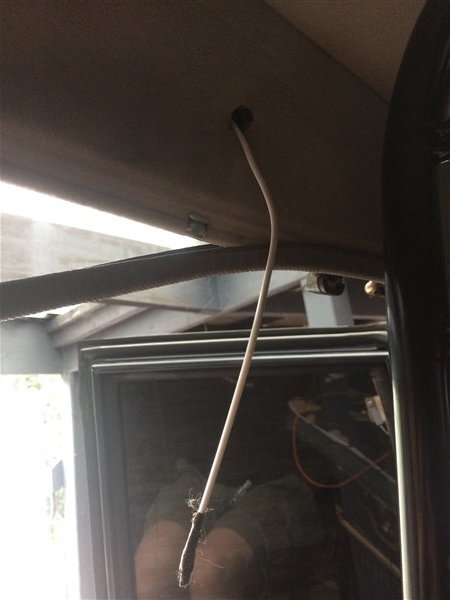
I carefully fed a wire coat hanger through the hole I made with the soldering iron and pushed it through the body cavity towards the big access hole.

And pulled it through the access hole.

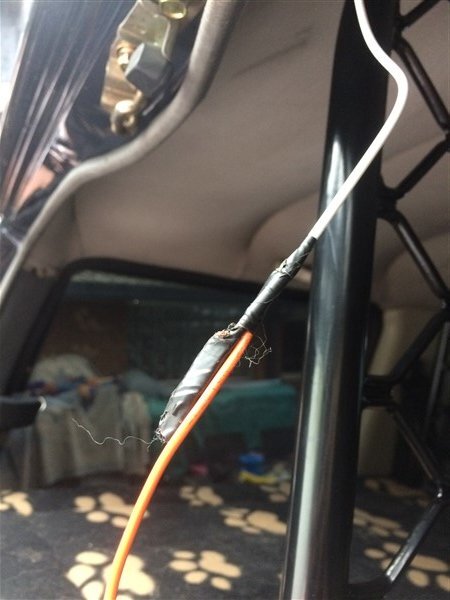
I taped some 2mm electrical wire onto the coat hanger.

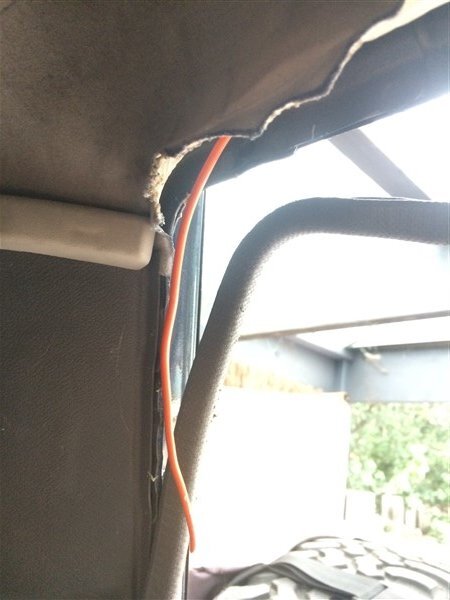
And pulled it through.

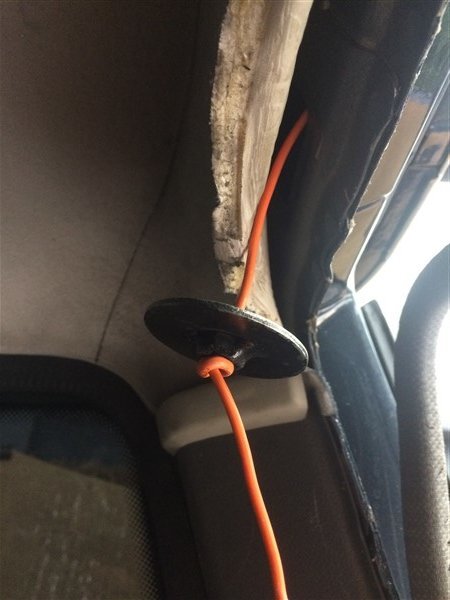
Next I threaded the washer with captive M8 nut up the wire and tied a knot below it.
I had to make sure the knot was high enough up the wire to give me a long enough tail, to pull it back out once the nut was in position.

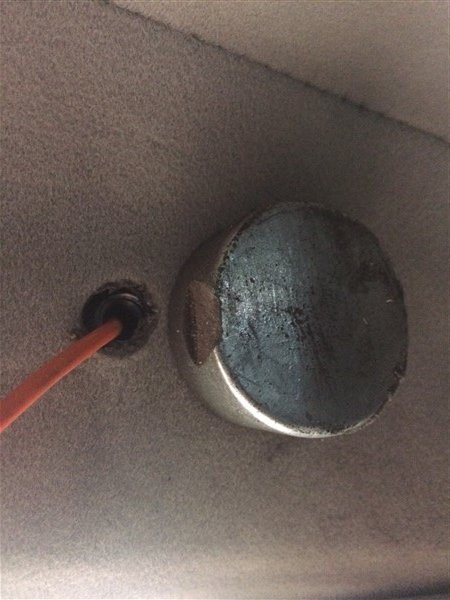
Then I could pull the other end of the wire to pull the captive nut into position and to hold it in place while I bolted the restraint in position I used a really strong rare earth magnet.

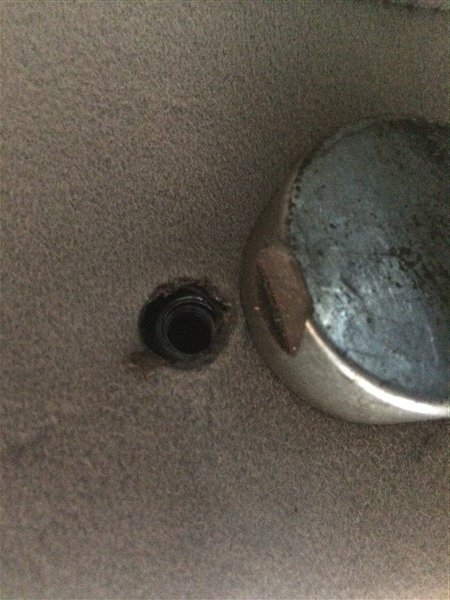
I then pulled the wire out, leaving the captive nut in place held by the magent.

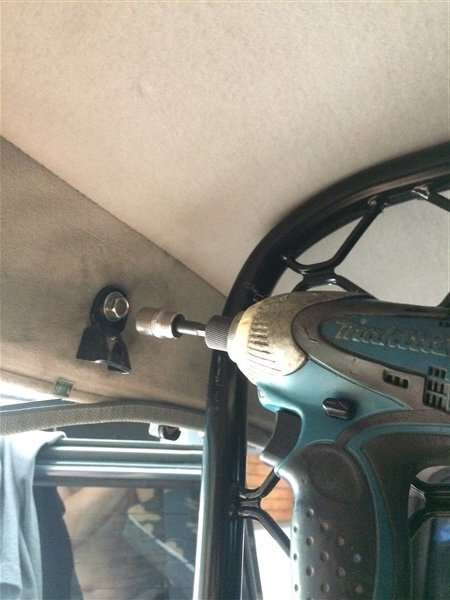
Putting the bolt in was actually pretty tough because the magnet was so strong it kept trying to pull the bolt and socket into the magnet.
But eventually I got it to take thread and then whizzed it up with the impact driver, before giving it a final tighten by hand with a ratchet.

All done!


Thats it for now as I'm out of time.
I will do the electrical update next time.
- Joined
- Apr 10, 2016
- Messages
- 1,899
- Country Flag
A well thought out solution Ben and a great result. Well done.The alluminium tie down rails arrived.
View attachment 141597
View attachment 141598
They needed cutting down.
View attachment 141647
View attachment 141648
I took them to work and cut them down.
View attachment 141663
View attachment 141664
Brought them home and removed the top drawer and layed an old towel down to catch all the sawdust.
View attachment 141659
I found some M6 bolts and T nuts.
View attachment 141660
And drilled and bolted them in place.
View attachment 141661
View attachment 141662
Next I fitted the top tether child restraint point.
I gave this a lot of thought to come up with this solution................
Firstly I used a soldering iron to burn through the head lining exactly where the existing hole was.
View attachment 141645
View attachment 141646
Next I pulled the pinch weld trim off and carefully pealed back the head lining to reveal the big access hole in the body.
View attachment 141649
I carefully fed a wire coat hanger through the hole I made with the soldering iron and pushed it through the body cavity towards the big access hole.
View attachment 141650
And pulled it through the access hole.
View attachment 141651
I taped some 2mm electrical wire onto the coat hanger.
View attachment 141652
And pulled it through.
View attachment 141653
Next I threaded the washer with captive M8 nut up the wire and tied a knot below it.
I had to make sure the knot was high enough up the wire to give me a long enough tail, to pull it back out once the nut was in position.
View attachment 141654
Then I could pull the other end of the wire to pull the captive nut into position and to hold it in place while I bolted the restraint in position I used a really strong rare earth magnet.
View attachment 141655
I then pulled the wire out, leaving the captive nut in place held by the magent.
View attachment 141656
Putting the bolt in was actually pretty tough because the magnet was so strong it kept trying to pull the bolt and socket into the magnet.
But eventually I got it to take thread and then whizzed it up with the impact driver, before giving it a final tighten by hand with a ratchet.
View attachment 141657
All done!
View attachment 141658
Thats it for now as I'm out of time.
I will do the electrical update next time.
Nice one Ben. I think I would have put a bit of glue of some description on the washer just to keep it there for when you remove the car seat and want to use the fixing for something else. Just a thought for the future.
Similar threads
- Replies
- 10
- Views
- 301
- Replies
- 2
- Views
- 418


