Don't like the adverts? Click here to remove them
You are using an out of date browser. It may not display this or other websites correctly.
You should upgrade or use an alternative browser.
You should upgrade or use an alternative browser.
LJ78 Build Thread
- Thread starter Ben
- Start date
- Joined
- Oct 13, 2010
- Messages
- 6,058
- Country Flag
The space in front of the drawers will generally be an empty space and will be useful for if/when I need to carry heavy stuff. Things like car parts, bags of fire wood etc. Things that I dont really want to have to lift high up, especially as with this build my aim is to keep all the heavy weight as low as possible and ideally between the axles. Hence the alluminium roof rack rather than steel, and the heavy (when full) water tank and high lift are as low as reasonably possible and between the axles. 
That empty floor space will also be useful for prepping food, changing nappies, stripping/fixing car parts etc.
The drawers are 400mm deep, so should be plenty big enough for everything they need to carry.
The bedding will be strapped down on the top shelf above the drawer system, the tent will go on the roof and for a few years at least (until daughter/son no.2 arrive) we will have some free seat space in the back for stuff.
The tent and chairs will go on the roof rack.
alexy
Active Member
- Joined
- Oct 2, 2015
- Messages
- 90
- Country Flag
if you will drive with a baby seat, then you can only fill the space behind your driving seat and you can have minimal storage on the back bench since either you or your lady will have to be able to stay on the rear bench to attend the baby t times. do not worry too much though, ours is 10 months old and we managed already few long drives, longest 700km in one go. driving at night might be only solution while the little ones are little.
our drives were in a land cruiser lj73 , of course….
our drives were in a land cruiser lj73 , of course….
- Joined
- Oct 13, 2010
- Messages
- 6,058
- Country Flag
Looking very nice.
Hope you can clean the mud off the hi-lift before you put it back in, otherwise you will mess up the pristine interior.
Thanks mate.
I've got one of the plastic Hi-lift jack bases so if its muddy I will use that and that can then be chucked in the rubbish bag on the spare wheel.
TBH though I doubt I will use the jack very often, its rare I use it for recoveries, although I do sometimes use it with the wheel lift attachment so I can lift a wheel and put a waffle board underneath it.
Which reminds me I want to get a canvas bag made up to store 2 waffles in, which can then go on the roof rack when going on trips as I dont want to leave the fiberglass waffles in the sun, as our harsh UV's will weaken them.

if you will drive with a baby seat, then you can only fill the space behind your driving seat and you can have minimal storage on the back bench since either you or your lady will have to be able to stay on the rear bench to attend the baby t times. do not worry too much though, ours is 10 months old and we managed already few long drives, longest 700km in one go. driving at night might be only solution while the little ones are little.
our drives were in a land cruiser lj73 , of course….
Maybe, but at the moment my Mrs is quite adamant that the baby wont be able to sit in the baby seat for more than 3 hours at a time (apparently thats what doctors and manufactures recommend) and if he needs a feed or a nappy change we will have to stop. She's not very keen on attending to him while I keep driving.
She looks after babies in her job, so shes pretty knowledgeable (where as I havent really got a clue) but who knows, things change, so once we get into she might change her mind.

- Joined
- Oct 13, 2010
- Messages
- 6,058
- Country Flag
Long time no update! 
While the soft top body conversion on my LJ70 has been taking up a lot of my time over the last few months, I have done a bit of work on this project.
But I just haven't had time to do an update.
So last update I had been working on the interior fit out.

Even though I wont be finishing the 3 drawers until I'm back at Piranha, I decided to make the drawer fronts while I still had all the materials out.


The space at the side of the bottom drawer, where the wheel arch is, was just big enough for my Piranha Fluro light which I use when were camping.


Anyway, back to the drawer front...............
I covered it in marine carpet.


Next one.


And the small top one.


I cleaned off the last of the blue primer!
Off the bump strips from the doors.

And removed the old adhesive from the backs.


And gave the faces a good sand down with 1000 grit wet n dry paper.


Applied a good quality double sided tape to them.


And used some RTV sealant in between, as per Toyota originally fitted them.

And stuck them on.


I needed to mount my new Australian made, side awning.
So I made some brackets out of stainless steel.


Bolted them to the awning.


Marked where the other mounting holes needed to be, removed them and drilled them.

I then bolted them to the roof rack.


And then bolted the awning on.


I needed some where to mount all my switches, gauges and UHF radio. But I didnt want to alter the dash too much as I love the retro, utilitarian metal dash of these earlier 70's!
So I decided to design and build something I was never able to in LJ, as LJ had a sun roof (or moon roof as Toyota called the later glass sun roof's, even though the earlier metal ones were called sun roof's. )
)
A roof console!
Cardboard template.

Then I built the real one out of 9mm MDF.


Made some alluminium mounting brackets.

And bolted it in position for a trial fit.


Made some more alluminium brackets, this time to mount the UHF radio.


I made a gauge panel out of alluminium.


Dismantled a CB/UHF radio, external speaker.


To give me a bare speaker to mount into it.


I then carpeted the whole thing in automotive carpet and bolted everything in position.
I also added a piece of black cargo netting with an elasticated top section.


So on my wifes side of the car, she will have the first aid kit (seen as shes a nurse) and the tyre deflator.


And on my side I will have a bank of 8 carling switches and UHF radio.
(The surround hadnt turned up at this point, hence why its not fitted)

Gauges.

Installed.


The stainless steel switch panel surround arrived.


I need to get a few more switch covers for some of the things they will control, but for now I just pushed some spare switches in to fill the gaps.


I installed an Engel power socket in the rear next to the fridge.

And drilled a hole in the center console and installed a double USB socket for charging phones and Ipads.


I had some deliveries turn up.

Something every vehicle should carry, a fire extinguisher.


And a solar panel.


Now you may wonder why I went for such a high output solar panel(s) as its obviously much bigger than what I need................
From all the testing we did at Piranha Off Road with the solar car I built it became apparent that its rare you get the panels to put out the wattage that they are sold as, even in perfect conditions and if you do it will only be for a short period of time, as there are so many variables that affect solar panels and their efficiency.
So its much better to get a bigger one than you need and then even if it is a cloudy day/the panel isnt at a perfect angle to the sun/the panel is too hot etc. etc. it will still put out enough power for your needs.
Anyway..................
It was then my Birthday, so what better excuse for a long weekend away camping in the new touring/overland vehicle I'd spent so much time building!
I loaded it up ready for camping.

And we hit the road and drove 3 hours in land to a huge working cattle property that offers bush camping.

We chose the furthest camp site we could away from the entrance for some much needed solitude, this involved a 30 minute drive in along some interesting tracks.
It was the 78's first trip off road since I took ownership.

We found a beautiful little spot next to a creek.


And soon had the Oz Tent up.


A new addition for this trip was the mesh floor area which would prove to be really good and much nicer than having grass/dirt in the annex area.


The fire was soon going.


Just as it was getting dark, we prepared some food.

And cooked it on the fire.

Steak and veggies.


The next morning I was awake nice and early.
As was Lexi.

We had breakfast and then had some visitors.


It was a really nice spot and there were lots of birds around.


Breakfast done it was time to give The 78 a work out on some of the hundreds of km's of 4wd tracks they have through out the property.


It doesnt look like much or a climb, but I couldnt get up it.
Granted I was driving carefully, but still.
It proved to me that diff locks front and rear are essential and will be getting fitted as soon as I'm back in Melbourne!


So I reversed out and decided to drive around and come back down that section of track, seen as I couldnt get up it!


We passed more cows.


Flex testing.


We went up one track which I instantly regretted as it turned out to be so steep and rocky.
But there was no where to turn around so I had no choice but to keep going and hope for the best.
Had I have had a working winch and diff locks it would have been fine, but I didnt.
We turned around at the first available section, thankfully before it got any steeper.


We headed back to camp for a much needed beer and I got the solar panel setup.


We spent the rest of the day chilling out relaxing and swimming in the creek in a deeper section we found.


In the afternoon I got the fire going.

And I added an end section to the Oz Tent to give us some privacy encase anyone else turned up, not that they did.


we went back down to the creek for another dip and 10 minutes later we headed back, as I got closer I spotted a bloody cow in the annex area eating our food!
So after running over shouting and throwing one of my thongs (flip flops) at it to scare it off.
I figured it might as well have the 2 bananas it had no chewed the ends off.

After a few more beers to get over that excitement.............
I cooked dinner.


Lamb shanks.

We then had a nice night relaxing around the fire.

The next morning I was again up nice and early.


We loaded the car up and headed for home.


It was a great shake down trip and The 78 performed faultlessly, even if it couldn't get up that steep climb out of the creek.
I've been using The 78 as my daily drive for a few months now and its a joy to drive! Every time I get in it I smile and it feels great that I've accomplished what I set out to do when I bought it, which was to turn that abused, worn out 70 into a great vehicle again, a perfect family touring vehicle!
Next update should be when I'm back in Melbourne fitting the diff locks and getting all the electrics wired up.

While the soft top body conversion on my LJ70 has been taking up a lot of my time over the last few months, I have done a bit of work on this project.
But I just haven't had time to do an update.

So last update I had been working on the interior fit out.
Even though I wont be finishing the 3 drawers until I'm back at Piranha, I decided to make the drawer fronts while I still had all the materials out.
The space at the side of the bottom drawer, where the wheel arch is, was just big enough for my Piranha Fluro light which I use when were camping.
Anyway, back to the drawer front...............
I covered it in marine carpet.
Next one.
And the small top one.
I cleaned off the last of the blue primer!
Off the bump strips from the doors.
And removed the old adhesive from the backs.
And gave the faces a good sand down with 1000 grit wet n dry paper.
Applied a good quality double sided tape to them.
And used some RTV sealant in between, as per Toyota originally fitted them.
And stuck them on.
I needed to mount my new Australian made, side awning.
So I made some brackets out of stainless steel.
Bolted them to the awning.
Marked where the other mounting holes needed to be, removed them and drilled them.
I then bolted them to the roof rack.
And then bolted the awning on.
I needed some where to mount all my switches, gauges and UHF radio. But I didnt want to alter the dash too much as I love the retro, utilitarian metal dash of these earlier 70's!
So I decided to design and build something I was never able to in LJ, as LJ had a sun roof (or moon roof as Toyota called the later glass sun roof's, even though the earlier metal ones were called sun roof's.
A roof console!
Cardboard template.
Then I built the real one out of 9mm MDF.
Made some alluminium mounting brackets.
And bolted it in position for a trial fit.
Made some more alluminium brackets, this time to mount the UHF radio.
I made a gauge panel out of alluminium.
Dismantled a CB/UHF radio, external speaker.
To give me a bare speaker to mount into it.
I then carpeted the whole thing in automotive carpet and bolted everything in position.
I also added a piece of black cargo netting with an elasticated top section.
So on my wifes side of the car, she will have the first aid kit (seen as shes a nurse) and the tyre deflator.
And on my side I will have a bank of 8 carling switches and UHF radio.
(The surround hadnt turned up at this point, hence why its not fitted)
Gauges.
Installed.
The stainless steel switch panel surround arrived.
I need to get a few more switch covers for some of the things they will control, but for now I just pushed some spare switches in to fill the gaps.
I installed an Engel power socket in the rear next to the fridge.
And drilled a hole in the center console and installed a double USB socket for charging phones and Ipads.
I had some deliveries turn up.

Something every vehicle should carry, a fire extinguisher.
And a solar panel.
Now you may wonder why I went for such a high output solar panel(s) as its obviously much bigger than what I need................
From all the testing we did at Piranha Off Road with the solar car I built it became apparent that its rare you get the panels to put out the wattage that they are sold as, even in perfect conditions and if you do it will only be for a short period of time, as there are so many variables that affect solar panels and their efficiency.
So its much better to get a bigger one than you need and then even if it is a cloudy day/the panel isnt at a perfect angle to the sun/the panel is too hot etc. etc. it will still put out enough power for your needs.
Anyway..................
It was then my Birthday, so what better excuse for a long weekend away camping in the new touring/overland vehicle I'd spent so much time building!

I loaded it up ready for camping.
And we hit the road and drove 3 hours in land to a huge working cattle property that offers bush camping.
We chose the furthest camp site we could away from the entrance for some much needed solitude, this involved a 30 minute drive in along some interesting tracks.
It was the 78's first trip off road since I took ownership.

We found a beautiful little spot next to a creek.
And soon had the Oz Tent up.
A new addition for this trip was the mesh floor area which would prove to be really good and much nicer than having grass/dirt in the annex area.
The fire was soon going.
Just as it was getting dark, we prepared some food.
And cooked it on the fire.
Steak and veggies.
The next morning I was awake nice and early.
As was Lexi.
We had breakfast and then had some visitors.
It was a really nice spot and there were lots of birds around.
Breakfast done it was time to give The 78 a work out on some of the hundreds of km's of 4wd tracks they have through out the property.
It doesnt look like much or a climb, but I couldnt get up it.

Granted I was driving carefully, but still.

It proved to me that diff locks front and rear are essential and will be getting fitted as soon as I'm back in Melbourne!
So I reversed out and decided to drive around and come back down that section of track, seen as I couldnt get up it!
We passed more cows.
Flex testing.
We went up one track which I instantly regretted as it turned out to be so steep and rocky.
But there was no where to turn around so I had no choice but to keep going and hope for the best.

Had I have had a working winch and diff locks it would have been fine, but I didnt.
We turned around at the first available section, thankfully before it got any steeper.
We headed back to camp for a much needed beer and I got the solar panel setup.
We spent the rest of the day chilling out relaxing and swimming in the creek in a deeper section we found.
In the afternoon I got the fire going.
And I added an end section to the Oz Tent to give us some privacy encase anyone else turned up, not that they did.
we went back down to the creek for another dip and 10 minutes later we headed back, as I got closer I spotted a bloody cow in the annex area eating our food!

So after running over shouting and throwing one of my thongs (flip flops) at it to scare it off.
I figured it might as well have the 2 bananas it had no chewed the ends off.

After a few more beers to get over that excitement.............
I cooked dinner.
Lamb shanks.
We then had a nice night relaxing around the fire.
The next morning I was again up nice and early.
We loaded the car up and headed for home.
It was a great shake down trip and The 78 performed faultlessly, even if it couldn't get up that steep climb out of the creek.

I've been using The 78 as my daily drive for a few months now and its a joy to drive! Every time I get in it I smile and it feels great that I've accomplished what I set out to do when I bought it, which was to turn that abused, worn out 70 into a great vehicle again, a perfect family touring vehicle!

Next update should be when I'm back in Melbourne fitting the diff locks and getting all the electrics wired up.
Don't like the adverts? Click here to remove them
Paddler Ed
Well-Known Member
Hey Ben,
Sunroof is generally a metal panel, whilst a moon roof is the glass ones.
Interesting what you say about the solar panels - there is a big difference between brands I found when I was doing it. I ended up with a 90W panel for our stuff, as most of my power needs are drawing power in the day, with minimal overnight (one fridge) as our lights are rechargable work lights they can be charged during the day and used over night.
Looks a great spot, and dog friendly - we need to find somewhere we can our Collie x Kelpie.
Animal Mother
Well-Known Member
- Joined
- Sep 27, 2016
- Messages
- 839
- Country Flag
Excellent write-up. Somewhat envious and miss the easy of wild camping in Oz.
And a very happy (if not belated) birthday to you Ben ! 


Good to see the truck (and Lexie) getting muddy, and goodness, the truck looks superb mate, absolutely brilliant.
Without this thread, nobody would ever believe it was the same vehicle!

 you must be very proud of how it’s turned out.


Good to see the truck (and Lexie) getting muddy, and goodness, the truck looks superb mate, absolutely brilliant.
Without this thread, nobody would ever believe it was the same vehicle!


 you must be very proud of how it’s turned out.
Looking superb Ben, you've even got wildlife admiring your build quality.  You should be very proud of what you've achieved in such a short time. I wonder what the previous owners would think if they saw it now? I bet they wouldn't believe it was the same truck, it really is a credit to you it looks fantastic.
Happy (belated) birthday BTW.

Happy (belated) birthday BTW.
Last edited:
doyle61
Member
- Joined
- Dec 19, 2013
- Messages
- 136
- Country Flag
Ben, you've never heard me criticize you yet, but I'm going to be the one who says this............ Will you please slow down a bit

 . Your making the rest of us look really bad at this stage, you with two projects nearly finished and the rest of us struggling on one
 .
.
Ah seriously though; that's some setup. I really like the roof console. I thought it was cool seeing it on Facebook but the breakdown here's a lot better on how to build it. My project has the sunroof but if I can't sort it and am forced to cover it in I'll be building a roof console like yours but tbh I want my sunroof.
Ooh and happy birthday lad


 . Your making the rest of us look really bad at this stage, you with two projects nearly finished and the rest of us struggling on one
 .
. Ah seriously though; that's some setup. I really like the roof console. I thought it was cool seeing it on Facebook but the breakdown here's a lot better on how to build it. My project has the sunroof but if I can't sort it and am forced to cover it in I'll be building a roof console like yours but tbh I want my sunroof.
Ooh and happy birthday lad
Mike001
New Member
- Joined
- Apr 12, 2016
- Messages
- 22
- Country Flag
------I spotted this the other day.
Its a 1990 LJ78 with factory rear locker, electric everything, manual transmission and I cant find any rust on it yet.
With the seats missing from the boot, it is huge!
It has got decent Dobinsons suspension on it like my other 70's, but the front springs need changing for some stiffer ones so I can do away with those hideous spring spacers.
The LJ and KZJ 78's and 79's are identical bodies, from the windscreen back as the new V8 70 series wagons!
I'm excited about the huge boot space!
The Boot !!! Removed my rear set to lose 3 seats, for the space
I am interested to know what brand/model coils you end up with as need to change mine.
Your fridge location is precisely how I am going to do mine.
Cheers,
Mike
AlexanderVanBaelen
Active Member
- Joined
- Mar 2, 2017
- Messages
- 53
- Country Flag
Love the entire build and that center console is amazing!!! You've got skills!
- Joined
- Oct 13, 2010
- Messages
- 6,058
- Country Flag
Update time!! 
We moved down to Melbourne just after Christmas and now I'm working back at Piranha Off Road work can continue on this project!
The first thing to fix was the rear diff which got incredibly noisy 2 days before we were due to drive down from QLD, to the point of me having to remove the rear prop shaft and drive down in front wheel drive.
As a replacement 4:8 ring and pinion for my factory locked rear diff was proving hard to find and the fact that I wasnt sure if the solenoid would ever work again after I removed all the magnets to rebuild it and never knew at the time that they are North/South magnets and I have probably put them back in the wrong place.....
I decided I would just fit the KZJ78 axle I have spare, with a new ring and pinion, all new bearings and an Eaton E locker.
I drained the old oil out of the KZJ78 axle.
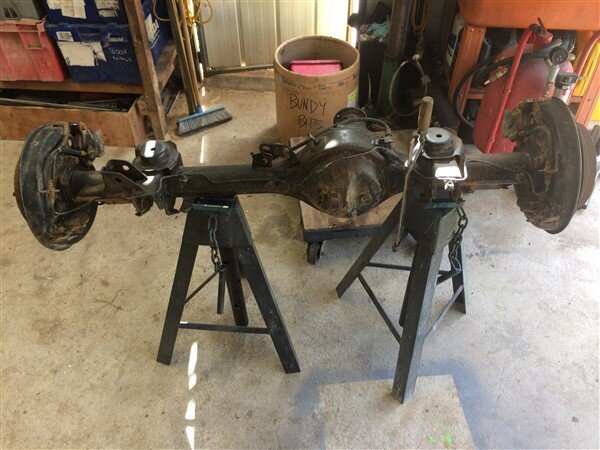
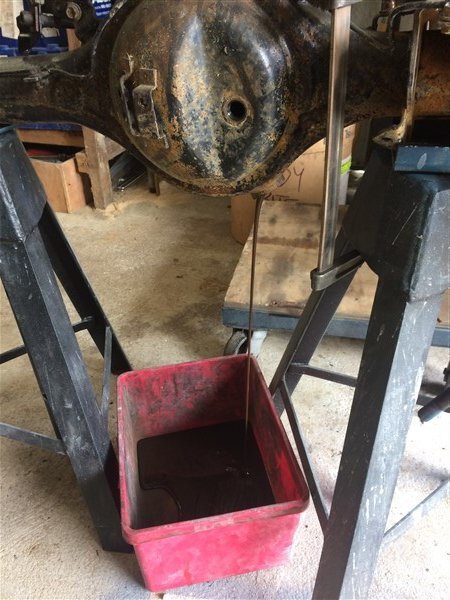
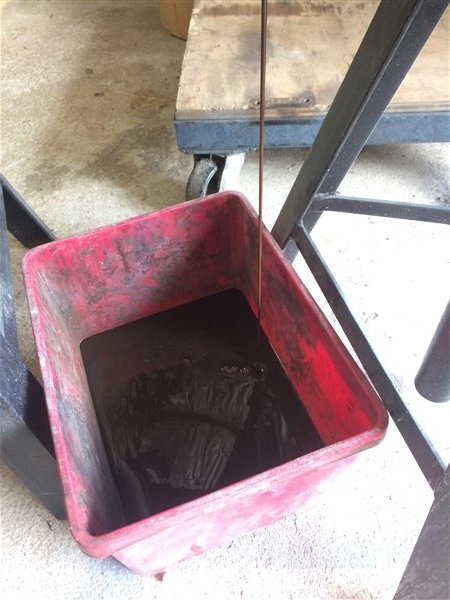
I then pulled the half shafts and diff center out.
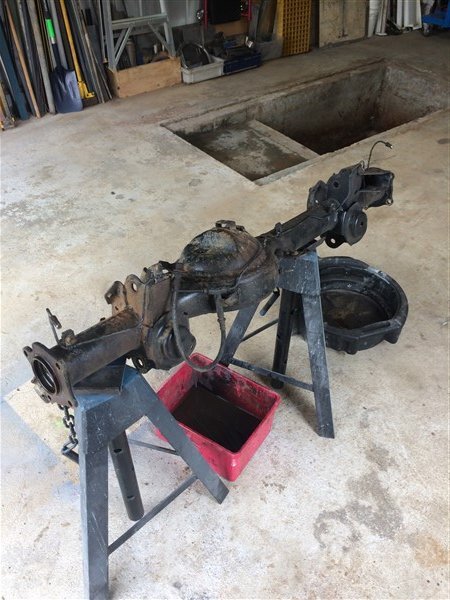
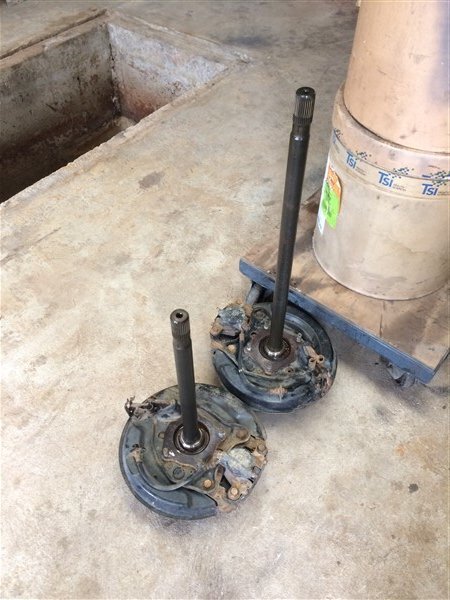
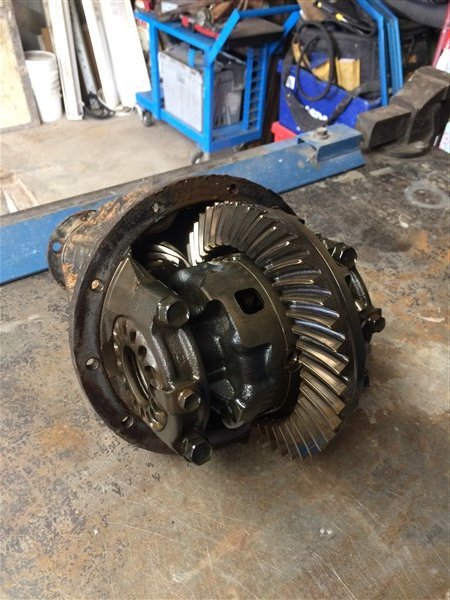
I brought the axle casing to work for repairs.
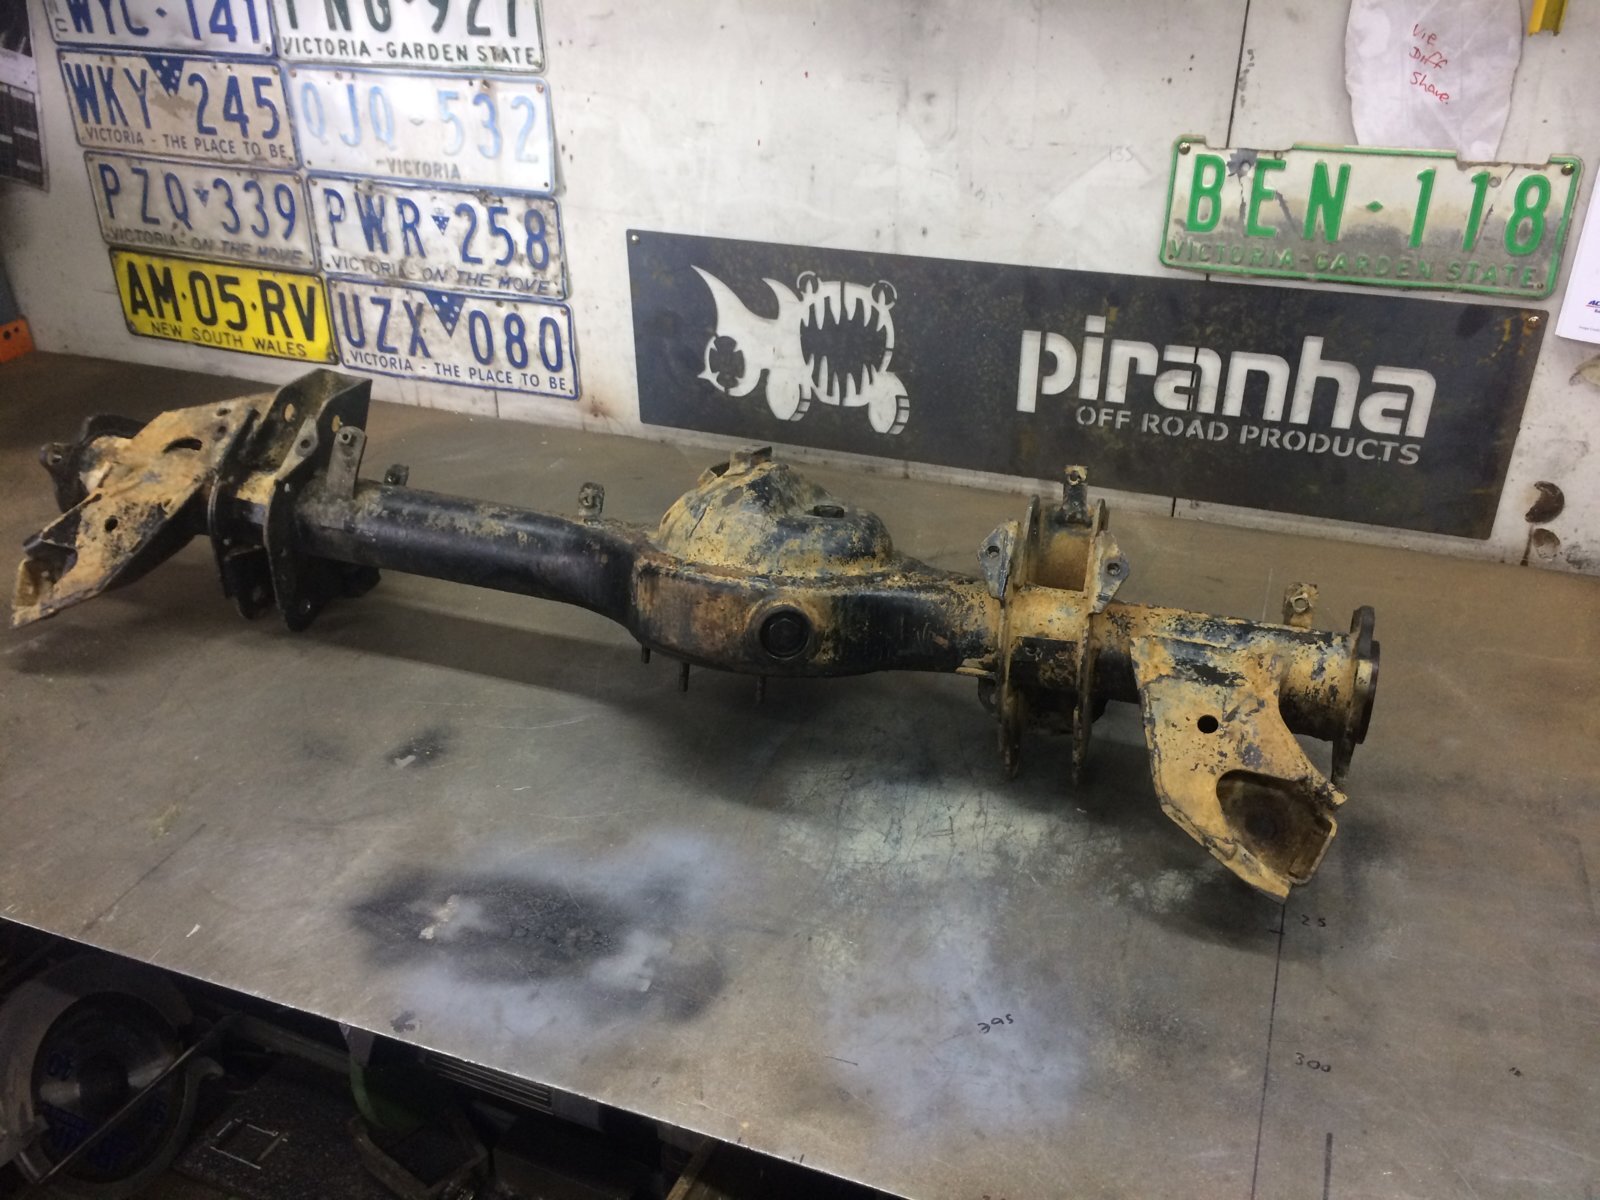
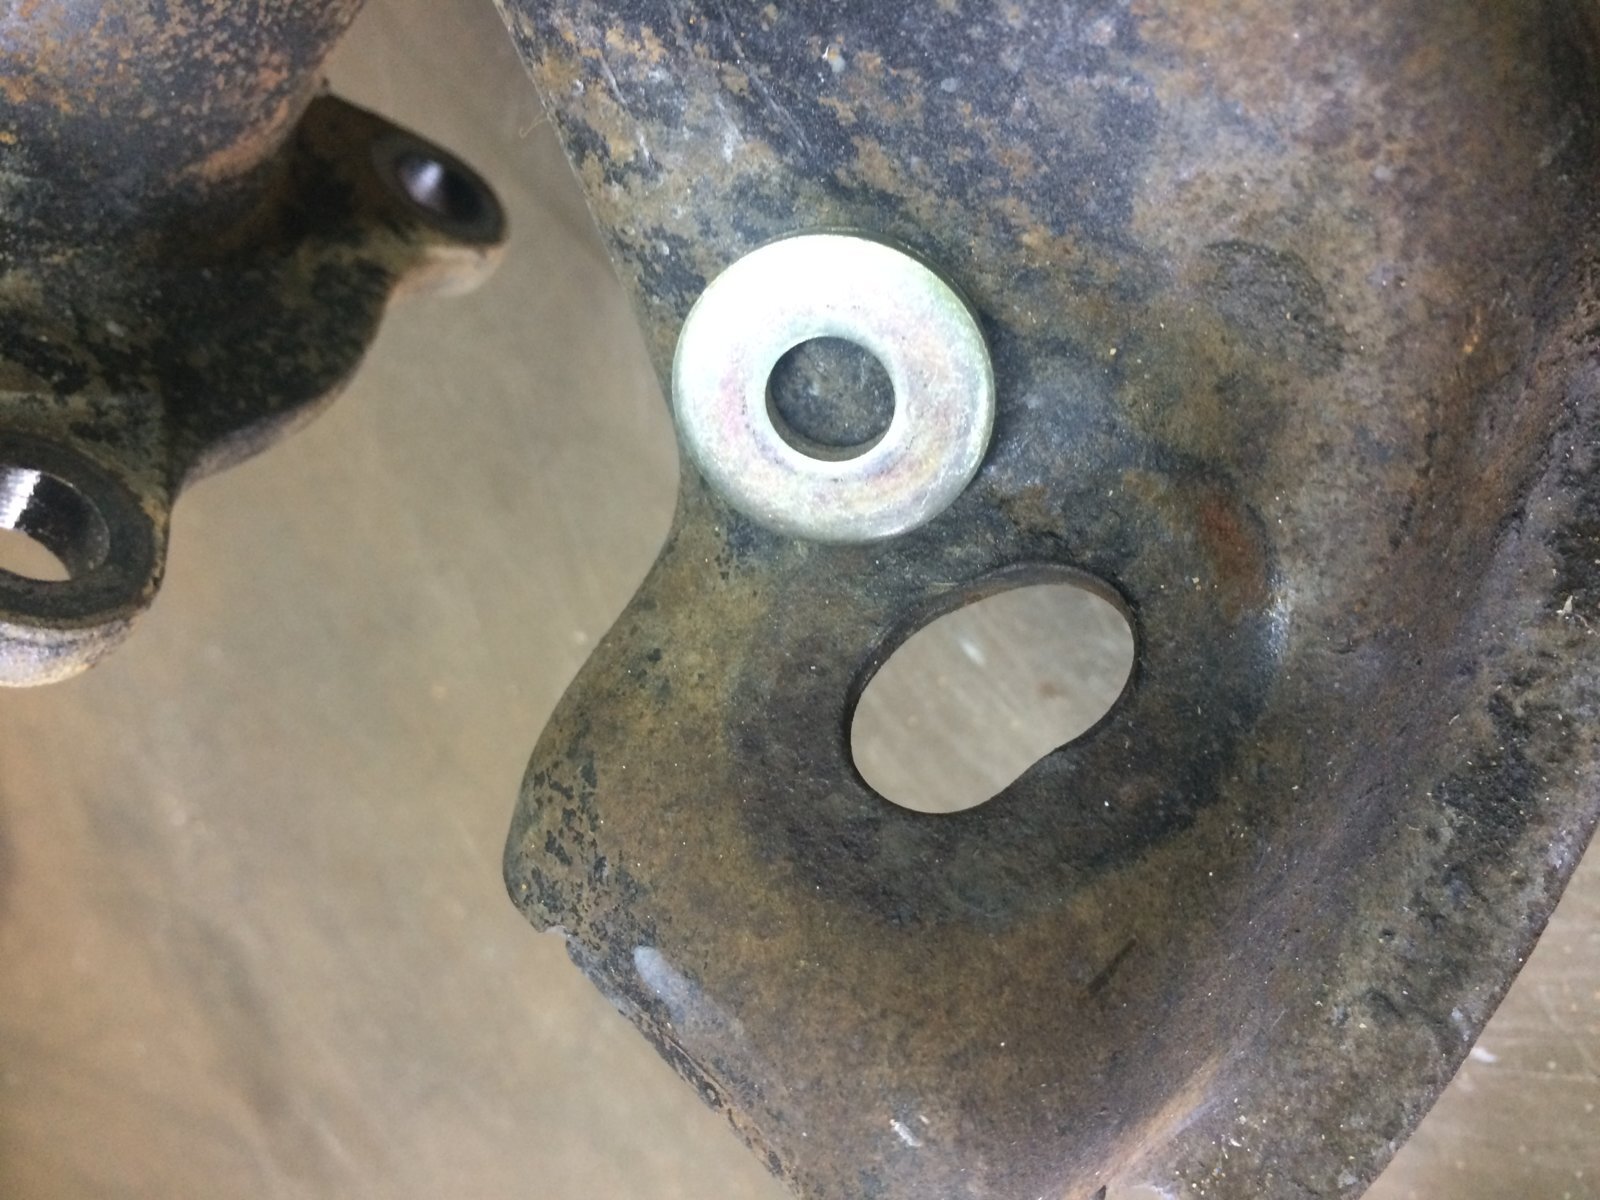
As often happens with the LJ/RJ/KZJ 70 rear axles, at some point the shock bushes had worn out and the bottom shock mounts had badly flogged out the mounting holes in the axle.
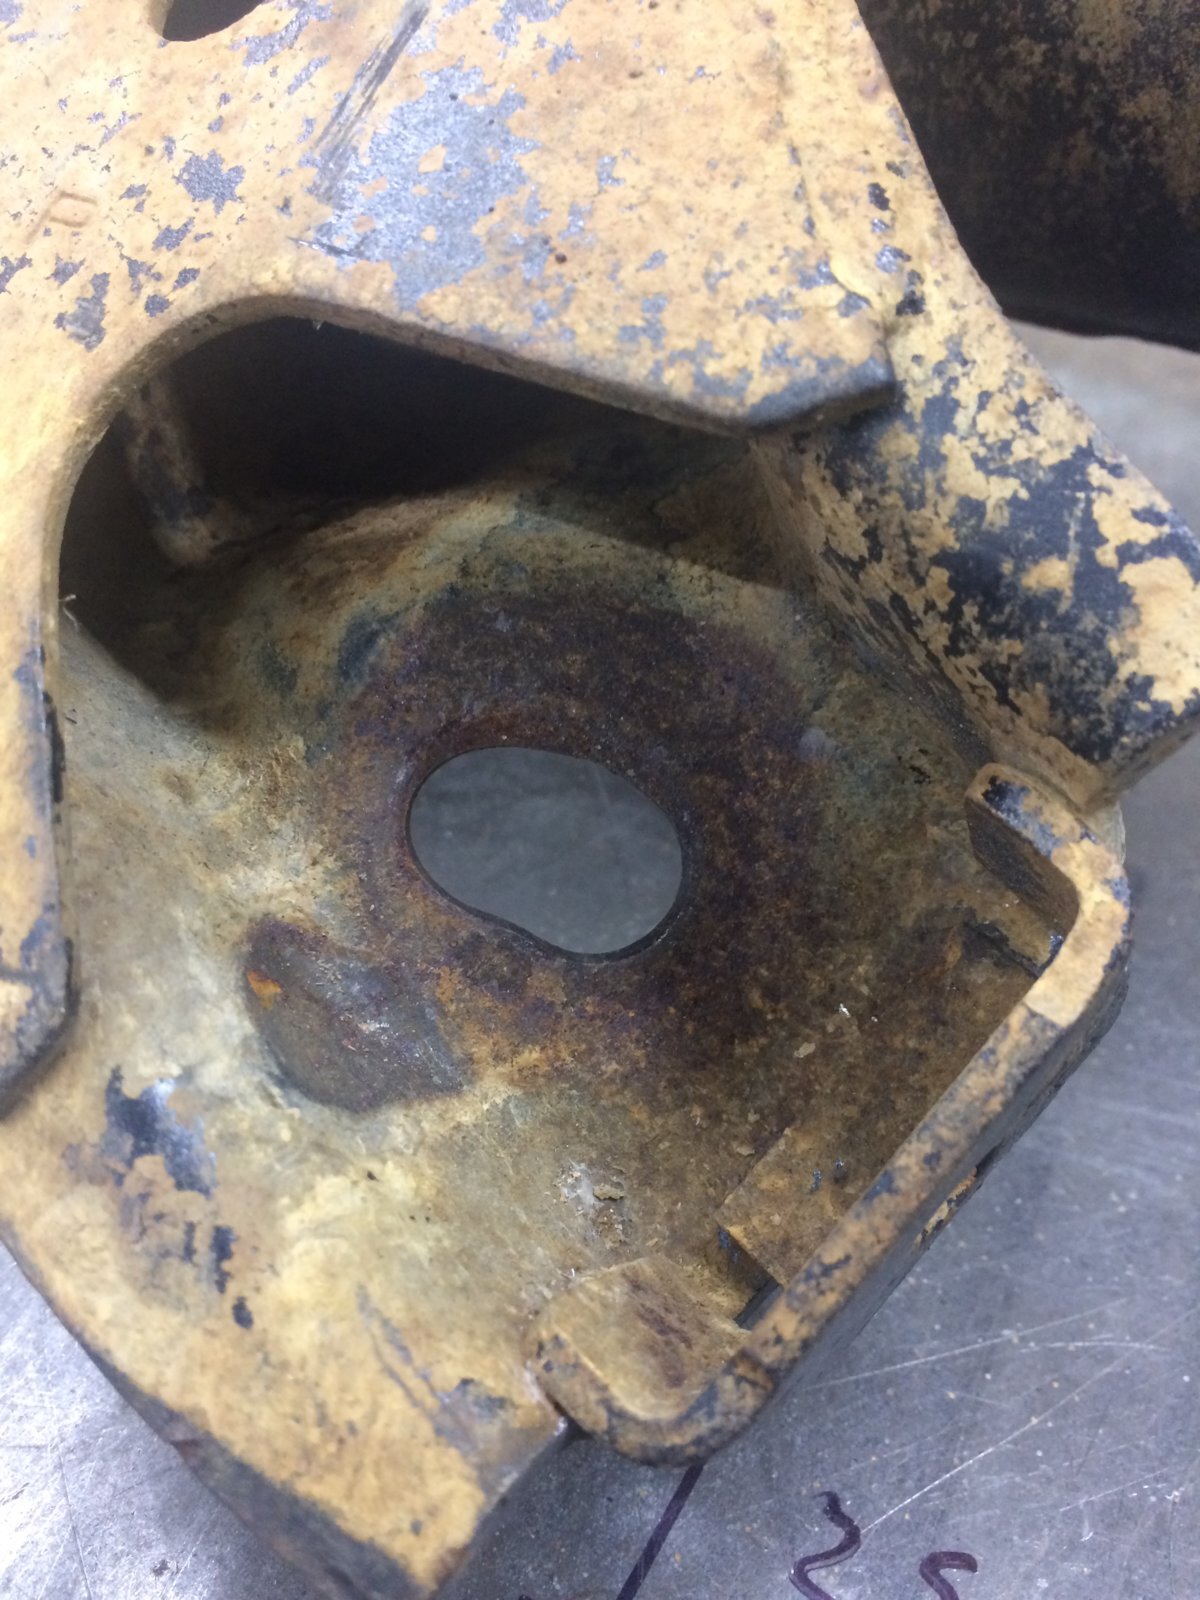
I will diegrind the holes out big enough to fit some nice thick chunky washers we have at work and then TIG weld them in.
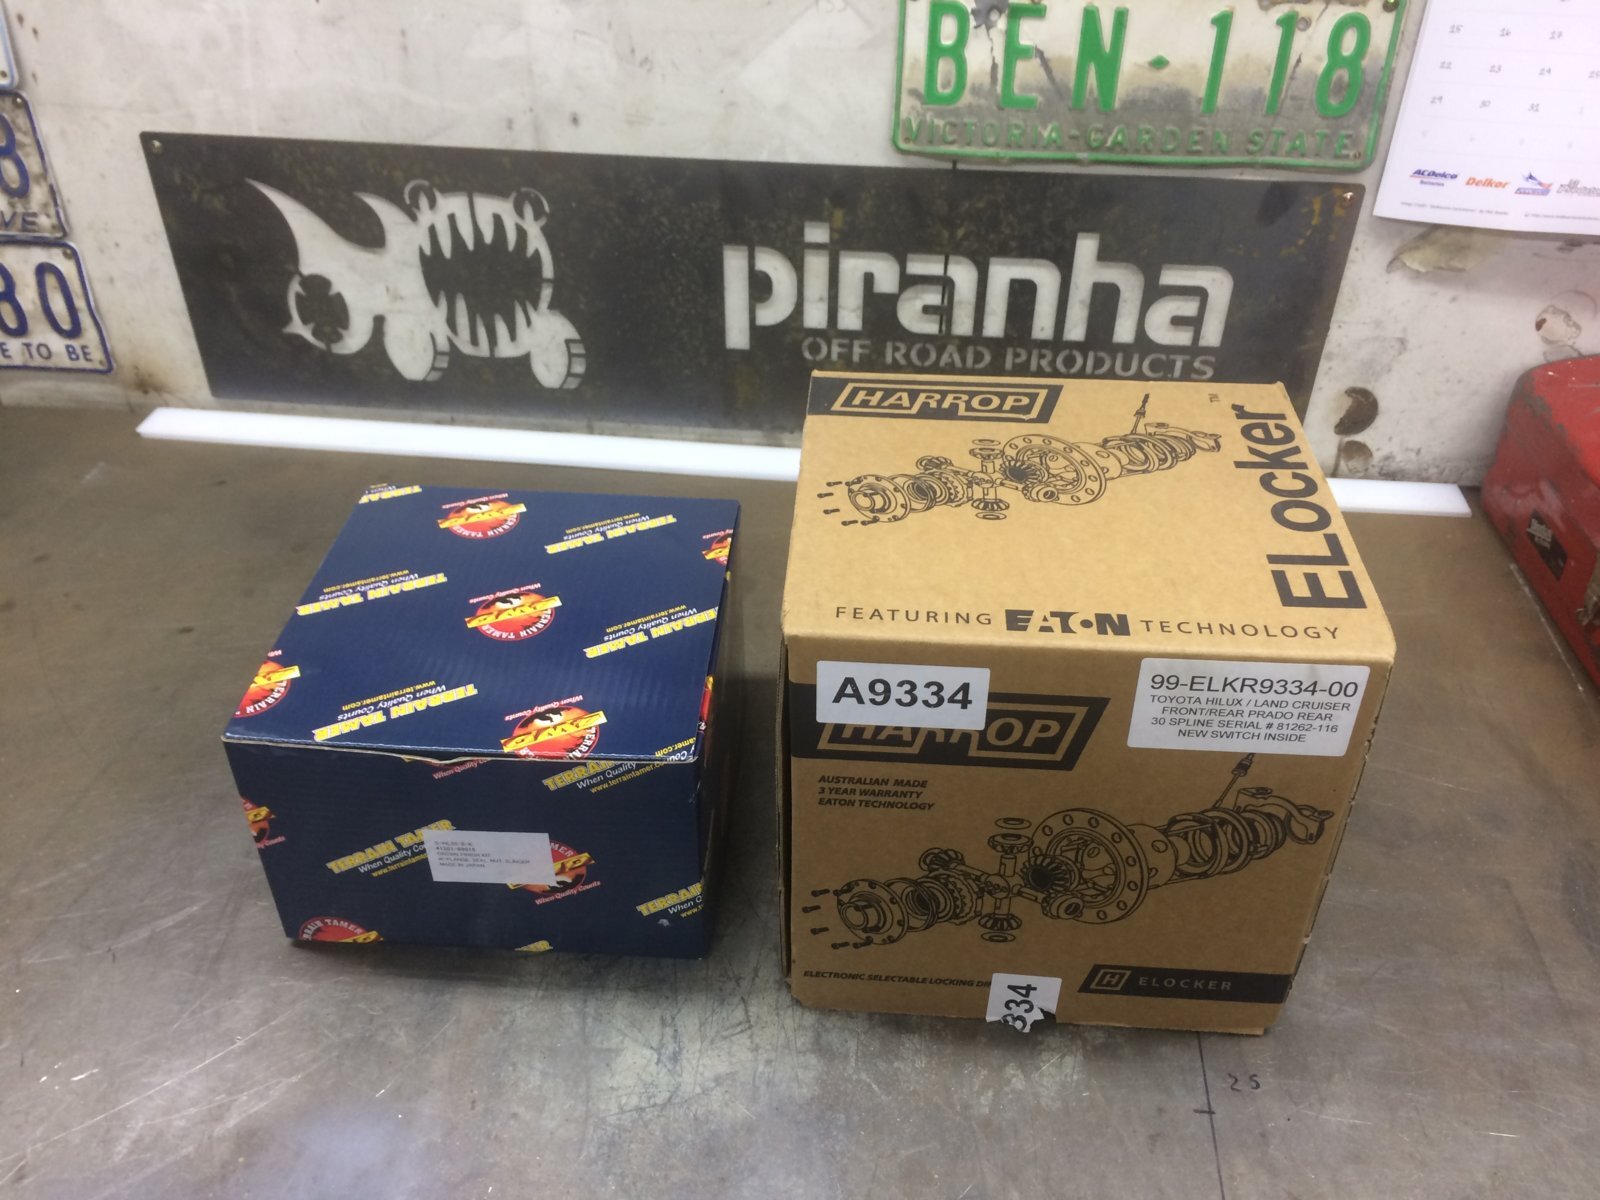
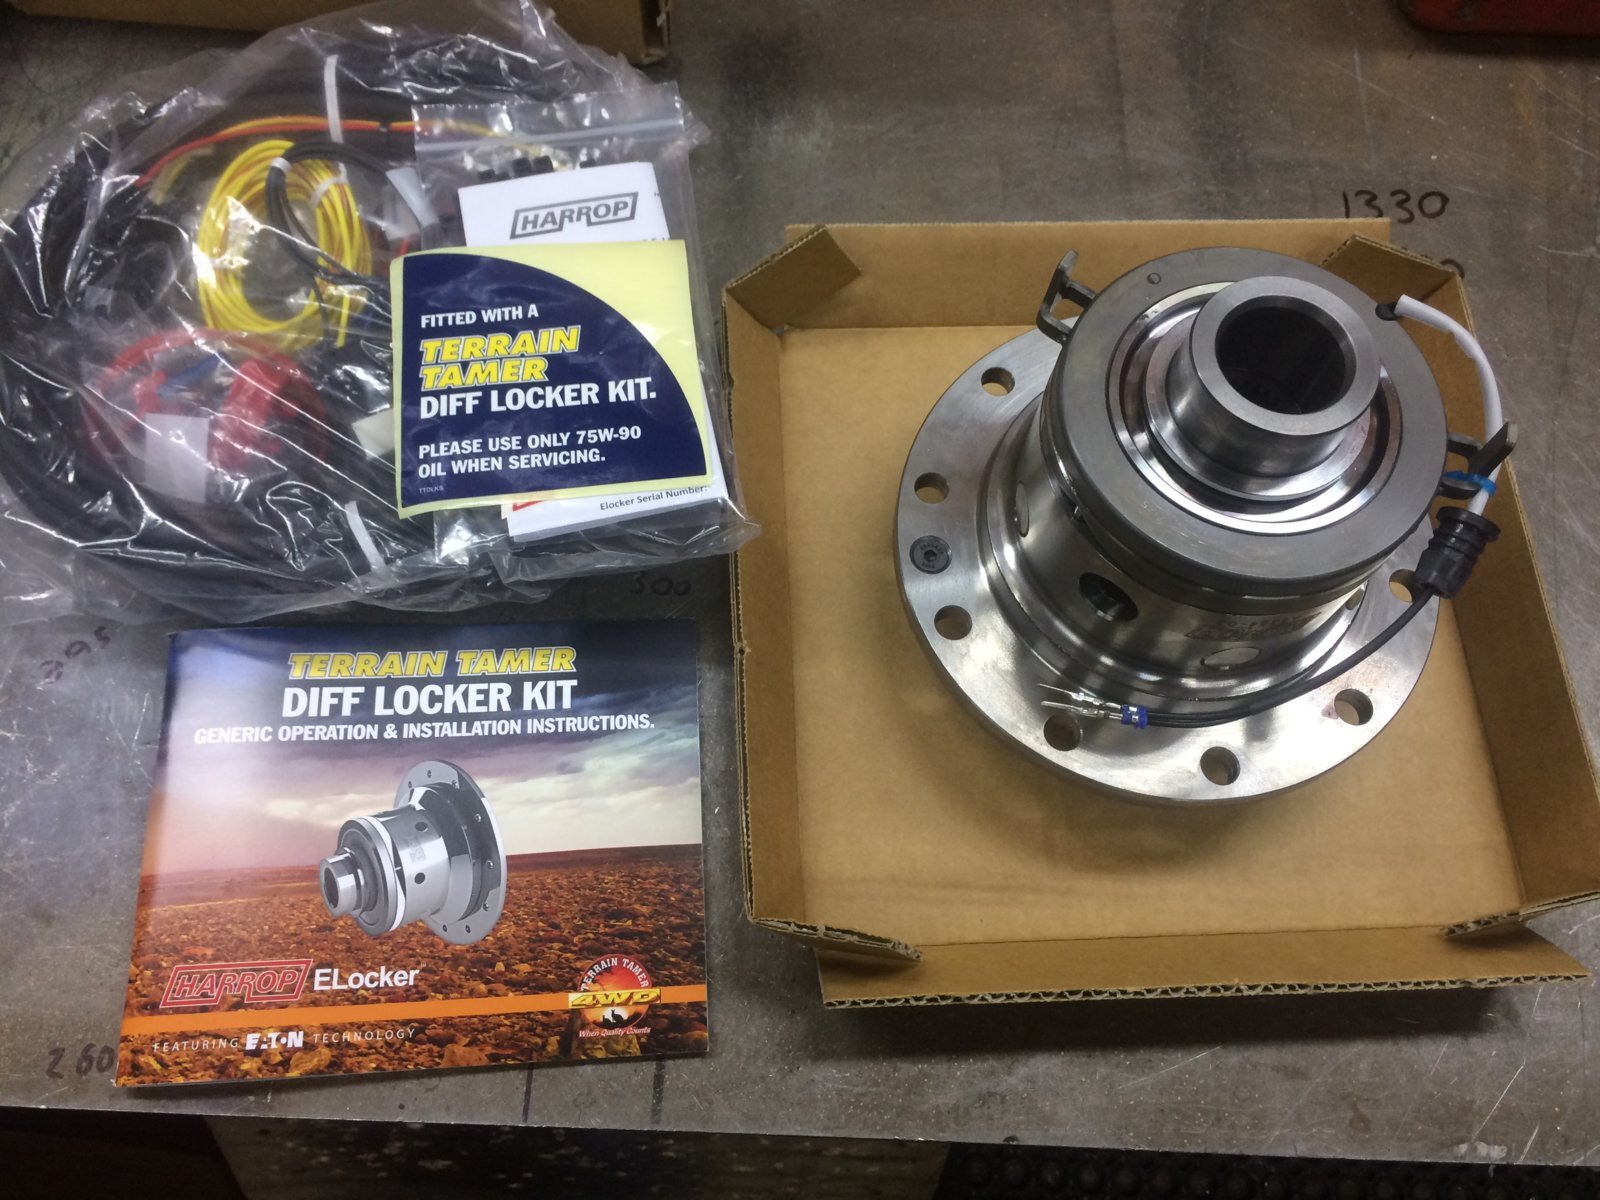
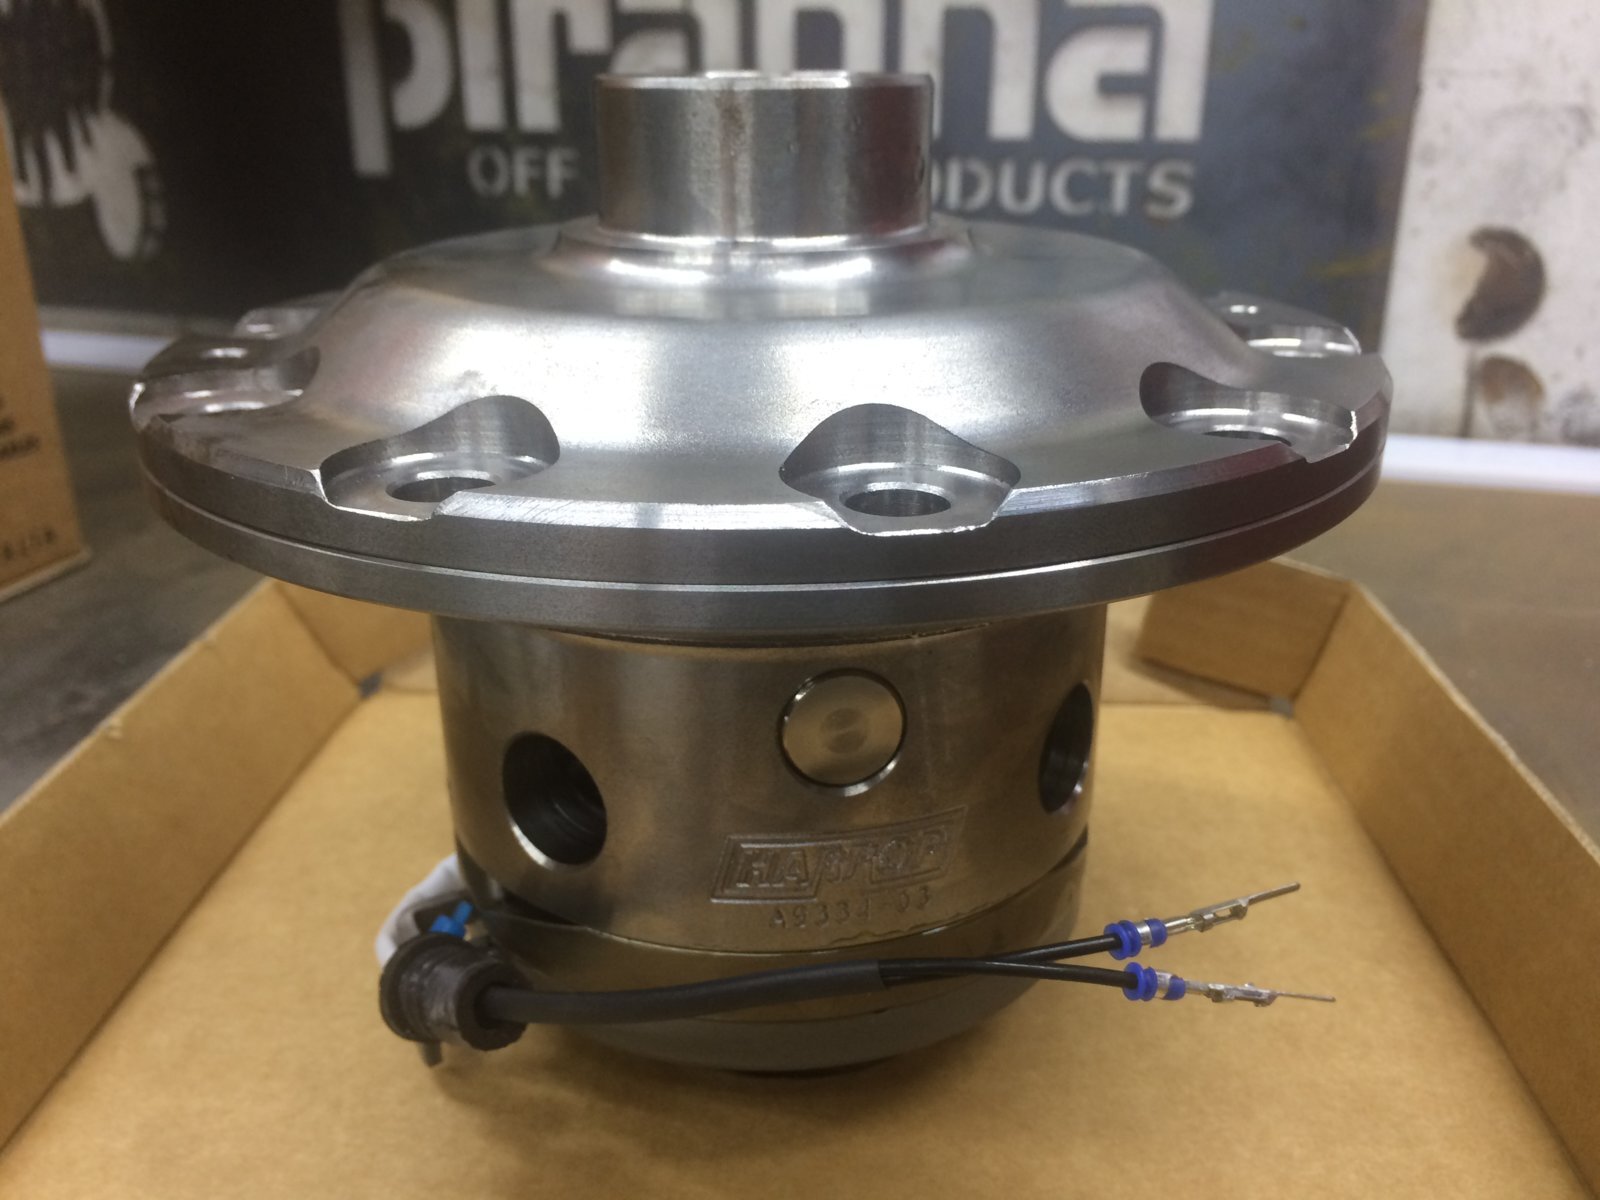
I got a new ring and pinion and E locker at cost price!
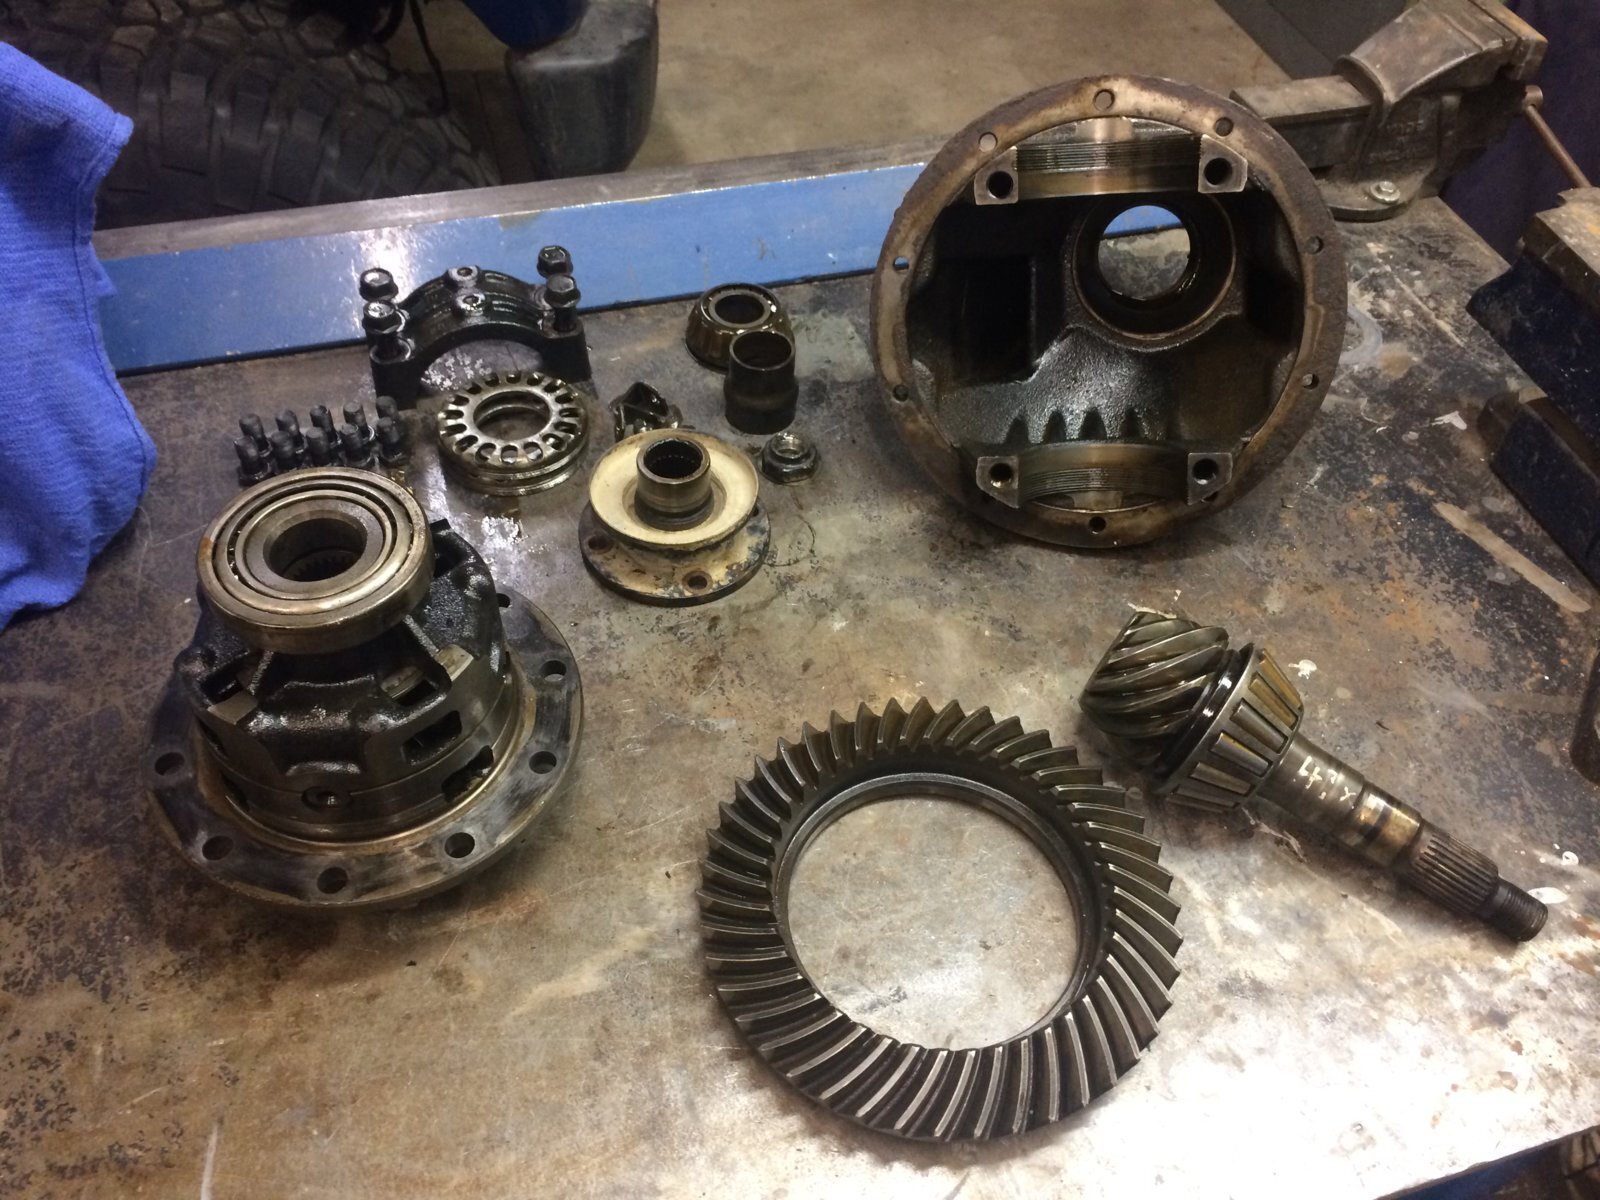
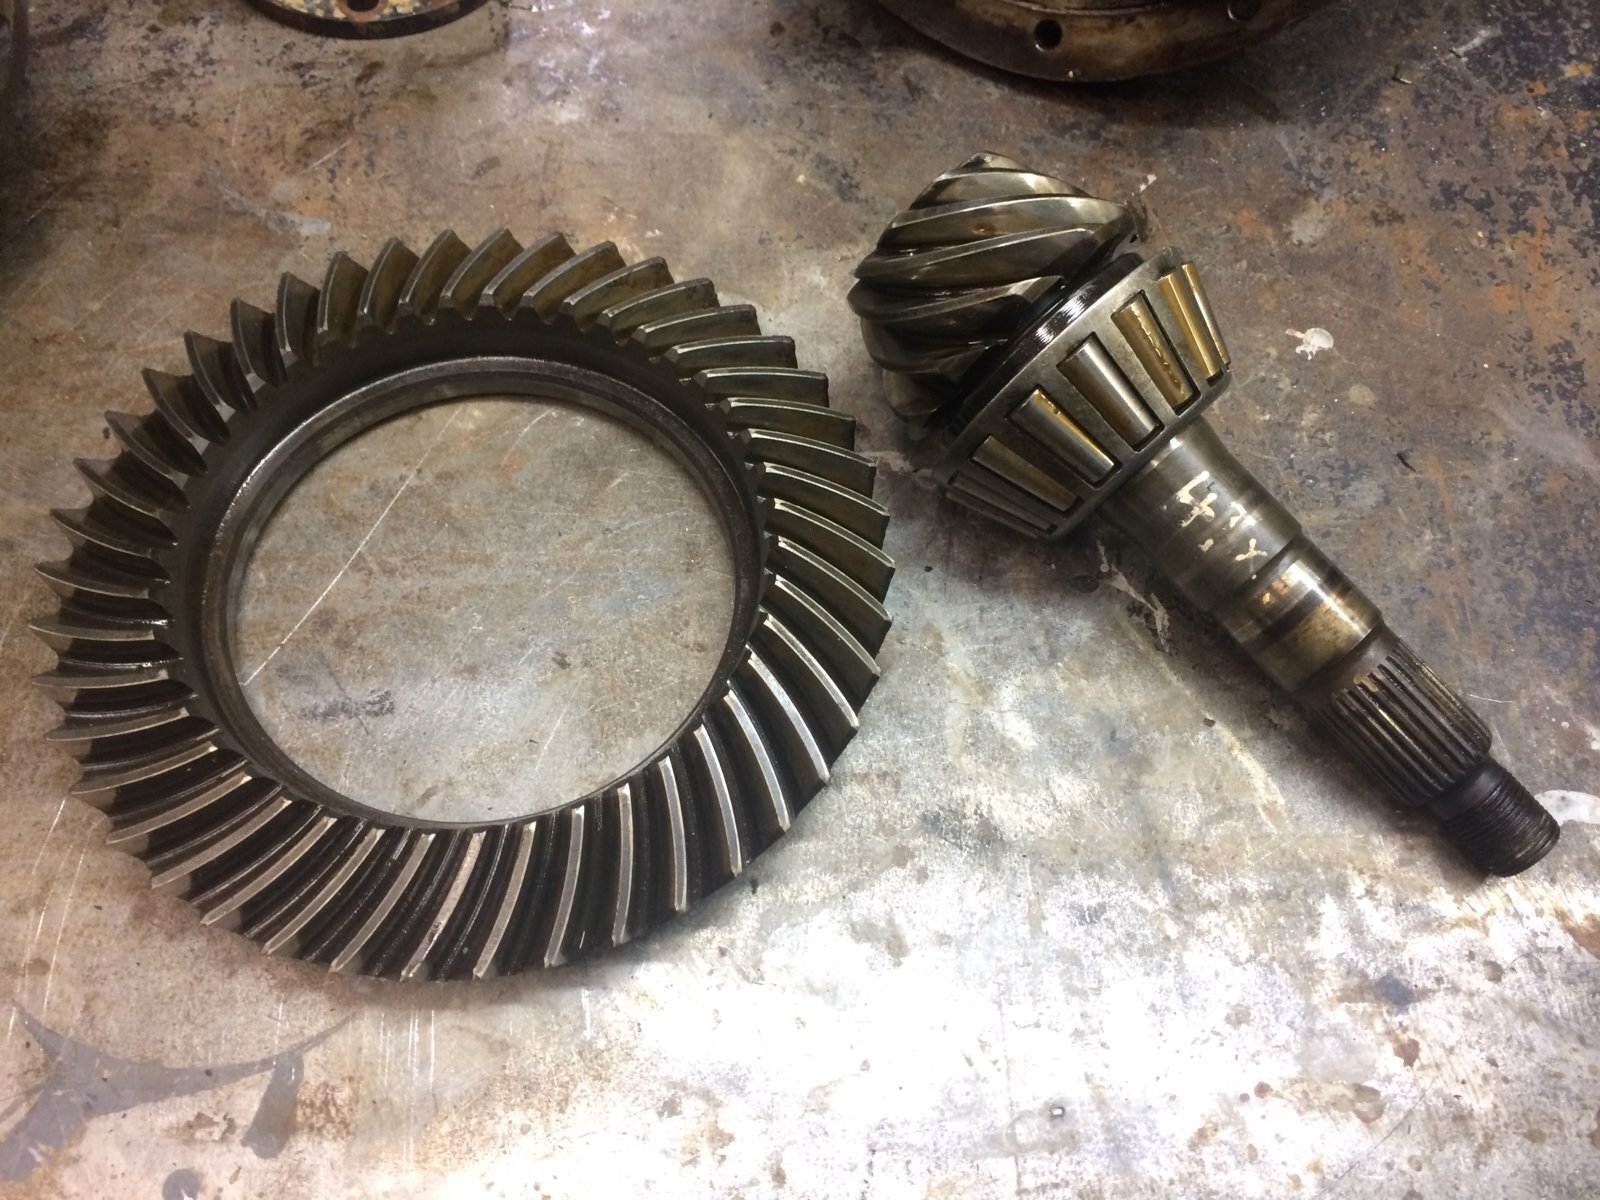
I was a bit concerned that the new ring and pinion might not be the right ones, so I stripped down the KZJ78 diff.
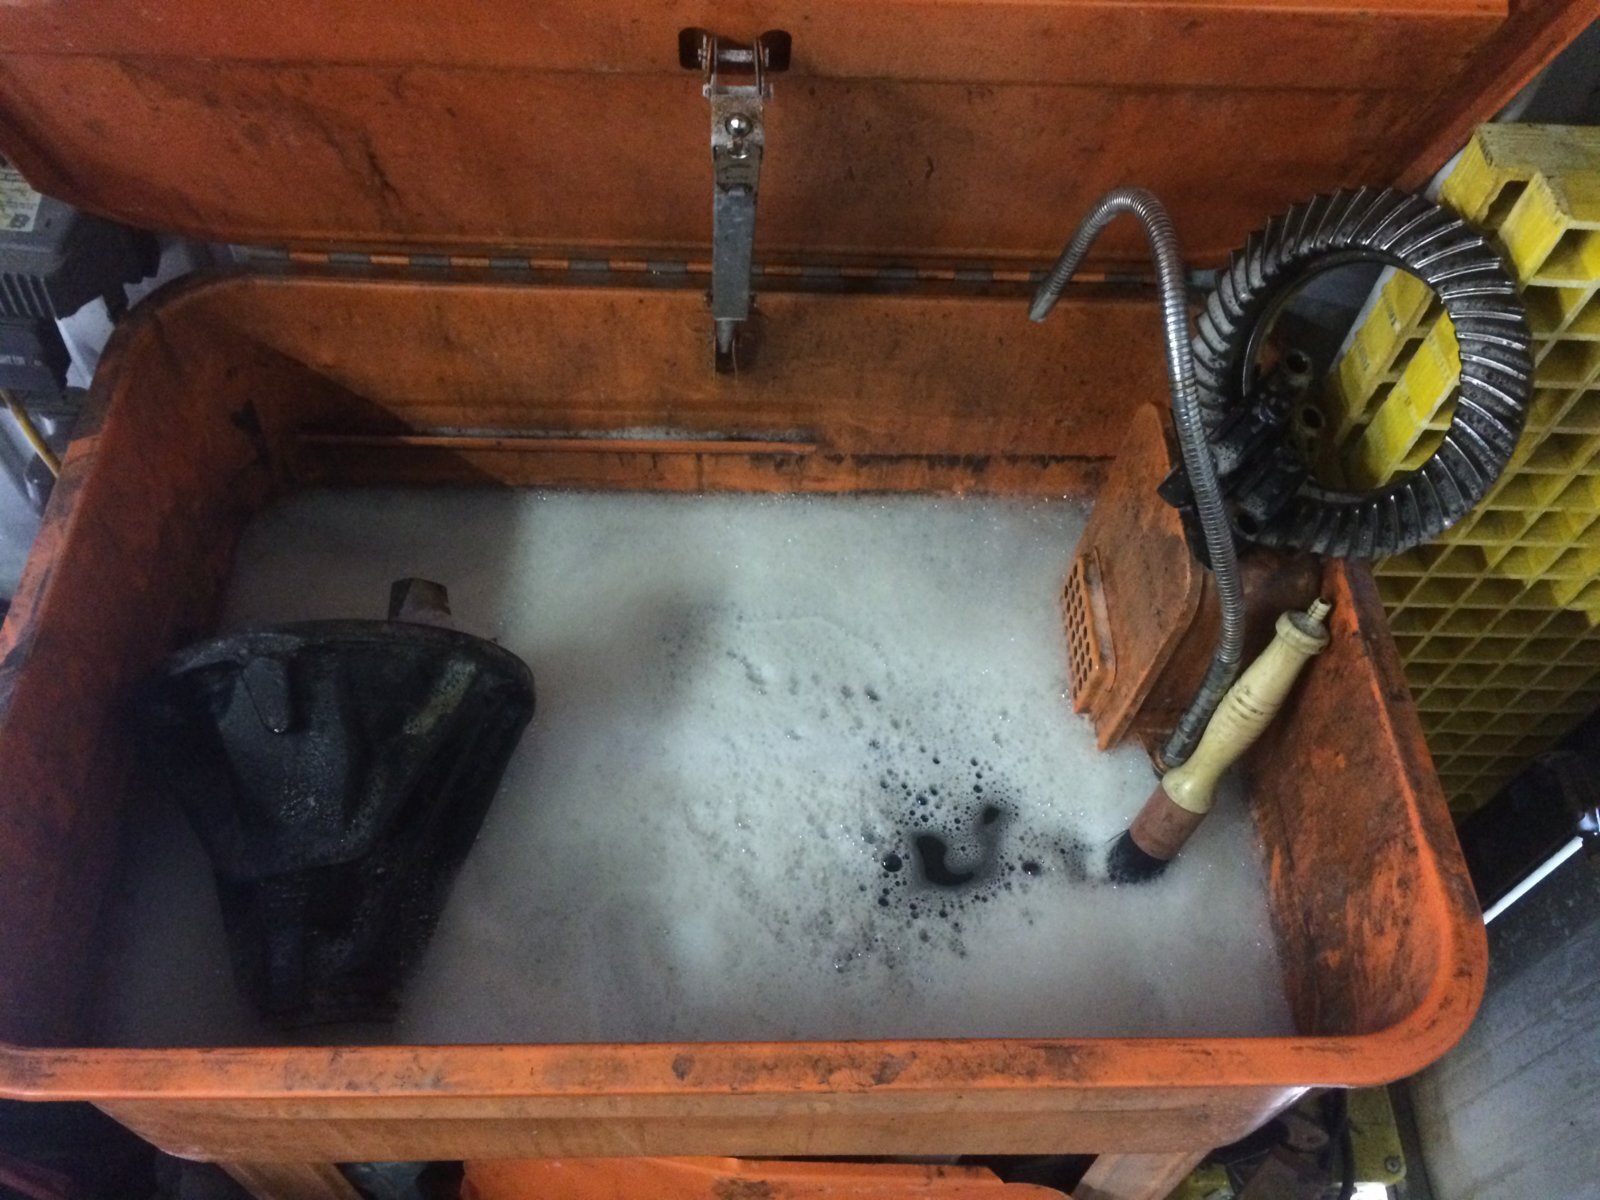
Gave them a clean up in the parts washer.
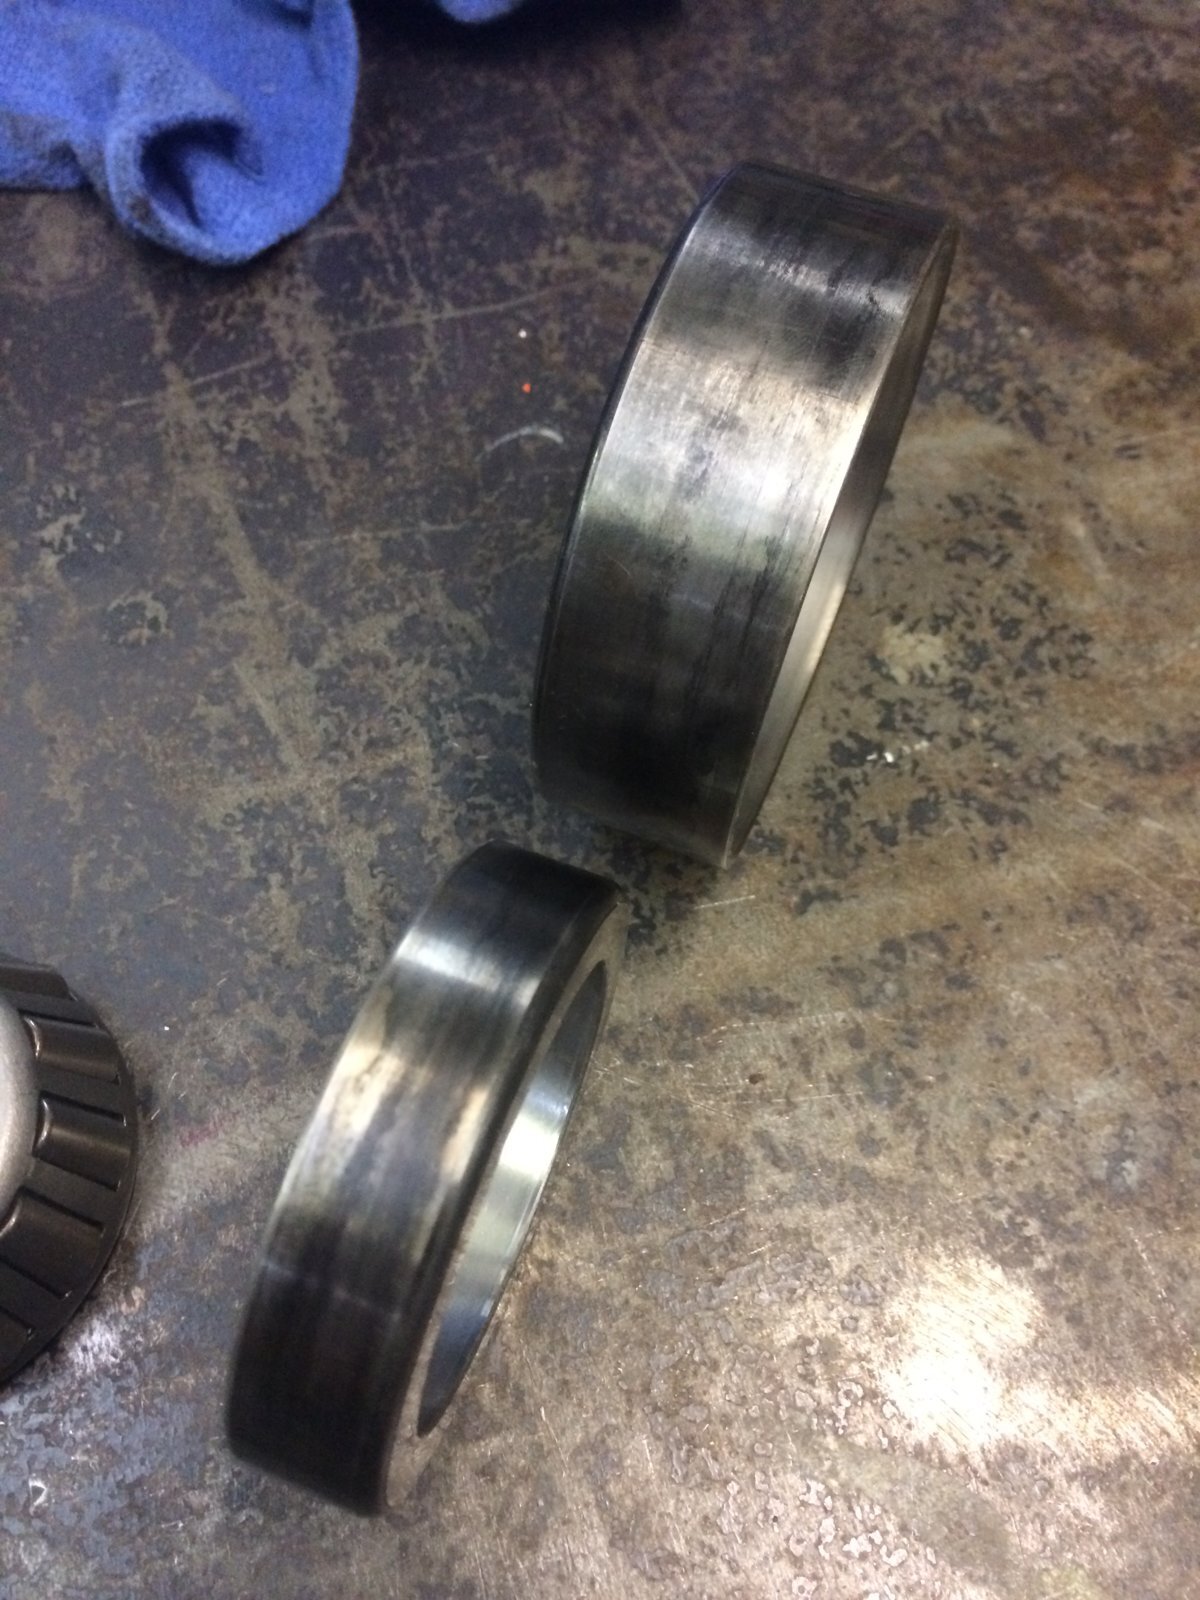
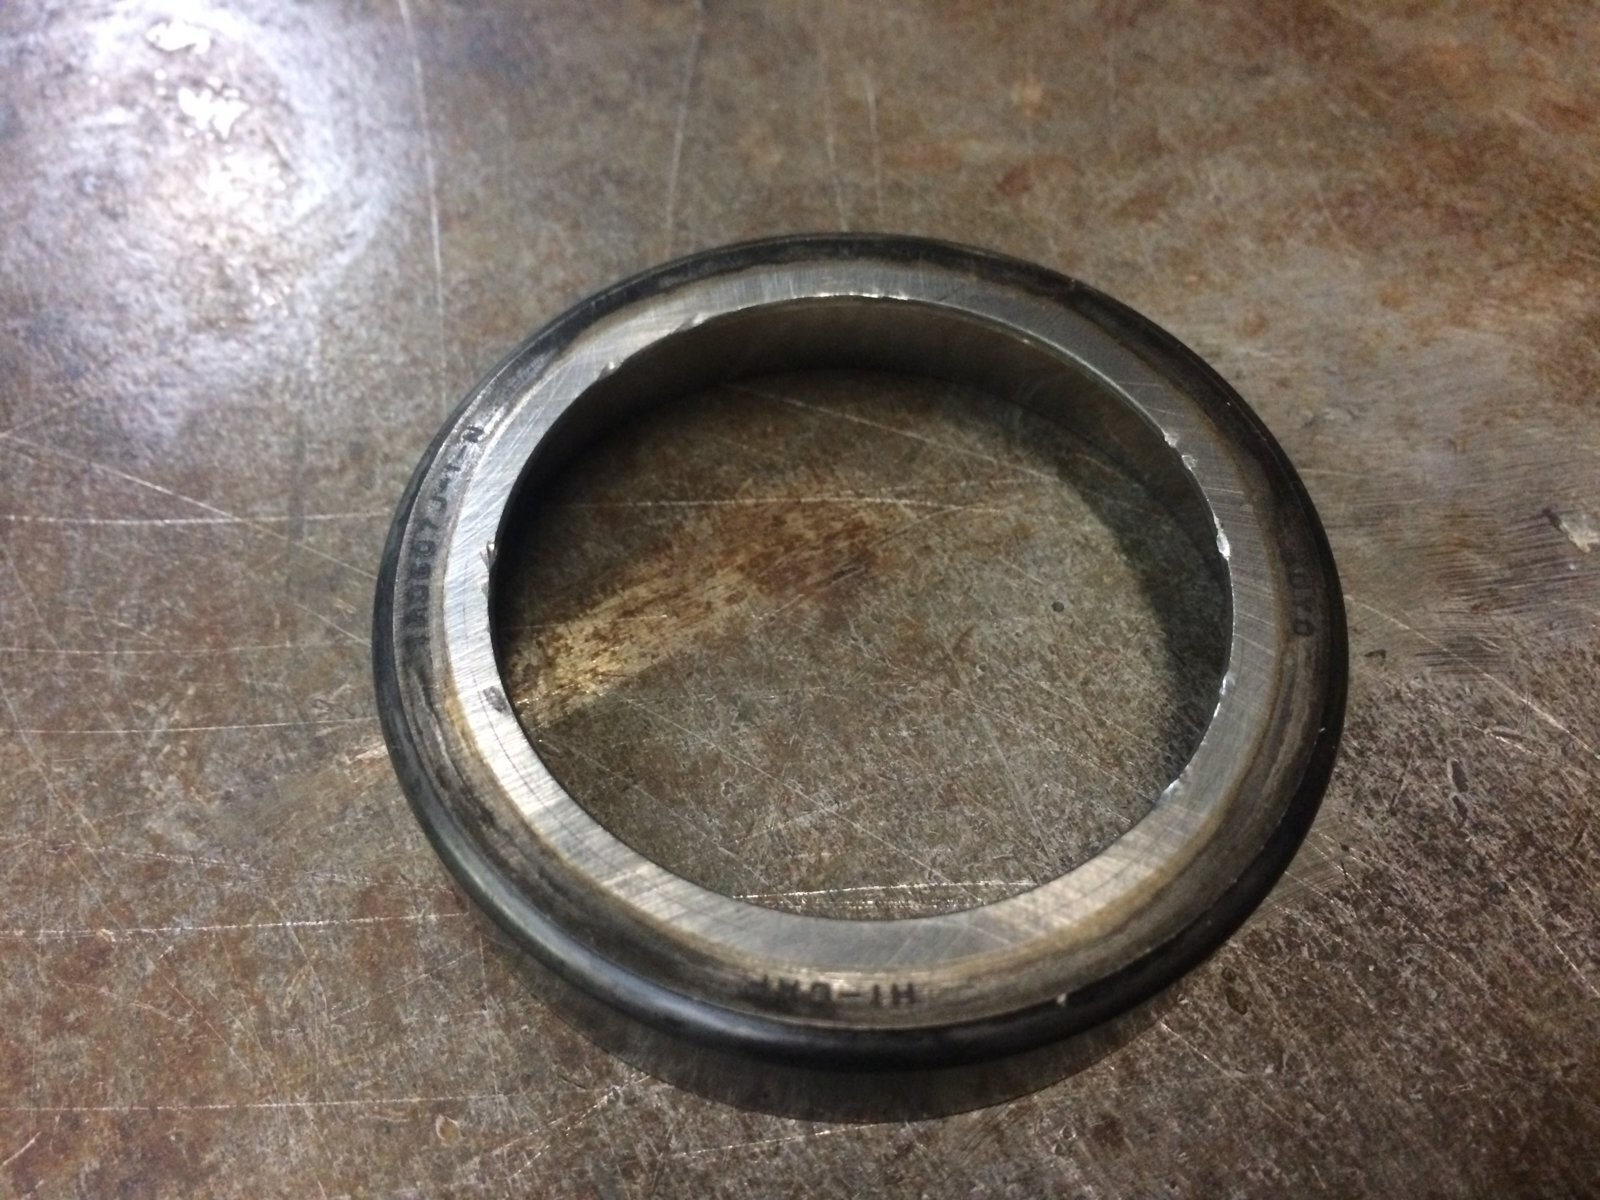
I cleaned all the old bearings up ready to source replacements.

Some of them had obviously got pretty hot at some point as they were black!
I took the ring and pinion to work to compare it to the new one.

Sadly the new ring gear was thinner than the KZJ one.
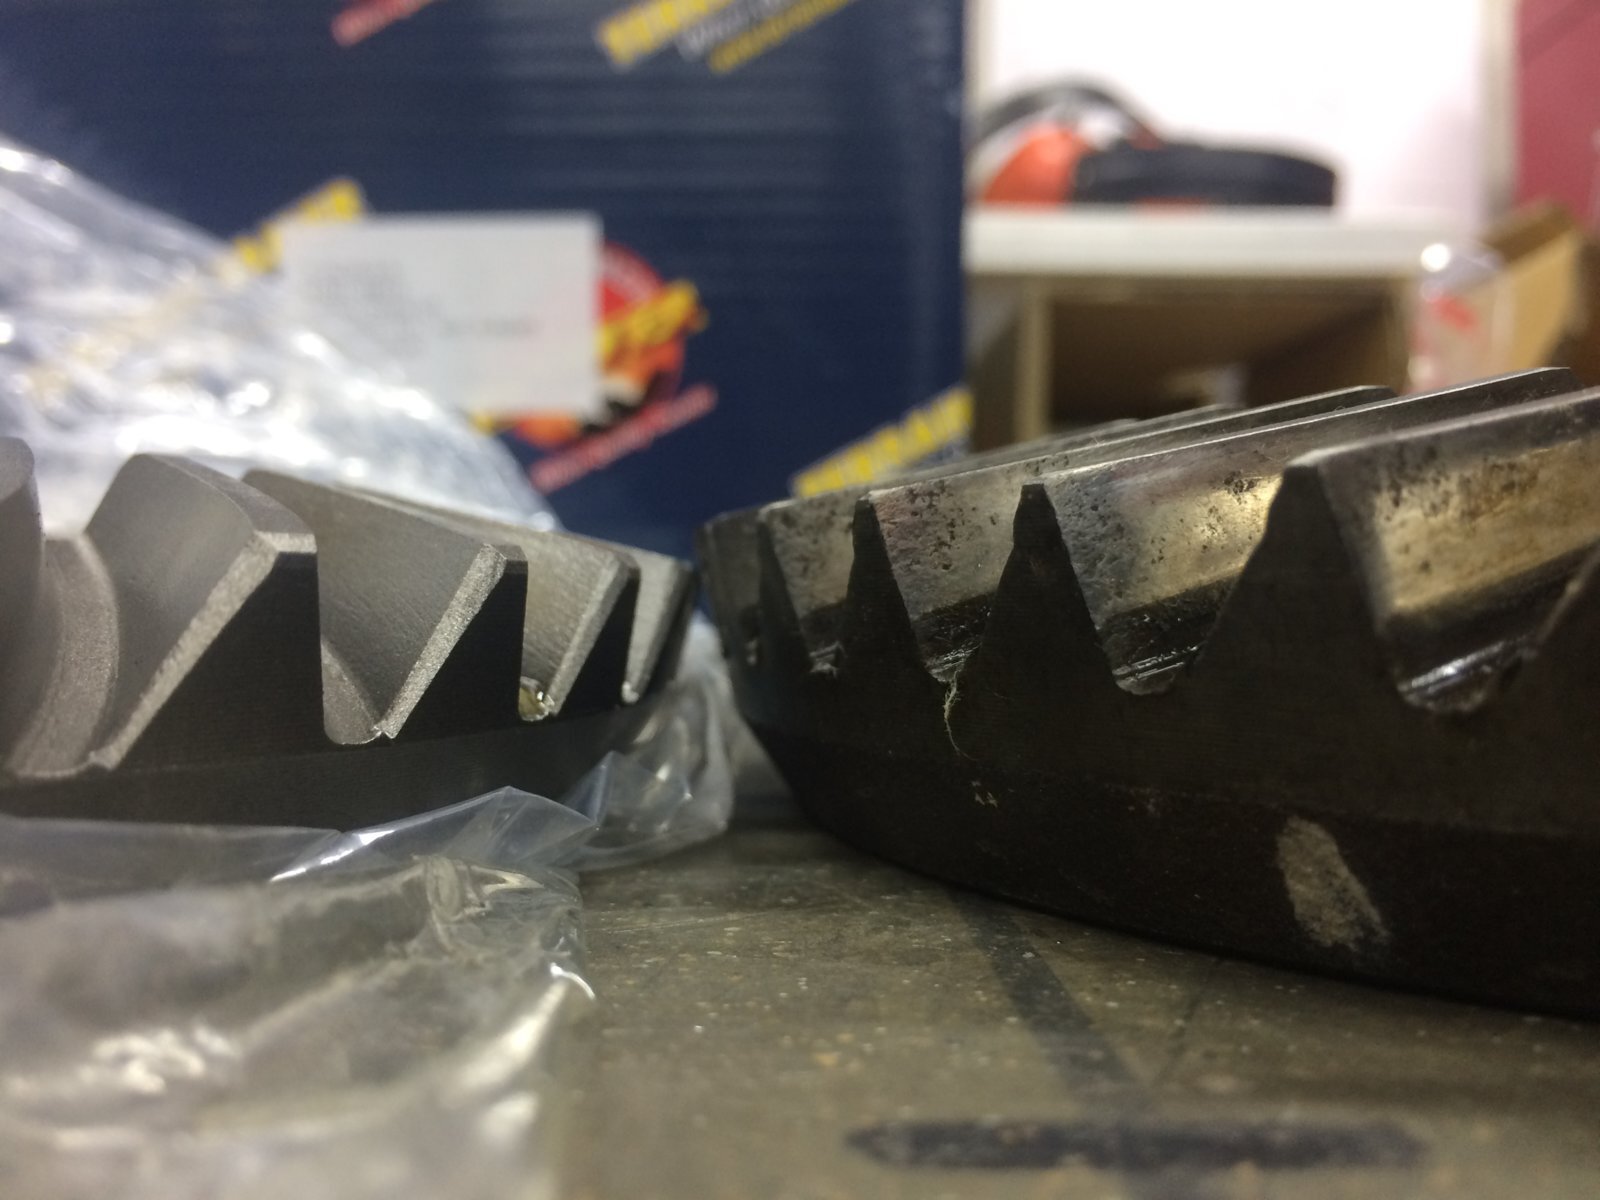
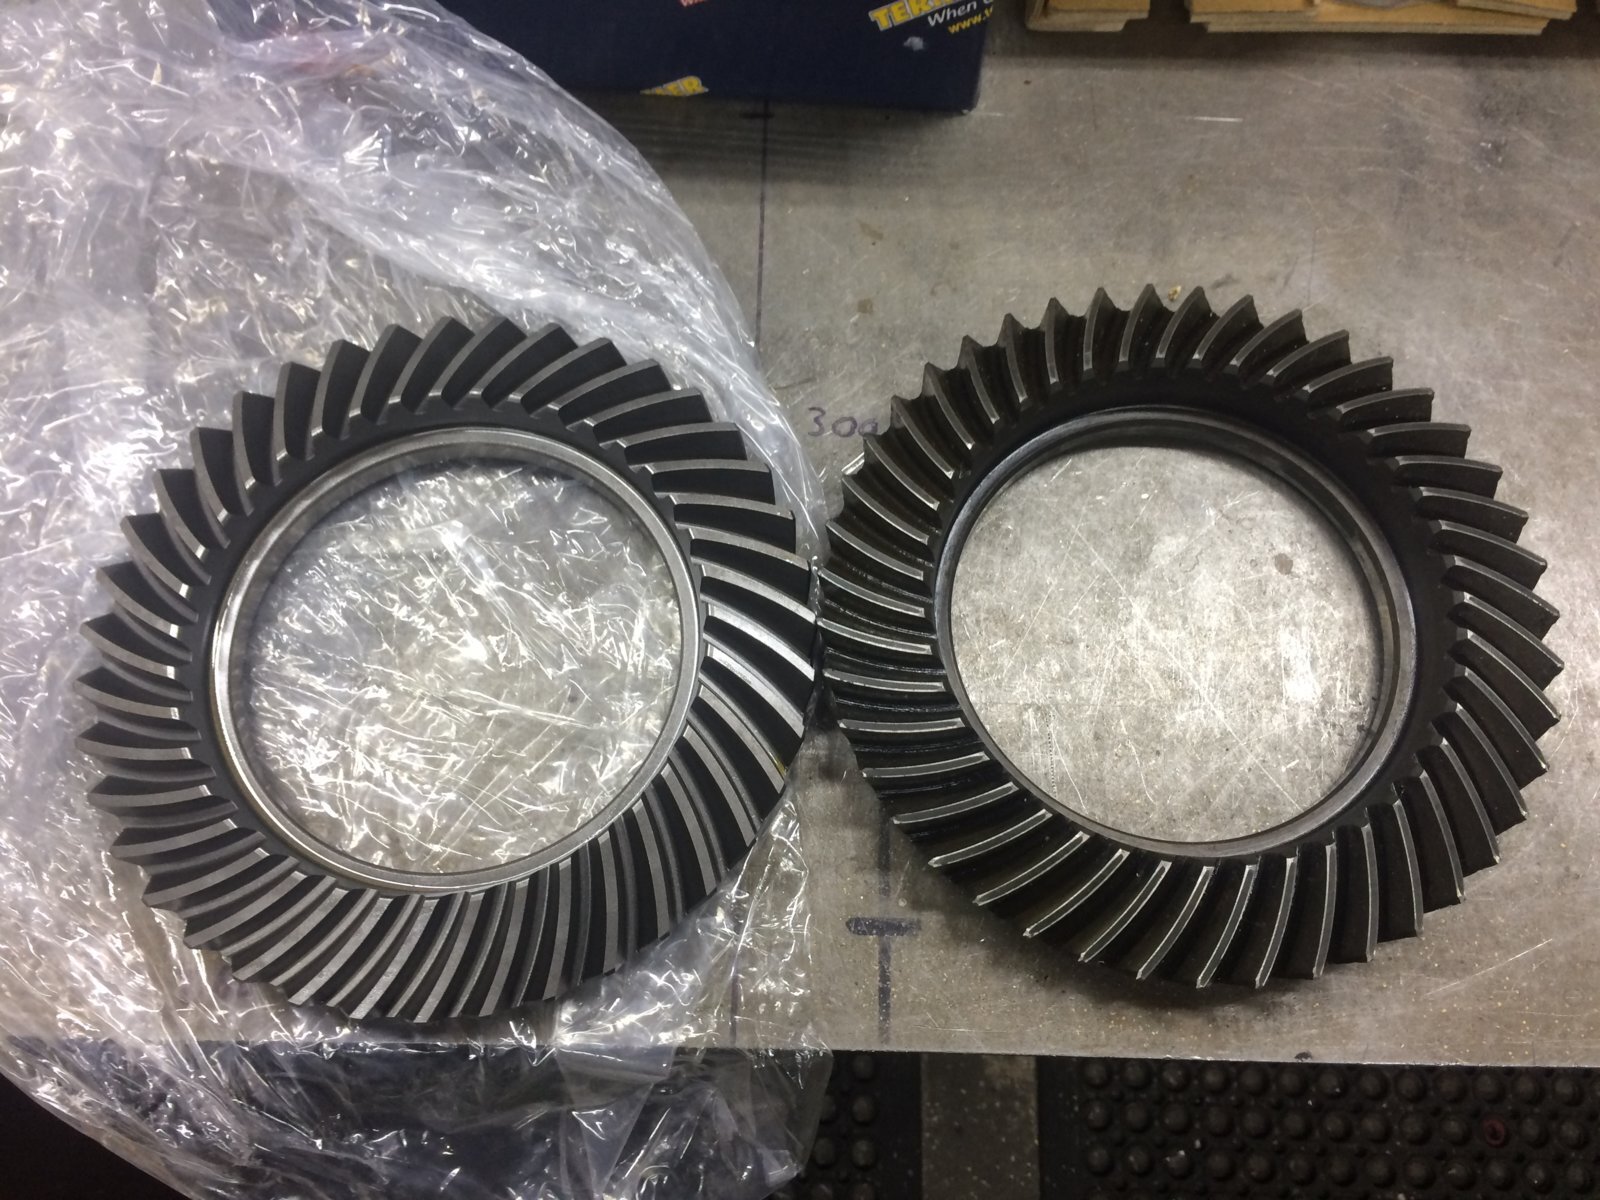
For some reason the LJ70 4:8 ring gears are thinner than the ring gears on the RJ and KZJ 70's, meaning swapping ring and pinions between models really isnt an option.
So to keep with the nice low 4:8 (The KZJ is 4:3) I will need to source an aftermarket 4:8 from some one like Nitro/Yukon etc.
I compared the old KZJ center to the new E locker center and thankfully their almost the same, the E locker is slightly larger in width but not by much.


I've sourced the new bearings, I need to order a genuine pinion seal and a few other bits and obviously the new ring and pinion. Oh and a solid pinion spacer because crush tubes suck!
Then I will drop all the bits off with the company I'm going to get to build it for me.

We moved down to Melbourne just after Christmas and now I'm working back at Piranha Off Road work can continue on this project!
The first thing to fix was the rear diff which got incredibly noisy 2 days before we were due to drive down from QLD, to the point of me having to remove the rear prop shaft and drive down in front wheel drive.
As a replacement 4:8 ring and pinion for my factory locked rear diff was proving hard to find and the fact that I wasnt sure if the solenoid would ever work again after I removed all the magnets to rebuild it and never knew at the time that they are North/South magnets and I have probably put them back in the wrong place.....
I decided I would just fit the KZJ78 axle I have spare, with a new ring and pinion, all new bearings and an Eaton E locker.
I drained the old oil out of the KZJ78 axle.


I then pulled the half shafts and diff center out.


I brought the axle casing to work for repairs.

As often happens with the LJ/RJ/KZJ 70 rear axles, at some point the shock bushes had worn out and the bottom shock mounts had badly flogged out the mounting holes in the axle.

I will diegrind the holes out big enough to fit some nice thick chunky washers we have at work and then TIG weld them in.

I got a new ring and pinion and E locker at cost price!


I was a bit concerned that the new ring and pinion might not be the right ones, so I stripped down the KZJ78 diff.


Gave them a clean up in the parts washer.

I cleaned all the old bearings up ready to source replacements.

Some of them had obviously got pretty hot at some point as they were black!


I took the ring and pinion to work to compare it to the new one.

Sadly the new ring gear was thinner than the KZJ one.


For some reason the LJ70 4:8 ring gears are thinner than the ring gears on the RJ and KZJ 70's, meaning swapping ring and pinions between models really isnt an option.
So to keep with the nice low 4:8 (The KZJ is 4:3) I will need to source an aftermarket 4:8 from some one like Nitro/Yukon etc.

I compared the old KZJ center to the new E locker center and thankfully their almost the same, the E locker is slightly larger in width but not by much.


I've sourced the new bearings, I need to order a genuine pinion seal and a few other bits and obviously the new ring and pinion. Oh and a solid pinion spacer because crush tubes suck!
Then I will drop all the bits off with the company I'm going to get to build it for me.
- Joined
- Oct 13, 2010
- Messages
- 6,058
- Country Flag
We had a new VDJ76 wagon in the workshop at work for some electrical work and I had a look at the child restraint points in the back, which are mounted above the rear doors.
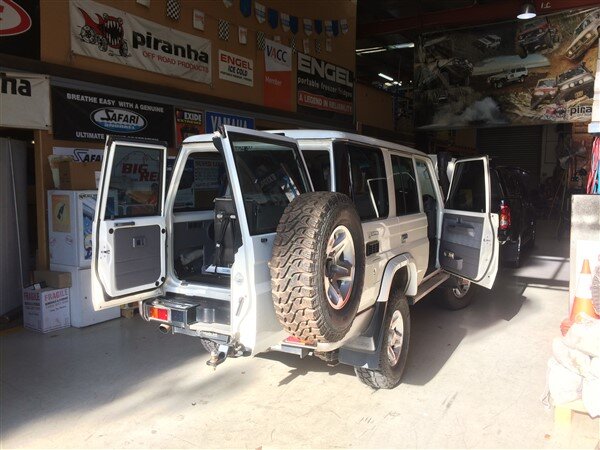
These are something that were never fitted to LJ and KZJ 78's and 79's.
In fact it turns out they were never fitted to the new VDJ76's sold here in Australia, well not by Toyota them selves, they are fitted when they land in Australia by a private company, for Toyota before they are sold.
Anyway....................
This is them.
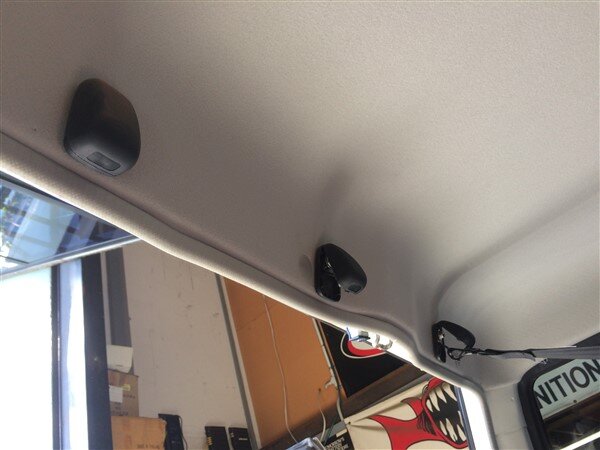
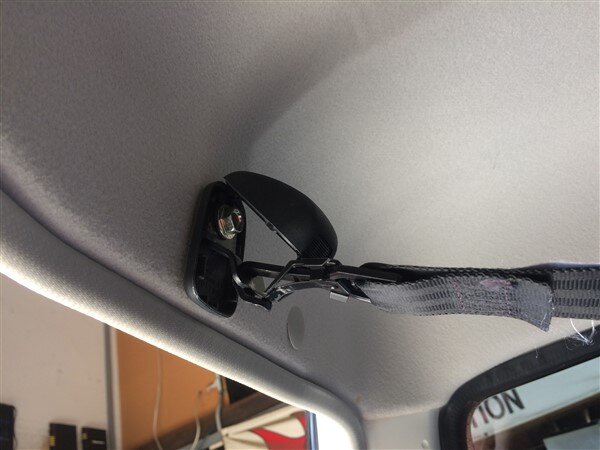
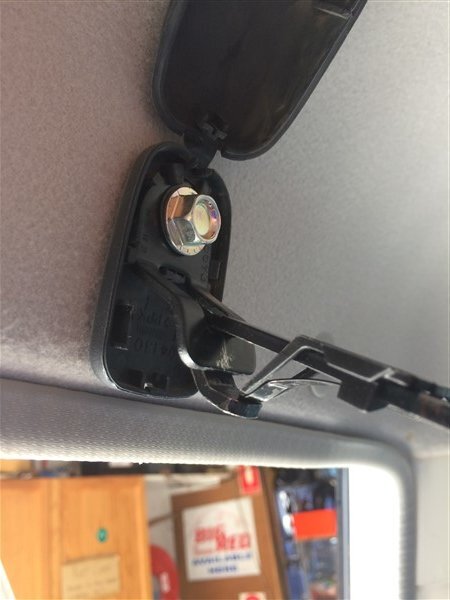
Which got me thinking about how I could fit them to my LJ78.
Upon inspecting my LJ78 and feeling along that section I could feel 3 10mm holes through my headlining in roughly the same places as the VDJ76 ones were.
I wanted to explore the possibility of fitting them in my LJ78, so I pealed back the headlining and had a look.
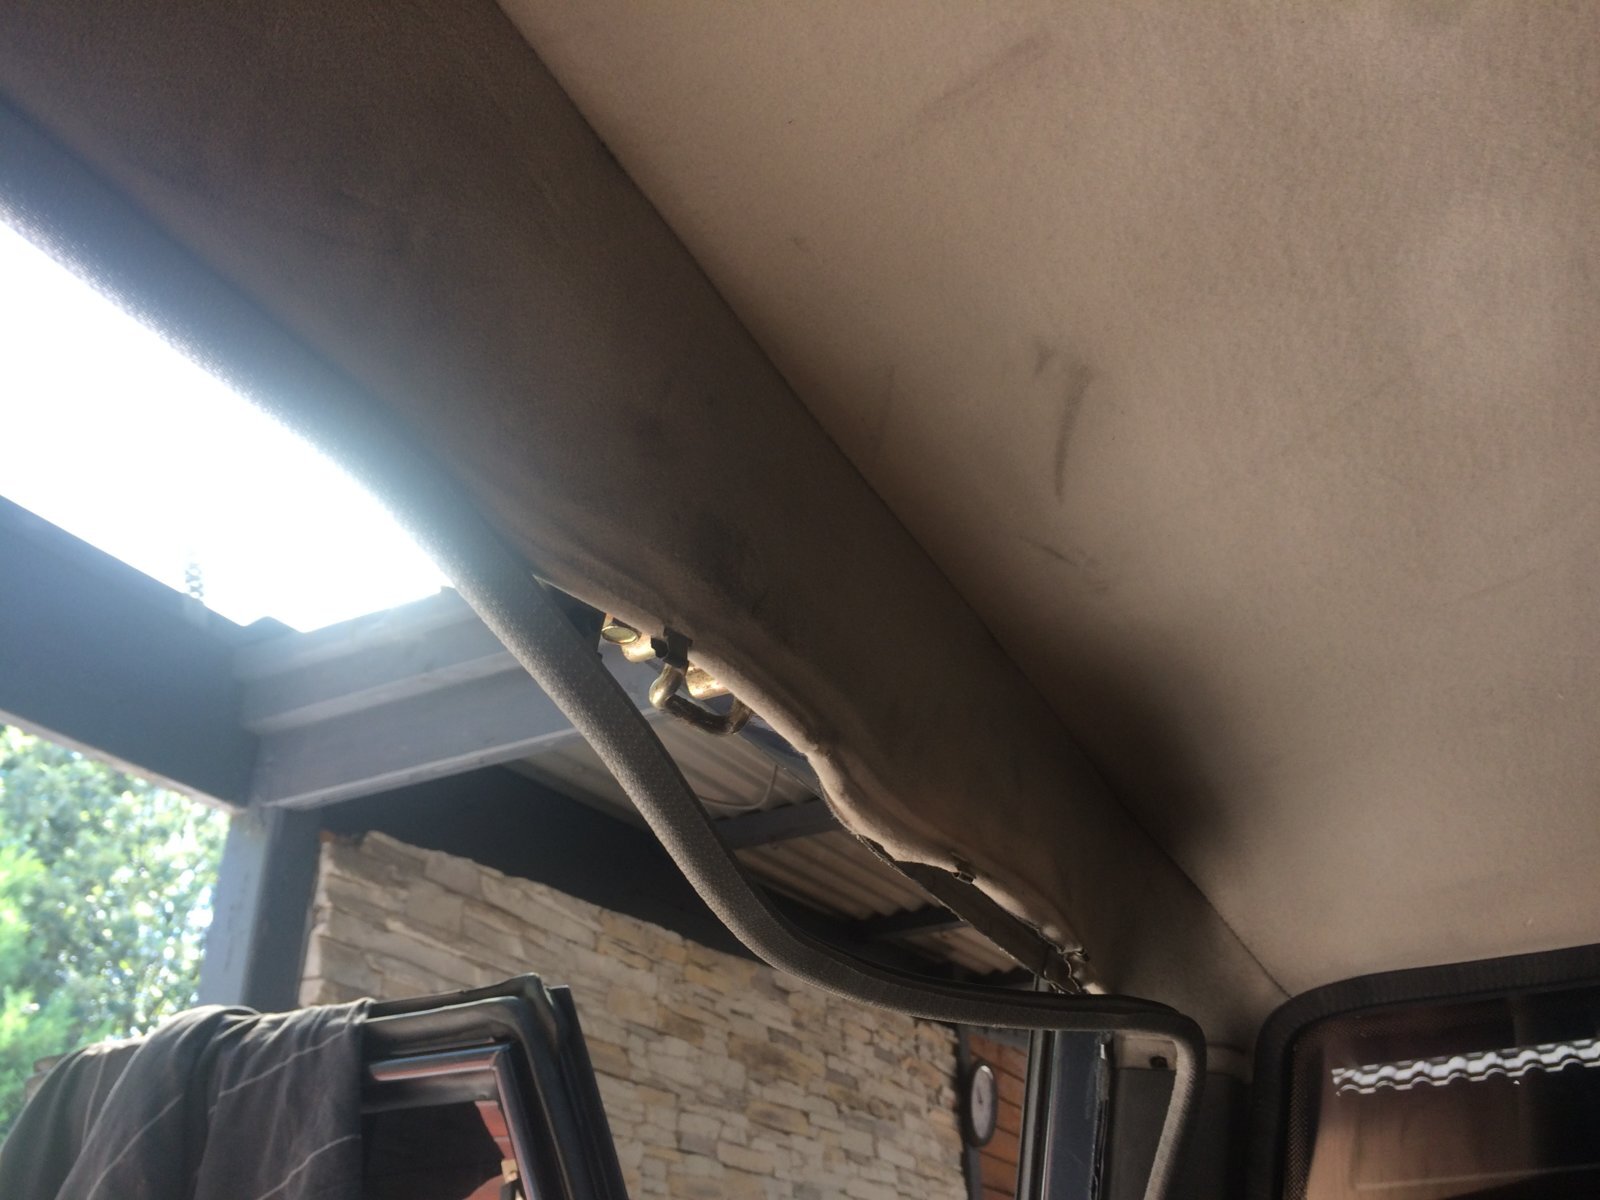
And at the ends each side is a nice big hole, easily big enough for the big 50mm diameter, 5mm thick washers that come with the child restraint points, which have an M8 nut welded to the back.
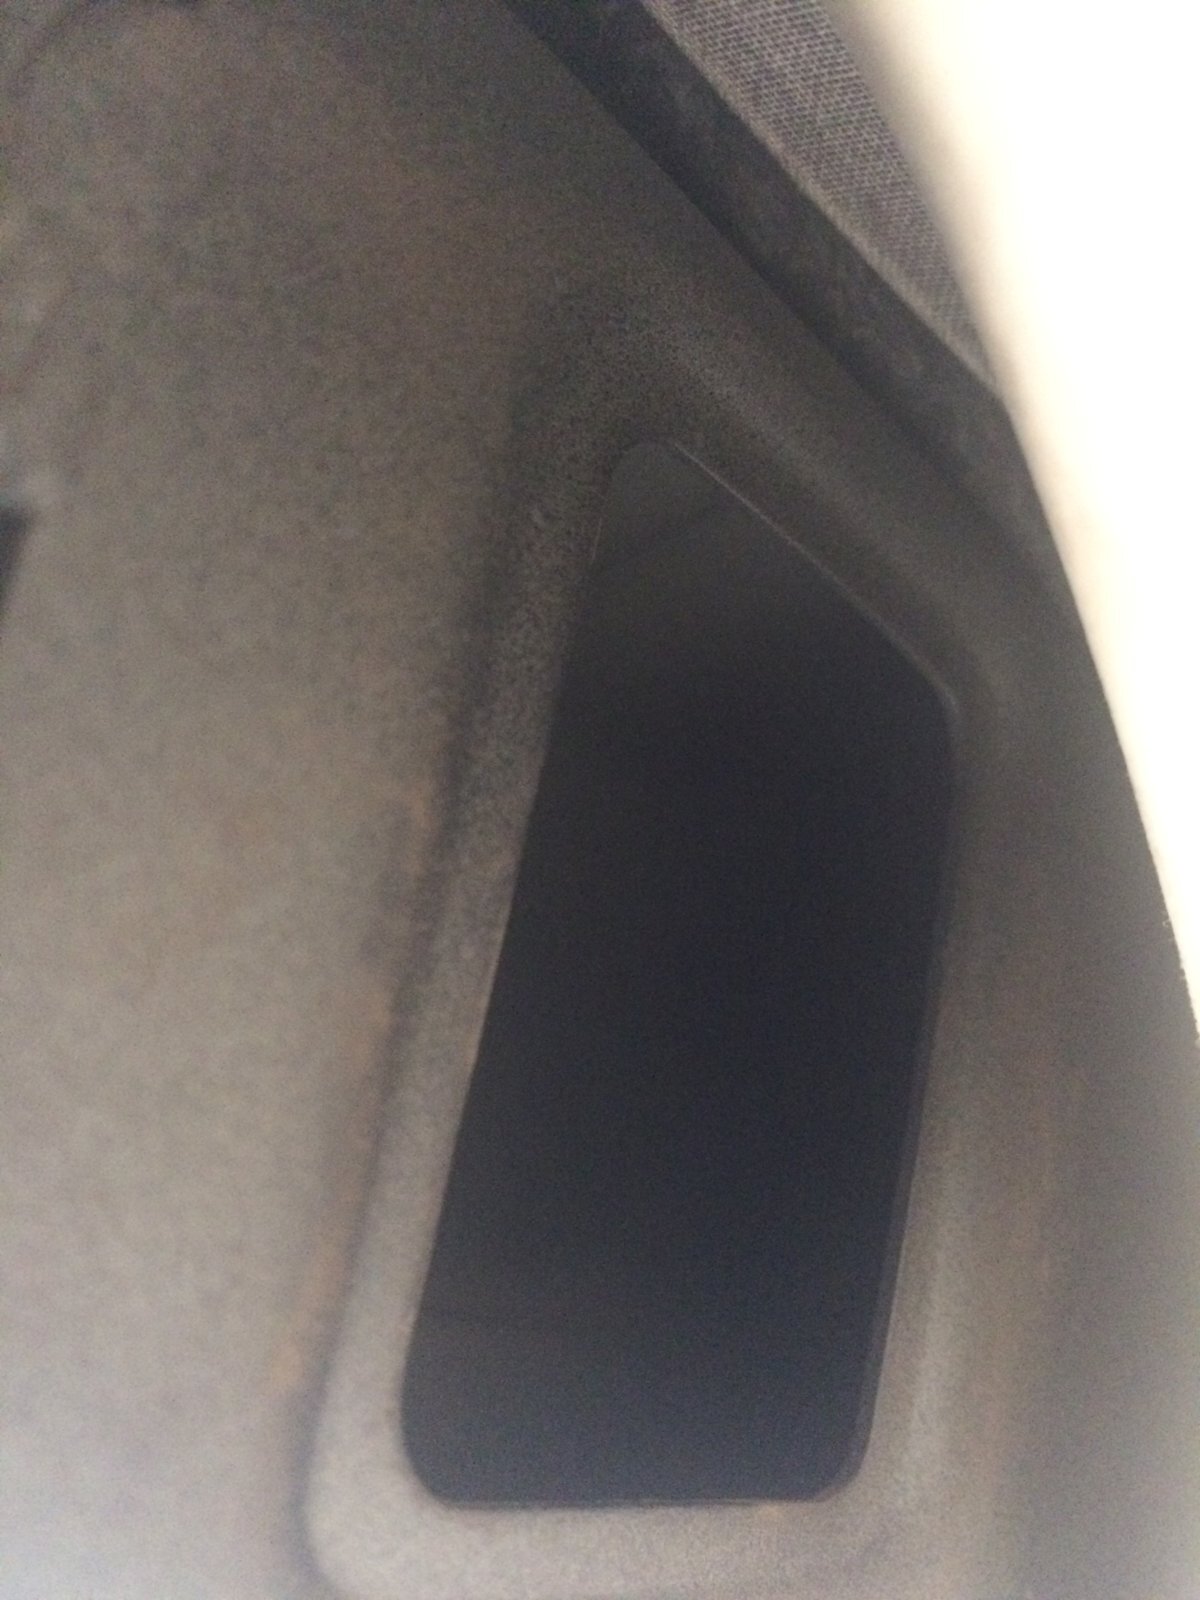
So should I want to add child restraint points for the top tether on child seats, I can do very easily!

I've been working on the storage system in the back of the car and as I'm going to store my tools in the box to the left of the fridge over the passenger rear wheel arch, space is limited and weight is a major factor with this build as I'm trying to keep the entire vehicle as light as possible.
So I decided to cut down on the tools I carry and organise them a bit better.
This was the bulky Aldi socket set I was carrying.
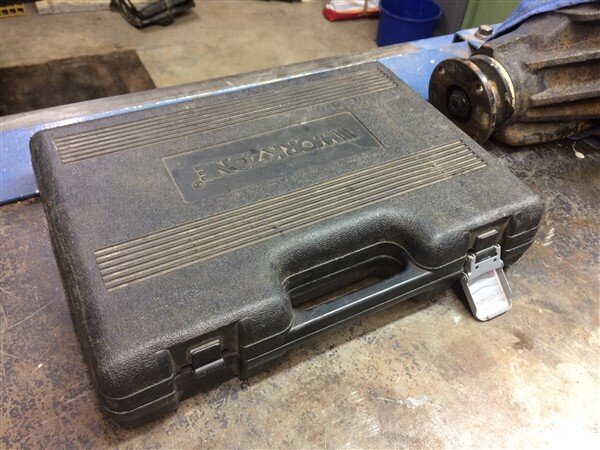
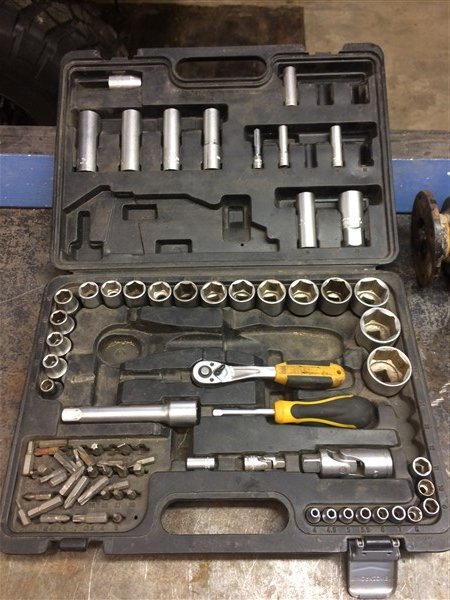
So I removed the sockets that fit my car and ditched everything else I didnt think I'd need.
I also bought 2 x socket rails. One for 1/4 sockets and one for 1/2".
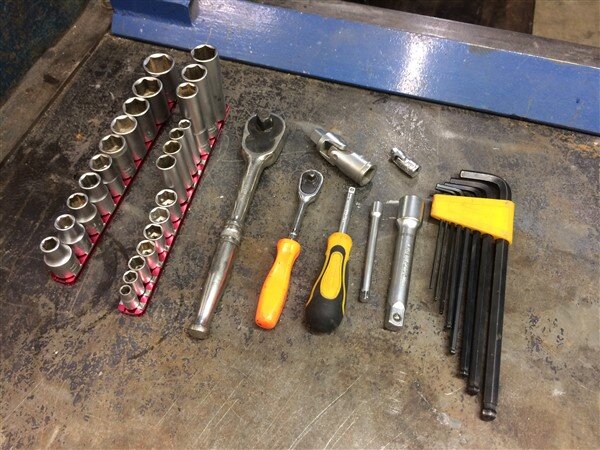
They then went in one of my tool rolls.
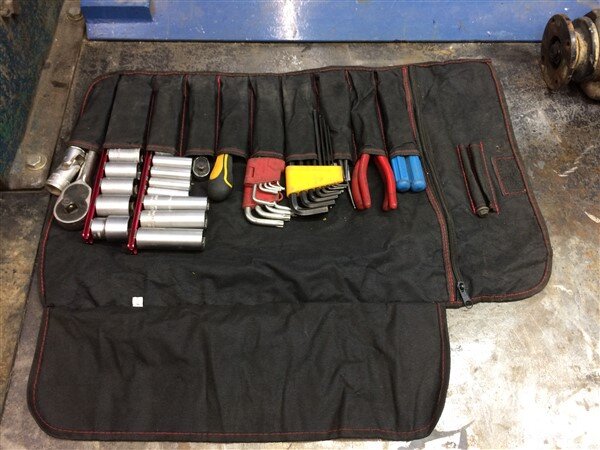
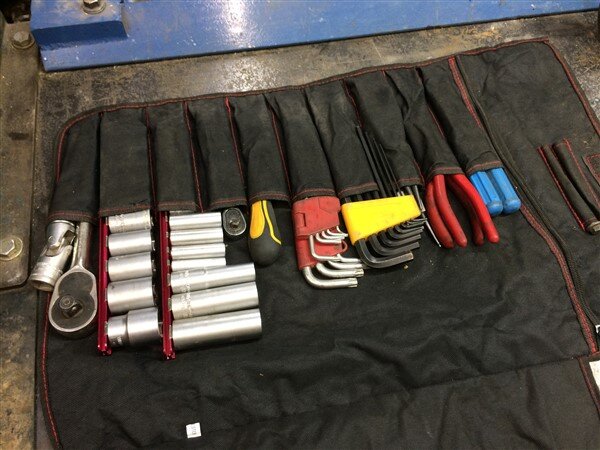
And I sorted out my other tool roll and removed any spanners that dont fit my car and any tools I dont think I will need.
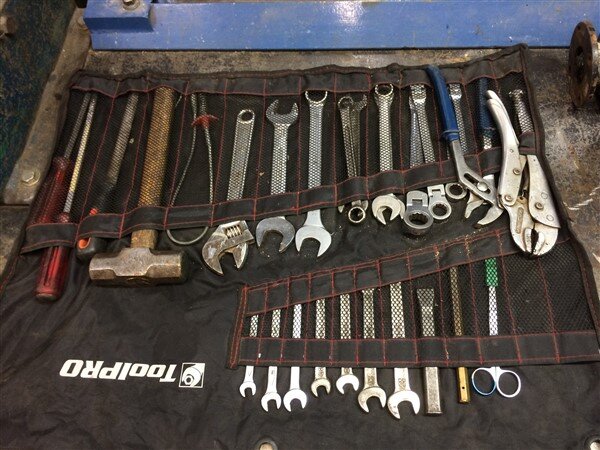
So thats my main 2 tool rolls which roll up nice and tight to not only take up minimum room but also so they dont rattle on rough roads.
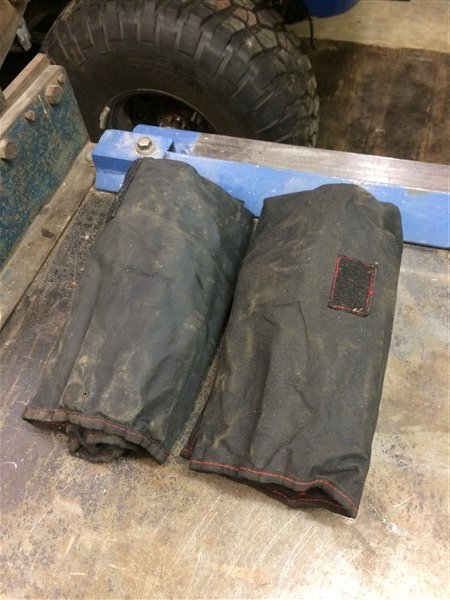
Theres also a few other tools that wouldnt fit in the rolls.
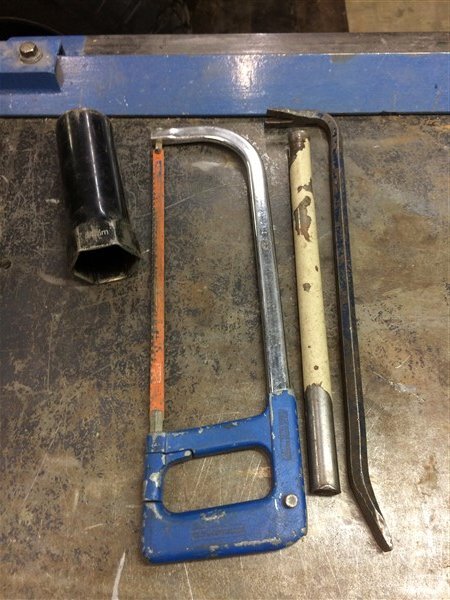
And a few other essentials.

They all fit snugly into the tool storage box to the left of the fridge, out of the way.
Leaving the drawers free for all the everyday cooking and camping items that are needed on every trip.
I also carry a small bag of tools in the glovebox, which are quick and easy to get to.
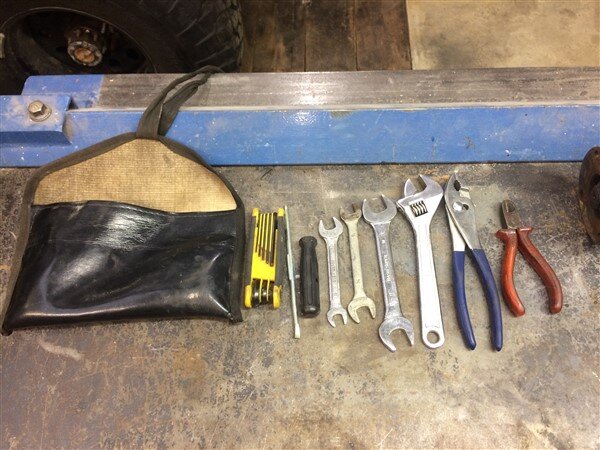
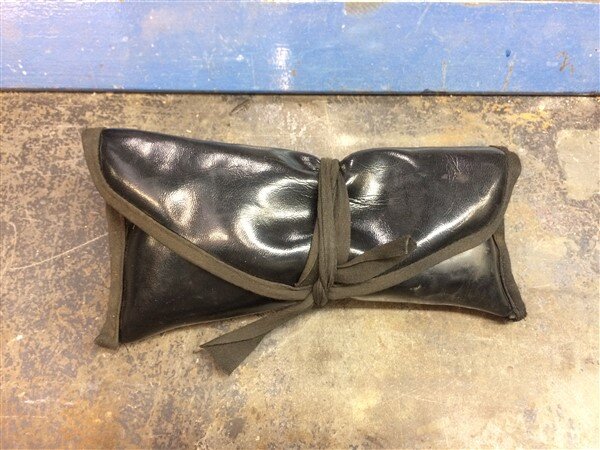

These are something that were never fitted to LJ and KZJ 78's and 79's.
In fact it turns out they were never fitted to the new VDJ76's sold here in Australia, well not by Toyota them selves, they are fitted when they land in Australia by a private company, for Toyota before they are sold.
Anyway....................
This is them.


Which got me thinking about how I could fit them to my LJ78.
Upon inspecting my LJ78 and feeling along that section I could feel 3 10mm holes through my headlining in roughly the same places as the VDJ76 ones were.

I wanted to explore the possibility of fitting them in my LJ78, so I pealed back the headlining and had a look.

And at the ends each side is a nice big hole, easily big enough for the big 50mm diameter, 5mm thick washers that come with the child restraint points, which have an M8 nut welded to the back.


So should I want to add child restraint points for the top tether on child seats, I can do very easily!


I've been working on the storage system in the back of the car and as I'm going to store my tools in the box to the left of the fridge over the passenger rear wheel arch, space is limited and weight is a major factor with this build as I'm trying to keep the entire vehicle as light as possible.
So I decided to cut down on the tools I carry and organise them a bit better.

This was the bulky Aldi socket set I was carrying.


So I removed the sockets that fit my car and ditched everything else I didnt think I'd need.
I also bought 2 x socket rails. One for 1/4 sockets and one for 1/2".

They then went in one of my tool rolls.


And I sorted out my other tool roll and removed any spanners that dont fit my car and any tools I dont think I will need.

So thats my main 2 tool rolls which roll up nice and tight to not only take up minimum room but also so they dont rattle on rough roads.

Theres also a few other tools that wouldnt fit in the rolls.

And a few other essentials.

They all fit snugly into the tool storage box to the left of the fridge, out of the way.
Leaving the drawers free for all the everyday cooking and camping items that are needed on every trip.
I also carry a small bag of tools in the glovebox, which are quick and easy to get to.


- Joined
- Oct 13, 2010
- Messages
- 6,058
- Country Flag
Drawers next! 
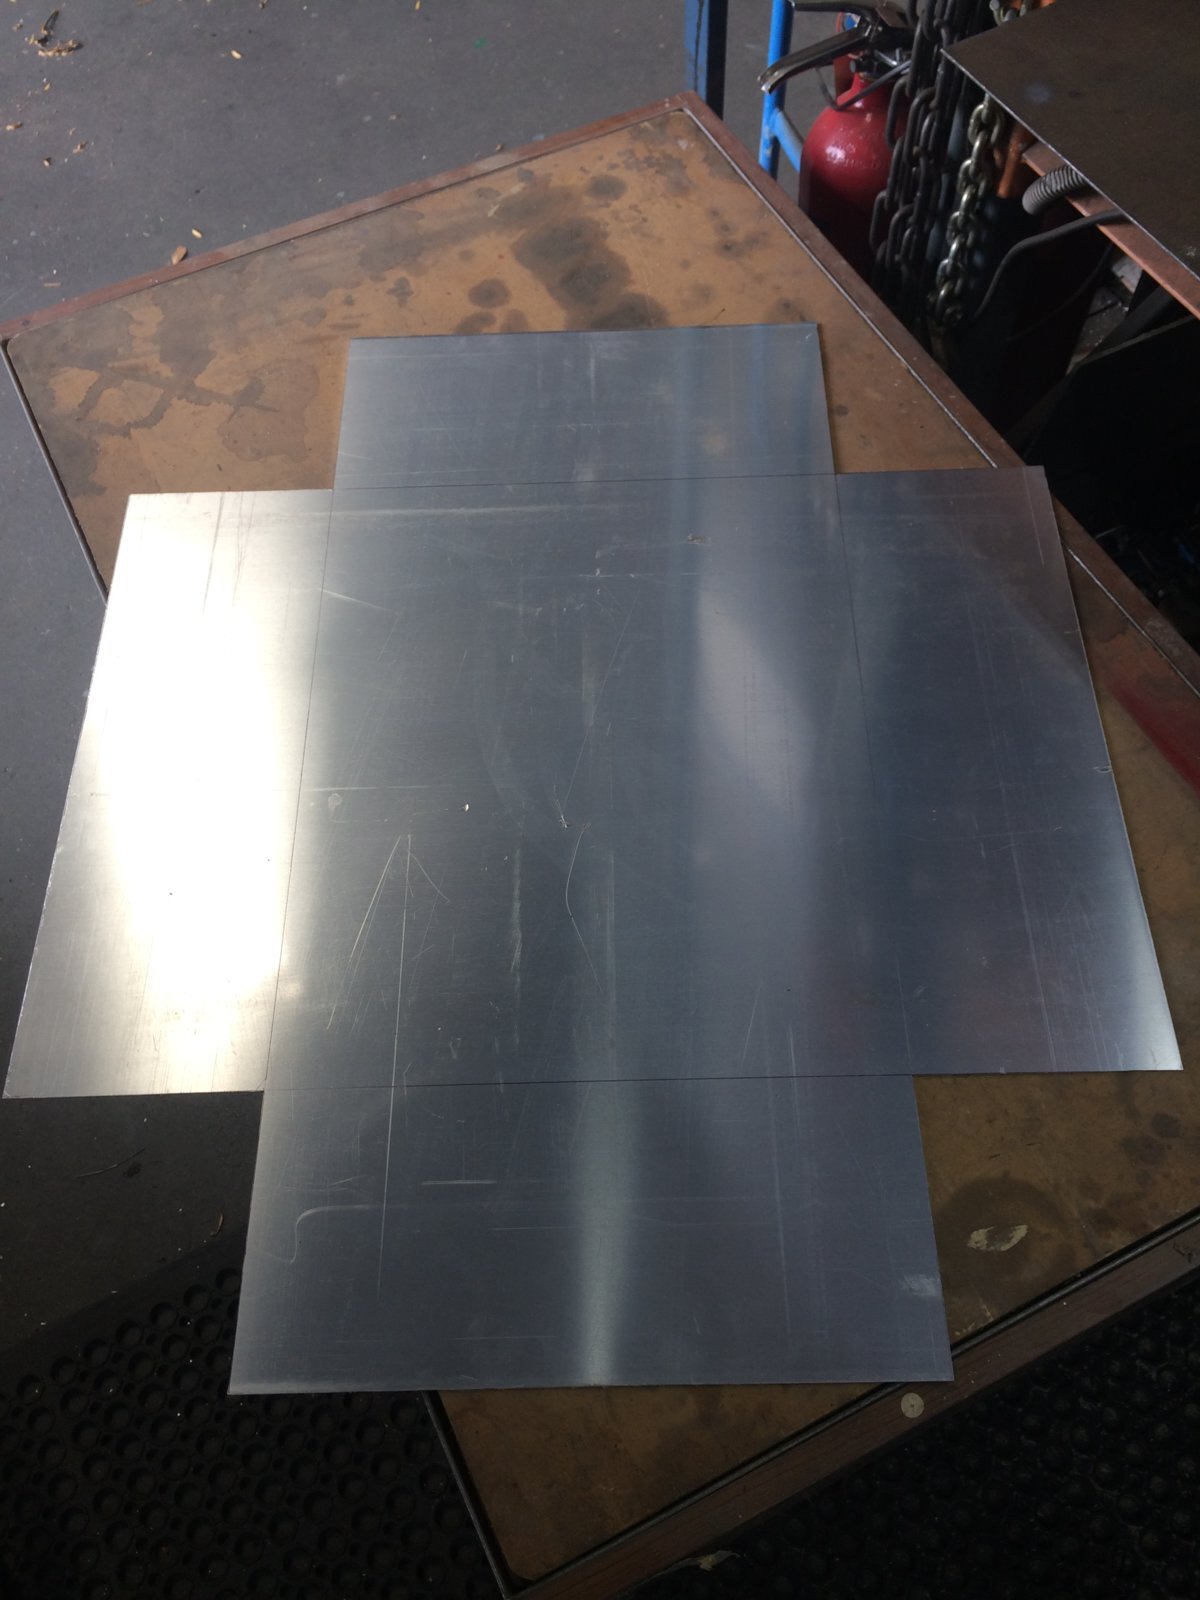
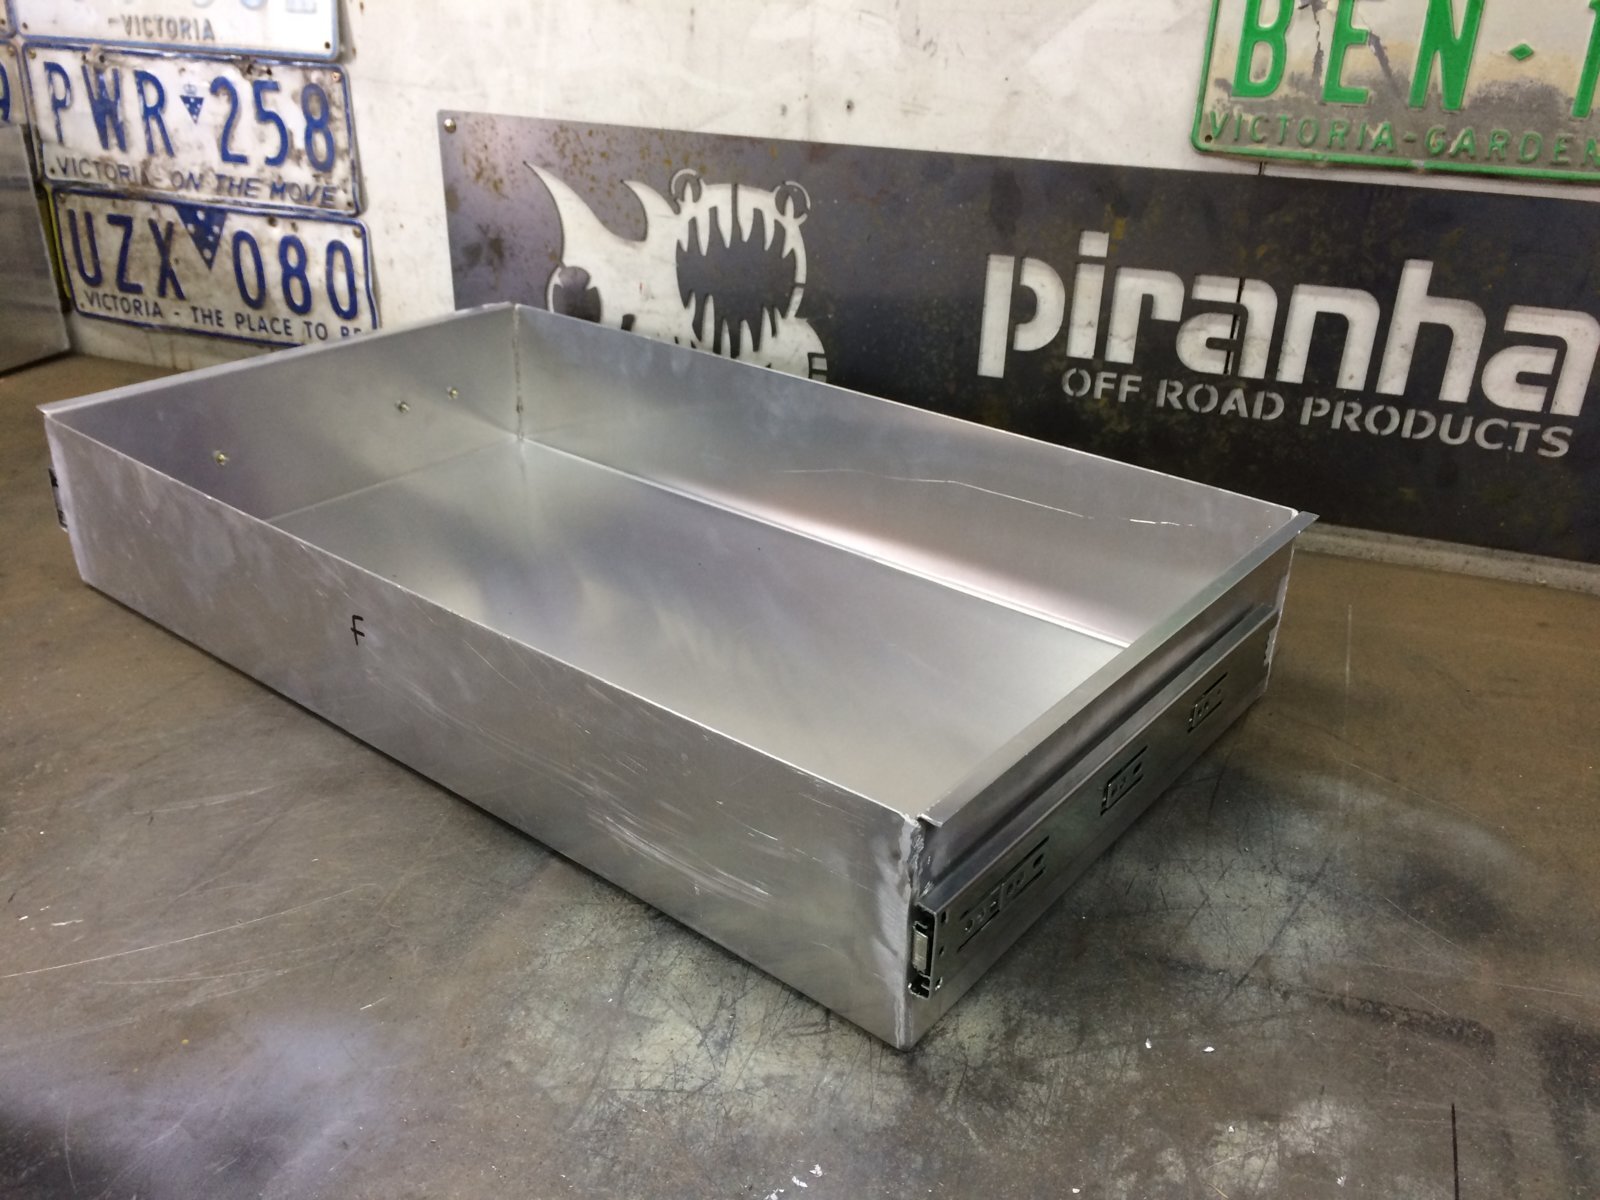
To keep them nice and light I bought a sheet of 1.6mm alluminium for the main drawer boxes.
Measured, marked and cut out the alluminium for each drawer.
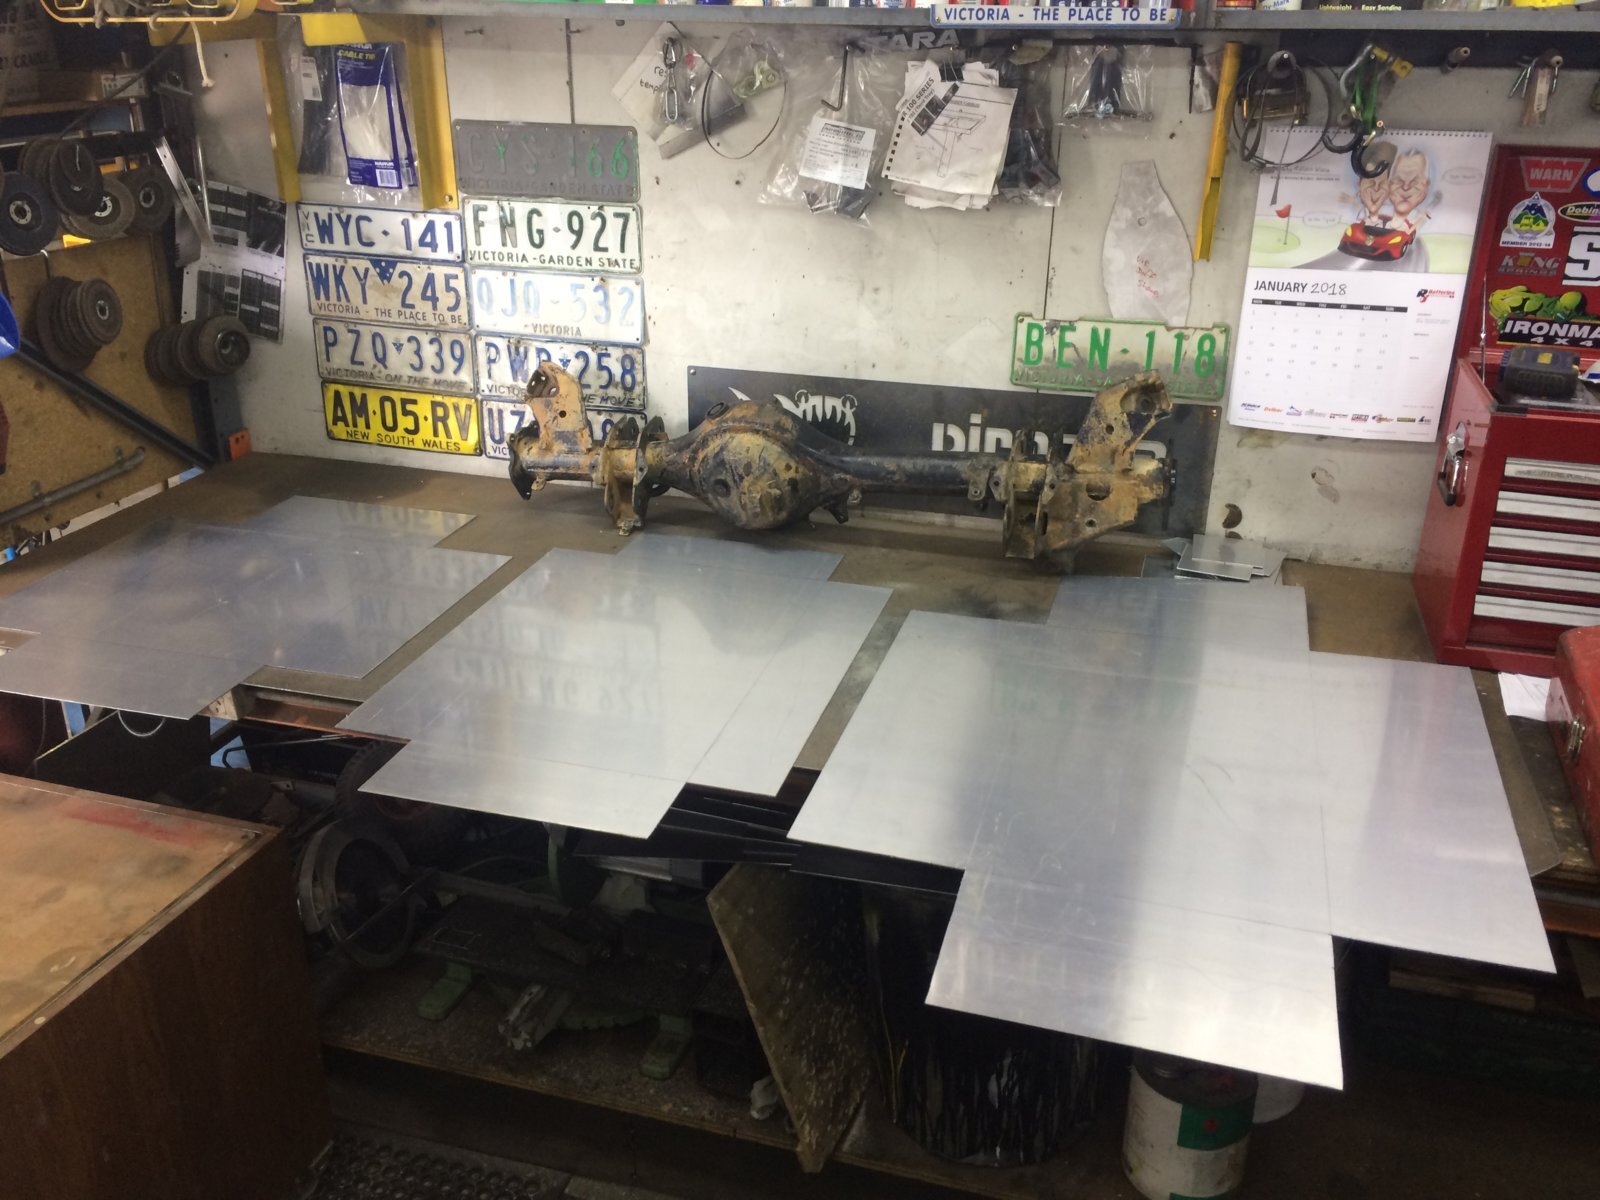
And got them onto the pan press for folding.


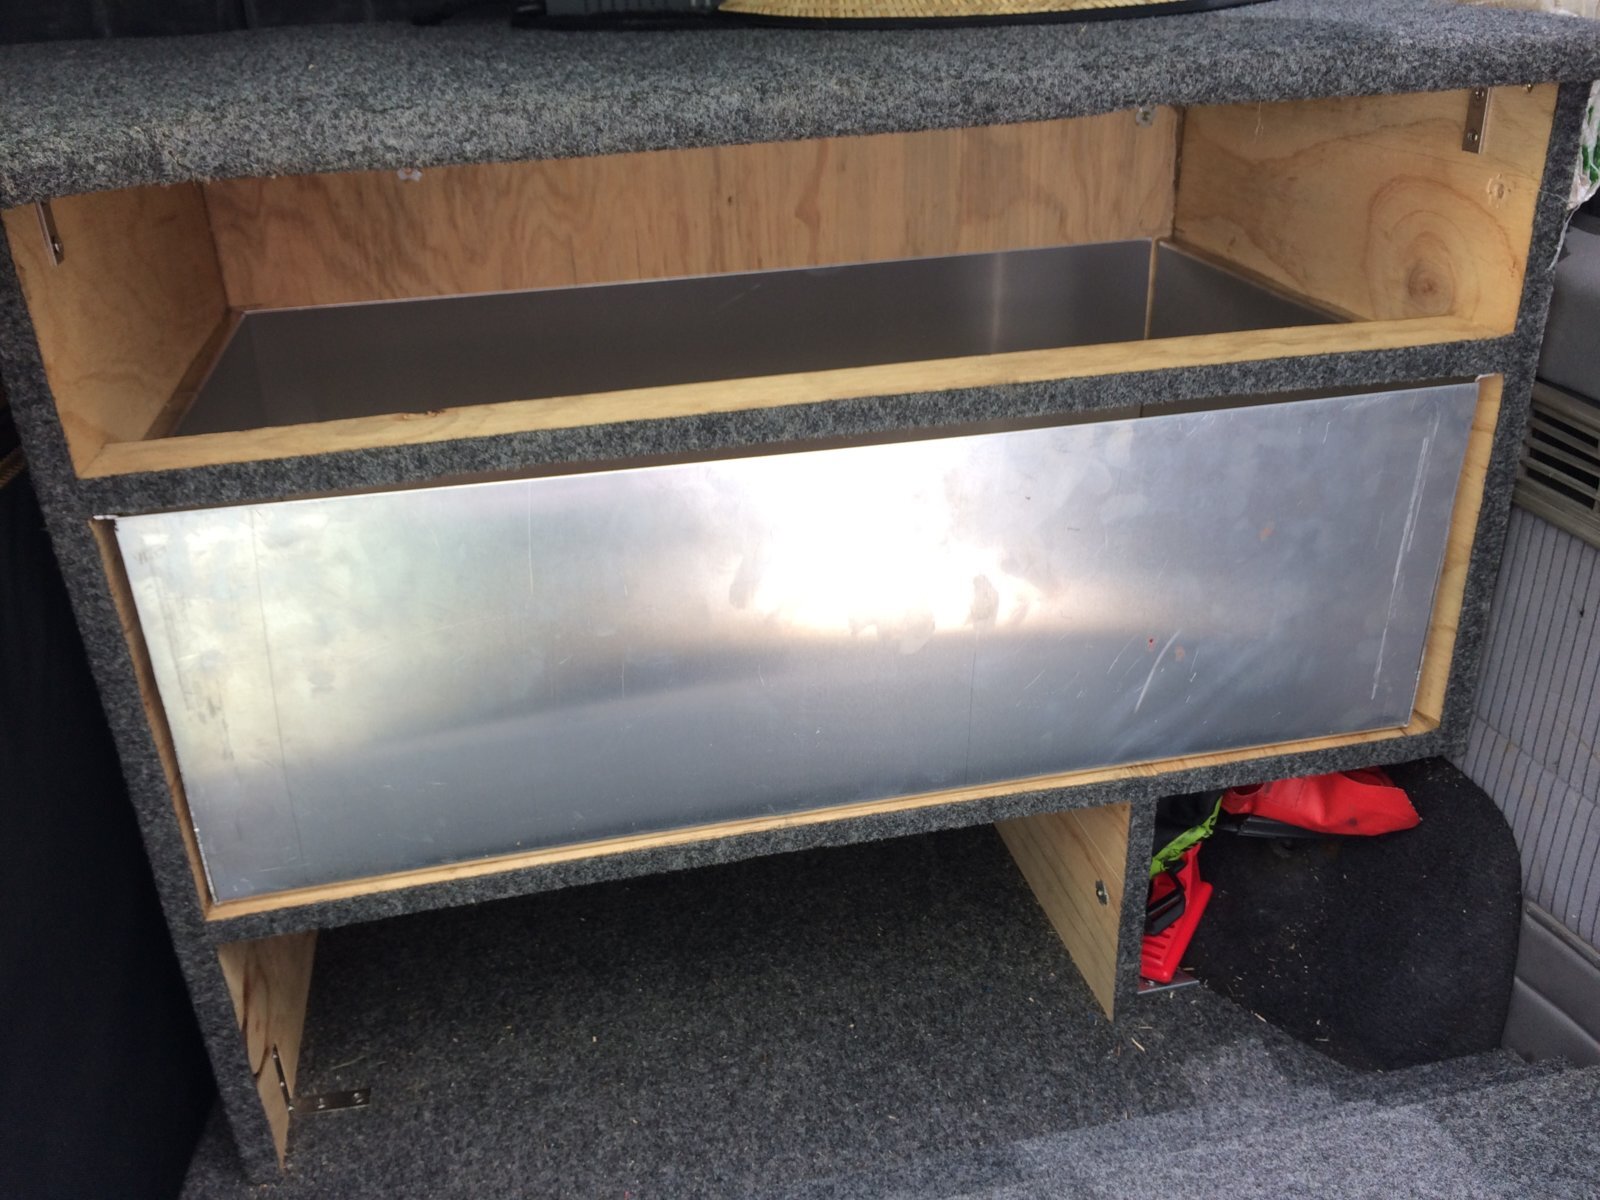
First one folded.


Test fitting.
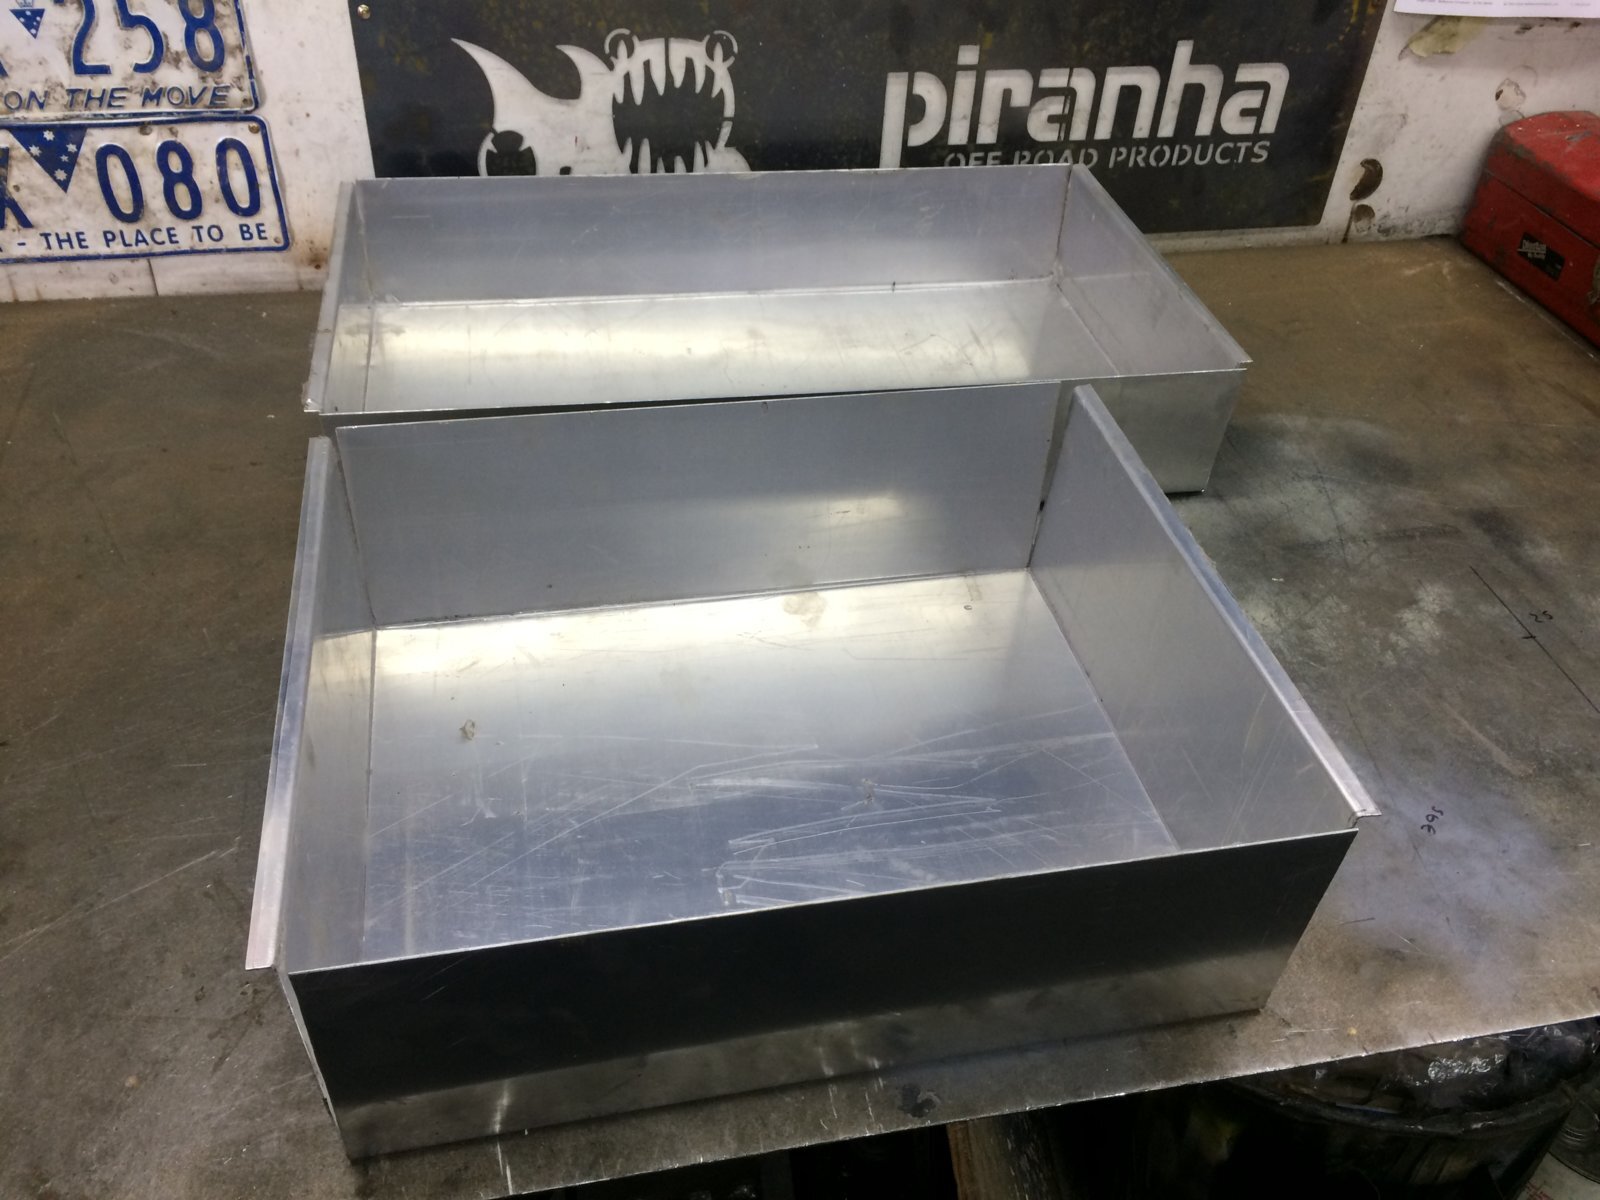
Other 2 folded.
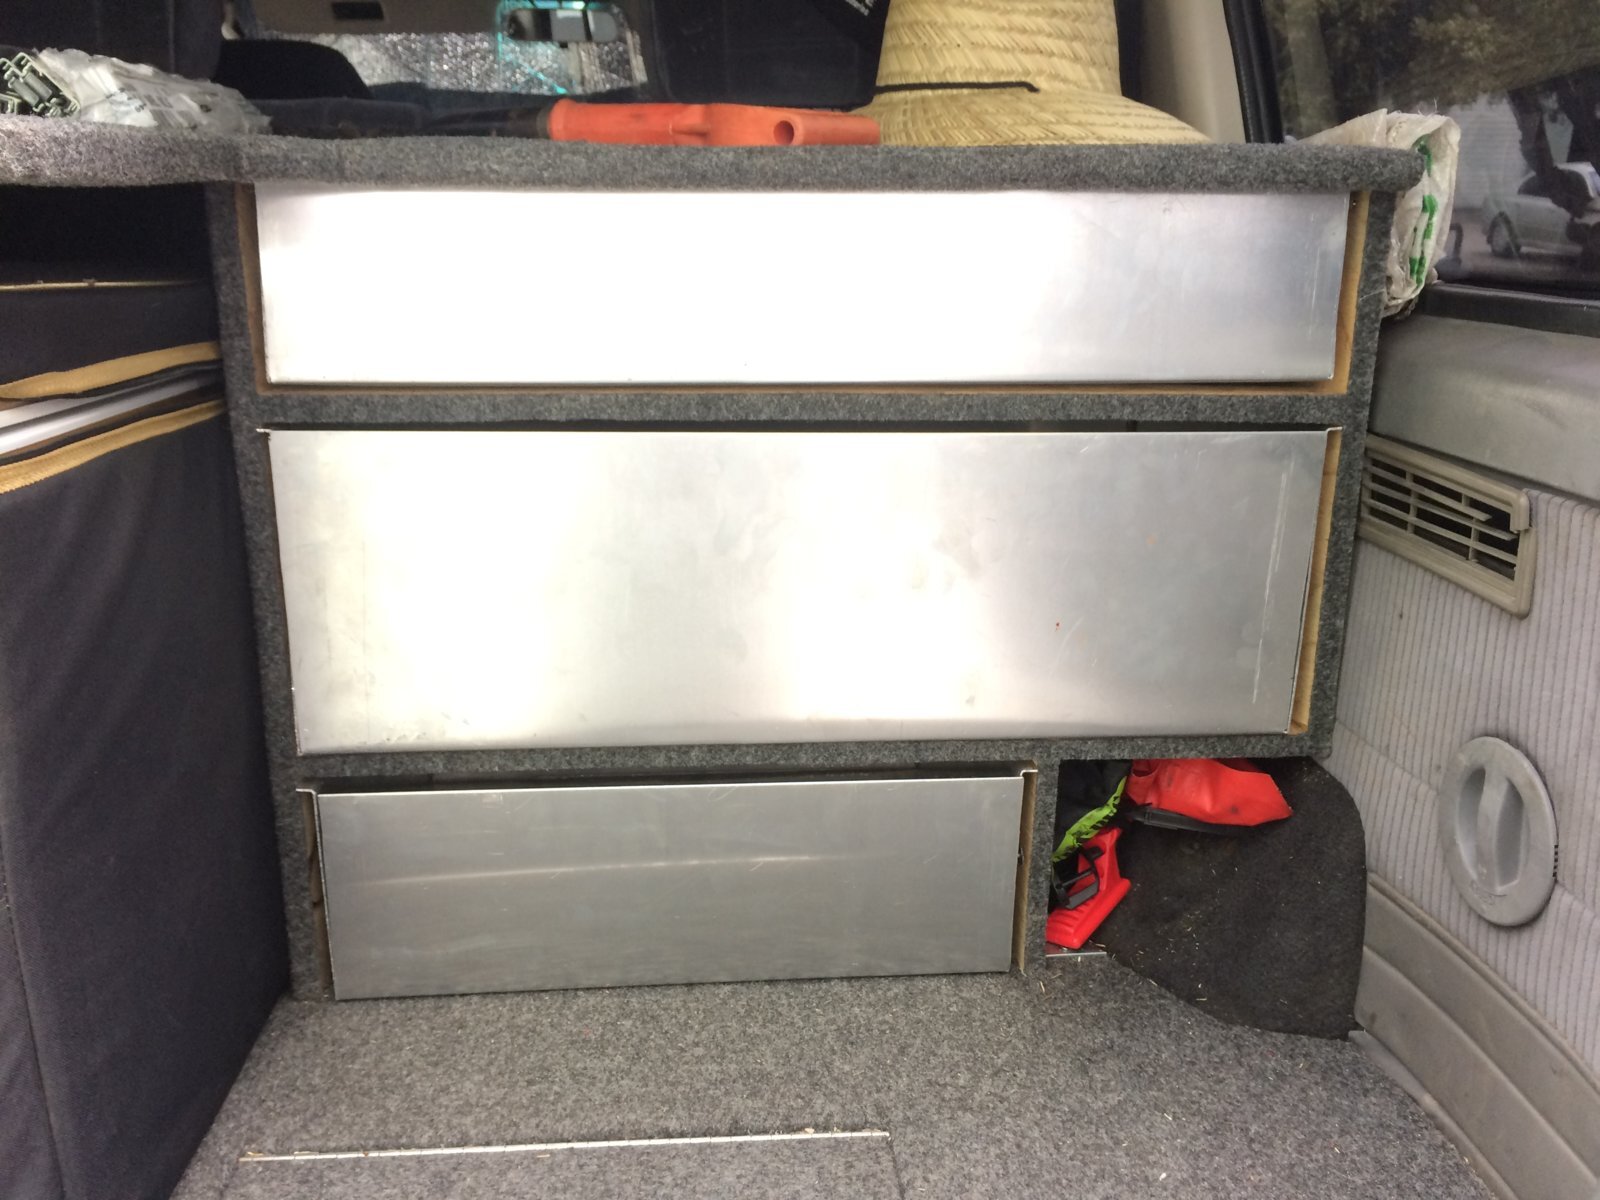
All 3 in position.
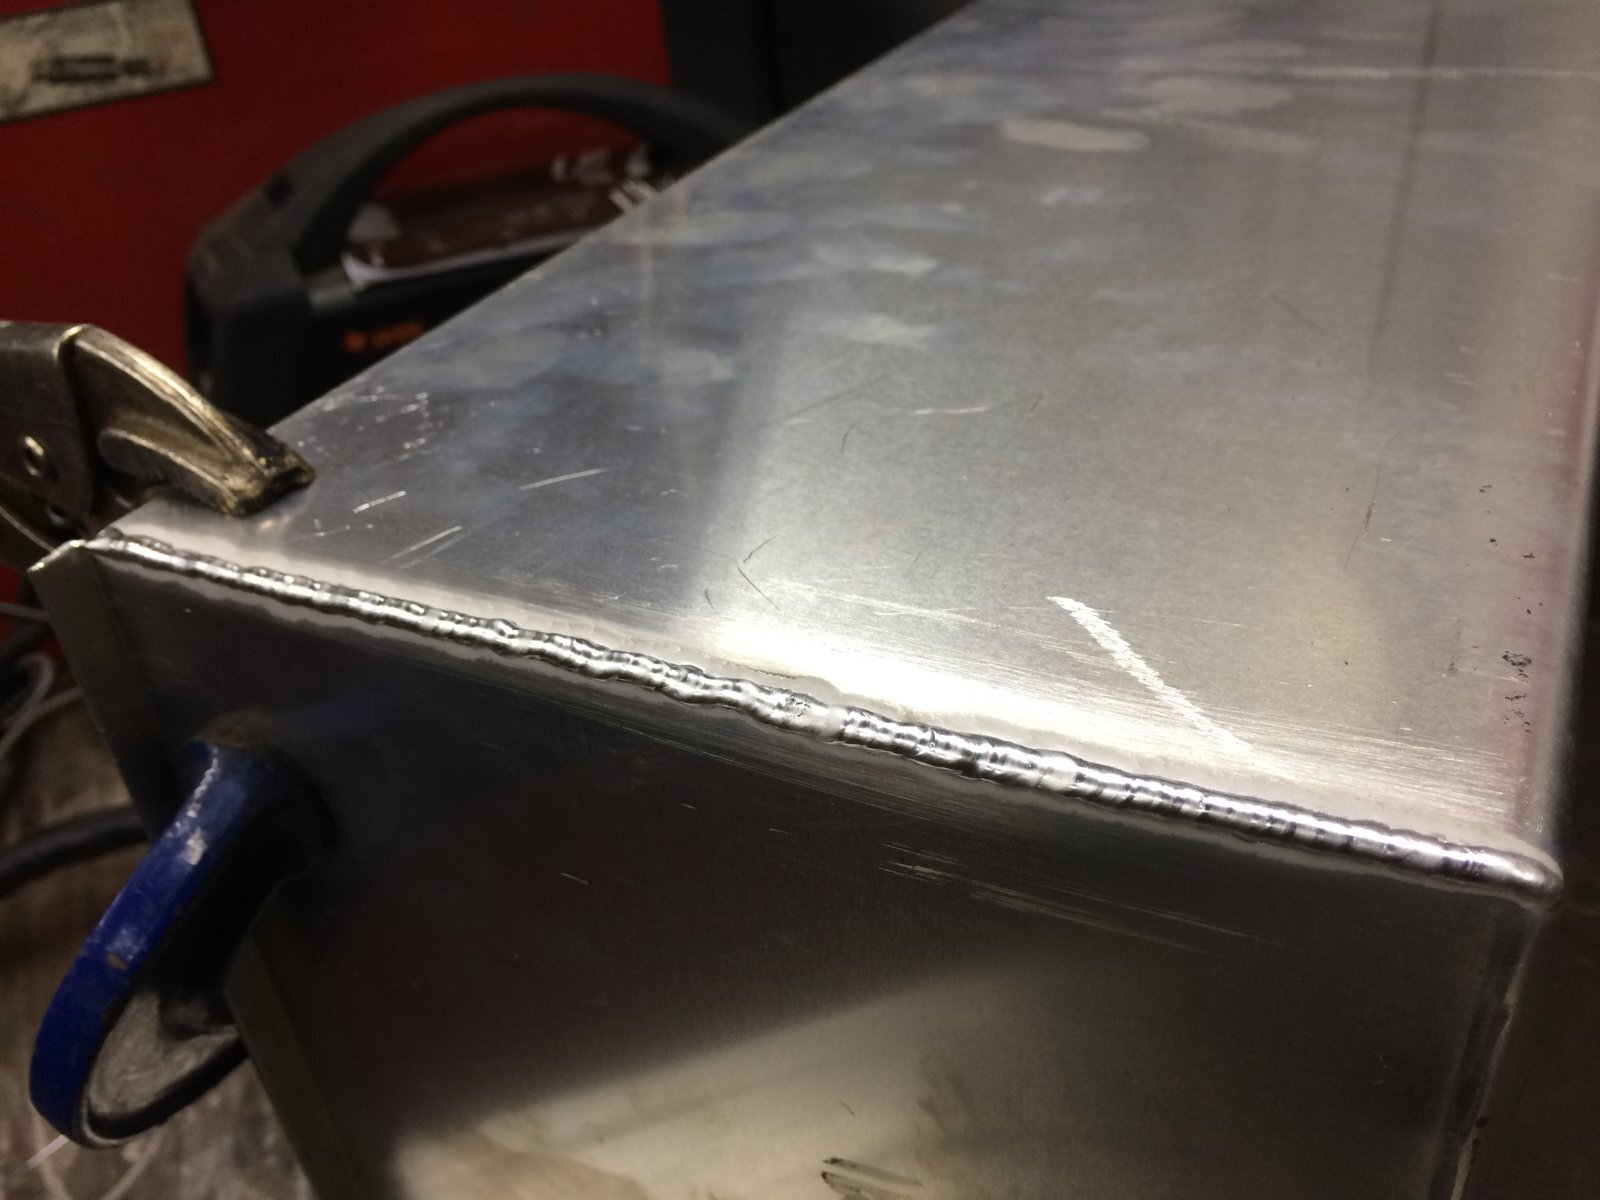
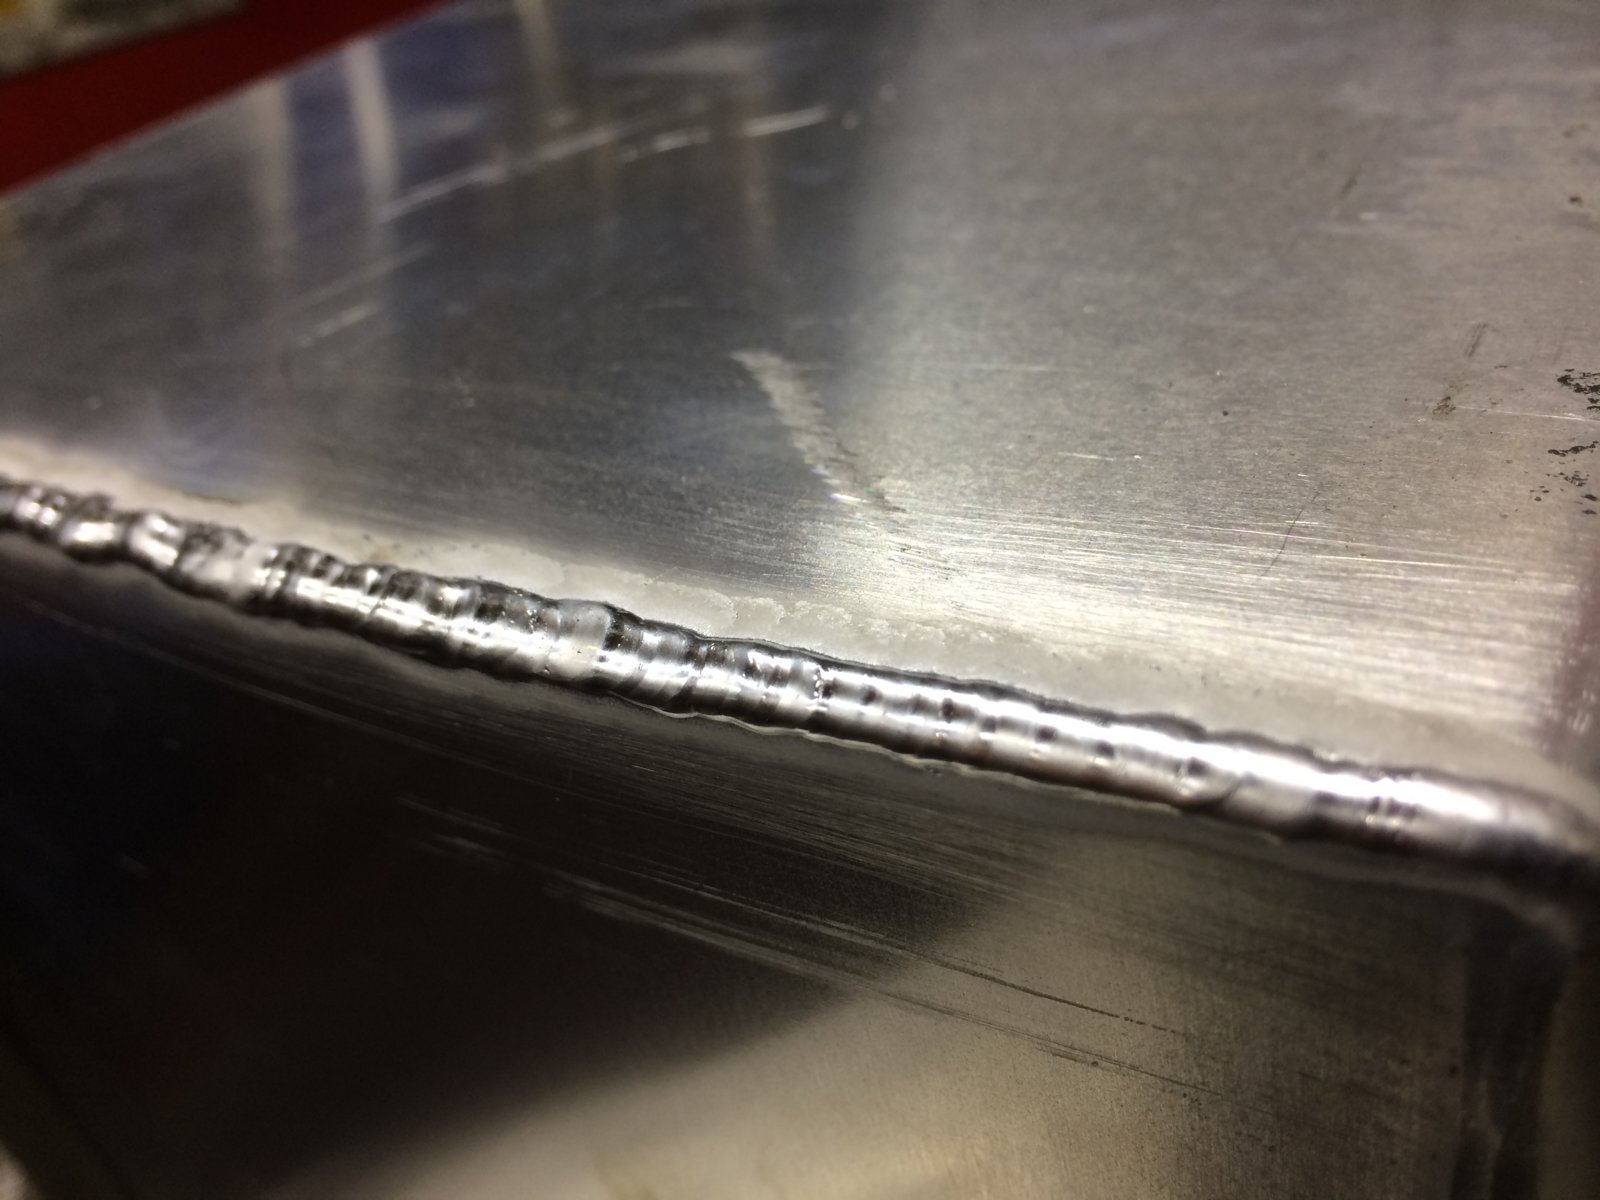
Next it was time to TIG weld the 4 joins on each box.
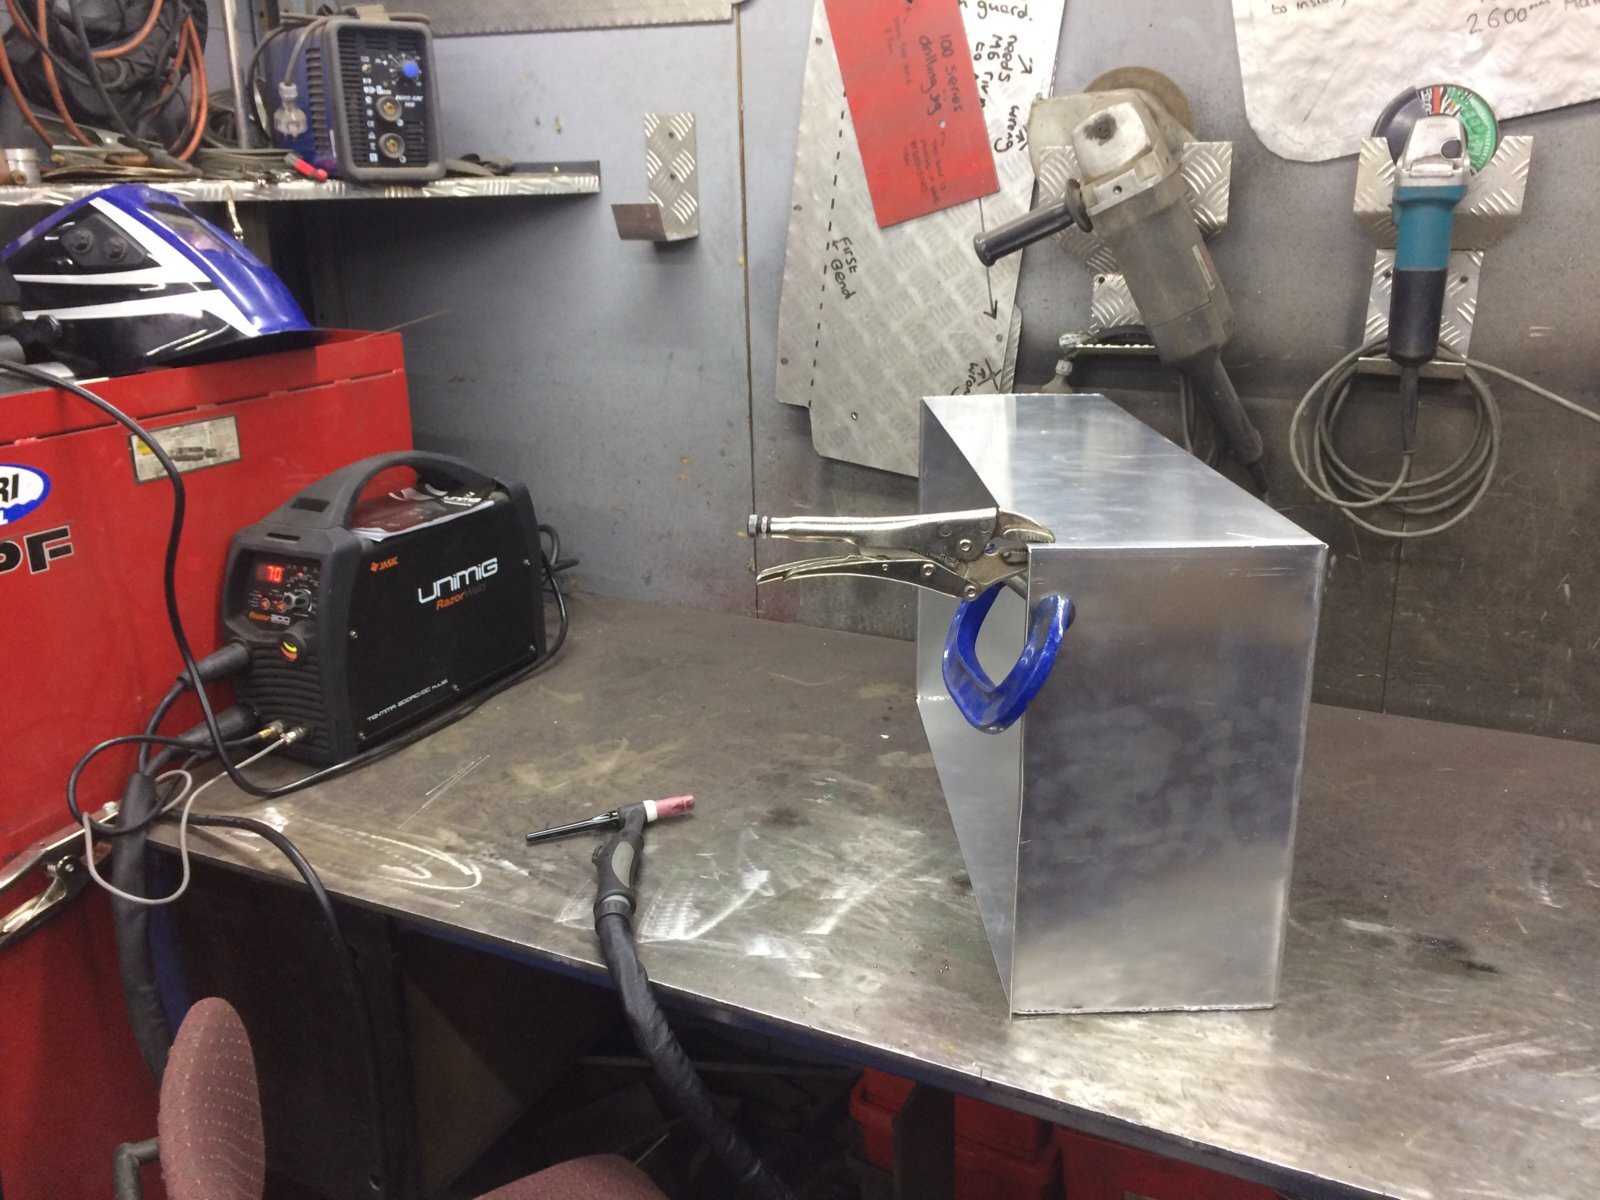
I clamped some angle in place to help hold the corners for welding.
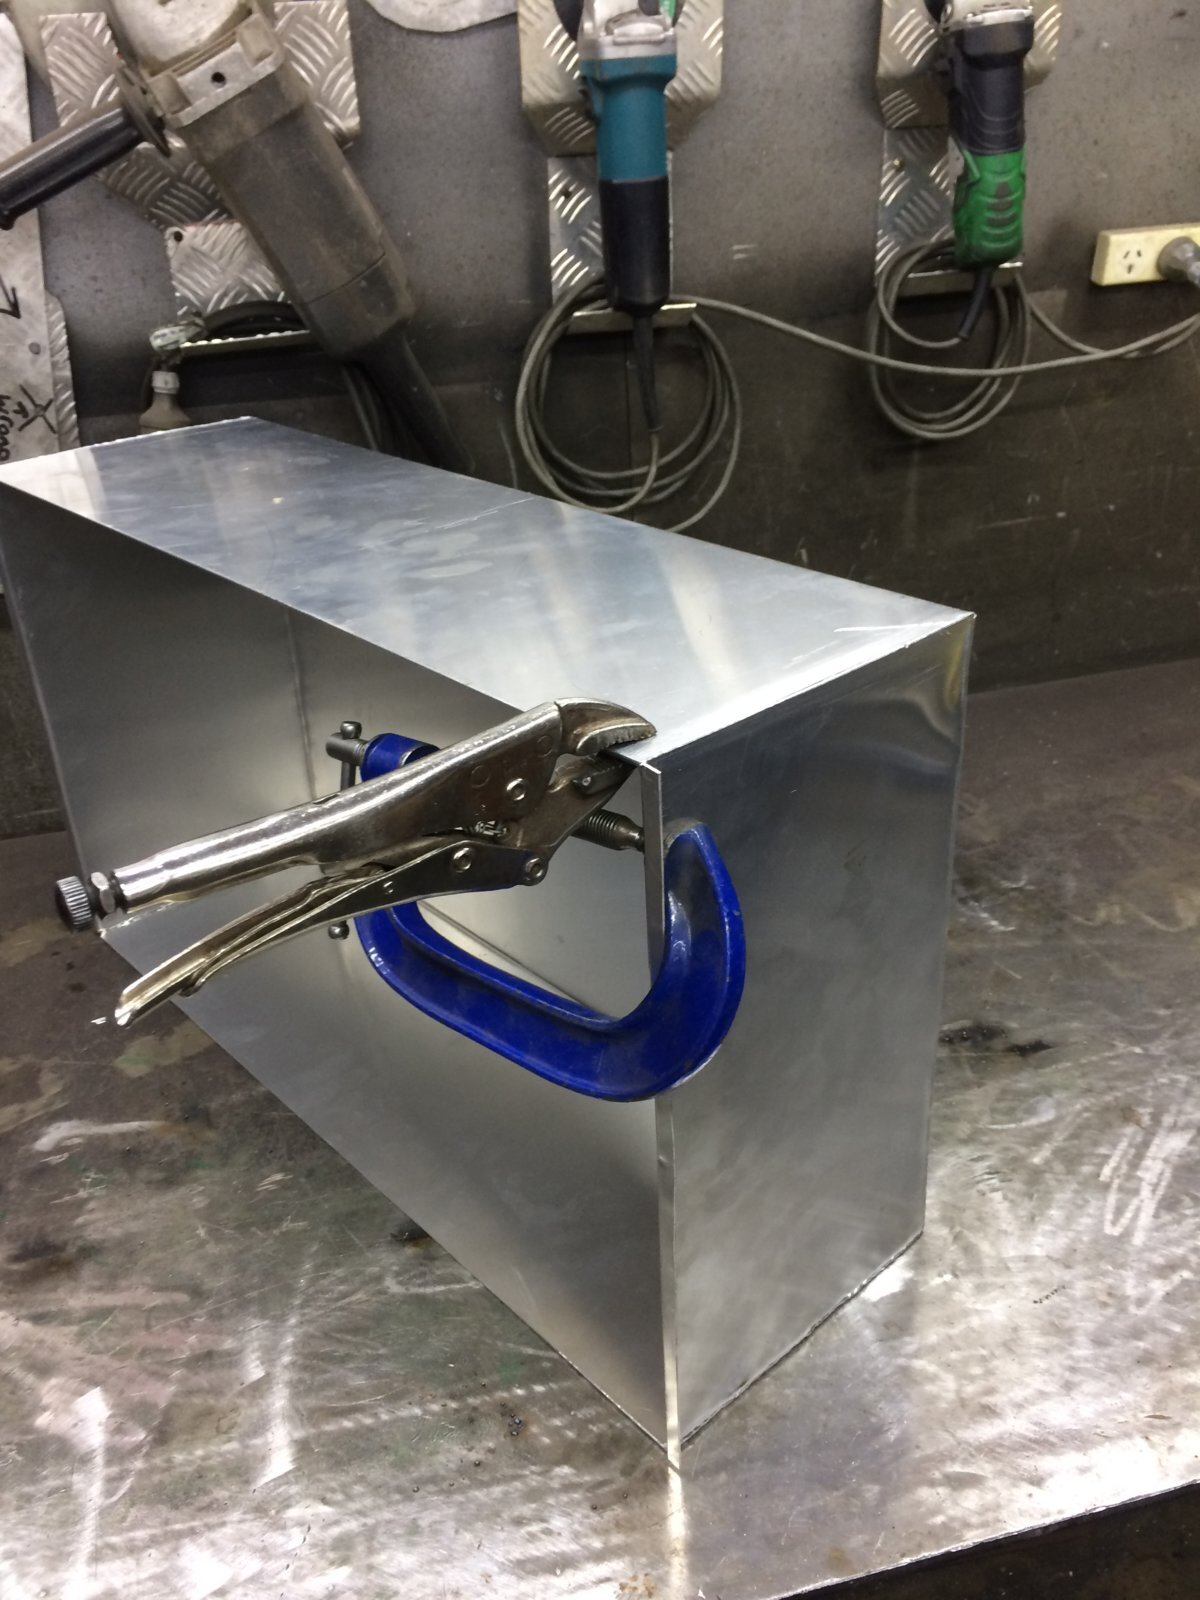
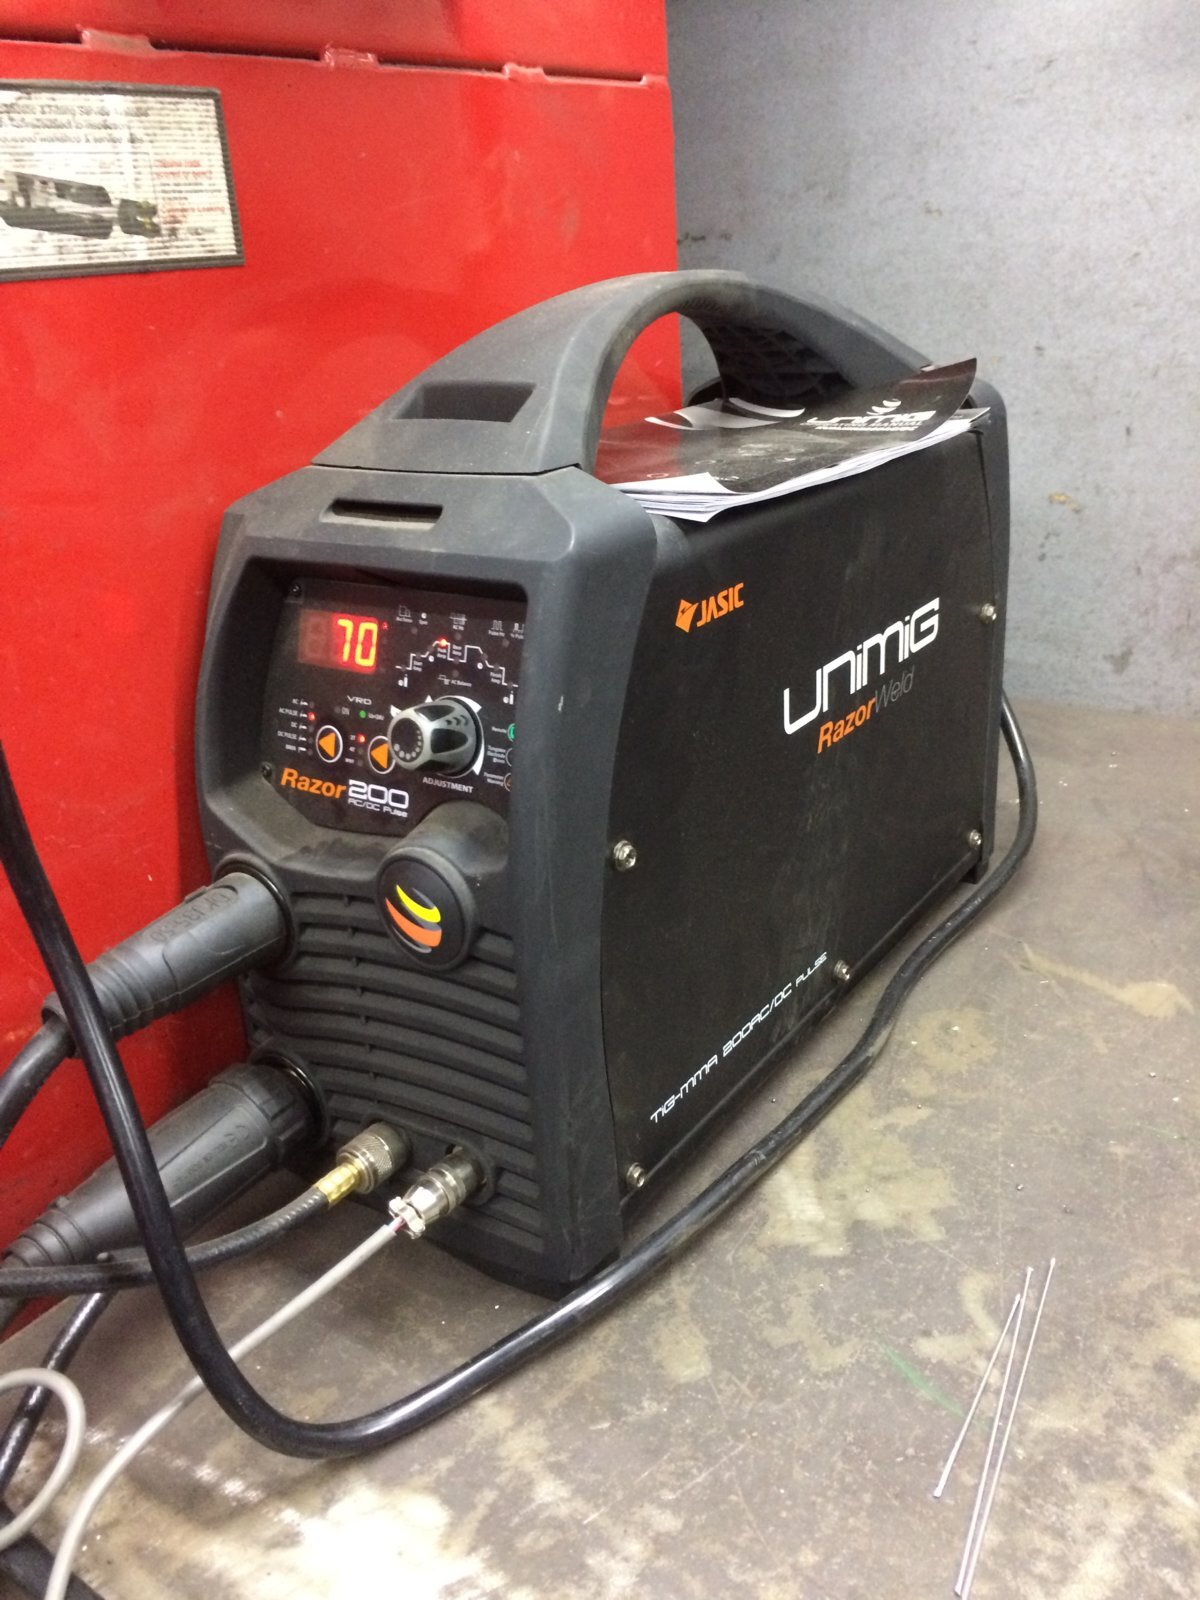
And using the new TIG my boss has bought..........
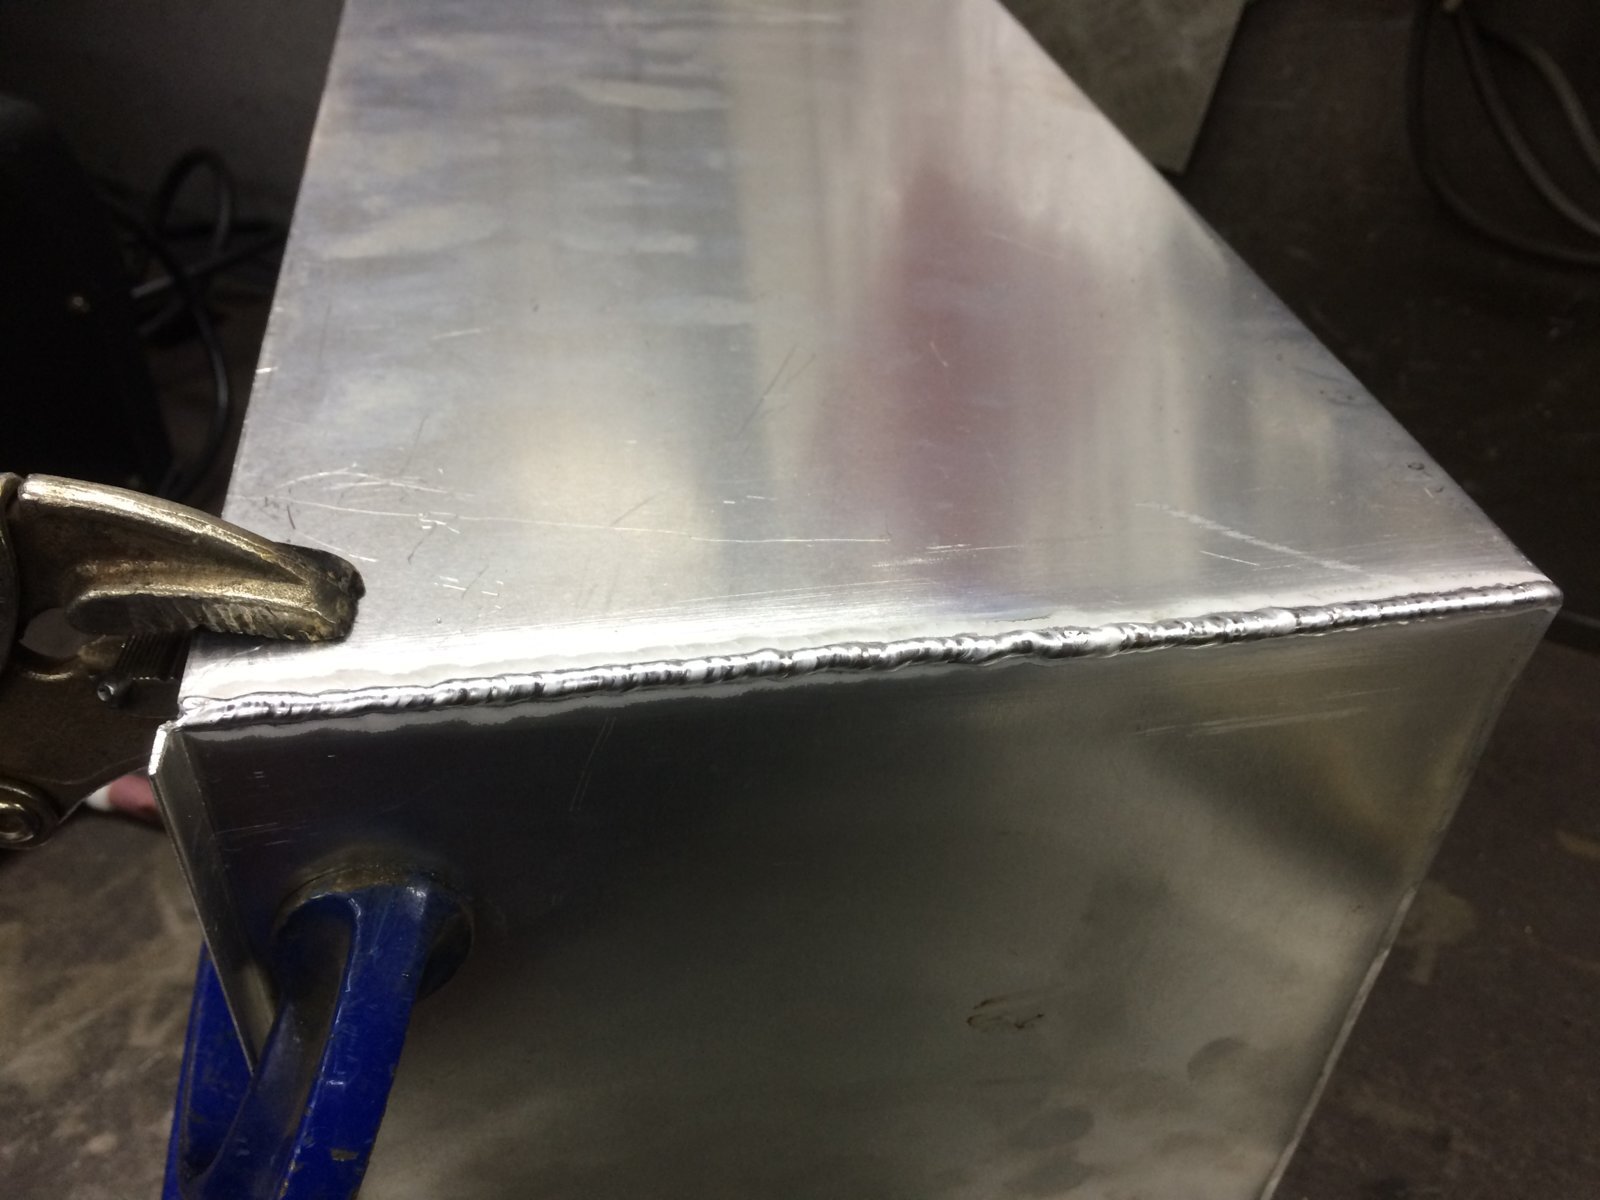
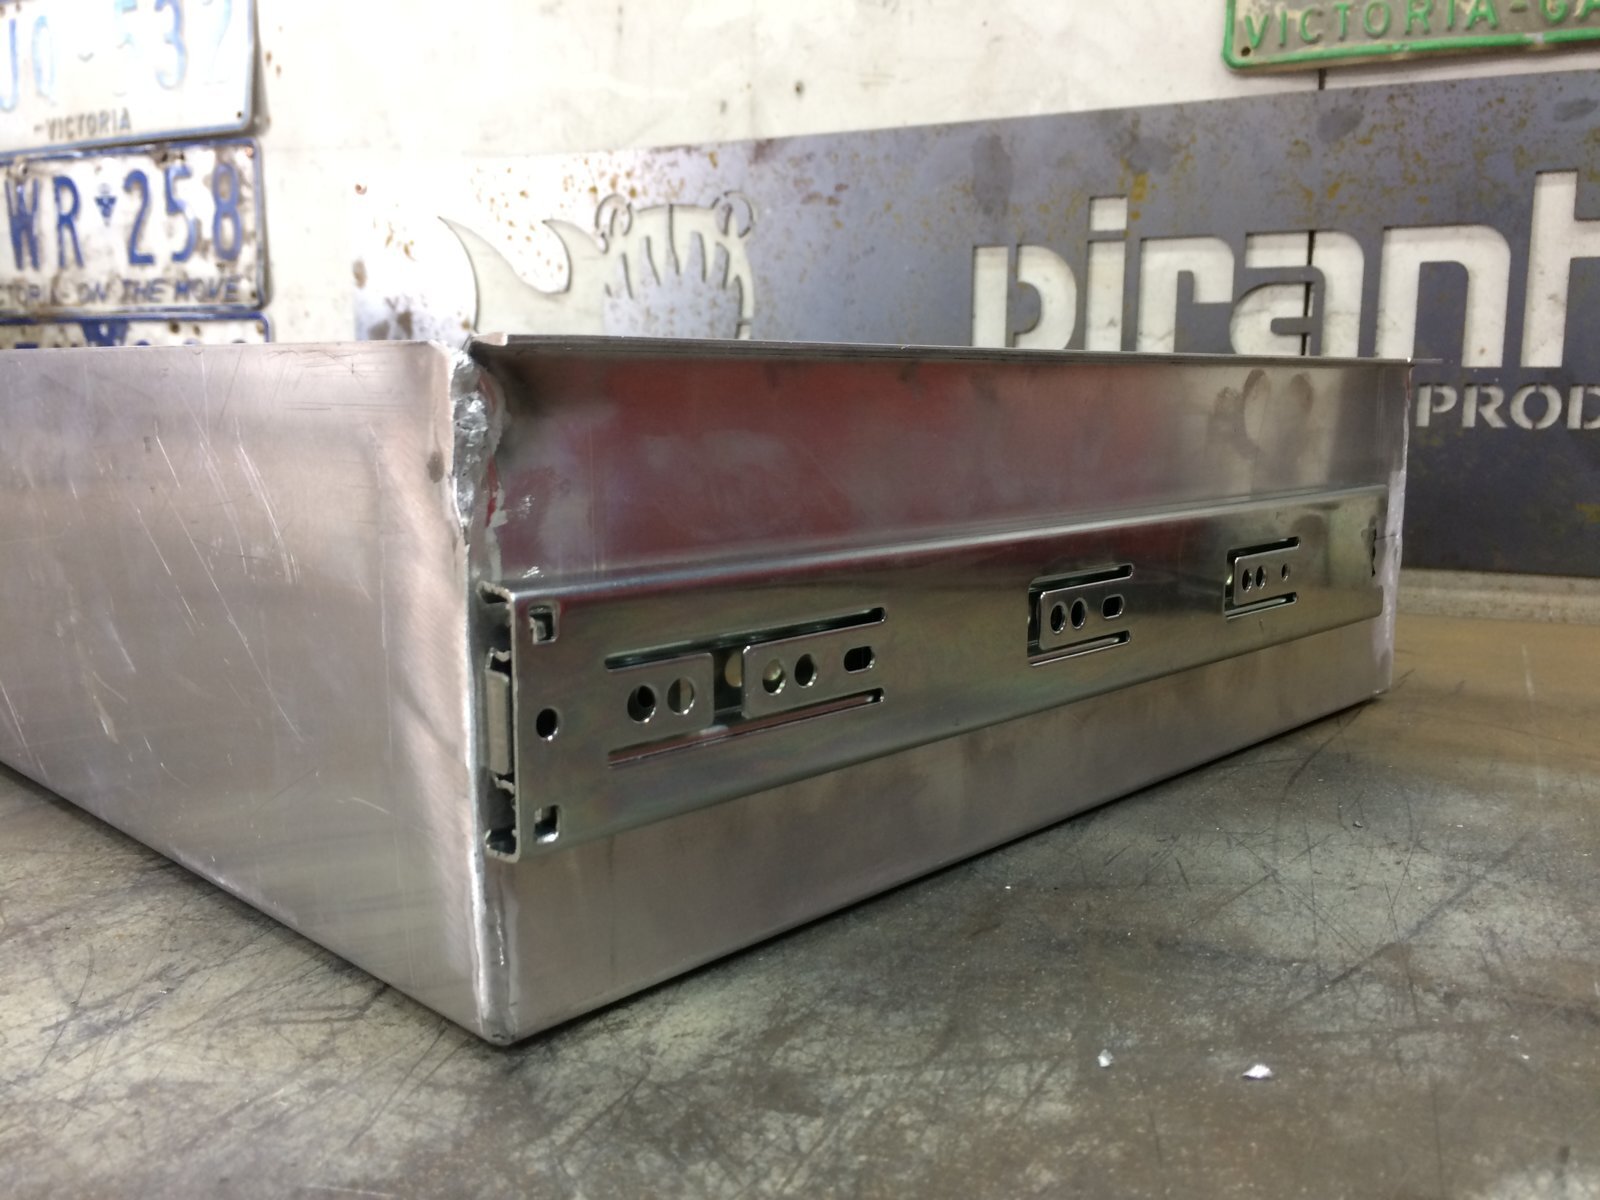
Welded the corners, mainly just fusion welding, so just melting the 2 metals together but in places I had to add some filler rod.
Drawer runners next...........
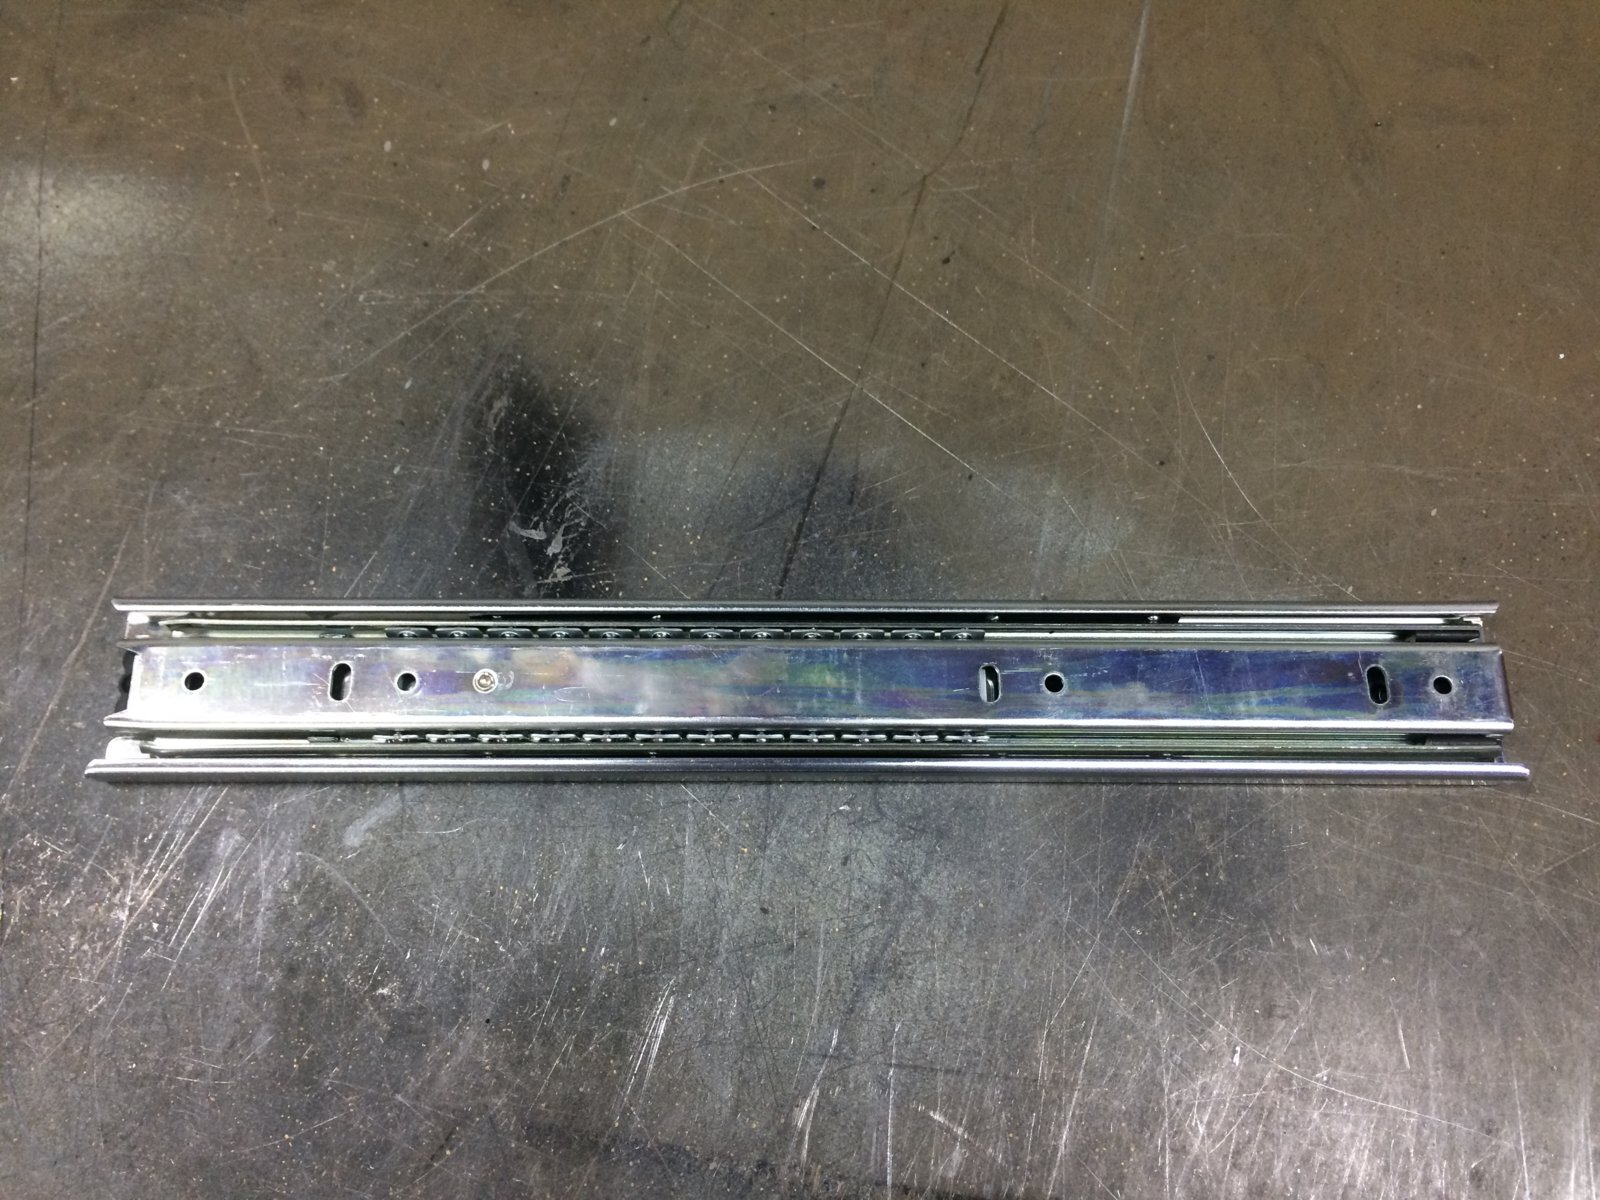
With previous drawers I've built I've gone along with the idea of using a piece of box section and roller skate bearings, like a lot of commercially available drawers.
But I've actually gone off that method for a number of reasons, mainly the weight of that style of drawer runner and secondly the amount of space they take up and eat into drawer space.
I also dont feel that method is necessary unless you have either really really long drawers or you plan on carrying a serious amount of weight in them.
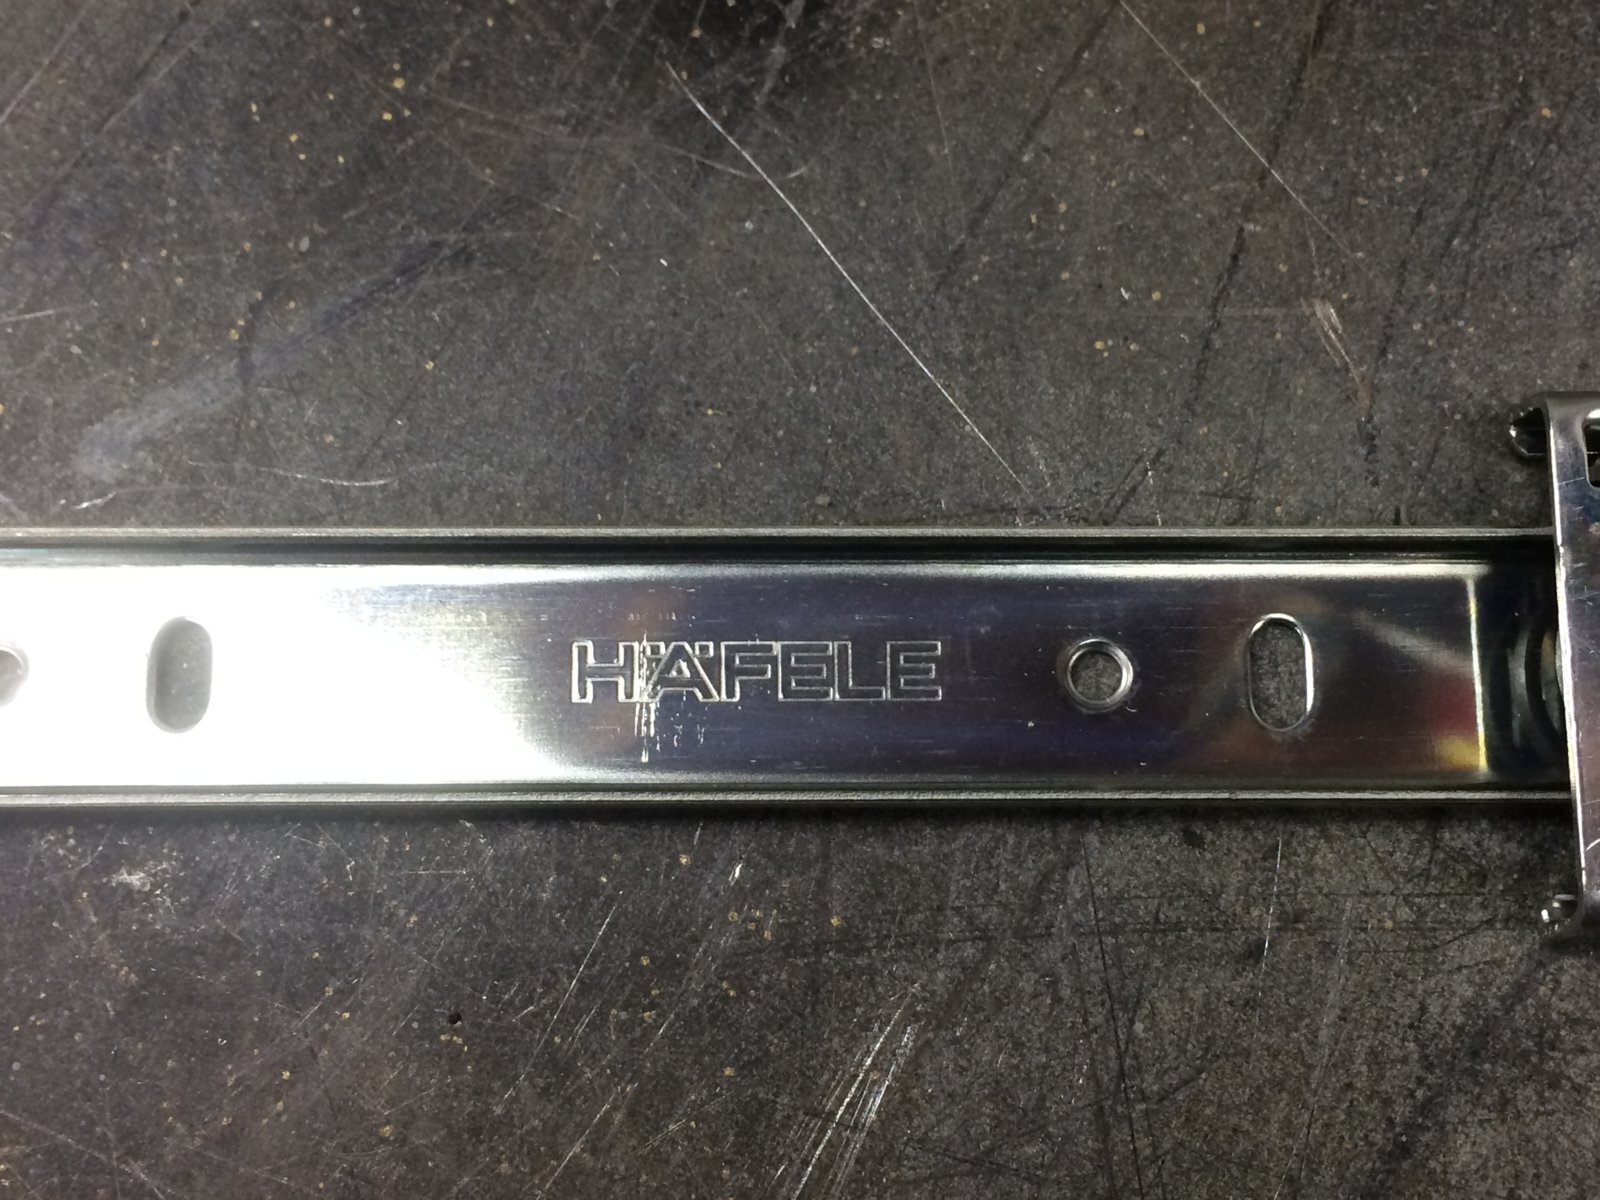
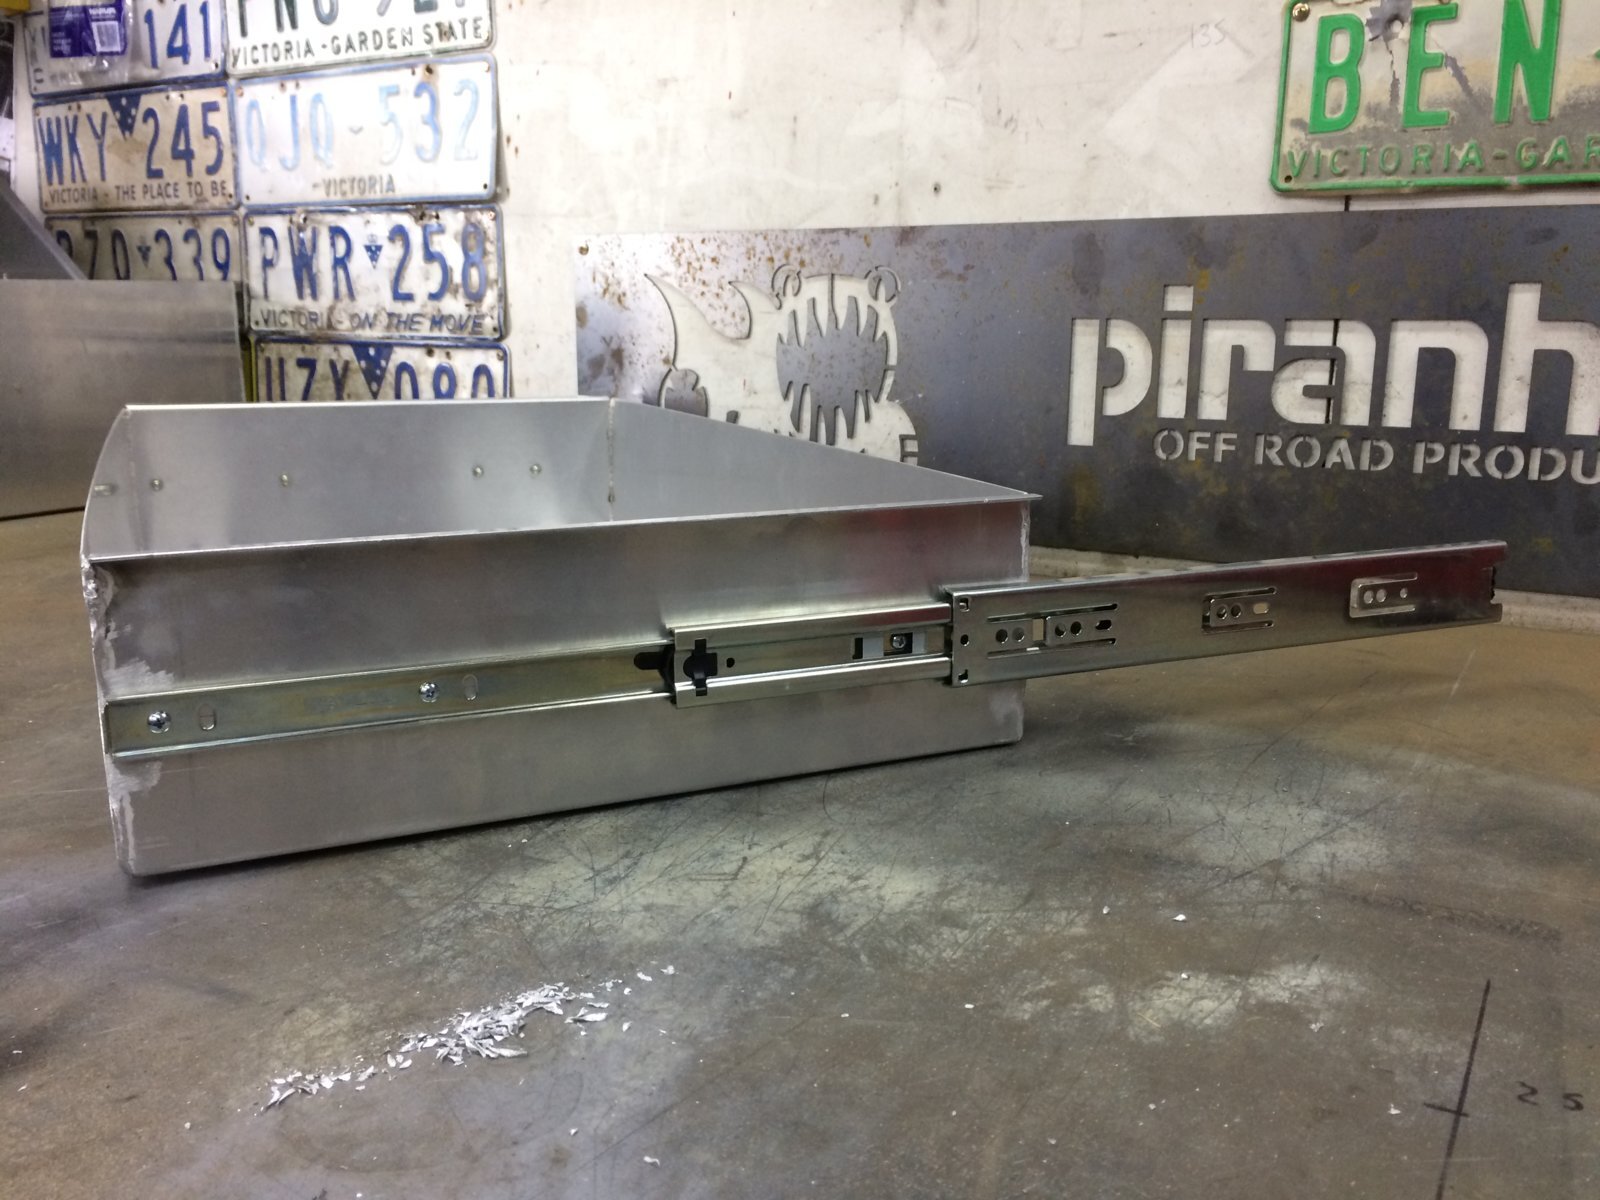
As my drawers are not very long and wont be carrying much weight, I went for good quality Hafele 60kg drawer runners, which in them selves are massively over kill as each drawer will only carry 5-6kg of cooking and camping gear.
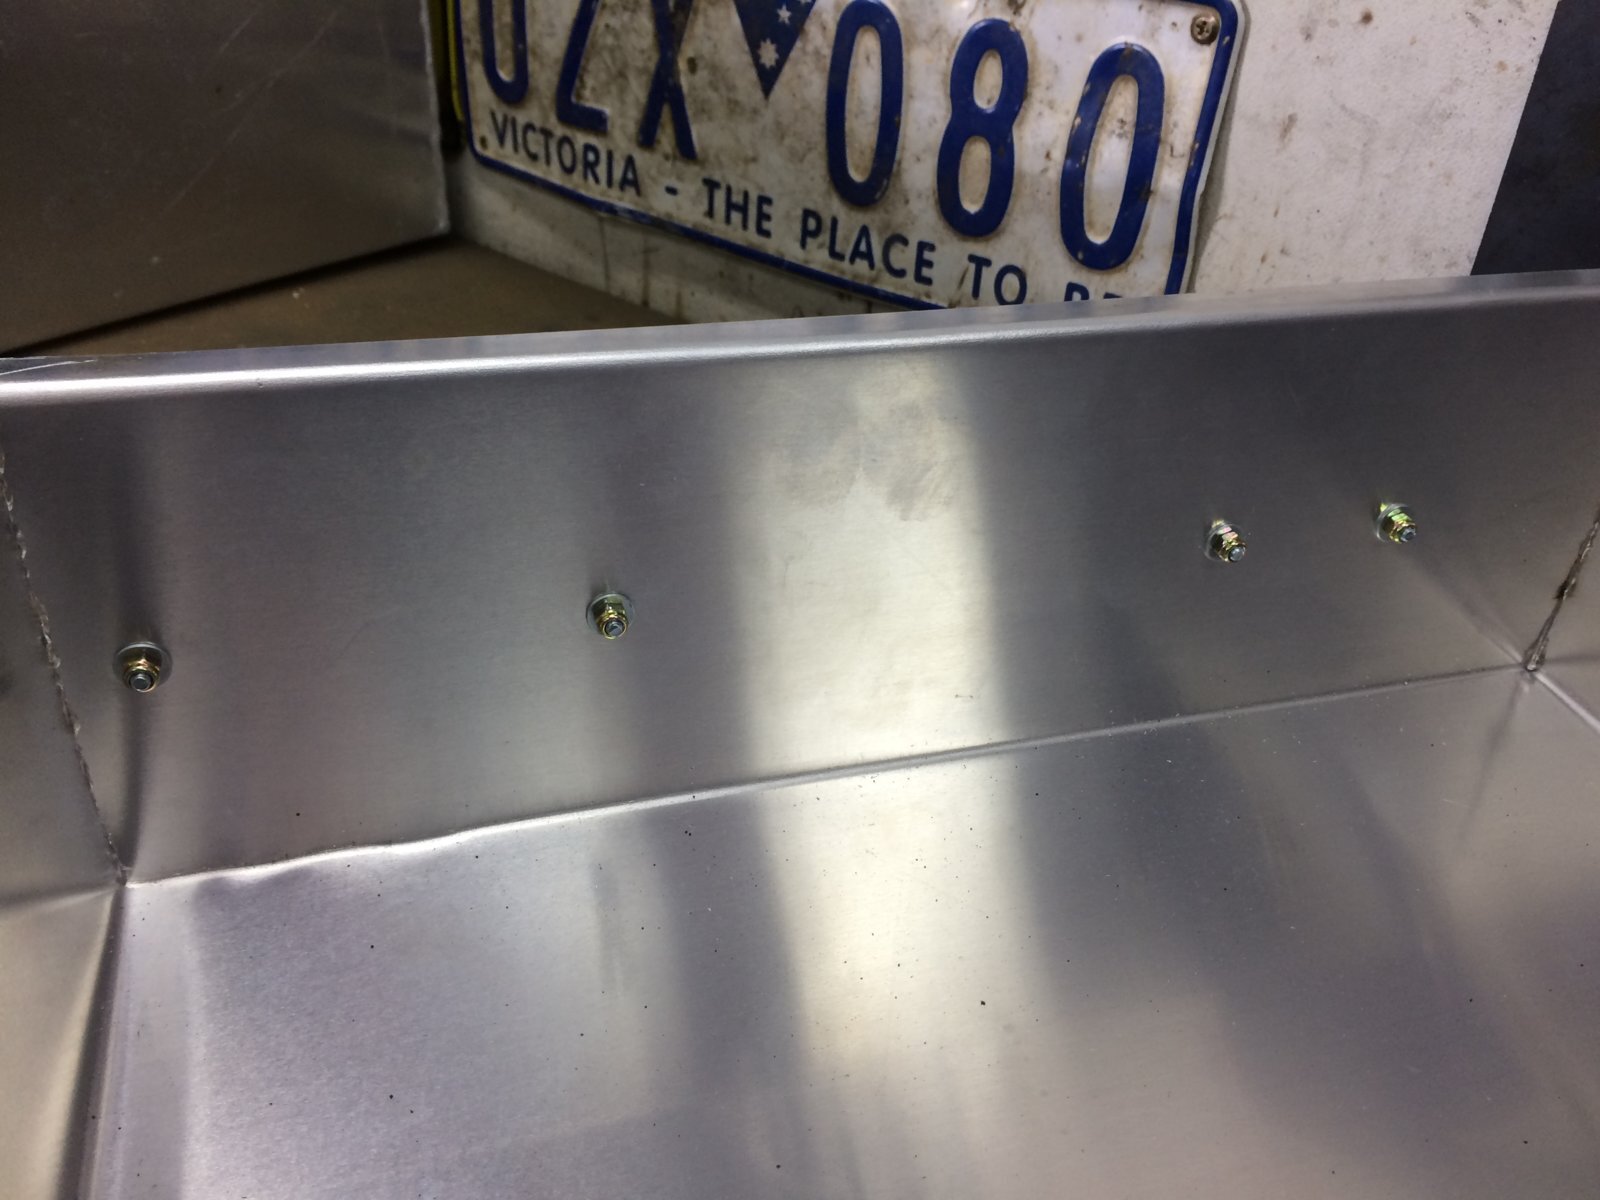
Bolted them on with M5 bolts and nyloc nuts.
Screwed them all in position.

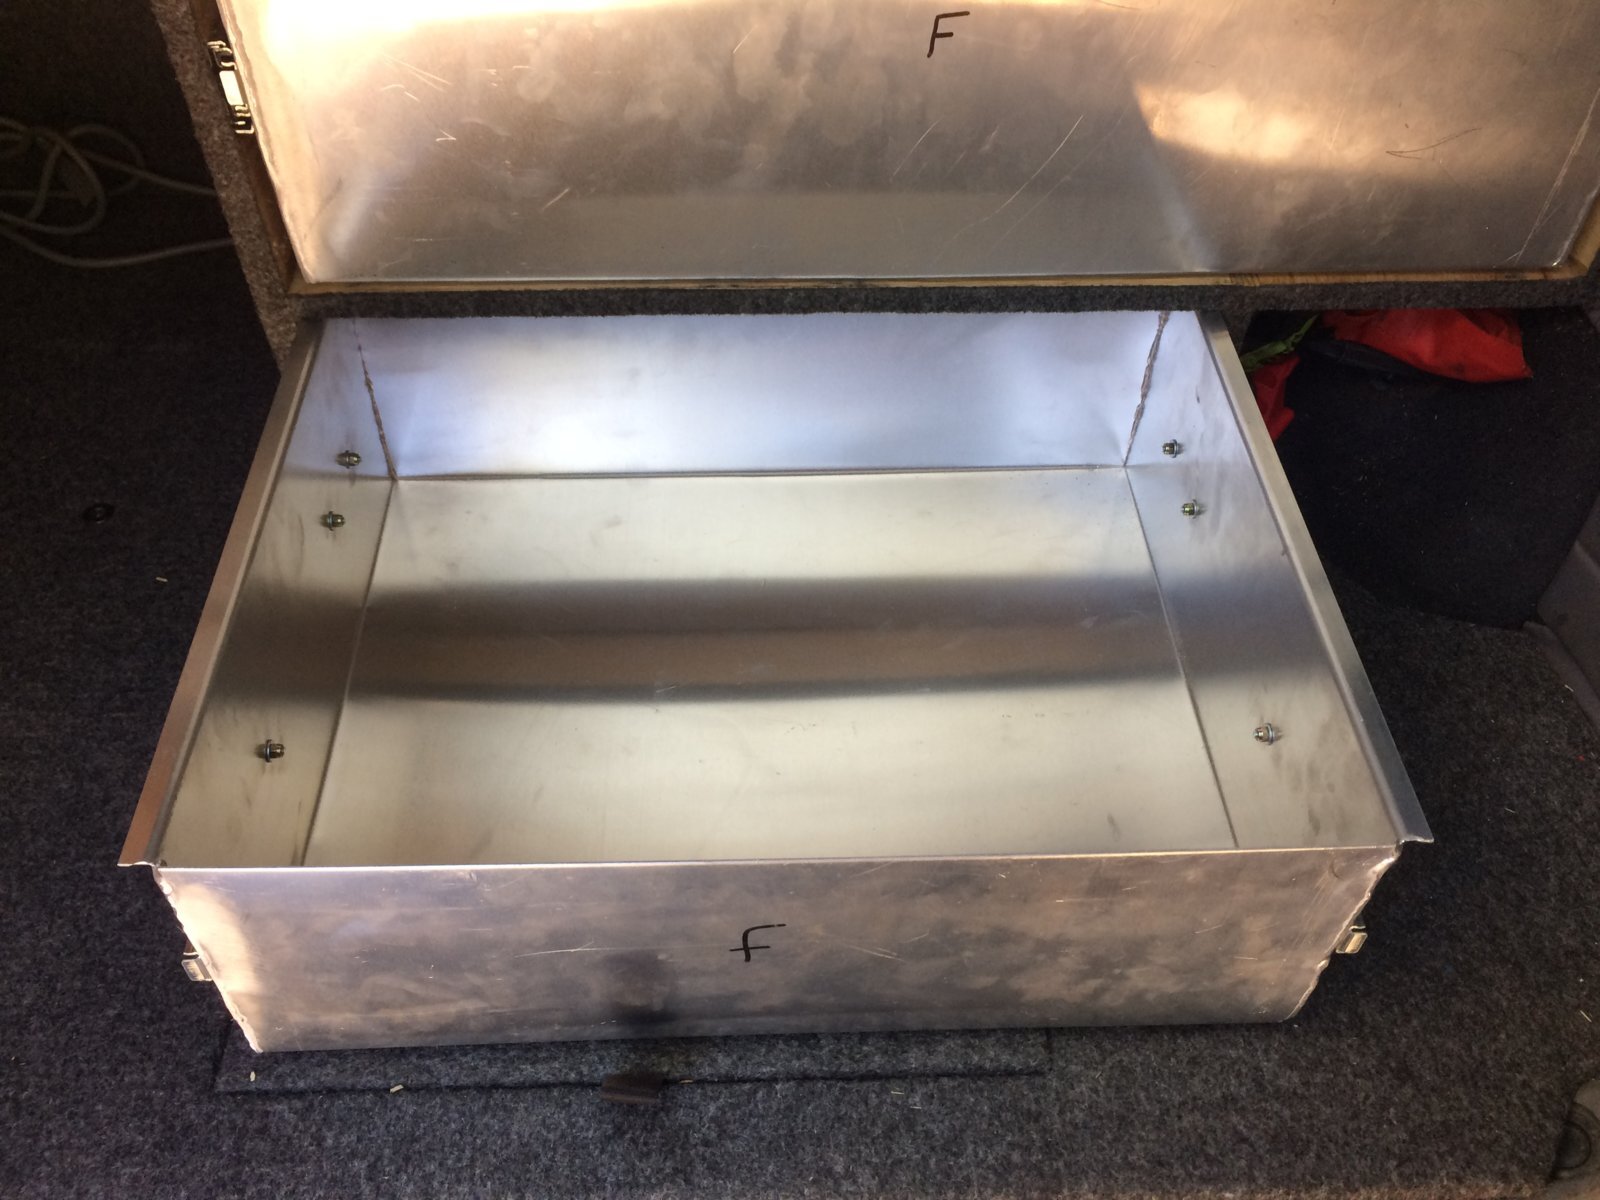
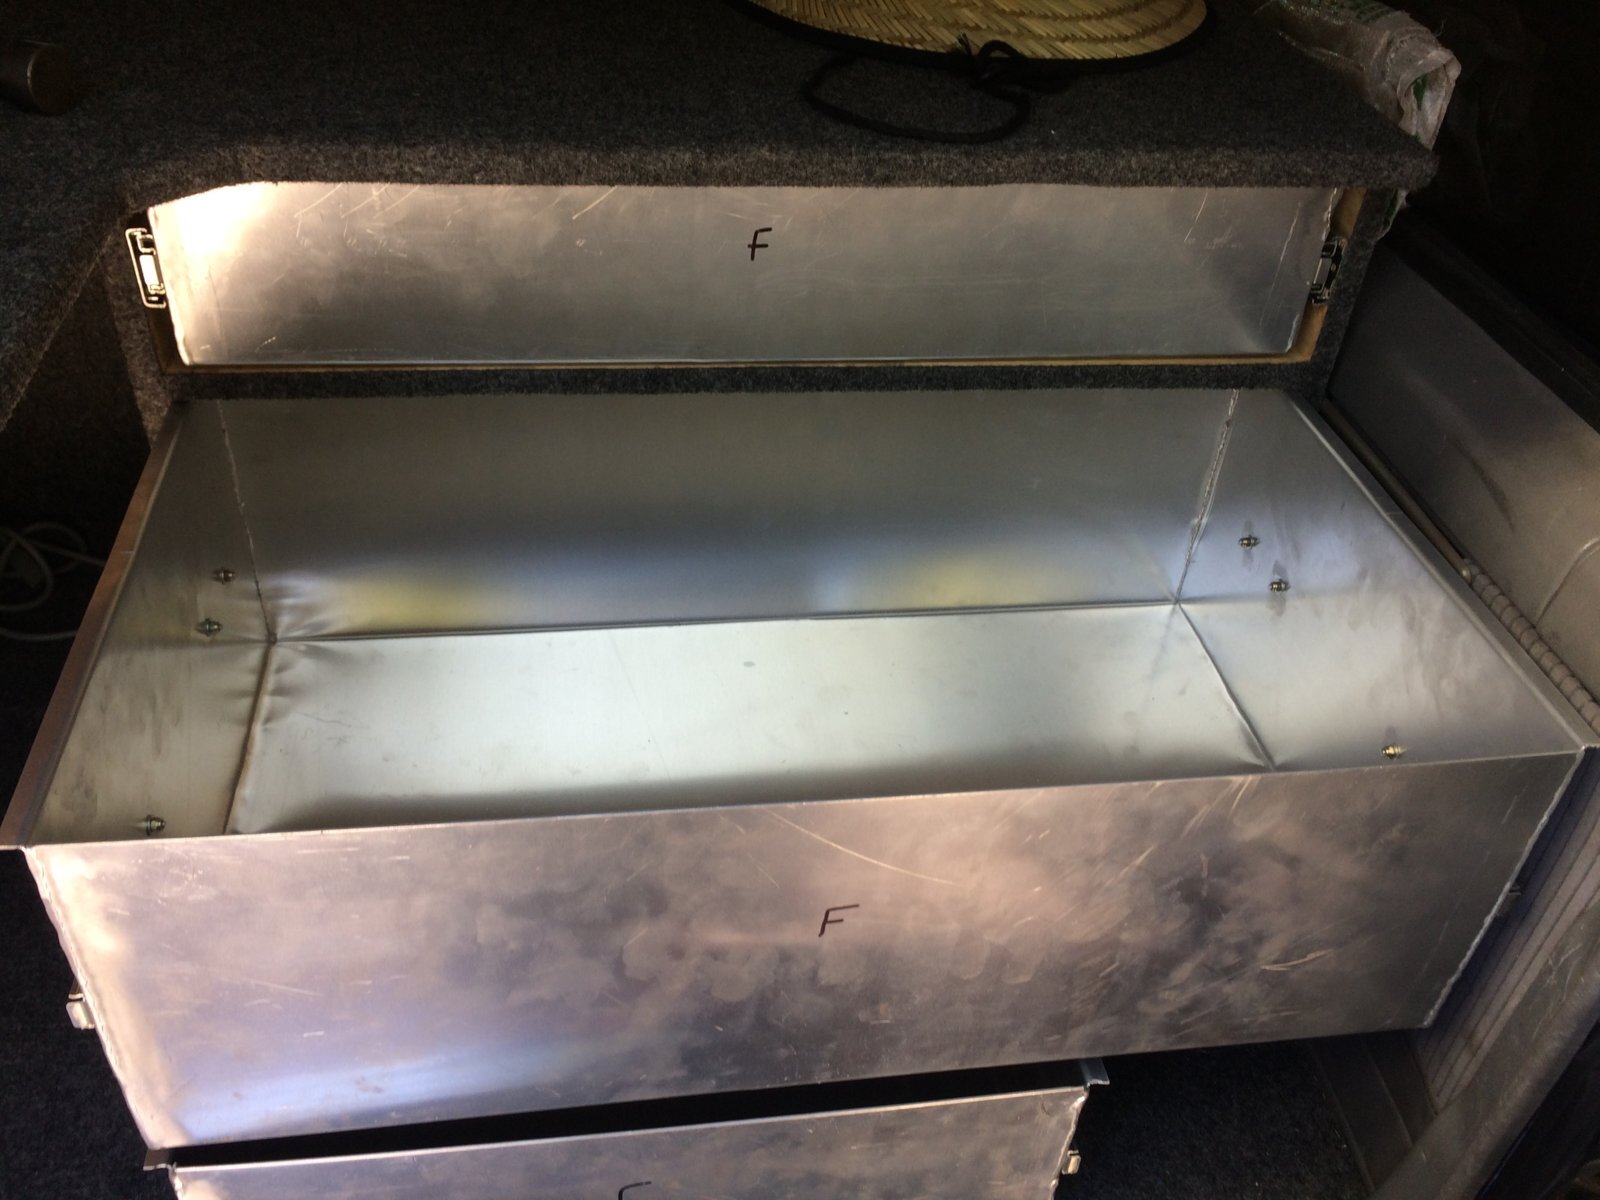

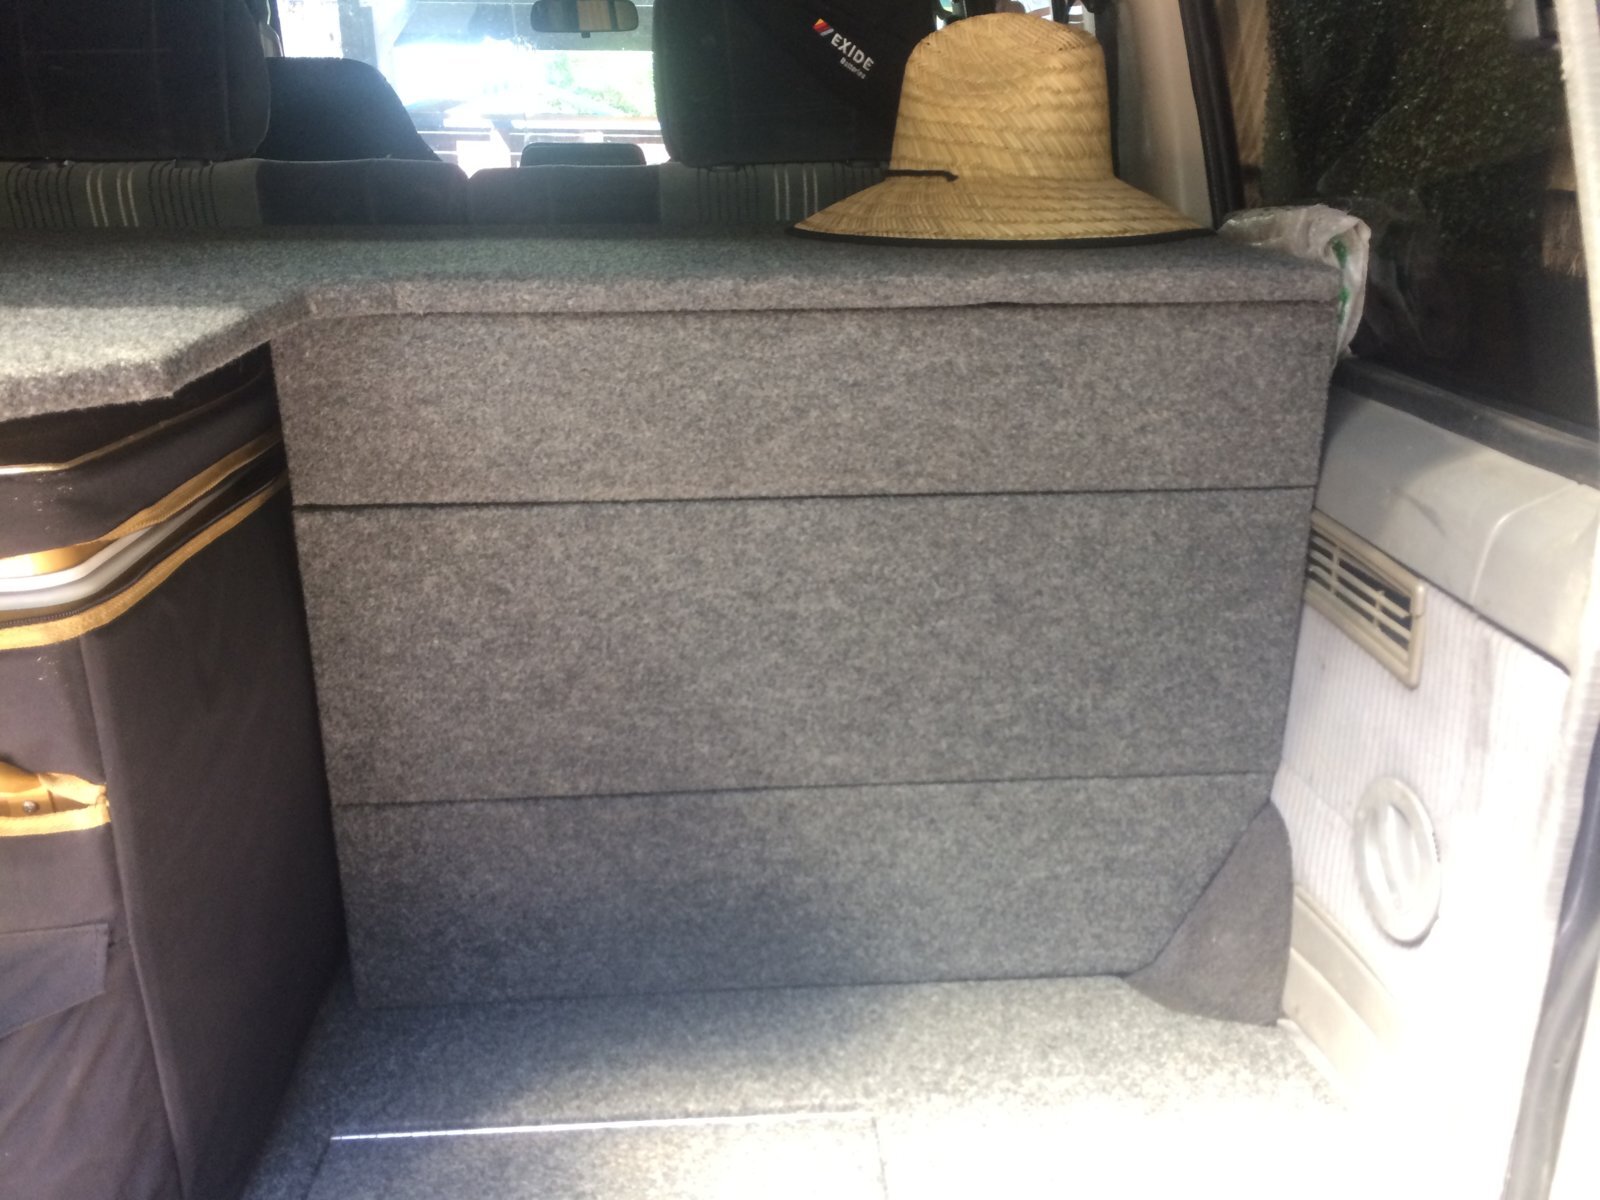
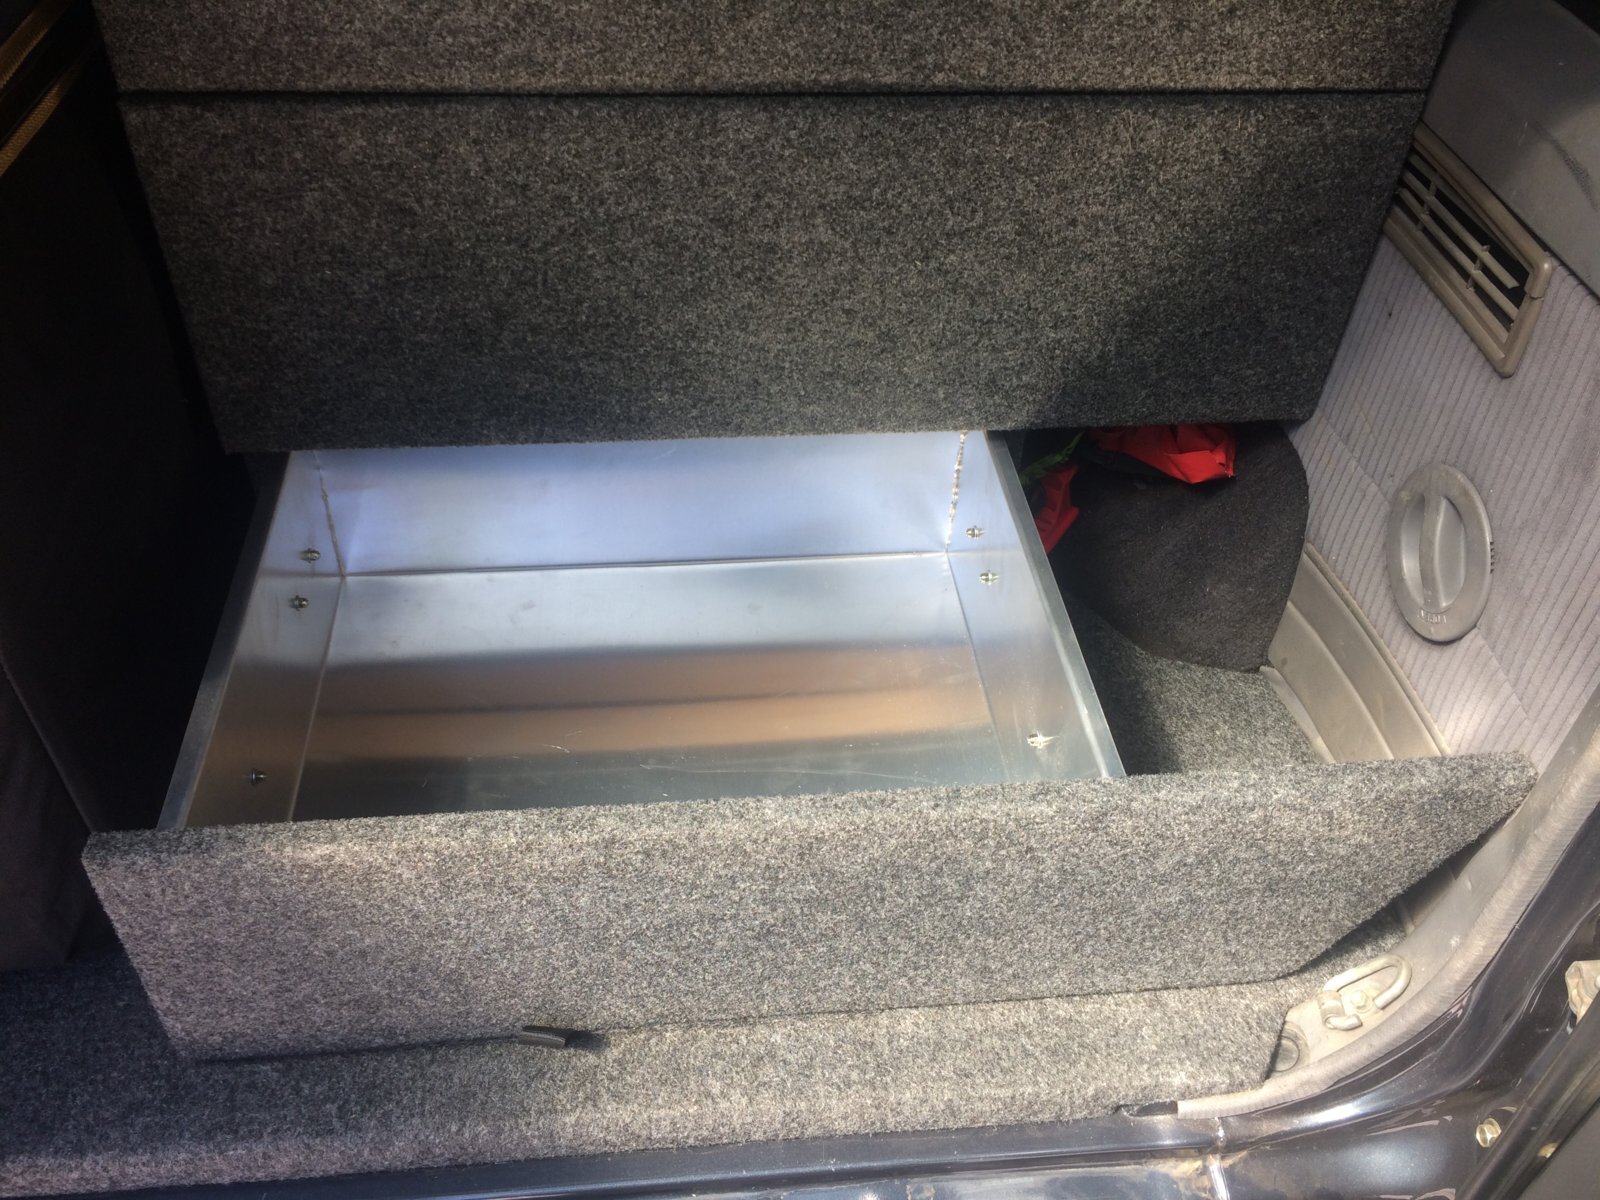
And screwed the marine covered, ply wood drawer fronts on.

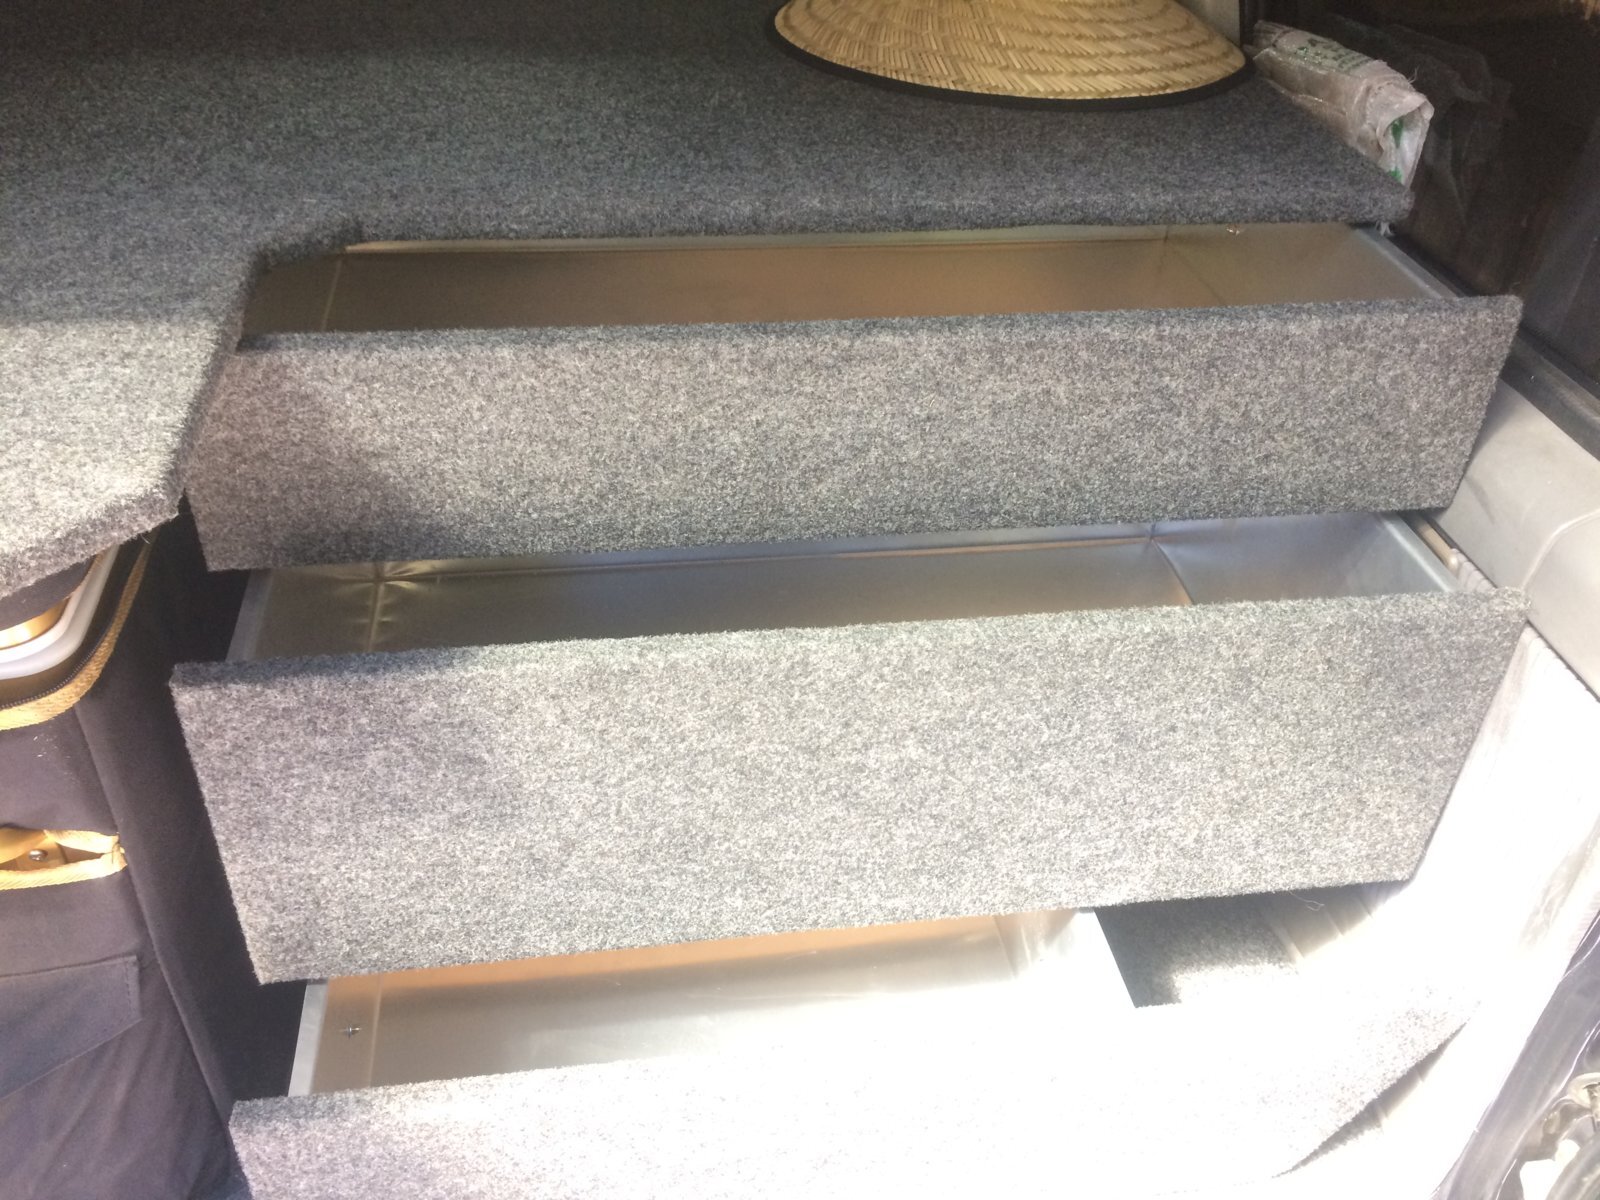
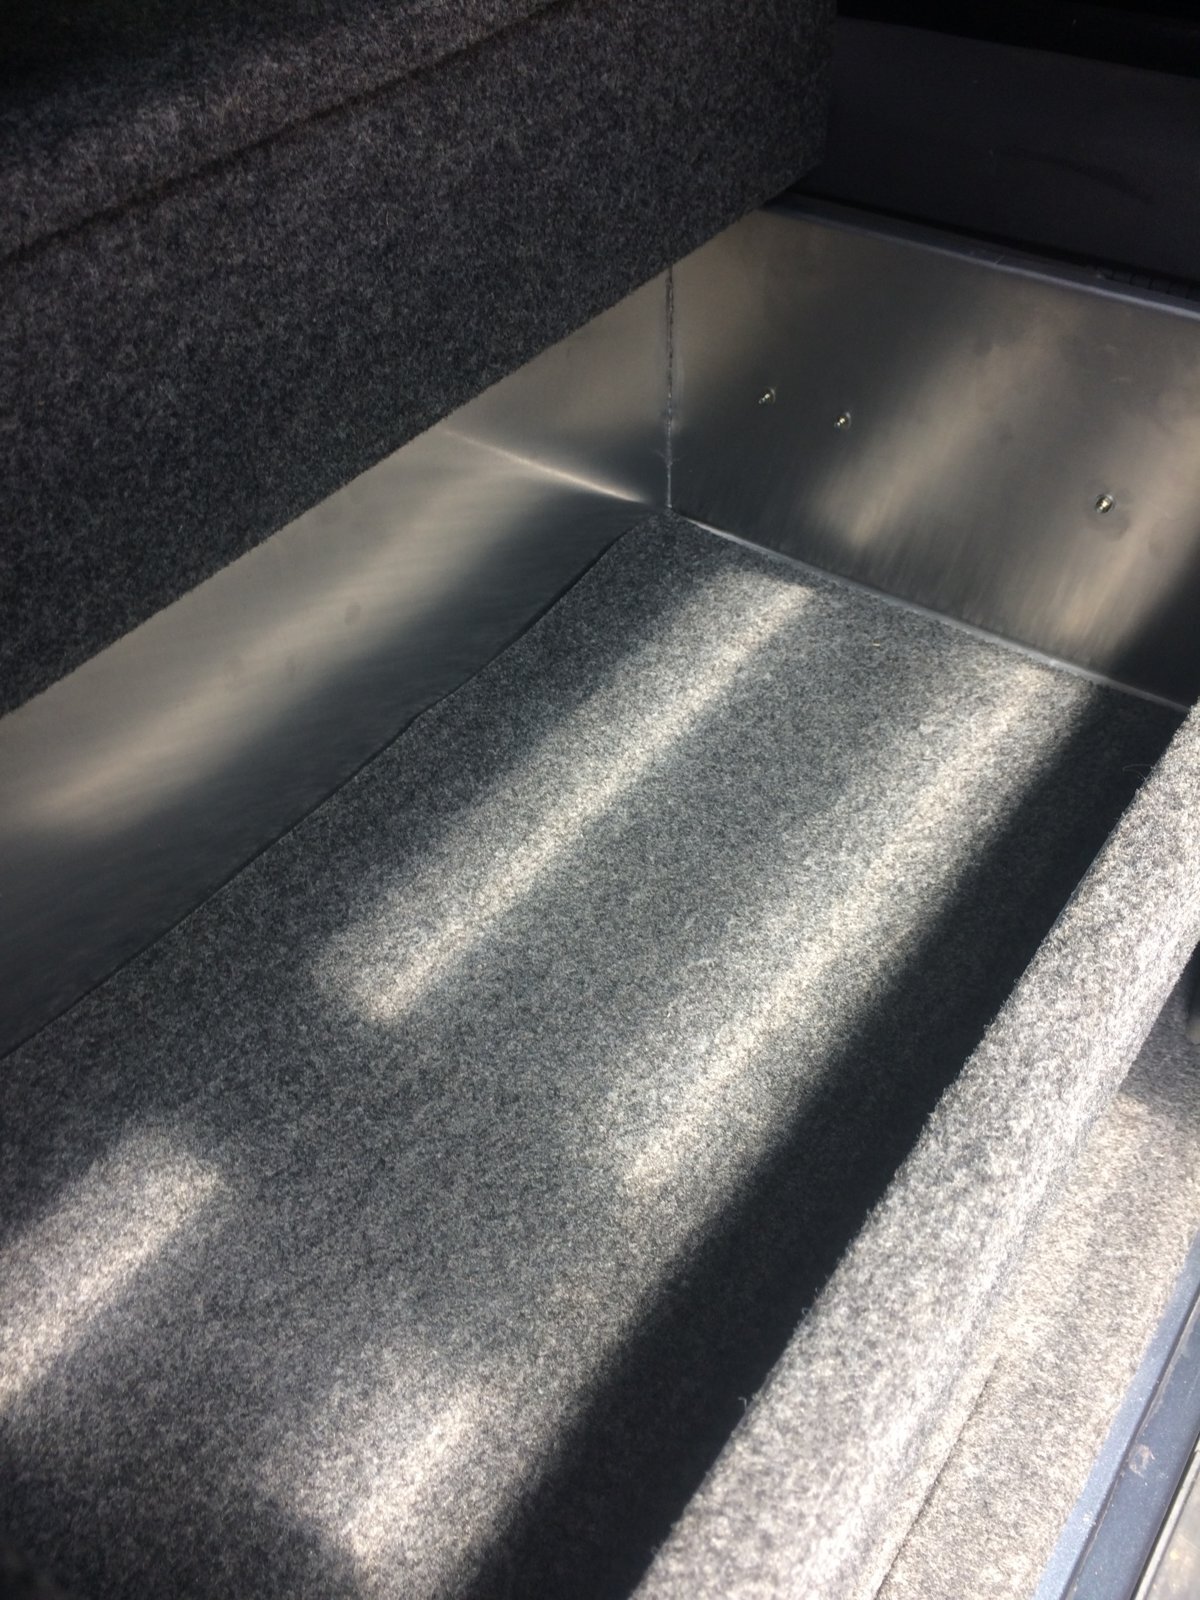
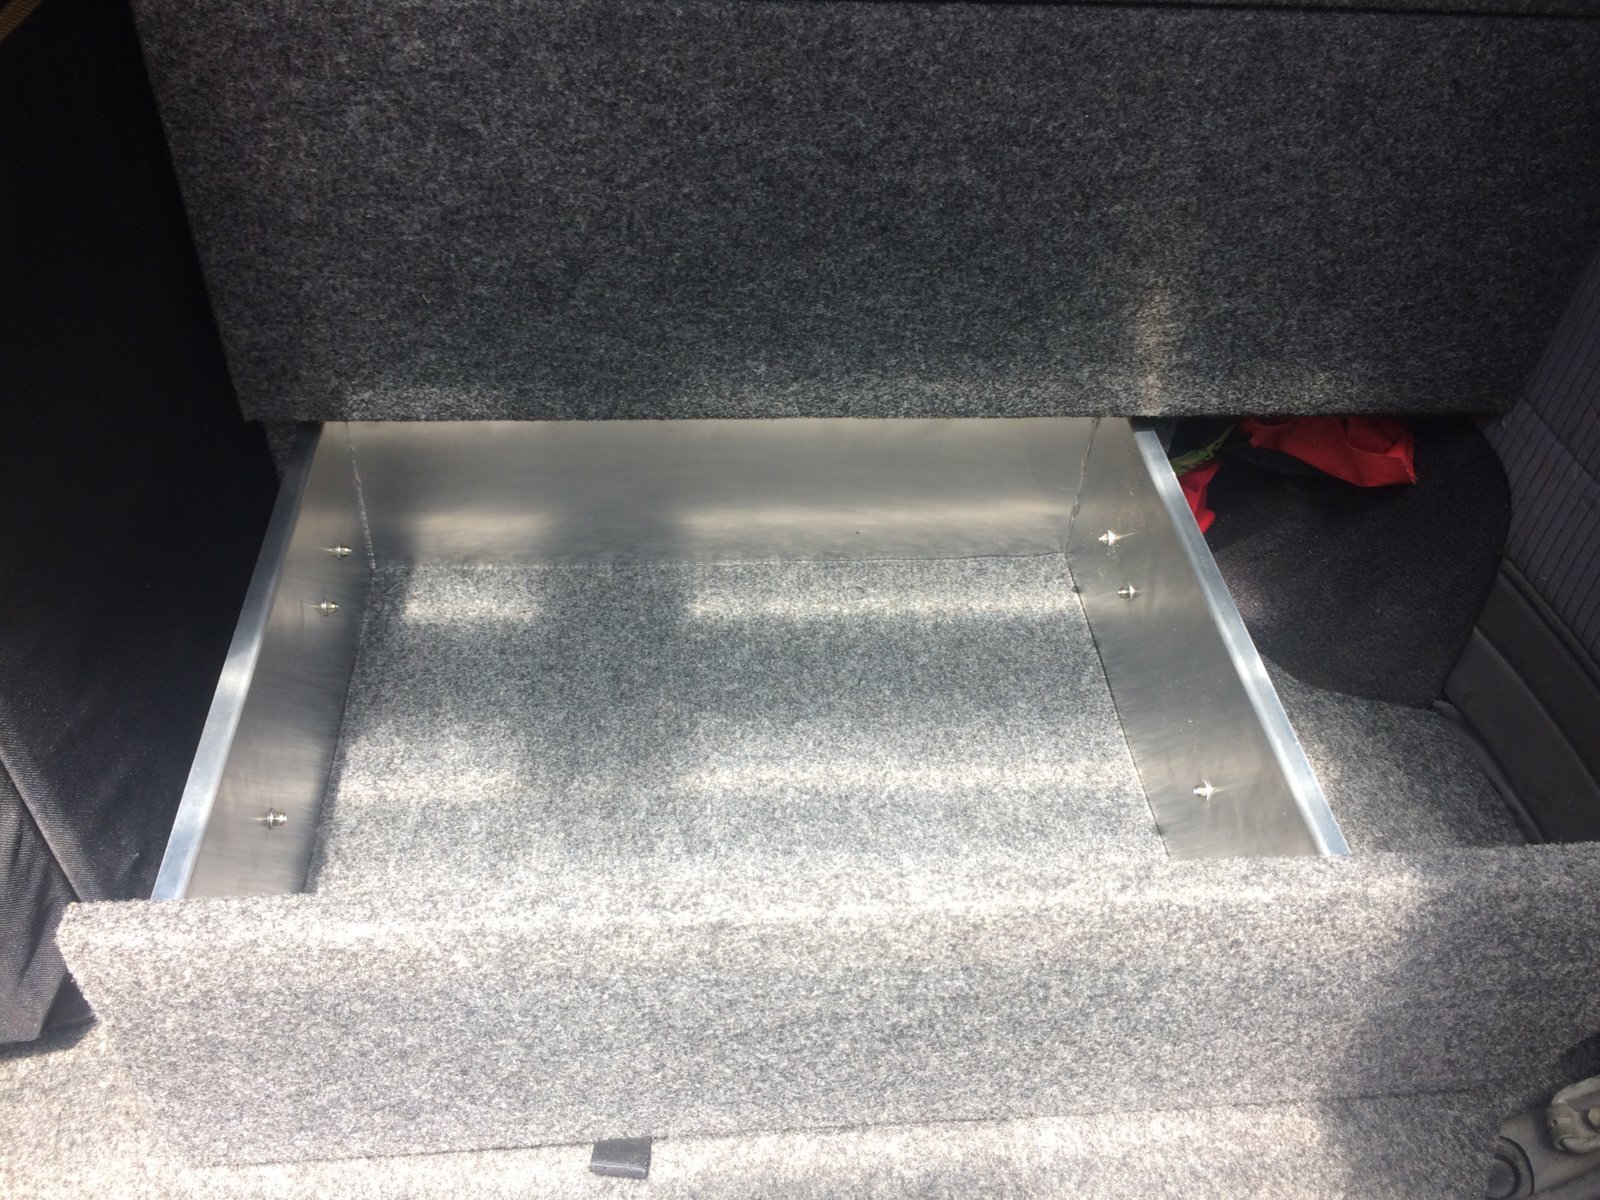
Next I cut a piece of marine carpet to line the inside of each drawer with.
To keep them nice and light I bought a sheet of 1.6mm alluminium for the main drawer boxes.
Measured, marked and cut out the alluminium for each drawer.


And got them onto the pan press for folding.


First one folded.


Test fitting.

Other 2 folded.

All 3 in position.

Next it was time to TIG weld the 4 joins on each box.

I clamped some angle in place to help hold the corners for welding.

And using the new TIG my boss has bought..........

Welded the corners, mainly just fusion welding, so just melting the 2 metals together but in places I had to add some filler rod.


Drawer runners next...........
With previous drawers I've built I've gone along with the idea of using a piece of box section and roller skate bearings, like a lot of commercially available drawers.
But I've actually gone off that method for a number of reasons, mainly the weight of that style of drawer runner and secondly the amount of space they take up and eat into drawer space.

I also dont feel that method is necessary unless you have either really really long drawers or you plan on carrying a serious amount of weight in them.

As my drawers are not very long and wont be carrying much weight, I went for good quality Hafele 60kg drawer runners, which in them selves are massively over kill as each drawer will only carry 5-6kg of cooking and camping gear.


Bolted them on with M5 bolts and nyloc nuts.


Screwed them all in position.


And screwed the marine covered, ply wood drawer fronts on.


Next I cut a piece of marine carpet to line the inside of each drawer with.


- Joined
- Oct 13, 2010
- Messages
- 6,058
- Country Flag
I watched one of Andrew St Piere Whites brilliant videos on his 4XOverland Youtube channel about a year ago and on it he had Paul Marsh talking about how to set up a vehicle for overlanding and they discussed drawers and how best to use them. 
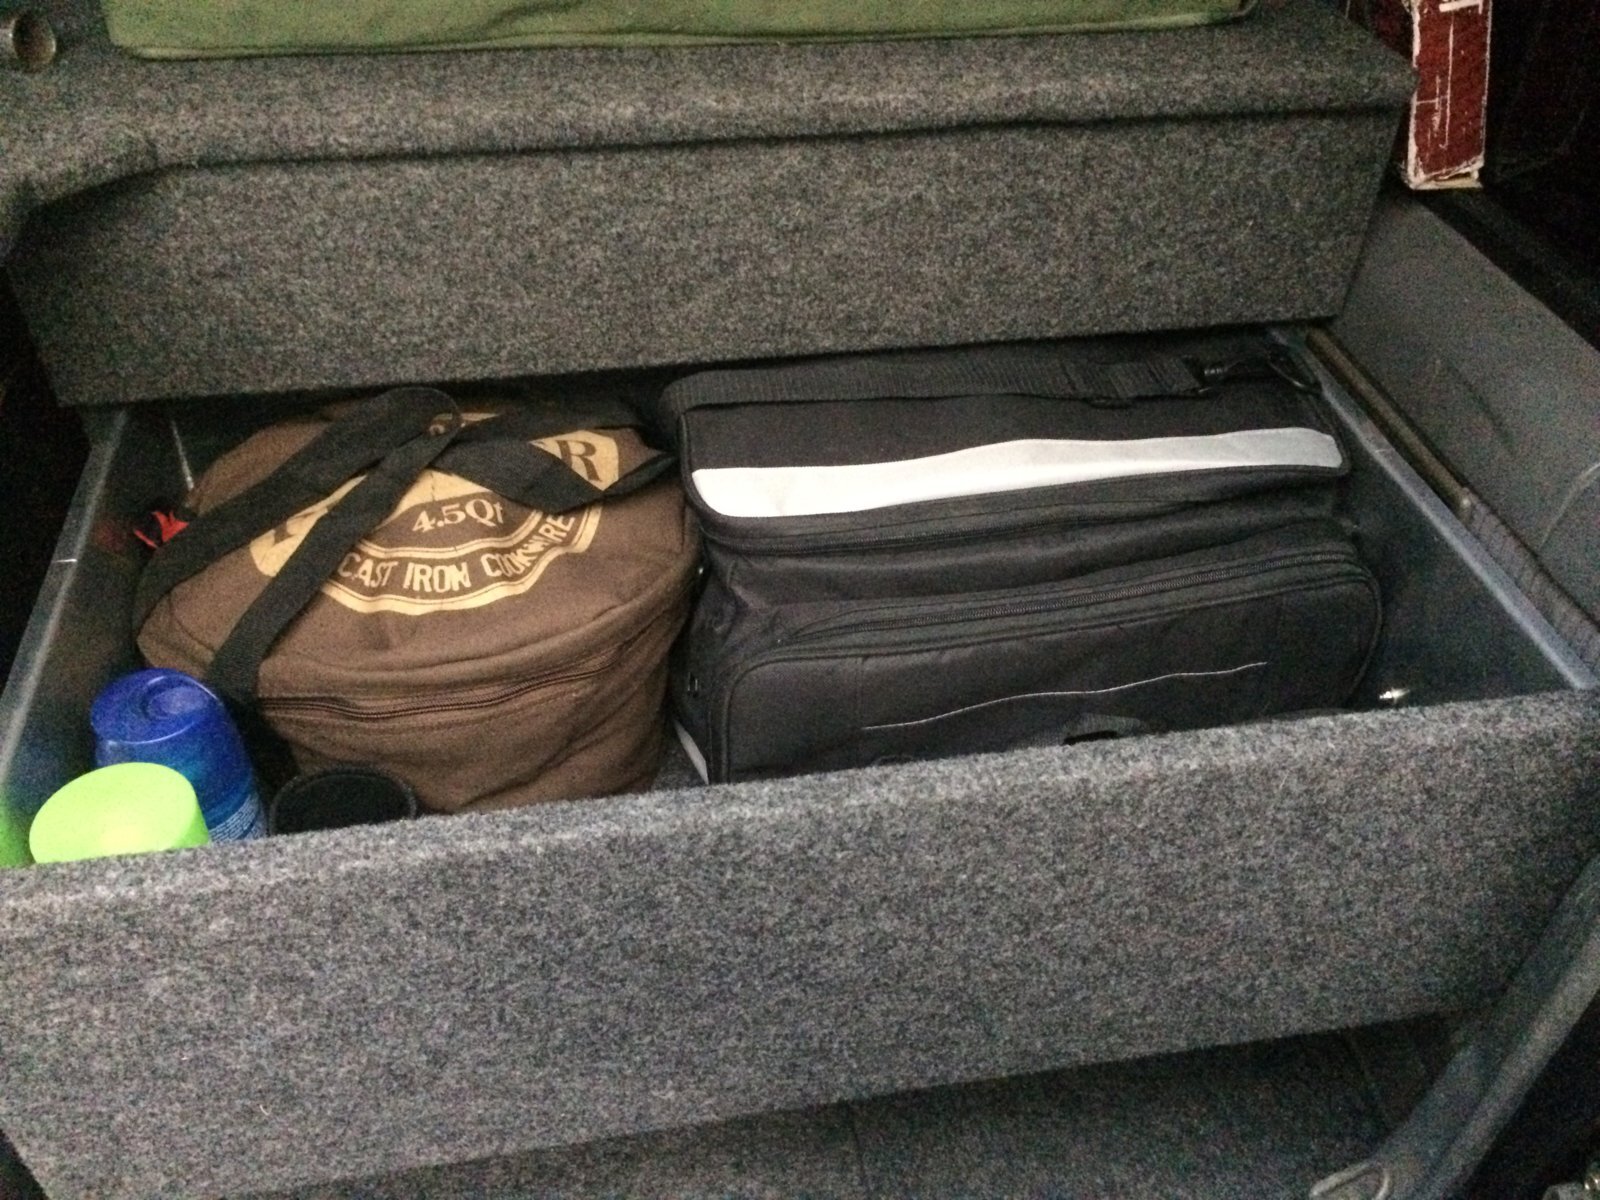
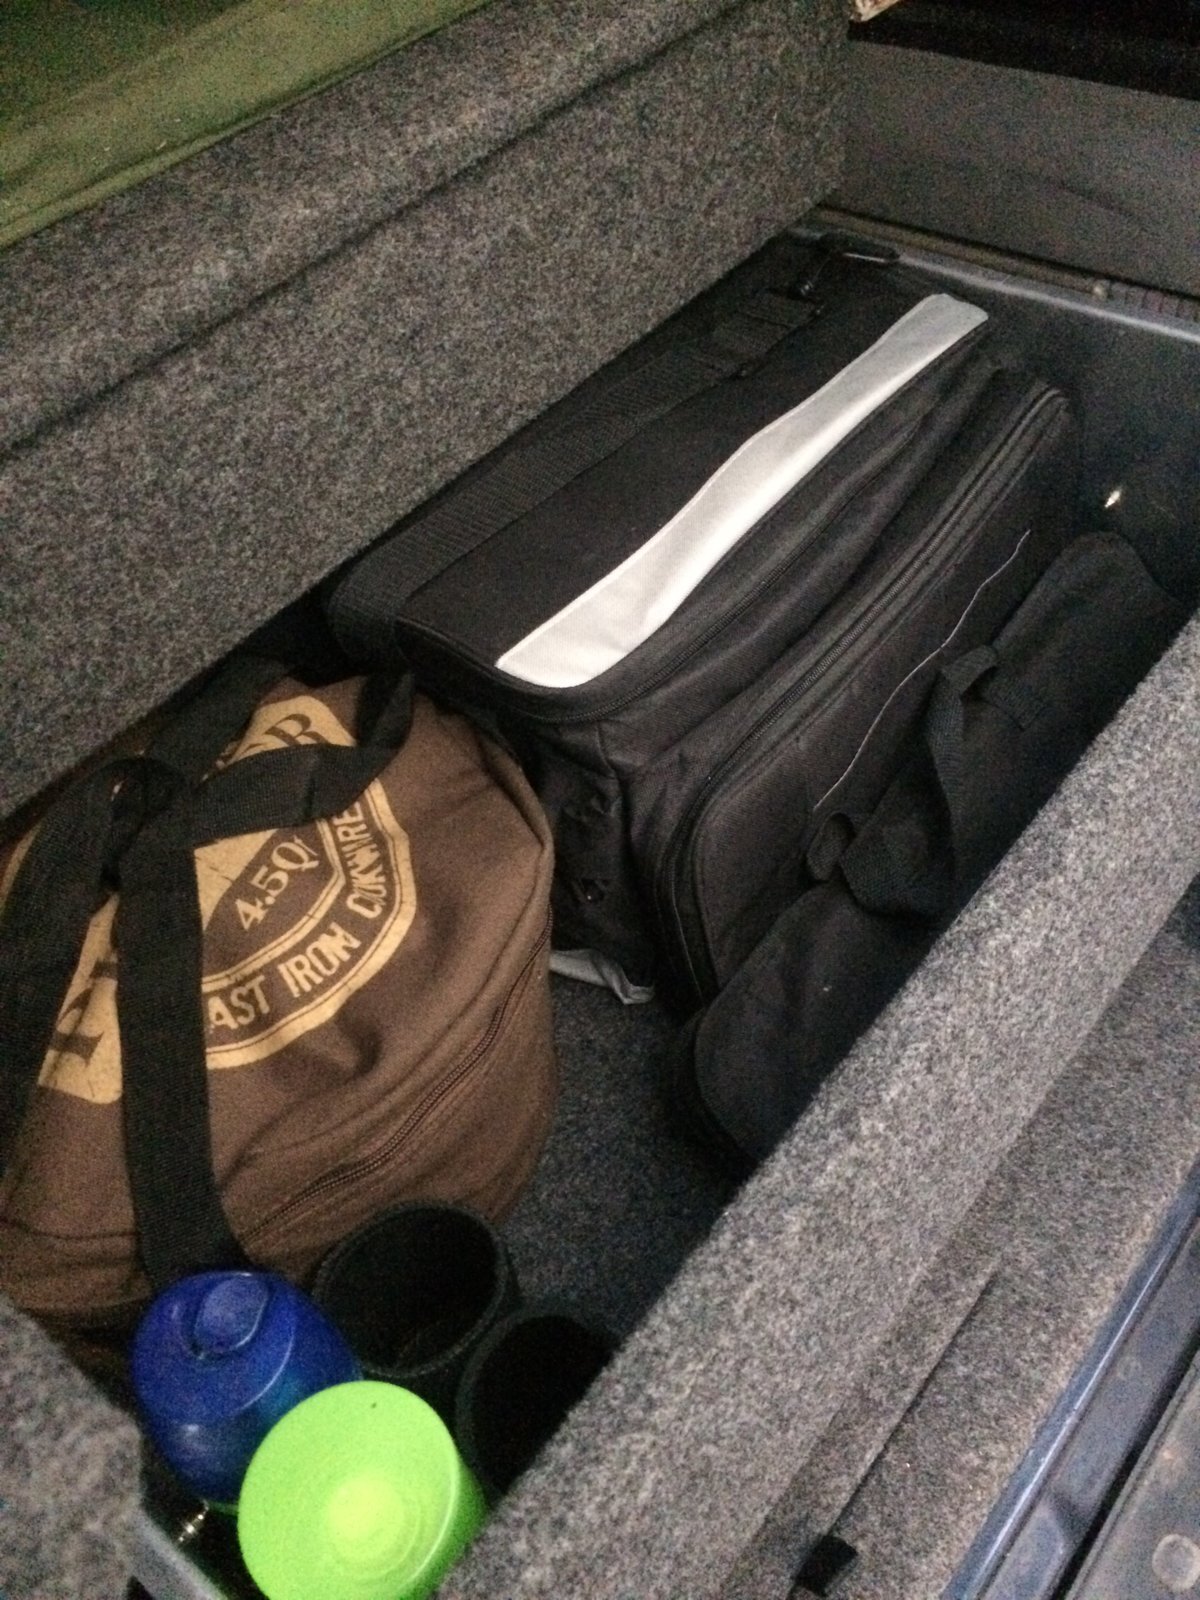
In the video Paul said that the best way to make use of drawers for overland travel is to have dedicated bags for storing things in that then go into the drawers, so if you need your cooking gear for example its all in one neat bag that fits in a drawer and doesnt rattle and bang about and is super quick and easy to access.
So thats what I set out to do with this build and thats why the drawers are the size and shape that they are.
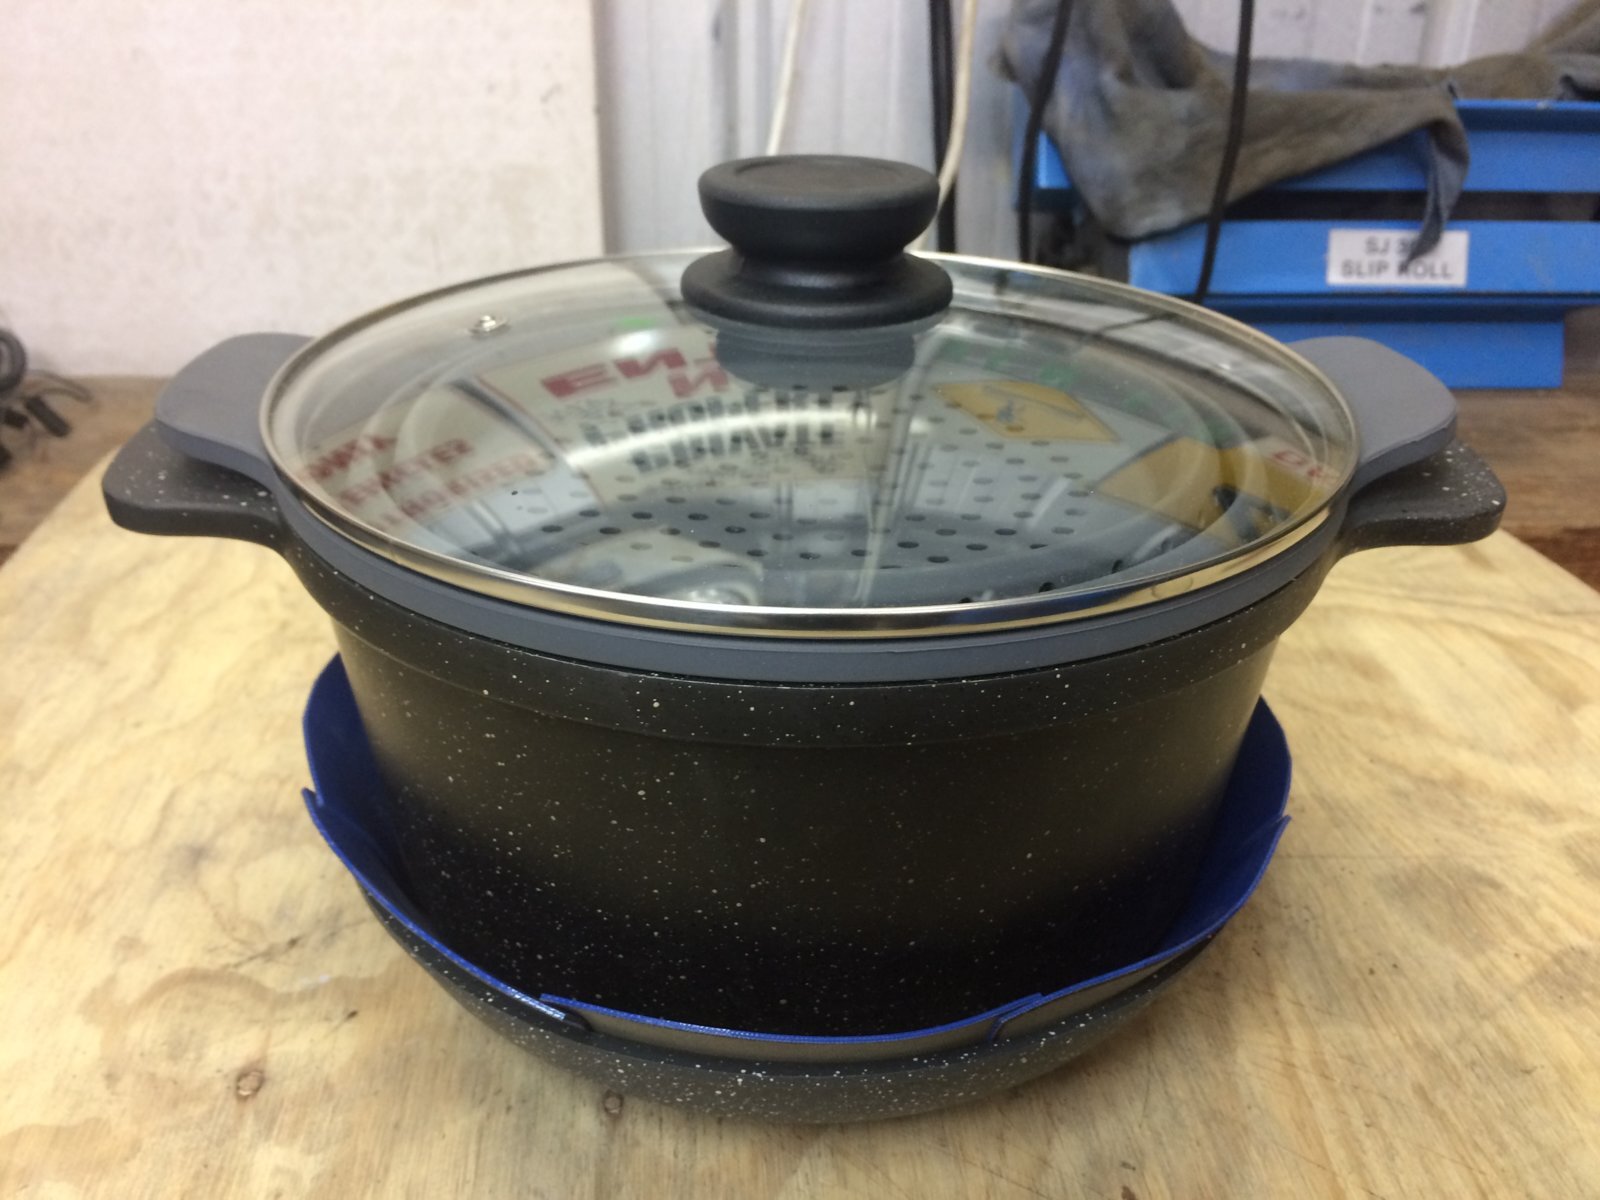
This is all my cooking pots and pans that I need to carry in the back of my 78.
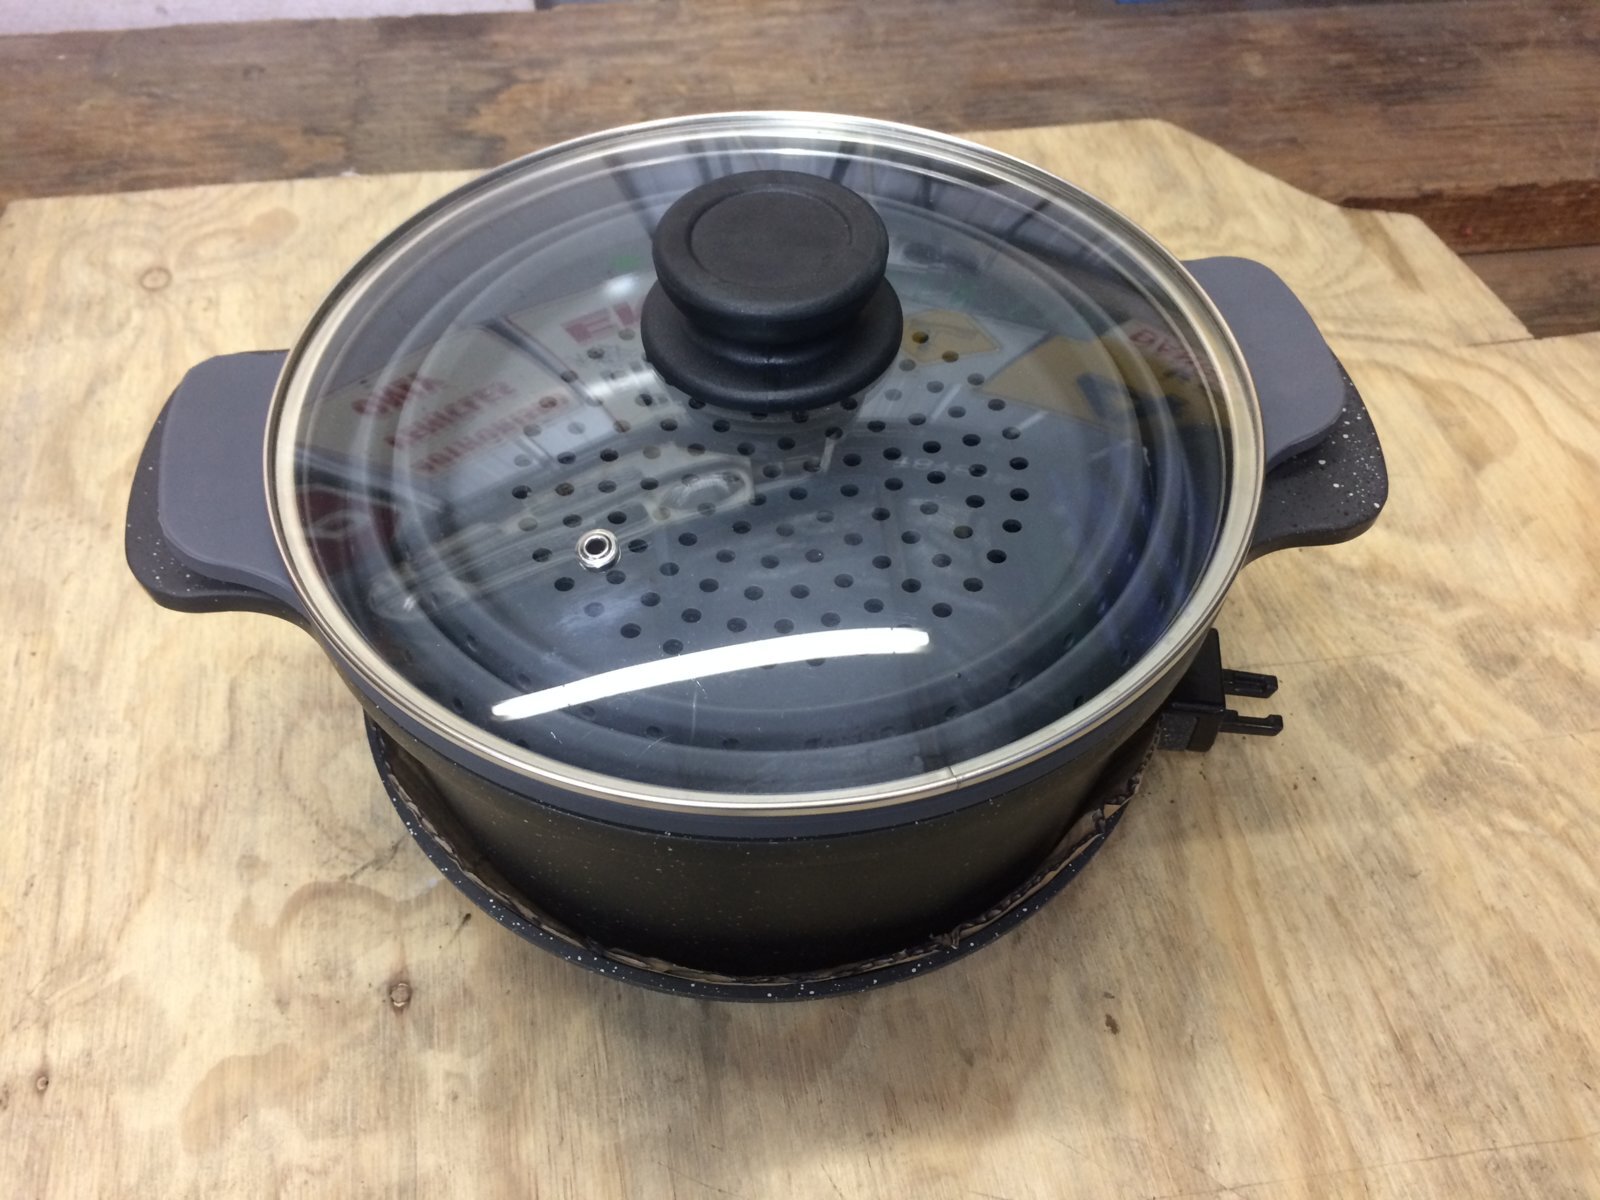
There was actually one more pot that I did away with as not only do I not need it but it was adding unnecessary height and weight.
Oh and there is 2 detachable handles, but there in the other bag that I will get to shortly.
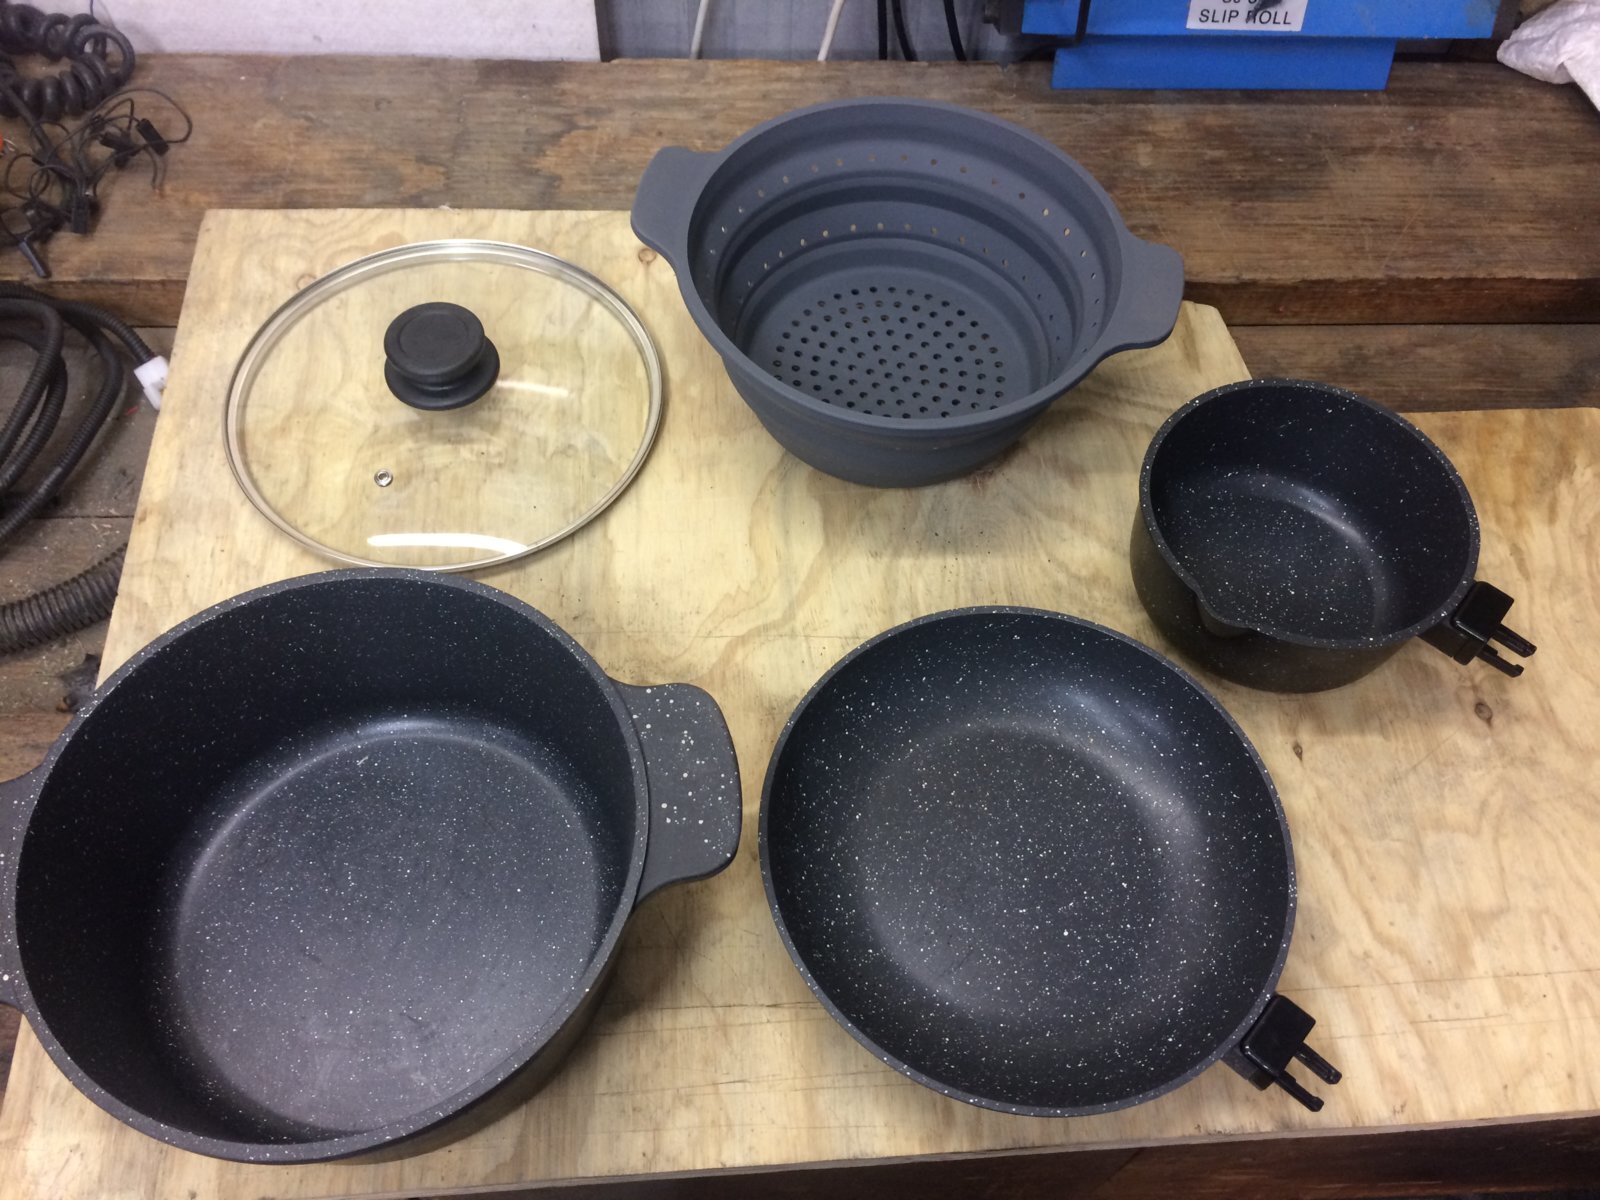
I really like them and they have a lovely non stick coating on them.
One thing I didnt like though is not only did they not come with a bag but they also didnt come with anything decent to go between the pots and pans to protect that magic non stick coating.
They came with a piece of carboard between each pot which lets face it wouldnt have lasted more than a few hundred k's of rough road before it would have been reduced to dust!
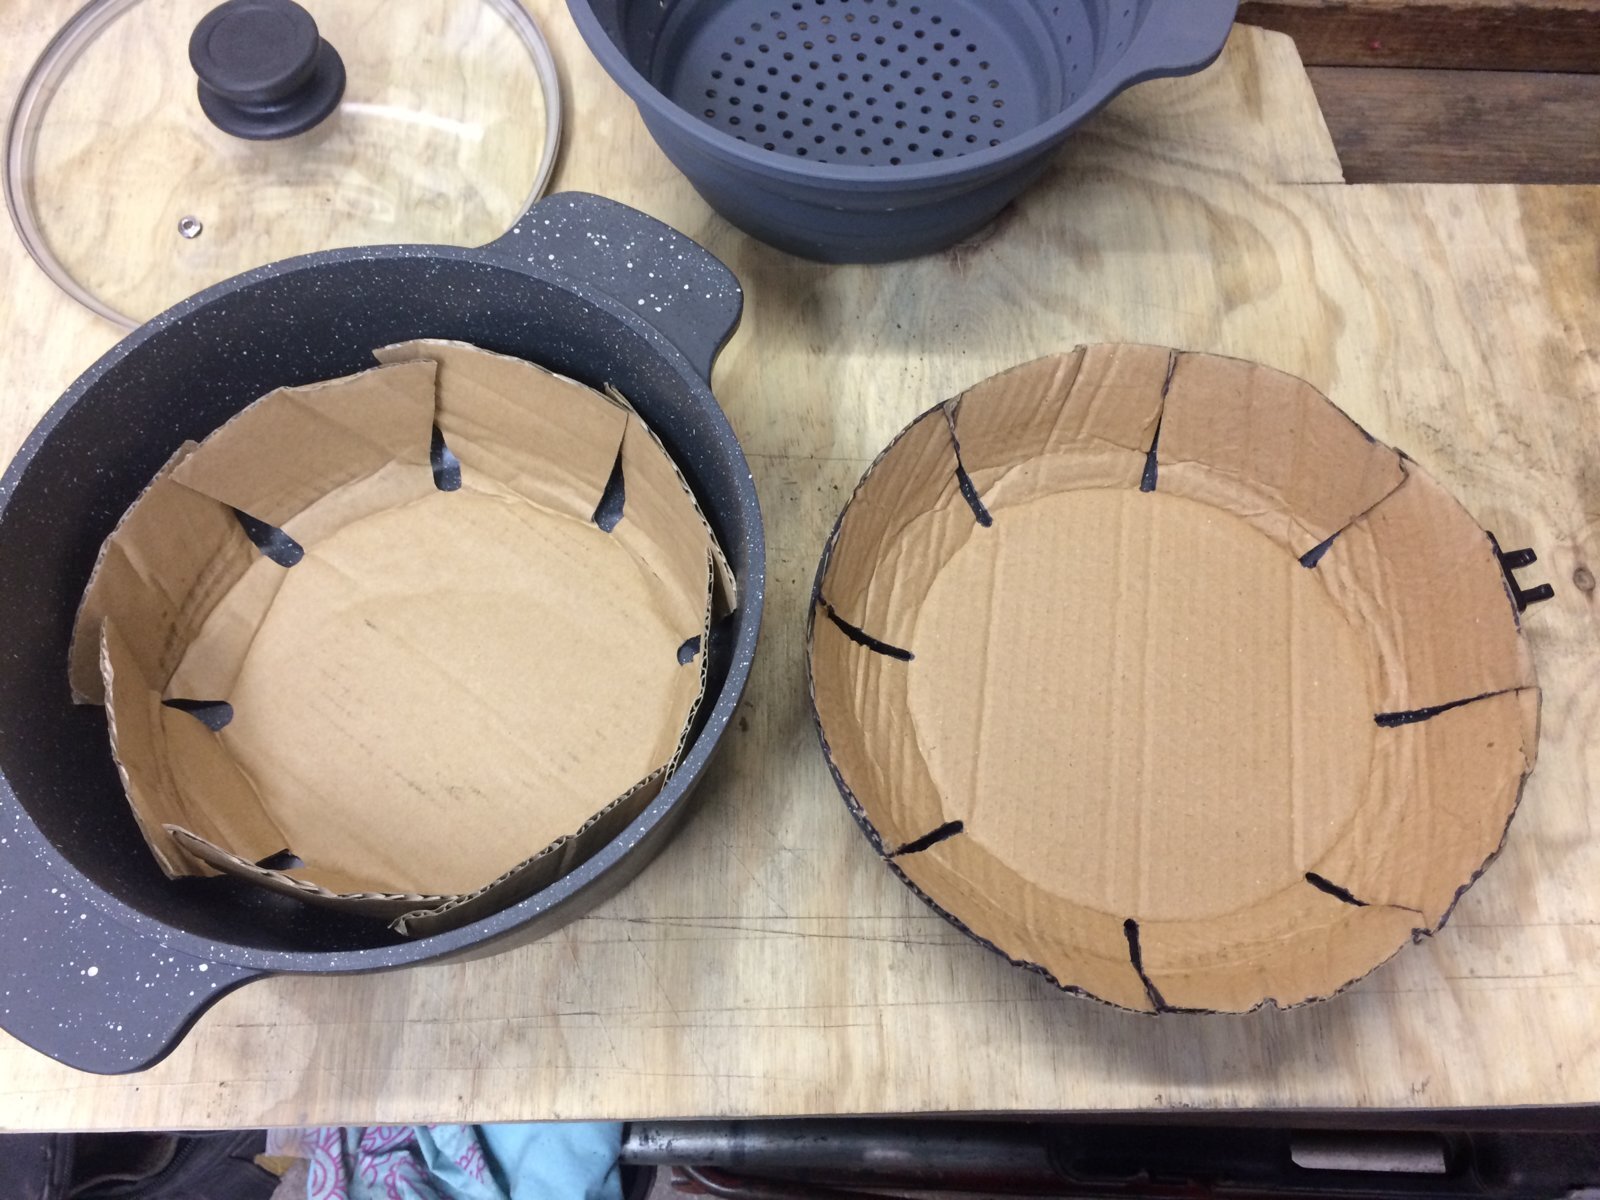
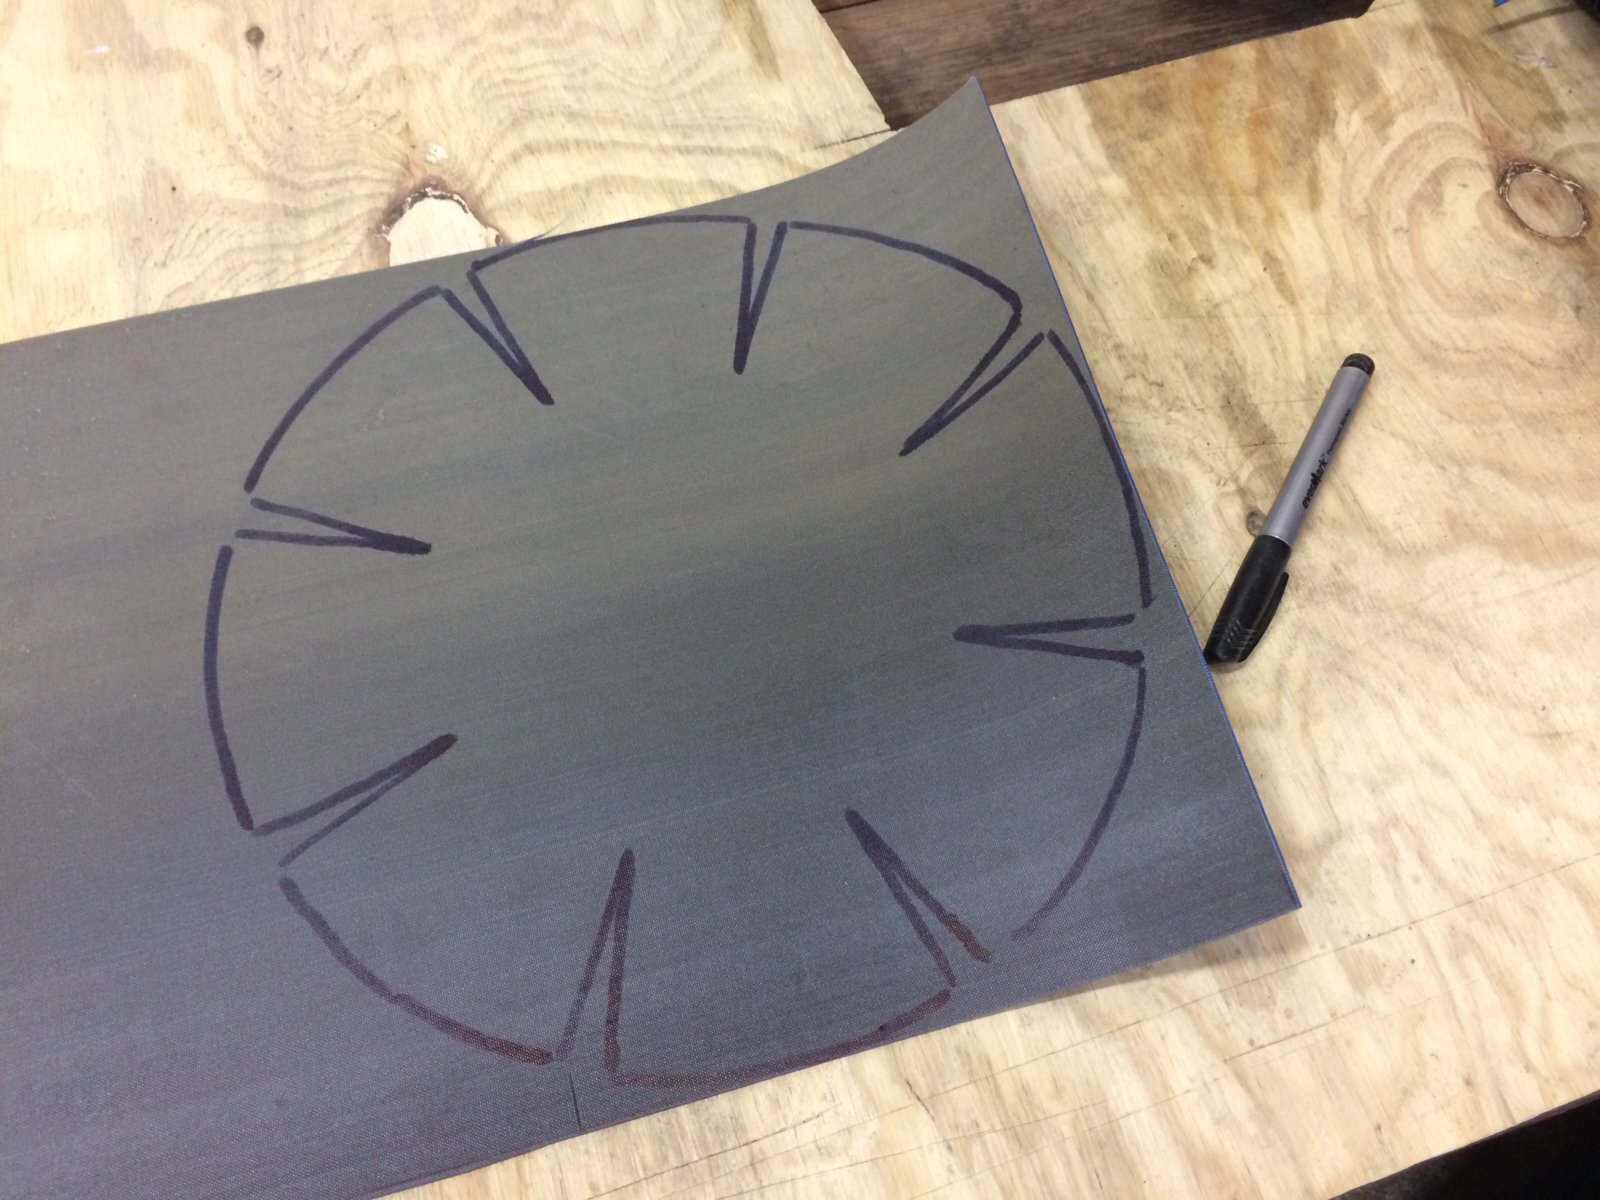
I used the pieces of cardboard as templates to copy their size and shape onto the back of some thin conveyor belt material from a food factory.
Cut them out.
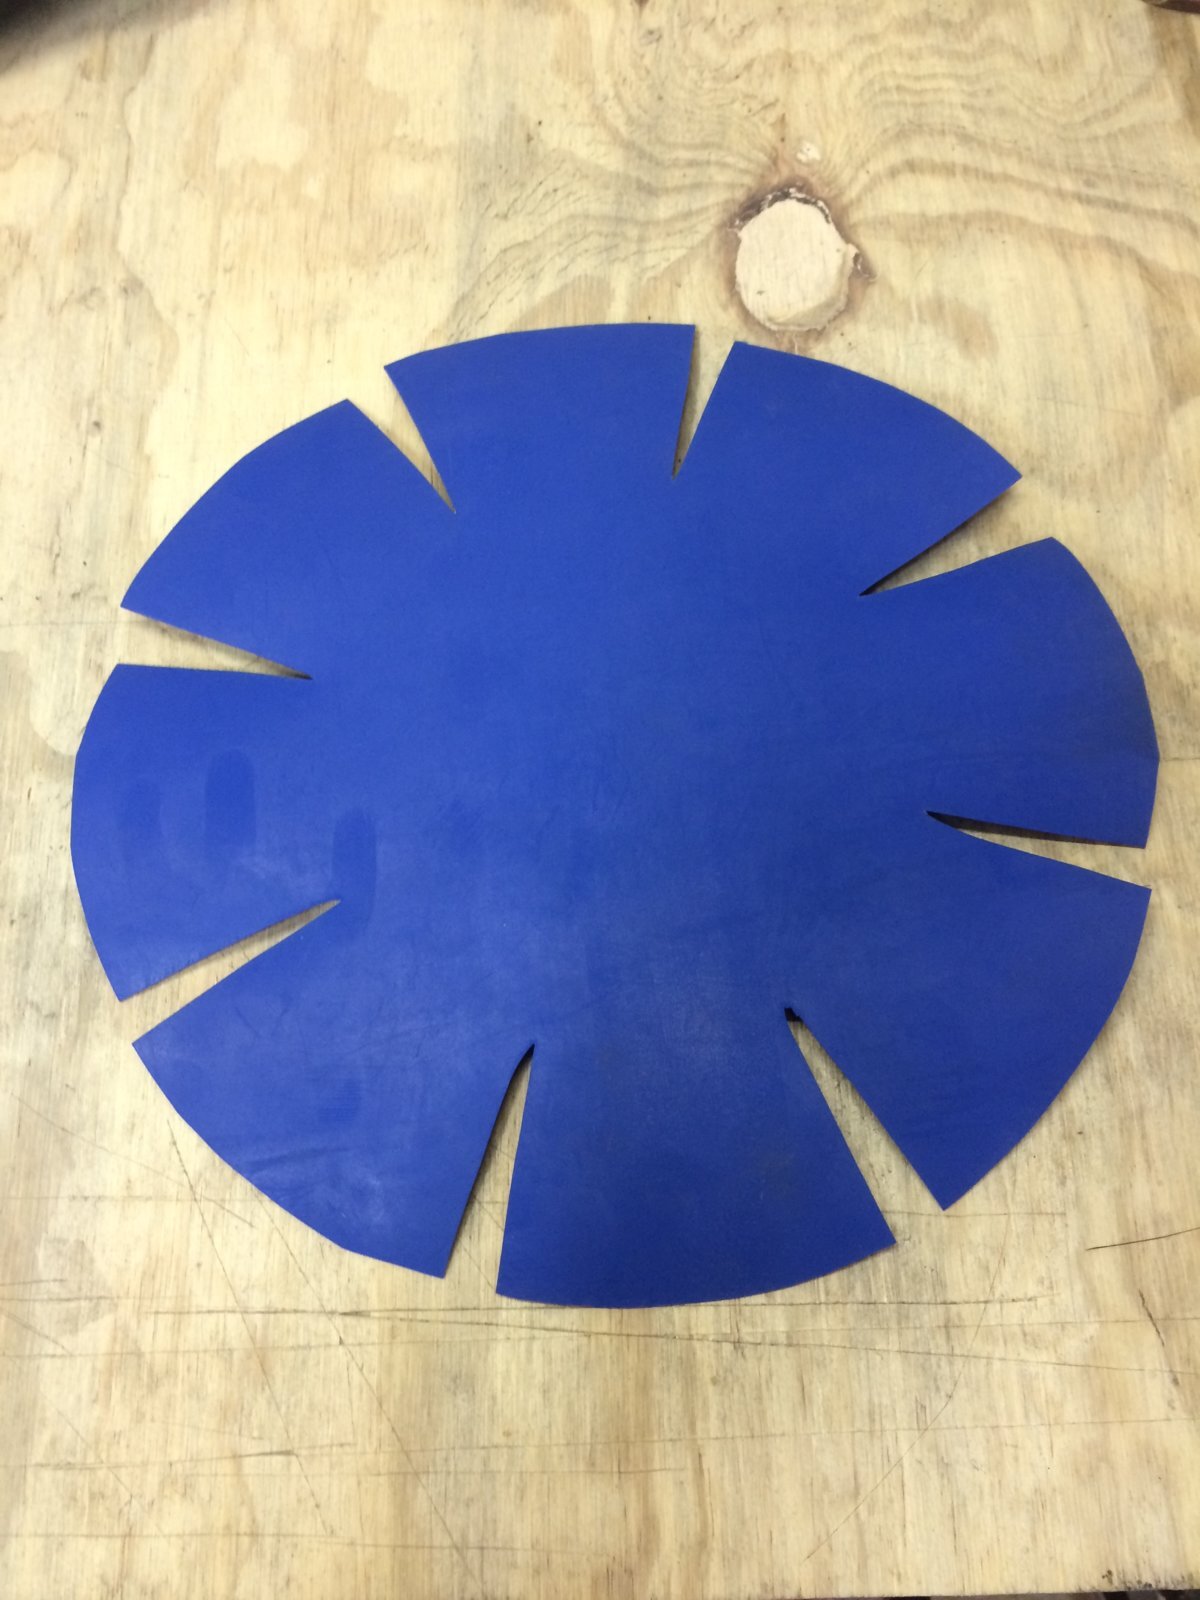
And they fit beautifully in between the pots.
Next I wanted a nice, strong, canvas bag to store them in.
After a bit of searching I found this one from www.Snowys.com.au and as always the price and service were both excellent.
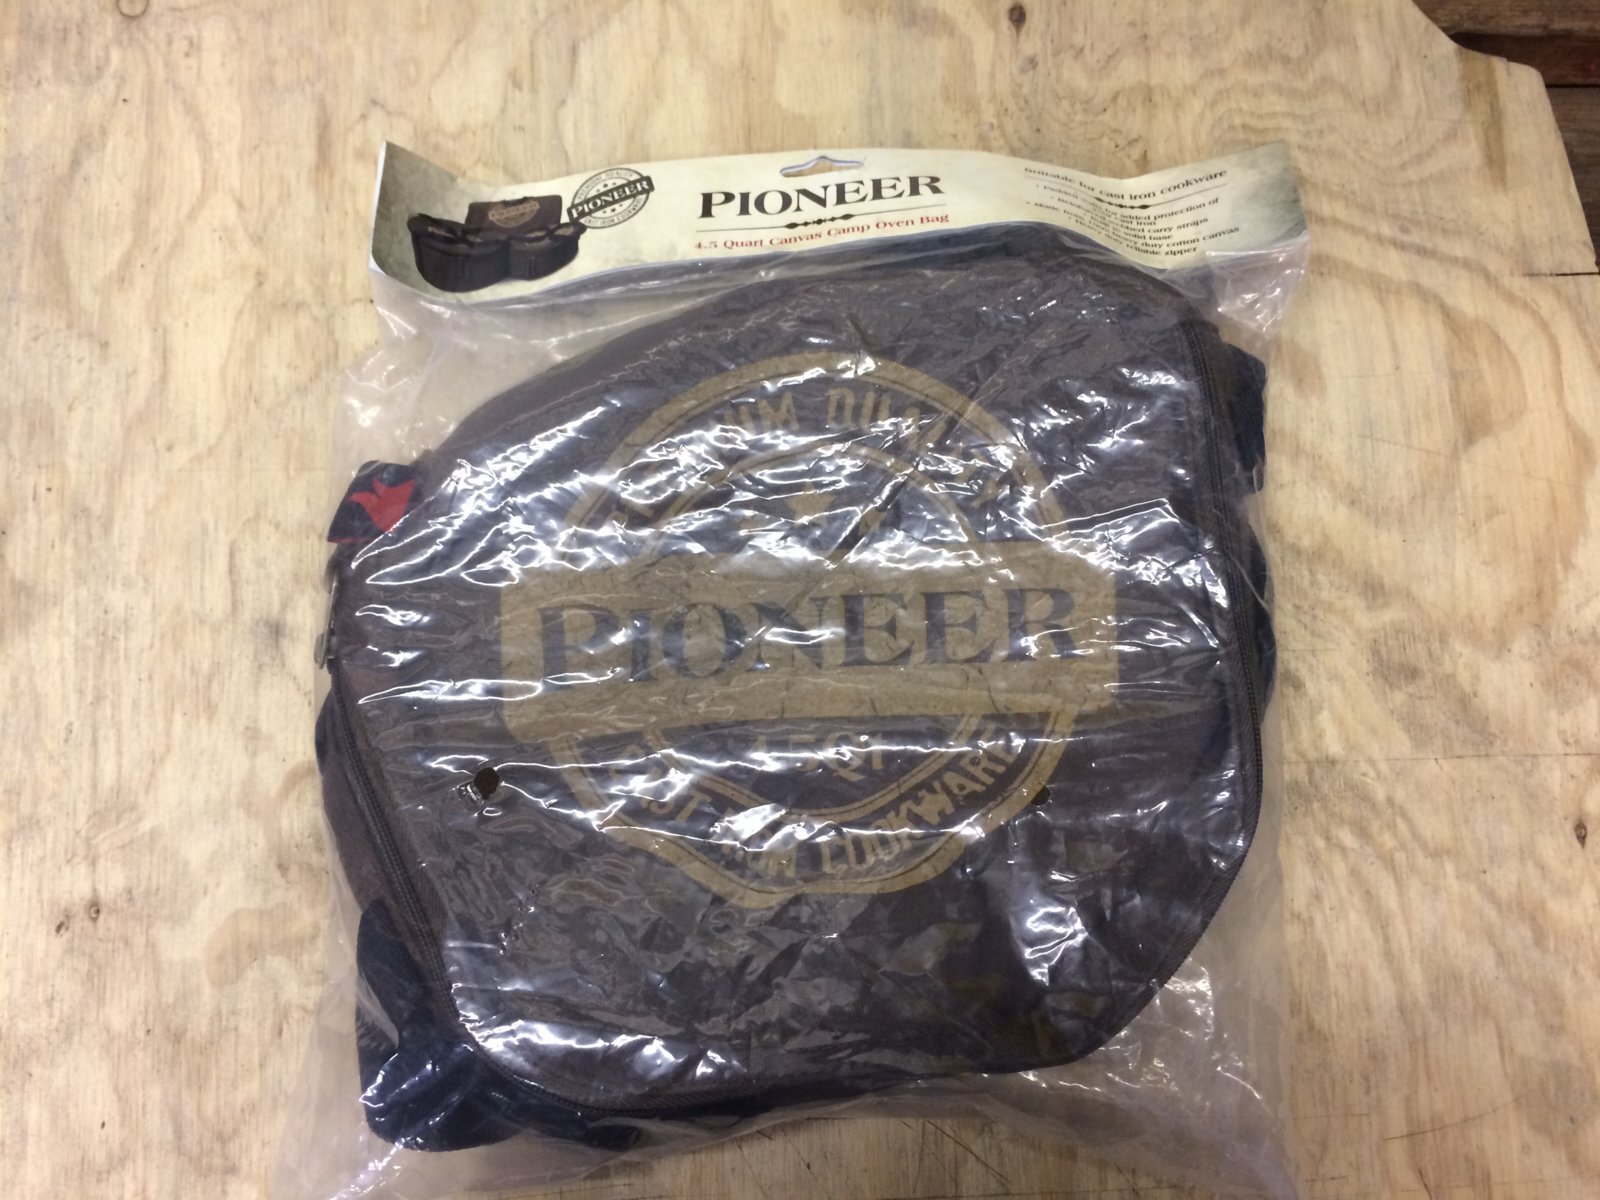
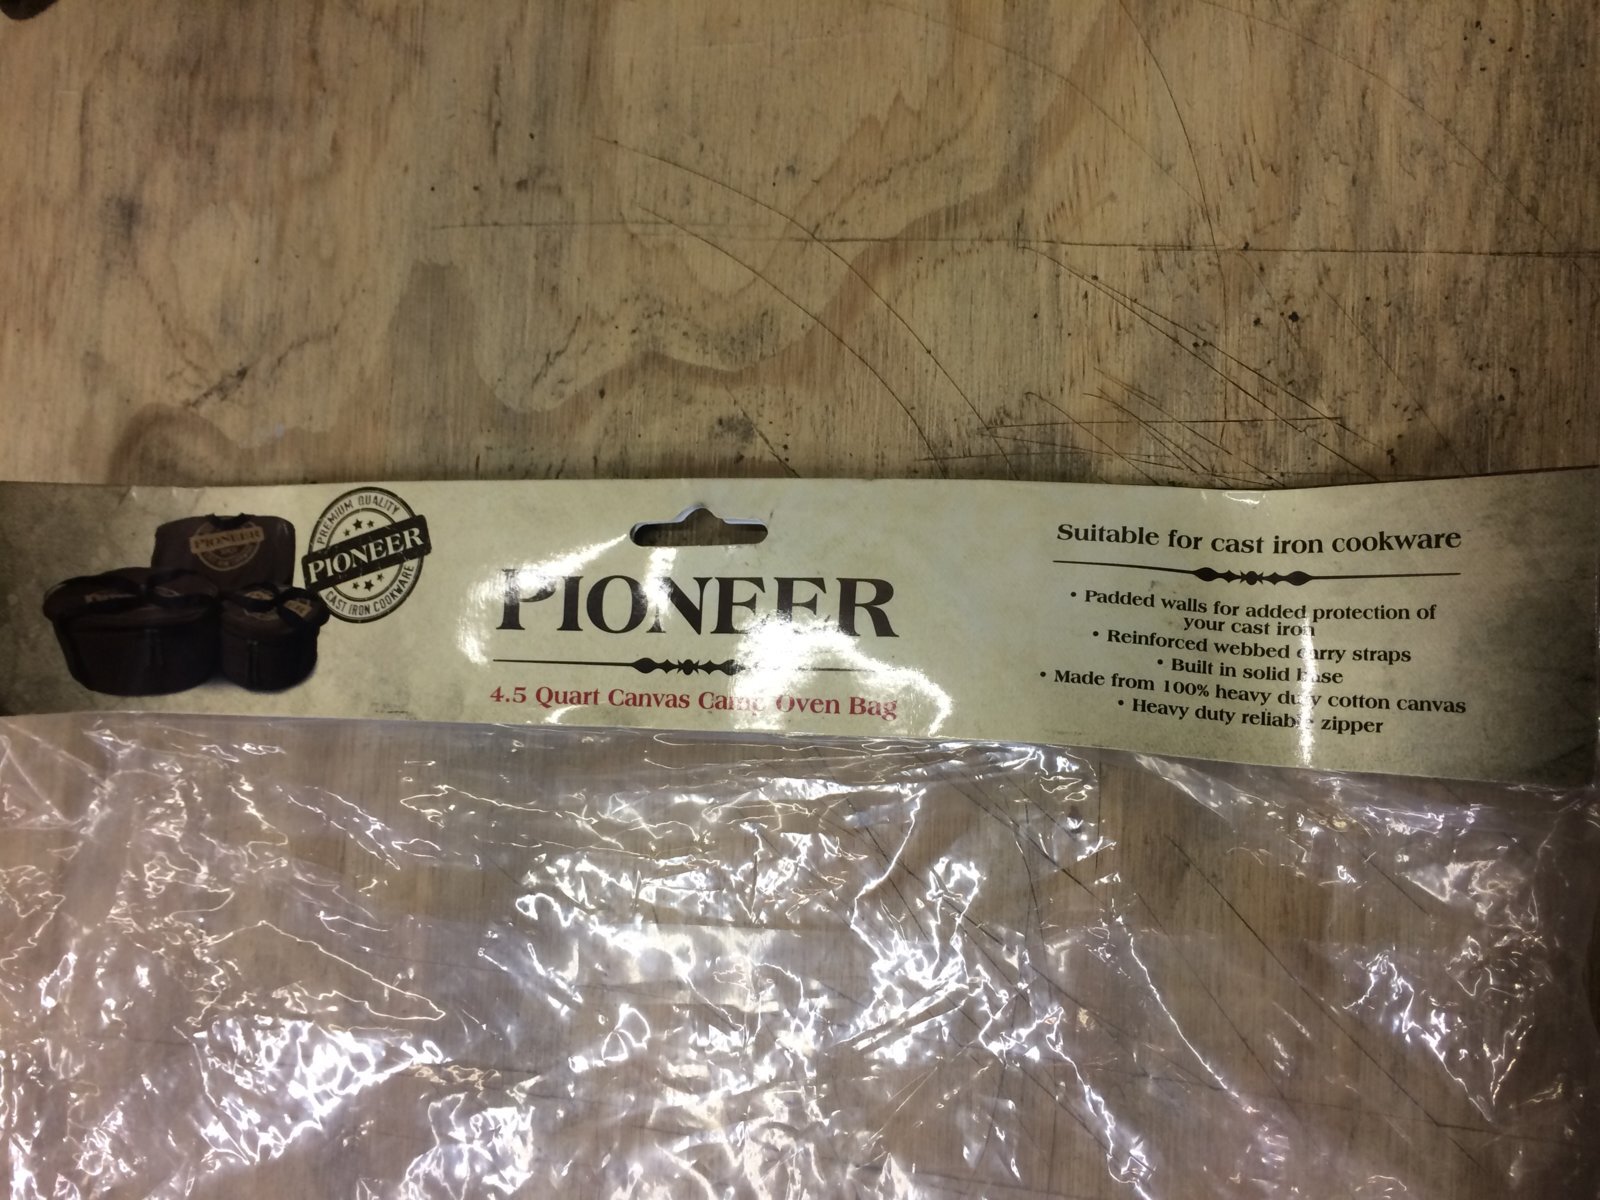

Made in India and great quality!
Also as they are designed for heavy cast iron pots it should be easily strong enough for my light weight alluminium pots.

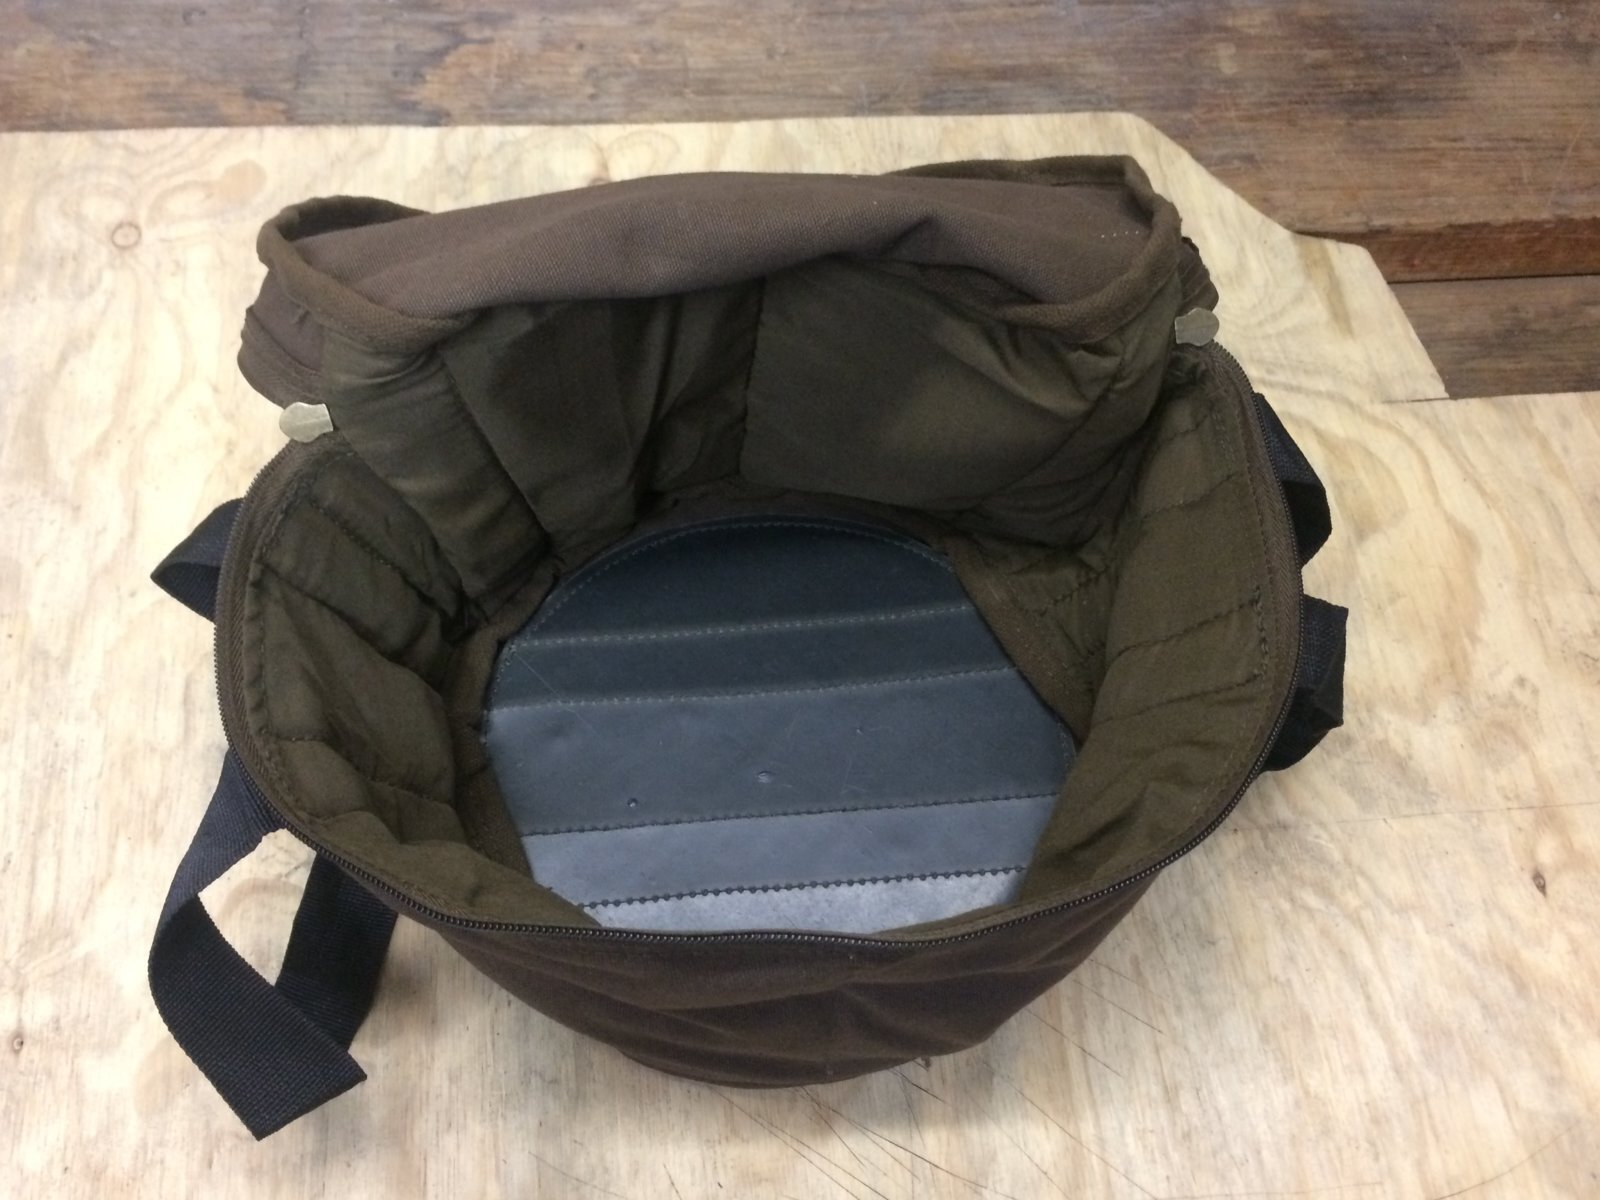
And my pots fitted perfectly!

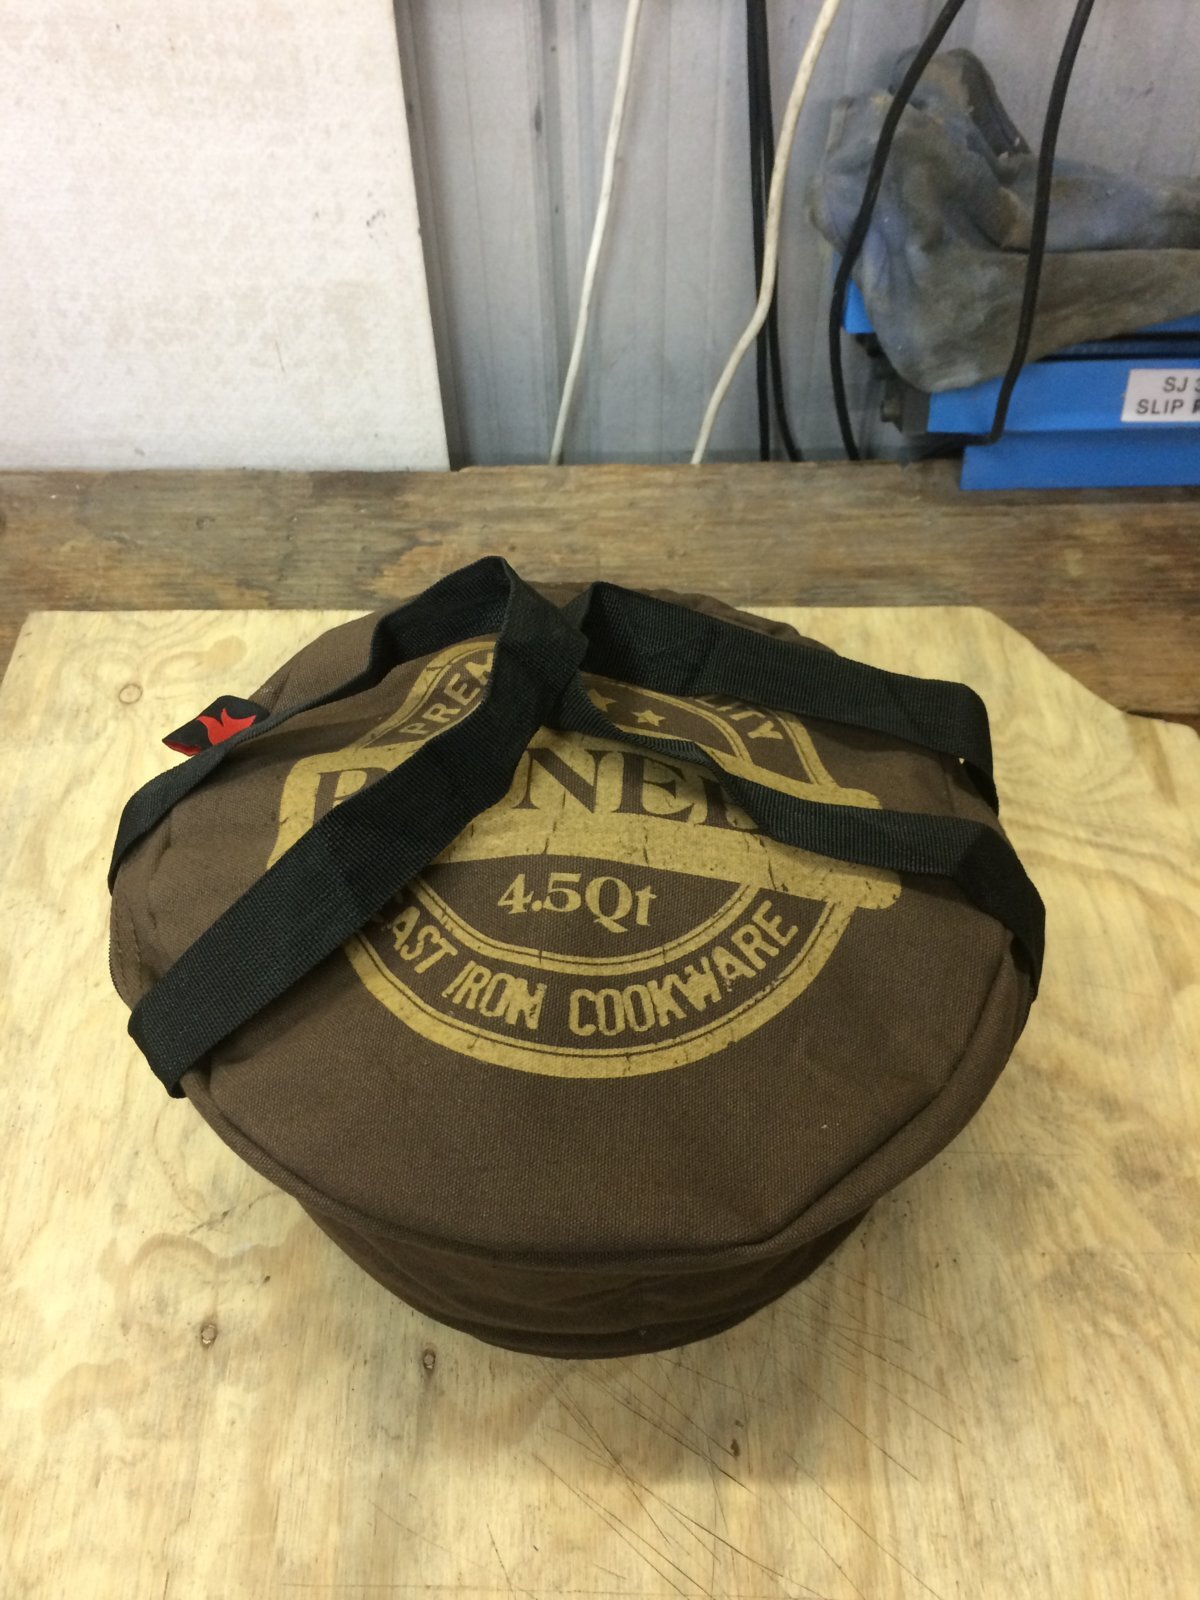
Next I needed one more bag for all my plates, bowls, cups and cutlery.
I actually searched for quite a while and found nothing!
Then I remembered the picnic bag I got given by my old company at Christmas. It came stuffed full of beer, wine and food from a company that specilises in gift hampers.
It turned out to be the perfect size and shape!
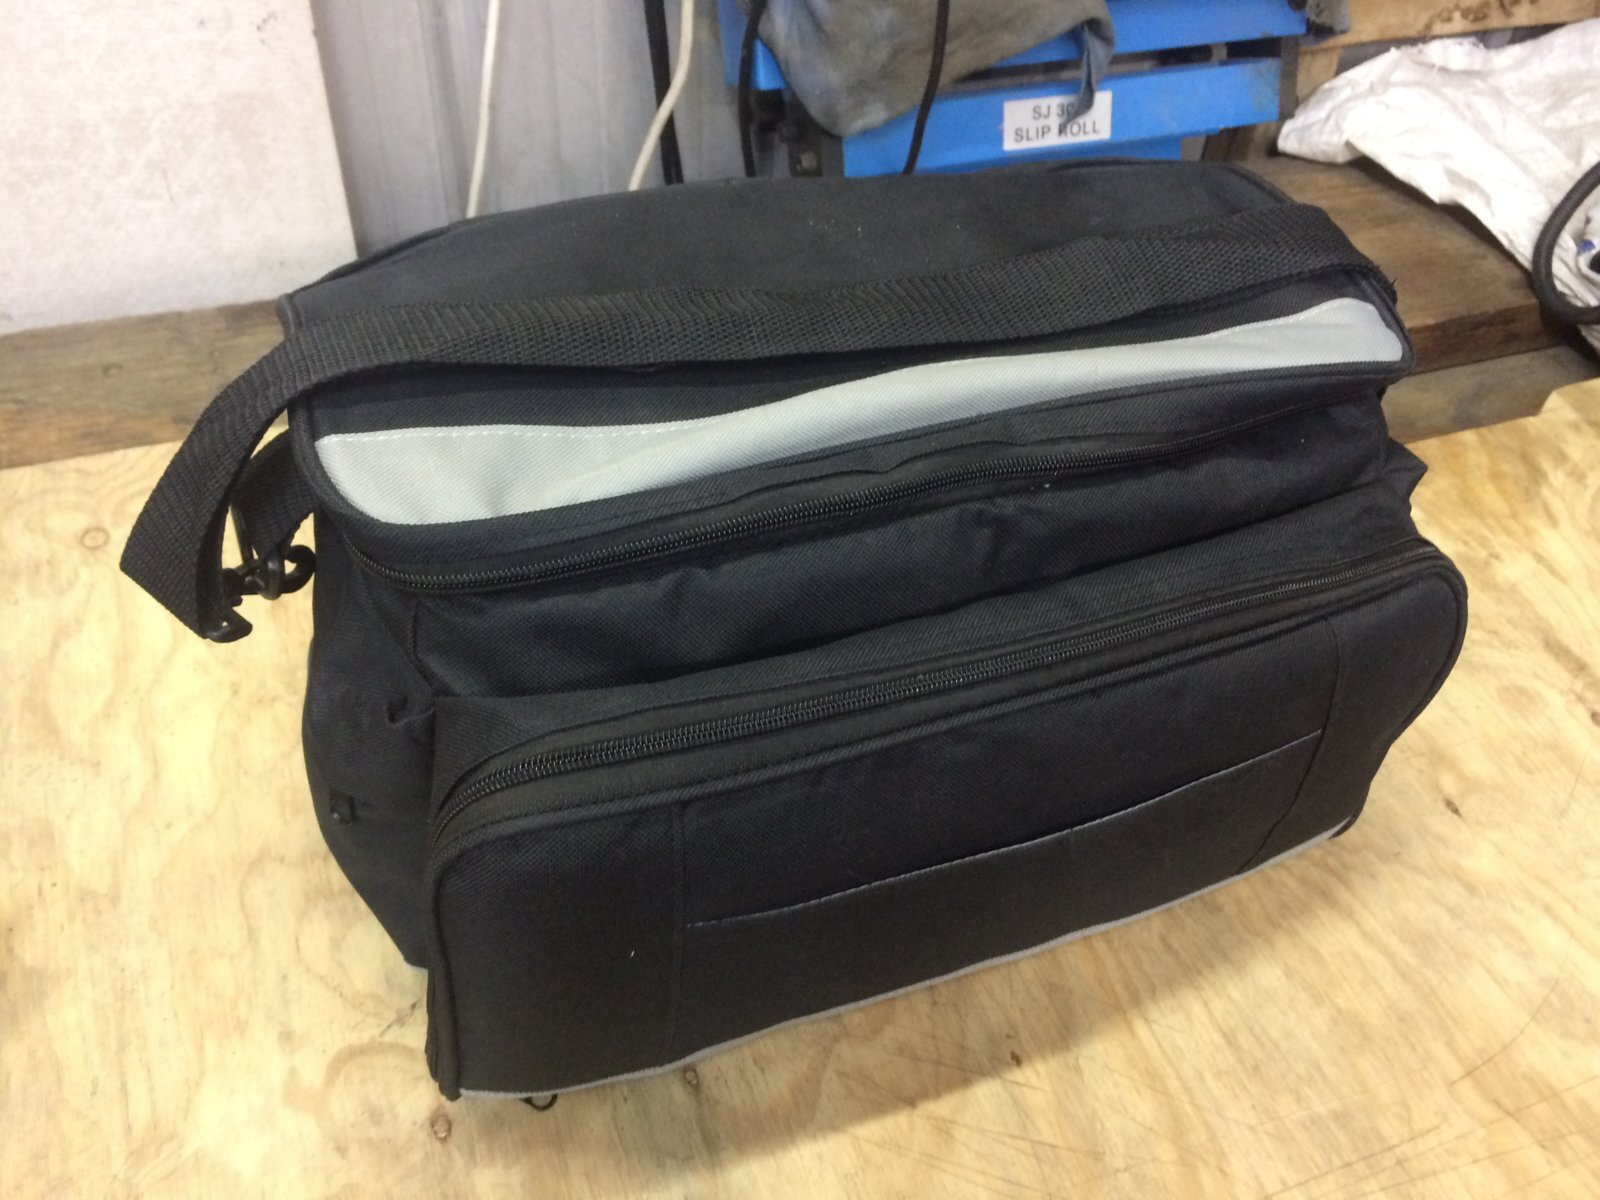
Inside it all of this comfortably fits.
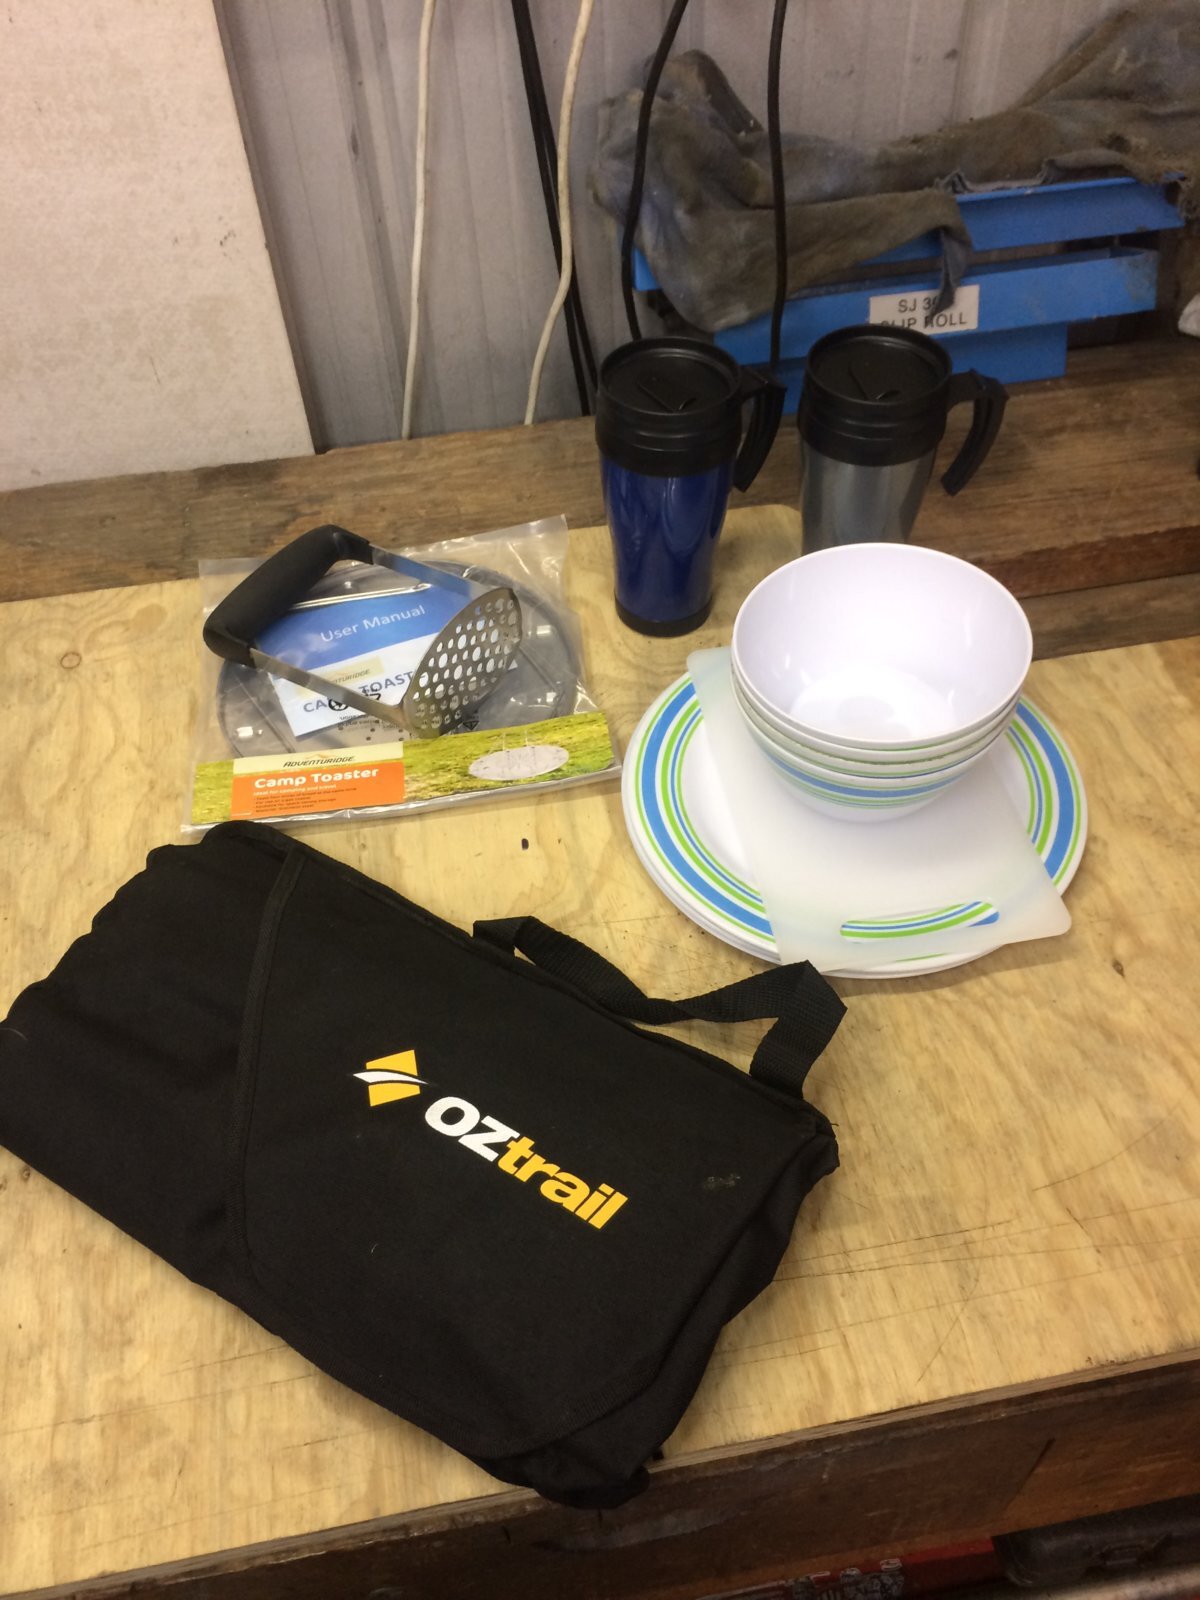
This is my cutlery set.

So these 2 neat bags contain everything I need to cook when camping.
And the beauty of having everything in bags like this is, if we ever camp and wish to cook away from the vehicle, maybe at a commercial camp site or around a communal fire etc. we just have 2 bags that are quick and easy to grab!
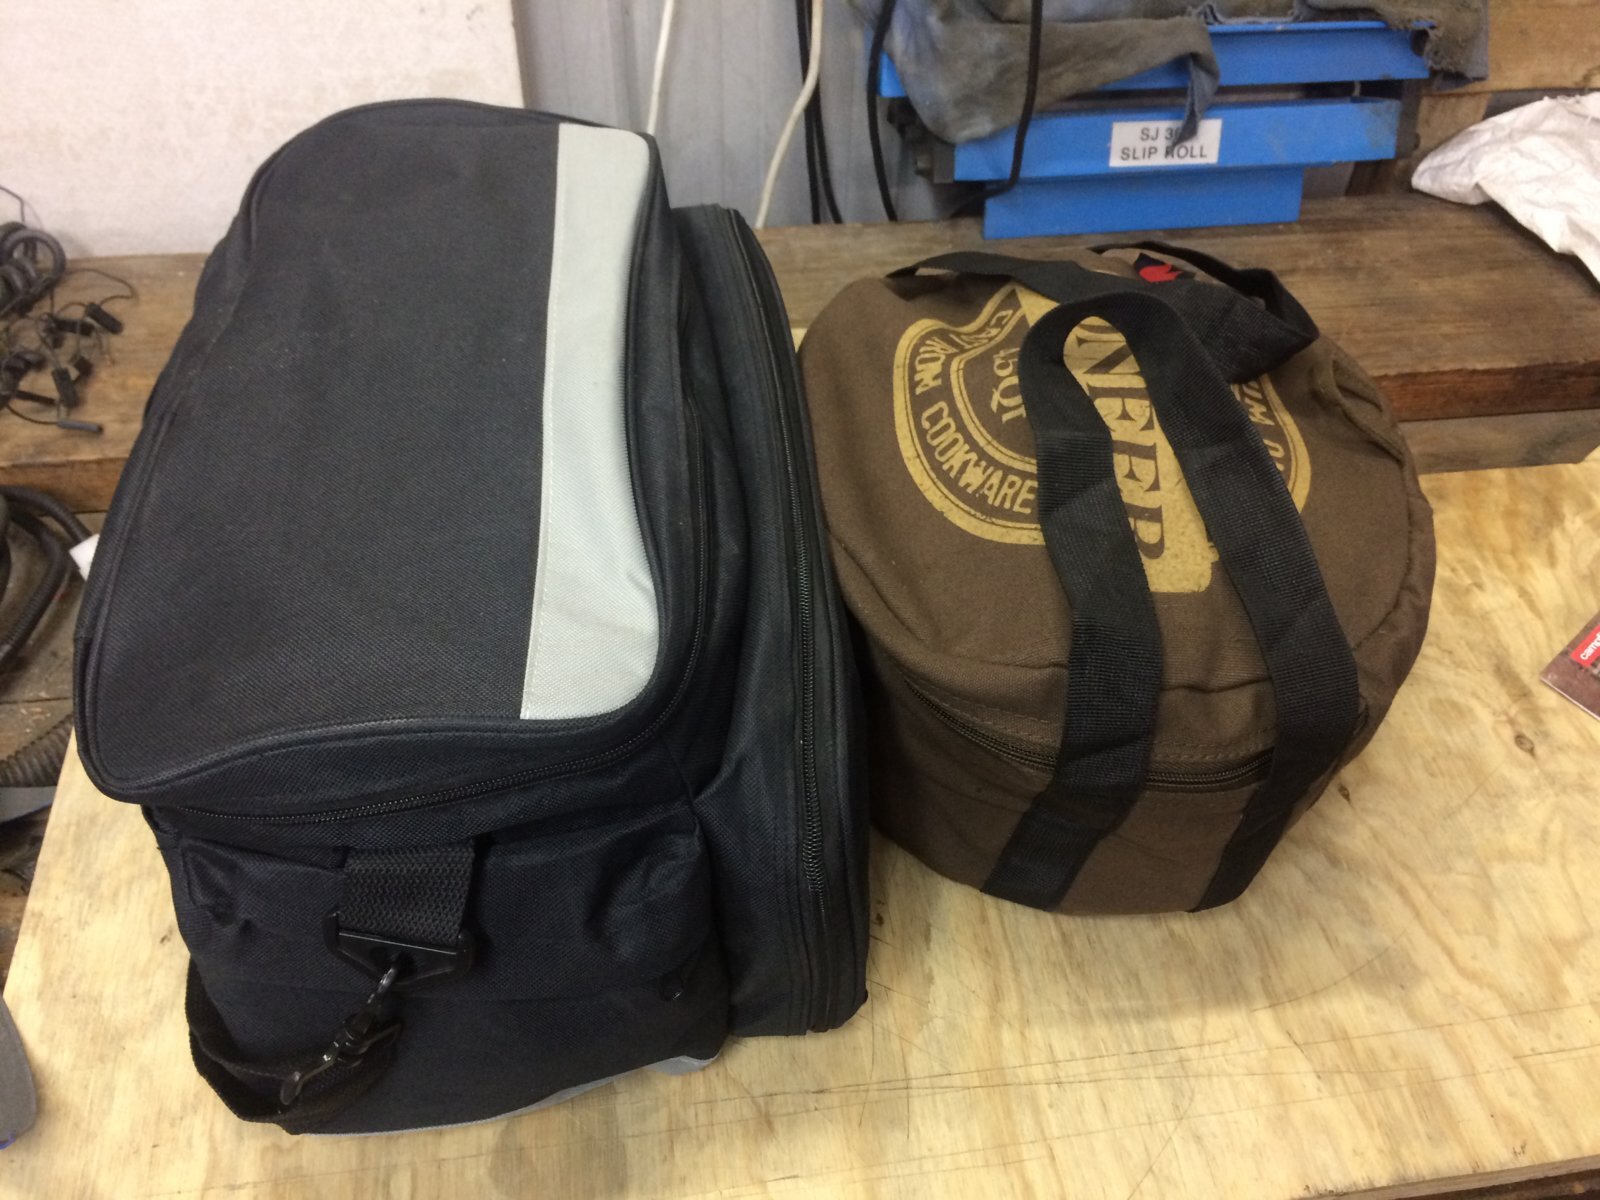
They fit nicely in the middle, large drawer.
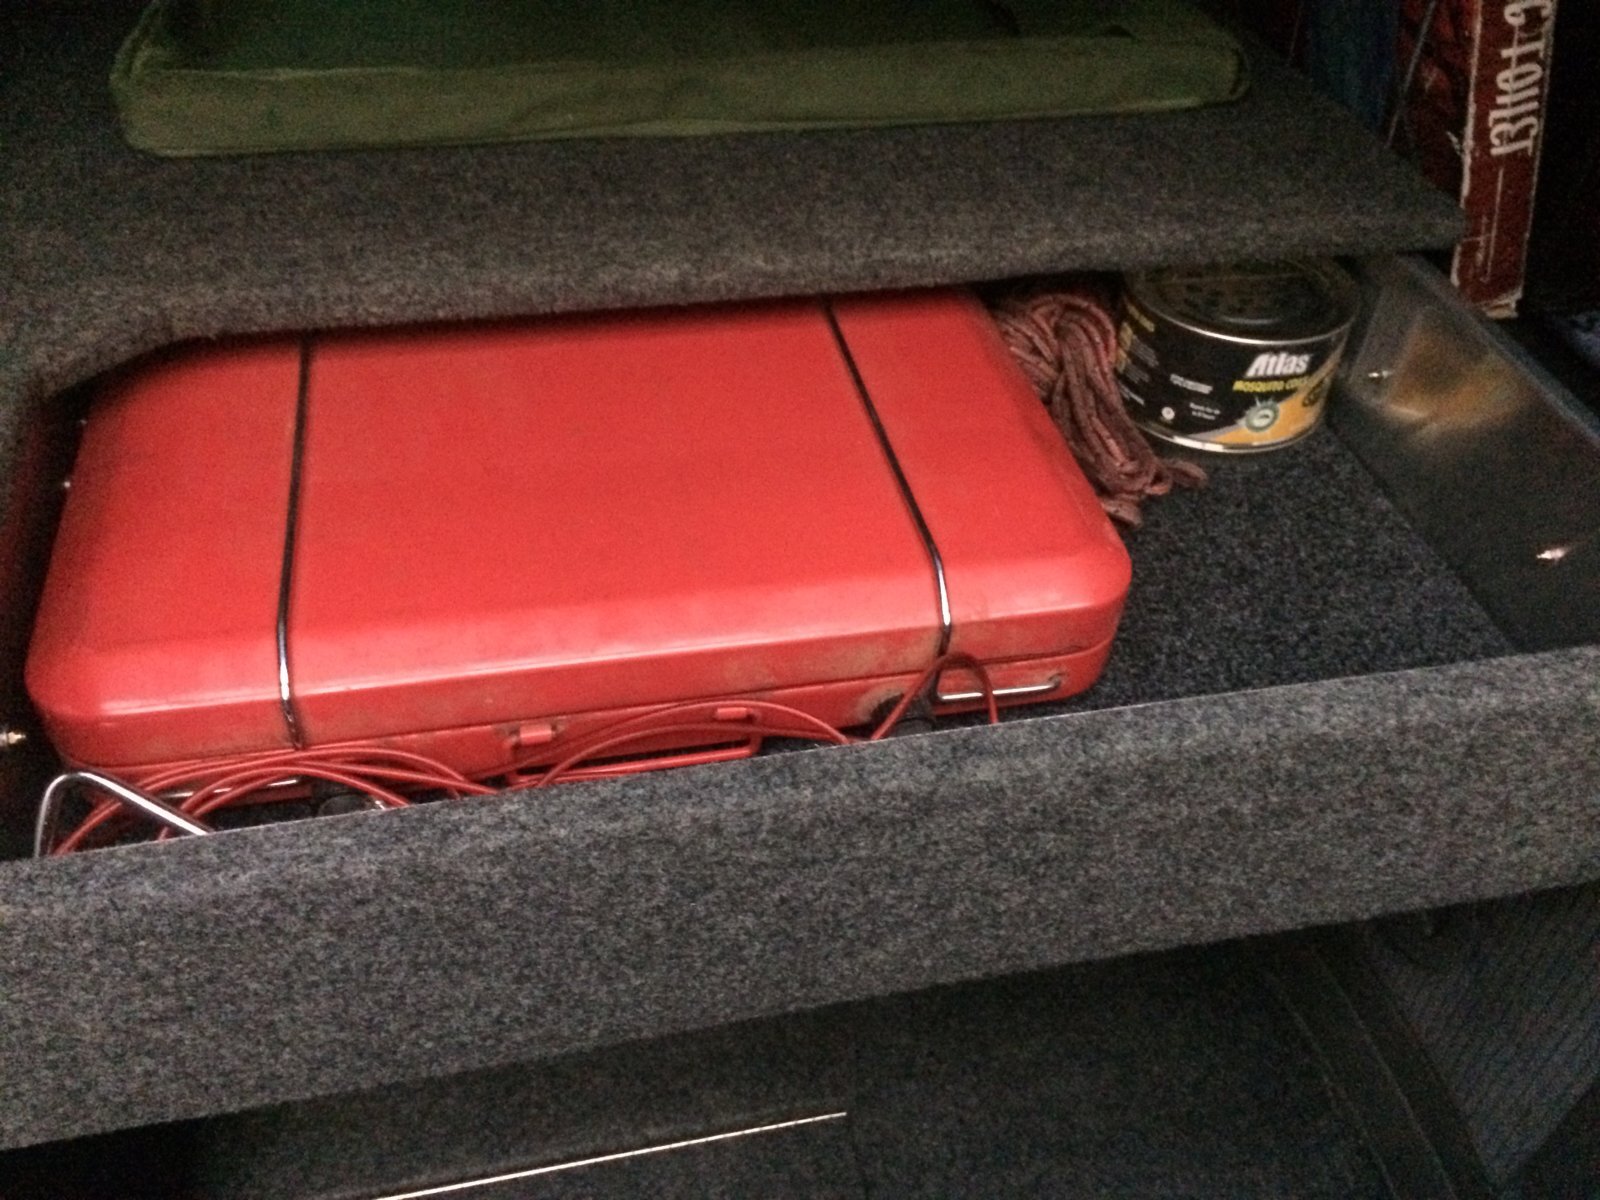
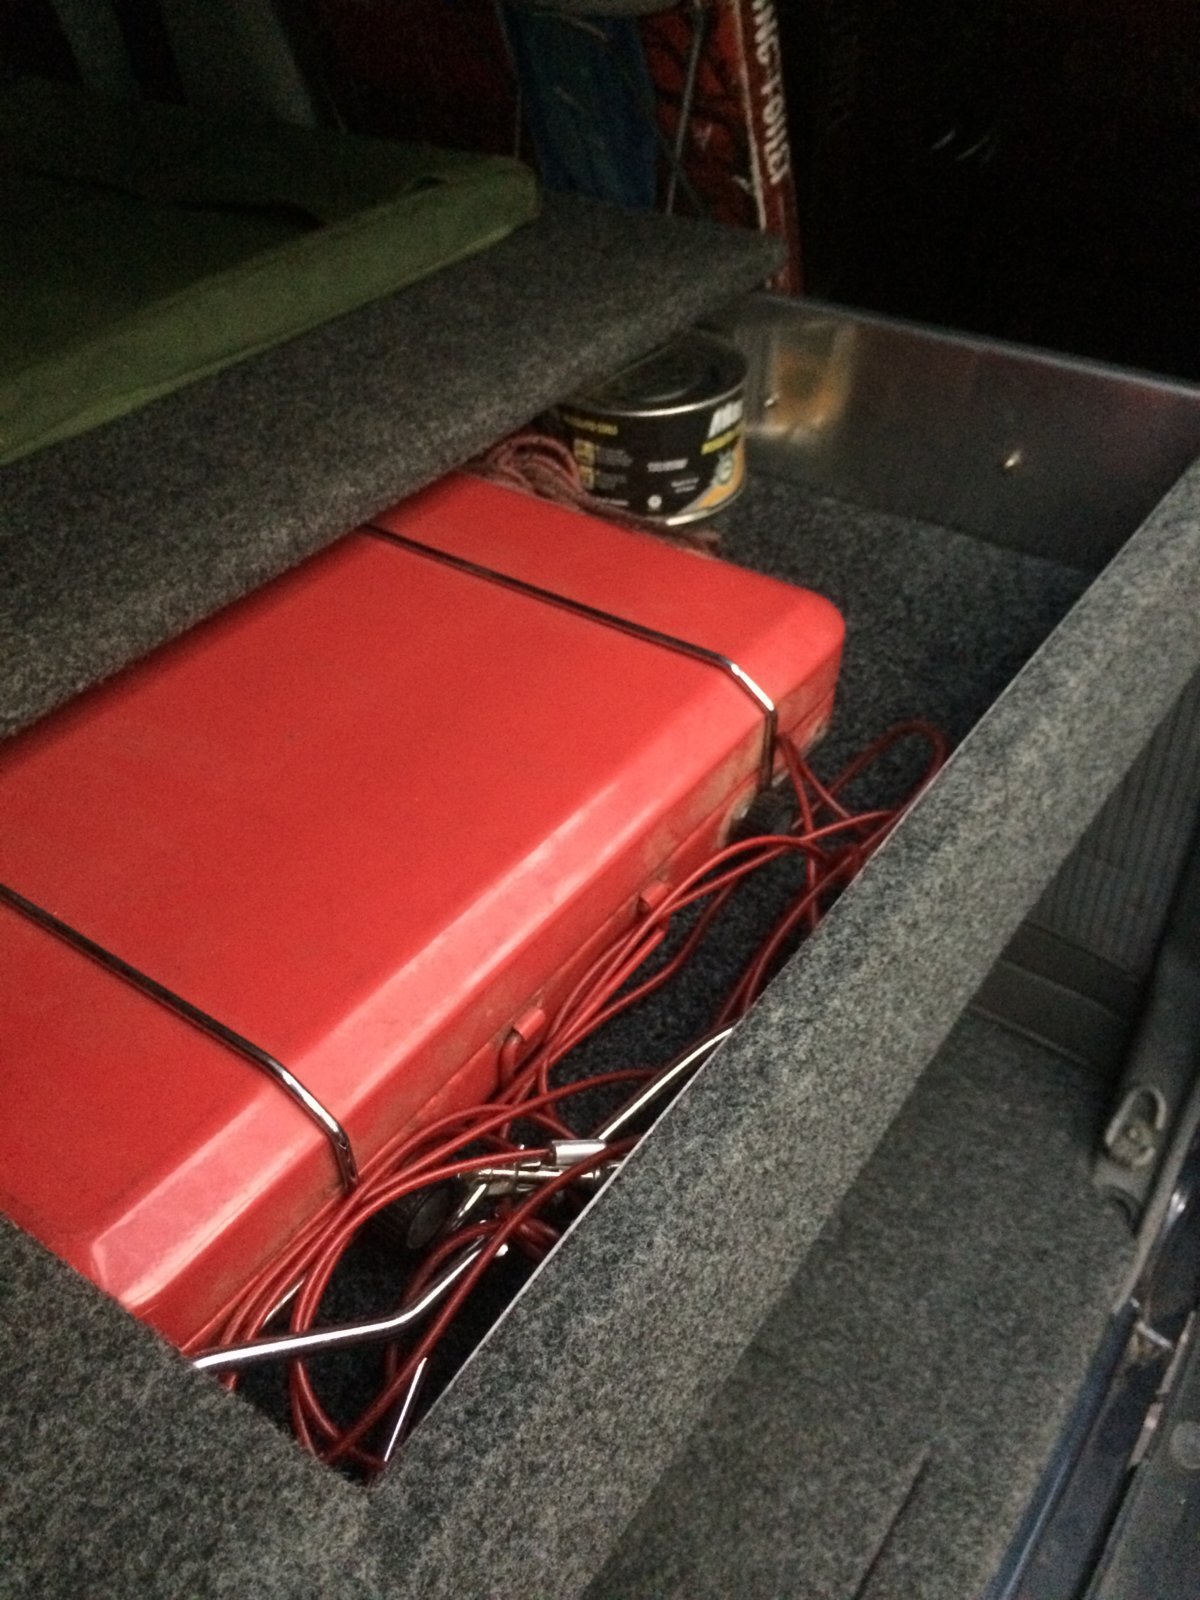
The top drawer houses the gas stove, which we rarely use as I prefer to cook on the hot plate over the fire.
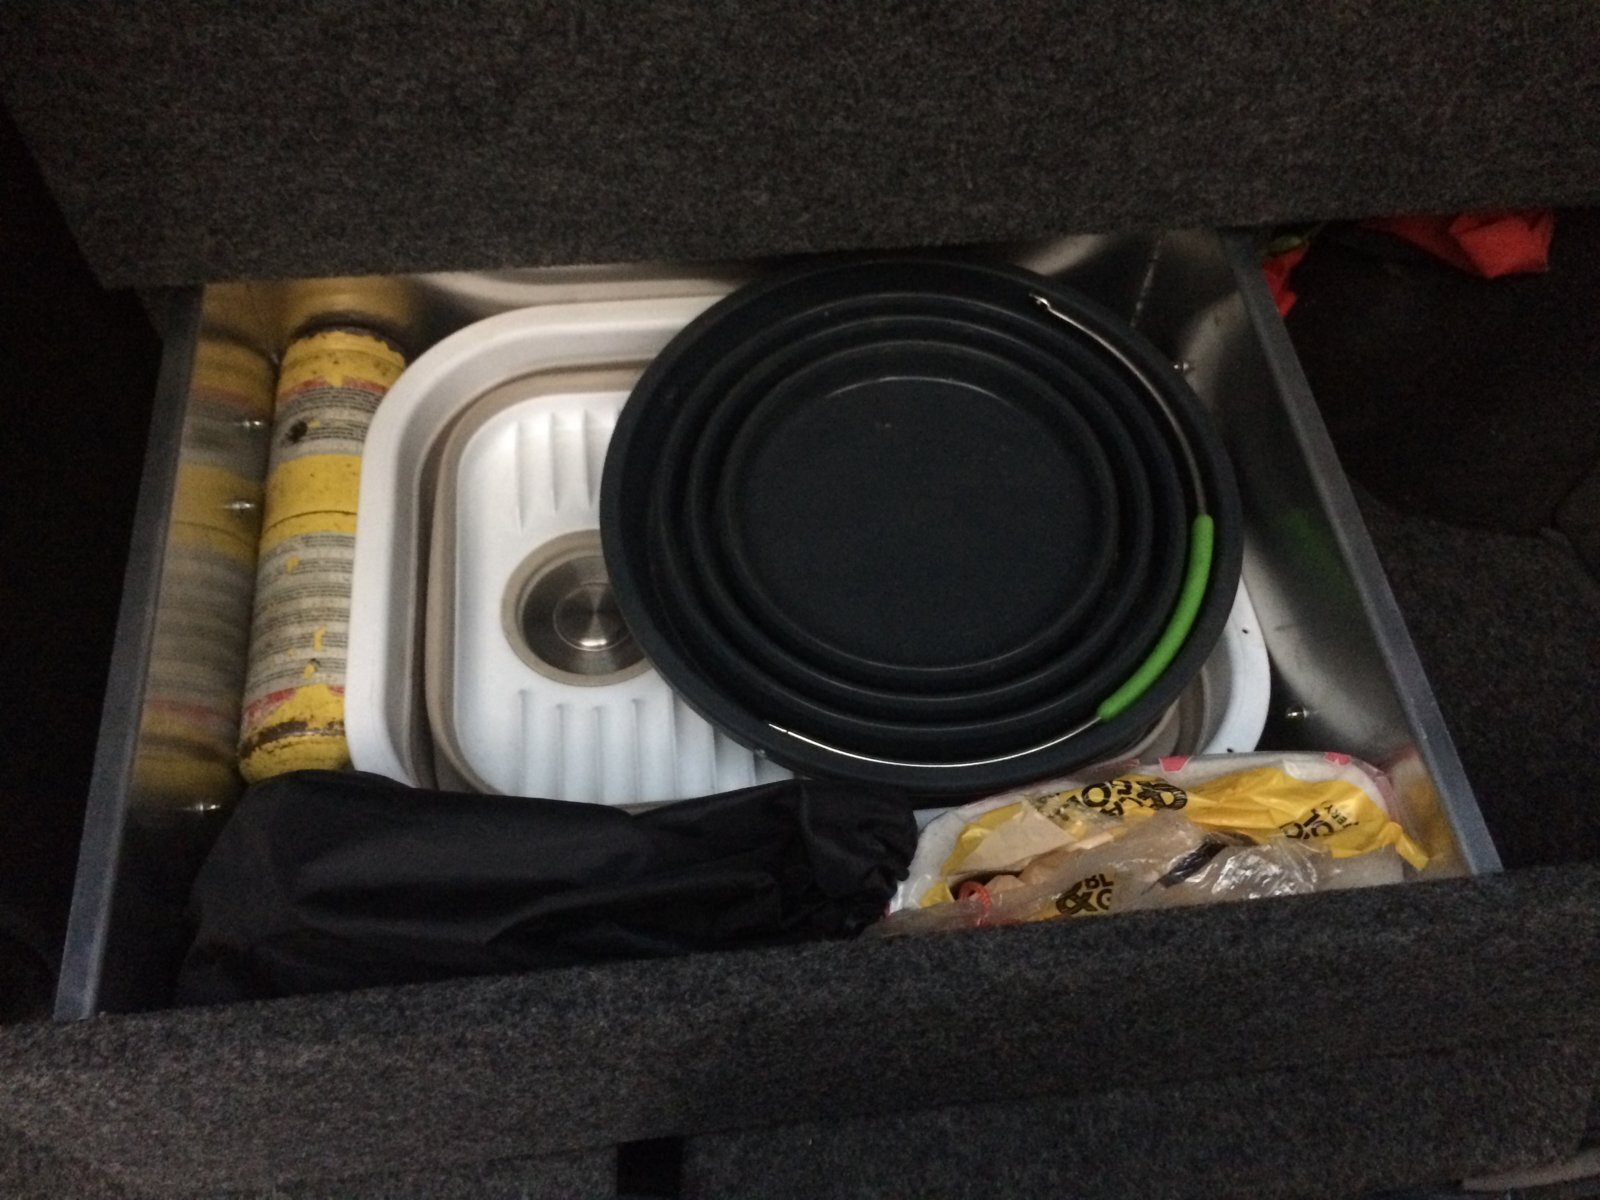
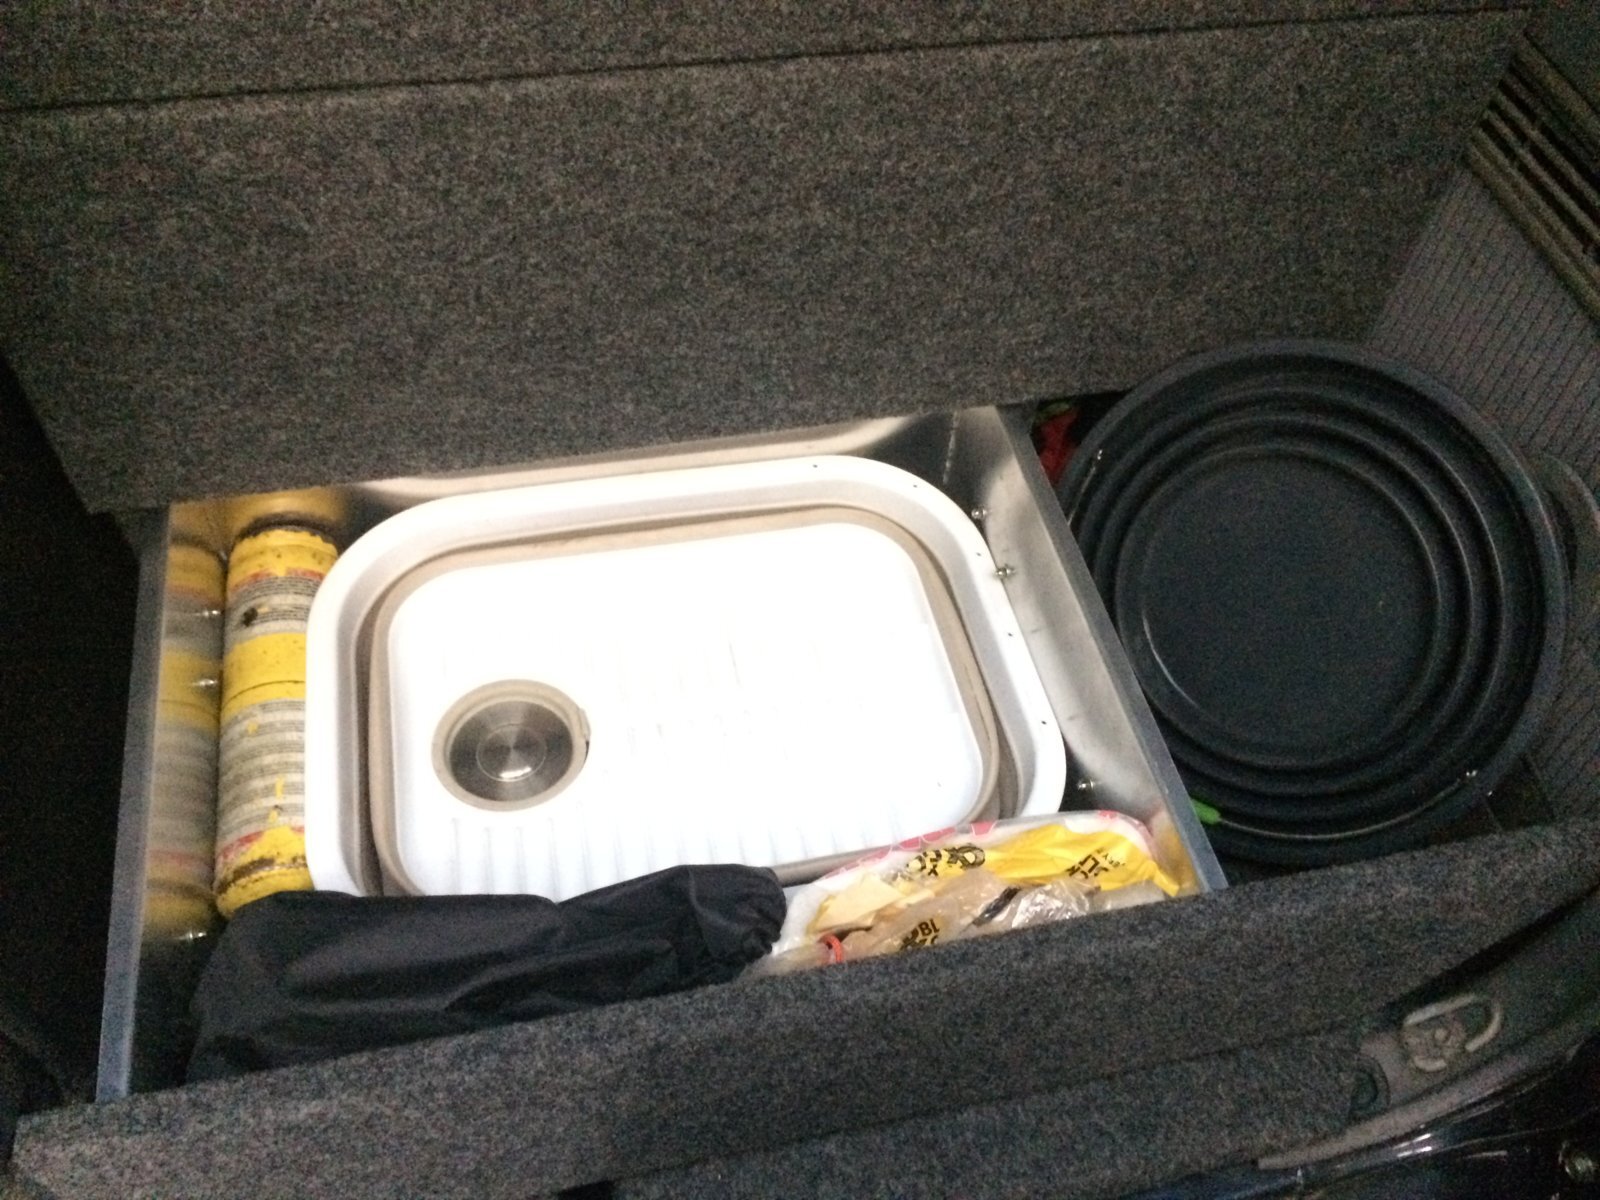
And the bottom drawer houses the collapsible bucket and collapsible sink. As well as my favorite fire starter, a blow torch!
With the drawers almost finished (I'm just waiting for the latches to arrive from China)
I turned my attention to the next part of the build.
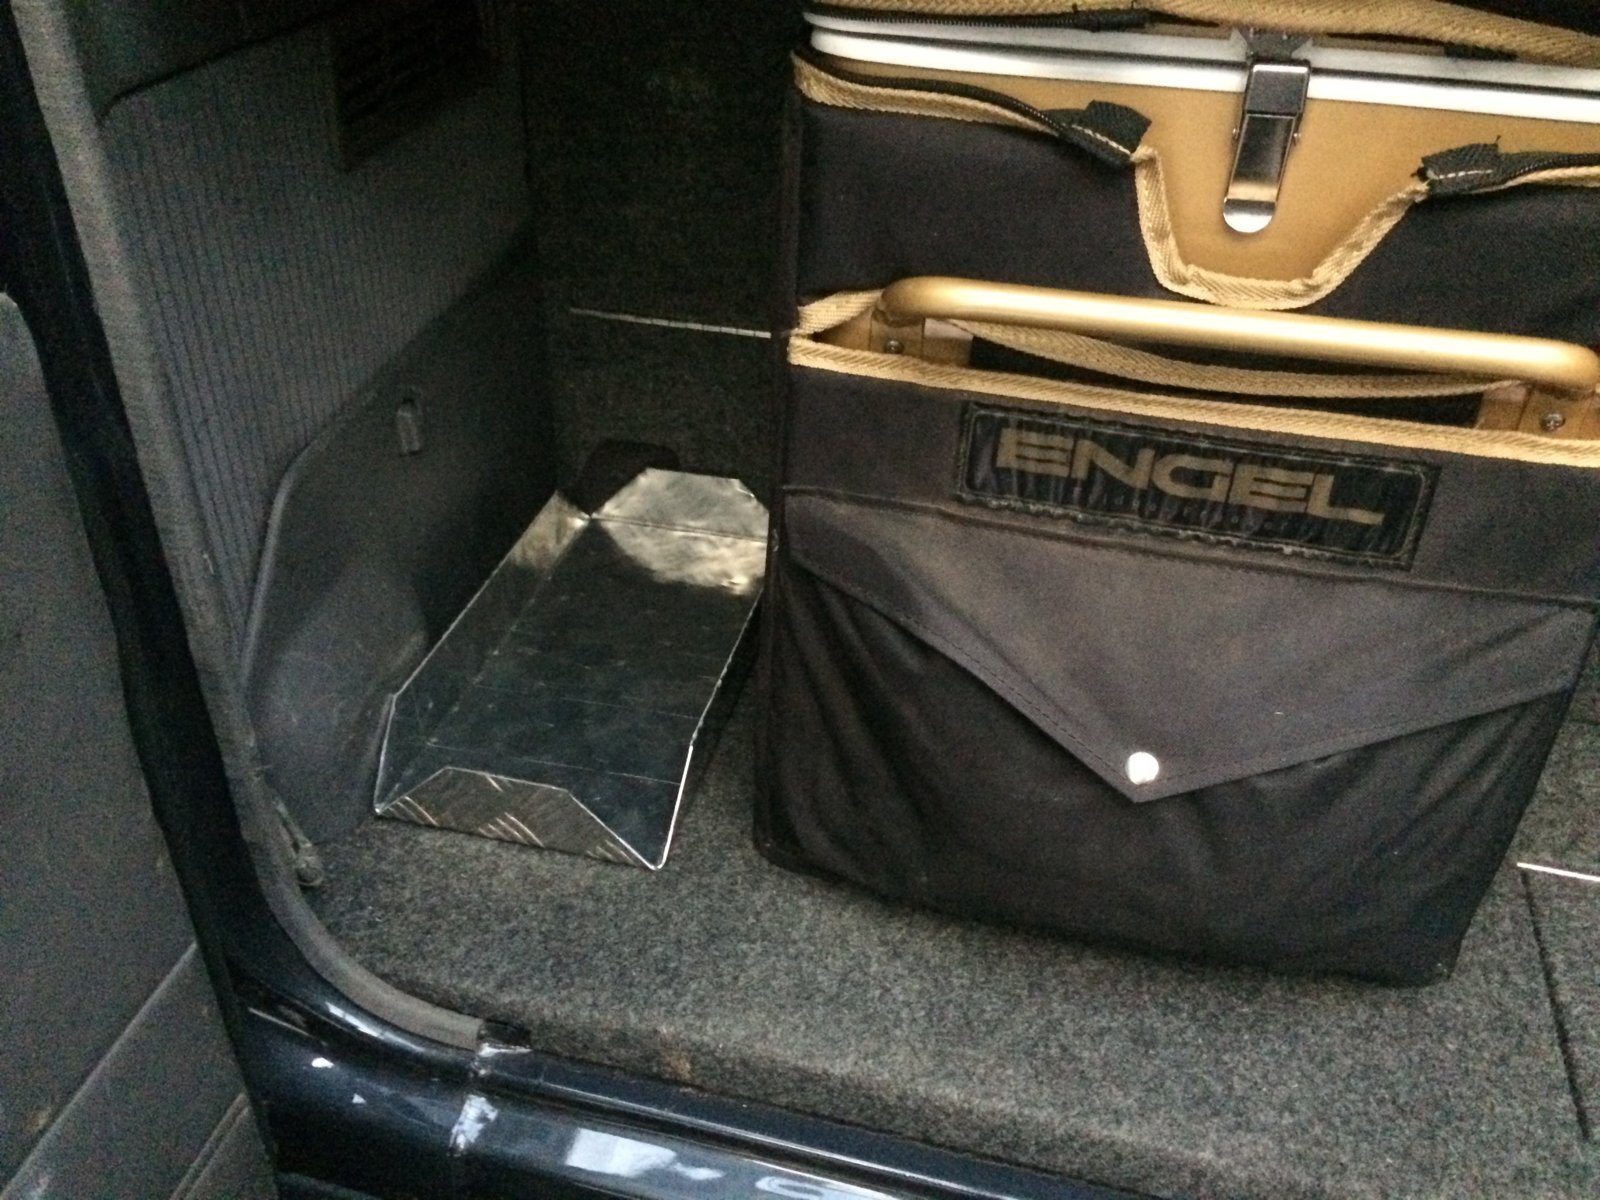
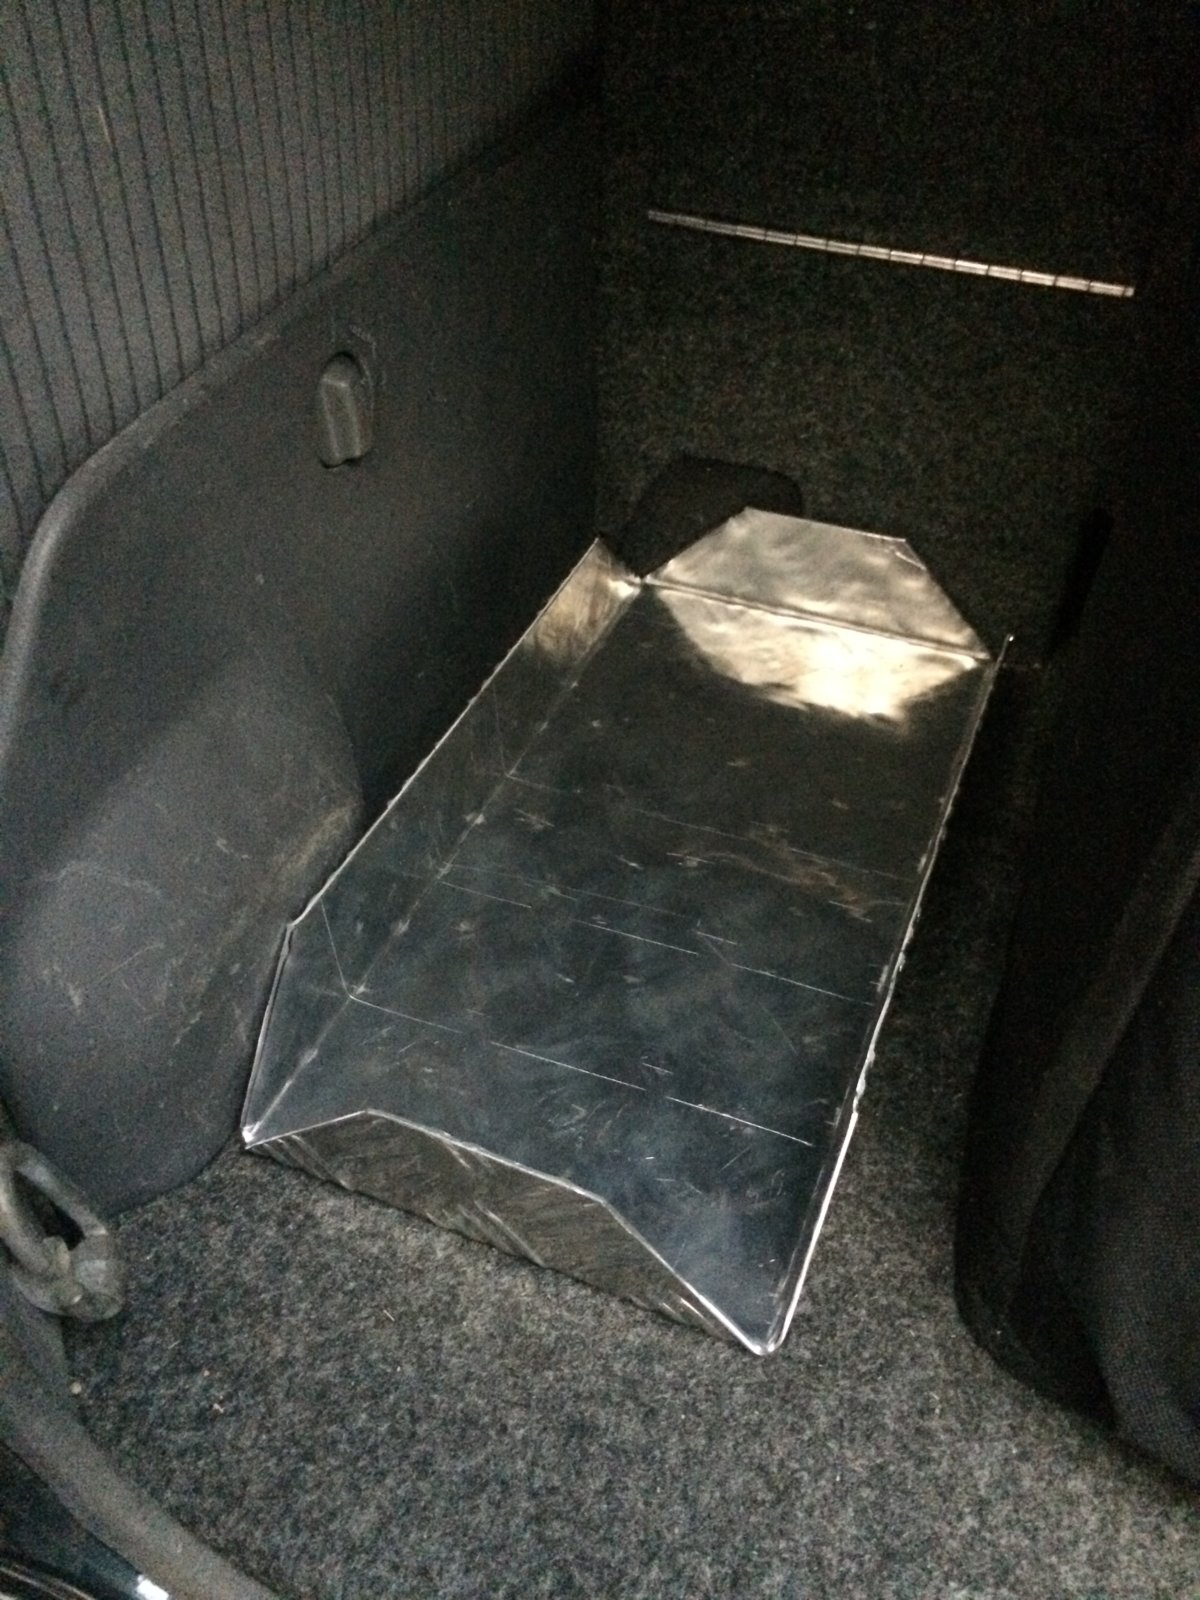
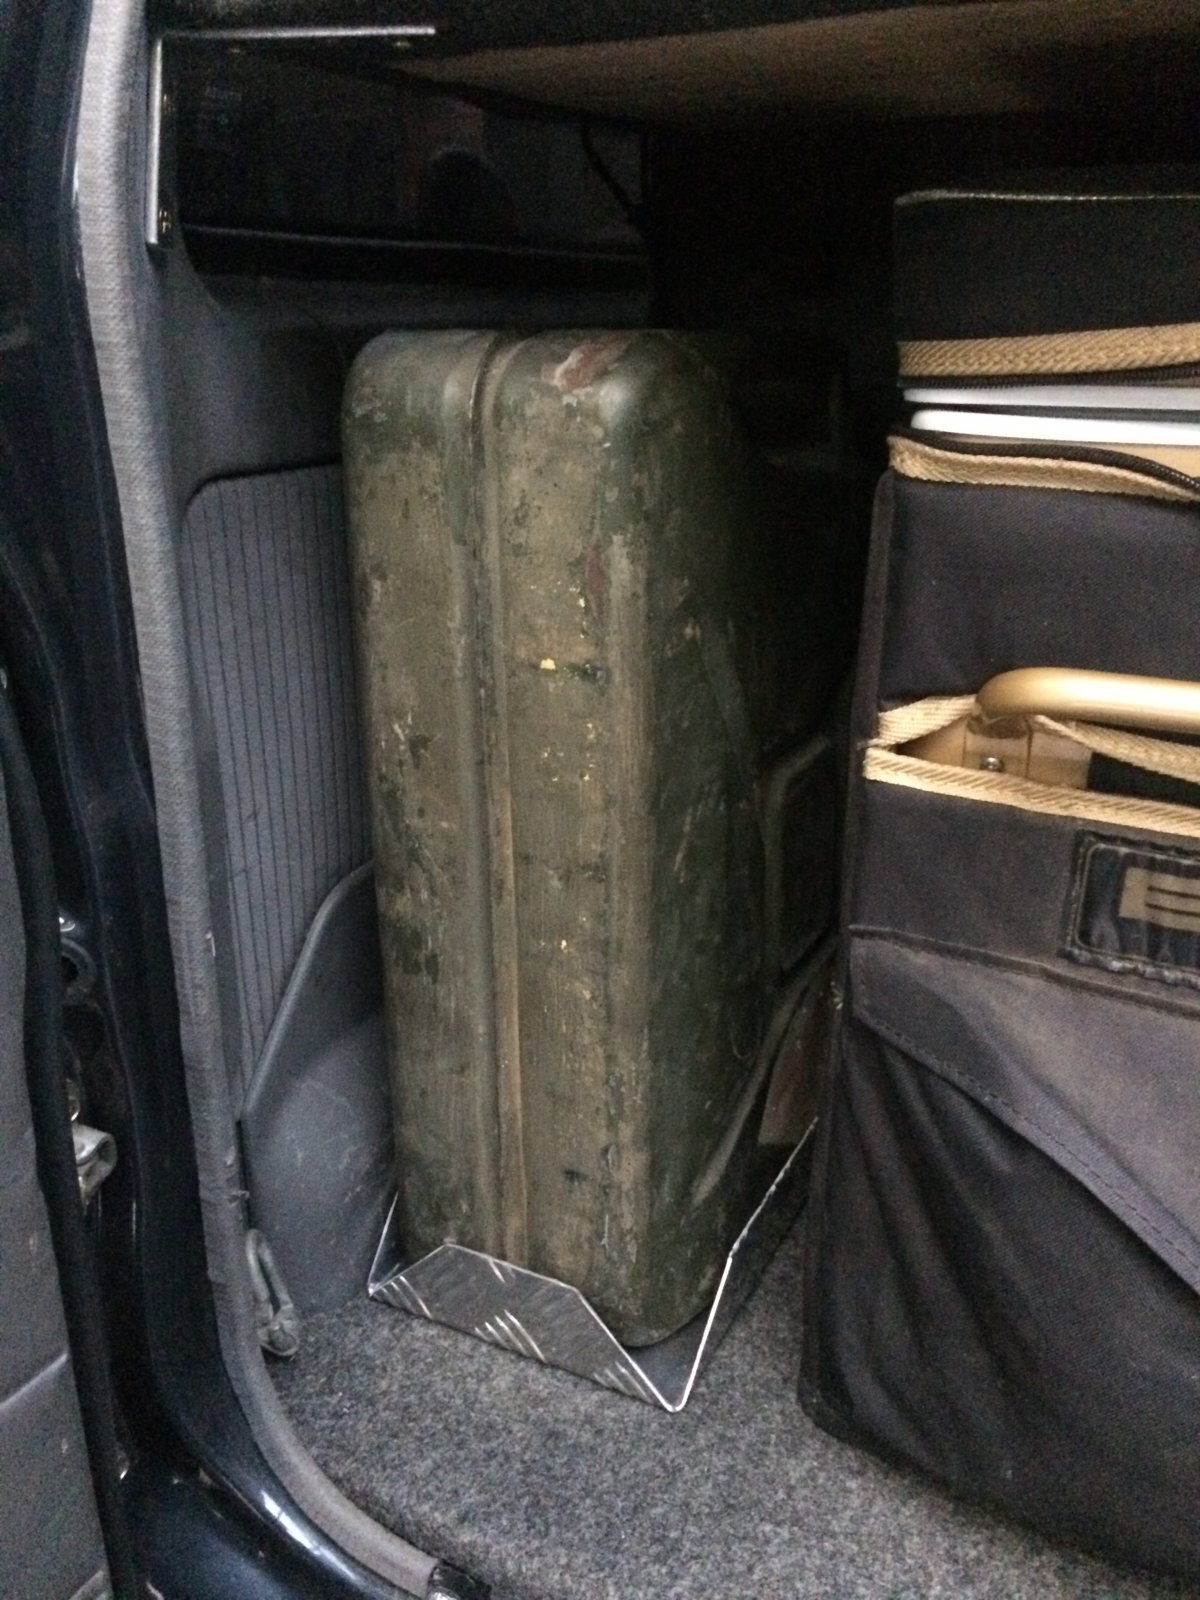
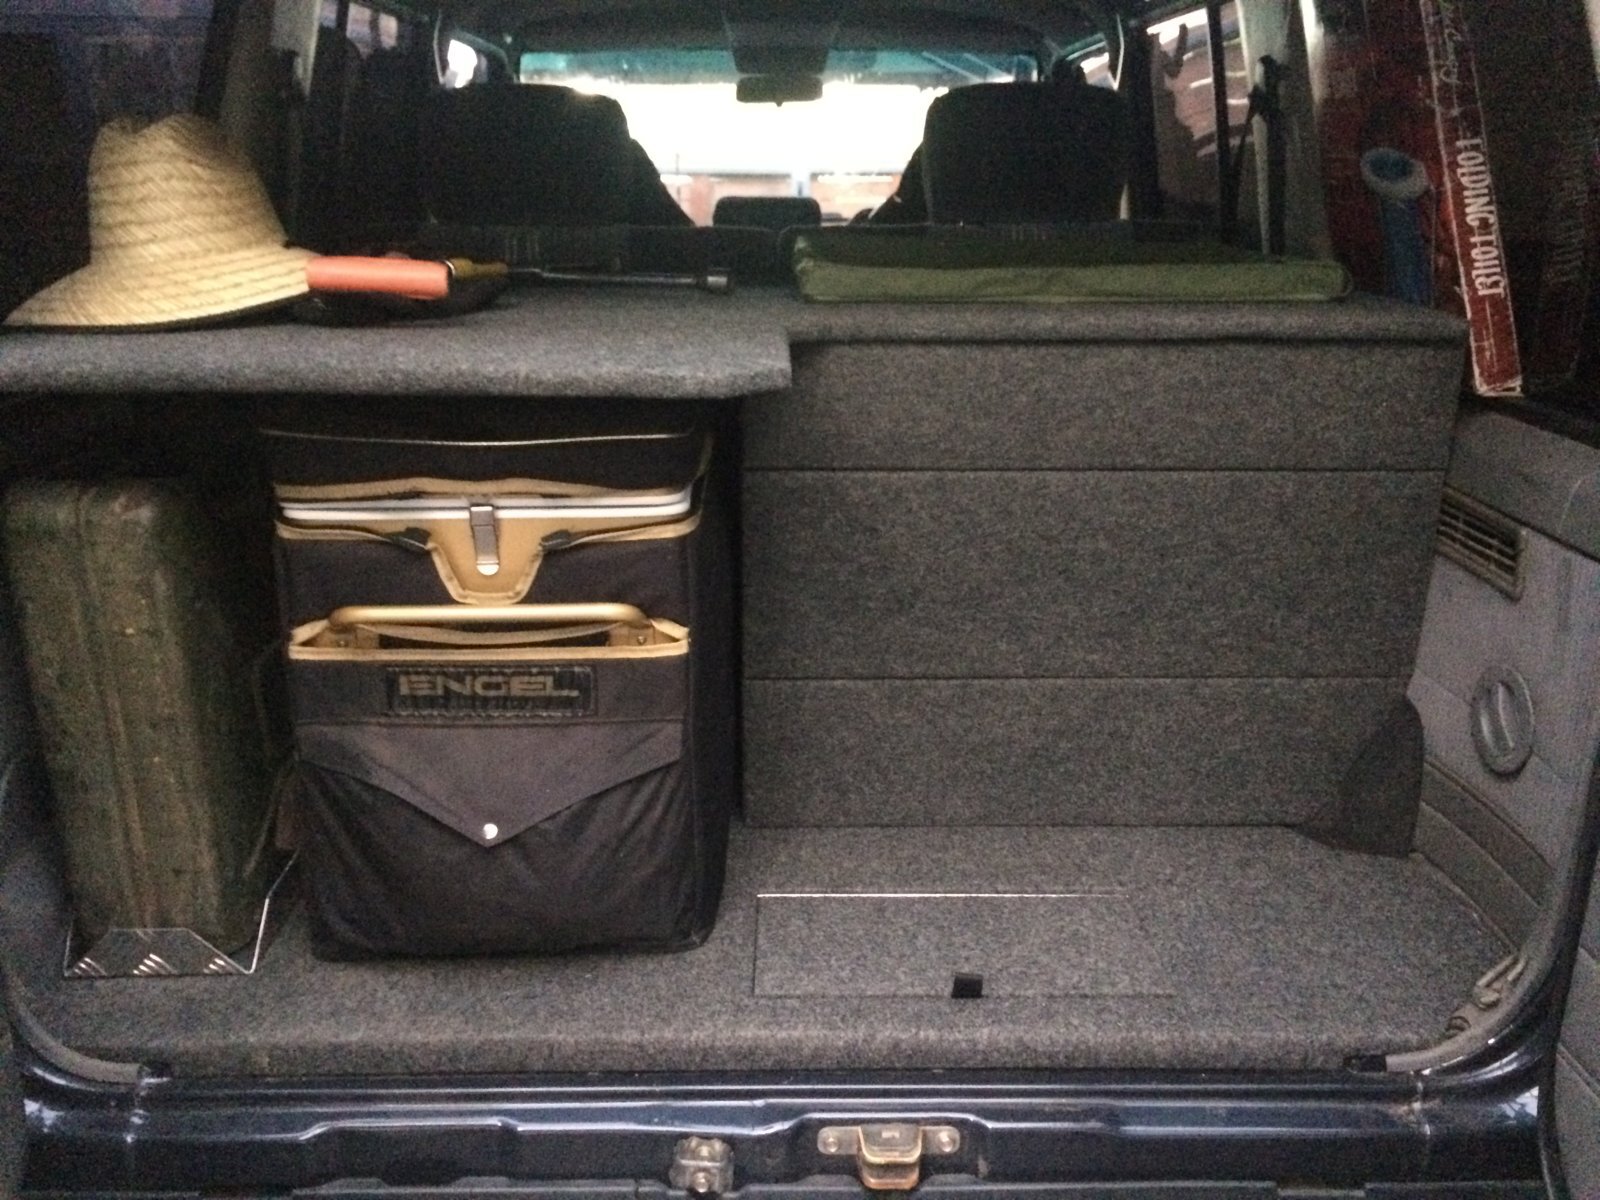
A jerry can holder.
I cut and folded up some alluminium checker plate.
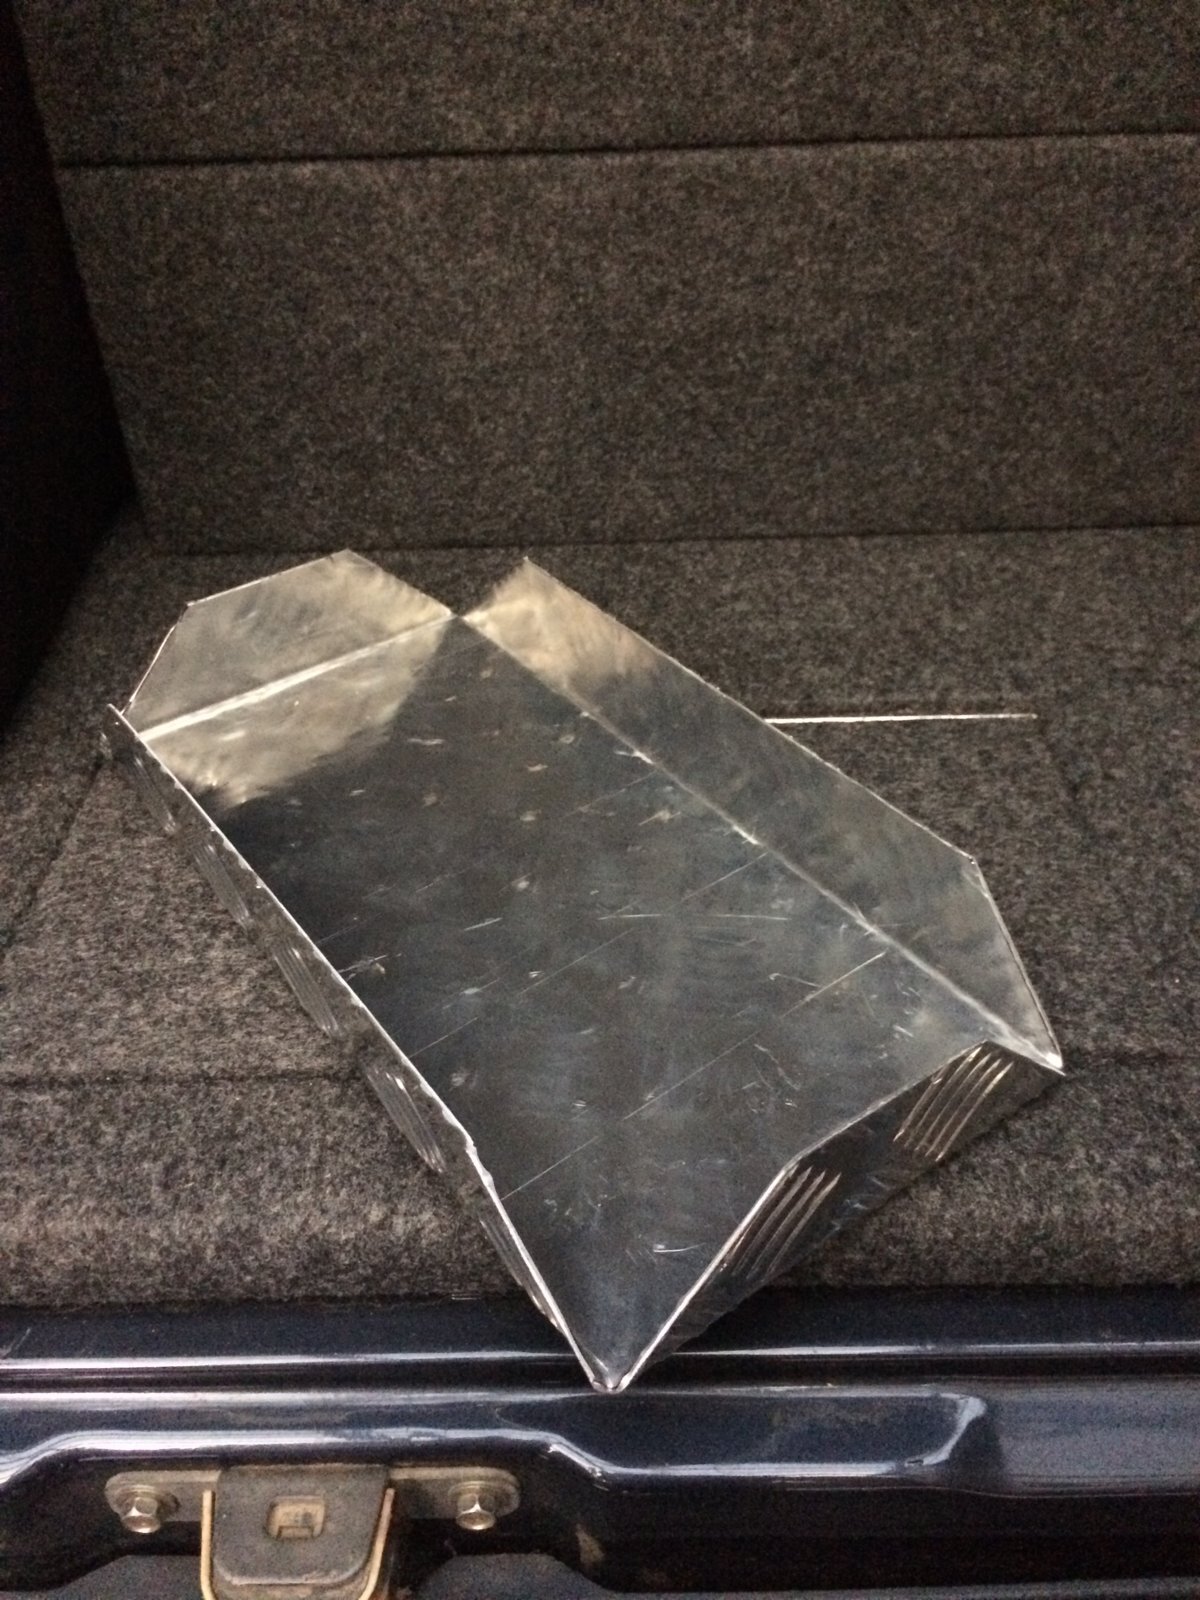
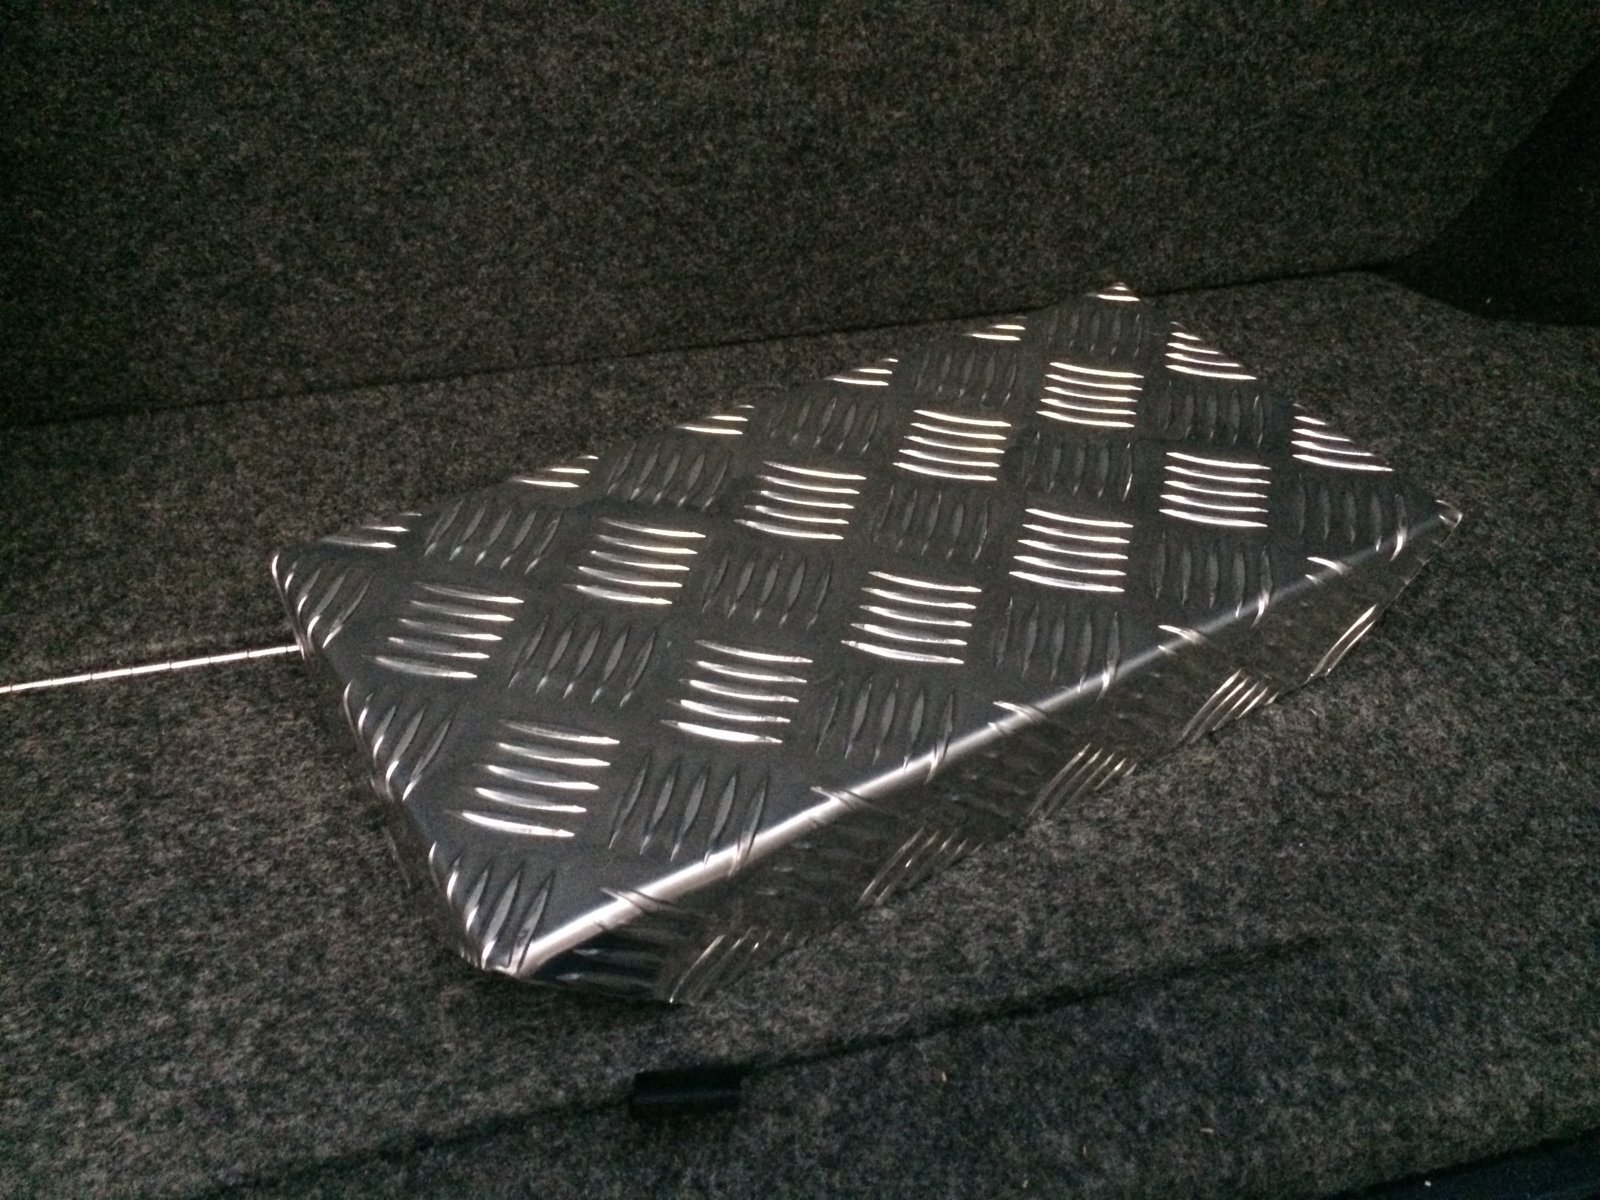
This will get fixed down to the side of the fridge and will have hold down straps to securely hold the can in place.
I can either carry a 20 litre plastic water can, if I feel the 55 litre tank behind the rear seats isnt enough.
Or more likely a 20 litre jerry can full of diesel as I found in the past that 90 litres just wasnt quite enough for the High Country trips I like to do, but that extra 20 litres will be!
The fuel will be siphoned into the main tank using a jiggle siphon at the earliest convenient time on a trip, so as to move that weight lower down and closer to the axle to reduce my center of gravity.
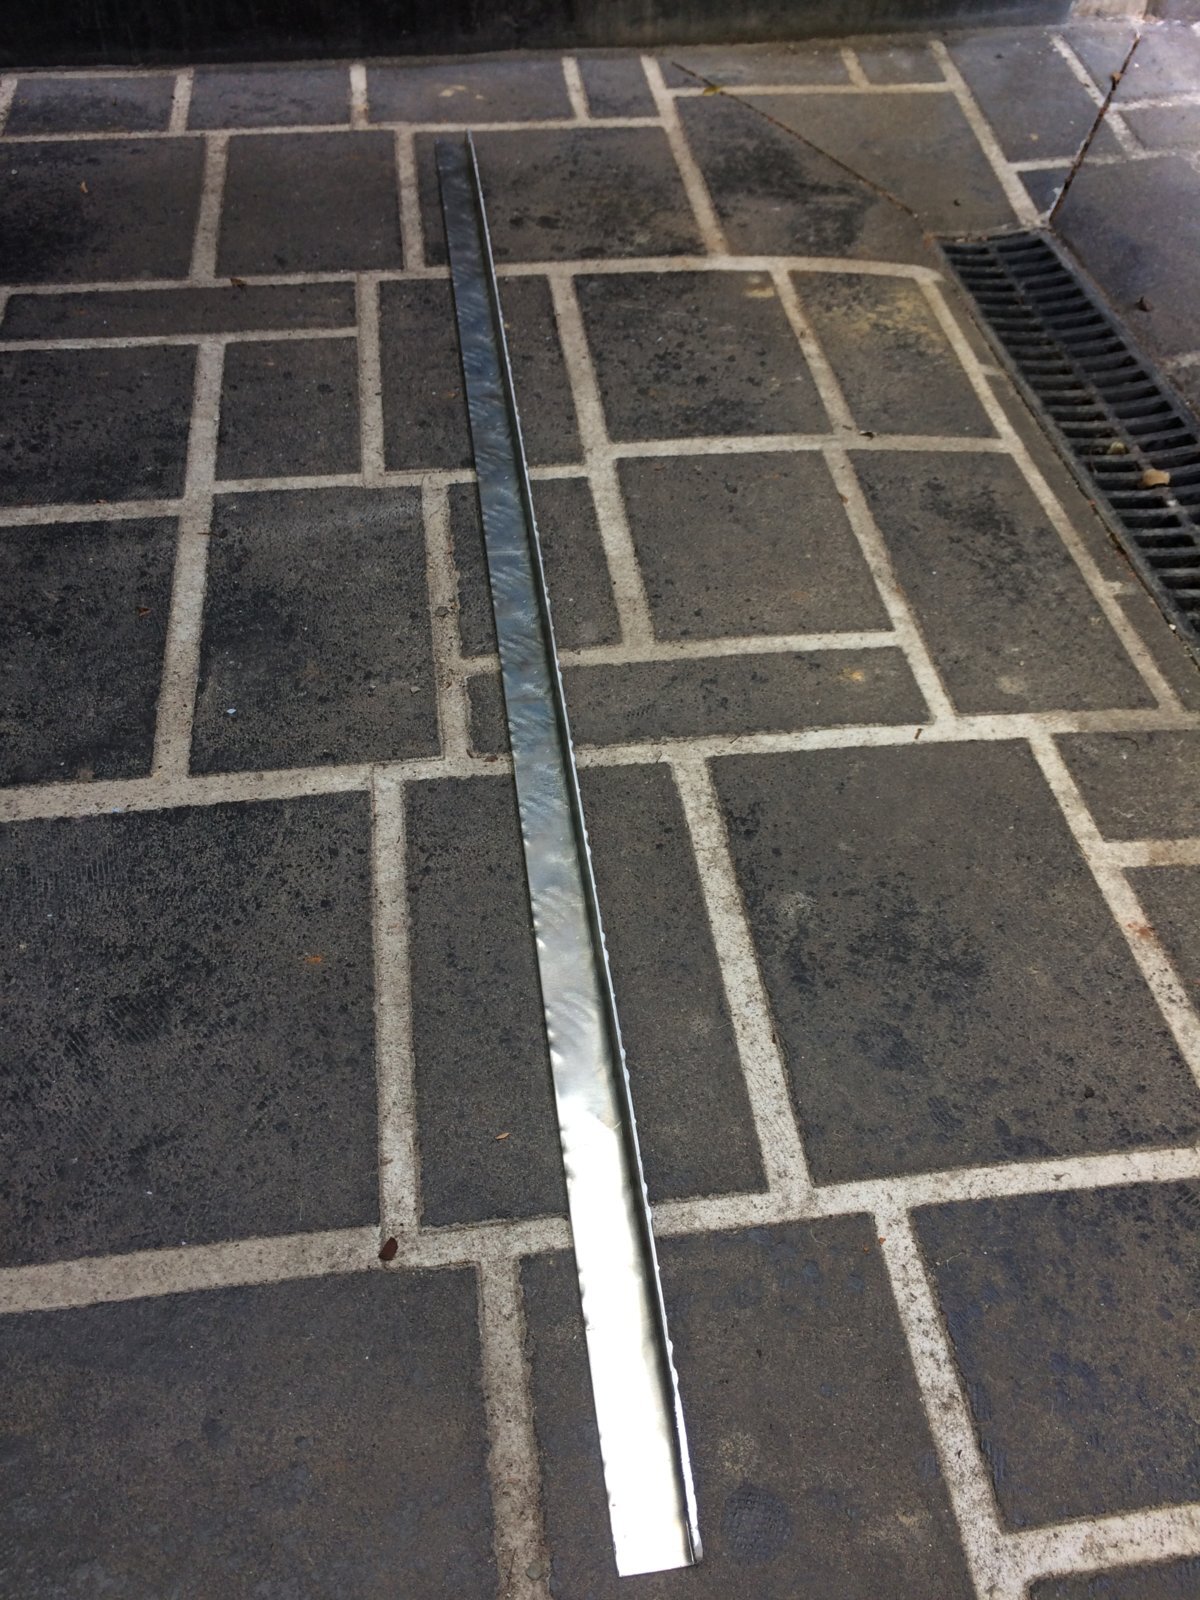
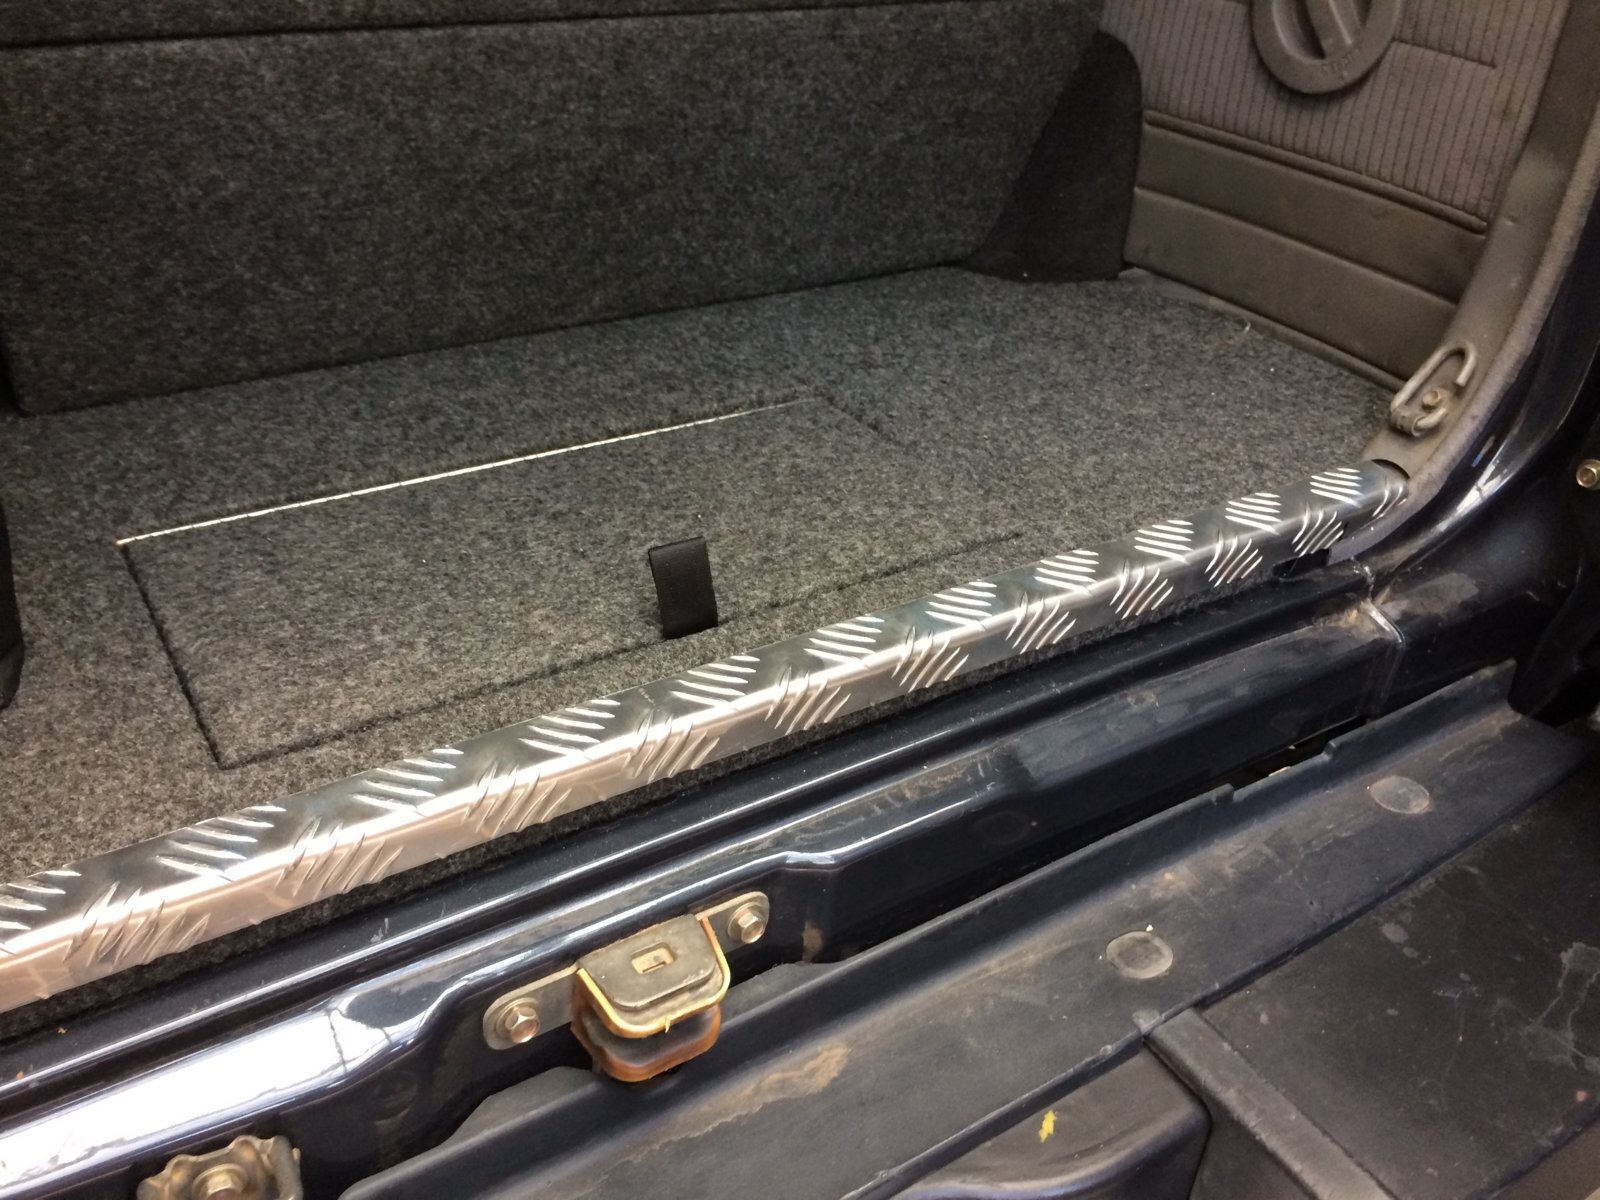
I folded up some more alluminium checker plate.
To cover the edge of my false floor to help protect the edge of the marine carpet.

And finally I made a template for the alluminium cargo barrier I will be making next.
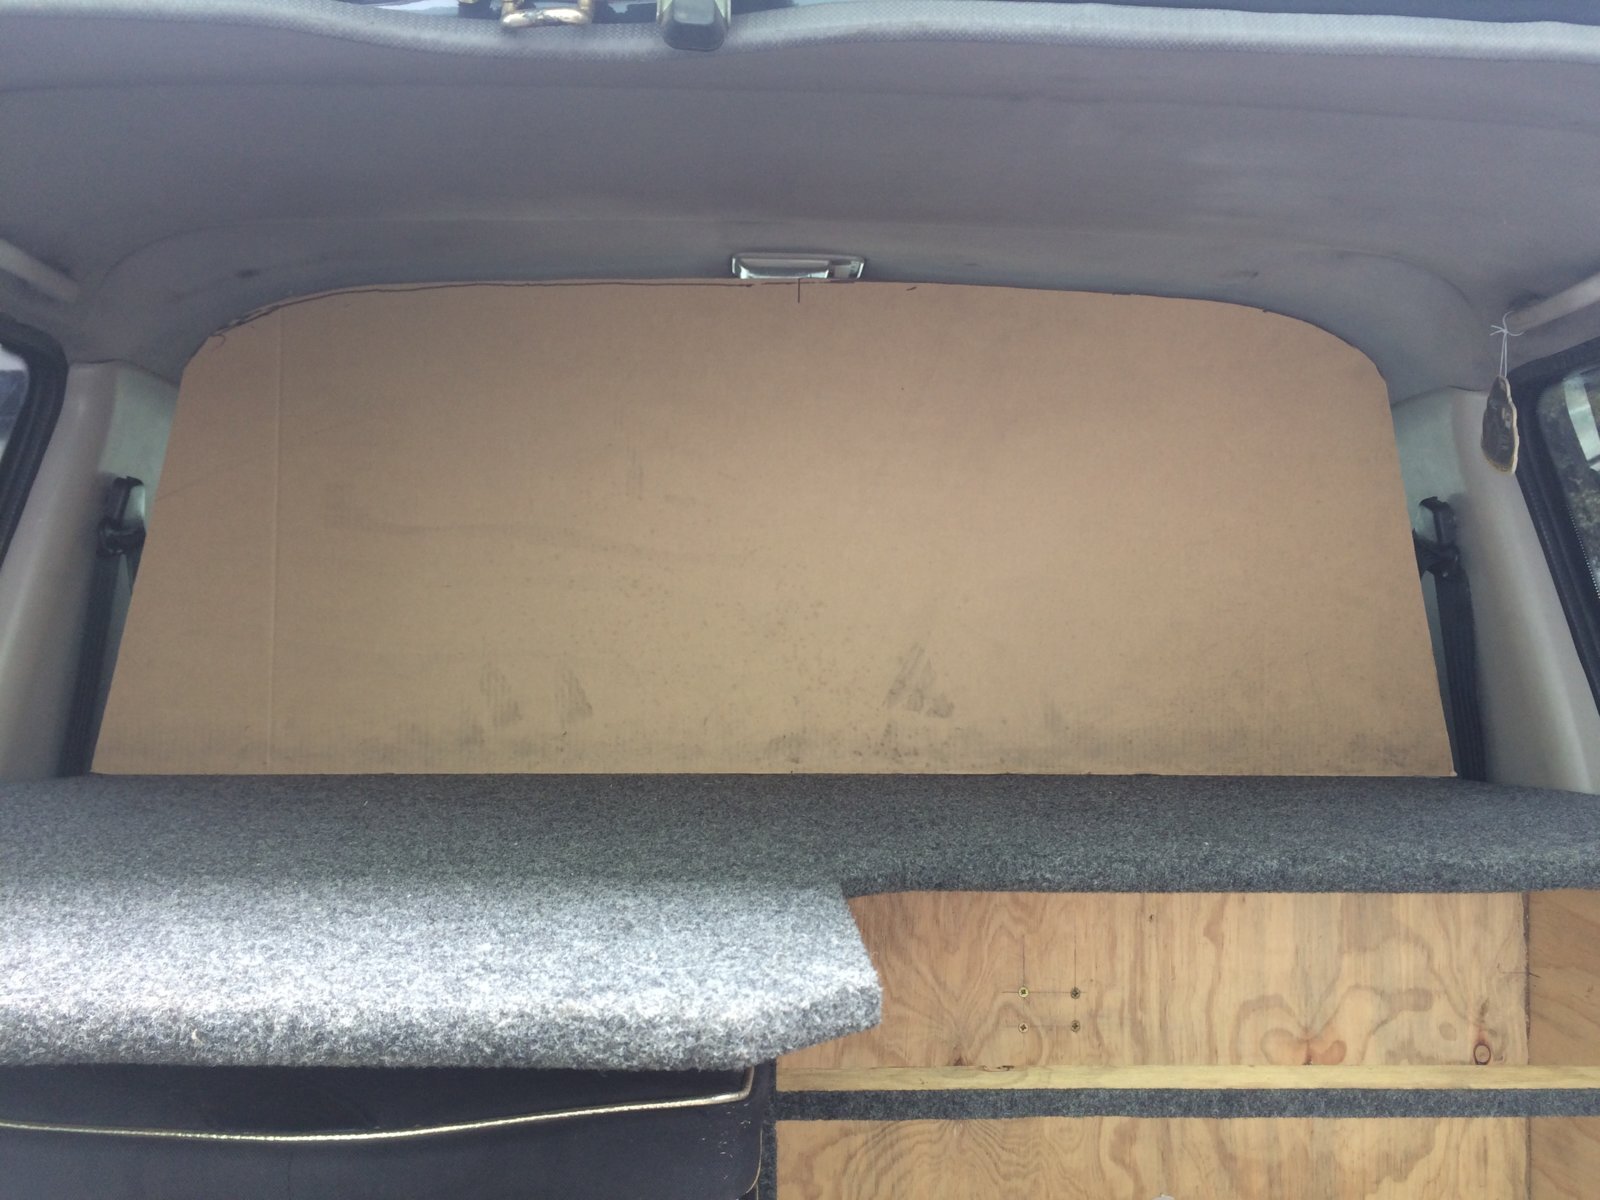
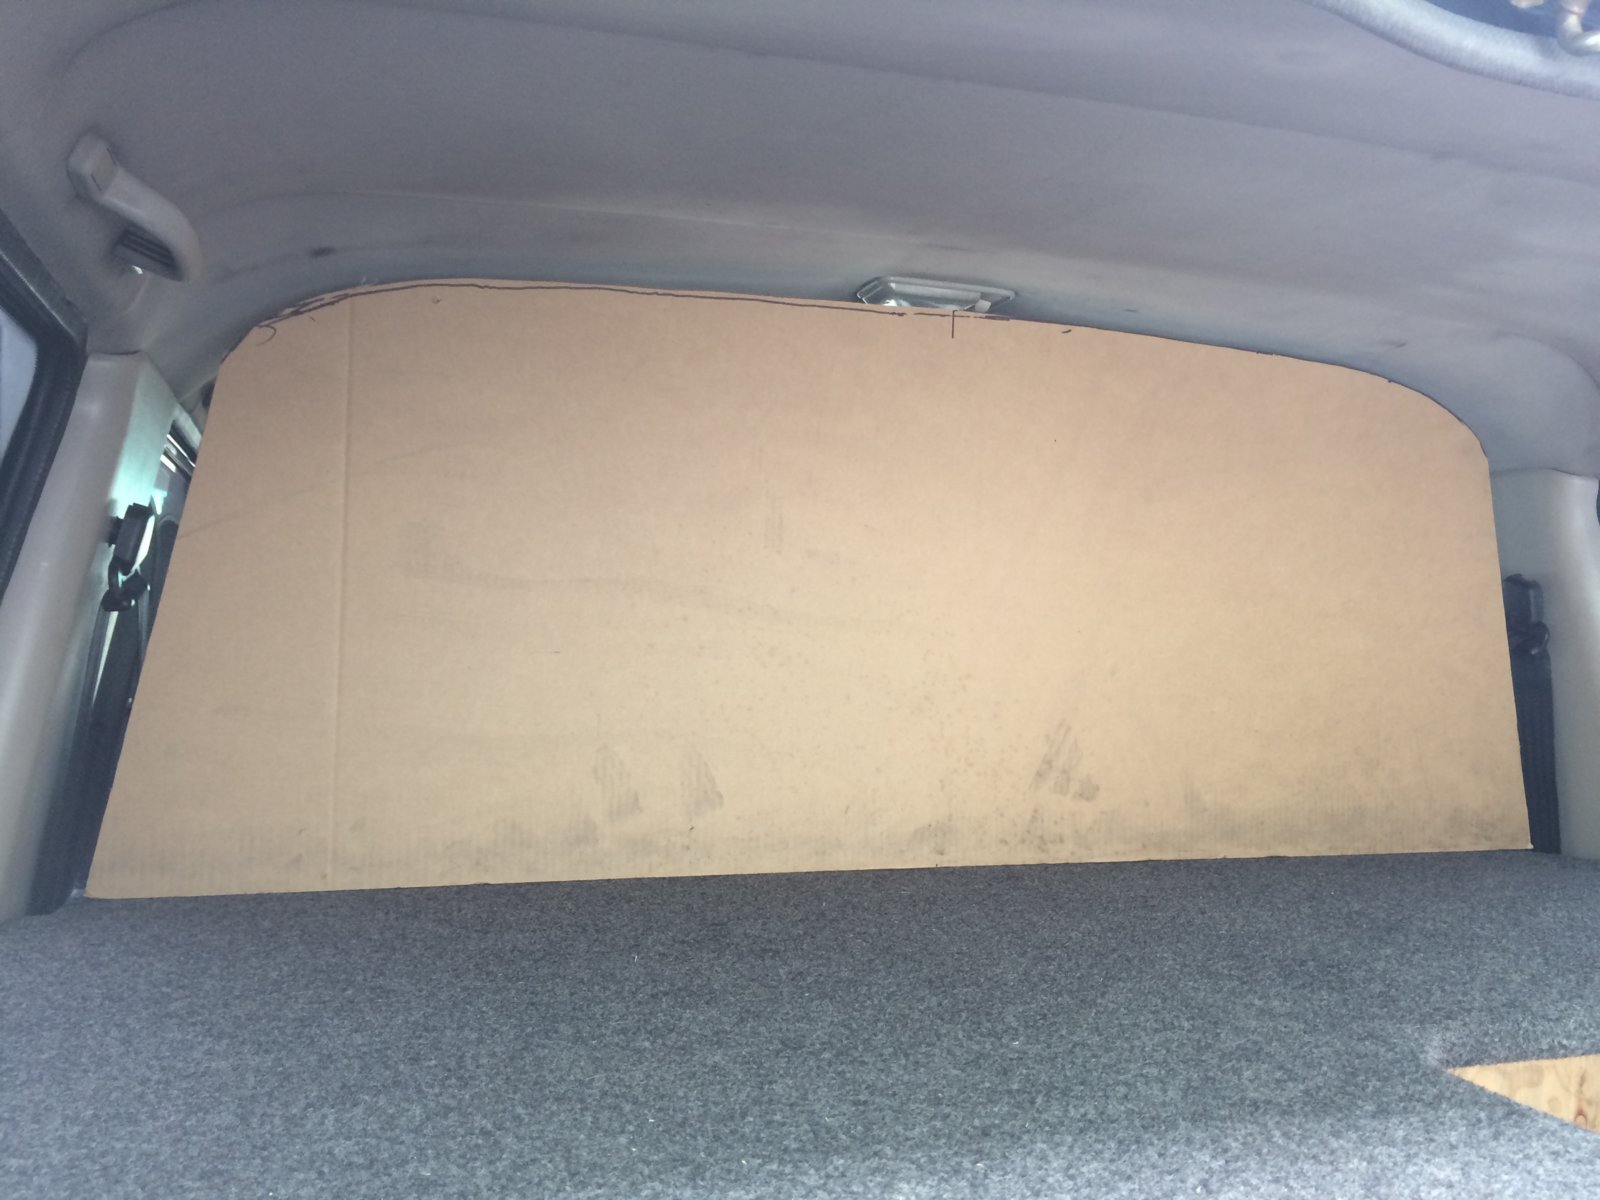
It will consist of 25mm x 3mm alluminium tube, bent to the profile of the cardboard template, with alluminium mesh welded across it.
There will also be a middle section that runs from the centre of the back doors up to the centre of the main cargo barrier to leave a space on the left for Lexi (the dog) and the space on the right will be where the sleeping bags, pillows etc will be secured when on trips.
Both sections will then get powder coated black.
And thats where I'm up to.
I'm aiming to have the rear diff and locker installed, all the vehicle electrics done and the cargo barrier built and fitted in time for a High Country trip at Easter with my new friend Jiri, who I met off of this forum a few weeks ago.
In the video Paul said that the best way to make use of drawers for overland travel is to have dedicated bags for storing things in that then go into the drawers, so if you need your cooking gear for example its all in one neat bag that fits in a drawer and doesnt rattle and bang about and is super quick and easy to access.

So thats what I set out to do with this build and thats why the drawers are the size and shape that they are.
This is all my cooking pots and pans that I need to carry in the back of my 78.

There was actually one more pot that I did away with as not only do I not need it but it was adding unnecessary height and weight.
Oh and there is 2 detachable handles, but there in the other bag that I will get to shortly.

I really like them and they have a lovely non stick coating on them.
One thing I didnt like though is not only did they not come with a bag but they also didnt come with anything decent to go between the pots and pans to protect that magic non stick coating.

They came with a piece of carboard between each pot which lets face it wouldnt have lasted more than a few hundred k's of rough road before it would have been reduced to dust!

I used the pieces of cardboard as templates to copy their size and shape onto the back of some thin conveyor belt material from a food factory.

Cut them out.

And they fit beautifully in between the pots.

Next I wanted a nice, strong, canvas bag to store them in.
After a bit of searching I found this one from www.Snowys.com.au and as always the price and service were both excellent.


Made in India and great quality!
Also as they are designed for heavy cast iron pots it should be easily strong enough for my light weight alluminium pots.


And my pots fitted perfectly!


Next I needed one more bag for all my plates, bowls, cups and cutlery.

I actually searched for quite a while and found nothing!

Then I remembered the picnic bag I got given by my old company at Christmas. It came stuffed full of beer, wine and food from a company that specilises in gift hampers.
It turned out to be the perfect size and shape!


Inside it all of this comfortably fits.

This is my cutlery set.

So these 2 neat bags contain everything I need to cook when camping.
And the beauty of having everything in bags like this is, if we ever camp and wish to cook away from the vehicle, maybe at a commercial camp site or around a communal fire etc. we just have 2 bags that are quick and easy to grab!

They fit nicely in the middle, large drawer.


The top drawer houses the gas stove, which we rarely use as I prefer to cook on the hot plate over the fire.


And the bottom drawer houses the collapsible bucket and collapsible sink. As well as my favorite fire starter, a blow torch!


With the drawers almost finished (I'm just waiting for the latches to arrive from China)
I turned my attention to the next part of the build.
A jerry can holder.
I cut and folded up some alluminium checker plate.


This will get fixed down to the side of the fridge and will have hold down straps to securely hold the can in place.
I can either carry a 20 litre plastic water can, if I feel the 55 litre tank behind the rear seats isnt enough.
Or more likely a 20 litre jerry can full of diesel as I found in the past that 90 litres just wasnt quite enough for the High Country trips I like to do, but that extra 20 litres will be!
The fuel will be siphoned into the main tank using a jiggle siphon at the earliest convenient time on a trip, so as to move that weight lower down and closer to the axle to reduce my center of gravity.


I folded up some more alluminium checker plate.

To cover the edge of my false floor to help protect the edge of the marine carpet.


And finally I made a template for the alluminium cargo barrier I will be making next.


It will consist of 25mm x 3mm alluminium tube, bent to the profile of the cardboard template, with alluminium mesh welded across it.
There will also be a middle section that runs from the centre of the back doors up to the centre of the main cargo barrier to leave a space on the left for Lexi (the dog) and the space on the right will be where the sleeping bags, pillows etc will be secured when on trips.
Both sections will then get powder coated black.
And thats where I'm up to.
I'm aiming to have the rear diff and locker installed, all the vehicle electrics done and the cargo barrier built and fitted in time for a High Country trip at Easter with my new friend Jiri, who I met off of this forum a few weeks ago.
Last edited:
Similar threads
- Replies
- 10
- Views
- 301
- Replies
- 2
- Views
- 418


