I sometimes work in hospitals on the plant so I understand exactly what you mean.
Don't like the adverts? Click here to remove them
You are using an out of date browser. It may not display this or other websites correctly.
You should upgrade or use an alternative browser.
You should upgrade or use an alternative browser.
RJ70 Build Thread.
- Thread starter Ben
- Start date
AndyCook
Well-Known Member
Not all jobs are exciting all the time Ben, mine goes through phases too, e.g. boring times, and busy times, but so far this year been really busy.
I too am sitting waiting to help people out and fix problems, but not mechanical but helping geologists and geophysicists with IT issues and also using software to find black gold!
As long as I get a decent monthly pay I don't care! I use the quiet boring times to plan my next adventures and hilux mods
- Joined
- Oct 13, 2010
- Messages
- 6,058
- Country Flag
Its certainly giving me lots of time to plan future trips and mods to my LandCruisers.
I wont be working here forever I hope, but its the easiest money I've ever earnt, so I am enjoying the relaxed pace!
I'm hoping to go back to Melbourne for a week or 2 this year to help my old boss with another crazy, big project on his farm! Might drive the 78 down so he can fit me out with a load of ARB and Piranha goodies in return for my hard work.

Ian Chuter
Well-Known Member
- Joined
- Dec 8, 2012
- Messages
- 426
- Country Flag
I'm hoping to go back to Melbourne for a week or 2 this year to help my old boss with another crazy, big project on his farm! Might drive the 78 down so he can fit me out with a load of ARB and Piranha goodies in return for my hard work.
I can't wait to see what you come back with if he lets you do a supermarket sweep
- Joined
- Oct 13, 2010
- Messages
- 6,058
- Country Flag
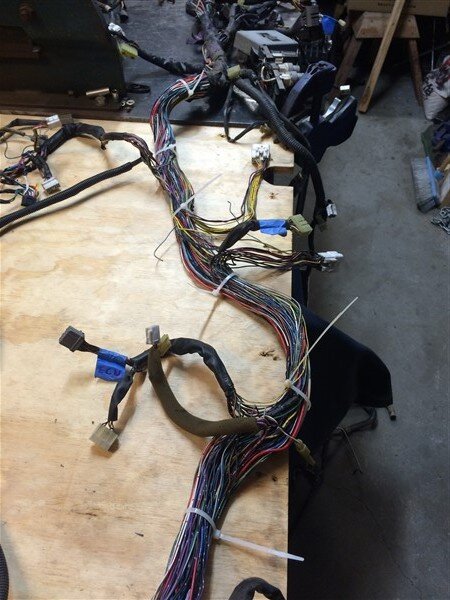
So I got the 78 loom on the bench ready to begin surgery.
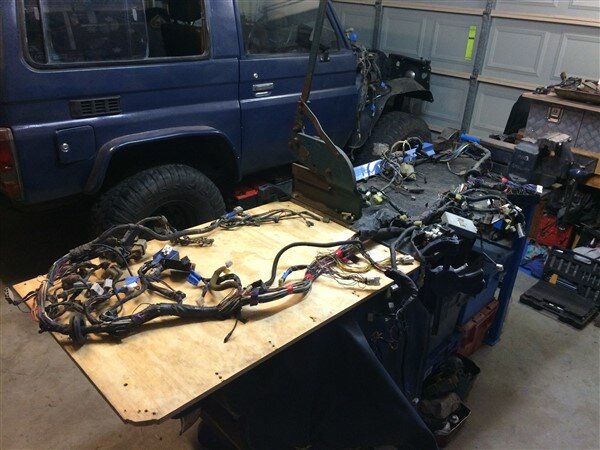
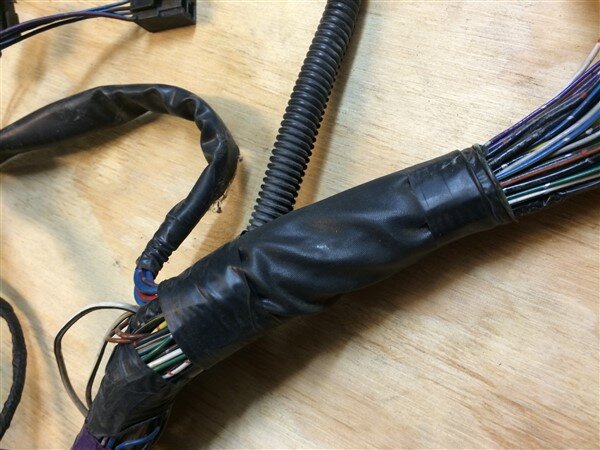
I cut back all the outer sheathing.
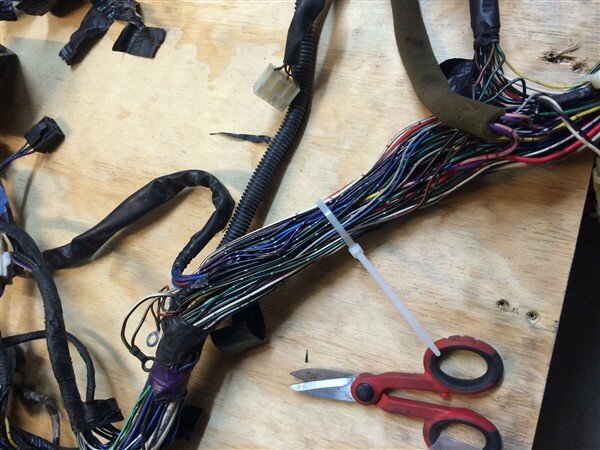
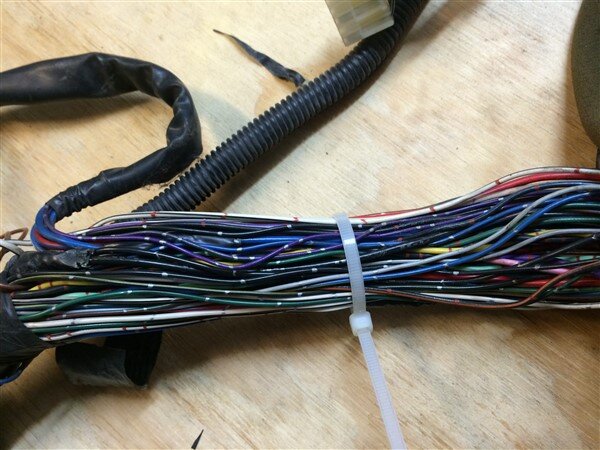
And used cable ties to keep the loom roughly together, but to give me enough slack to trace and remove wires.
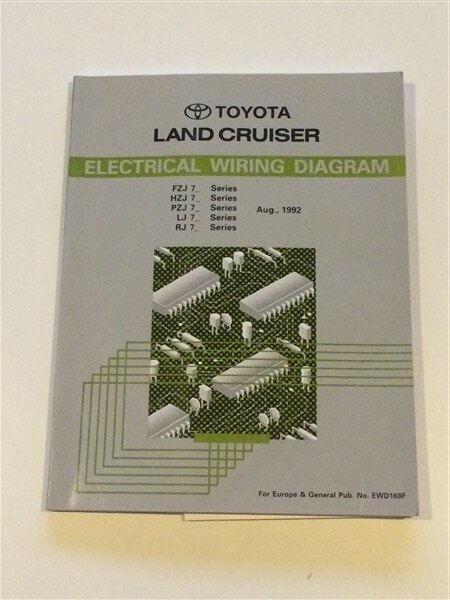
I thought this book would help me.
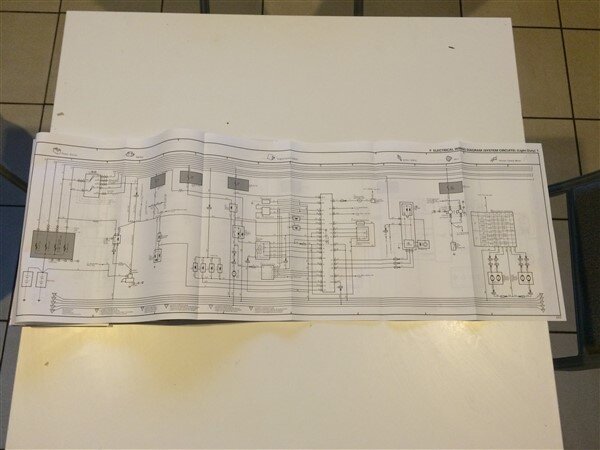
The wiring loom had an ECU on it.
But sadly it was for the 22r engine and non of the colours matched my loom.
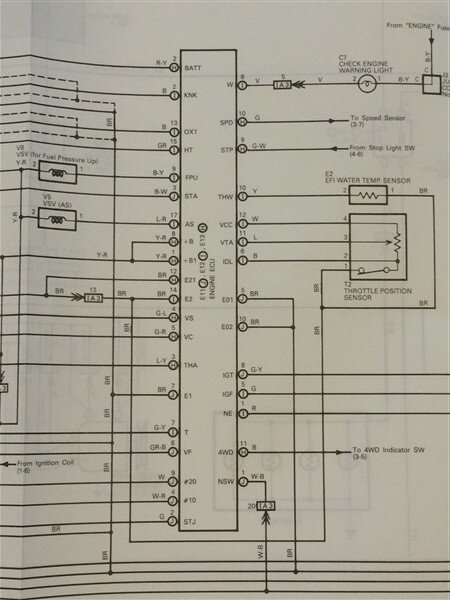
But I carried on regardless and instead followed each wire from the ECU plugs and chased them all the way back to the different components they connect to.
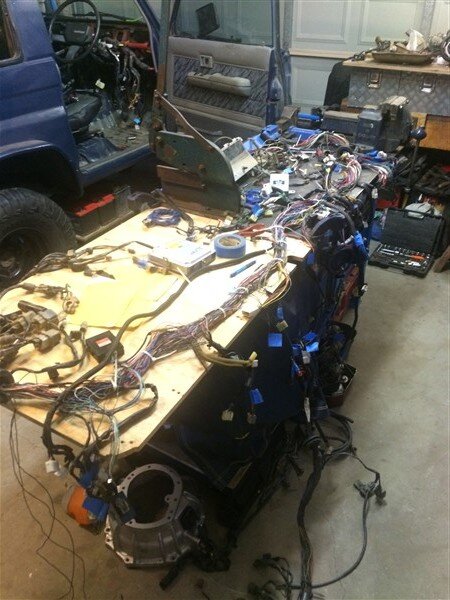
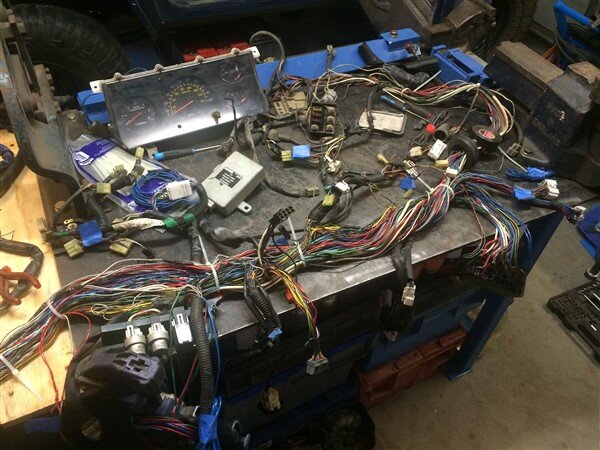
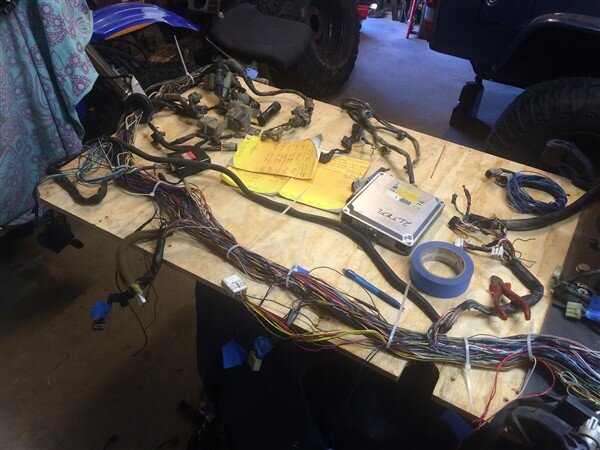
I labeled everything and cut out the ECU connector from the loom.

That connected to the engine loom.
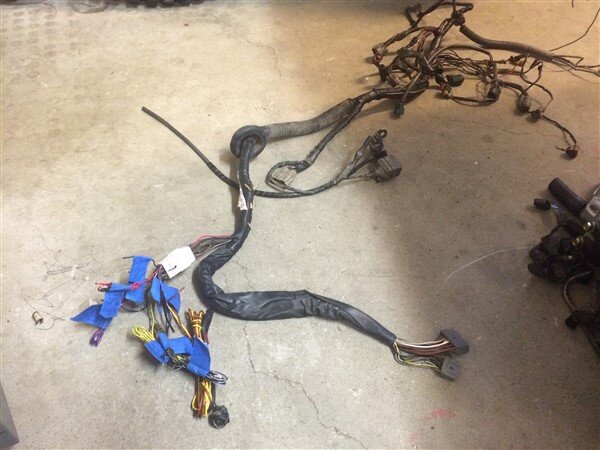
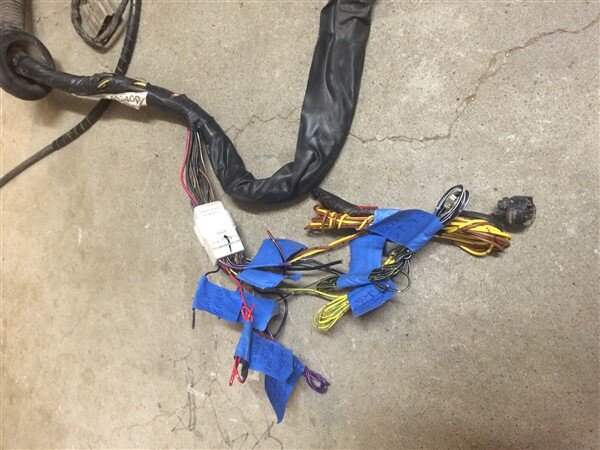
But the more I removed from the loom for the engine the more things I found that were inter connected and the more it was looking like I would have to remove.
At this point I called a few auto electricians but none of them wanted to touch it, they all wanted to just do easy wiring jobs like wiring winches, lights, trailer brakes etc. and didnt want the challenge of this job.
So at this point I decided I would order a manual fuel pump for the 2lt-e engine and put the 78 loom back together.
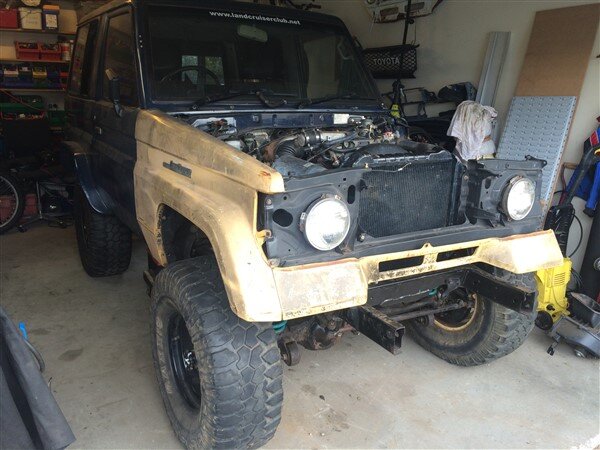
I fitted one of the new front guards/wings.
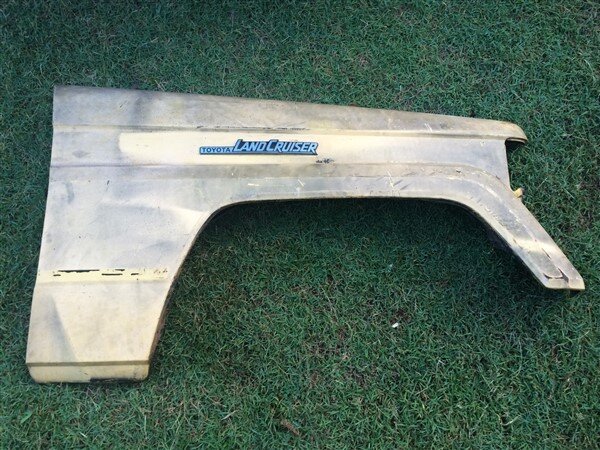
As the engine bay side has already been painted matt black (like the inner wheel arches I've fitted) I decided to bolt it straight on and I will paint the outside afterwards.
Using matt black in the engine bay should mean I have enough blue left to paint the bonnet, guards, panel below the grill and the slam panel.
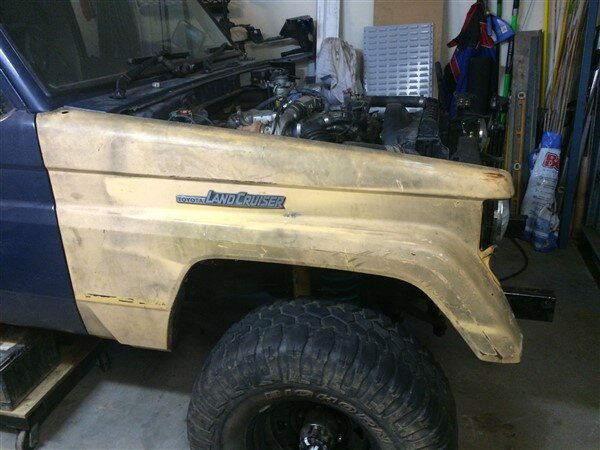
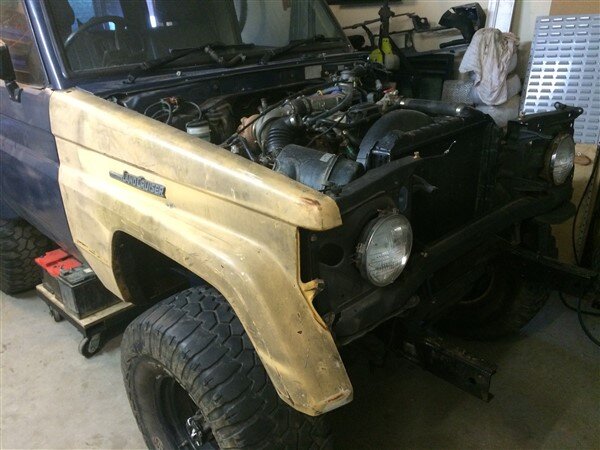
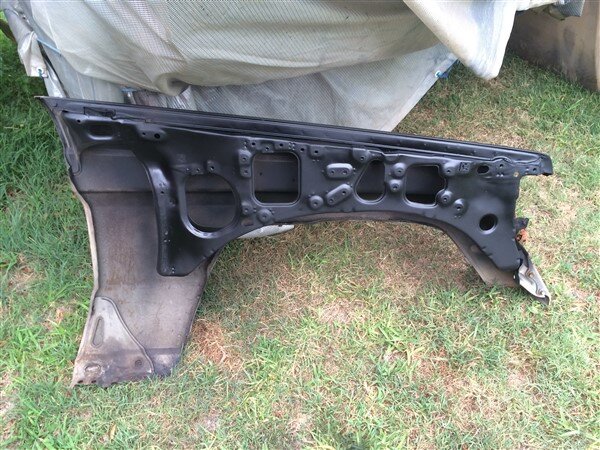
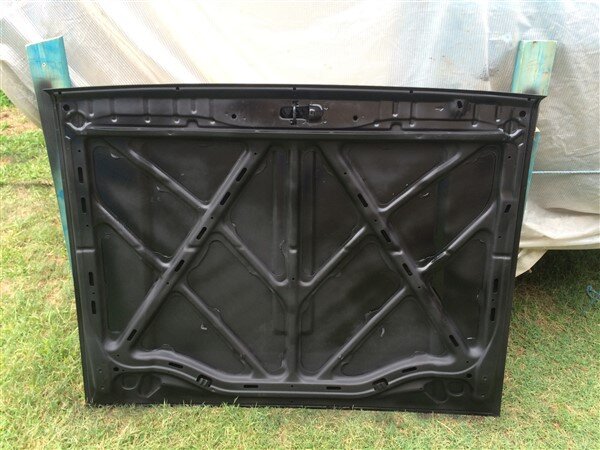
The bonnet and passenger side guard needed painting on the engine bay side.
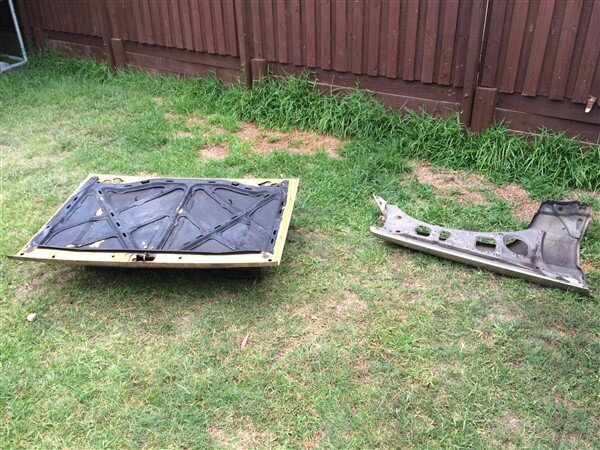
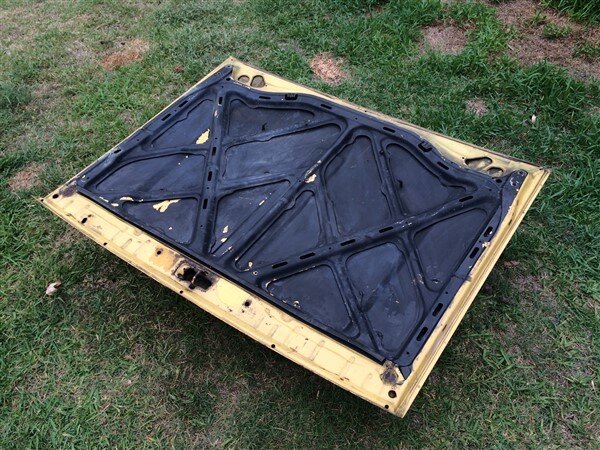
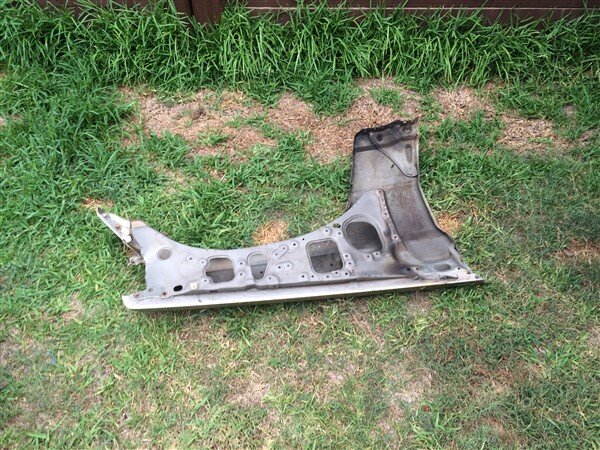
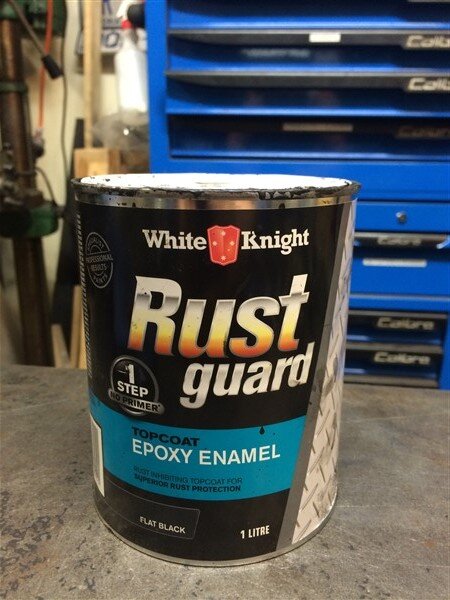
So I poured some of this into my gun.
And gave them a few coats.
Tomorrow I will get them fitted.
Then I need to remove the exhaust off the 78 and alter it to fit this car and get it bolted on.
Now I'm using the wiring loom already in this body, I can fit the dashboard and get the interior back together and as soon as the fuel pump arrives, get it bolted on and see if it will start.
Then theres just some body work and painting to do and shes ready to sell.
Messing around with the wiring loom has cost me 10+ hours in time!
But I'm still hoping that another week or 2 and it will be done.

I cut back all the outer sheathing.

And used cable ties to keep the loom roughly together, but to give me enough slack to trace and remove wires.


I thought this book would help me.

The wiring loom had an ECU on it.

But sadly it was for the 22r engine and non of the colours matched my loom.


But I carried on regardless and instead followed each wire from the ECU plugs and chased them all the way back to the different components they connect to.


I labeled everything and cut out the ECU connector from the loom.

That connected to the engine loom.


But the more I removed from the loom for the engine the more things I found that were inter connected and the more it was looking like I would have to remove.
At this point I called a few auto electricians but none of them wanted to touch it, they all wanted to just do easy wiring jobs like wiring winches, lights, trailer brakes etc. and didnt want the challenge of this job.

So at this point I decided I would order a manual fuel pump for the 2lt-e engine and put the 78 loom back together.

I fitted one of the new front guards/wings.

As the engine bay side has already been painted matt black (like the inner wheel arches I've fitted) I decided to bolt it straight on and I will paint the outside afterwards.
Using matt black in the engine bay should mean I have enough blue left to paint the bonnet, guards, panel below the grill and the slam panel.


The bonnet and passenger side guard needed painting on the engine bay side.


So I poured some of this into my gun.

And gave them a few coats.


Tomorrow I will get them fitted.
Then I need to remove the exhaust off the 78 and alter it to fit this car and get it bolted on.

Now I'm using the wiring loom already in this body, I can fit the dashboard and get the interior back together and as soon as the fuel pump arrives, get it bolted on and see if it will start.

Then theres just some body work and painting to do and shes ready to sell.

Messing around with the wiring loom has cost me 10+ hours in time!

But I'm still hoping that another week or 2 and it will be done.
Last edited:
Don't like the adverts? Click here to remove them
Rusty Bottoms
Member
- Joined
- Aug 23, 2016
- Messages
- 121
- Country Flag
Incredible amount of effort Ben, well done. I'm still trying to get the time to replace seals on my front axle! Though I want to drop the entire front axle and pull it out to clean and replace stuff, I might have to settle for a wire brush and some hammerite while it's in place. Good job again with everything, amazing.
- Joined
- Oct 13, 2010
- Messages
- 6,058
- Country Flag
I got the panels bolted onto RJ.


The passenger side front guard will need some work before its ready for paint.


I removed the front 2 sections of exhaust off the 78.


The down pipe was already snapped on the exhaust when I bought the 78.


And one of the studs snapped on me when I was unbolting the flange off the turbo.


I removed the rest of the exhaust off the 78.

Cut it up and knocked up a side exit, straight through pipe for RJ.

Found a can of paint.

Gave it a coat of paint and left it to dry overnight.

Then bolted it on.


I removed the tube arch extensions/flares off LJ's old front guards.

And bolted them on.


Pulled the rocker cover off to investigate the massive oil leak.


Turned out the roker cover gasket was as hard as concrete and badly cracked, so previous owner(s) had attempted to fix it with silicon sealant.

I ordered a new gasket.


Which turned out to be the wrong one.
I really should have checked more carefully before ordering.

New one should be here next week.
Decided to clean up the rocker cover while it was off and make it look new again.
Wire wheel in the drill made light work of that.


Then got it outside for a coat of epoxy enamel.

The interior is almost back together now and most of the dash is back in.


Fitted the old school Piranha battery tray.


And got the battery that came with the 78 sat in place and bolted some of the relays and solenoids on.


Decided to let my old home made bullbar go with this car as I want to run something different on LJ when the soft top body goes on.


It needed a bit of modification, especially the sides as it didnt fit the bodywork properly.

So I got it off and gave it a hair cut.

Removed all these bits.

Bit more test fitting.


Much better.

Not a perfect fit along the center though as the earlier round head light front end is very square, where as the later square headlight front end curves.
I dont think it will matter though as its not that noticeable.

Pulled the bar back off and got it on the bench.

Cut some sheet steel to cap off the ends with.

And fusion welded them on with the TIG.


I rust killed the front guard and started filling it.

As I was busy filling some holes in the rear door anyway.


From where I removed the number plate light.
Which I want to keep for my other 70's.

Decided I'm going to give the whole car a quick re-spray when I'm painting the front, seen as I've got enough paint left.
I picked up a new sander and a much better spray gun the other day, so they should make life a lot easier with the respray.

The manual fuel pump turned up today so I will get that bolted on this weekend and hopefully get everything fully connected up on the engine.
I'm trying to source a G52 to 2lt bell housing so that I can remove and keep the rare expensive R151 transmission thats currently fitted, for a spare for my other 2 and in its place fit the common G52 transmission.
So its getting very close to being finished!
If it wasnt for my stuff up ordering the wrong rocker cover gasket, I would have hopefully had it all finished, running and drivable this weekend! Then I could have driven it out and into the back garden ready for the paint job.
The passenger side front guard will need some work before its ready for paint.
I removed the front 2 sections of exhaust off the 78.
The down pipe was already snapped on the exhaust when I bought the 78.
And one of the studs snapped on me when I was unbolting the flange off the turbo.
I removed the rest of the exhaust off the 78.
Cut it up and knocked up a side exit, straight through pipe for RJ.
Found a can of paint.
Gave it a coat of paint and left it to dry overnight.
Then bolted it on.
I removed the tube arch extensions/flares off LJ's old front guards.
And bolted them on.
Pulled the rocker cover off to investigate the massive oil leak.
Turned out the roker cover gasket was as hard as concrete and badly cracked, so previous owner(s) had attempted to fix it with silicon sealant.
I ordered a new gasket.
Which turned out to be the wrong one.

I really should have checked more carefully before ordering.

New one should be here next week.
Decided to clean up the rocker cover while it was off and make it look new again.
Wire wheel in the drill made light work of that.
Then got it outside for a coat of epoxy enamel.
The interior is almost back together now and most of the dash is back in.
Fitted the old school Piranha battery tray.
And got the battery that came with the 78 sat in place and bolted some of the relays and solenoids on.
Decided to let my old home made bullbar go with this car as I want to run something different on LJ when the soft top body goes on.
It needed a bit of modification, especially the sides as it didnt fit the bodywork properly.
So I got it off and gave it a hair cut.
Removed all these bits.
Bit more test fitting.
Much better.
Not a perfect fit along the center though as the earlier round head light front end is very square, where as the later square headlight front end curves.
I dont think it will matter though as its not that noticeable.
Pulled the bar back off and got it on the bench.
Cut some sheet steel to cap off the ends with.
And fusion welded them on with the TIG.
I rust killed the front guard and started filling it.
As I was busy filling some holes in the rear door anyway.
From where I removed the number plate light.
Which I want to keep for my other 70's.
Decided I'm going to give the whole car a quick re-spray when I'm painting the front, seen as I've got enough paint left.
I picked up a new sander and a much better spray gun the other day, so they should make life a lot easier with the respray.
The manual fuel pump turned up today so I will get that bolted on this weekend and hopefully get everything fully connected up on the engine.

I'm trying to source a G52 to 2lt bell housing so that I can remove and keep the rare expensive R151 transmission thats currently fitted, for a spare for my other 2 and in its place fit the common G52 transmission.

So its getting very close to being finished!
If it wasnt for my stuff up ordering the wrong rocker cover gasket, I would have hopefully had it all finished, running and drivable this weekend! Then I could have driven it out and into the back garden ready for the paint job.

- Joined
- Oct 13, 2010
- Messages
- 6,058
- Country Flag
Long time, no update! 
Should have been finished ages ago, but weve been busy and have had friends staying so I havent had much spare time to work on this project. But some progress has been made.
The painted rocker cover came up good.


Manual fuel pump turned up.


Only then I realised that the radiator, fan, bets, cover and timing belt all had to be removed in order to change pumps.

I thought I could just undo the nut on the end of the pump and pull it off, but sadly not.

So rad out.


Next issue was getting the bolt undone on the crank.

Not a problem I thought, I will just wire up the engine and use the starter motor to turn the engine over with a socket on the crank bolt and a breaker bar wedged against the chassis.
Got it wired up.


Only all I was getting was click click click!
Starter motor had shit itself.
Removed it, stripped it down, cleaned it, looked for any possible damage, put it back together, still wouldnt work.
So new starter motor ordered, I decided to make a simple tool to bolt onto the bottom pulley so I could get the crank bolt out.
Found a big hole saw off cut that was 8mm thick and a suitable hole saw to drill the center out of it.

Drilled it out on the pillar drill.


Added a few more holes.

Clamped and welded it to a piece of flat.


Bolted it to the bottom pulley.

Sitting on the bullbar I was now able to hold the new tool with my foot and undo the crank bolt with a breaker bar and socket.

And then use a puller to remove the pulley.

Pulled the cover off and turned the crank to line all the timing marks up.


Next I could remove the belt and then remove this pulley that fits onto the fuel pump.

Pulley off.

Pump off.


Comparing the 2.


New pump on.

Had to knock up a very simple tool to help hold the fuel pump pulley still while I torqued the nut up.


Cover back on followed by bottom pulley.

Followed by the fan and rad.

The replacement rocker cover arrived.


As did the new starter motor.


So the next job which I thought would be quick and easy was to fit the new rocker cover gasket and freshly painted rocker cover.
Started cleaning the mountains of old silicon off the top of the head.

Found a sheared off bolt.

Needed to get the broken bolt out, so decided to drill it out and then use an easy out.
Non of my drill bits would touch it, the bolt was so hard.
So went and got some cobalt drill bits.

Well I can honestly say I've never come across a bolt as hard as this one or as difficult to remove!
No joke it took 6 hours of drilling/sharpening drill bits/drilling some more. Before finally a hole was drilled through the snapped bolt and the remains of the bolt came out.

And finally I had a perfect, threaded hole again!

New gasket on.

And cover bolted on.

On closer inspection it turned out the hole in the oil cap, was the result of someone using a drill!
Seriously some people shouldnt be allowed anywhere near tools!

I picked up a replacement.


Mounted a fuel filter.


I need to get one of these little rods with a ball socket on each end so I can connect a throttle cable and linkage.
<a href="http://s738.photobucket.com/user/be...hread Continued/IMG_6019_zps7cu67h5z.jpg.html" target="_blank"><img src="http://i738.photobucket.com/albums/xx24/ben-uk/RJ7 Build Thread Continued/IMG_6019_zps7cu67h5z.jpg" border="0" alt=" photo IMG_6019_zps7cu67h5z.jpg"/></a>
<a href="http://s738.photobucket.com/user/be...hread Continued/IMG_6022_zpsm0eo08e8.jpg.html" target="_blank"><img src="http://i738.photobucket.com/albums/xx24/ben-uk/RJ7 Build Thread Continued/IMG_6022_zpsm0eo08e8.jpg" border="0" alt=" photo IMG_6022_zpsm0eo08e8.jpg"/></a>
Like this one on my 1KZ.

But for now it starts and runs beautifully!
So I drove it into the back garden ready for painting!


Hoping to get it painted this week, then it can finally go on Gumtree for sale.
I'm ordering the throttle linkage and rod tonight.
And I need to bleed the brakes some more and refit a few bits and pieces and shes done!

Should have been finished ages ago, but weve been busy and have had friends staying so I havent had much spare time to work on this project. But some progress has been made.
The painted rocker cover came up good.
Manual fuel pump turned up.
Only then I realised that the radiator, fan, bets, cover and timing belt all had to be removed in order to change pumps.

I thought I could just undo the nut on the end of the pump and pull it off, but sadly not.
So rad out.
Next issue was getting the bolt undone on the crank.
Not a problem I thought, I will just wire up the engine and use the starter motor to turn the engine over with a socket on the crank bolt and a breaker bar wedged against the chassis.
Got it wired up.
Only all I was getting was click click click!

Starter motor had shit itself.

Removed it, stripped it down, cleaned it, looked for any possible damage, put it back together, still wouldnt work.
So new starter motor ordered, I decided to make a simple tool to bolt onto the bottom pulley so I could get the crank bolt out.
Found a big hole saw off cut that was 8mm thick and a suitable hole saw to drill the center out of it.
Drilled it out on the pillar drill.
Added a few more holes.
Clamped and welded it to a piece of flat.
Bolted it to the bottom pulley.
Sitting on the bullbar I was now able to hold the new tool with my foot and undo the crank bolt with a breaker bar and socket.

And then use a puller to remove the pulley.
Pulled the cover off and turned the crank to line all the timing marks up.
Next I could remove the belt and then remove this pulley that fits onto the fuel pump.
Pulley off.
Pump off.
Comparing the 2.
New pump on.
Had to knock up a very simple tool to help hold the fuel pump pulley still while I torqued the nut up.
Cover back on followed by bottom pulley.
Followed by the fan and rad.
The replacement rocker cover arrived.
As did the new starter motor.
So the next job which I thought would be quick and easy was to fit the new rocker cover gasket and freshly painted rocker cover.
Started cleaning the mountains of old silicon off the top of the head.
Found a sheared off bolt.

Needed to get the broken bolt out, so decided to drill it out and then use an easy out.
Non of my drill bits would touch it, the bolt was so hard.
So went and got some cobalt drill bits.
Well I can honestly say I've never come across a bolt as hard as this one or as difficult to remove!
No joke it took 6 hours of drilling/sharpening drill bits/drilling some more. Before finally a hole was drilled through the snapped bolt and the remains of the bolt came out.
And finally I had a perfect, threaded hole again!

New gasket on.
And cover bolted on.
On closer inspection it turned out the hole in the oil cap, was the result of someone using a drill!
Seriously some people shouldnt be allowed anywhere near tools!
I picked up a replacement.
Mounted a fuel filter.
I need to get one of these little rods with a ball socket on each end so I can connect a throttle cable and linkage.
<a href="http://s738.photobucket.com/user/be...hread Continued/IMG_6019_zps7cu67h5z.jpg.html" target="_blank"><img src="http://i738.photobucket.com/albums/xx24/ben-uk/RJ7 Build Thread Continued/IMG_6019_zps7cu67h5z.jpg" border="0" alt=" photo IMG_6019_zps7cu67h5z.jpg"/></a>
<a href="http://s738.photobucket.com/user/be...hread Continued/IMG_6022_zpsm0eo08e8.jpg.html" target="_blank"><img src="http://i738.photobucket.com/albums/xx24/ben-uk/RJ7 Build Thread Continued/IMG_6022_zpsm0eo08e8.jpg" border="0" alt=" photo IMG_6022_zpsm0eo08e8.jpg"/></a>
Like this one on my 1KZ.
But for now it starts and runs beautifully!

So I drove it into the back garden ready for painting!
Hoping to get it painted this week, then it can finally go on Gumtree for sale.
I'm ordering the throttle linkage and rod tonight.
And I need to bleed the brakes some more and refit a few bits and pieces and shes done!
AndyCook
Well-Known Member
Nice work,
Pain in ass about that bolt thought.
I spent an hour drilling holes with a masonry bit in hammer mode, in stone on wall on our drive to refit gate latch and thought that was bad
But nothing like 6 hour saga
Pain in ass about that bolt thought.
I spent an hour drilling holes with a masonry bit in hammer mode, in stone on wall on our drive to refit gate latch and thought that was bad
But nothing like 6 hour saga
- Joined
- Oct 13, 2010
- Messages
- 6,058
- Country Flag
Thanks mate. 
Yesterday was another stunning 30 degree day, so it seemed like the perfect time to do some painting.


This morning I started bolting bits back on.
I always wondered what LJ would look like with the earlier front end, now I know!


I'm going to be sad to see LJ's body go as we've been on a lot of adventures together!
But.............................
It will free up some much needed funds to get the LJ78 and soft top LJ70 finished.
Yesterday was another stunning 30 degree day, so it seemed like the perfect time to do some painting.
This morning I started bolting bits back on.
I always wondered what LJ would look like with the earlier front end, now I know!
I'm going to be sad to see LJ's body go as we've been on a lot of adventures together!
But.............................
It will free up some much needed funds to get the LJ78 and soft top LJ70 finished.

Looking good Ben. I've always liked the earlier round headlight front. Great truck for somebody. Hope you get an easy sale and get what you want for it.
Onwards and upwards.
Onwards and upwards.
Paddler Ed
Well-Known Member
How'd you fair with Debbie? Did you get much rain/wind from the tail end of it?
We got a little bit of extra rain down here, but not much to write home about; mates up in the Byron Hinterland copped it a bit more (he went to drop his timesheet off to get paid and then couldn't get home!)
Another mate is about to get it as the Fitzroy catchment is to run down into Rockhampton and he's based in Yeppoon.
- Joined
- Oct 13, 2010
- Messages
- 6,058
- Country Flag
Nice work done there Ben. Whoever buys it is getting a very good truck in fairness.
Looking good Ben. I've always liked the earlier round headlight front. Great truck for somebody. Hope you get an easy sale and get what you want for it.
Onwards and upwards.
Thanks guys.
This project has taken a lot longer than I'd hoped.

But it should be completely finished, photographed and online for sale, this weekend.

How'd you fair with Debbie? Did you get much rain/wind from the tail end of it?
We got a little bit of extra rain down here, but not much to write home about; mates up in the Byron Hinterland copped it a bit more (he went to drop his timesheet off to get paid and then couldn't get home!)
Another mate is about to get it as the Fitzroy catchment is to run down into Rockhampton and he's based in Yeppoon.
The cyclone really f****d things here!
We got 14+ hours of constant heavy rain, meaning the river behind my house rose over 5 meters, burst its banks in places and washed our bridge away!

I got to leave work early on the Thursday as I wanted to be home encase I needed to start sand bagging the house and garage but luckily the water never came anywhere near high enough to reach us.

Then on the Friday we were off to Byron for a weekend of camping. Got on the motorway and half an hour south they had signs up saying the motorway was flooded and closed
Of course I ignored all the signs and kept driving, eventually reaching a traffic jam with the Pacific motorway down to one lane and the police were letting people through very slowly through the flood water that was about a foot deep.
At this point I was very happy I ignored the signs as I thought we were through and on our way!
But soon we were driving through more flooded sections and then the traffic stopped completely, so we were forced to turn back, but now the water we had previously driven through was even deeper as the water was rising quite quickly.
We pushed on in the little Astra, driving the wrong way back up the flooded motorway and at times the water was almost to the top of the tyres!
We managed to find a way through on a coast road and eventually we made it to Byron, but by then all the roads we had come in on were closed due to the rising water and it looked like we might be stuck in Byron for a while, but fortunately a few days later the water had dropped and the motorway reopened!
I just wish we had been in LJ or the 78, would have been a lot less stressful for us!

Paddler Ed
Well-Known Member
Sounds like a normal Ben adventure then....
Looking great Ben 
I think you should have painted it a colour you don't like, it would be less emotional seeing it go then
It will be a beaut of a truck for the buyer.
I think you should have painted it a colour you don't like, it would be less emotional seeing it go then
It will be a beaut of a truck for the buyer.
- Joined
- Oct 13, 2010
- Messages
- 6,058
- Country Flag
So just to put this thread to bed........
I finished the RJ70, advertised it for sale and within 2 weeks it sold for $5500!
The 1UZ-FE V8 engine conversion, which I started and documented in this thread will continue in my LJ70 Build Thread soon.
I finished the RJ70, advertised it for sale and within 2 weeks it sold for $5500!

The 1UZ-FE V8 engine conversion, which I started and documented in this thread will continue in my LJ70 Build Thread soon.


![IMG_5625[1].JPG IMG_5625[1].JPG](https://www.landcruiserclub.net/community/data/attachments/114/114106-c73a77e995d7a161d856a2bf6f164847.jpg?hash=xzp36ZXXoW)
![IMG_5626[1].JPG IMG_5626[1].JPG](https://www.landcruiserclub.net/community/data/attachments/114/114107-6e15932196f6626441792c3e09ccd0c2.jpg?hash=bhWTIZb2Ym)


