Don't like the adverts?  Click here to remove them

Who is doing what maintenance today?

Gary I notice non-OEM Toyota parts there. Is that brand any good?


Been good in the past on other vehicles tbh. Seals are good quality etc.

Kit to re build both front calipers was £65 through their e bay shop. They do stainless steel pistons but the kit is £120.
Incidentally the same part number kit covers subaru too
 
Just managed to change out the front disks and pads before the heavens opened. Been for a lil spin and still alive, woo! I got roughtrax drilled and grooved disks and Toyota pads. Also got some new pin and Spring things for retaining the pads which...
image.jpeg
Are too short!
 
one of the long M6 bolts that hold the starter motor of the 80 together broke of.
checked the contacts as well :
DSCN2218-900.jpg

the contacts were getting a bit thin, so I changed them.

DSCN2219-900.jpg

I replaced the bolt, checked the coals which were still very good and put everything together again. New paint and back in the truck.
I wish all jobs were this easy...:chores-chopwood:
 
Just managed to change out the front disks and pads before the heavens opened.

Snap, did the front disks and pads today. Also changed the pins, anti-rattle plates and the spring thing... nice and shiny now and the pulsing when braking has now gone. Not too much trauma, although one of the pistons was sticking a bit so pushed it out as far as I could cleaned it up and used some Toyota red grease, all back together working nice.
20160611_110104.jpg

20160611_110057.jpg

I also bought disks and pads for the rear, but they are still fine, so will save them for probably next year.
 
Snap, did the front disks and pads today. Also changed the pins, anti-rattle plates and the spring thing... nice and shiny now and the pulsing when braking has now gone. Not too much trauma, although one of the pistons was sticking a bit so pushed it out as far as I could cleaned it up and used some Toyota red grease, all back together working nice.
View attachment 101990
View attachment 101991
I also bought disks and pads for the rear, but they are still fine, so will save them for probably next year.
Today was a day of preparation of rhe hj60 before going in for welding and derusting of bodywork.
Sothe side steps were removed, mud flaps and bumpers also removed.
The replacement front right inner wheel arch and rear left outer wheel arch repair panels were left in the car which will go in on Monday.
If all goes well it may gat a full body respray too
 
Don't like the adverts?  Click here to remove them
Took the 24V auto for its MOT today which it passed no advises. Not bad for an old smoker I bought a year ago and virtually hadn't touched just used.
Treated it to a partial auto fluid change ( drained 4L out and replaced it) and flushed the PAS out too and gave it new fluid. TBF the PAS fluid wasn't bad but the auto box fluid was like brown paint. However it ran perfectly on it and it ran perfectly on what I replaced it with so we will see.

That's the sort of thing I'm looking for, pasted its Mot, makes good parts.
 
My centre silencer was going on the '100', I got an 'advisory' at MOT time. Decisions, decisions . .

Genuine Toyota or pattern job from Roughtrax. I could buy three 'pattern' boxes for the price of the genuine original one, but as the original has lasted 15 years I decided to get another, then "Fit and Forget".

I had fitted stainless bolts to the front flange and the clamp that holds centre & rear together so they came out OK, but separating the middle from the rear was a PITA.

I eventually sawed through the rear pipe on the old box and took both sections out. hammering an 'OBO' nail and then a small cold chisel between the cut stub and the rear section eventually buckled the cut bit and I could pull it out. Then it was just a matter of cleaning-up the socket on the rear section with a Power File and coating both parts with Anti-Seize Paste before re-assembly.

It should have been an easy job, but with crawling about under the truck trying to get the old mounting rubbers off their fittings (washing-up liquid helps) plus the sawing and fettling the job took about five hours :wtf:.

All done and I'm happy.

No pictures I'm afraid (well, its a routine job isn't it) :icon-wink:.

Bob.
 
Last edited:
My LWB '95' failed the MOT a few weeks back with rotten inner sills. I was expecting that, but amazingly it passed last year with the gaping holes in full view. This year I took it to a different tester.

DSCN6148_zpsxzpwqzjt.jpg

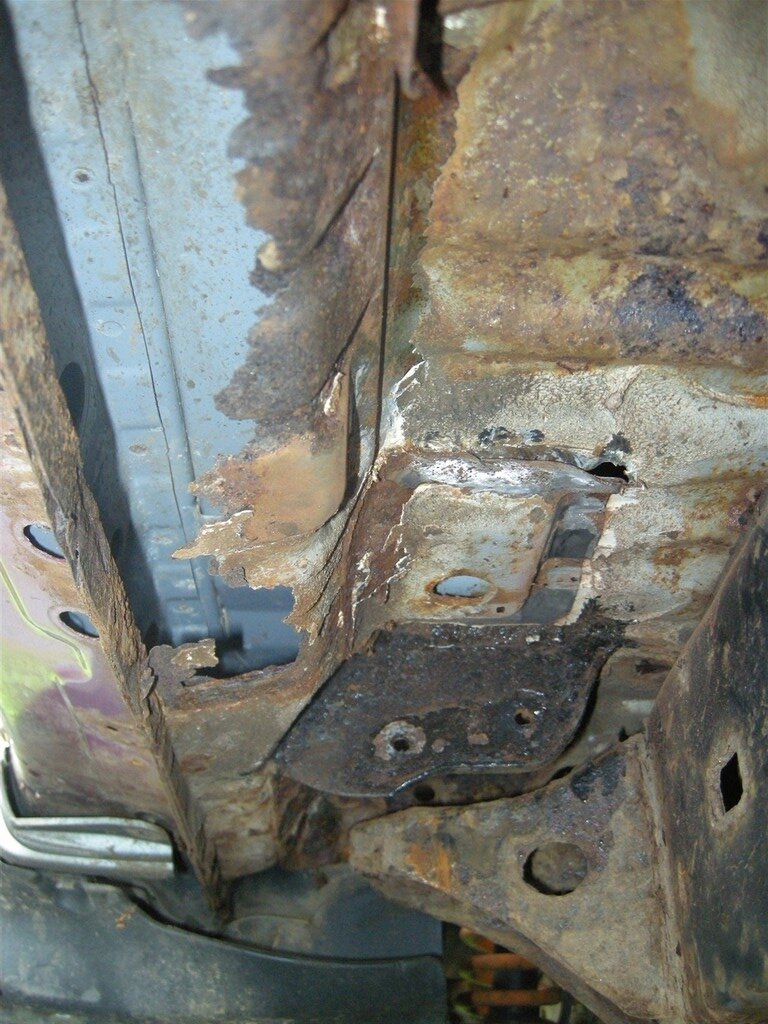
With the running board removed its easy to see why they didn't like it.

I had previously bought a new, genuine, Toyota N/S Sill via Simon Holton (a little under £300). It is a large pressing that incorporates three body mounts and forms part of the side of the car.


DSCN6163_zpsjj306drs.jpg

After a depressing day crawling about under the truck wondering where to start I eventually came up with a plan . . .

My original thought was to take the body off the chassis and do the job from below, but that would be unnecessary.

First - remove all body Mounts from the N/S. Now, all you guys down South and those in foreign climes probably think that is an easy job- just unbolt them . . but this is Scotland and the truck has had 18 years of road salt.

I used an Angle Grinder to cut the sides off the nuts, then with loads of penetrating oil I unscrewed what was left. Most of the bolts didn't survive :icon-rolleyes:.

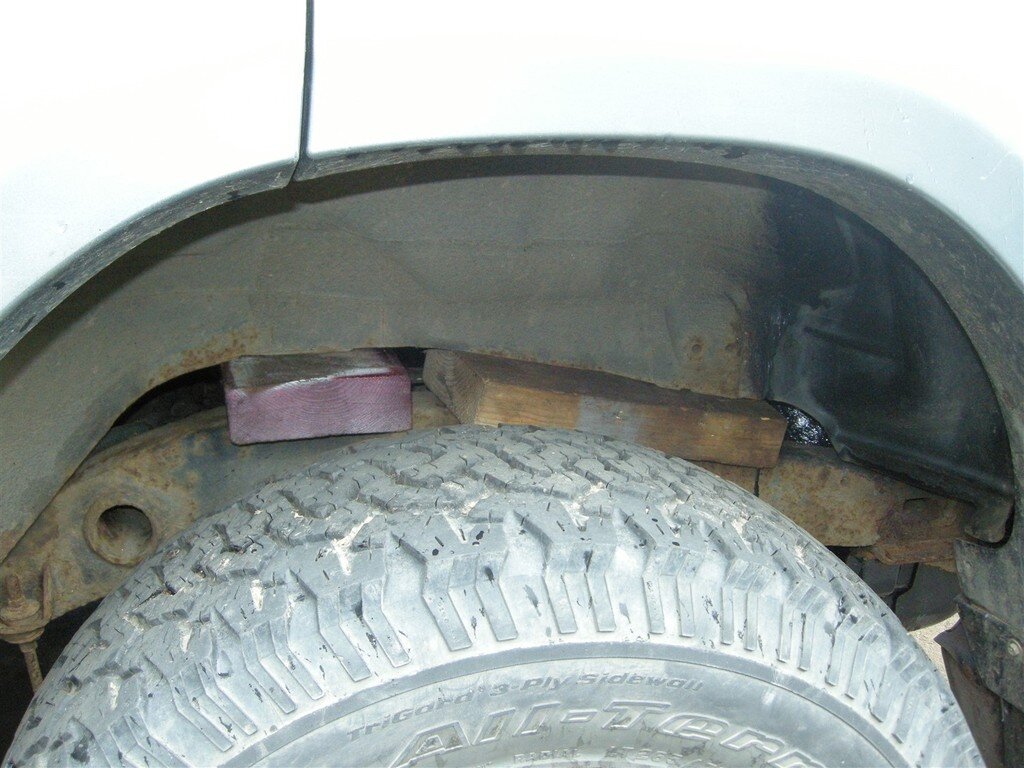
I was then able to jack the N/S up a couple of inches (watching brake lines, fuel pipes and so on), remove upper and lower rubbers and put wood blocks between the body & chassis.

DSCN6145_zpsqhje2uic.jpg

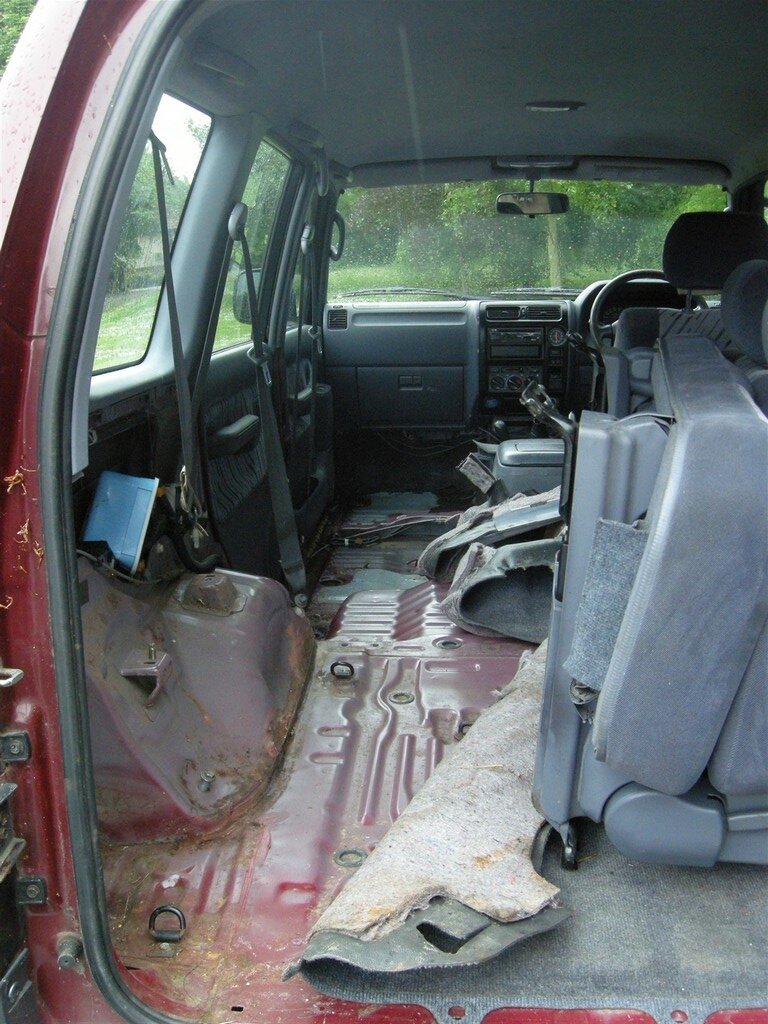
With the seats removed and carpet rolled back the holes where the bolts go are easy to get at.


DSCN6154_zps72bss28e.jpg


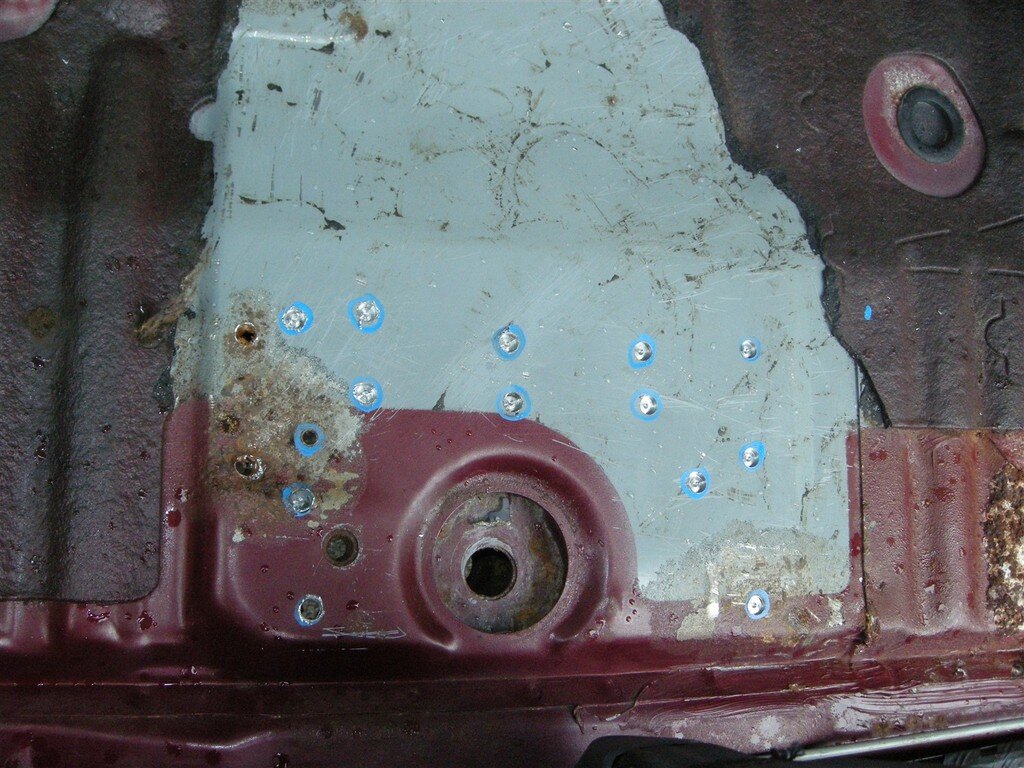
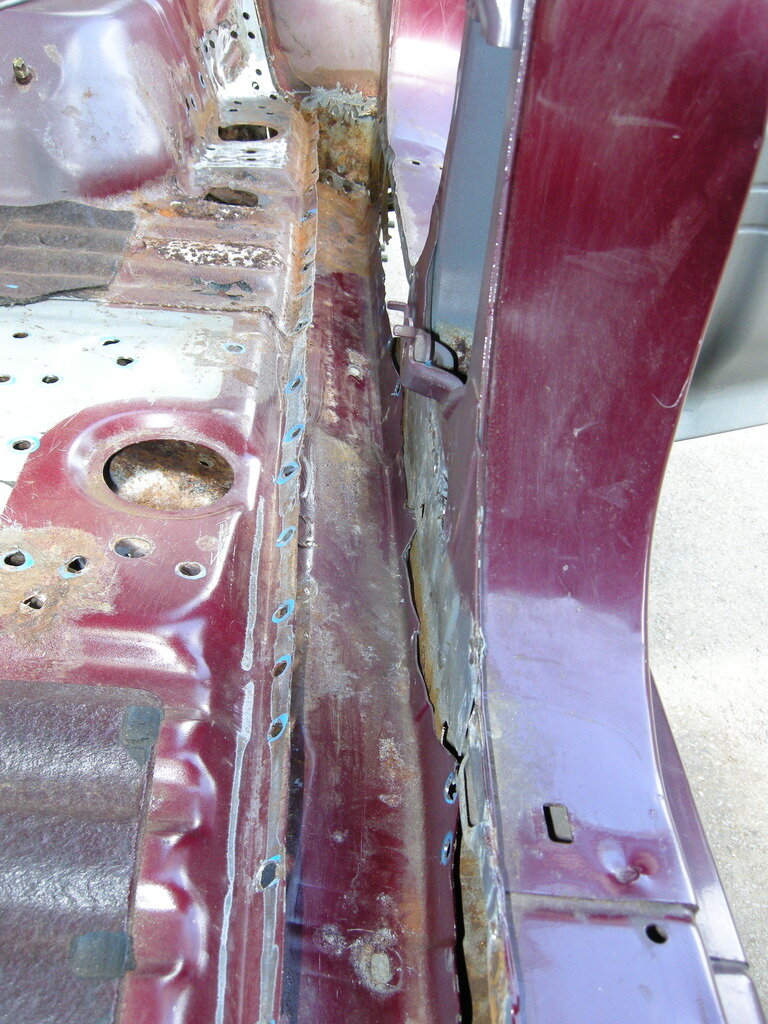
After removing all the wiring that runs along the N/S of the car, under the tread plates and chiselling off the bitumen sound-deadening layer I could see all the spot welds that held the sill to the floor and the side.

These were marked with a blue marker pen and I set about drilling out the welds with 6mm and 8mm 'Dormer Spot Weld Bits'.

DSCN6158_zpswldtmfid.jpg

The poor old truck looks a bit sorry for itself.


DSCN6161_zpse2f7hhj5.jpg


DSCN6153_zpscafr5slf.jpg

I have now drilled out every spot weld that I can see and have separated the old sill from the edge of the floor and from the side pressing. There are a couple of places that I need to investigate and I must remove the front N/S mud flap and part of the trim. After that I have to find a way of separating the three body mounts from the floor - from underneath. Spot welds never drill out cleanly and there is usually a bit that is still attached - unless one makes a ridiculously large hole.

Sunday will find me underneath with sharp bolster chisels and a mash hammer in an attempt to totally trash the body :thumbup:.

More to come.

Then I have to do the same to the O/S as its going too :icon-rolleyes:.

I'll have to SORN it at the end of this month, it won't be ready for an MOT Test in time I'm afraid.

Bob.
 
Last edited:
Today I did more work on the 95's sill replacement.

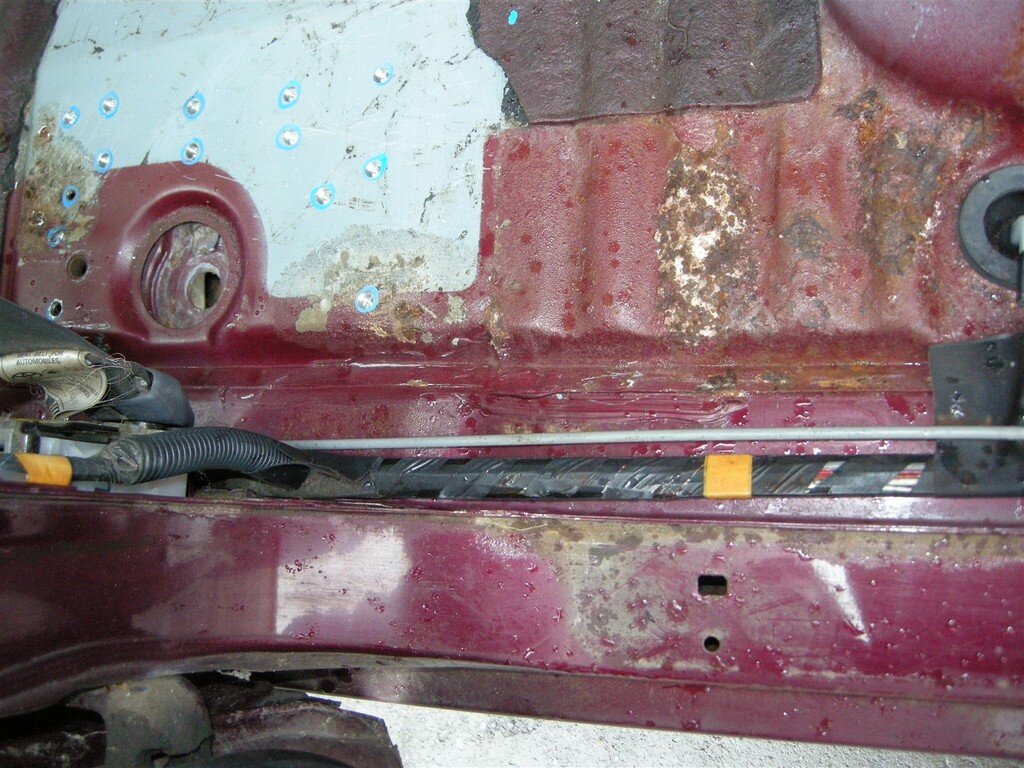
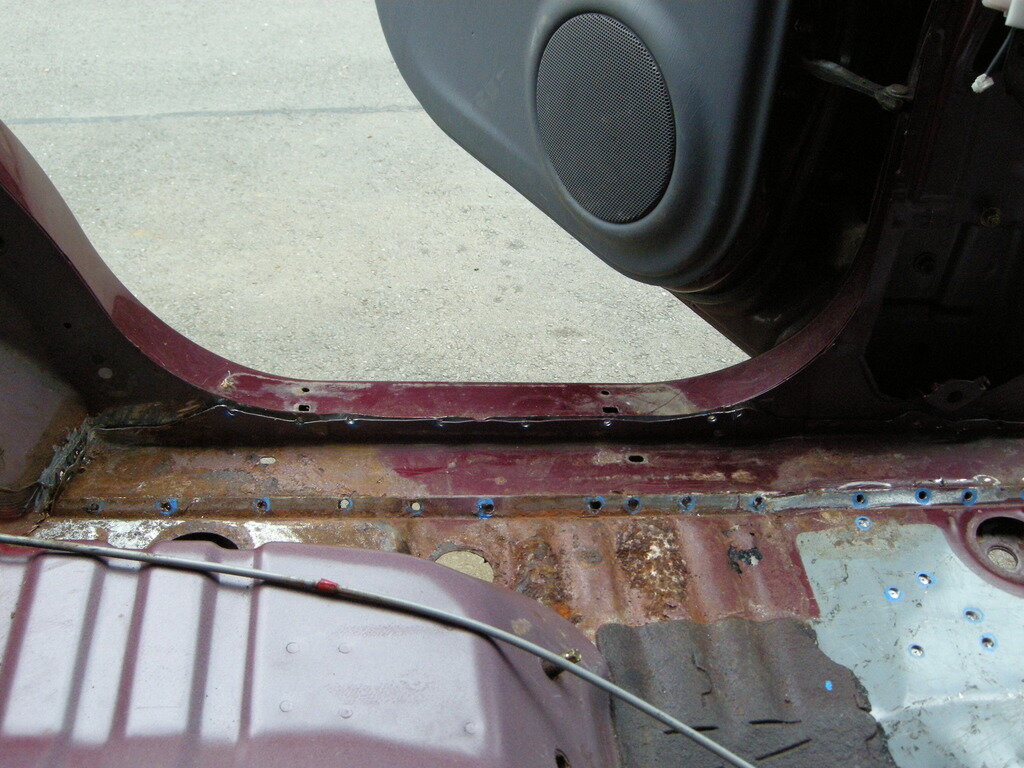
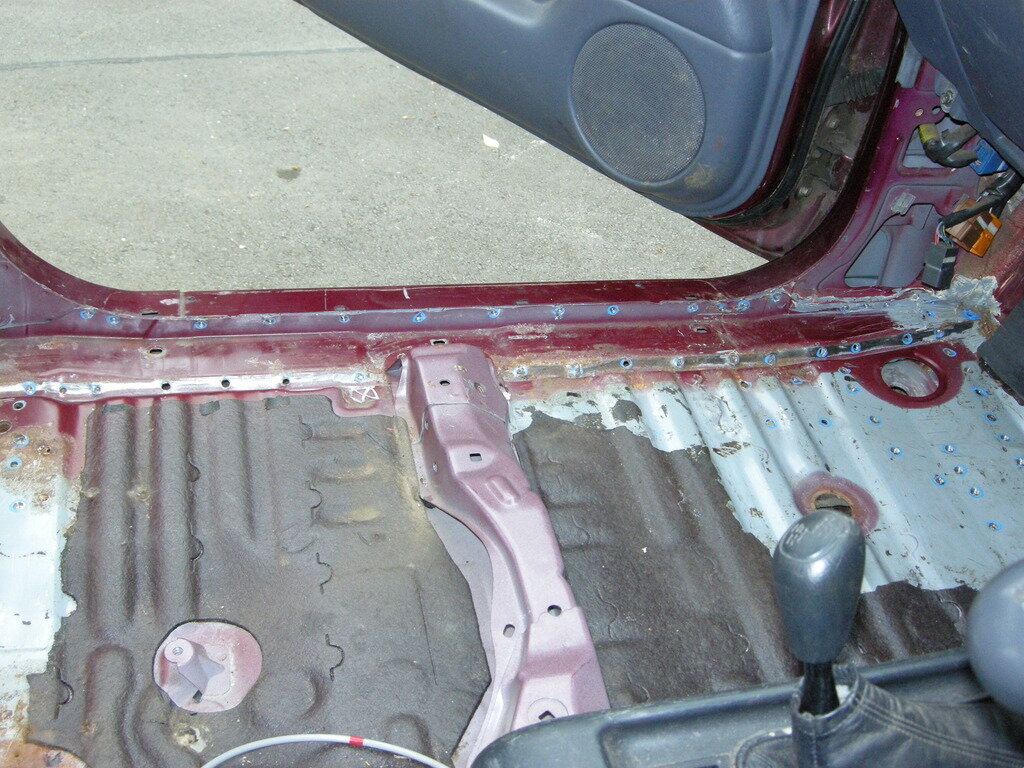
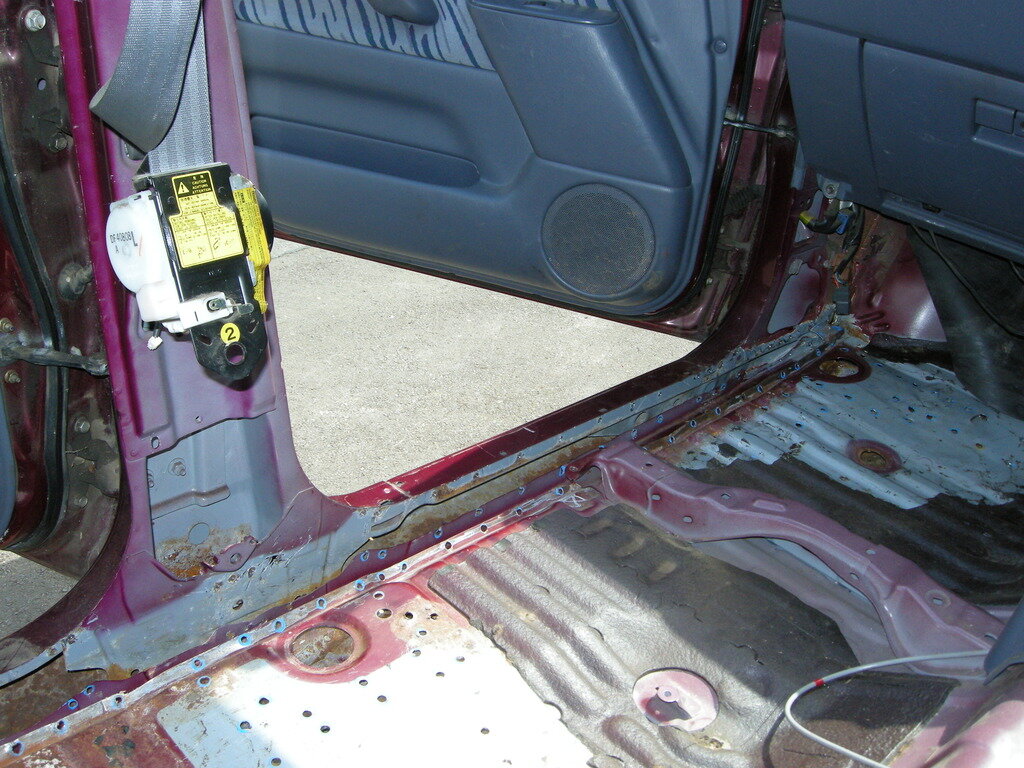
All the spot welds along the inner edge and between the sill and the floor have been drilled out:

DSCN6177_zpsbmzrpjke.jpg

DSCN6179_zpsxclzbjdv.jpg

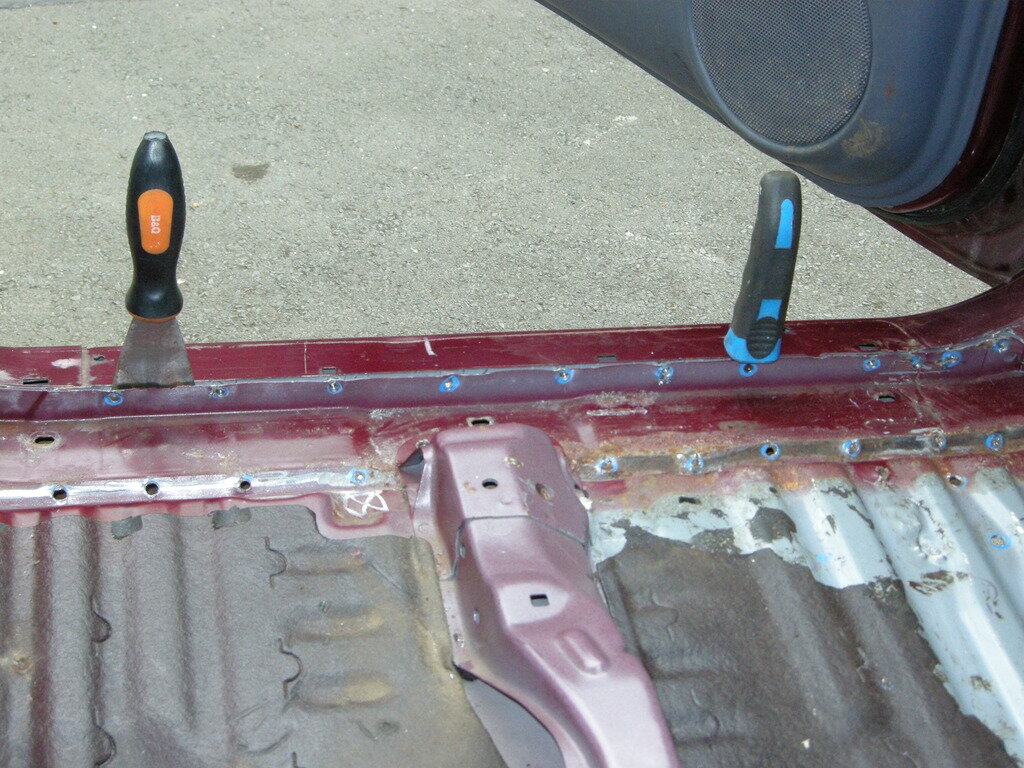
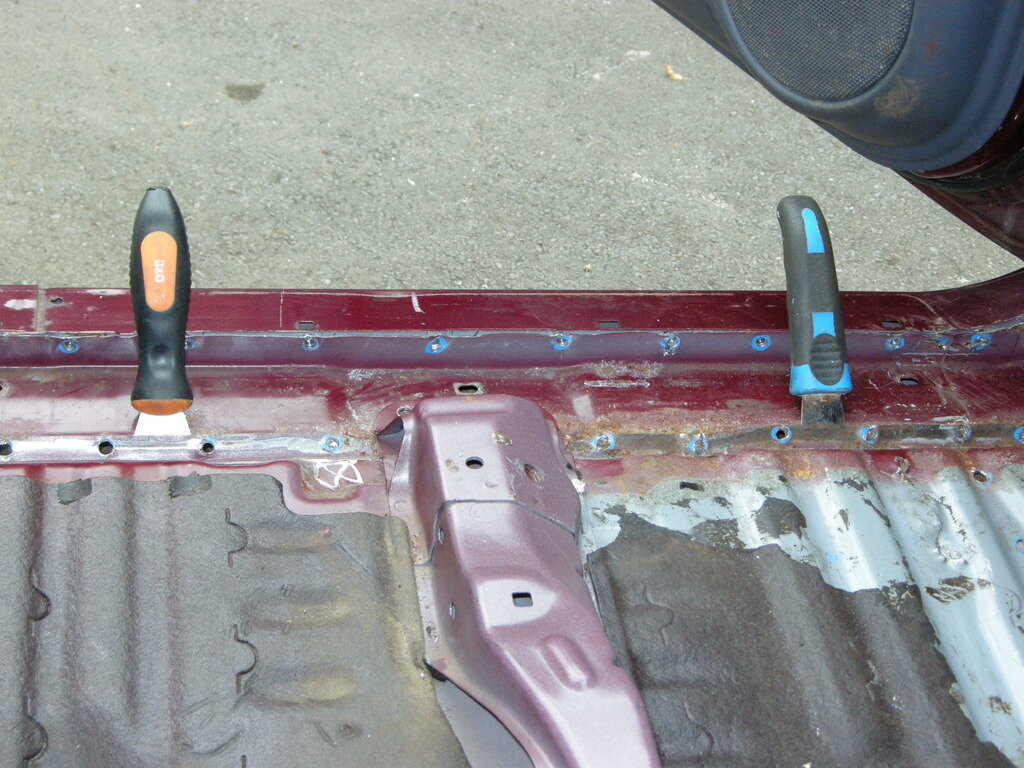
A couple of paint scrapers show that the sill is now separated from the side . . .

DSCN6181_zpsjchji07c.jpg

And from the floor.


DSCN6182_zpsxsqpv7pr.jpg


I started attempting to separate the forward body mount from the floor, but I need to do more work in removing the incredible mastic that is holding everything together. I have also discovered a few more spot welds underneath that I'll tackle with an angle grinder.

Then family arrived (its Fathers' Day :icon-rolleyes:) so work had to stop . . . Then the rain started again . . .

I must clear some space in the garage and get the truck inside (where its dark and cramped), the weather isn't likely to improve.

Bob.
 
I've been working on the '95 during the past couple of days; its fast becoming one of those jobs I wish I'd never started.

Lesson 1: there are always more spot welds than you think - just clean more mastic off the floor and look more closely.

Lesson 2: Not all spot welds leave a nice little round dimple in the metal, some are just invisible until the floor has been distorted by a bolster chisel being driven in from below :icon-rolleyes:.

Lesson 3: Toyota, in their wisdom, have put reinforcing pieces across the floor ON TOP of the body mounts (actually underneath - but not if you're on your back looking up :icon-wink:).

Lesson 4: those Toyota Welding Robots are more dexterous than me :lol:.

After a couple of days of crawling about getting my ears full of rust and swarf I finally got the body mounts free from the floor and those overlapping reinforcing pressings.

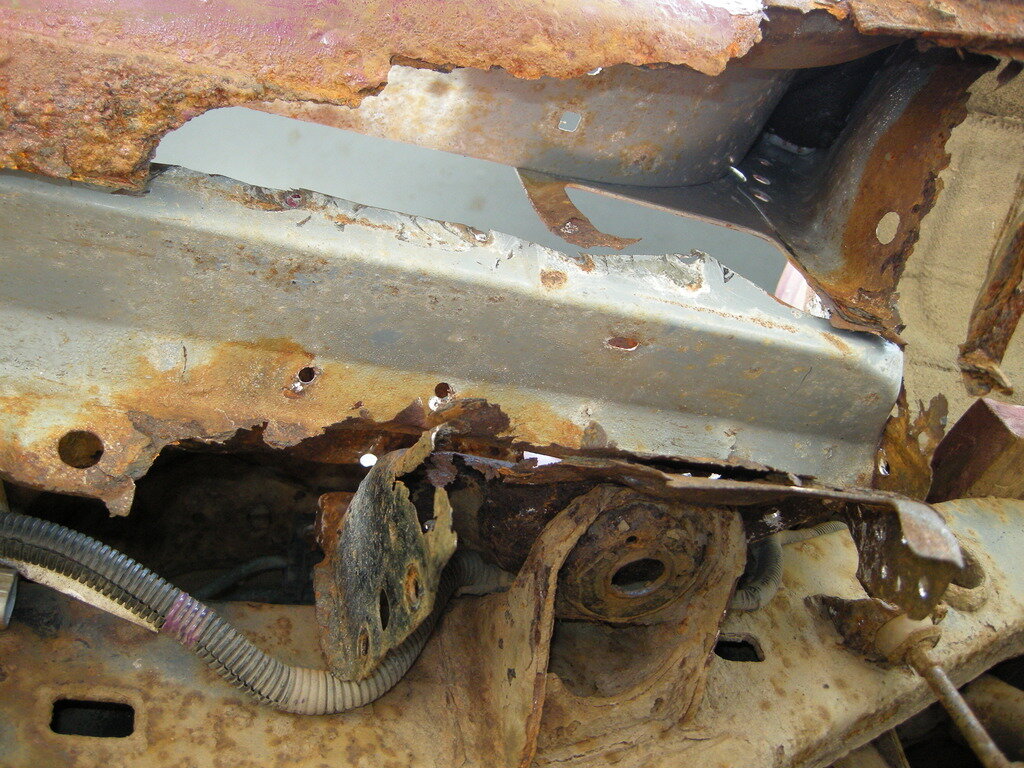
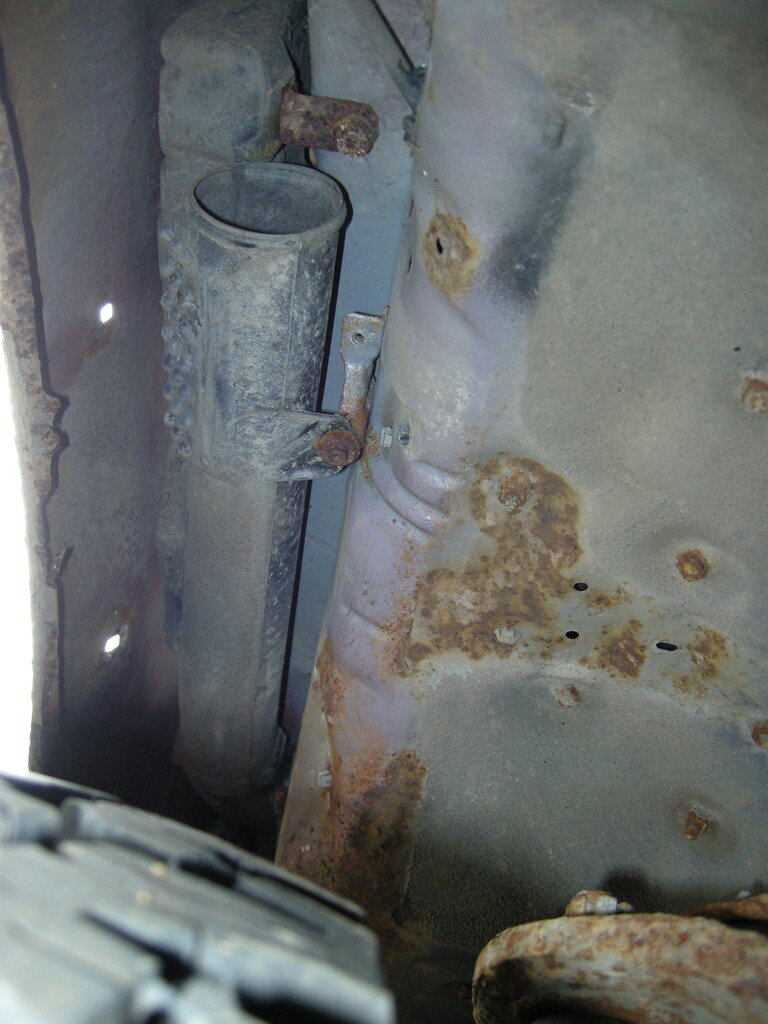
At this point the whole rusty sill dropped down and landed on the body mounts on the chassis:

DSCN6208_zpseelbvguk.jpg


DSCN6209_zps4hgmpzk6.jpg


DSCN6211_zps4wgcnnac.jpg


DSCN6214_zpsdsrm0rs4.jpg


DSCN6217_zpssd5kacf3.jpg

I had hoped that all I would have to do now was jack the body up a bit in relation to the chassis and fiddle the whole thing out. Replacement would then be the reverse process. . . . . . .

Unfortunately that is not going to happen, the body needs to be well clear of the chassis mounts before the sill will drop out :icon-evil:.

The plan now is to start work on removing the O/S sill (which ought to be easier/quicker as I now have a procedure - Ha Ha!). Then drain and remove radiator, disconnect Aircon Pipes (its empty!), undo the steering column, drain and uncouple brake pipes, undo handbrake cable, separate all wiring between body & chassis, Undo diesel pipes from filter + spill return, remove gear and transfer levers . . .

Then jack the body up using steel bars on hydraulic jacks that pass through the body mounts on the four corners (i.e. those that are not being abused). I'll support it on wood blocks as I go so that the body doesn't fall out of alignment with the chassis. I can't support it from below - the floor doesn't touch the sides :lol:.

I'll probably have to keep the doors locked or it might fold in half :oops:.

I could be at this for a while.

Bob.
 
I meant to say . . .

In order to get at the spot welds at the front, I had to remove the Tupperware and Mud Flap from the front wheel arch.

Loads of trapped mud down there:

DSCN6192_zpslw799rd8.jpg


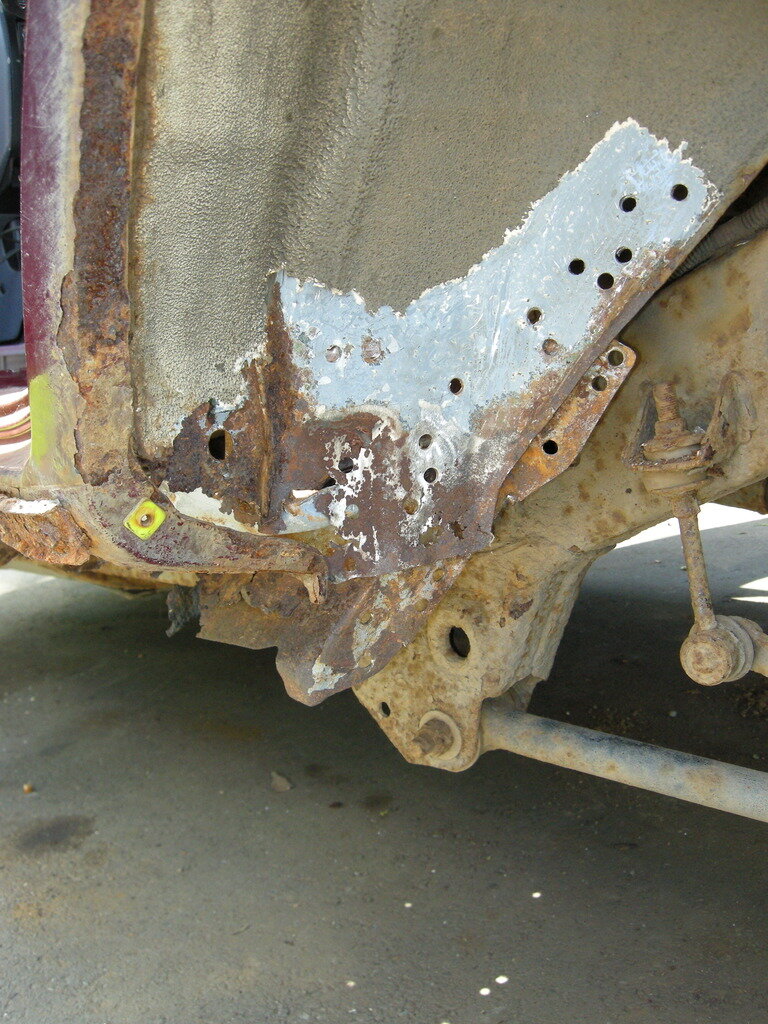
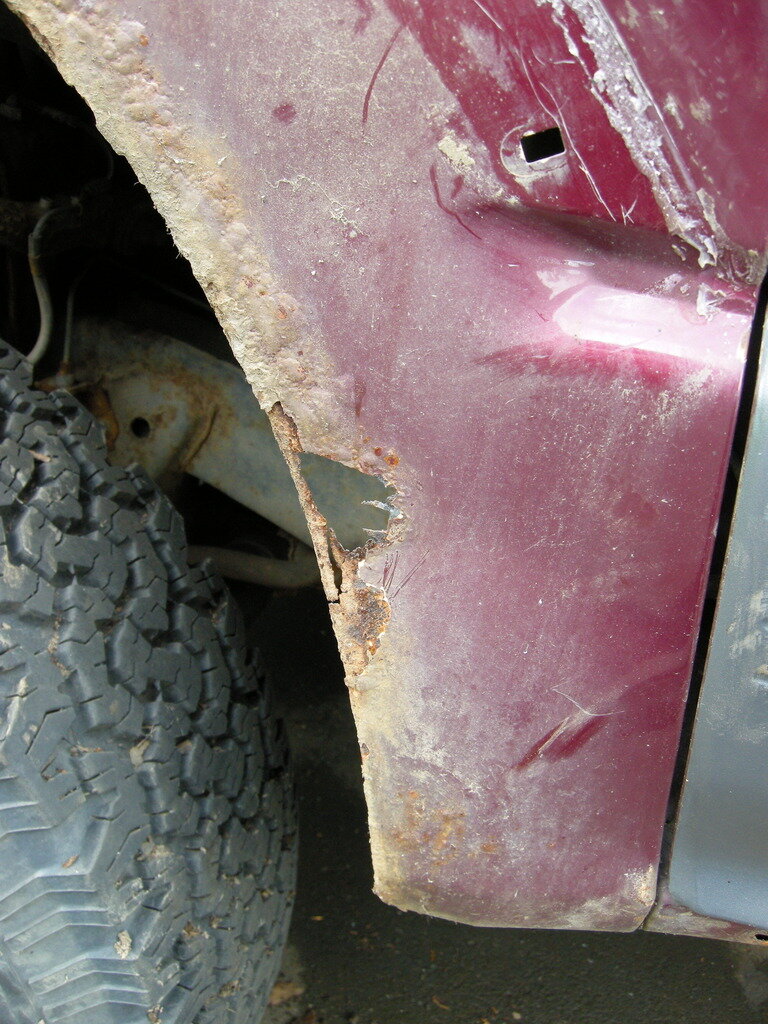
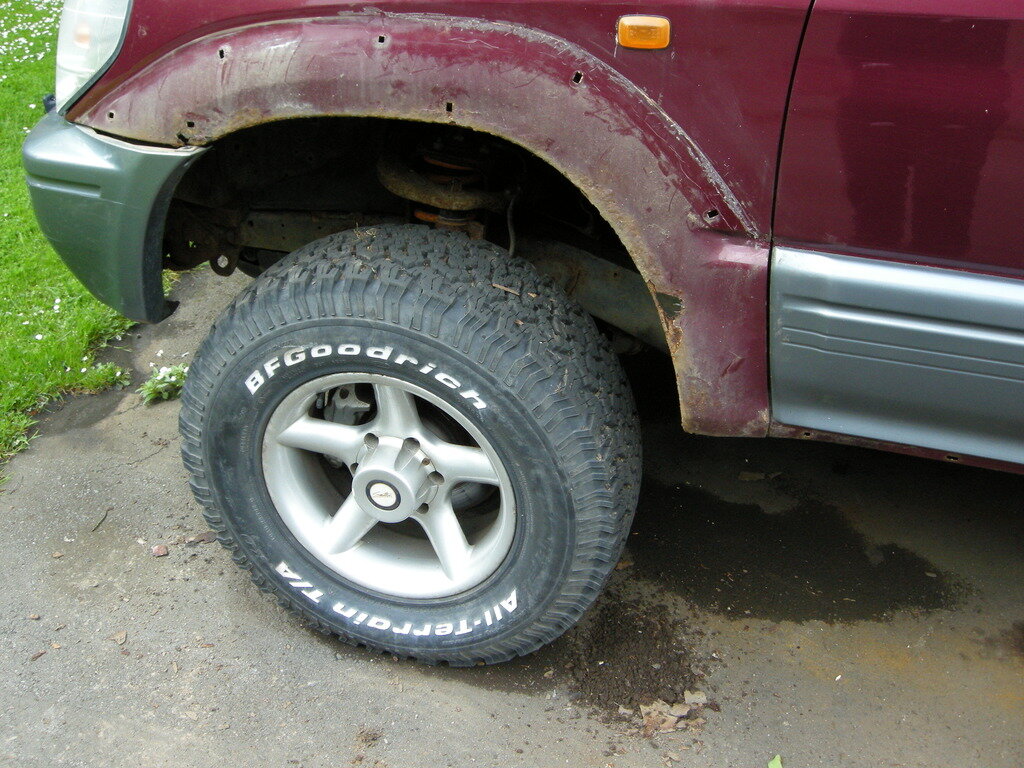
And the 'Tin Worm' has been busy on the front wing:


DSCN6193_zpsu9kyrbnl.jpg


DSCN6190_zps7bifyngt.jpg


Its very thin around the mounting stud holes and I really must replace it. Its a simple pressing that bolts on, so can't cost much . . . can it ??

£330 from Toyota and £350+ from Amayama :icon-surprised: , that's more than the sills cost.

Holy Moly, this fix is going to cost more than the truck is worth :doh:.

This is where the engine breathes from (I have removed the thin plastic moulding that covers it):

DSCN6198_zpsff90dksn.jpg

The voyage of exploration continues.

Bob.
 
One way to look at it is when it's done you know it's all good for the rest of your ownership and the knowing you've done it all your self,good progress so far keep up the good work.
 
A brave venture there, stay at it.

Repairs like this are never 'worth it' in cost, but your truck will be so much better than the average replacement vehicle, so think more of its 'value' to you.

good luck :thumbup:
 
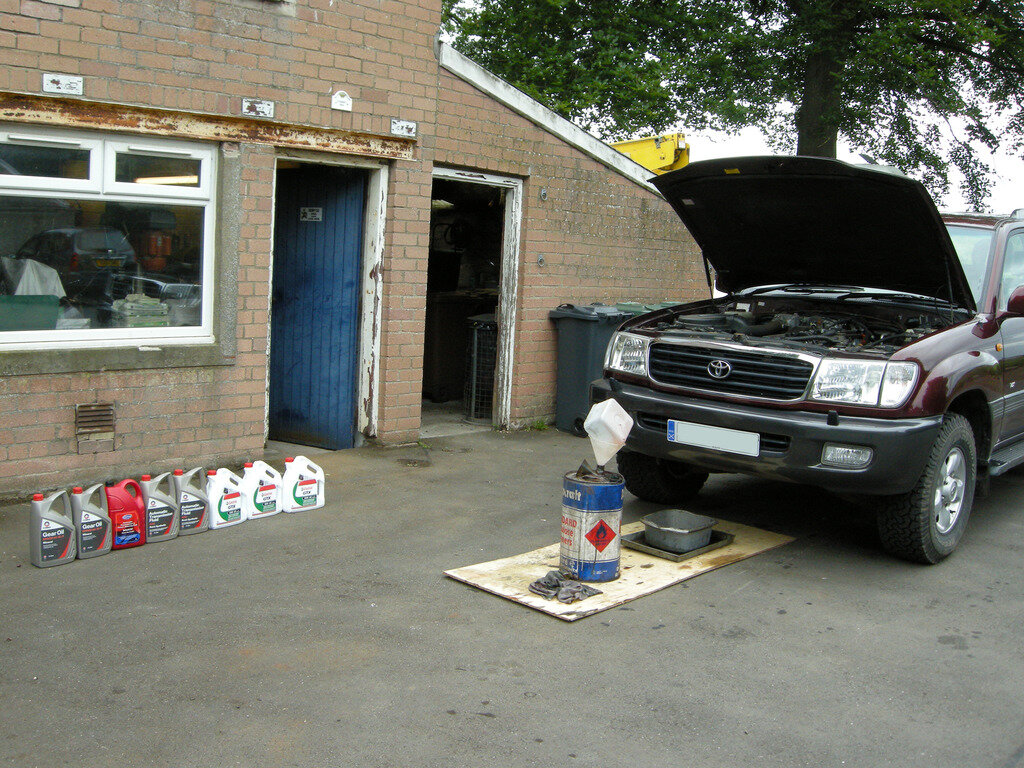
Today I had a rest from the '95' body work . . . . . . And spent the day changing all the oils and filters on the '100'.

This is no small undertaking.

DSCN6220A_zpsjwueuaqk.jpg

My 25 litre Waste Oil container was empty when I started - its brim-full now. I'll have to take it down the road to a neighbour's 250 gallon oil recycling tank tomorrow.

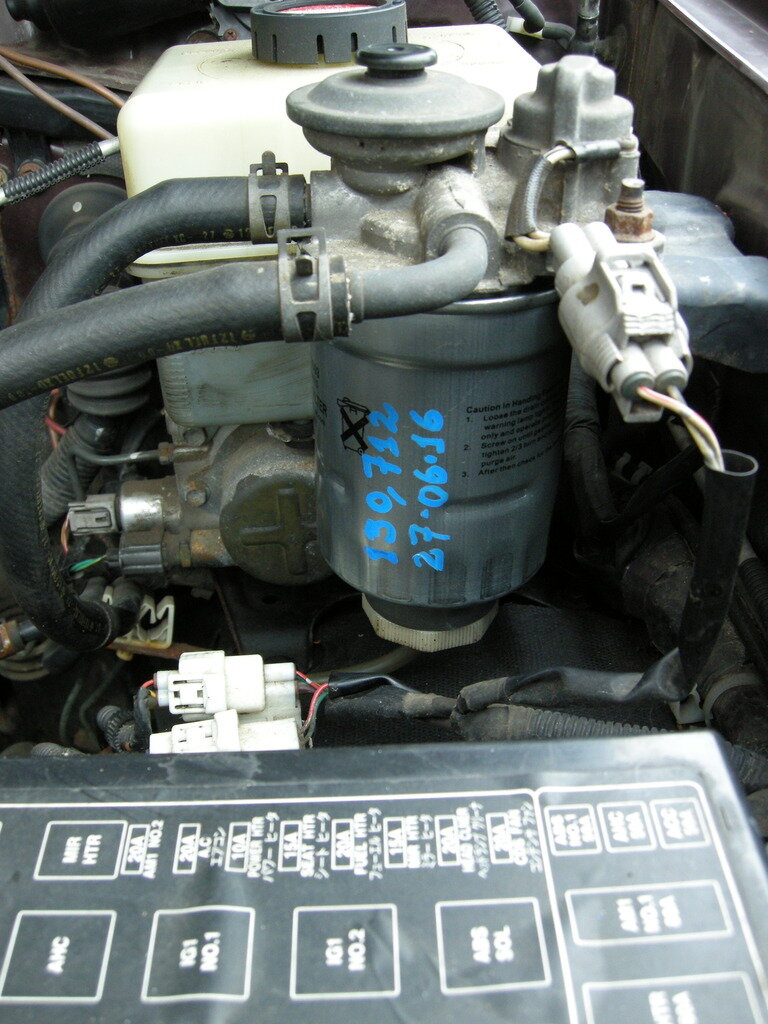
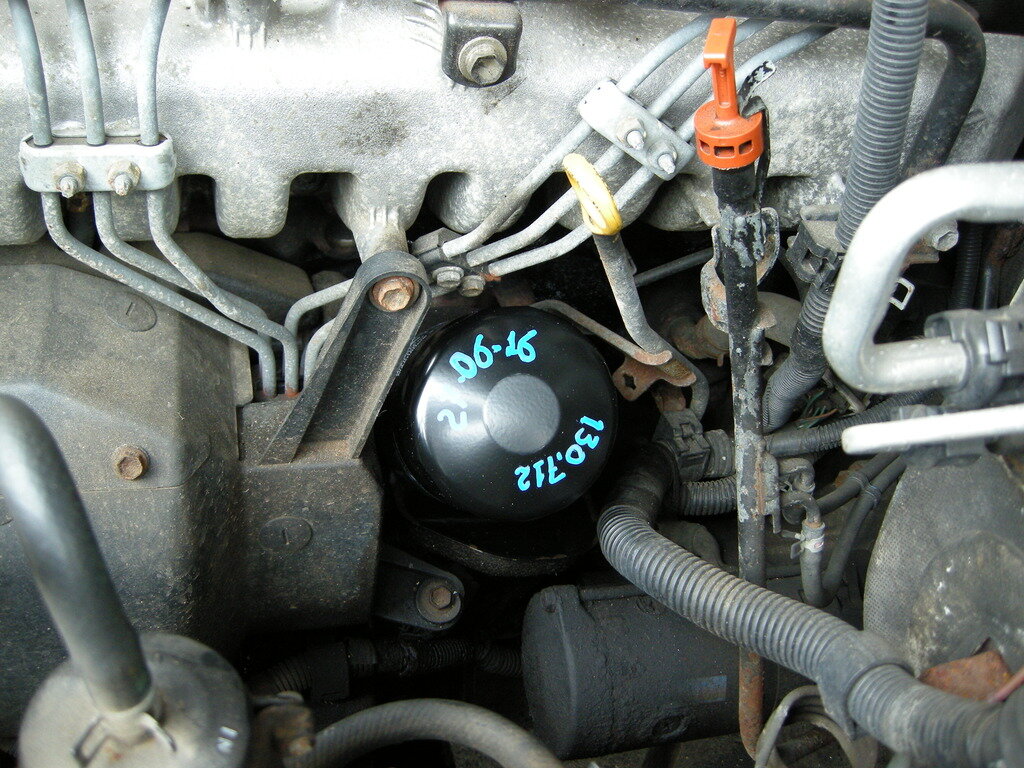
DOH! :icon-rolleyes:. I put the wrong date on the filter housings :lol:.

DSCN6221_zpso2sygpfj.jpg


DSCN6222_zpszk1pwsrv.jpg


I took it for a run before starting (I had already removed the under-trays) and then drained the Auto-Box . . Nice, clear, red oil. Refilled, ran it up again and went through the gears. Then drained it a second time and re-filled. I was getting 5 litres out of the drain plug at each attempt.

I thought that an old washing-up bowl would be large enough for the engine oil - WRONG, fortunately I had it standing in a large baking tray, on a sheet of ply :icon-wink:. These motors take 12 litres :shock:.

The Transfer Box and Front Axle oils were clean, with nothing on the magnetic drain plugs. The rear axle oil, however, was a silvery-grey colour with a large ball of fine grey paste on the magnet. I changed the oil fairly recently as well. Trouble ahead I fear, it must be towing those darned horses that's doing it.

Hmmm, I must replace those Workshop door frames and give the building a bit of a tidy-up. It was raining today, of course.

Bob.
 
wow Bob, that's one Rusty 90 series, how'd it get so bad in the first place?

Good luck on restoring those pieces. Have you thought about removing the body completely and sorting out all the rust?
 
Bob, you must really be attached to that 90 :fearscream: Admire your patience and effort, but I know I would not have the energy for that task
 
When I was replacing the rotted top arm mount on my 120 I noticed a hole in one of my sills. That's getting pumped full of wax after I've patched it. Seeing this just makes me realise the sill covers better come off this year, and do my best to protect both sides. Amazing job as usual.
 
Back
Top