Don't like the adverts? Click here to remove them
You are using an out of date browser. It may not display this or other websites correctly.
You should upgrade or use an alternative browser.
You should upgrade or use an alternative browser.
Who is doing what maintenance today?
- Thread starter warrenpfo
- Start date
Pink axel stands?
What's your point?
- Joined
- Oct 14, 2013
- Messages
- 3,416
- Country Flag
Guess there wasn't oneWhat's your point?
- Joined
- Oct 14, 2013
- Messages
- 3,416
- Country Flag
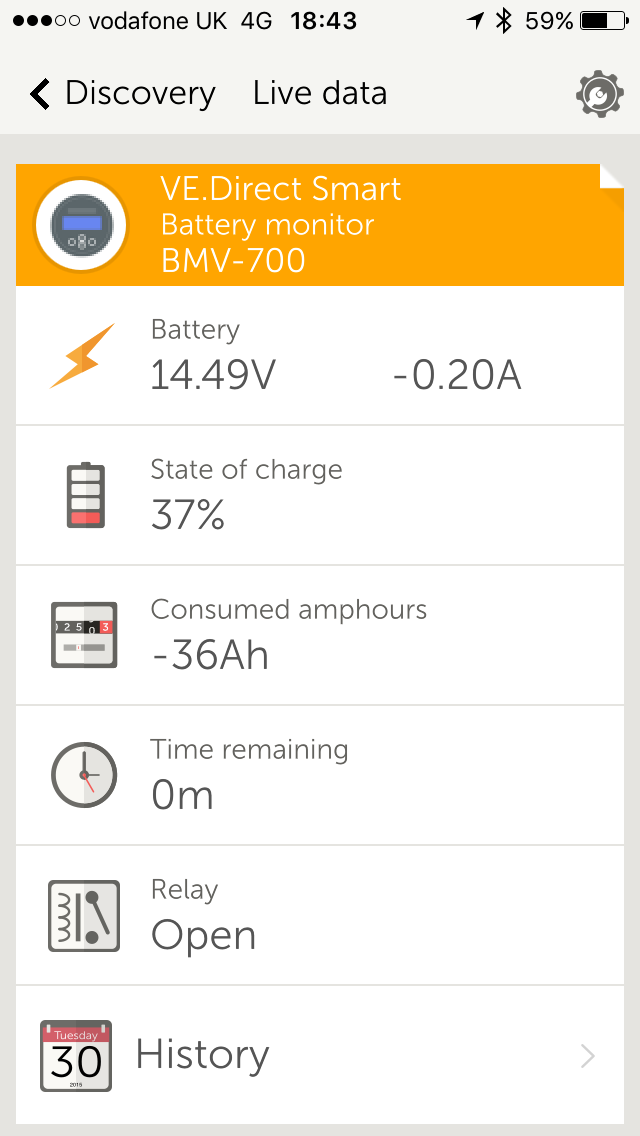
Tell me Chris, I've had the fridge running since yesterday, only some bottles of water in it so not full. Mr victron tells me it's gone from a 100% full down to 48%. I've since driven a 100 plus miles and it's now on 37%. I've turned the fridge off to see if it makes a difference. Have I wired something up wrong?
I've got another 50 miles to drive before I get home. Will update!

I've got another 50 miles to drive before I get home. Will update!
Don't like the adverts? Click here to remove them
Nick I can't tell you unless I know if you have entered all the correct setting. Clearly you have to tell the unit what battery you have. And then you have to charge it till it's fully charged, then zero it. You also have to set the discharge floor level - typically to about 60%
But that says you have pulled 37 Ah out of it. So the state of charge must be about right. But the fact that you have been driving it means that you should have more charge in there than that. But it's showing that you're pulling -.2 amps. You should be putting in + 20 amps
But that says you have pulled 37 Ah out of it. So the state of charge must be about right. But the fact that you have been driving it means that you should have more charge in there than that. But it's showing that you're pulling -.2 amps. You should be putting in + 20 amps
- Joined
- Oct 14, 2013
- Messages
- 3,416
- Country Flag
I thought it didn't look right. I shall go and have another look at the destructions. I can I tell if it's fully charged? I've only got a little ameter/ voltmeter thing. Or do I go borrow someone's magic charger? Thanks Chris
Well in terms of it being charged Nick, I'd say that a very long drive at 14.45v or yes a smart charger. You can zero the meter by pressing and holding the two buttons on the panel or via the app actually. The CTEKs should really ramp down when it's fully charged too just like a smartcharger. You should see the +amps going in dropping off as well when it's charged. Odd that yours in the screenshot show charging voltage but negative consumption. That doesn't make sense as the CTEKs are capable of 100 amp charge. Unless the engine wasn't actually running when you took the screen grab. It is possible that it's wired incorrectly but there aren't that many wires to get wrong.
- Joined
- Oct 14, 2013
- Messages
- 3,416
- Country Flag
I managed to reset it. Set the zero current. Started the engine up and it says its at -0.1 a The fridge is plugged in but not on, those two little usb sockets are permanently live. It just doesn't seem to be showing anything going into it.
Up until now i'd just been looking at the voltmeter on the fridge. I'm a little bit confused by it all. much reading to do!
This was with the engine running
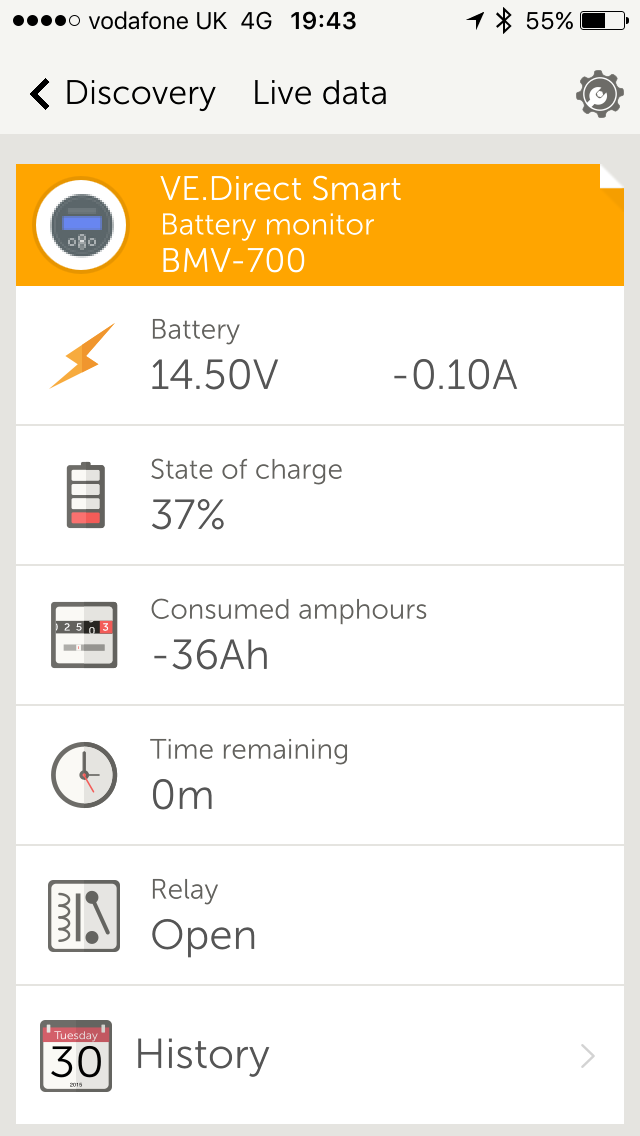
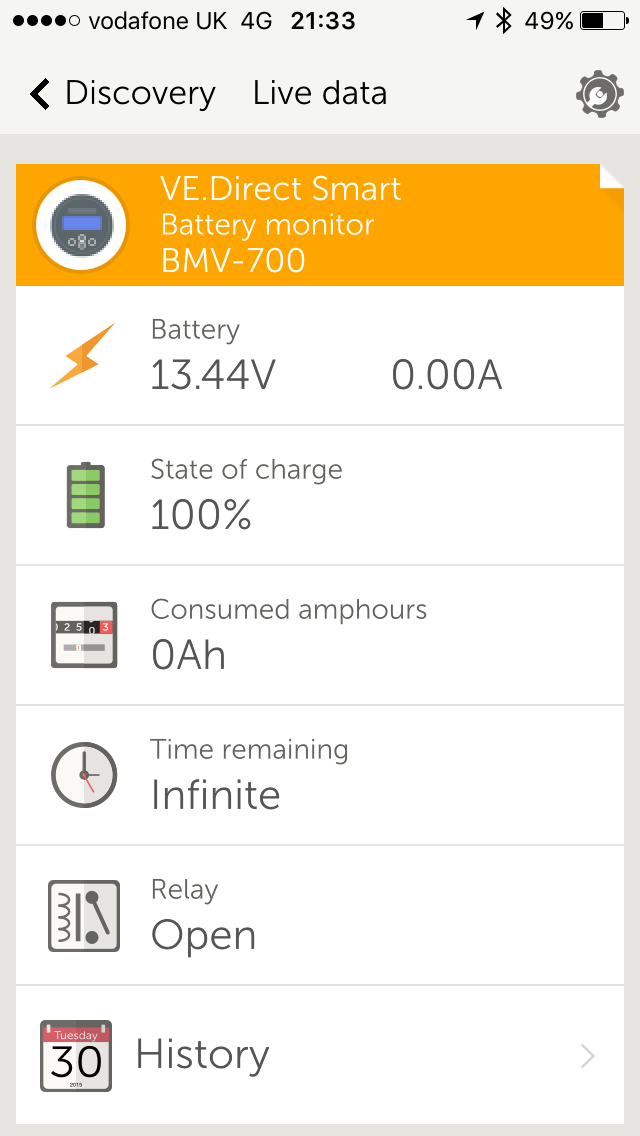
And this is as it is parked up for half hour after pushing buttons
I shall keep playing after work tomorrow. Must be something simple! Thanks Chris.
Up until now i'd just been looking at the voltmeter on the fridge. I'm a little bit confused by it all. much reading to do!
This was with the engine running

And this is as it is parked up for half hour after pushing buttons

I shall keep playing after work tomorrow. Must be something simple! Thanks Chris.
That second shot looks much better. Better on paper that is. But the charger has scaled down to the correct voltage, the battery is 100% and there's no charge going in. Let the fridge run for a bit now and see if it pulls some amperage out. It pulls about 3.5 amps when running but only runs for about 15 mins in an a hour. So you should only draw about 1 amp per hour total.
About right.
About right.
- Joined
- Oct 14, 2013
- Messages
- 3,416
- Country Flag
Ok. So I don't understand electrics! The answer to my problem was the earths/ negative cables. I've not had it up to the magic 20 amps but it's in the black. Woo!
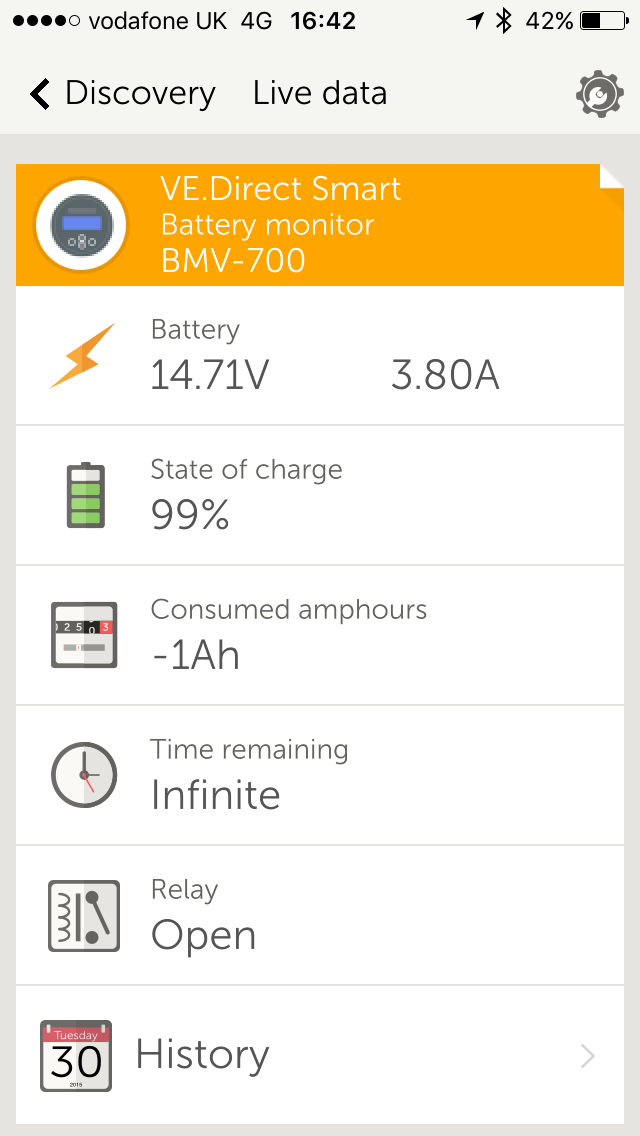
And put some juice back in
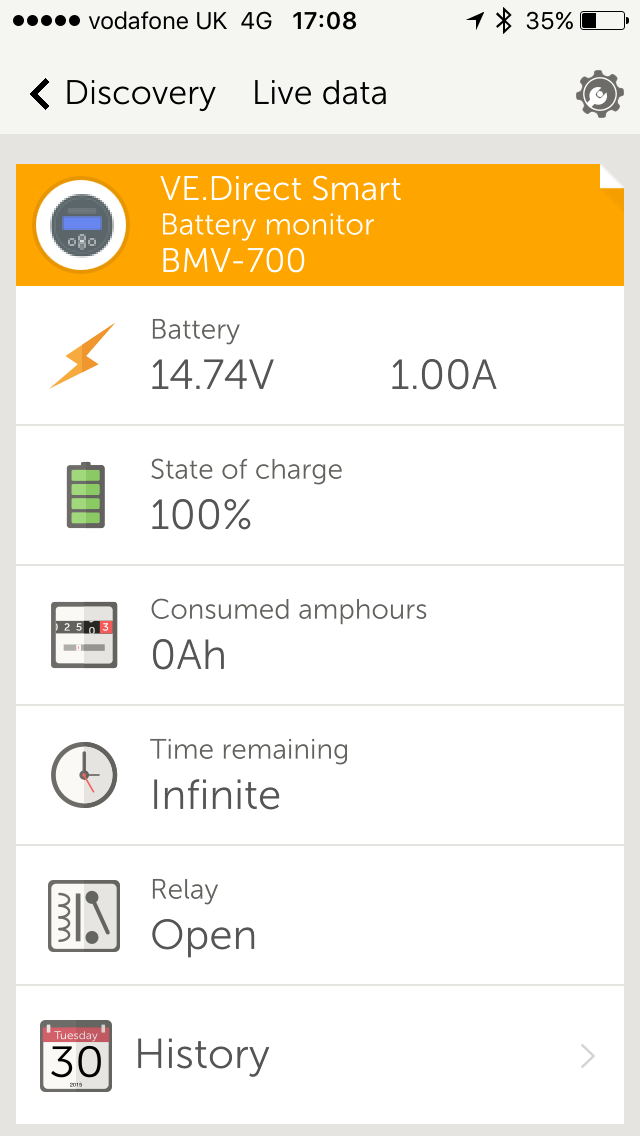
Edit. Won't bore you all with another screenshot. Left the fridge on all day. On the drive home it was sticking 19.5 amps back into the battery. Woo woo!

And put some juice back in

Edit. Won't bore you all with another screenshot. Left the fridge on all day. On the drive home it was sticking 19.5 amps back into the battery. Woo woo!
Last edited:
- Joined
- Feb 2, 2013
- Messages
- 17,191
Today's maintenance had me fall in love all over again .
A beautiful sunny day at last so mucking with the engine and wondering when i will get my intercooler back i decided to remove the bonnet and make the scoop hole a little bigger . Then the phone went "your intercooler is ready" and there i was an hour from home when the heavens opened with a vengeance .
Oh well i thought my drill and grinder will dry and so will the bonnet mat so nothing to worry abou my intake and turbo are open and exposed
  nothing i could do
I gets home and the thunder had woken the mrs (works nights) and in fear my engine electrics would get wet she cut a chunk out of my trailer tent awning and covered the engine bay .
You have to love them don't you even if they usually get it right for the wrong reasons
A beautiful sunny day at last so mucking with the engine and wondering when i will get my intercooler back i decided to remove the bonnet and make the scoop hole a little bigger . Then the phone went "your intercooler is ready" and there i was an hour from home when the heavens opened with a vengeance .
Oh well i thought my drill and grinder will dry and so will the bonnet mat so nothing to worry abou
 my intake and turbo are open and exposed
  nothing i could do
 I gets home and the thunder had woken the mrs (works nights) and in fear my engine electrics would get wet she cut a chunk out of my trailer tent awning and covered the engine bay .
You have to love them don't you even if they usually get it right for the wrong reasons

- Joined
- Feb 2, 2013
- Messages
- 17,191
I want to put the intercooler on but the open intake did get wet and there's no telling how wet . Heat gun has been blowing warm air in for a couple of hours and i'm thinking what if i pull a plug on the fuel pump and crank it over .
There's no harm in doing this with the intake open is there ?
There's no harm in doing this with the intake open is there ?
- Joined
- Mar 11, 2014
- Messages
- 1,506
I'm sure pic laden instructions thread would have been well appreciated on here Flint , i guess its too late for that now
A bit sketchy on pics (slow upload here), and far from definitive, but a few bits and bobs. Pretty much straight forward to get the diff out, jack up, stands under the chassis (with a bit of 2x1 to save the finish) and wheels off. Undo the four bolts that hold the lower ball joints to the wishbones and ease the drive shafts out of the diff and extension tube, I started them off with a cold chisel (gently) and popped them out with a crow bar. Disconnect the prop shaft after marking it and the diff flange (probably not really necessary if the pinion and crown wheel are coming out anyway, will check prop phase on reassembly). As my preload was out, I then took the diff flange off to make it easier to manoeuvre out. Get a trolley jack under the diff to take the weight and undo the two front mount bolts and the hex bolt (12mm) at the rear. The thread that sticks down from the rear mount through the cross member means the rear of the diff has to be lifted before it'll move forward, clearance with the diff flange on would make this pretty tight. Lower diff on the jack and have a cup of tea. The manual will now tell you, after taking the seal and splash ring out, to remove the outer bearing, special tool needed which I haven't got, so I pressed the pinion out after removing the extension tube, side cover (ten bolts) and diff case. This is what you'll find with the cover (side bearing retainer) removed.
It seems that I've been lucky, ring gear and pinion look fine, no chips or excessive wear (odd reflections from the flash) diff gears fine.
:
Pinion bearings and races not so good, so will be replaced together with a new crush sleeve. Side bearings and races seem fine, so I think I'll leave things be until it's all back together and the backlash and contact pattern are checked. Well, it's a start anyway
Beau
Well-Known Member
- Joined
- Jan 28, 2011
- Messages
- 2,014
- Country Flag
I want to put the intercooler on but the open intake did get wet and there's no telling how wet . Heat gun has been blowing warm air in for a couple of hours and i'm thinking what if i pull a plug on the fuel pump and crank it over .
There's no harm in doing this with the intake open is there ?
No harm in doing so, the turbo isn't functioning or pushing any air in during the cranking process.
- Joined
- Feb 2, 2013
- Messages
- 17,191
Cheers Beau i figure the turbo not being connected to the intake can only spit water back at the sky and the intake can't suck more air in than room will allow so fingers crossed i should be safe , however when my tenth soaking of the day blew my extension lead i thought F it put the bonnet back on and went to the pub so we will find out tomorrow .
- Joined
- Mar 11, 2014
- Messages
- 1,506
95 front diff. Decided to replace the side bearings as well while it's apart. The plate washers behind the side bearings are different thicknesses, 2.45mm and 2.23mm, no signs of damage so I'll put them back where they came from for the set up. Here are all the bits cleaned up and ready for new bearings. I thought that I'd try Surfex HD for the clean up, worked well.

silvercruiser
Well-Known Member
- Joined
- Mar 22, 2010
- Messages
- 3,368
Washed and leathered off again.


