Don't like the adverts?  Click here to remove them

An Ultra slow Ultra4 build

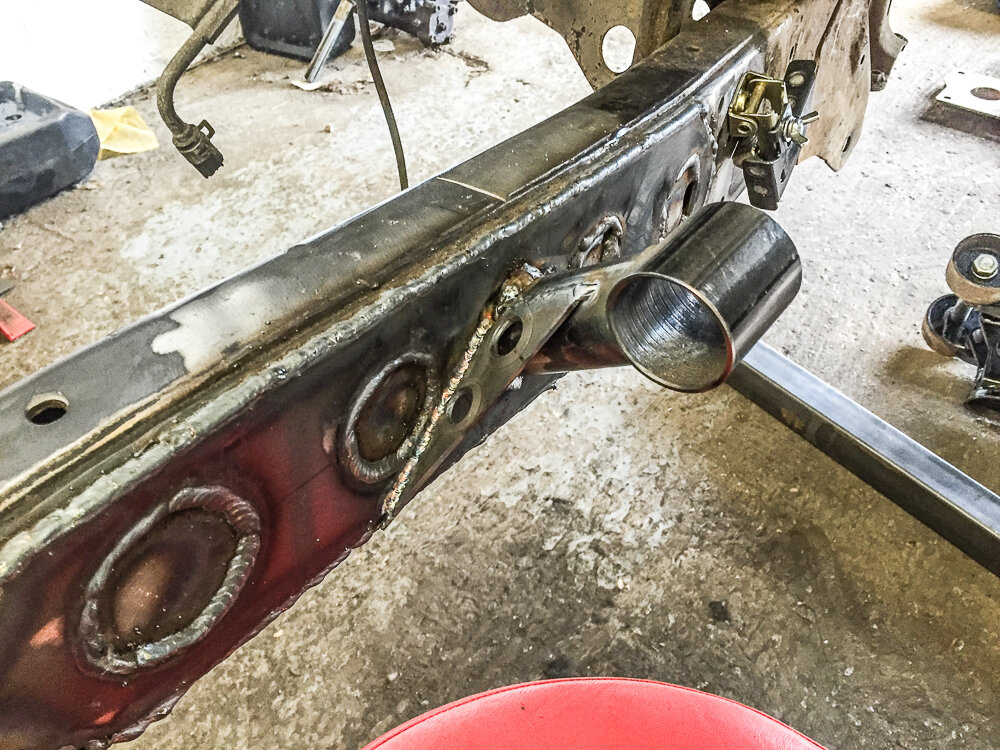
Looks good so far but ideally you shouldn't make the plates square/rectangle as the heat affected zone is running in a straight line vertical through the chassis.

I'm sure they will be fine in this instance but if you need to plate the chassis for any other mounts etc. a stronger way would be how they have done it below. :icon-ugeek:

(Search on Google images for "Chassis Fish Plates ")

View attachment 99027

Also having bigger holes helps as you can get a longer bead of weld in there.

Get yourself a TIG Finger then you can rest your hand right next to where you are welding. I got one for my TIG test and it was a huge help!

http://www.ebay.co.uk/itm/Tig-Finge...hash=item339aeb9f97:m:m-15aA9j2ABE4c2USjn3l9w

MIG will obviously be a lot quicker but it will be no where near as strong as TIG, as with MIG you arnt getting 100% fusion like you are with TIG.

Also unless you are turning the chassis on its side for welding its also going to be tricky to get perfect welds with the MIG in the vertical up and over head positions, where as TIG seems to be almost as easy in those positions as the horizontal position, as gravity doesnt seem to affect the weld pool in the same way as it does MIG.

So my advice would be to get a TIG finger and weld the plates on with the TIG. :thumbup:


Thanks mate. :thumbup:

Hey ben,

good tip regarding the fish plates, I hadn't thought about that. Thanks.

I have have a Tig finger which has helped. Think I just need more practic.
 
:thumbup:

Where possible try and sit and/or rest yourself in a comfortable position. Being in a comfortable position before you light up makes a huge difference to the control you have over the torch and the weld pool. :icon-ugeek:

One thing that might also help is a water cooled torch. Not only do they obviously stay a lot cooler so are nicer to hold (especially good when welding alluminium) but they are also a lot smaller than regular torches so are nicer in your hand and easier to maneuver.

I keep meaning to make a water cooler for mine. :icon-biggrin:
 
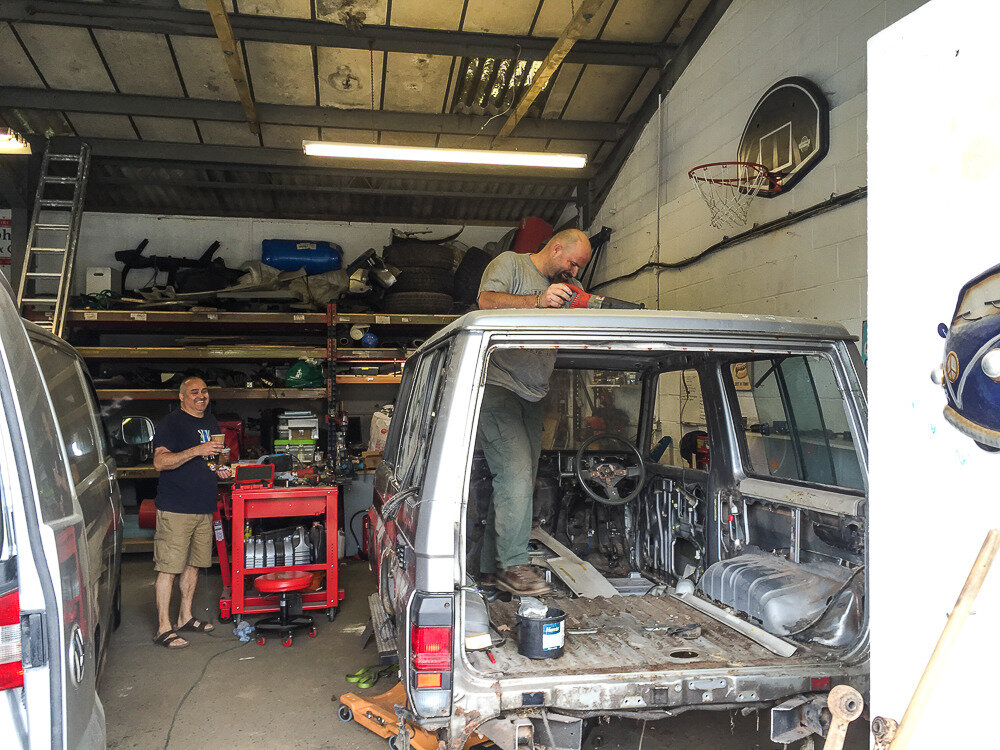
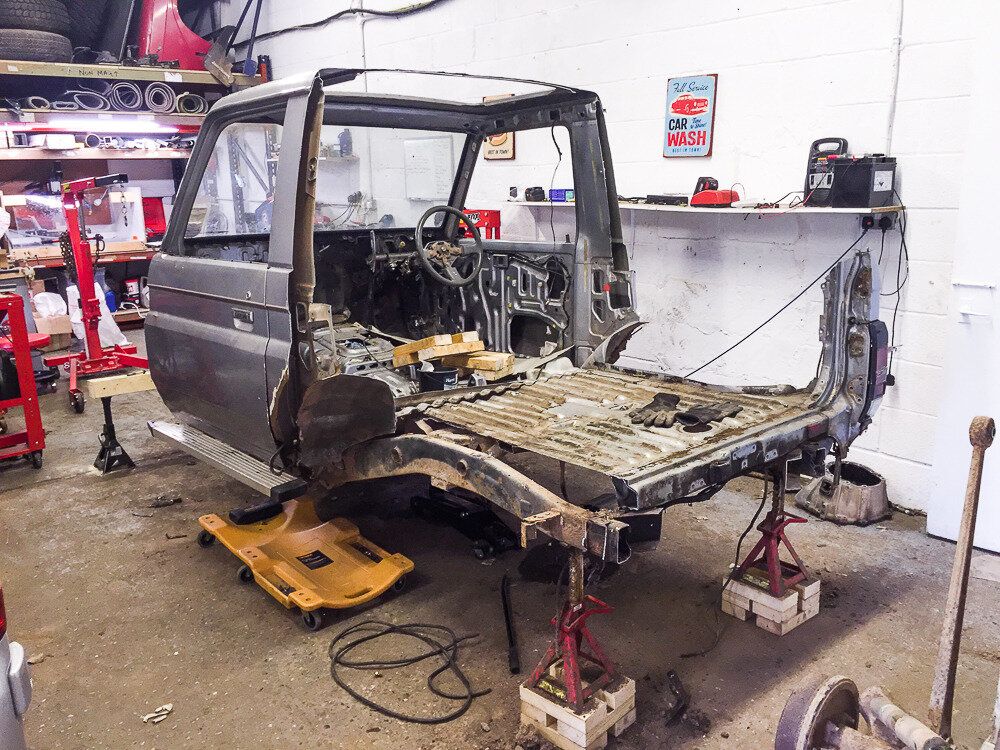
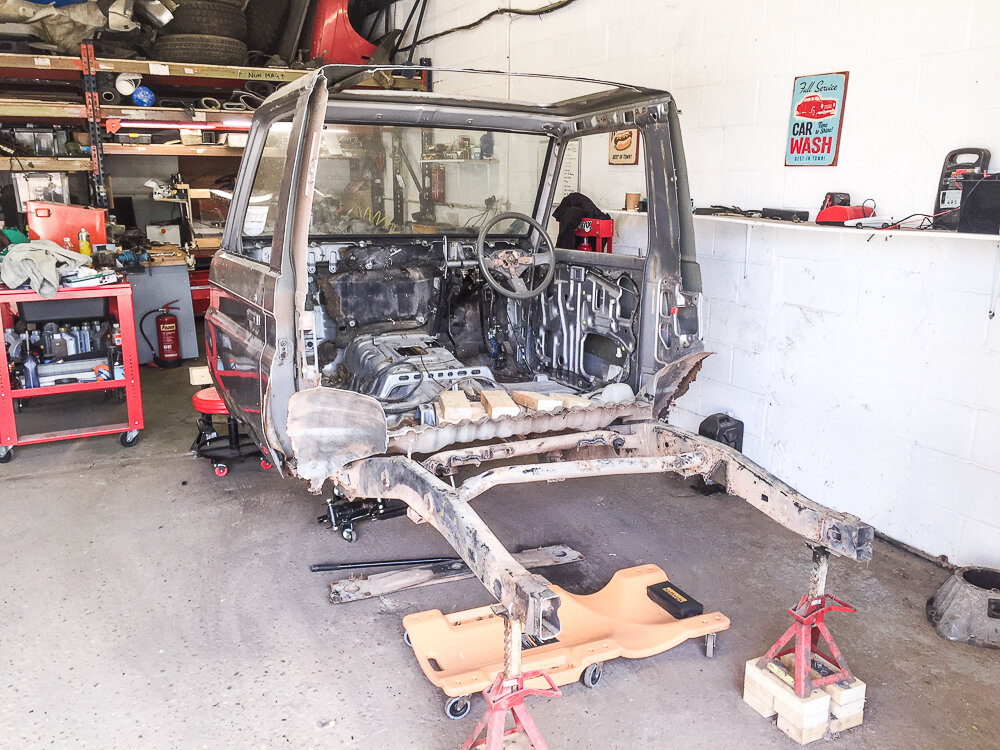
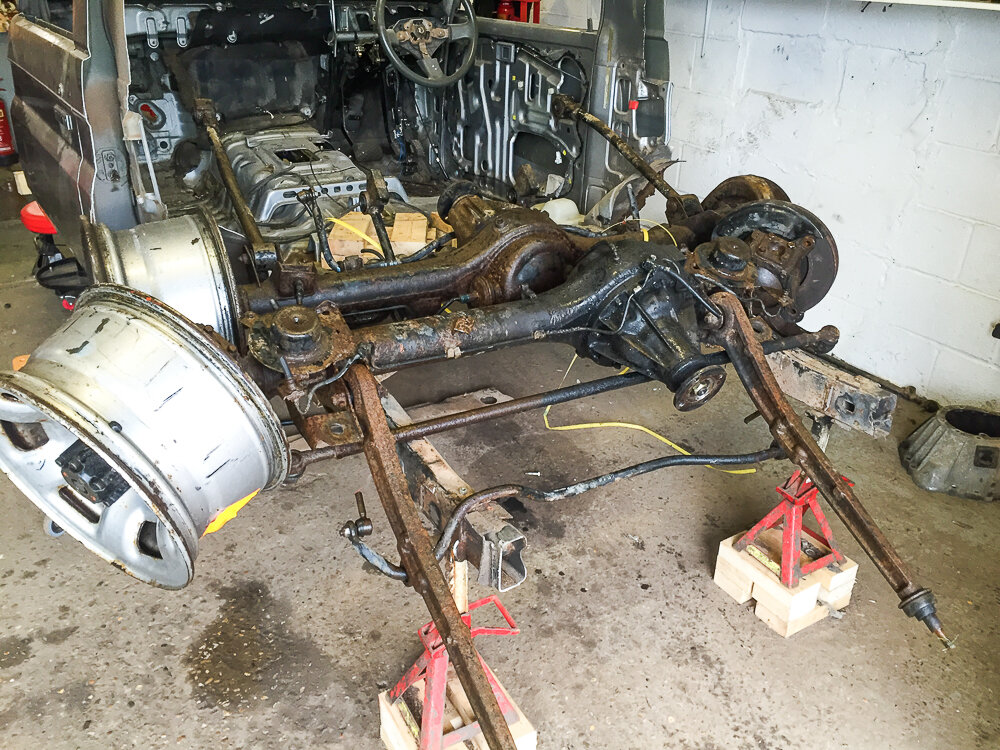
Ok so today was a very productive day. I had Erik (@BlackBetty) lend a hand today. While I was faffing about he removed the rear axle and cut most of the back half of the body off...

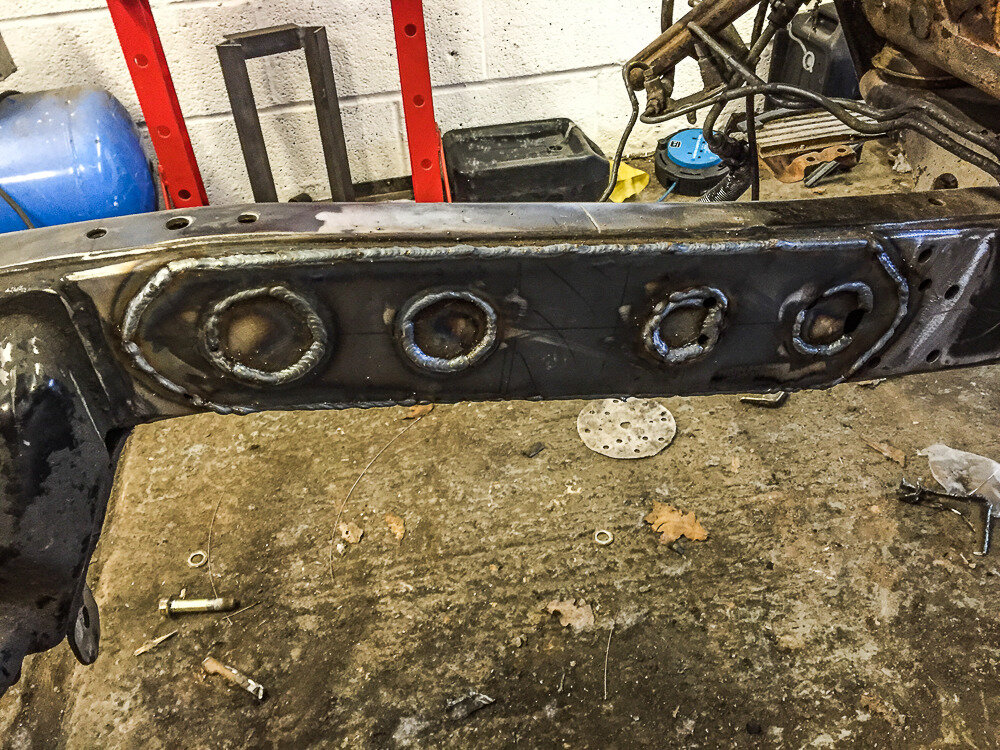
I fishplated the other chassis rail and I confess I MIG'd it. Which I sort of think in hindsight maybe I should have stuck with the TIG but is was quick. I had the volts turned up pretty high and felt I achieved decent penetration. Time will tell I guess...

No Vertical welds this time and bigger holes (Ben I hope you are proud...ish, just ignore the third hole from the left o_O)
IMG_2696_zps0ncldzjw.jpg

IMG_2697_zpskahbf57b.jpg

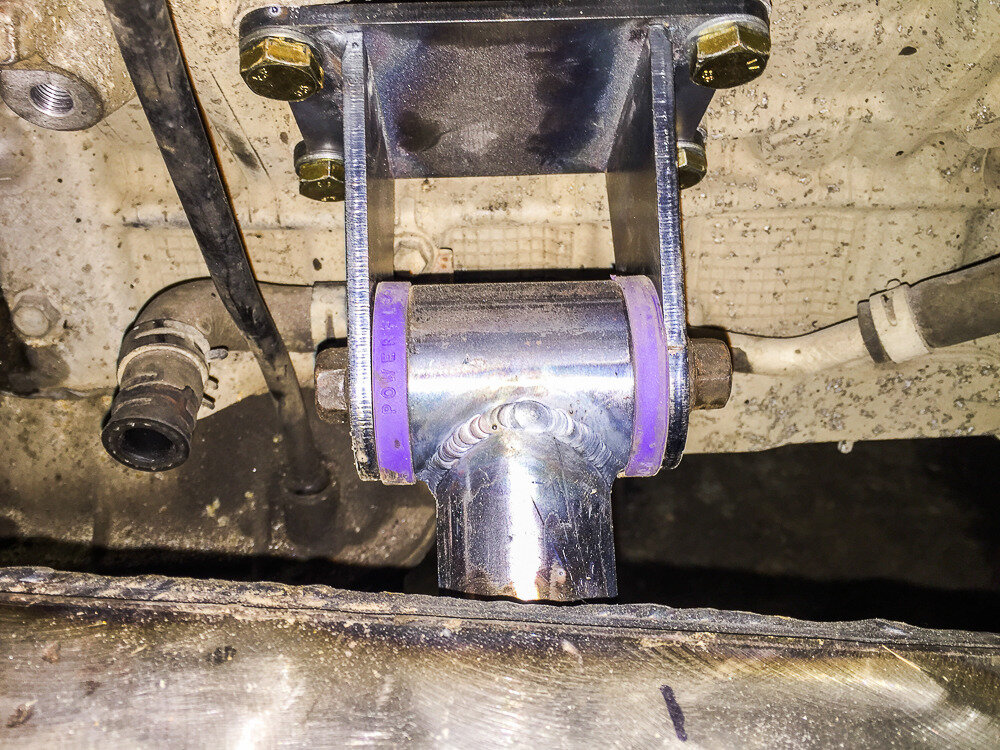
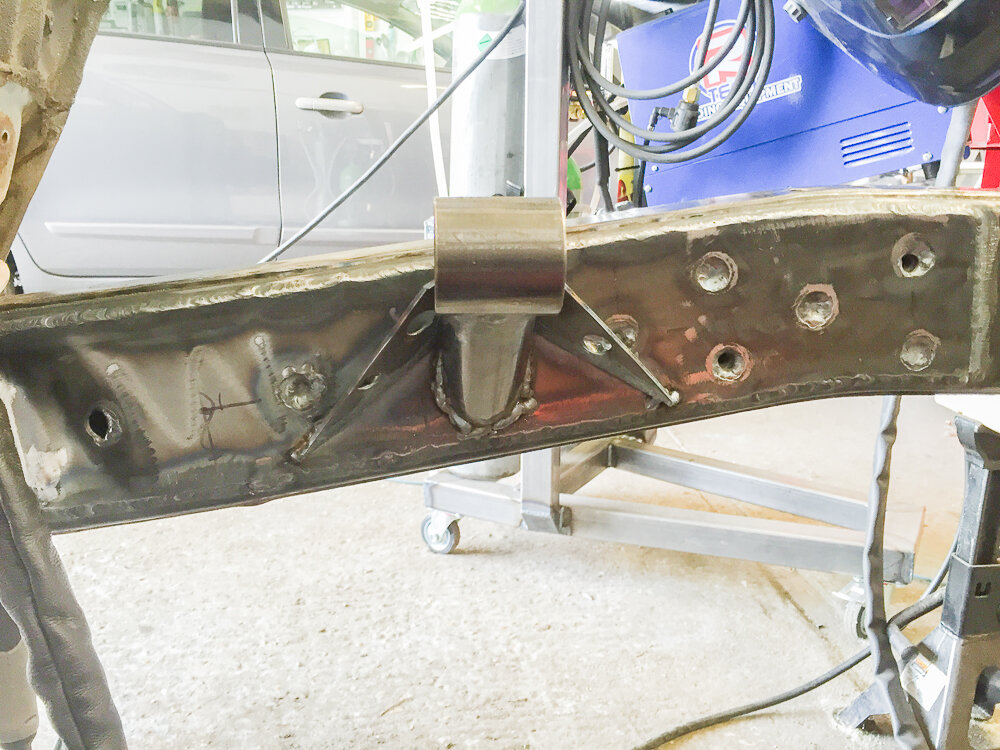
Then went onto weld up the mounts, TIG'd these on my bench...
IMG_2703_zpszovjob6j.jpg

Engine getting comfortable.
IMG_2706_zpsmq2ho2zy.jpg
@BlackBetty hard at work.
IMG_2698_zpsi7spqgck.jpg

Chop Chop yo!
IMG_2708_zps6krvrx8y.jpg
 
Last edited:
Nice work man. :thumbup:

Are you going to extend the wheel base?

If it was me (and this is something I'm planning with my RJ70 build when I eventually turn it into a similar vehicle to the one your building here) I would extend the wheel base slightly by mounting the rear axle a bit further back as I believe this will make the vehicle a lot more stable off road, both with driving up and down steep climbs and drop offs and at high speed on loose surfaces like gravel, to make the vehicle less twitchy!

I'm thinking maybe 100-150mm. :think:

Is this the kit you bought to fit the engine?

http://www.ebay.com/itm/1uz-1uzfe-toyota-Bellhousing-R150-R151-R154-gearbox-/282015564836

Do you have a link to the ECU you also bought? :icon-biggrin:
 
H
Nice work man. :thumbup:

Are you going to extend the wheel base?

If it was me (and this is something I'm planning with my RJ70 build when I eventually turn it into a similar vehicle to the one your building here) I would extend the wheel base slightly by mounting the rear axle a bit further back as I believe this will make the vehicle a lot more stable off road, both with driving up and down steep climbs and drop offs and at high speed on loose surfaces like gravel, to make the vehicle less twitchy!

I'm thinking maybe 100-150mm. :think:

Is this the kit you bought to fit the engine?

http://www.ebay.com/itm/1uz-1uzfe-toyota-Bellhousing-R150-R151-R154-gearbox-/282015564836

Do you have a link to the ECU you also bought? :icon-biggrin:

Yep that's the kit I went for.

I am using the stock ECU for now. I wanted to go with a link G4+ Xtreme but it's pretty pricey. Priority is to get the truck running and built to a level I can compete. I may upgrade at a later stage to the link unit or possibly a Haltec if it'll net me an increase in performance.

I am going to increase the wheelbase but I was planning on moving the front axle forward and that way have the engine and gearbox closer to the centre of the vehicle.
 
Don't like the adverts?  Click here to remove them
Do the Nissan axles come locked or what you going to do with them? Thinking of starting a silly build next year.
 
Unless your planning on hydro steer and no front panhard rod you may find your limited with how far you can push the front axle forwards, before those 2 components become an issue, thats what I've found anyway. :icon-ugeek:

I like your thinking though regarding having the engine more central in the vehicle! That should make it much more balanced when you start jumping it! :icon-twisted:

If the Nissan Patrol axles are from a UK car they will have a rear locker. Are you going to fit a front locker. :think:
 
The axles I have ordered are coming from a GR patrol which I believe is LHD so am not to sure whether it will come locked or LSD or niether.

Not going going full hydro, not allowed to for modified class, but I will be doing hydro assist of sorts. I have been doing some research on what the US guys are doing and have come across some interesting setups that seem to work well. I'll elaborate more on this as I get into the steering setup.

Once i I have the axles I'll be able to start mocking things up and try and figure out how to make everything fit.
 
Had another productive day today.

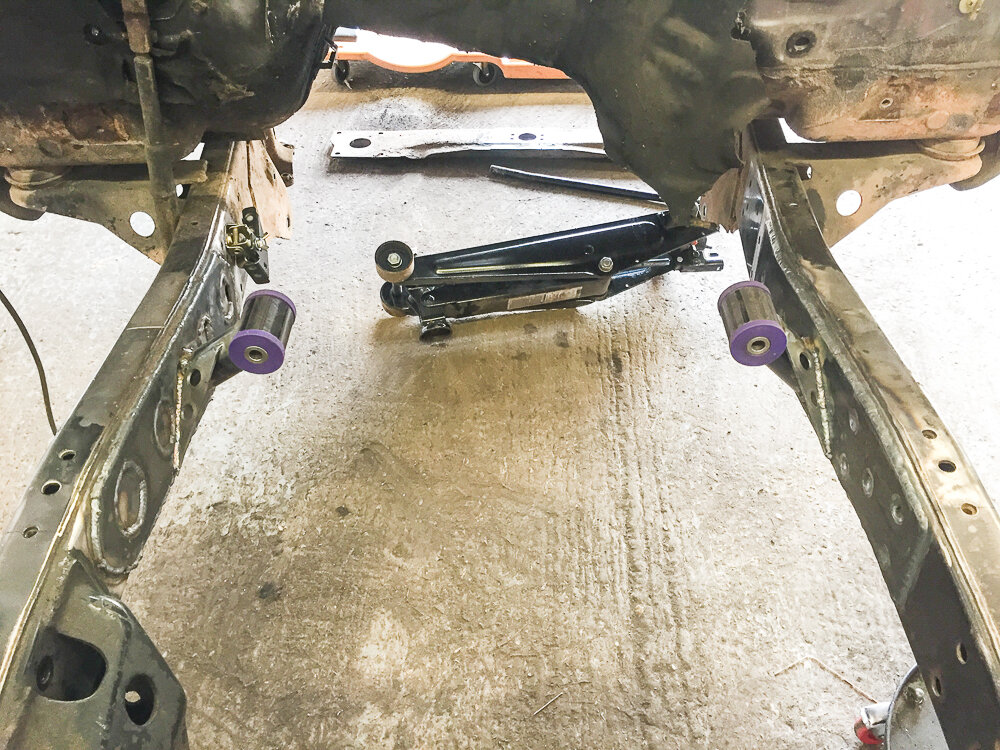
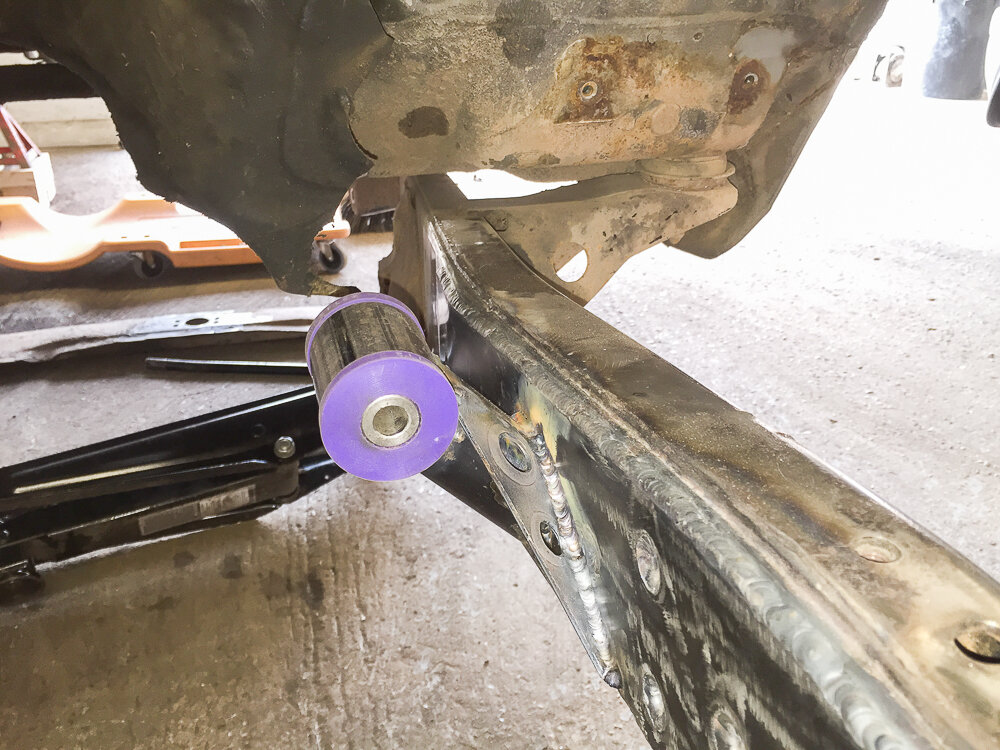
I made gussets for the engine mounts and welded them in. So the engine mounts are now finally done.
IMG_2730_zpszno3dik8.jpg

IMG_2735_zpswikgknns.jpg

IMG_2739_zpsyqofo31z.jpg

IMG_2740_zpsmjsaqfm1.jpg

Whilst I was doing that Erik was cutting the rest of the rear floor out.

IMG_2743_zpshf7c0zau.jpg

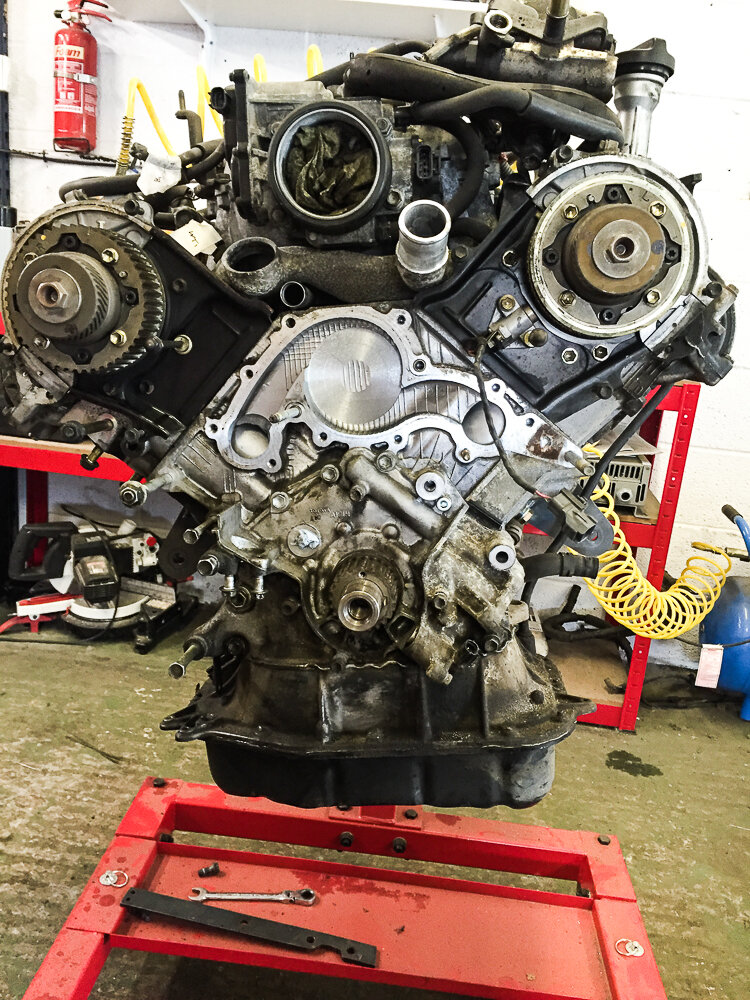
And now it's onto servicing the engine. Plan is to replace the Cam belt, new water pump, new tappet cover gaskets and new idler pulleys.
 
Nice work mate. :thumbup:

How far have you managed to move the gearbox/transferbox/engine back by? :icon-biggrin:

Another thing I was thinking was............................

Do the Patrol axles you've bought have the diff off set to the same side as the 70 series ones you've taken off? :think:
 
Nice work mate. :thumbup:

How far have you managed to move the gearbox/transferbox/engine back by? :icon-biggrin:

Another thing I was thinking was............................

Do the Patrol axles you've bought have the diff off set to the same side as the 70 series ones you've taken off? :think:

There is about 10-15mm clearance between the engine and bulkhead. The gearbox is in its stock location. Without cutting out the bulkhead it's as far back as it's going to go for now.

I have been been reading up on some interesting steering setups the US Ultra4 guys that race modified class are running using a double ended ram that acts as a track bar at too. So as soon as I get the axles I'll start looking at how I'm going to move the axle forward.

Axle wise, as far as I am aware the patrol rear axle had the diff in the centre and the front axle is offset to the right. So not too dissimilar to the 70's axles.
 
The axles came today and turns out the rear has a locking diff so I'm stoked. These do look pretty beef. They are definitely bigger than the 80's axles. They didn't come with brake callipers but I am not too fussed about that. I managed to pick these up for a steal so no complaints from my side.

IMG_2761_zpsmprzmnmz.jpg

IMG_2762_zps61yht1g4.jpg

This weekends mission, after servicing the engine is to start cleaning these bad boys up. I'll make sure I take a few side by side pics of the axles and CV's compared to the set of 80 series ones I have.
 
Well hello stranger!

Im not sure how to take that. Yes it's a Landcruiser that's a plus it has going for it...

Mine will be way cooler!
 
No doubt it will be mon ami :sunglasses:

I loved the front tube & infill work a lot!!! Thought it might offer inspiration if you needed any ;)
 
Well, not much in the way of progress this weekend. I'm busy renovating a flat which has been taking up my time...

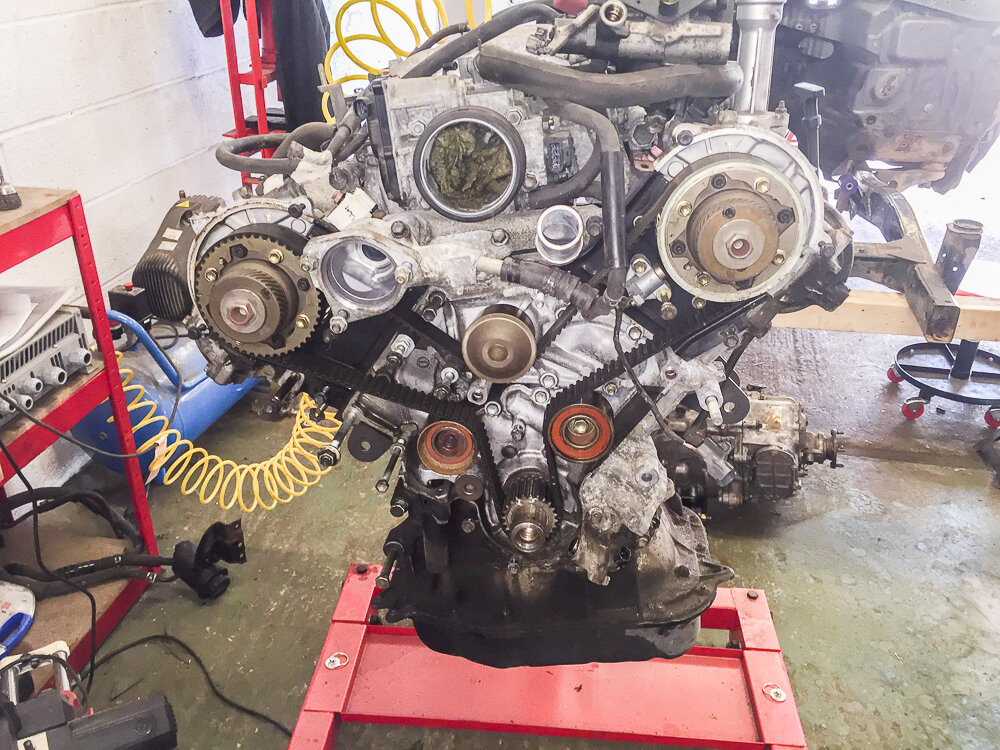
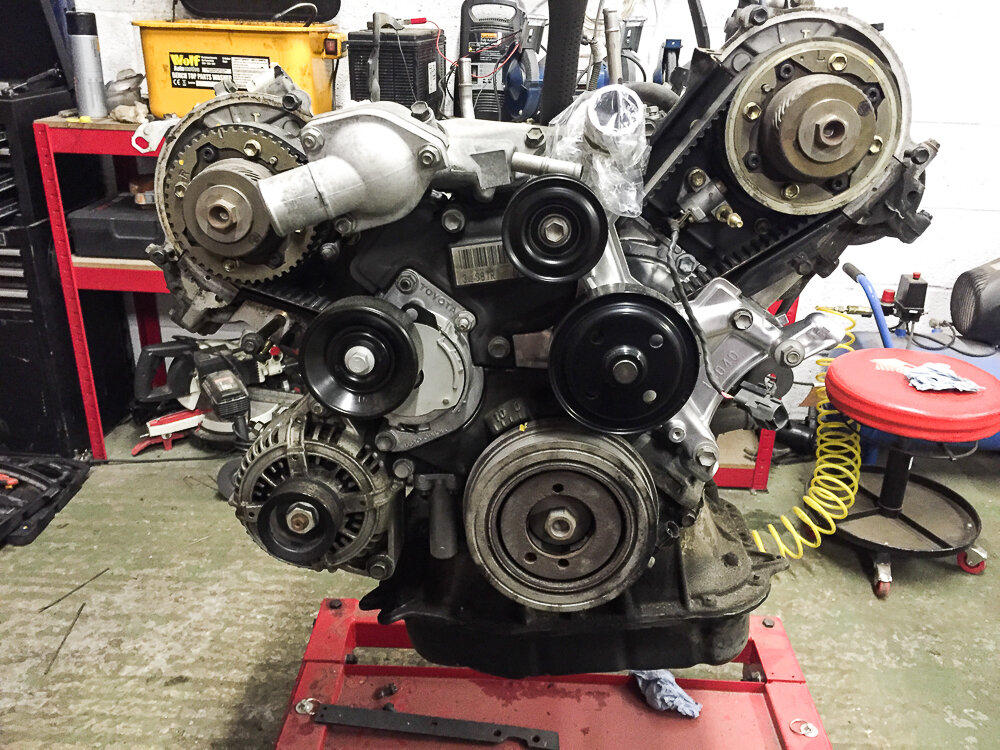
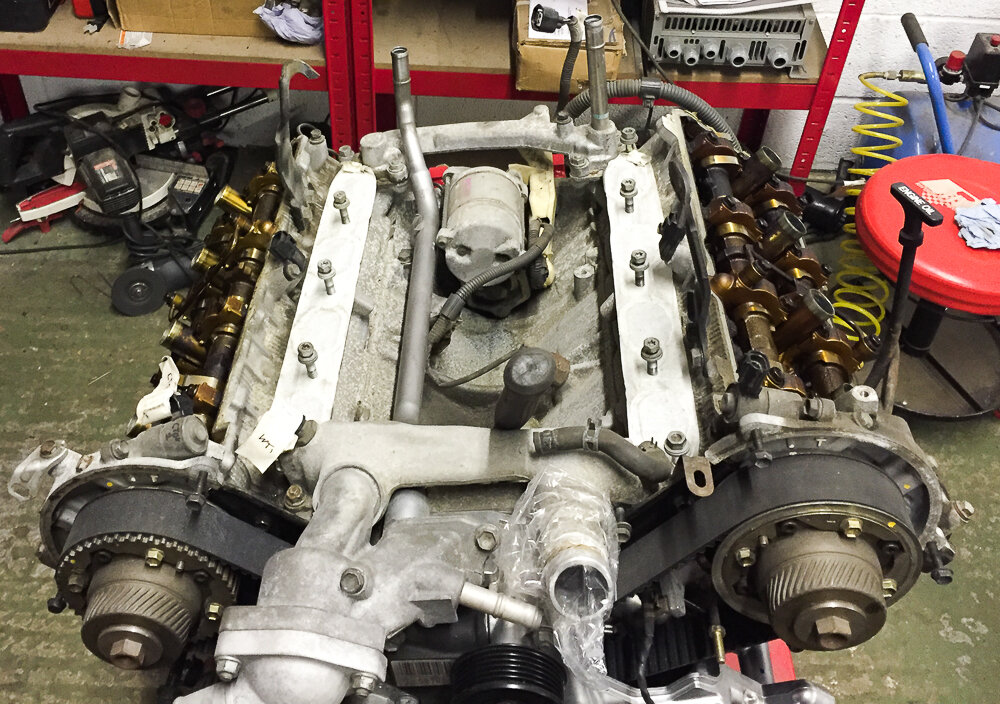
I did however have time to finish changing the cam belt, which I started last weekend. While I was in there I replaced the water pump too, which was probably not necessary based on how clean everything is inside the motor
IMG_2824_zpsw1qlb0yo.jpg

IMG_2745_zpsfmivgvgi.jpg

I went ahead and replace all of the idler pulleys also...

IMG_2877_zpseac1zyk6.jpg

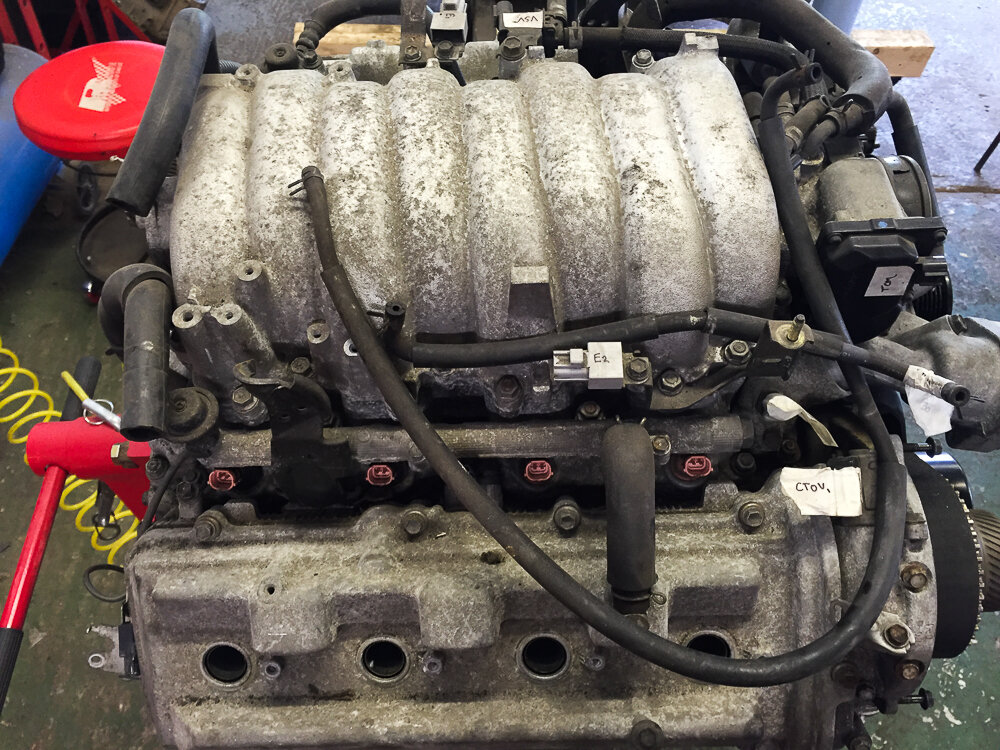
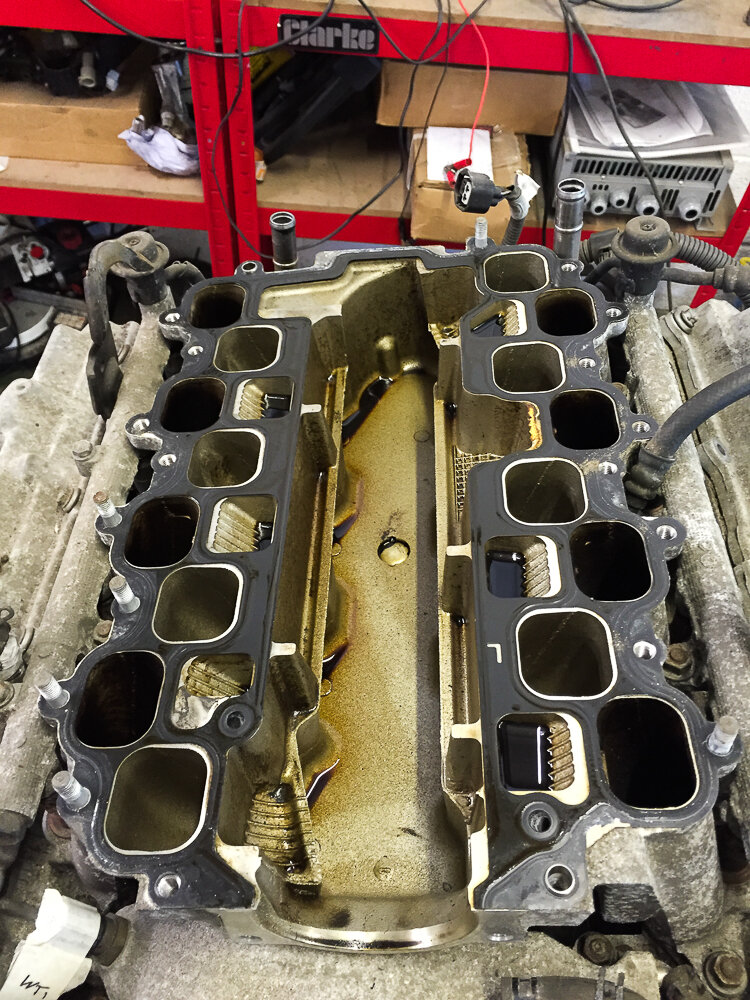
Then removed the intake manifold to give things a good clean and also to get to the started motor to inspect it.

IMG_2828_zpsp9rkindy.jpg

IMG_2833_zpsf0bqotjz.jpg

I noticed that there seems to be a fair amount of oil gathered in the galleys (Not sure what else to call it) but apparently this is normal on the VVTi motors?

IMG_2878_zpsnjdiuvrd.jpg
 
Last edited:
Nice work. :thumbup:

Are you going to change the spark plugs? :think:

Have you thought about what tyres you may run? Maxxis Treps seem to be the most popular choice in the comp scene at the moment. :icon-twisted:
 
Yo, yes new spark plugs will be going in.

I'm leaning towards Treps. Will probably pull the trigger on them in the next month or two. They are pricey though...
 
Back
Top