Don't like the adverts?  Click here to remove them

Home made winch bumper

GeorgeG

Well-Known Member
Joined
Nov 19, 2014
Messages
354
Country Flag
bulgaria
Hello all,
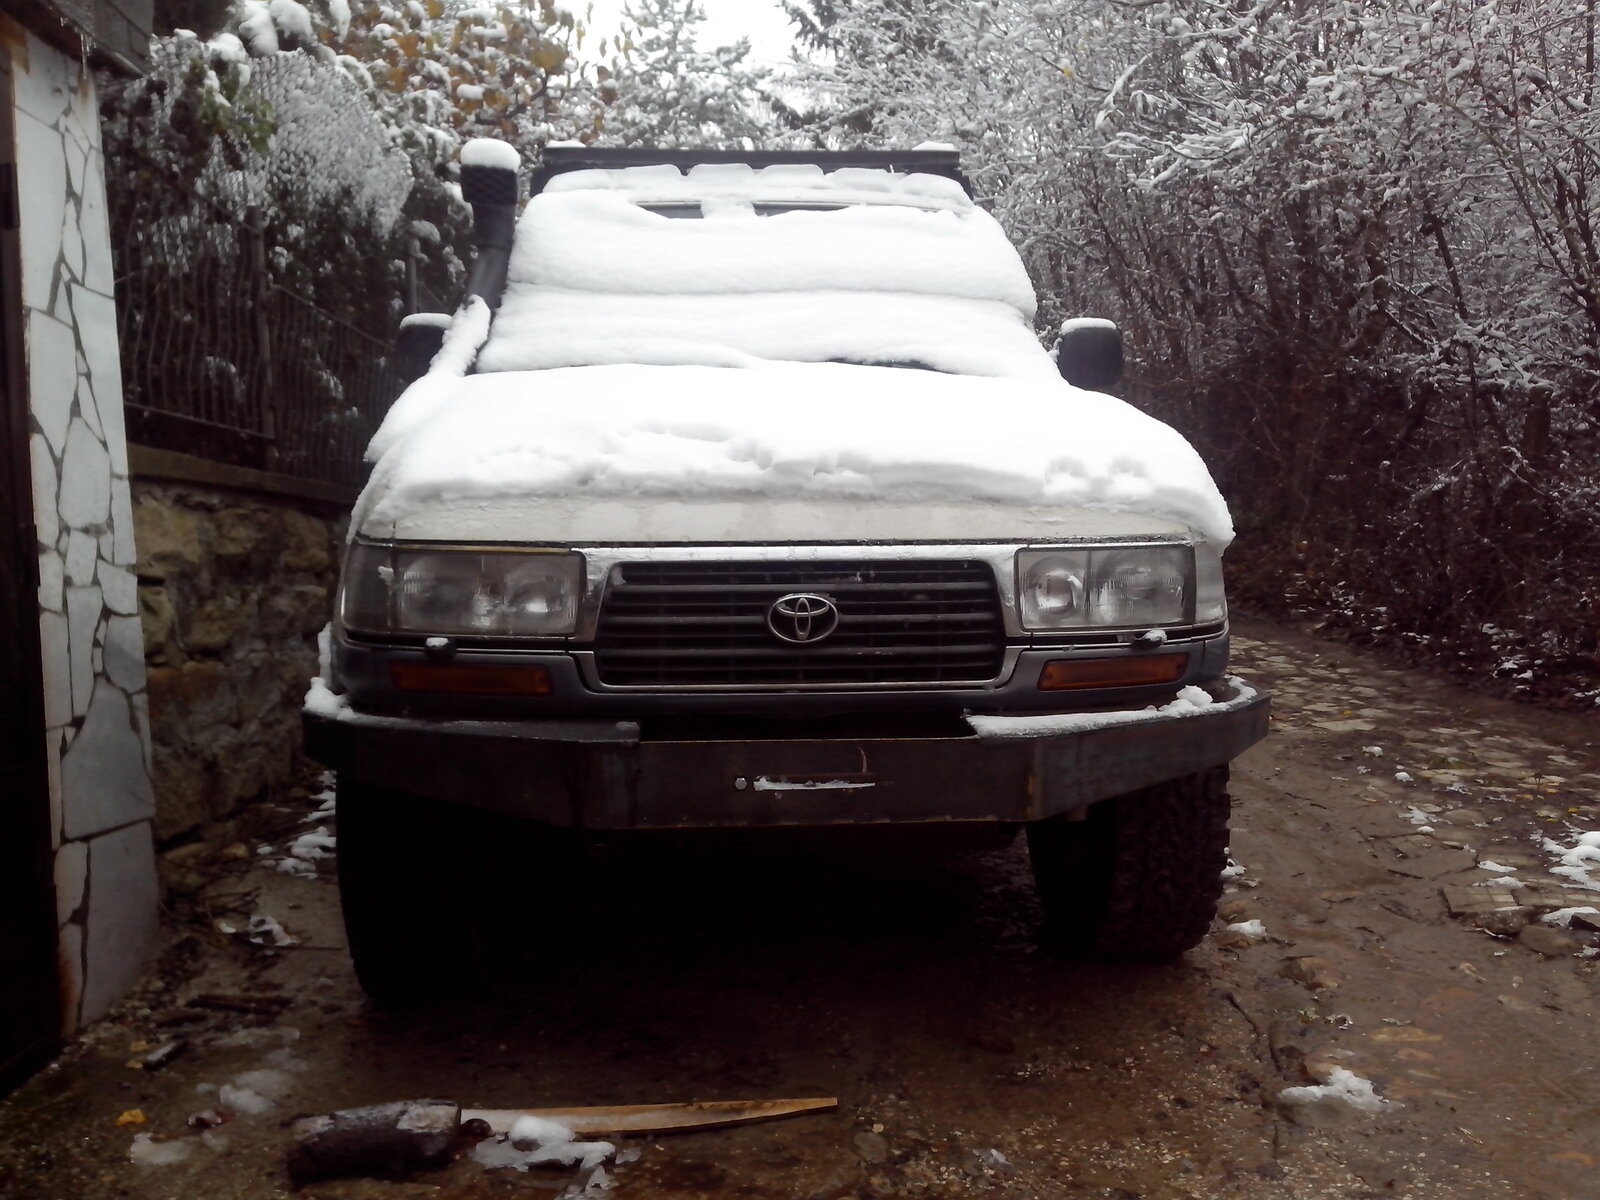
finaly I've desided to build my own bumper for the 80! Before I start here's a little info: it's a '97GX 1HZ (lhd) manual transmission and the back barn doors.No front and back diff locks. It has over 350 000km on and still performs as new. I've got it about tree years ago and it had 285 000km on. No modiffications were done till then. Since I've got it I've done some changes. How it has TJM +3"shocks and struts, OME streering dempfer,OME castor corection, OME poliurethane bushings all around, Safari(replica) snorkel. I made an exact copy of an ARB roof rack without the side bars so I can put my Autohome Columbus tent on. Of course when I got it did the usual stuff ( rear and front axel revision, new CV joints, brakes, lubricants etc...)
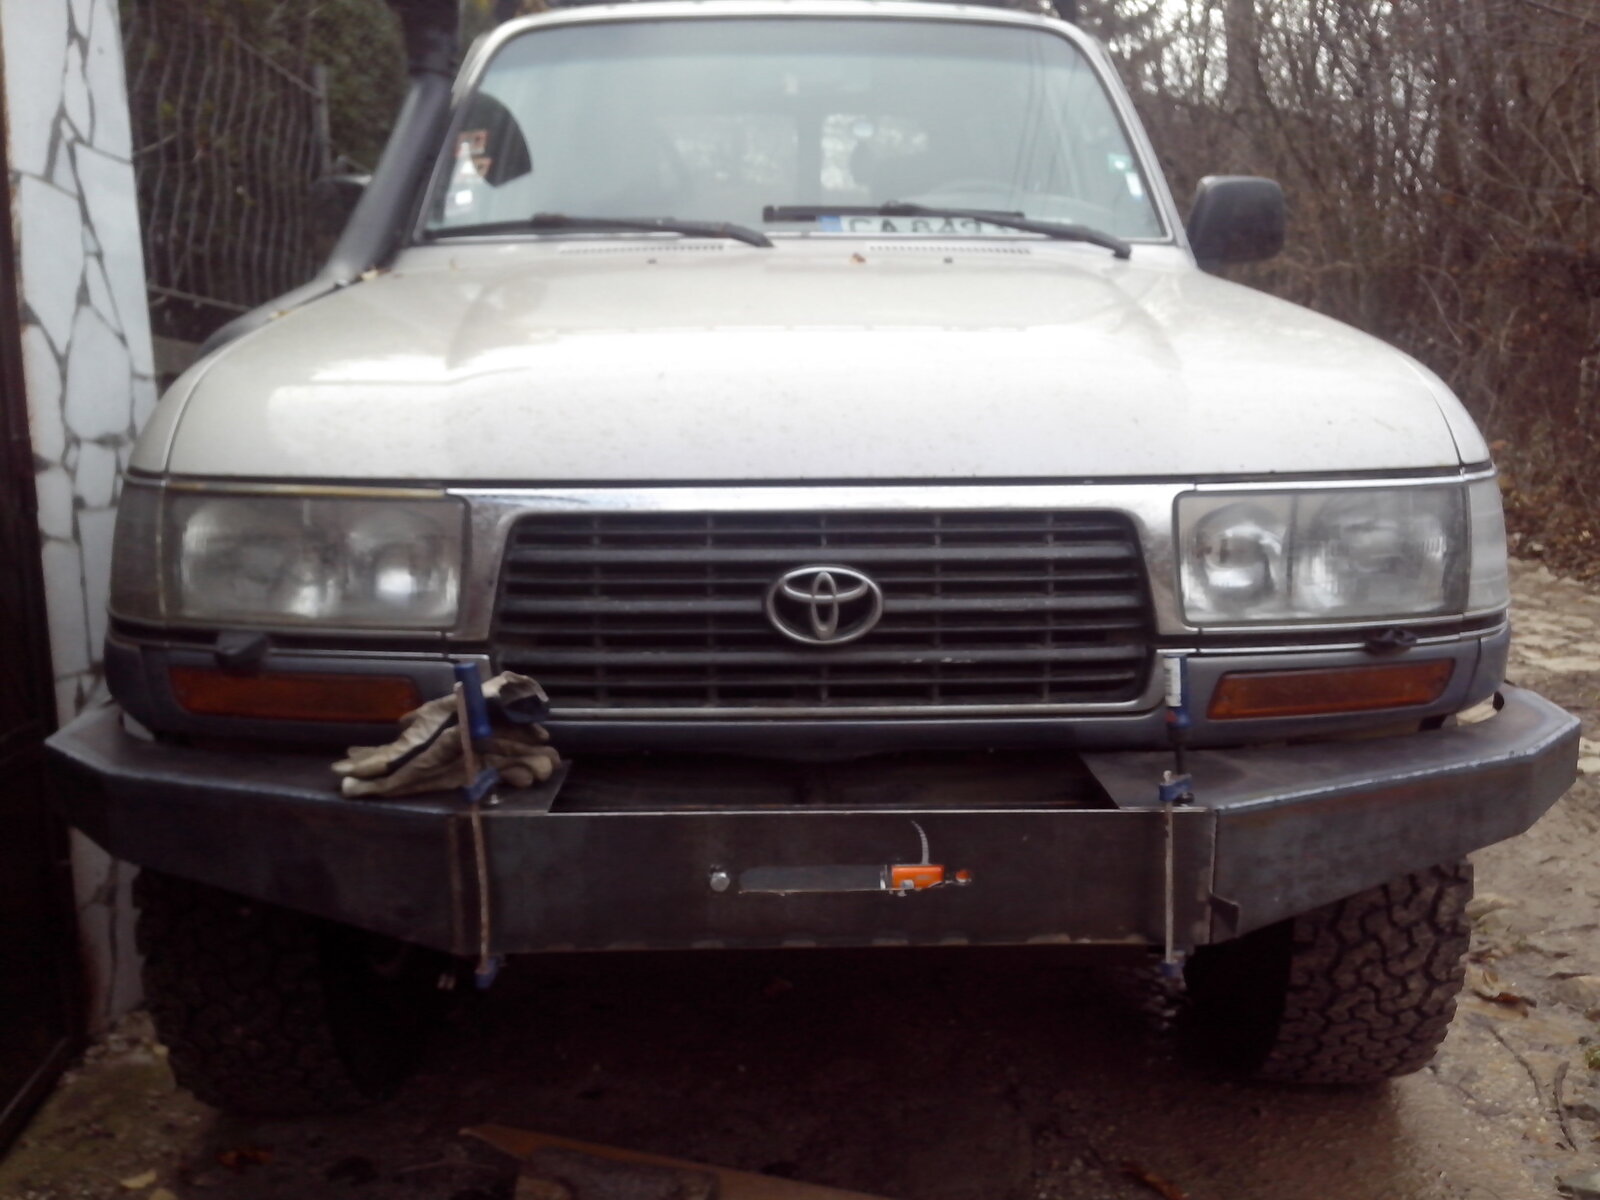
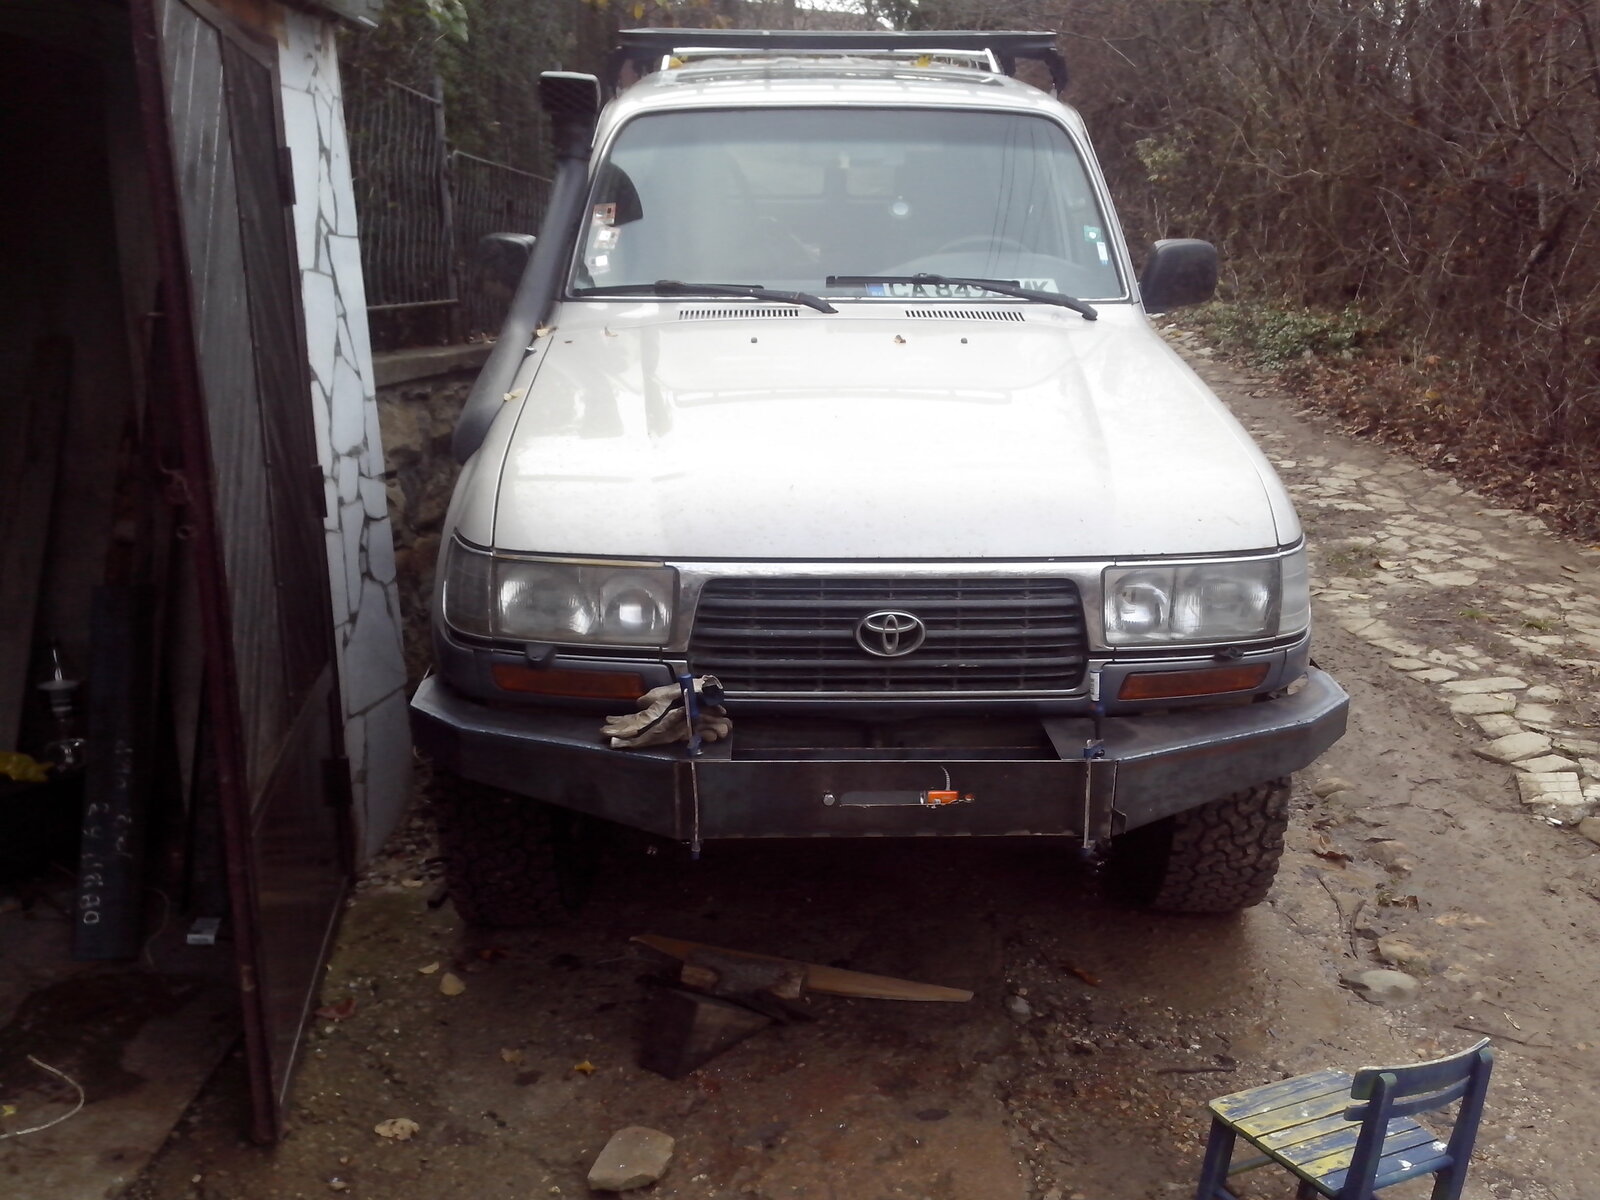
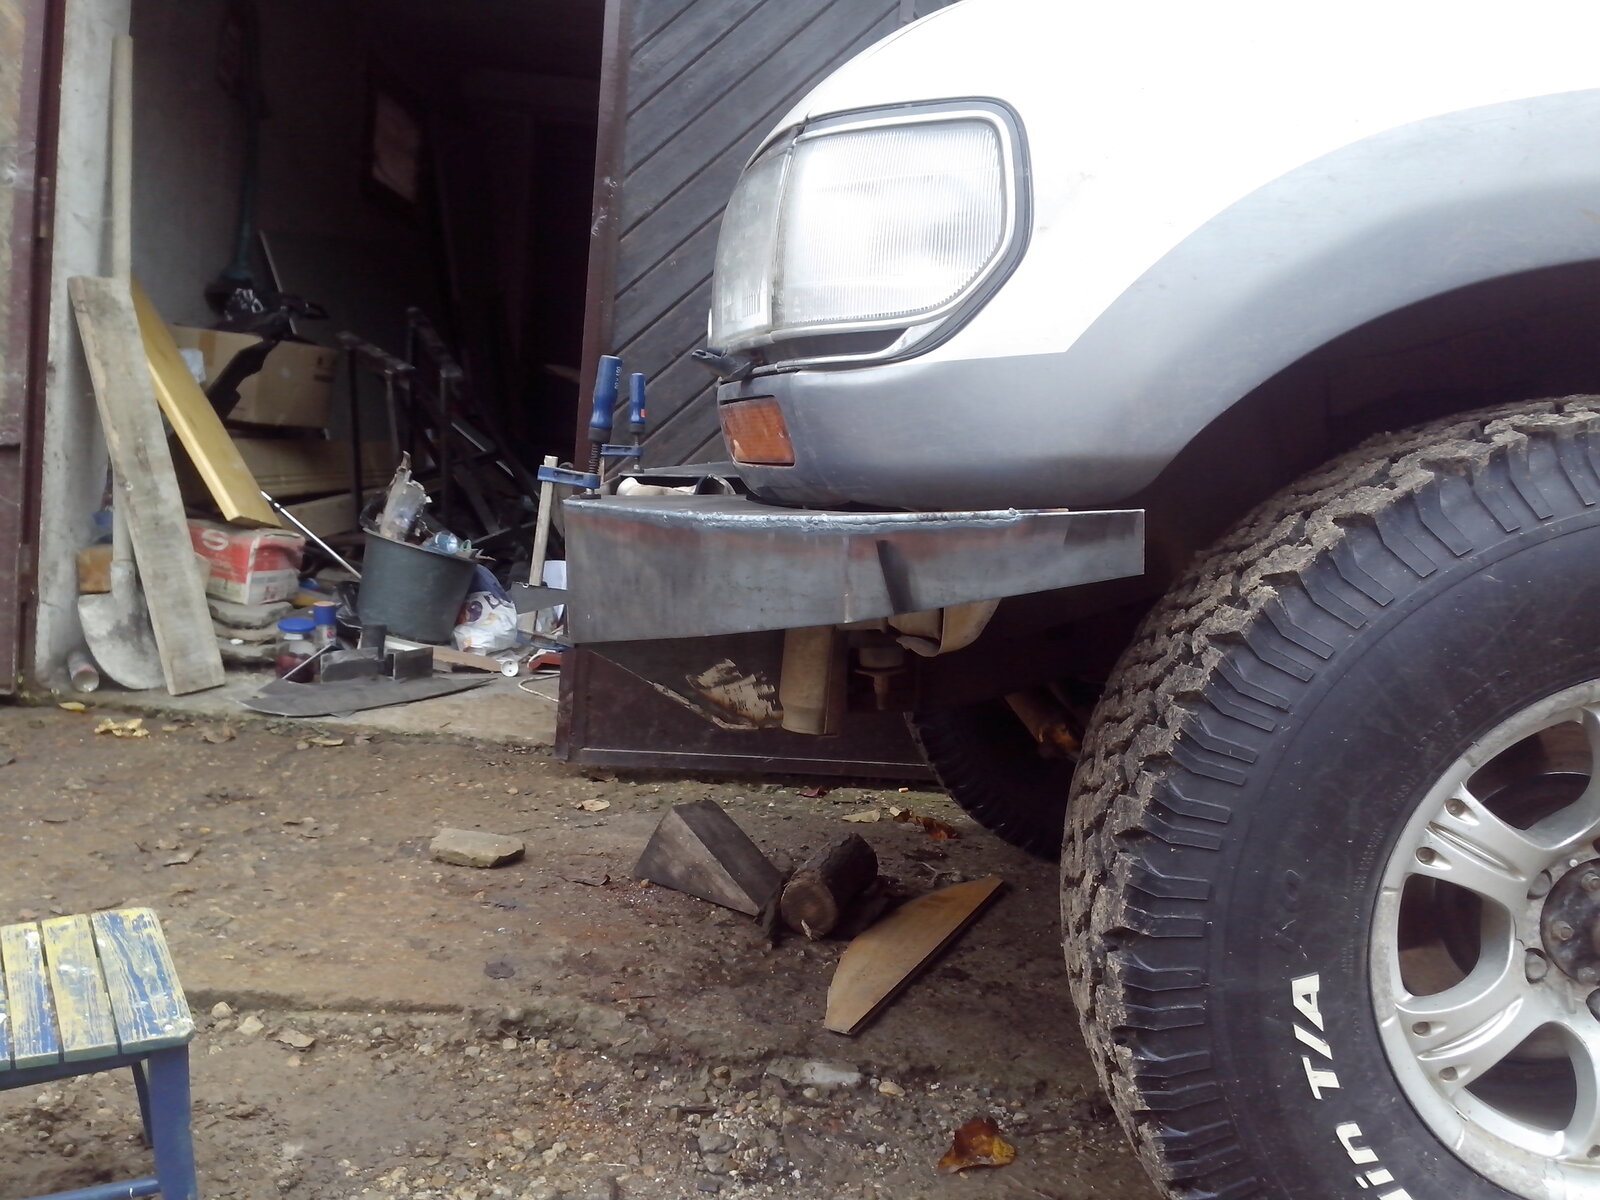
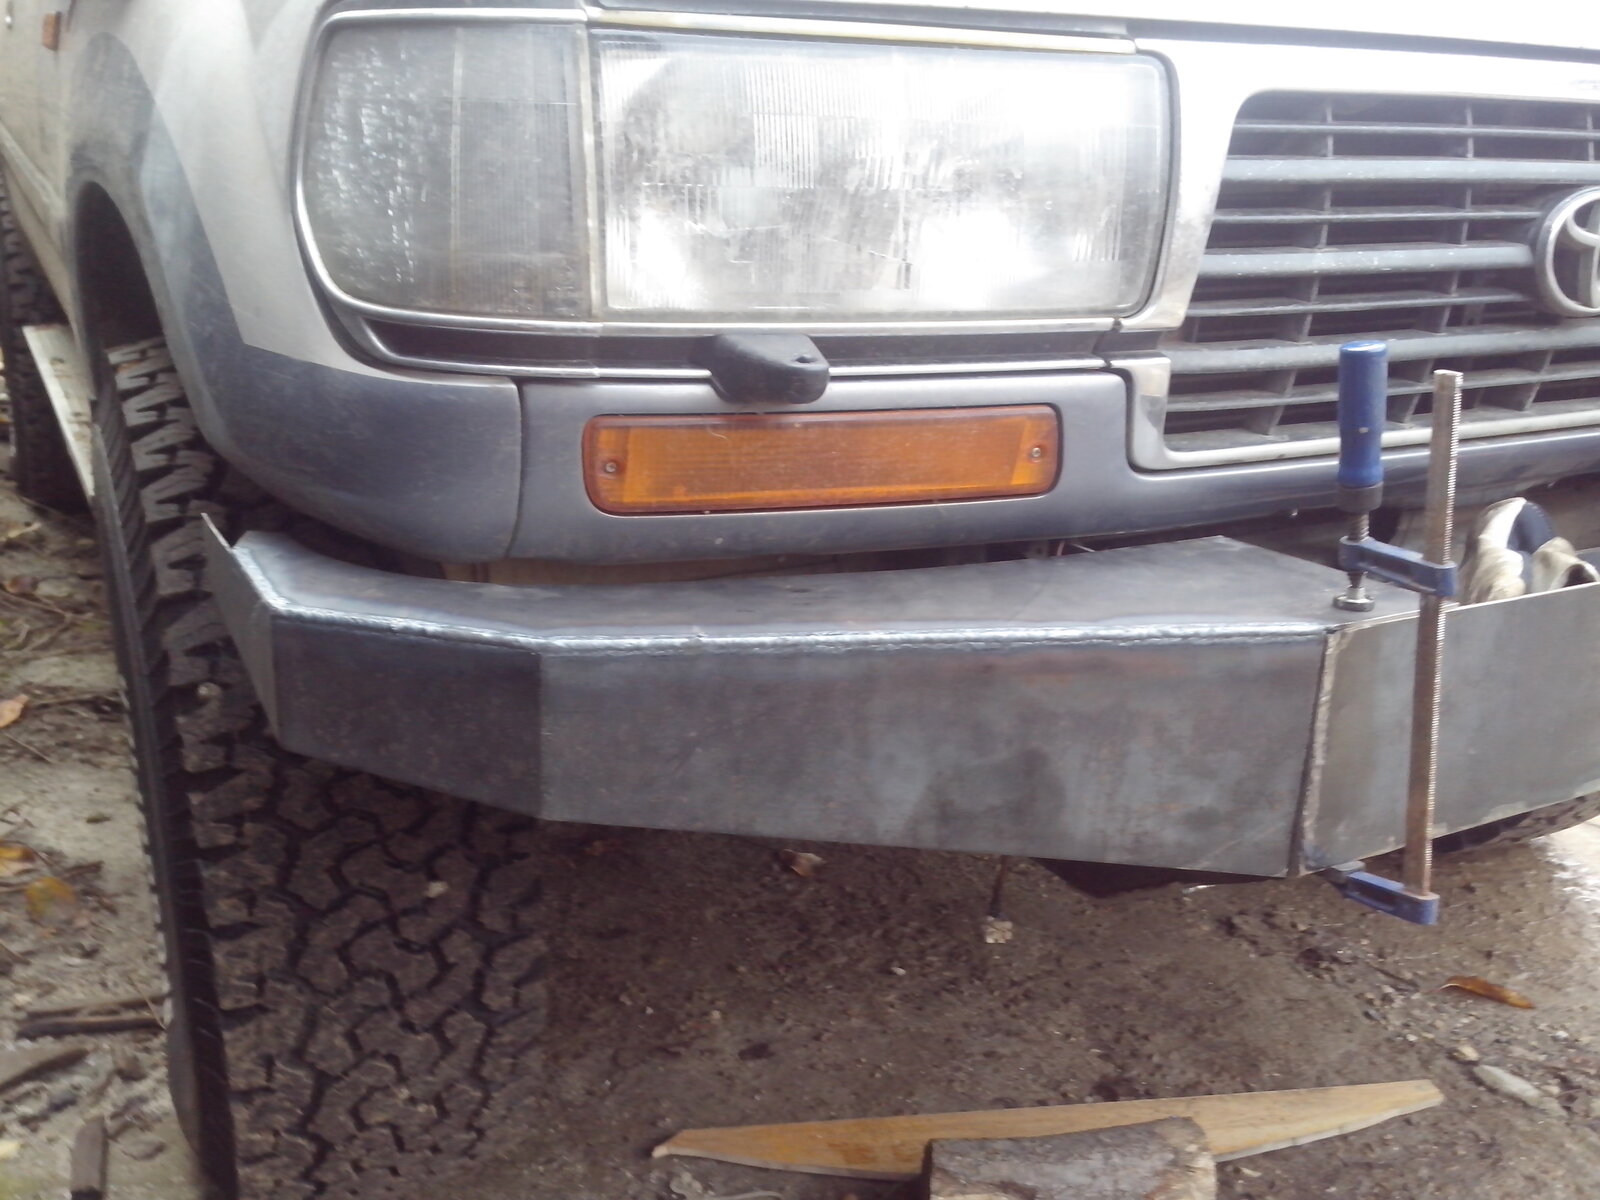
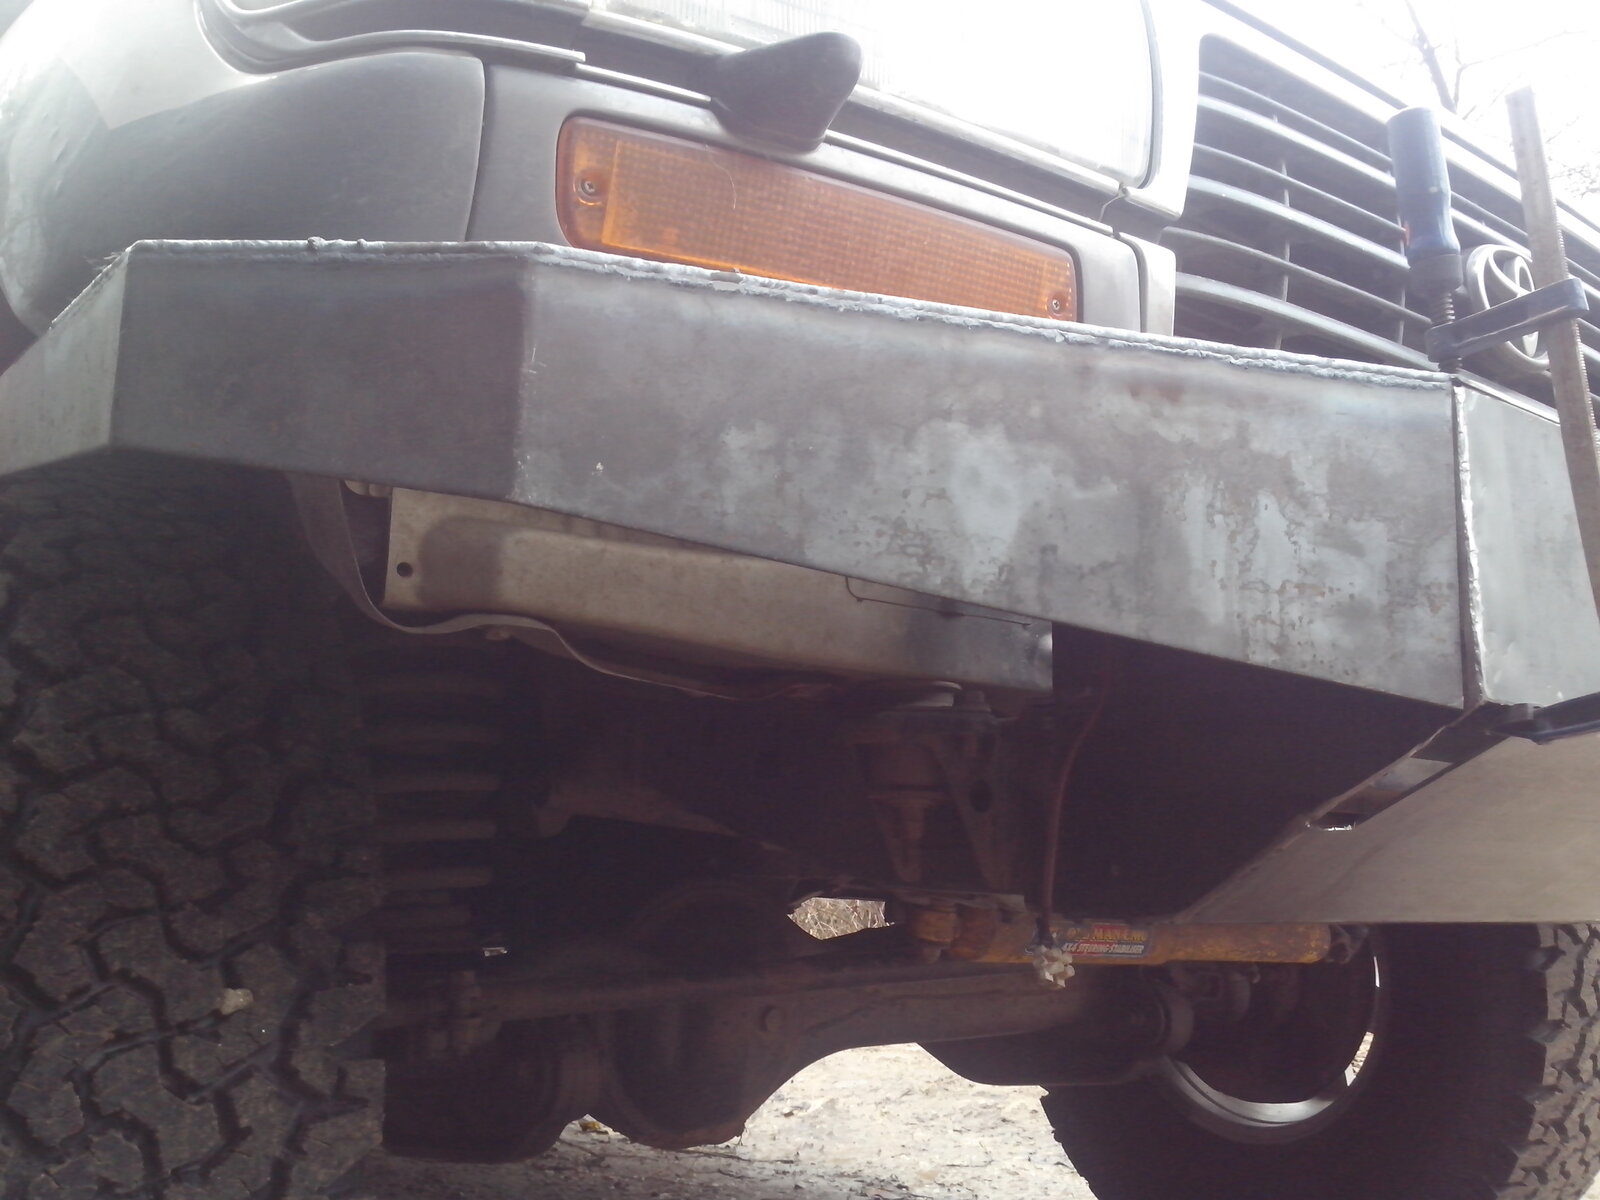
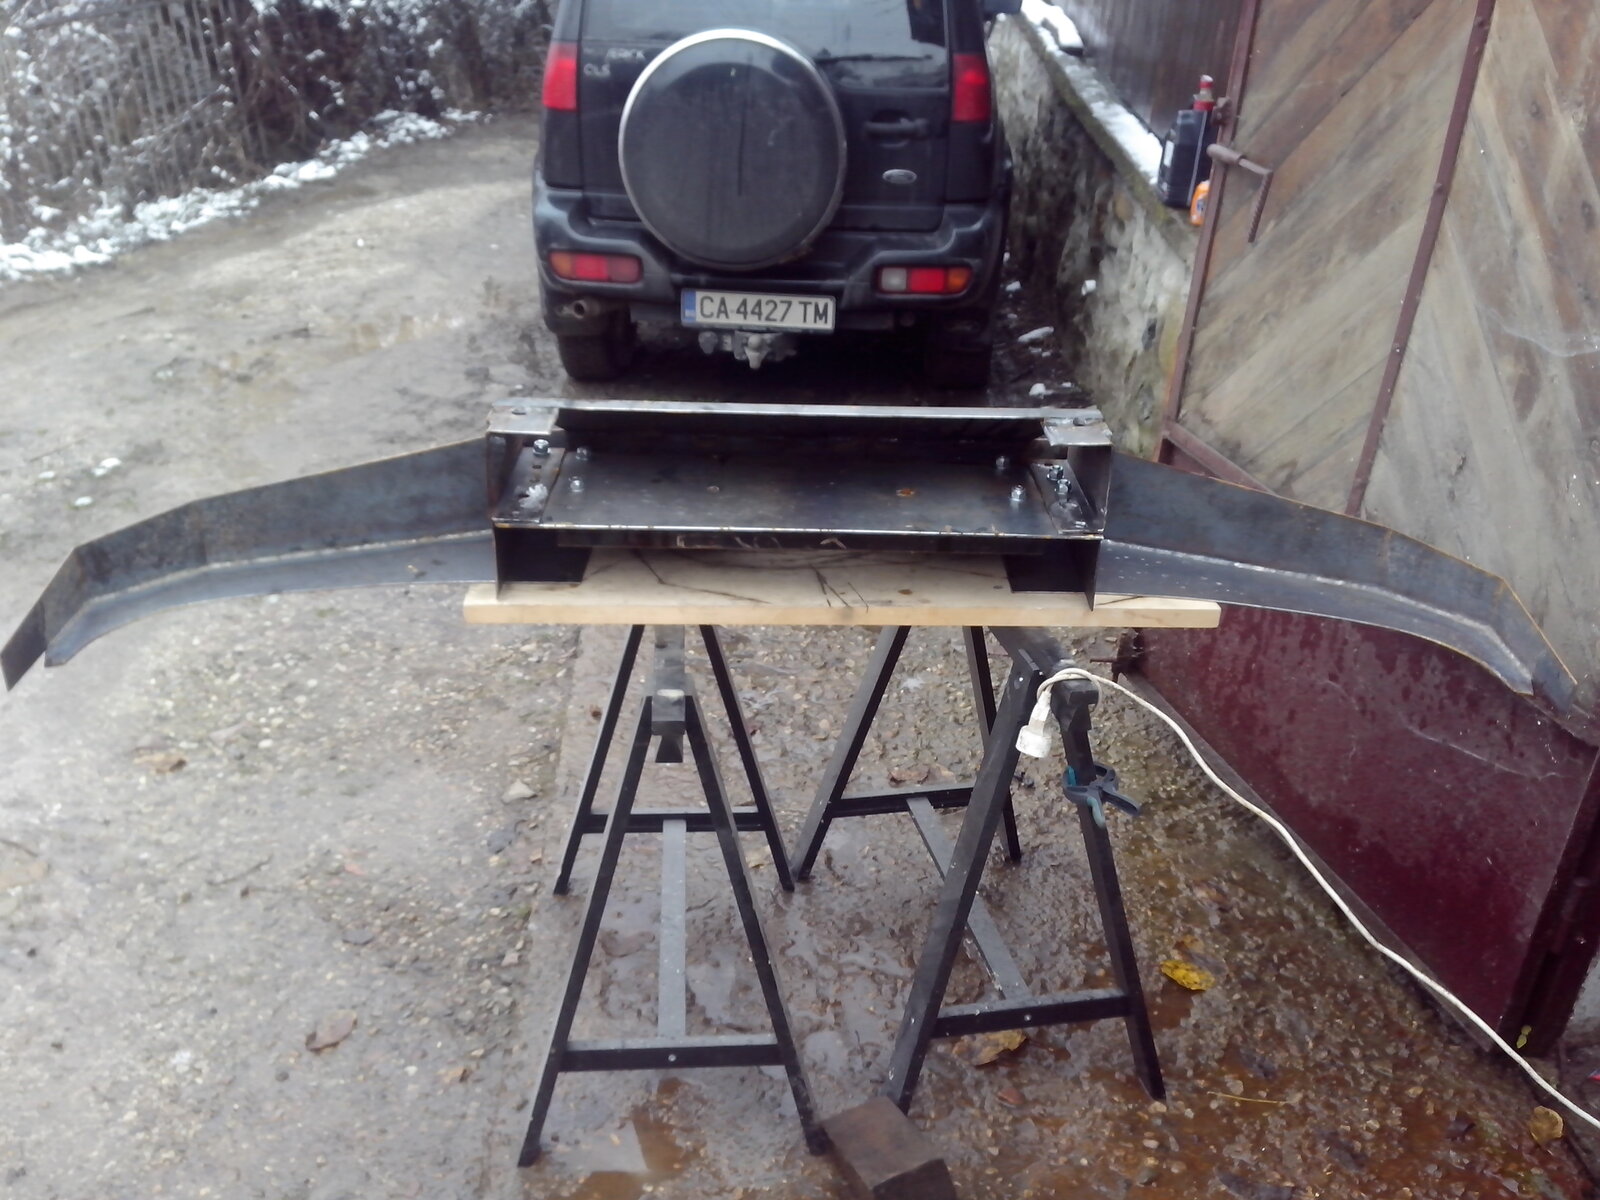
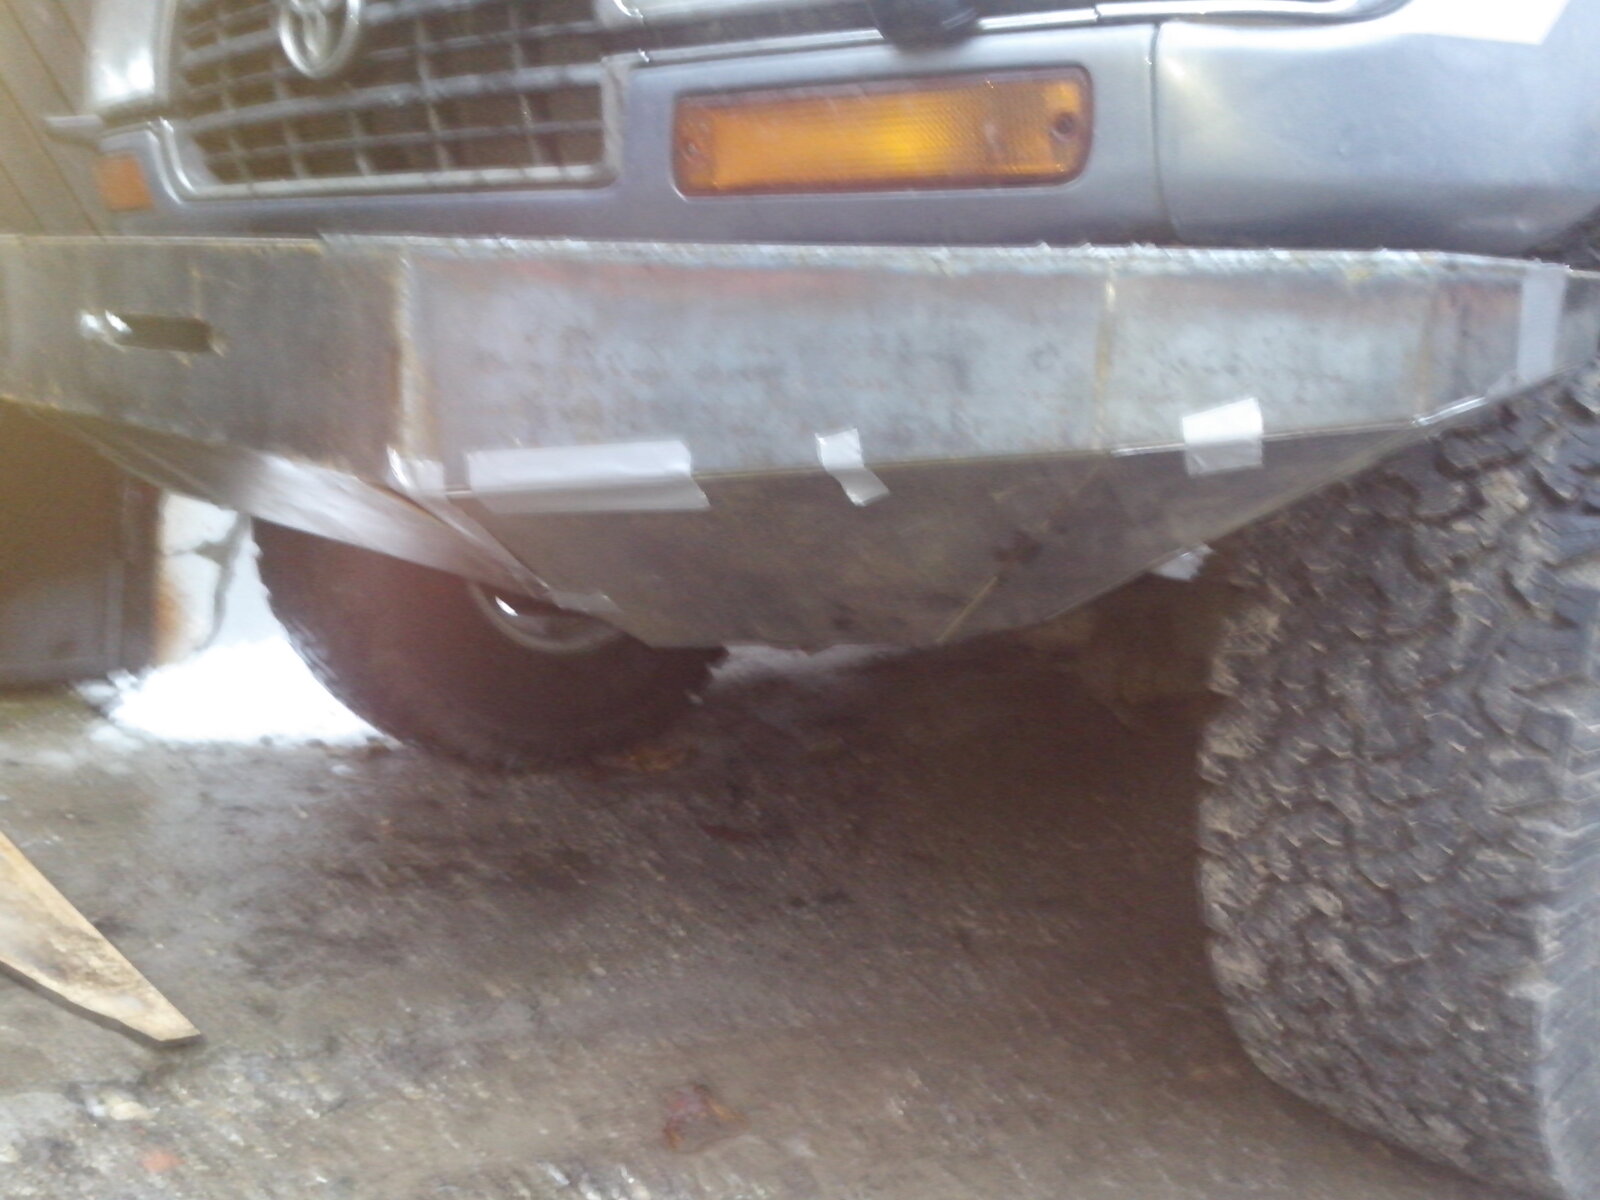
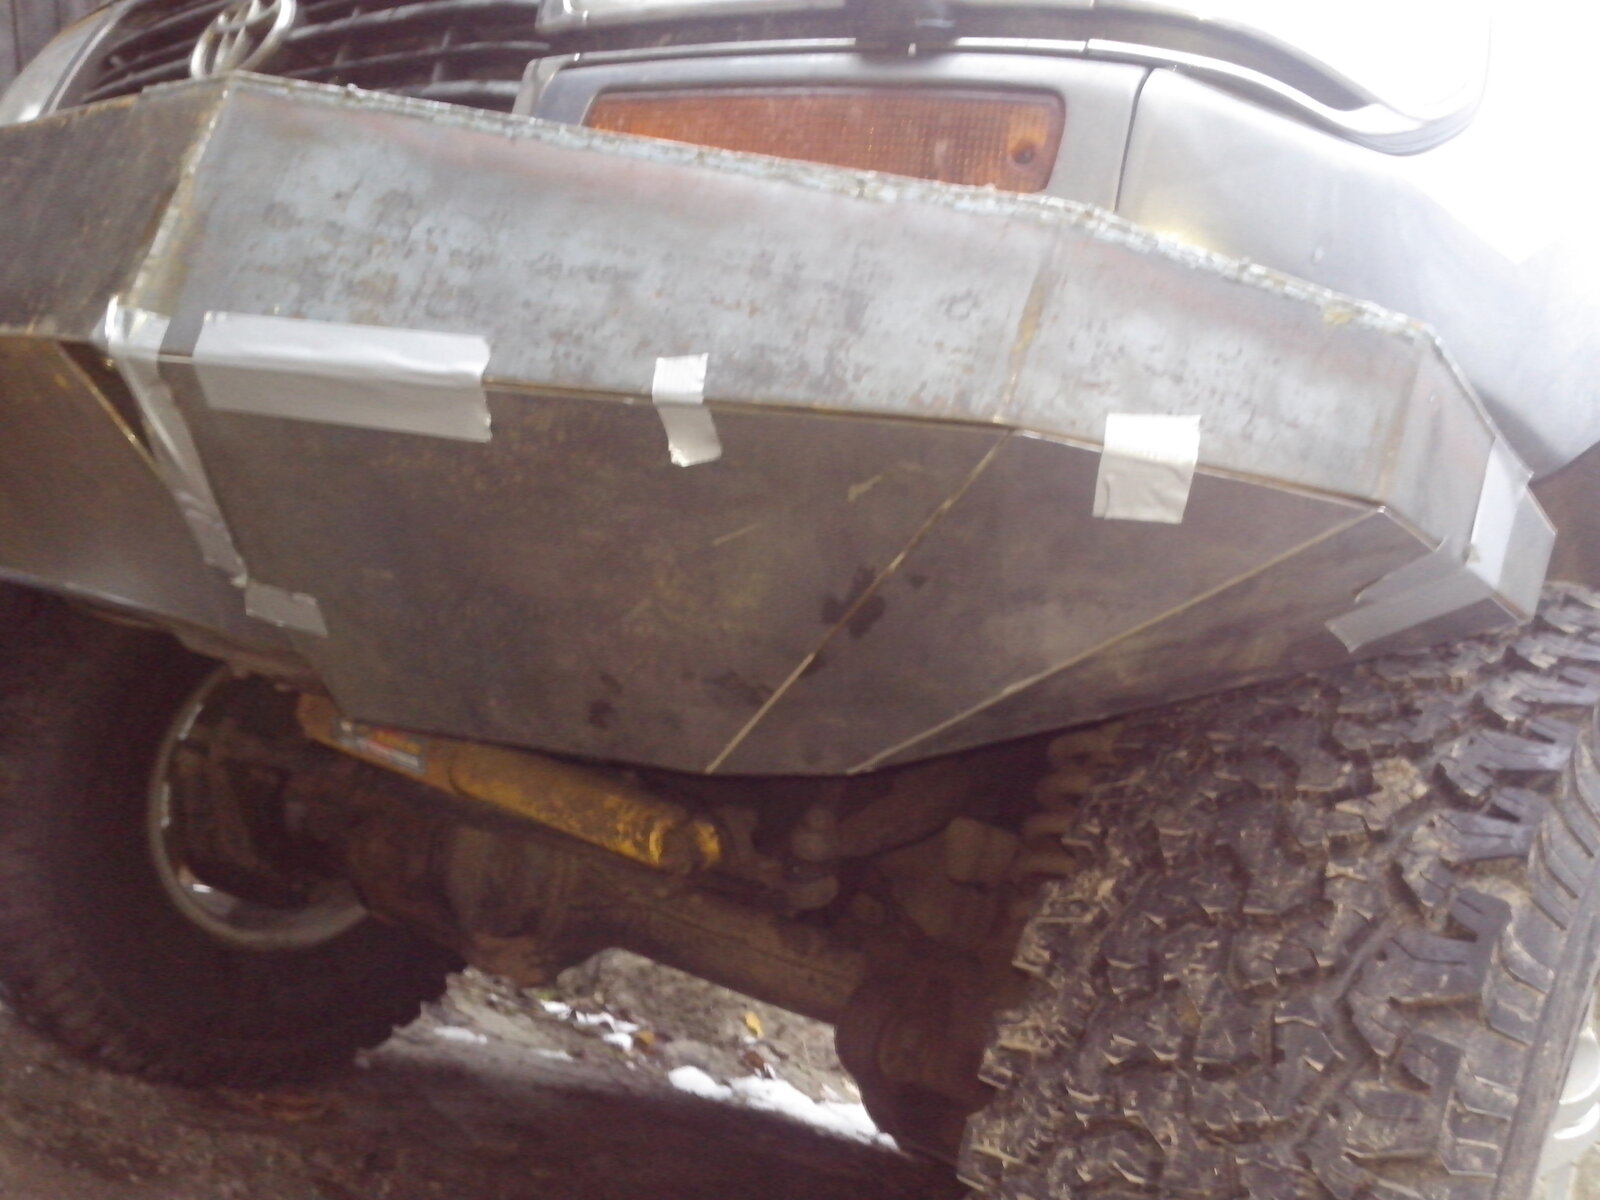
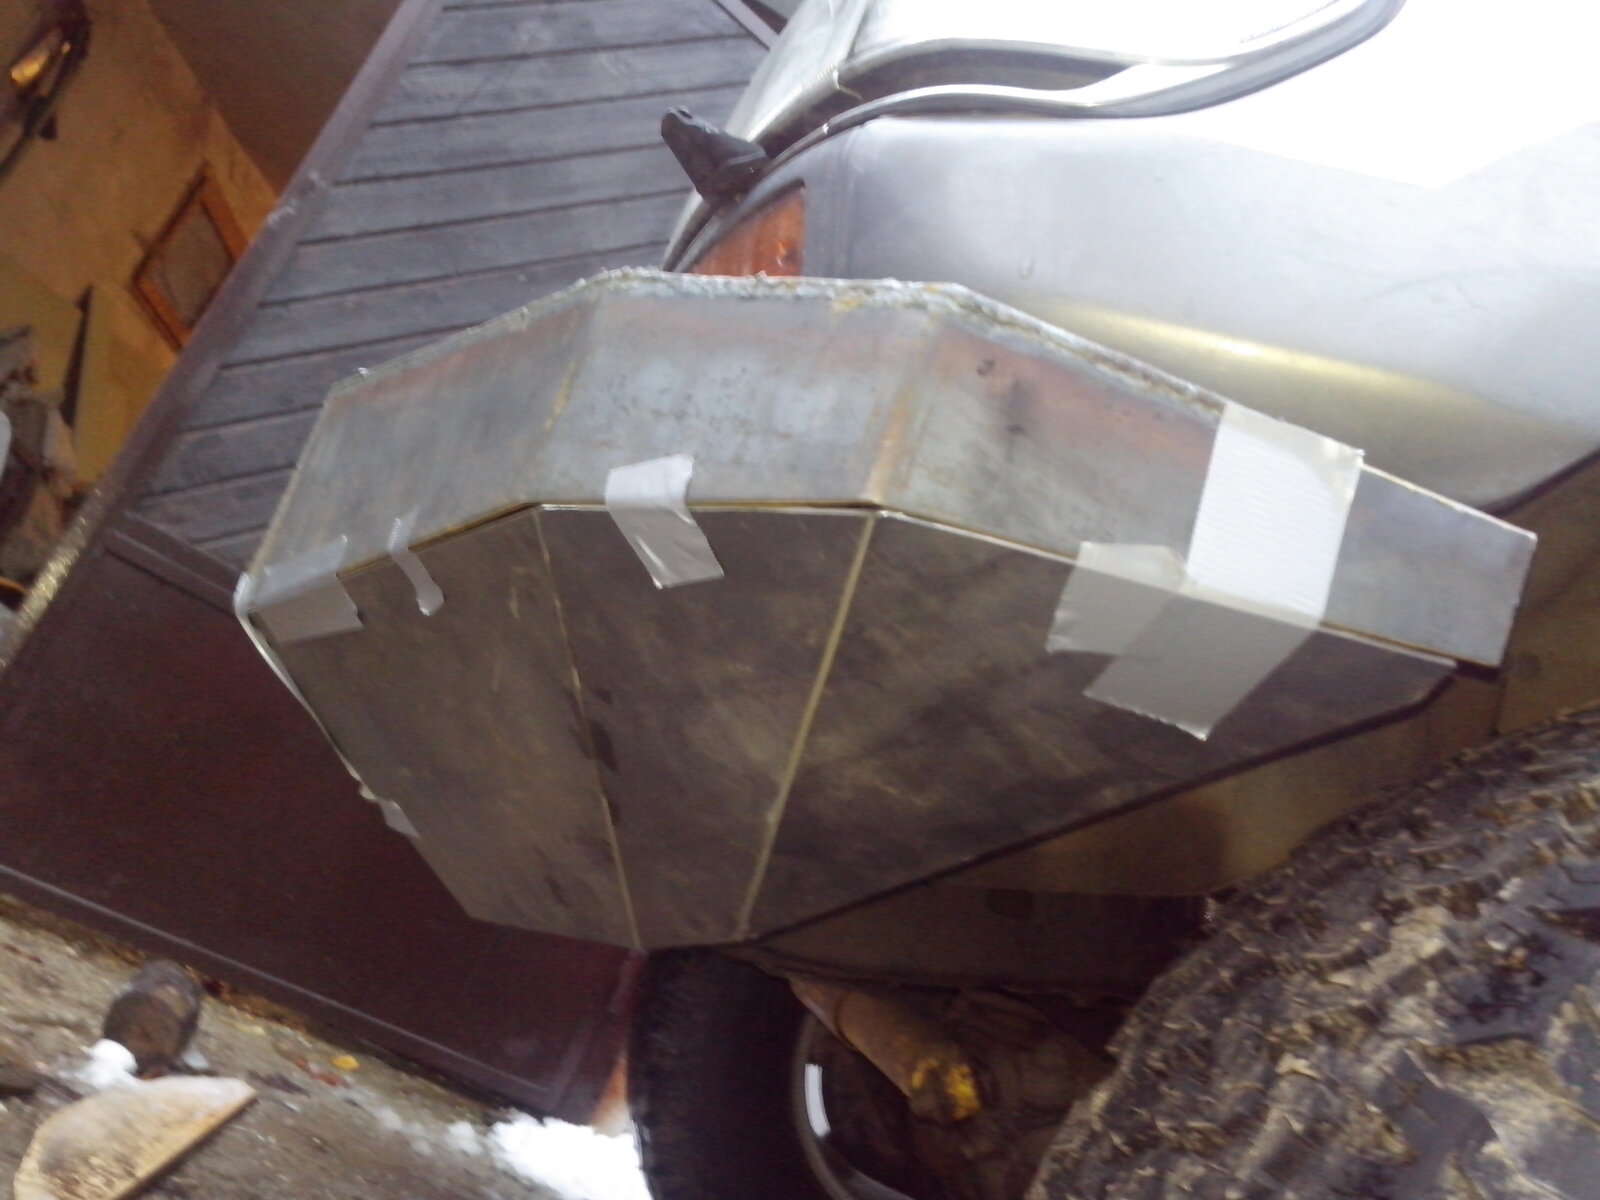
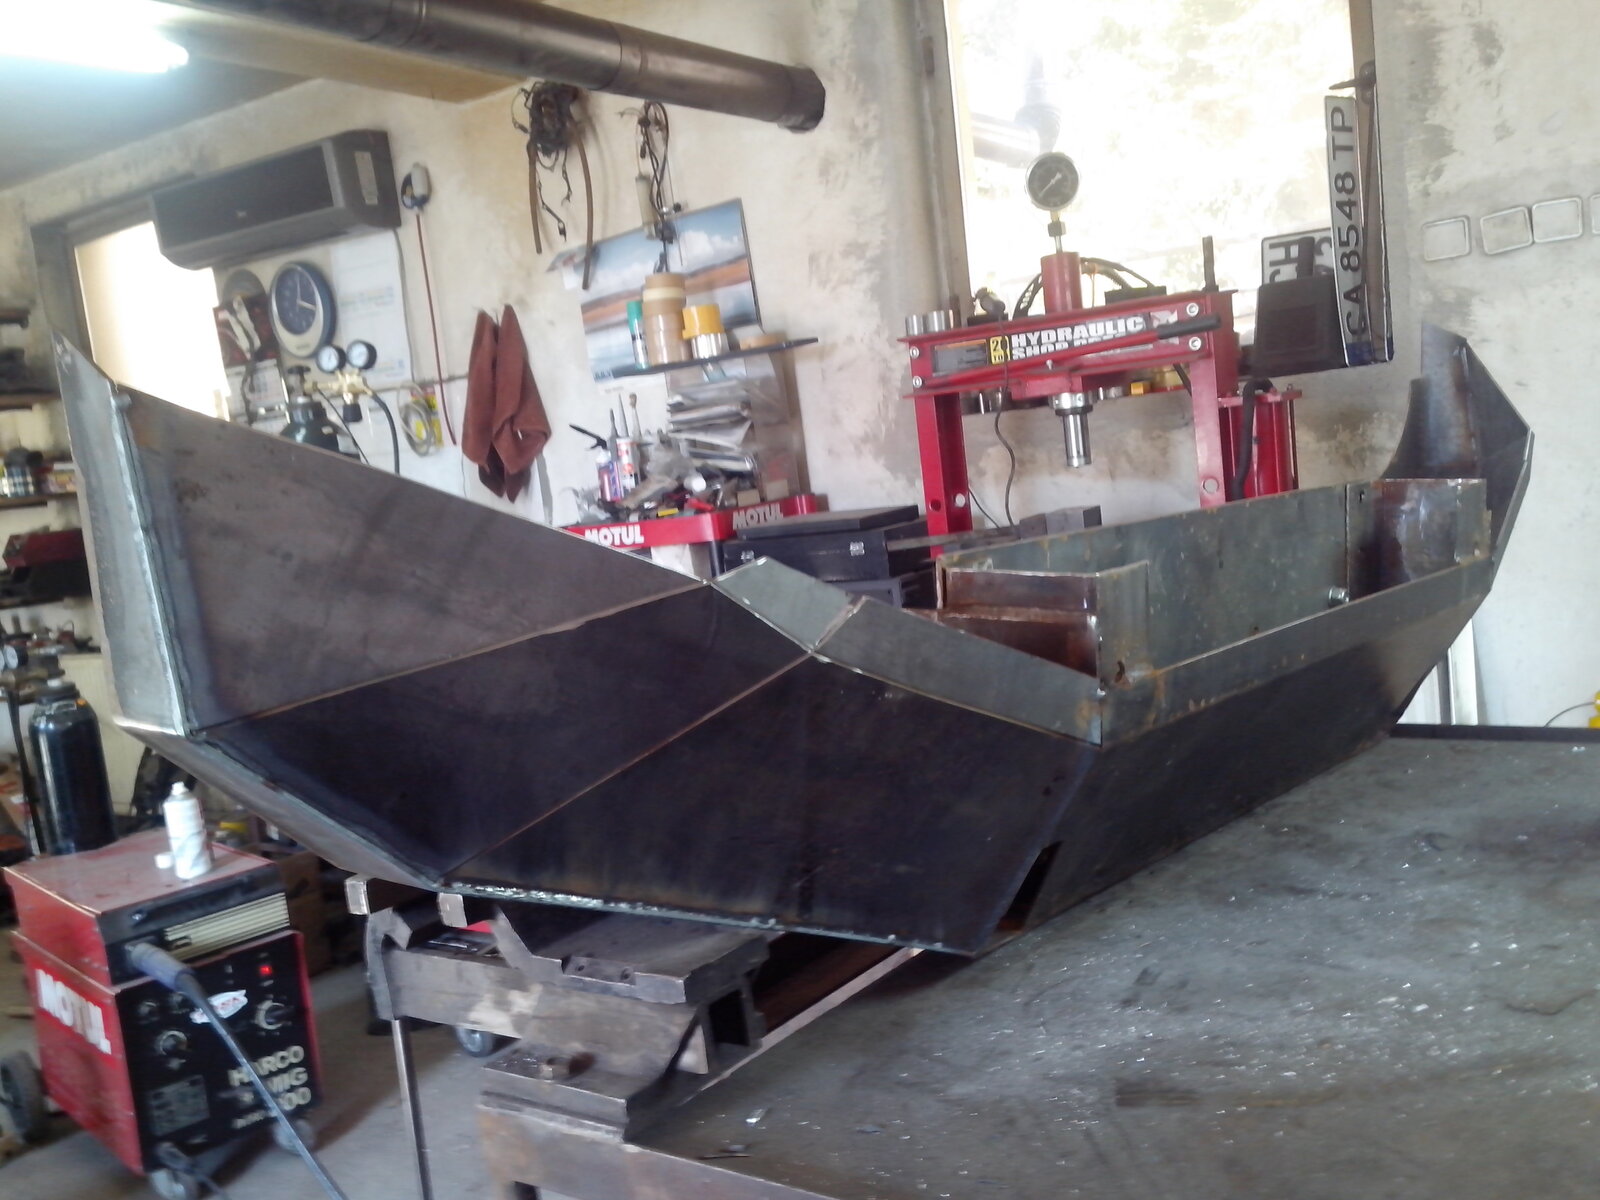
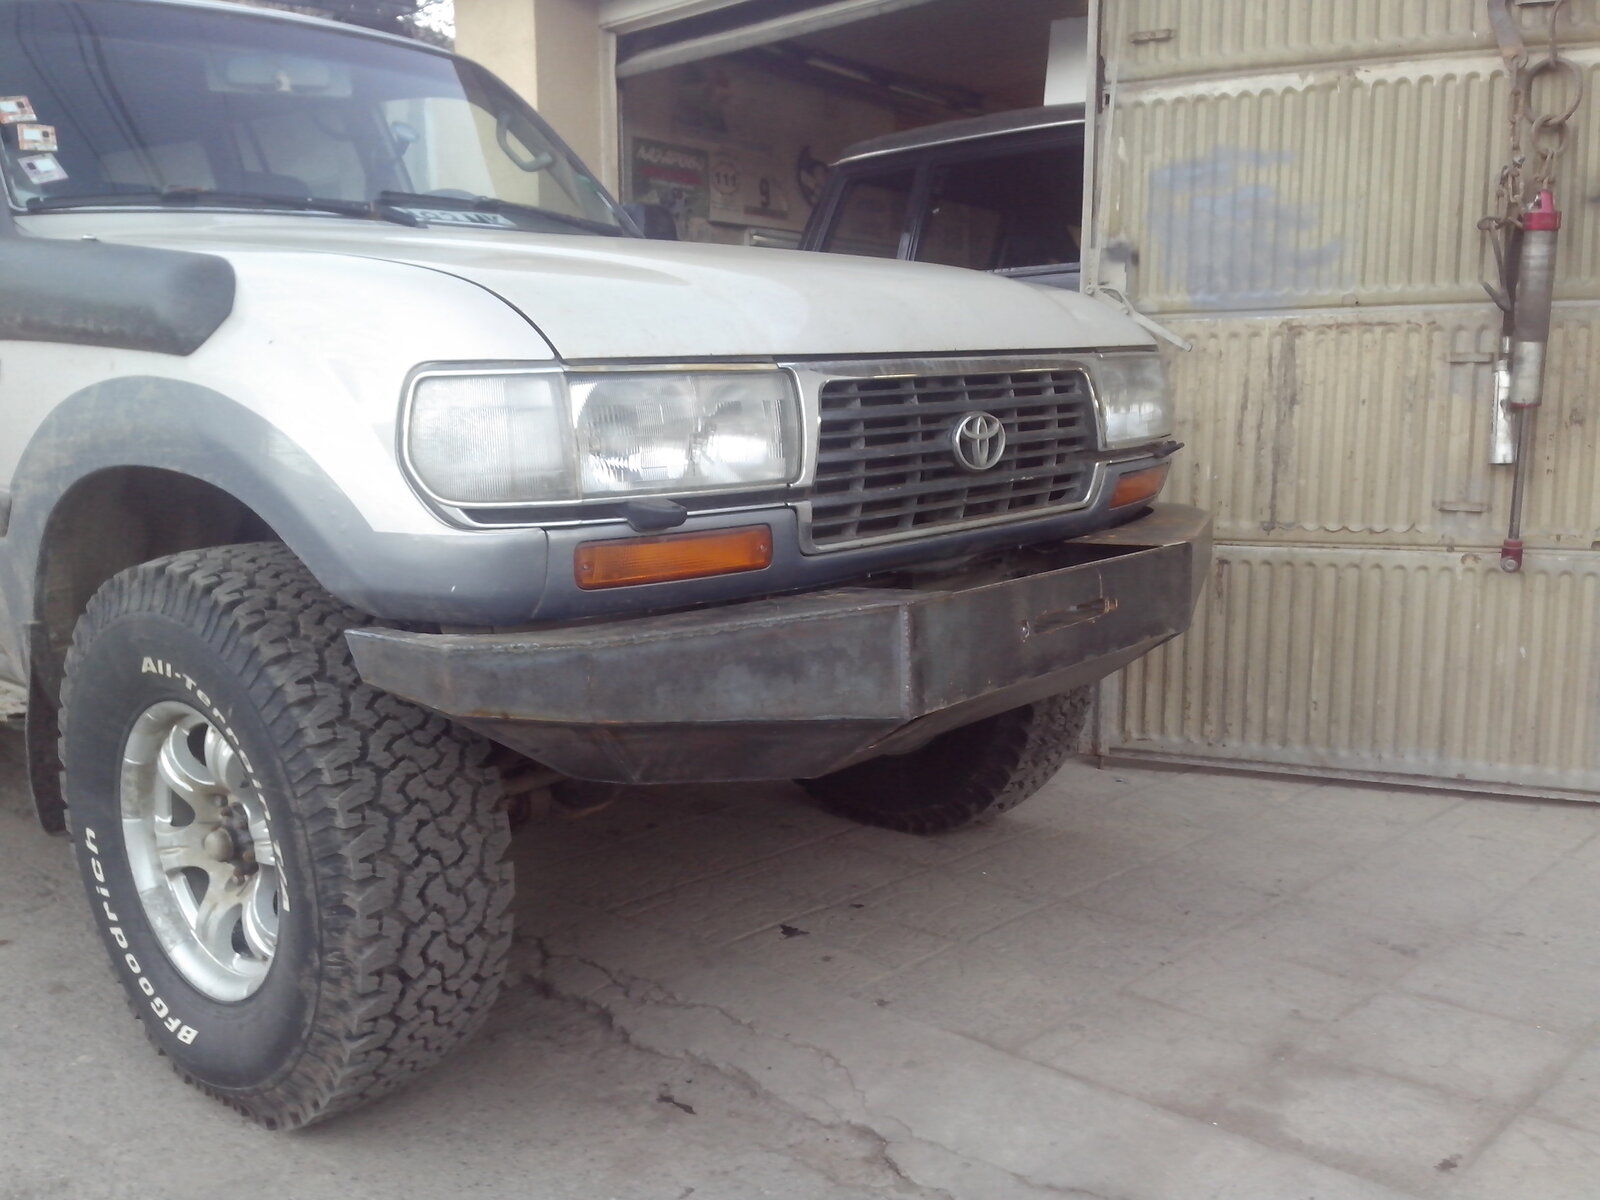
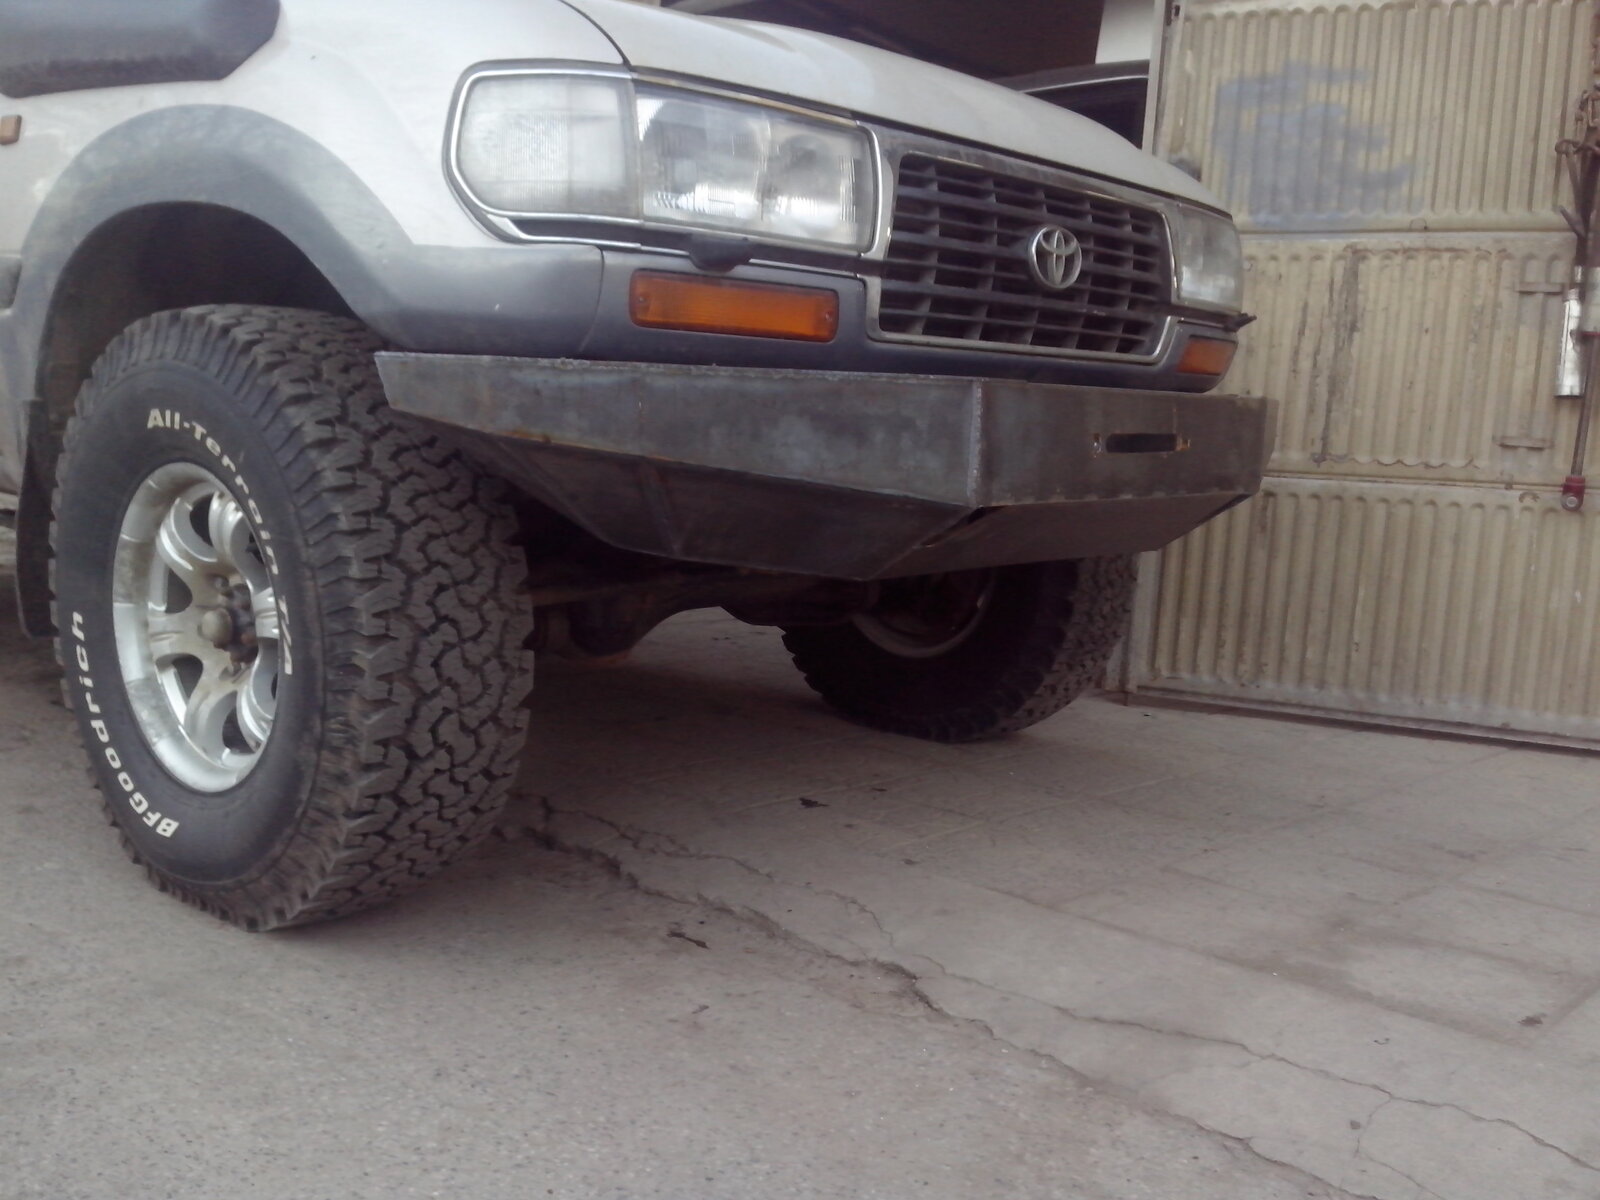
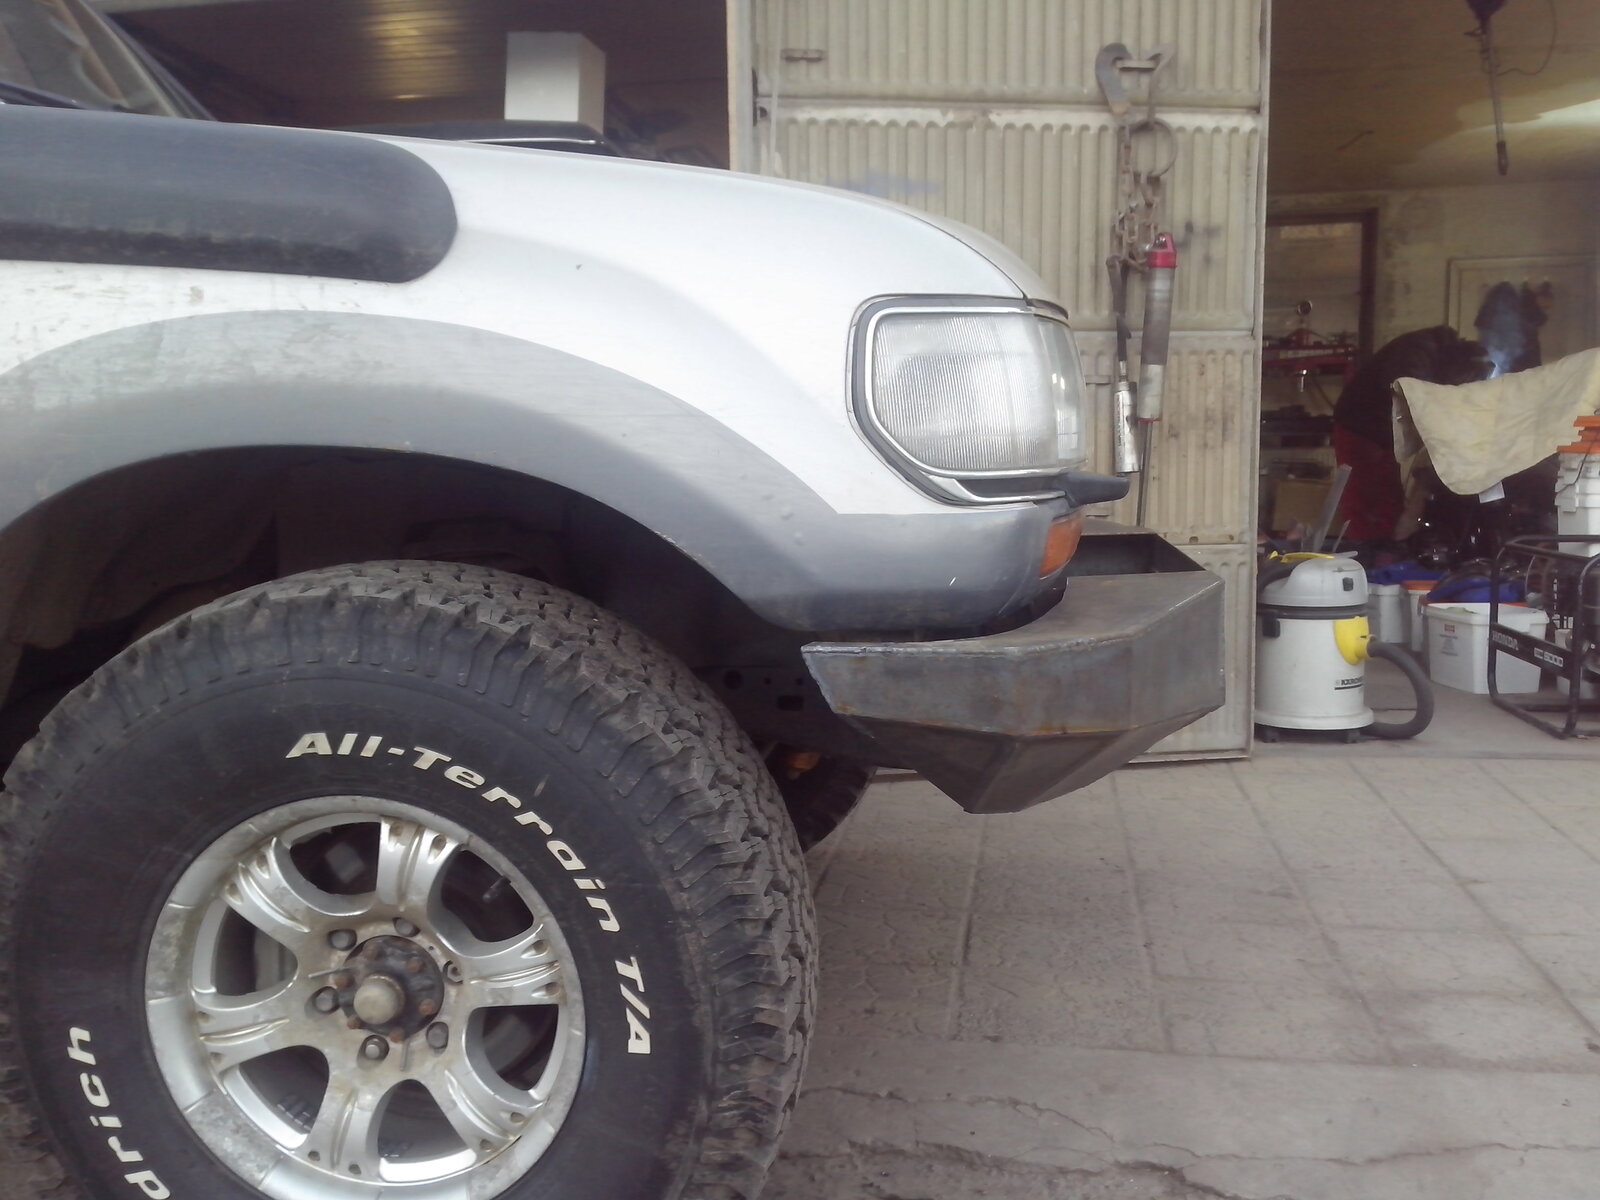
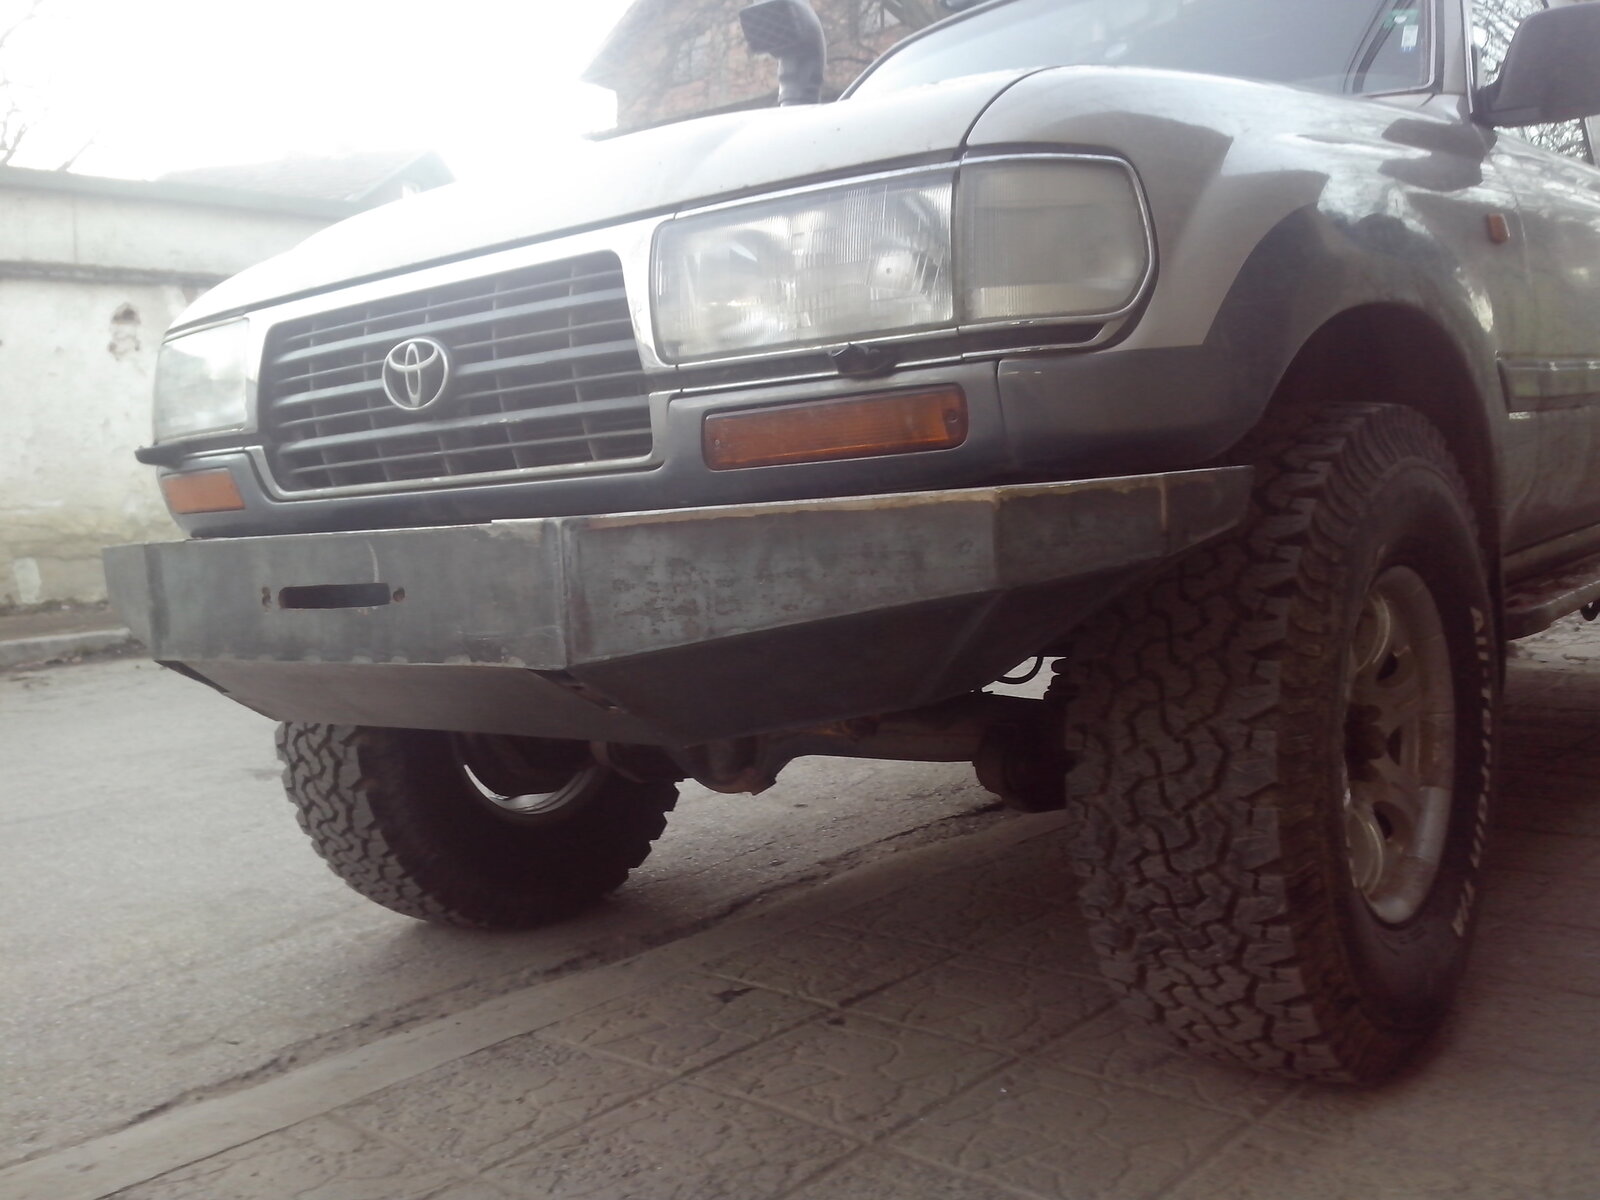
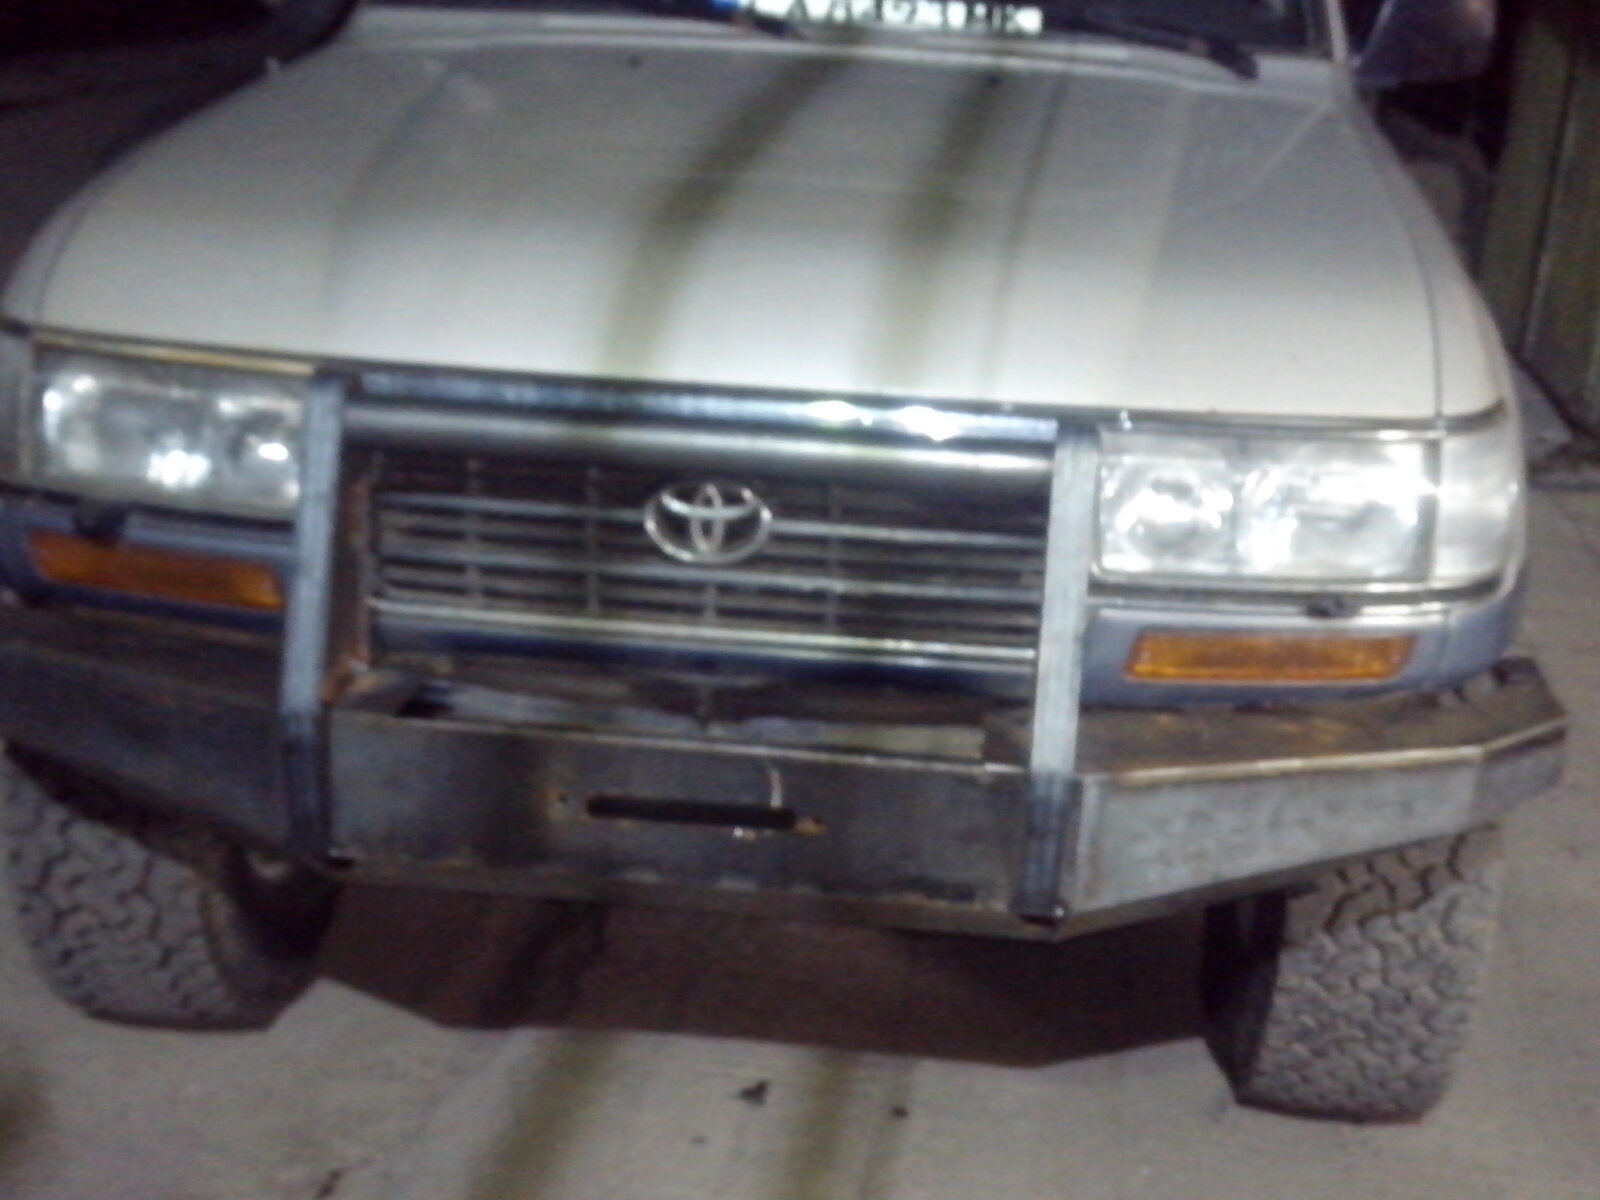
So, soon after I got the truck I changed the front bumper with an ARB deluxe. I hated it the very next moment I sat behind the wheel and did a little offroad.I felt like I'm carrying a huge concrete block on the front:). It drastically changes the attack angle of the front for the worse! Any ways, now I've got some free time and took off the ARB...and started building my own:) .... This is my first one ever to build, so don't criticize me alot:) There are and will be mistakes:)....
 
Last edited:
The chassis extension is 17cm and is made of 6mm steel .The winch plate is 10mm.the rest will be made out of 3mm.
Fist made the winch box, cut the sides at an angle I thought is ok, got some metal for under and cut some holes for the hi jack...welding, grinding....After I do the whole structure I'll pay more attention supporting the hi jack points...
 

Attachments

  • tlc80_project 003.jpg
    tlc80_project 003.jpg
    771.7 KB · Views: 187
  • tlc80_project 006.jpg
    tlc80_project 006.jpg
    656.1 KB · Views: 187
  • tlc80_project 008.jpg
    tlc80_project 008.jpg
    541.1 KB · Views: 204
  • tlc80_project 010.jpg
    tlc80_project 010.jpg
    957.5 KB · Views: 211
  • tlc80_project 009.jpg
    tlc80_project 009.jpg
    676.3 KB · Views: 184
  • tlc80_project 014.jpg
    tlc80_project 014.jpg
    485.2 KB · Views: 193
  • tlc80_project 016.jpg
    tlc80_project 016.jpg
    860.6 KB · Views: 182
  • tlc80_project 017.jpg
    tlc80_project 017.jpg
    636 KB · Views: 195
  • tlc80_project 011.jpg
    tlc80_project 011.jpg
    495.9 KB · Views: 180
  • tlc80_project 012.jpg
    tlc80_project 012.jpg
    518 KB · Views: 176
Last edited:
This looks good :thumbup:. I look forward to seeing how it develops. Won't you be swapping one concrete block for another though? Or are you doing something different to save weight?
 
The weight doesnt bother me as much as the depth of the ARB both down and upfront. The one I'm making is about 10cm closer do the body and aproxx 12cm higher compared to the ARB. It has alot to do with the fact I put the winch plate above the chassis instead of lewel it with the lower edge like it was before.I even started doing it with a lower winch and changed plans very fast:) Heres a pic. from day one.
 

Attachments

  • tlc80_project.jpg
    tlc80_project.jpg
    26.4 KB · Views: 166
The side panels are on...and it start raining:cry: 
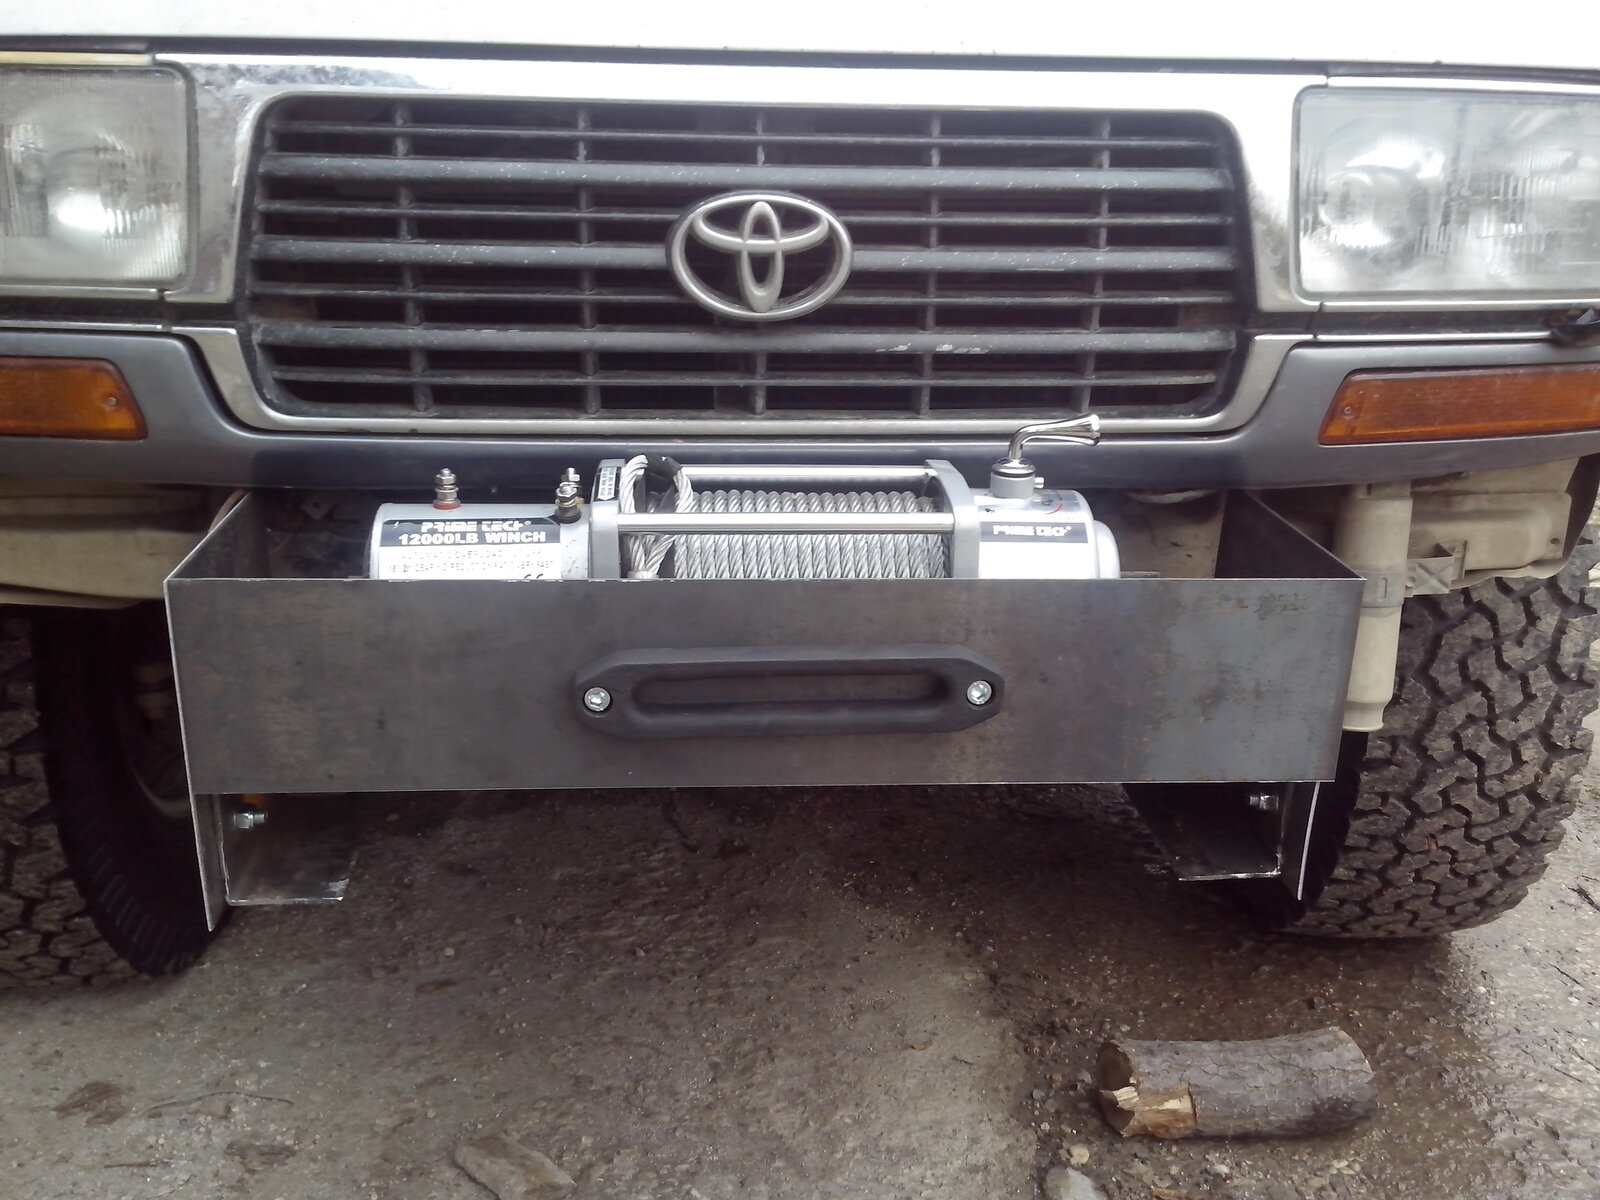
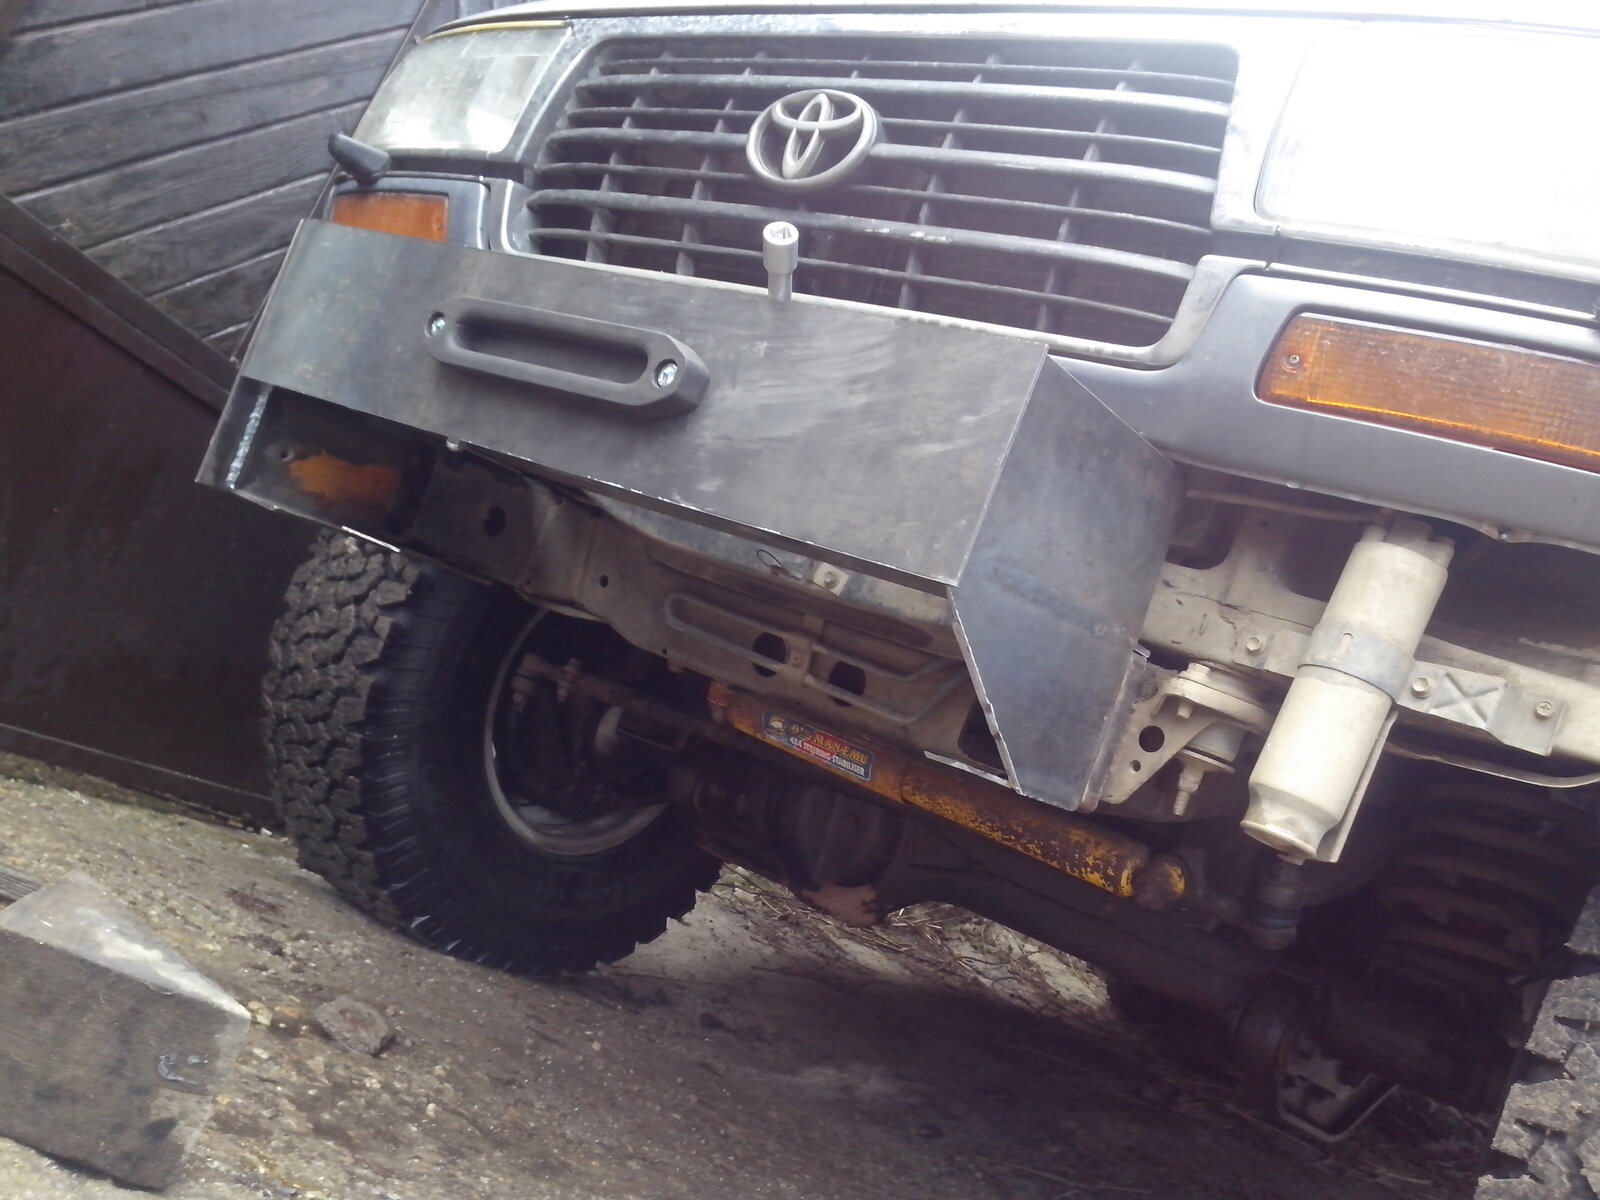
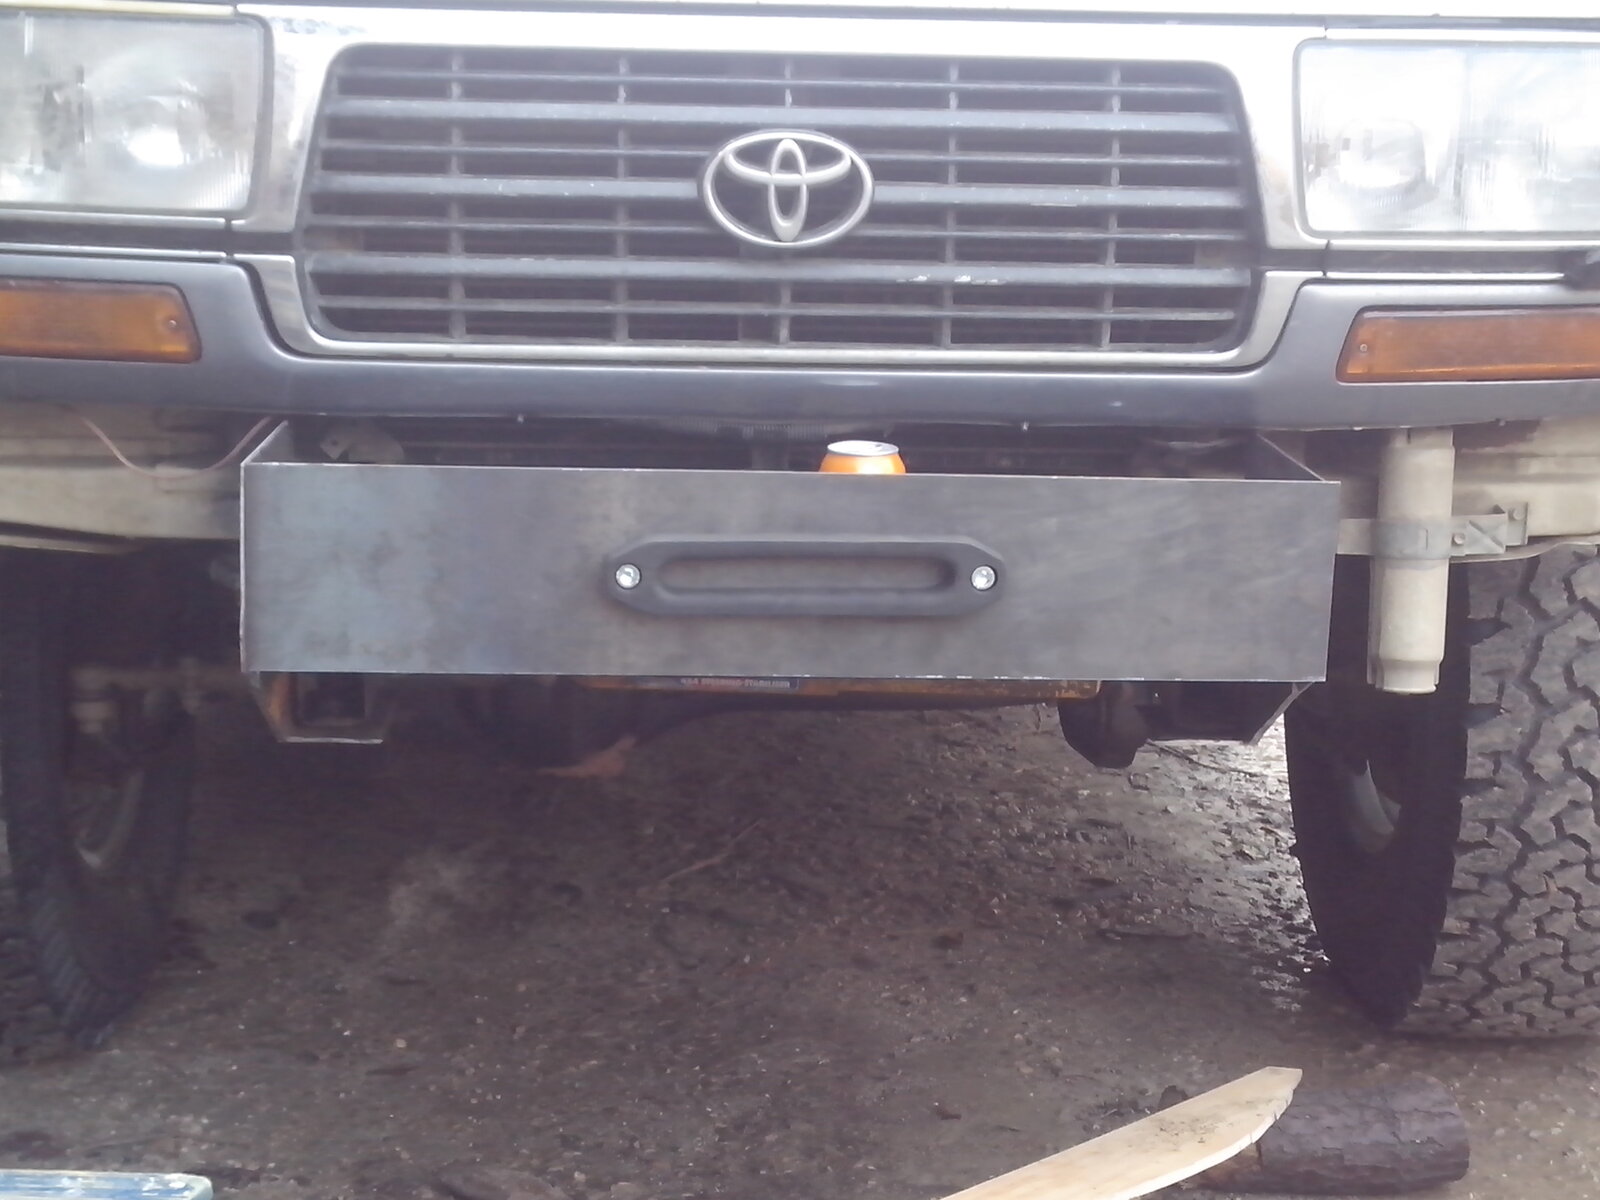
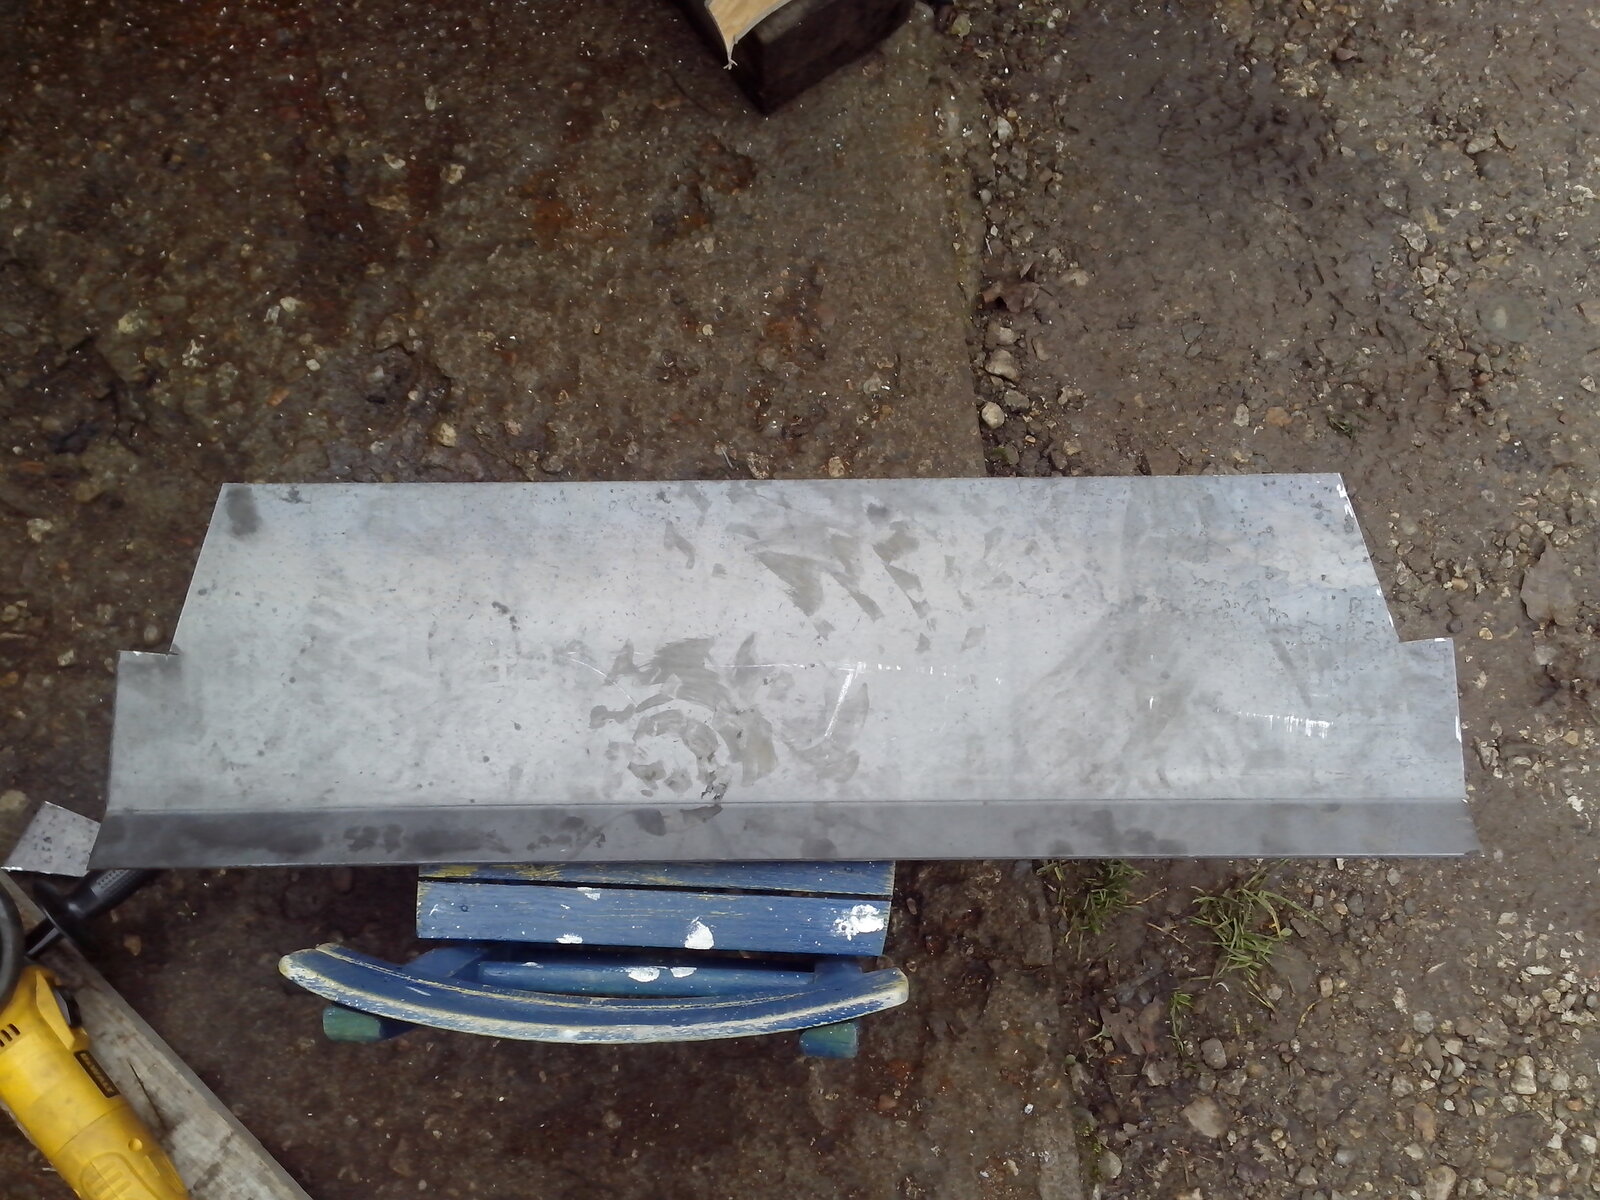
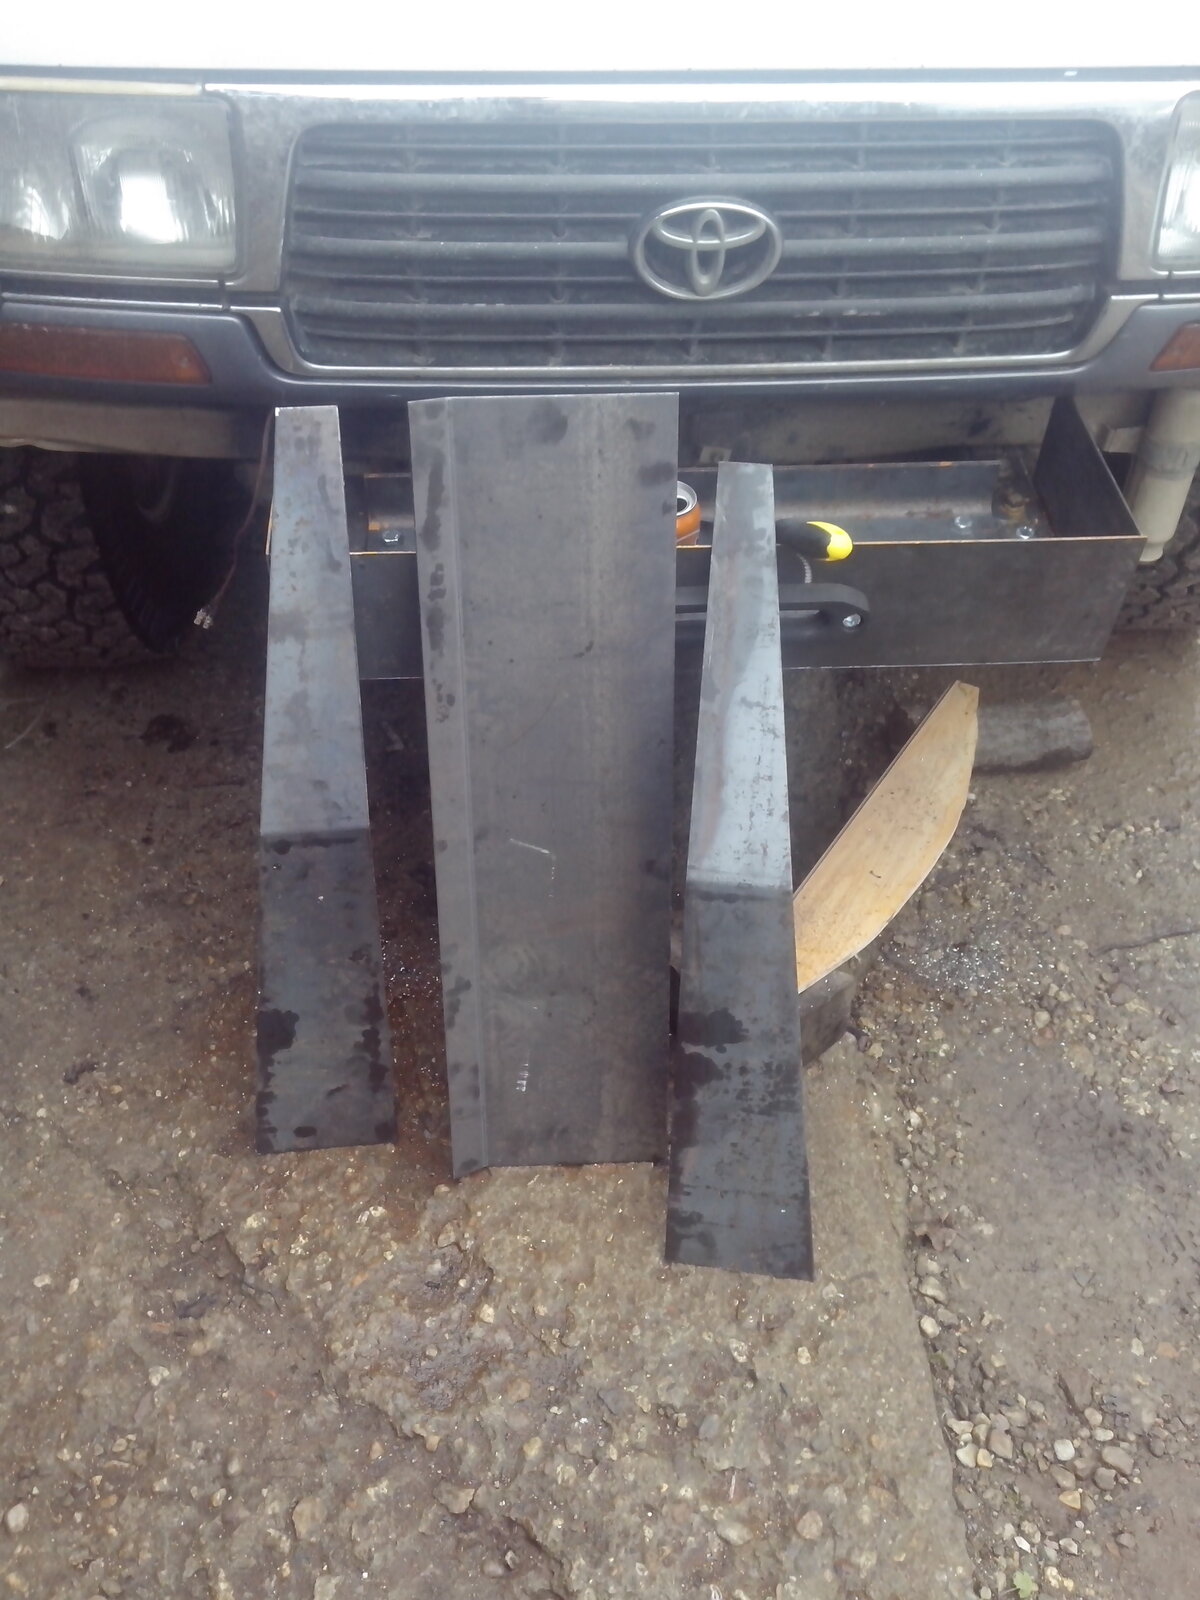
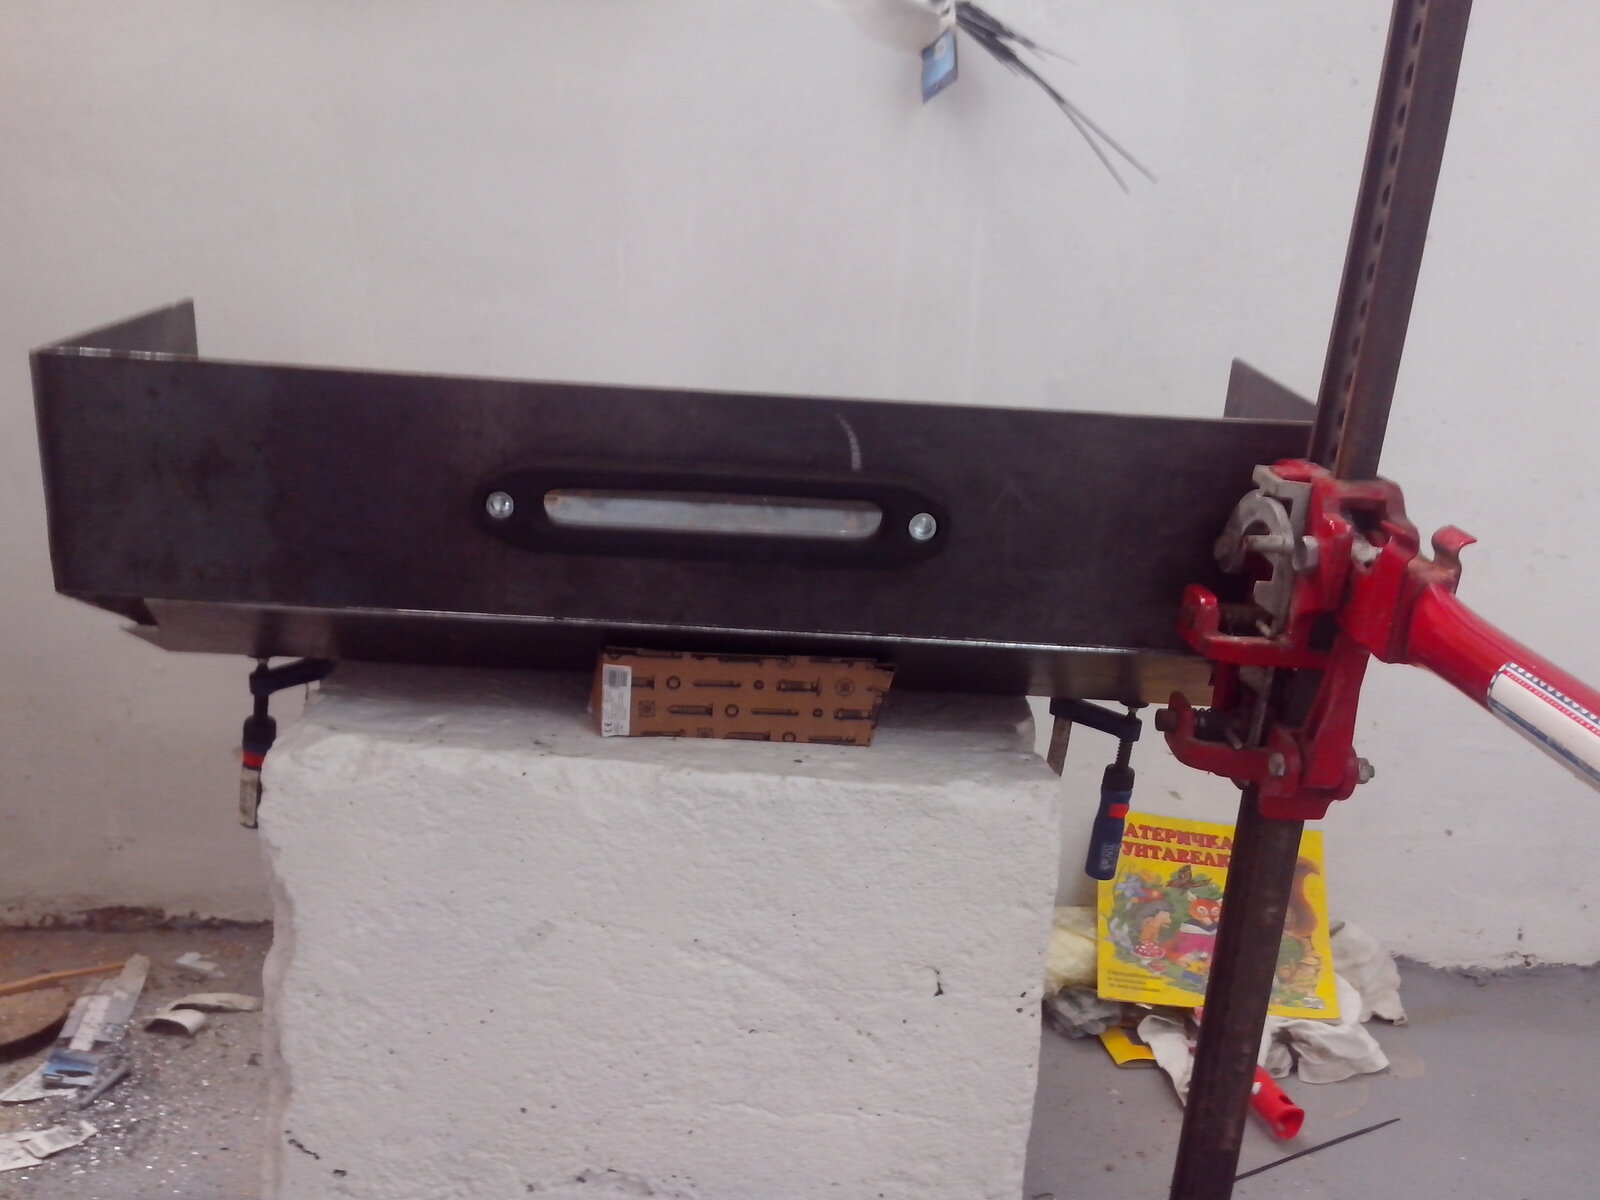
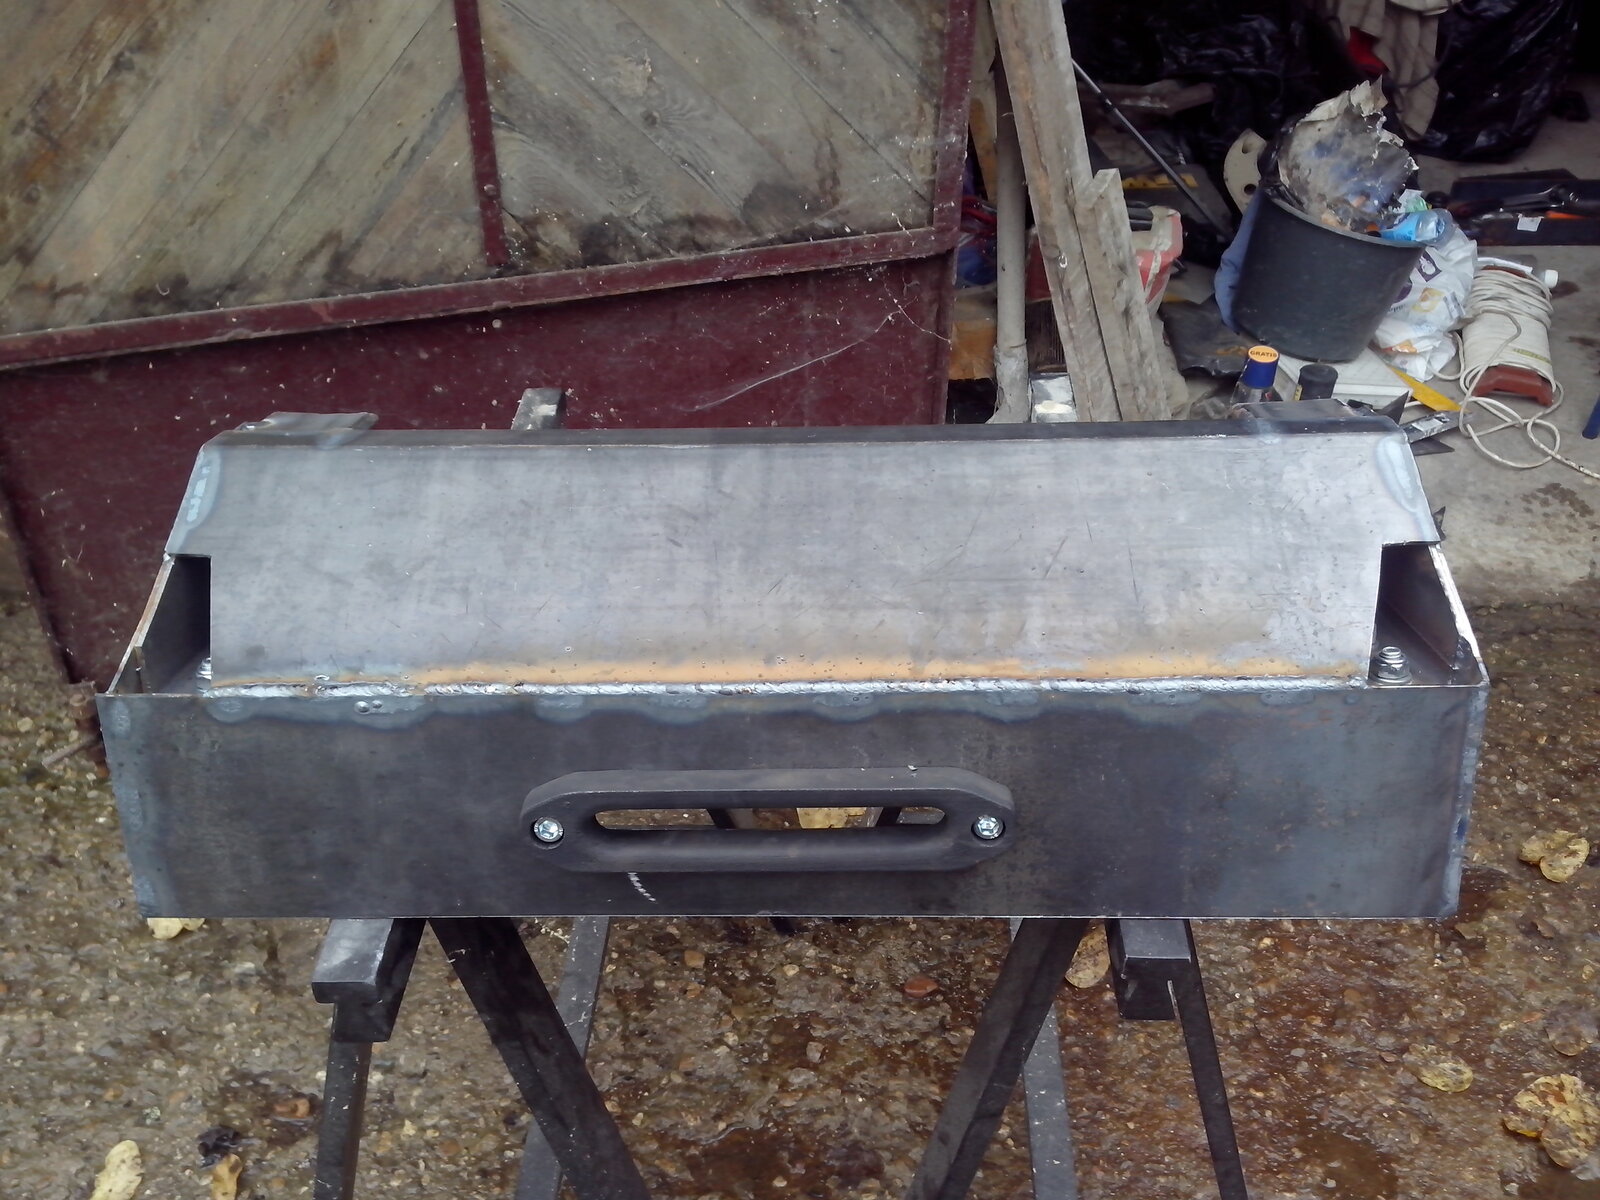
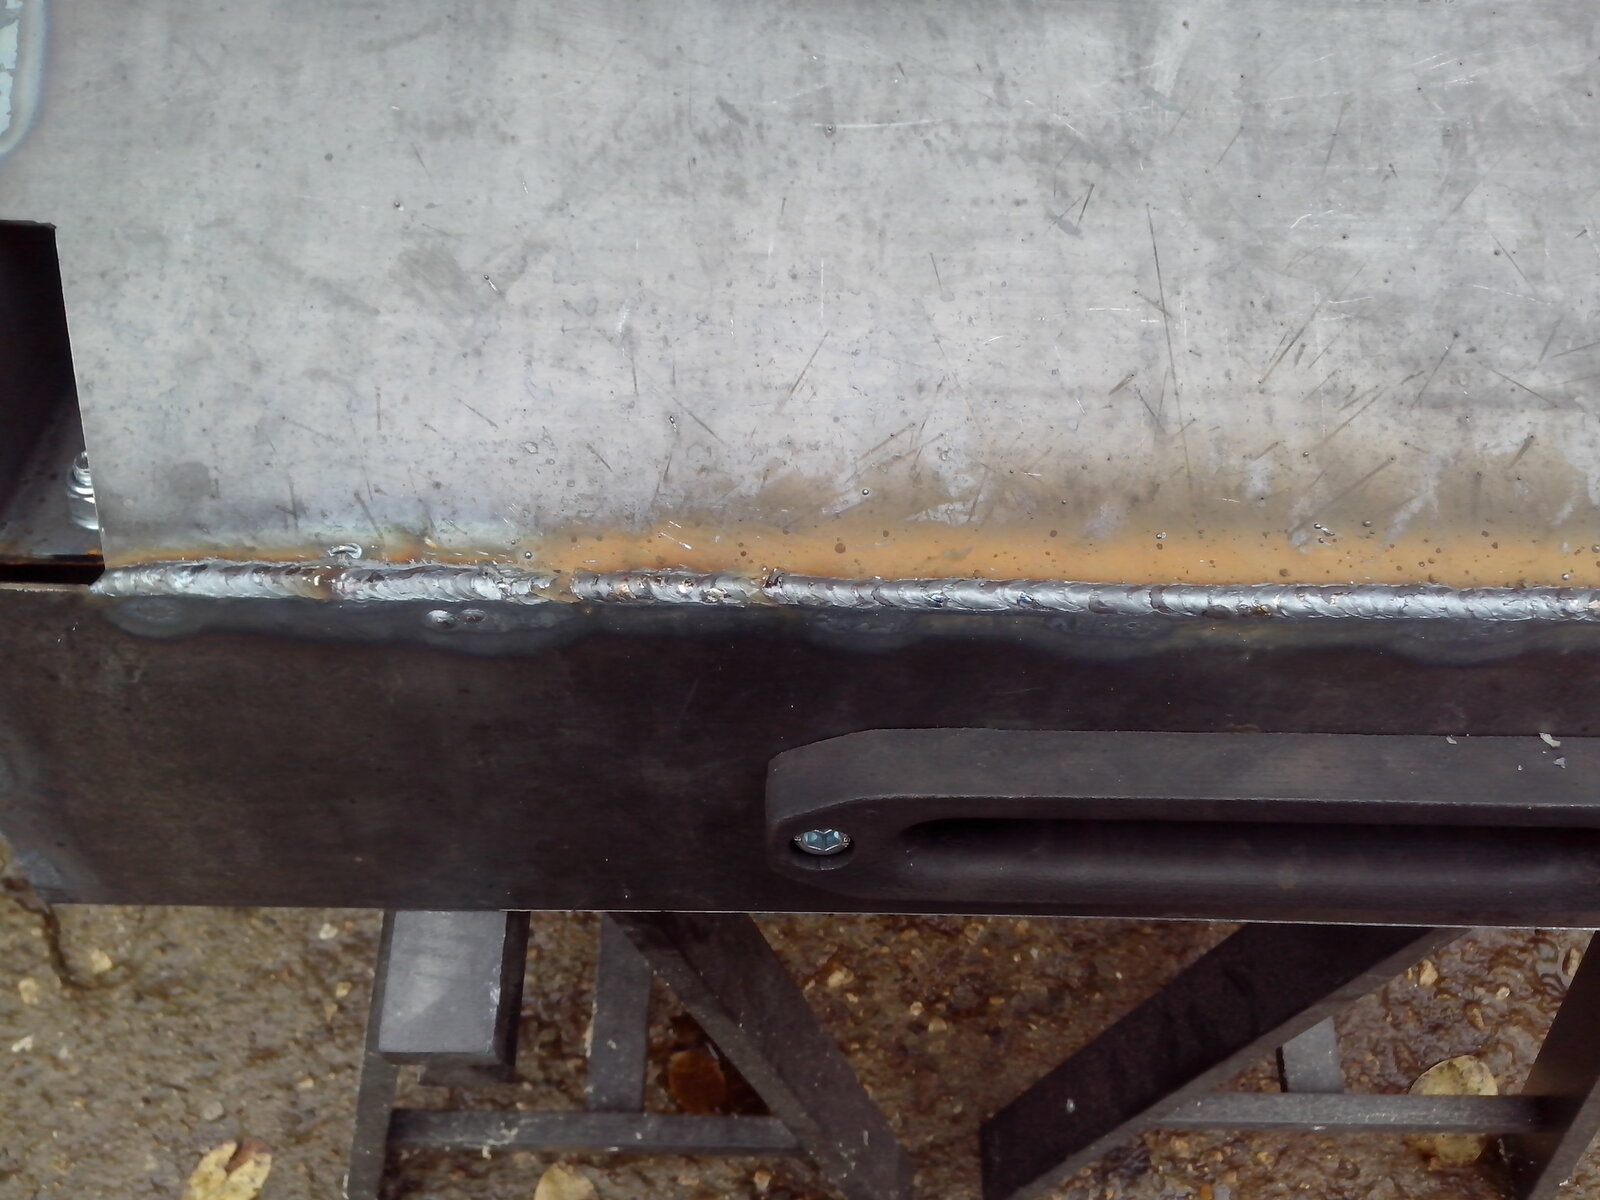
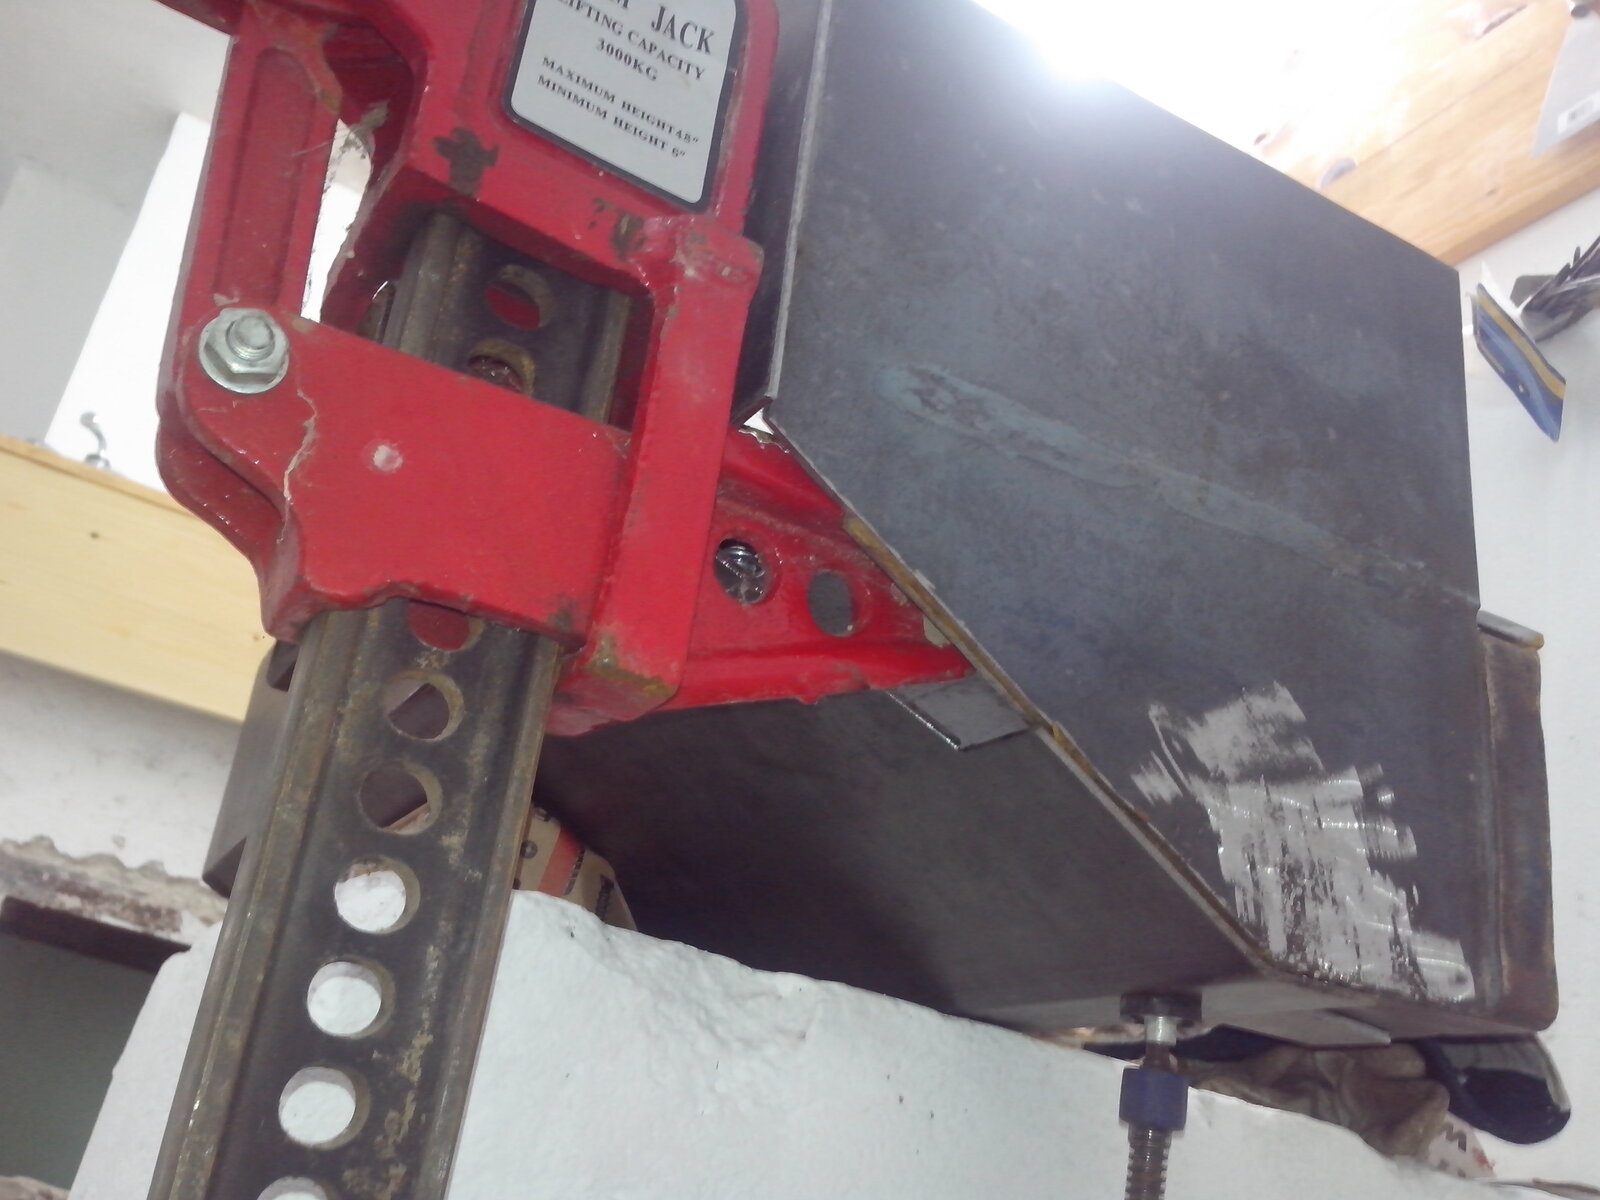
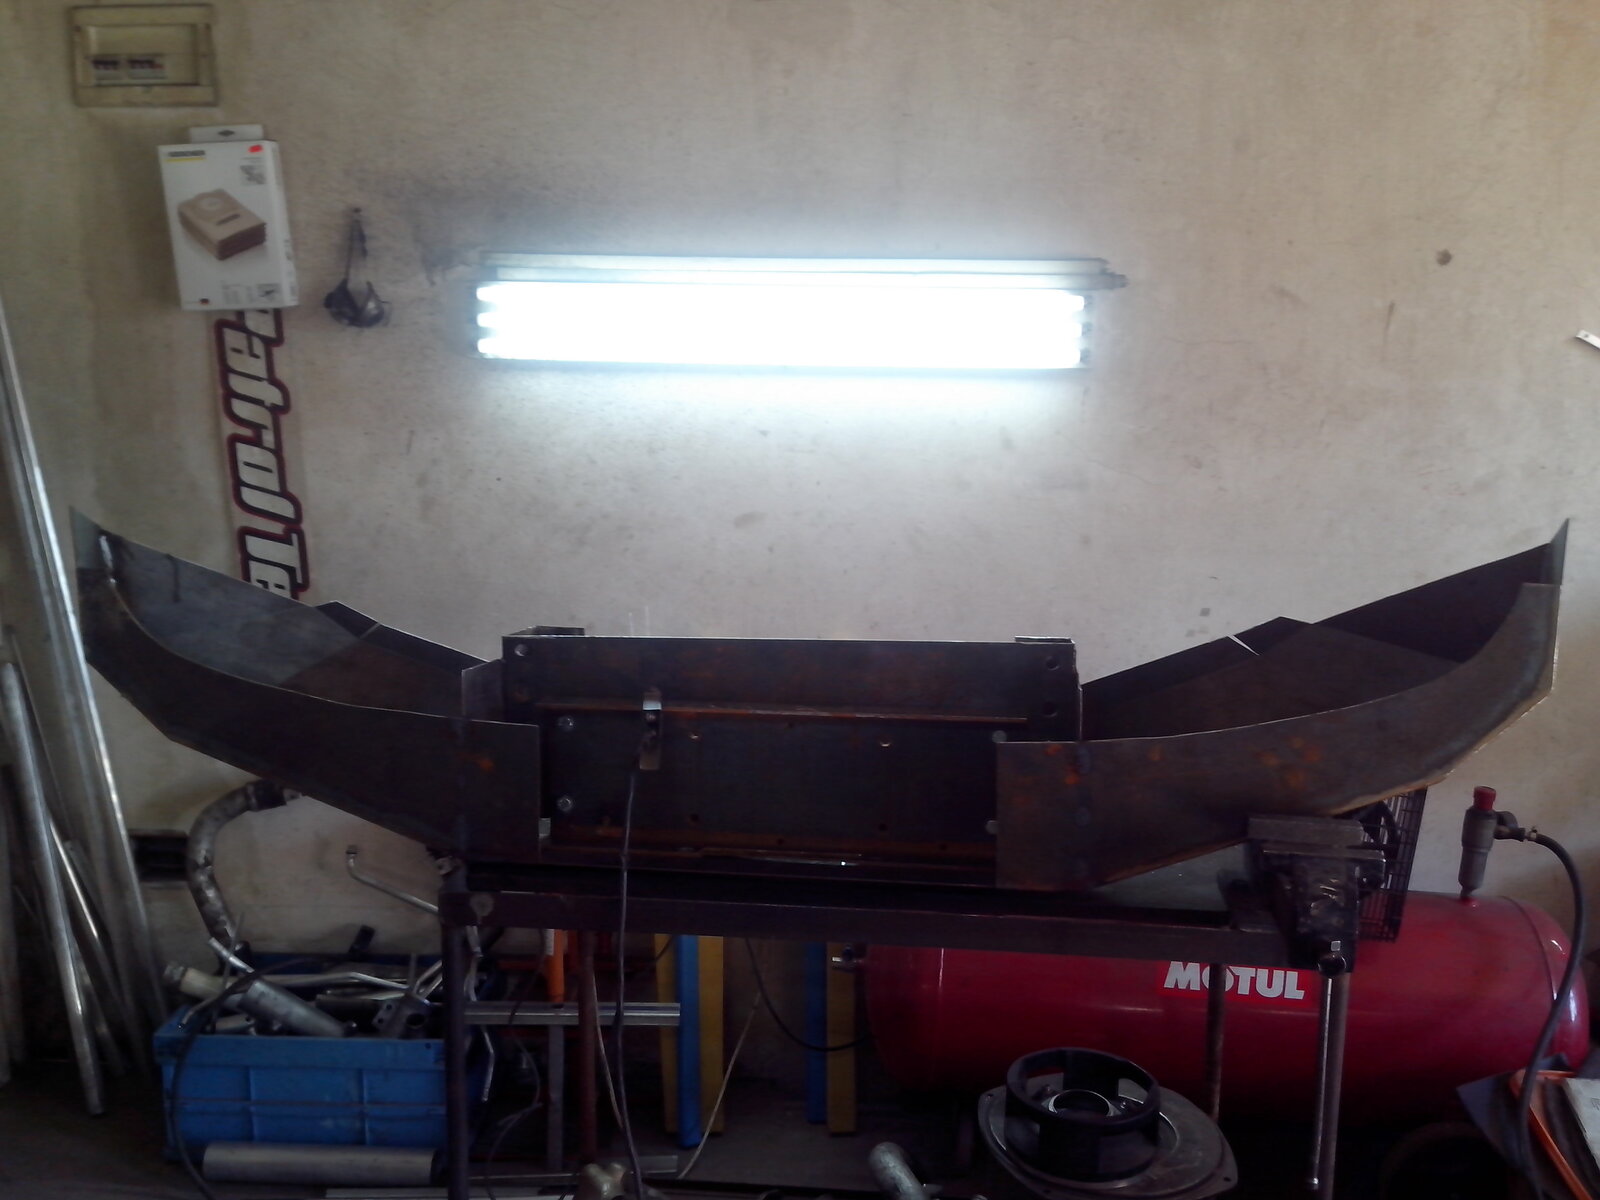
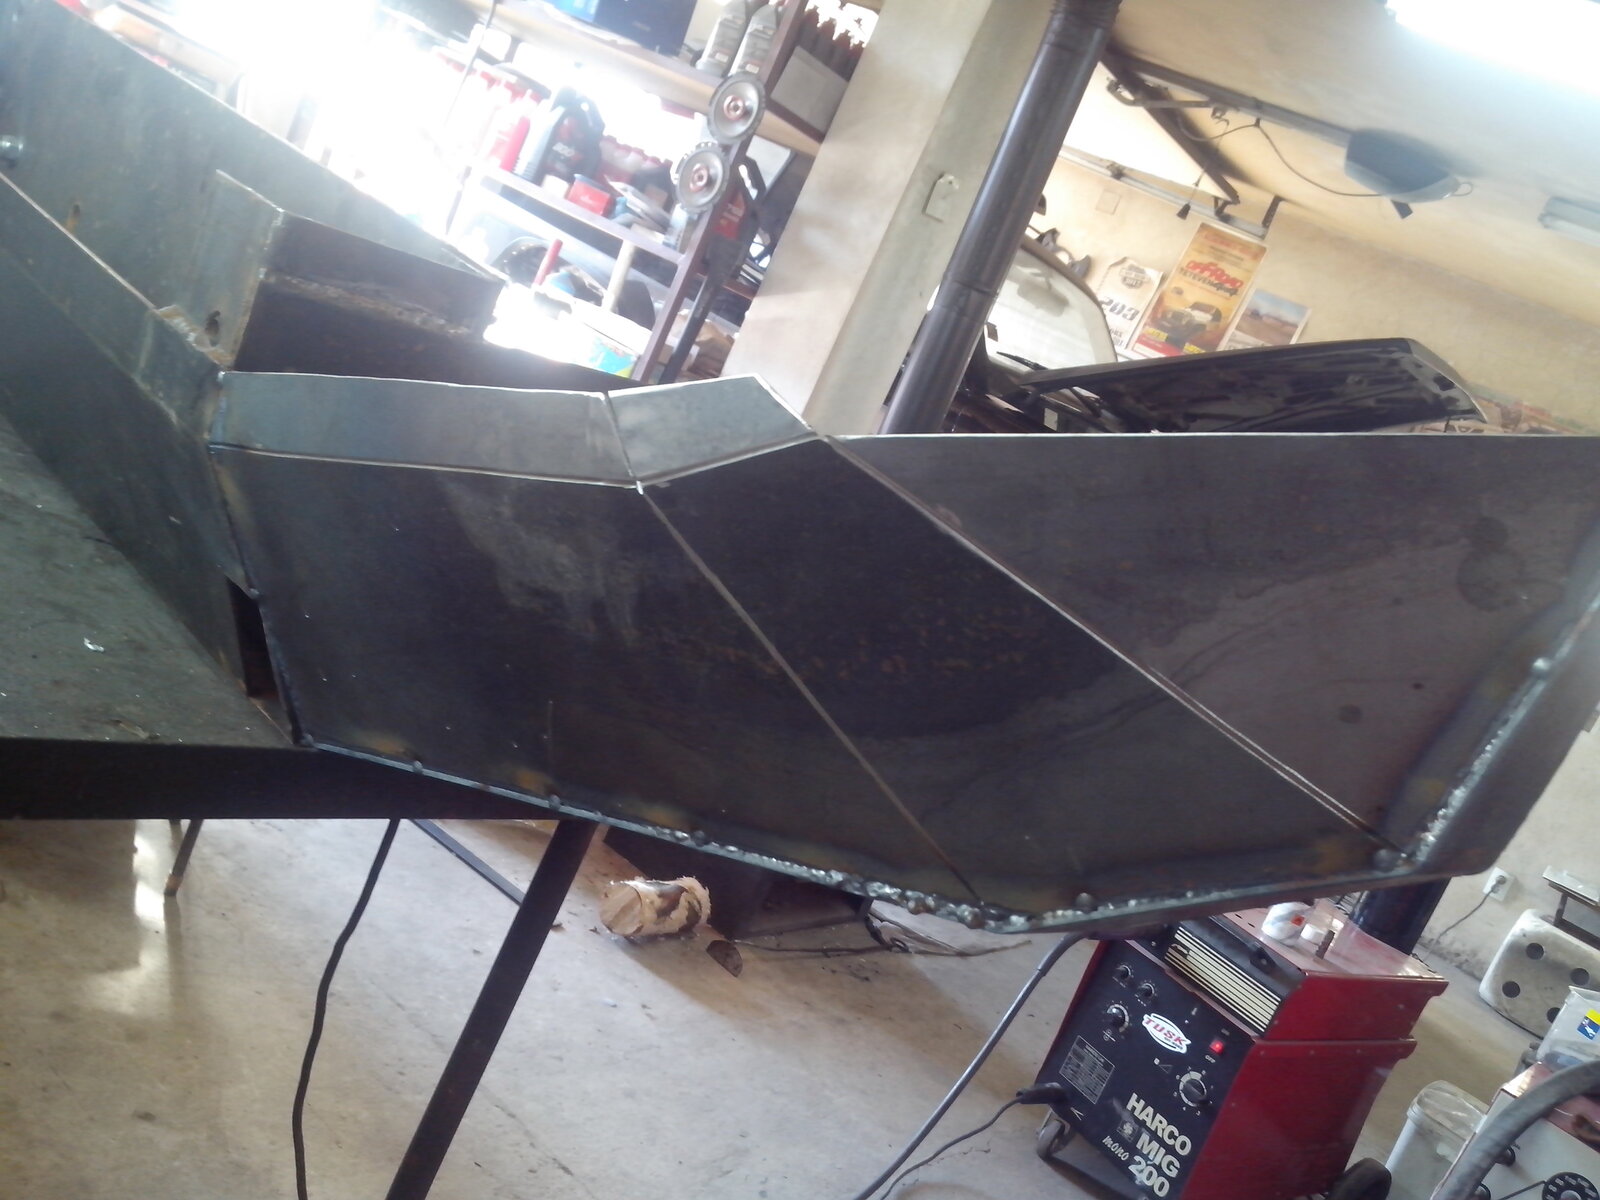
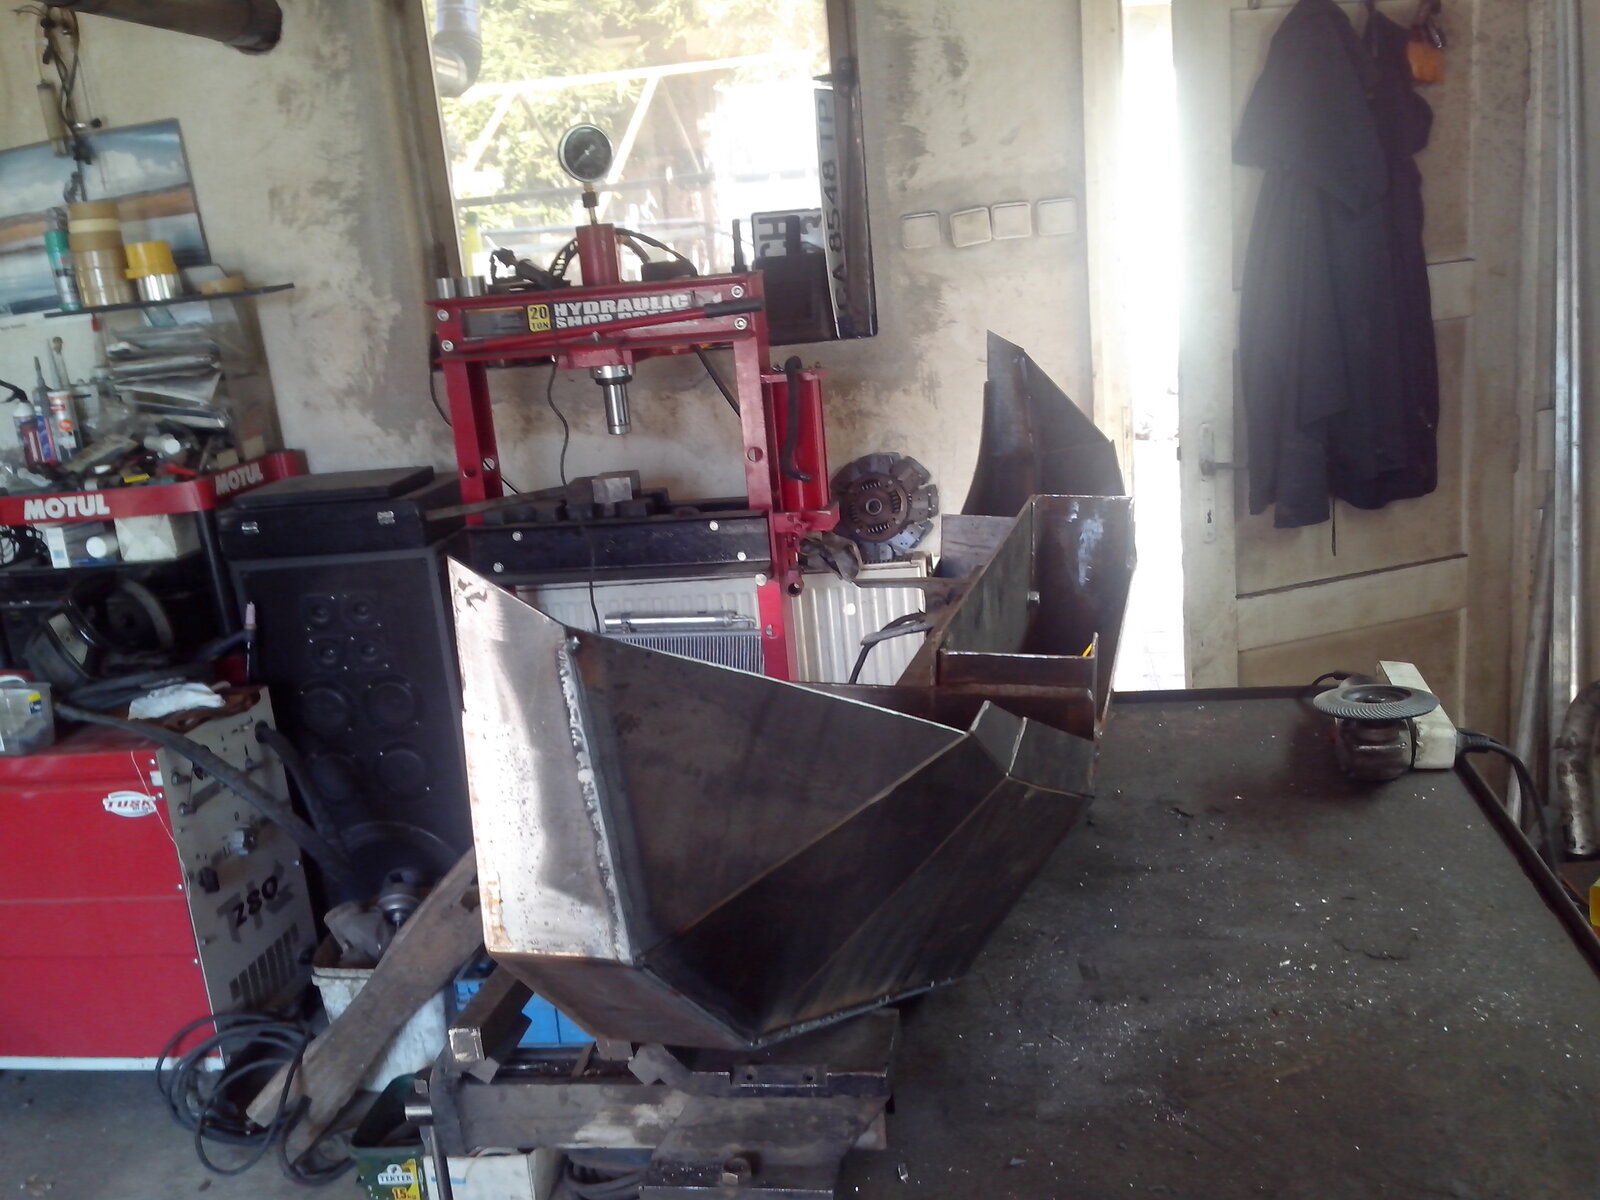
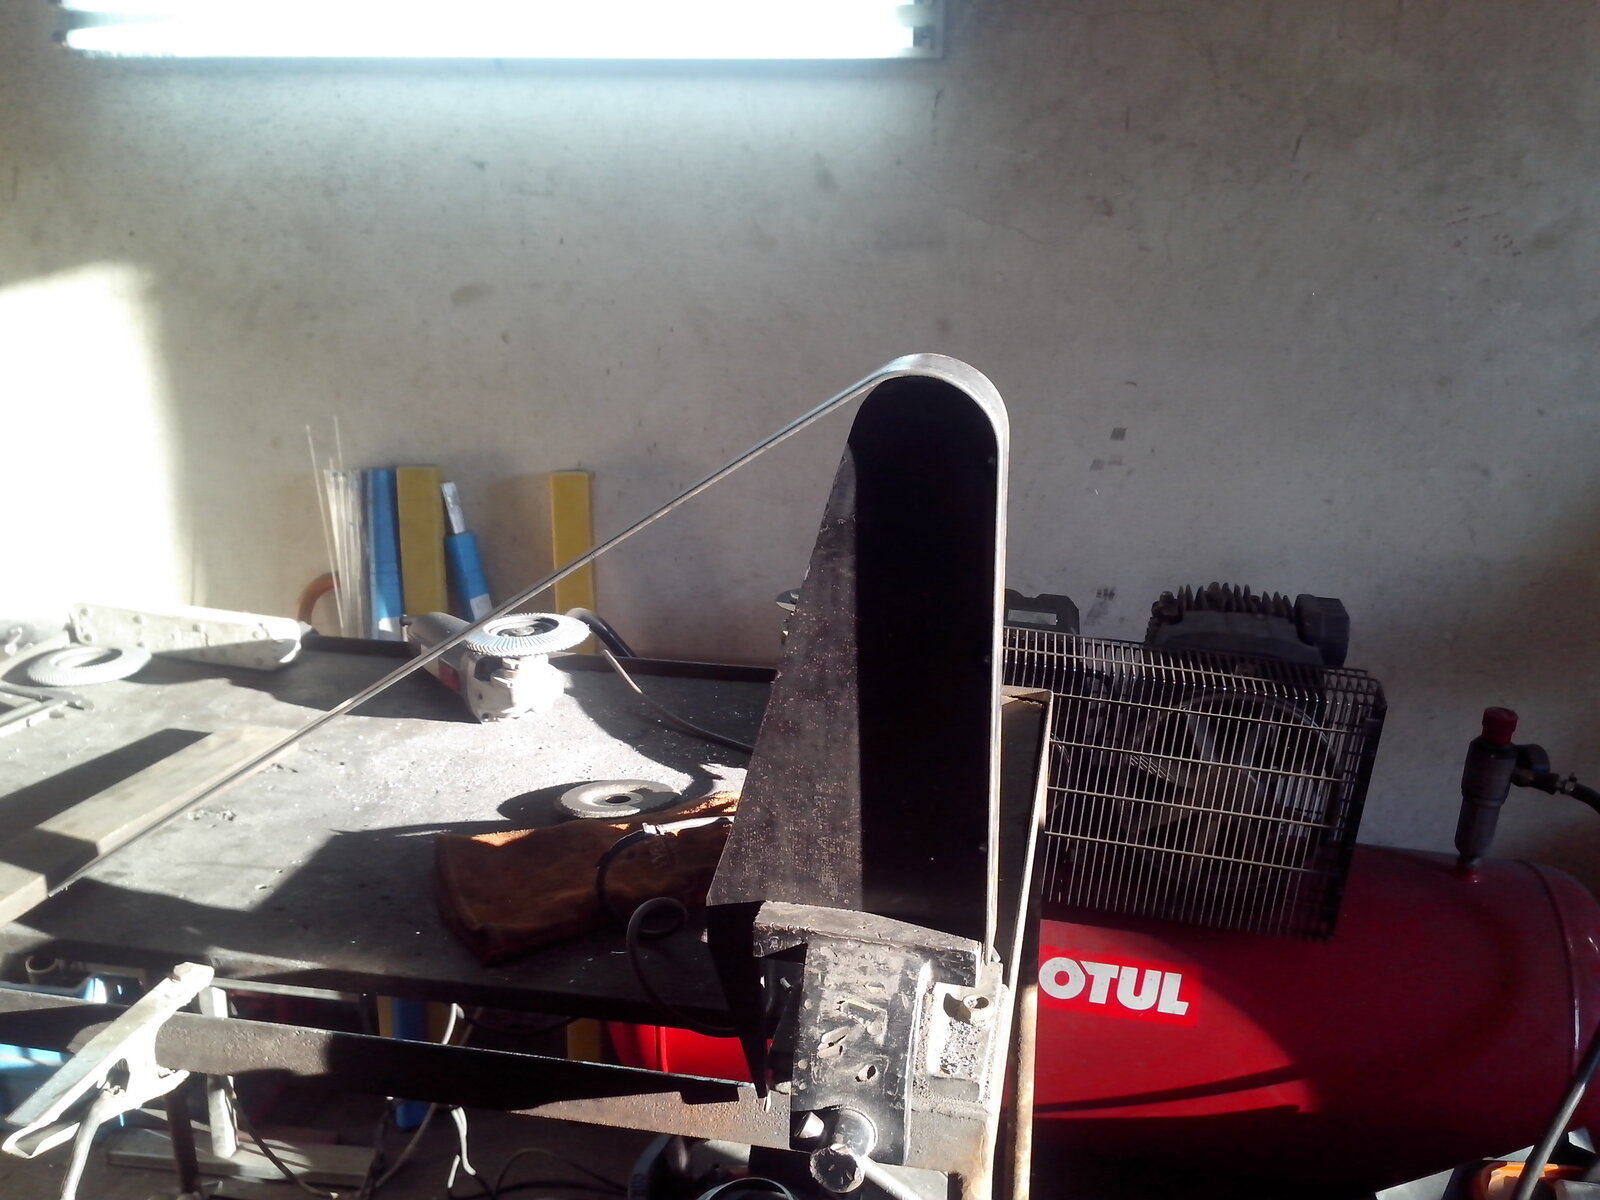
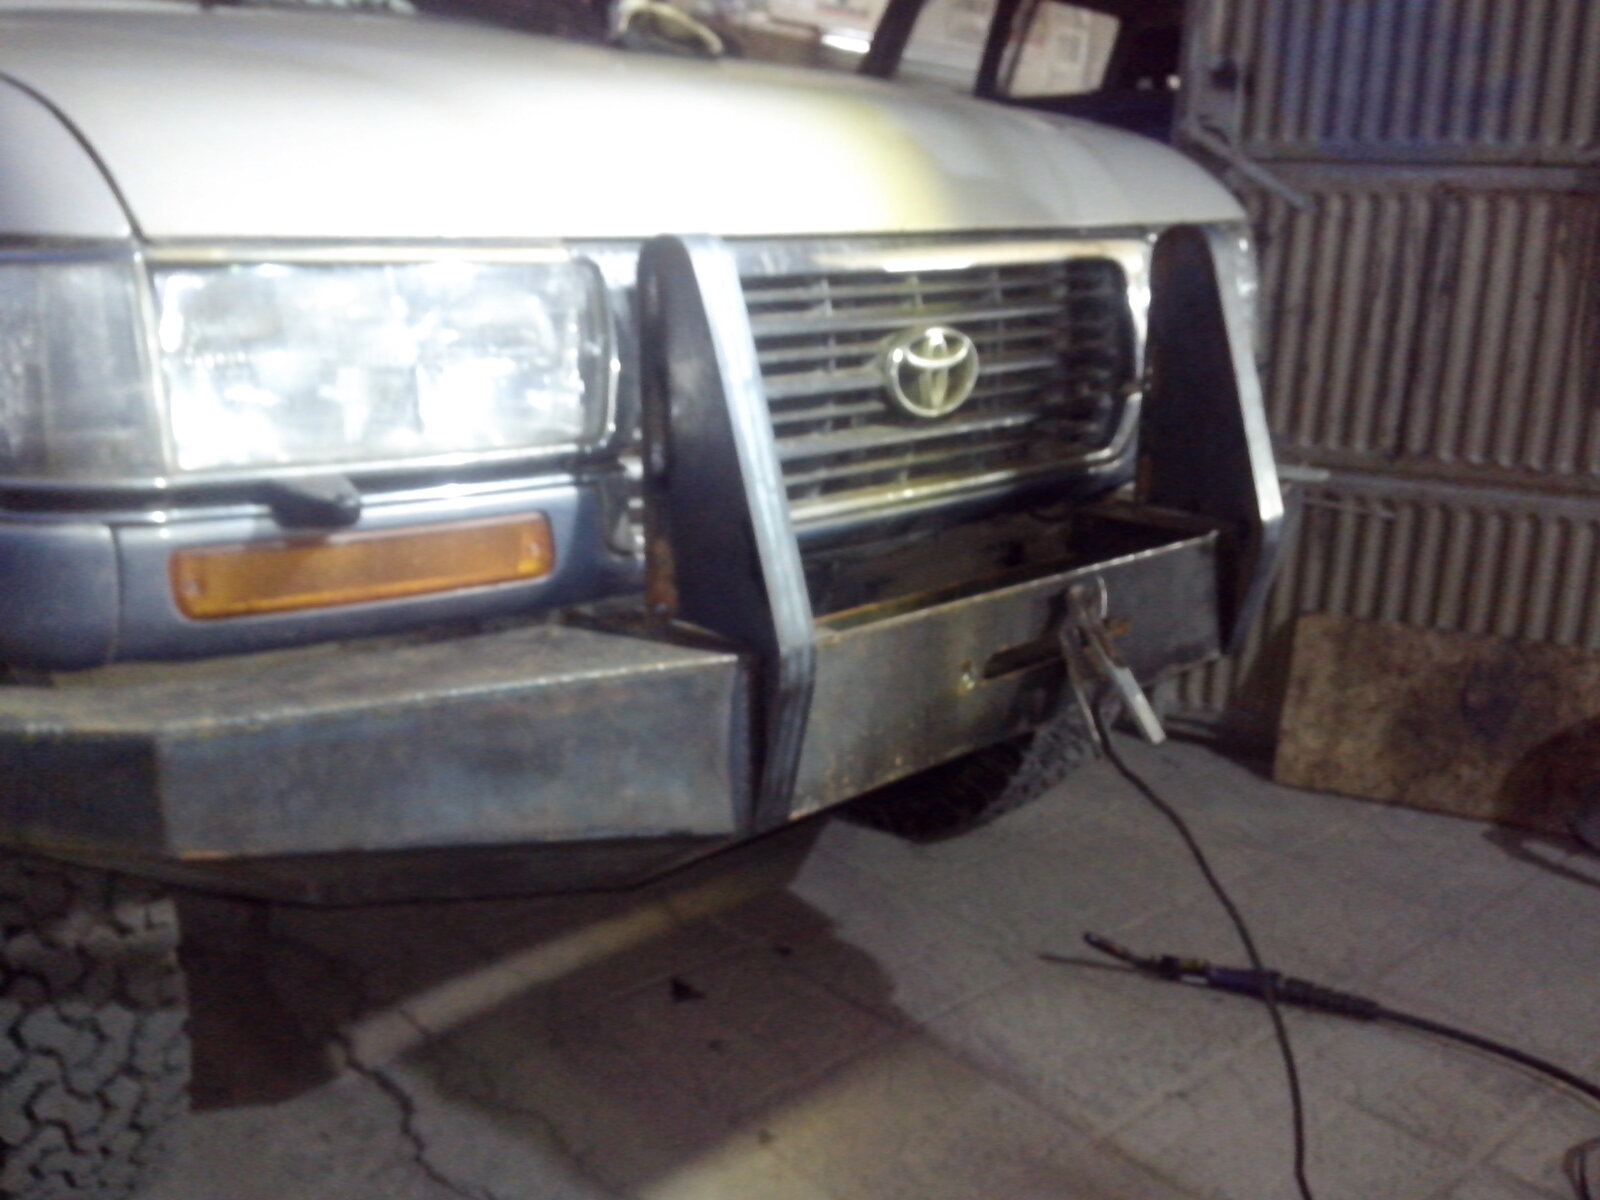
I work outside the garage as the Yota wont get in through the gate.Here's how far I'm so far:)...Hope it wont rain tomorrow.
 

Attachments

  • tlc80_project 020.jpg
    tlc80_project 020.jpg
    529.8 KB · Views: 163
  • tlc80_project 019.jpg
    tlc80_project 019.jpg
    742.4 KB · Views: 160
  • tlc80_project 021.jpg
    tlc80_project 021.jpg
    715.6 KB · Views: 202
  • tlc80_project 024.jpg
    tlc80_project 024.jpg
    628.4 KB · Views: 155
  • tlc80_project 025.jpg
    tlc80_project 025.jpg
    794.7 KB · Views: 161
  • tlc80_project 022.jpg
    tlc80_project 022.jpg
    661.5 KB · Views: 170
  • tlc80_project 023.jpg
    tlc80_project 023.jpg
    529.7 KB · Views: 159
Looks just like my bumper. Good work
 
Don't like the adverts?  Click here to remove them
FWIW I seem to remember there is a kit to relocate the A/C dryer, this is one of the first things to get busted when getting serious off road. It might have been Slee but it was awhile back.

regards

Dave
 
Thanks Dave! I gave it a thought and then I just passed on the idea of relocating it. I'll just make a couple of ribs in the bumper to ensure litte more security to the unit. I dont really use the cruiser for a hard offroad. However we all know how can a soft go at some point:music-rockout:
 
The rain turned into snow and could not do much till it stopped at some poin today.Took the opportunity and grabbed a metal sheet.Did most of the lower part ot the left panel. Still needs some adjustments, some trimming and little bending of the lower edge. Tomorrow is another day:)...
 

Attachments

  • tlc80_project 031.jpg
    tlc80_project 031.jpg
    877.7 KB · Views: 141
  • tlc80_project 032.jpg
    tlc80_project 032.jpg
    748.4 KB · Views: 126
  • tlc80_project 034.jpg
    tlc80_project 034.jpg
    575.1 KB · Views: 132
  • tlc80_project 035.jpg
    tlc80_project 035.jpg
    580.4 KB · Views: 135
  • tlc80_project 036.jpg
    tlc80_project 036.jpg
    555.1 KB · Views: 124
Yesterday was a good day for the project.Did most of the metal work :)
 

Attachments

  • zemqta+horata 002.jpg
    zemqta+horata 002.jpg
    453.6 KB · Views: 93
  • zemqta+horata 003.jpg
    zemqta+horata 003.jpg
    588.5 KB · Views: 98
  • zemqta+horata 007.jpg
    zemqta+horata 007.jpg
    634.4 KB · Views: 102
  • zemqta+horata 005.jpg
    zemqta+horata 005.jpg
    652.6 KB · Views: 118
  • zemqta+horata 011.jpg
    zemqta+horata 011.jpg
    596.8 KB · Views: 109
  • zemqta+horata 012.jpg
    zemqta+horata 012.jpg
    574.1 KB · Views: 101
  • zemqta+horata 013.jpg
    zemqta+horata 013.jpg
    581.2 KB · Views: 104
  • zemqta+horata 014.jpg
    zemqta+horata 014.jpg
    521.7 KB · Views: 106
I did not realise how much time consuming procedure is to make the bar until I made one. Used 8mm metal (there's no need to be thicker than 6mm) covered by 40x3. And the pipe is 60mm diameter x3mm.
P.S. Sorry for the poor quality of pics:oops:

MERRY CHRISTMAS!:)
 

Attachments

  • zemqta+horata 008.jpg
    zemqta+horata 008.jpg
    639.7 KB · Views: 108
  • zemqta+horata 009.jpg
    zemqta+horata 009.jpg
    497.8 KB · Views: 102
  • zemqta+horata 016.jpg
    zemqta+horata 016.jpg
    561.6 KB · Views: 108
  • zemqta+horata 017.jpg
    zemqta+horata 017.jpg
    524.4 KB · Views: 98
Last edited:
Back
Top