Don't like the adverts?  Click here to remove them

LJ70 Build Thread!

:text-goodpost:

Thanks mate. I love that 3 link rear suspension setup on the LJ78 on the mud link! Think thats how I should do mine.


Yeah thats what I thought when I saw it. :thumbup:

Only real difference is he changed the bottom links as well. :think:

Very interesting, when are you doing that? :icon-smile:

I was going to build new links originally thinking the cut arms would reduce articulation but they they work so well and is easy to get bushes for I never really bothered, your truck will be fecking awesome with a 3 linked back end, and a man of your talents you could knock it up in no time B)
 
Great update Ben :thumbup: LJ is going to be in great shape for the Simpson trip by the time you have finished.

Like the shots of the bumpers and tyre swing outs, gas strut assistance is a nice mod. If only the Kaymar bumpers were a bit more affordable! The receiver hitch mounted swing out is interesting but not very common, I have only seen this done a couple of times, certainly one way of doing it without modding the truck.

An interesting insight into the Ford Rangers, all those cables and the prop do look quite vulnerable under there, thats going to ruin peoples day/trip when they damage the truck on fairly easy going terrain.

Re your ex house mates 80, driving without a panhard rod on the highway was a very poor decision, then upping the speed to 110kph was just plain stupid. Glad no one else got injured or caught up in his crash. I hope it was an education for him. Shame another nice 80 bites the dust.

Keep up the good work as always Ben, your build thread has just passed the 200 page milestone! :dance:
 
I did some more work on LJ yesterday.

P5100001_zps625c517d.jpg

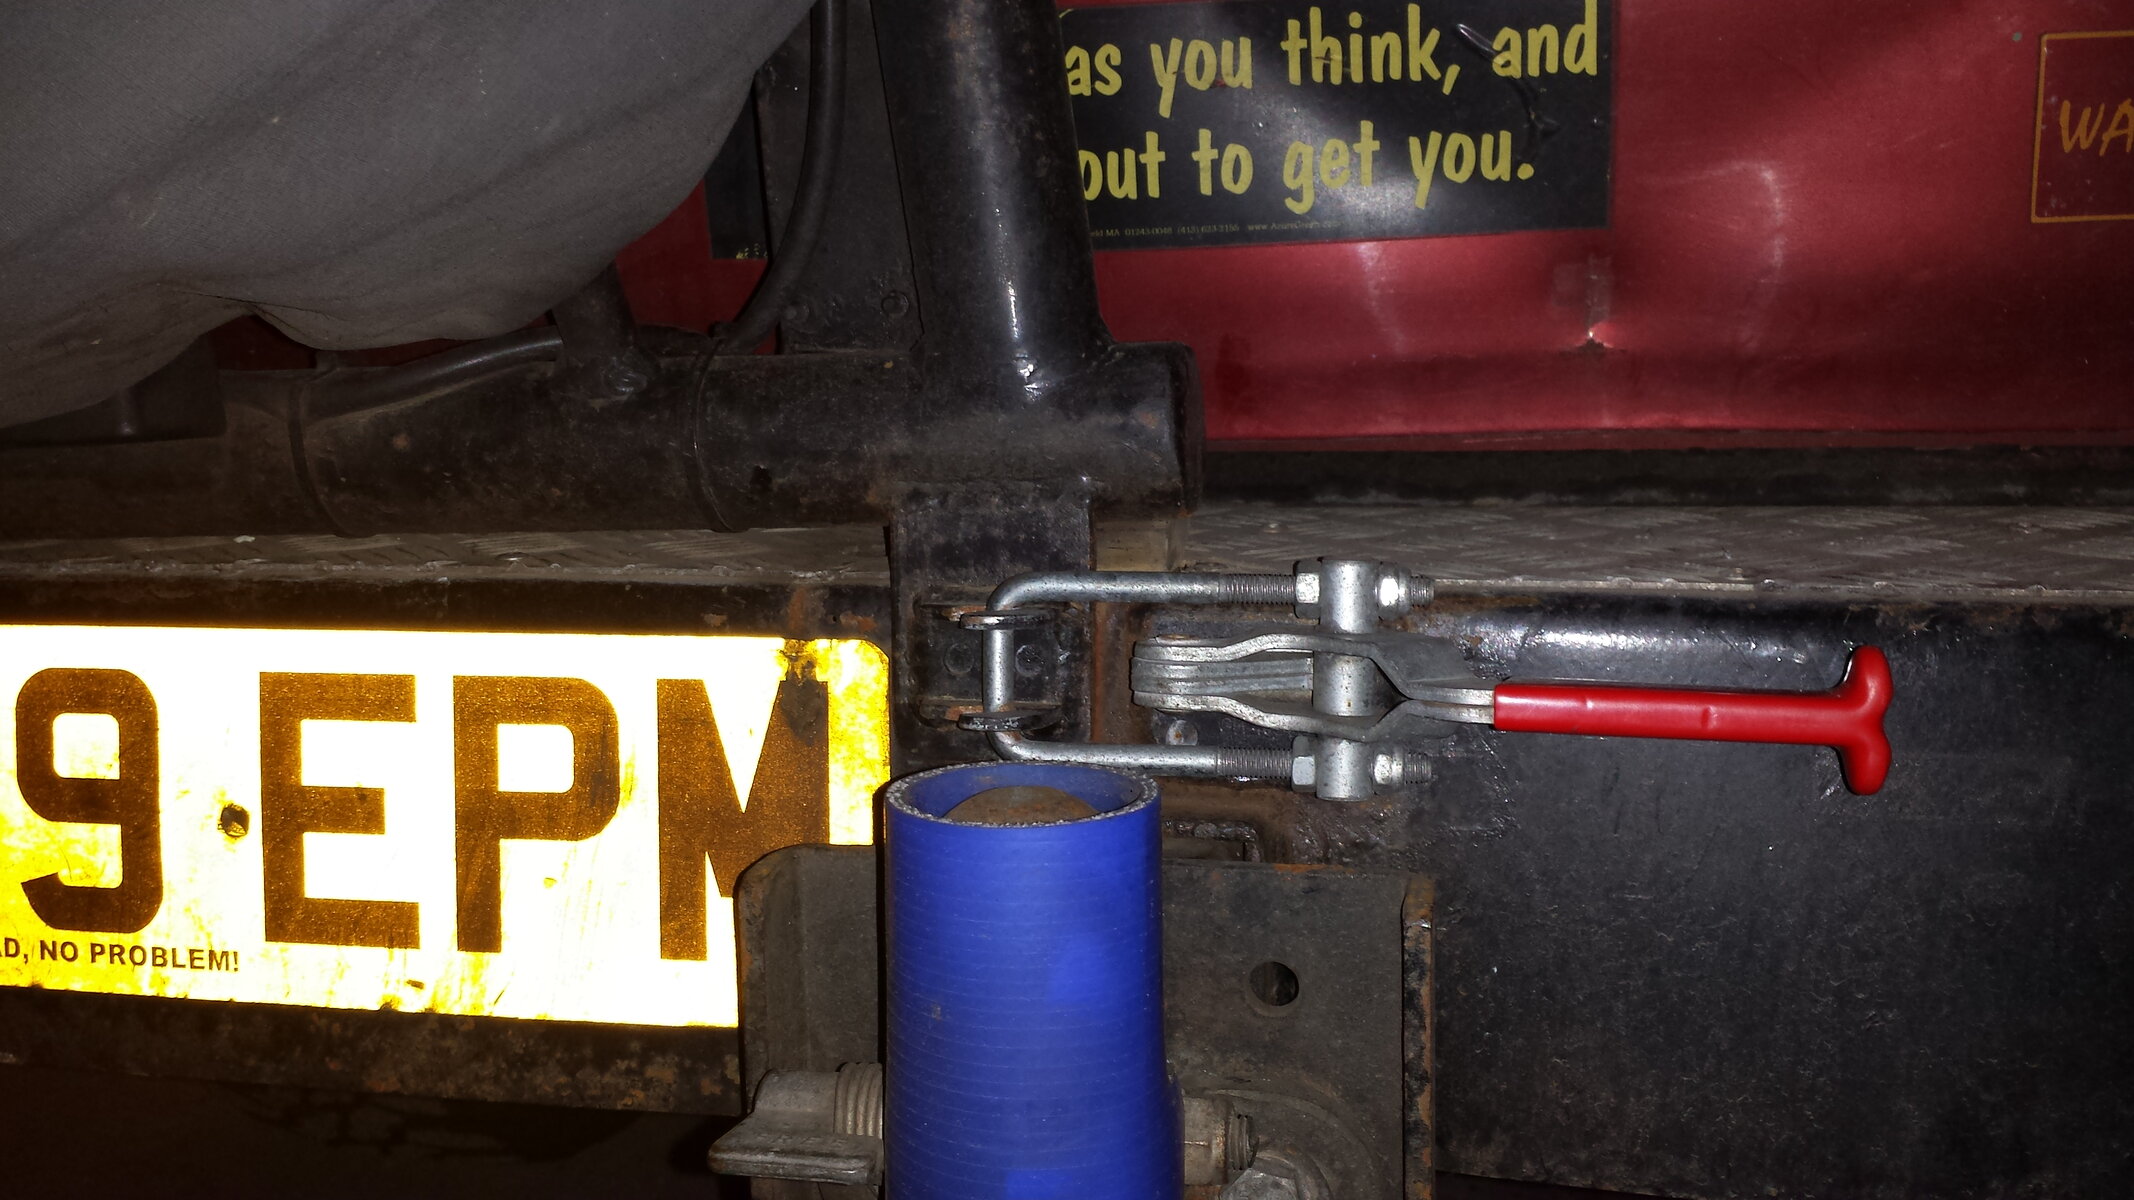
I needed to fit the rear bumper and work out how best to mount the latch.

P5100002_zps3352db35.jpg

P5100003_zps0d64bafe.jpg

P5100004_zps52668238.jpg

The arm is now at a much better angle.

P5100005_zpsd1df3b49.jpg

P5100007_zps3522c384.jpg

P5100008_zps3b219ecc.jpg

P5100009_zps0e868e89.jpg

The swing away wheel carrier swings enough for the door to open fully.

P5100010_zps3a6e6c7f.jpg

So I needed to look at how best to mount the latch.

P5100011_zpsa7405d4a.jpg

P5100012_zps71eb49e9.jpg

This was how it was mounted before, but this will obviously restrict the door from opening.

P5100013_zps05f9cf76.jpg

And this is how I'm thinking of mounting the latch now.

P5100014_zpsb980f40a.jpg

P5100015_zps382c6b6b.jpg

The captive nuts in the front of the chassis that I used to secure my recovery points and steering guard, had recently got a bit cross threaded so I decided to do away with them and fit bolts through the chassis instead.

P5100016_zps92781c60.jpg

P5100017_zps2d0cf96a.jpg

P5100018_zps7b5fd757.jpg

Marked the top of the chassis where the holes needed drilling.

P5100019_zps879fe875.jpg

I drilled the captive nuts out.

P5100021_zpse9faab4b.jpg

P5100022_zps3d1bf66e.jpg

Drilled the top of the chassis.

P5100024_zps19e1ba57.jpg

Fitted the winch tray.

P5100025_zps9146c685.jpg

P5100026_zps45e9218a.jpg

P5100027_zps0d9695a8.jpg

P5100028_zpse1ec838c.jpg

P5100029_zpsc2f95779.jpg

I've discovered that LJ70 doors are worth a lot of money as they also fit the 79 series pick up trucks in the mines. My local wrecker sells front doors for $650 and they were completely out as the mines buys them all to repair their fleets.

So I decided I should just fix the passenger door that I've got.

I removed the glass and mechanism.

P5100032_zps27cb7499.jpg

With that out I could then spend some time pushing and hammering all the dents out.

P5100033_zps5c8dacfa.jpg

Difficult to see in pics but I actually managed to get a lot of the dents out.

P5100034_zpsaee83e33.jpg

P5100035_zps17c13187.jpg

P5100036_zps6323a3f2.jpg

P5100037_zpsd07f03be.jpg

P5100038_zpsdaaa061e.jpg

I used the grinder to take some of the paint off where I wanted to fill so that the filler would key better to the panel.

P5100040_zps7eadf54d.jpg

P5100041_zps43f26b3f.jpg

I also removed a lot of surface rust from the edge of the door.

P5100042_zps3da7443a.jpg

I applied some filler.

P5100043_zps8b906c9f.jpg

P5100044_zps8de60d0d.jpg

I also did a bit more filling and sanding on the C pillars.

P5100045_zpsc9530b89.jpg

P5100046_zps01b46bb7.jpg

P5100047_zpse62bcc87.jpg

I had a quick look at how much I will cut out when I make the oil drum arches/flares.

P5100048_zps6ef46b62.jpg
 
Hey Ben, on the latch, I started out mounting mine horizontally on Muxley & it didn't hold the arm securely at all, maybe I had something wrong but I would try to keep it vertical if I were you :icon-ugeek:

Shame about Michael's 80 :doh:
 
Thanks Gav. :icon-biggrin:

What latch did you use?

I think my one has got 800kg of clamping force IIRC. :think:

I'm not sure there is enough room to keep it vertical and still be able to open the little rear door. :doh:
 
Don't like the adverts?  Click here to remove them
Same/similar to that Ben - it needs to pull the swingarm onto something to work properly... Hence 'clamping' force I guess...

Can you shorten the arm further so that the latch sticks up in front of the bigger door perhaps :think: I think that's what I would try... :icon-cool:
 
Thinking about what the others have to say:

What about mounting the bracket onto the top of the bumper, and the latch onto the top of the swing away, so it's pulling the arm into the bumper?

So the same set up as:
P5100013_zps05f9cf76.jpg


But with the small hooked latch on the top side of the bumper, and the arm bit on the swing arm.... flip round 180* and then mount at 90* to how it is in that picture? Maybe make a little box section hood for the hook so that it doesn't get snagged on anything? If the arm had a 90* bend in it so that it ran down the swing away, and possibly pin-locked in place to prevent it flipping open if snagged on anything.
 
When my release catch (a drop down through the bumper pin) broke I asked Julian V to come up with a replacement, this is it;

Clamp.jpg

although it doesn't pull downwards it does keep the arm solid with no movement or rattles. When it was held by the drop down pin it rattled a lot.
 
Last edited:
Ben, what are you going to do to stop the pin bending again? Folk here generally say that those type of hinge pins will always bend, especially with that huge tire you have on there! Have you considered having a support off the top of the hinge to the rear pillar - kind of along the lines of a what an 80 series has? I have a feeling your just gonna bend it again otherwise...

just my 2 pennies worth!

Mark
 
My ARB pivot is supported top and bottom, can't imagine anything ever bending that.... :think:

I'd also be looking for a very positive locating pin/plate at the latch, with the latch taking almost no load from the carrier, just holding in place.

Sorry Michael lost his 80, it was a beaut. But really what was he thinking of ? and why did he lose a wheel? Surely there's no connection between a broken panhard and wheel loss? He must have just forgotten to tighten it :doh:Getting careless is dangerous, I'm sure he realizes that now. He's lucky to have escaped uninjured.

great updates Ben
 
Thanks guys, lots for me to think about. :thumbup:

Regarding the bent pivot pin..........................

I'm not going to be running a 37" tyre as a spare anymore and there a staggering 20kg heavier than the 35" BFG thats on there now! :wtf:

I'm also hoping now I've hardened it it wont bend as easily, but I guess only time will tell. :pray:

I will see if there is a way of adding a top support though. :think:

Sorry Michael lost his 80, it was a beaut. But really what was he thinking of ? and why did he lose a wheel? Surely there's no connection between a broken panhard and wheel loss? He must have just forgotten to tighten it :doh:Getting careless is dangerous, I'm sure he realizes that now. He's lucky to have escaped uninjured.

great updates Ben

I agree! :icon-smile:

The bottom kingpin completely sheared off which resulted in the wheel coming off! :wtf:

Whether this was because of the constant shaking and vibrations of not having a panhard rod connected, or whether it got damaged when he did whatever he did to break that huge monster of a panhard rod, I dont know. :think:

But I've certainly never heard of anyone breaking a kingpin and nor has anyone else I've spoken to! :icon-confused:
 
No not at all Clive, dont worry mate. :thumbup:
 
Tempered steel tends not to bend, but just to shear right off after enough stress...
And a bloody shame on that 80's..
 
Is that my dents your filling in on the rear of the body next to the windows? lol fond memories from those dents...:icon-biggrin:
 
Good update as usual. Big shame on the 80 :icon-cry: can anything be salvaged for a project?
 
Tempered steel tends not to bend, but just to shear right off after enough stress...
And a bloody shame on that 80's..

Thanks mate, fingers crossed that doesnt happen on my wheel carrier. :pray:

Is that my dents your filling in on the rear of the body next to the windows? lol fond memories from those dents...:icon-biggrin:

:lol:

No there my dents! I used your roof and A pillars! The B and C pillars were mine. Still got plenty of dents on the roof to fill that were yours though! :icon-biggrin:

I'm borrowing an old set of rims with no tyres on that I will fit which should make spraying the roof a lot easier. :thumbup:

Good update as usual. Big shame on the 80 :icon-cry: can anything be salvaged for a project?

Thanks. :thumbup:

Yeah hes salvaged quite a lot and has bought another cheap 80 to swap most of the bits onto. :icon-wink:
 
Back
Top