Don't like the adverts? Click here to remove them
You are using an out of date browser. It may not display this or other websites correctly.
You should upgrade or use an alternative browser.
You should upgrade or use an alternative browser.
RJ70 Build Thread.
- Thread starter Ben
- Start date
- Joined
- Oct 13, 2010
- Messages
- 6,058
- Country Flag
1UZ Engine Removal.
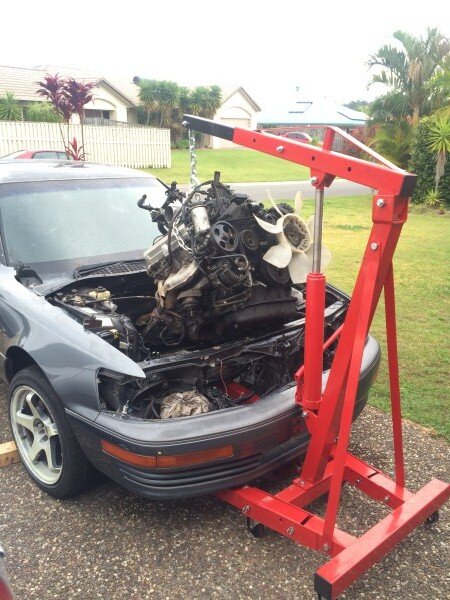
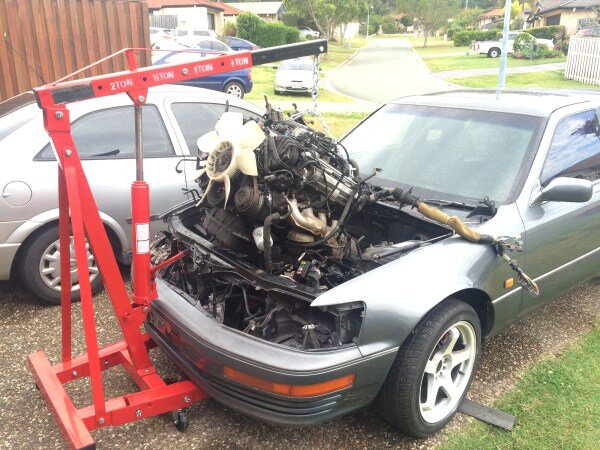
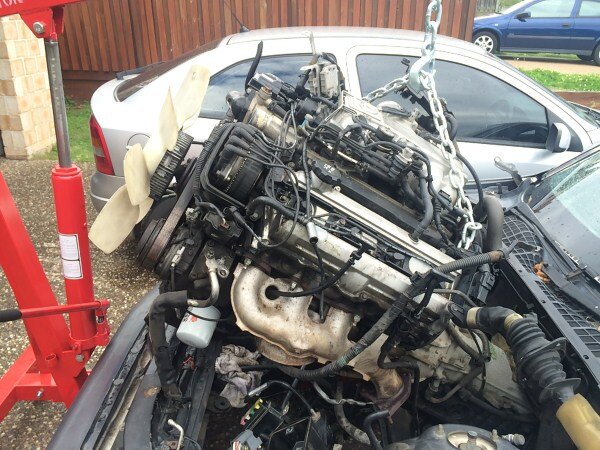
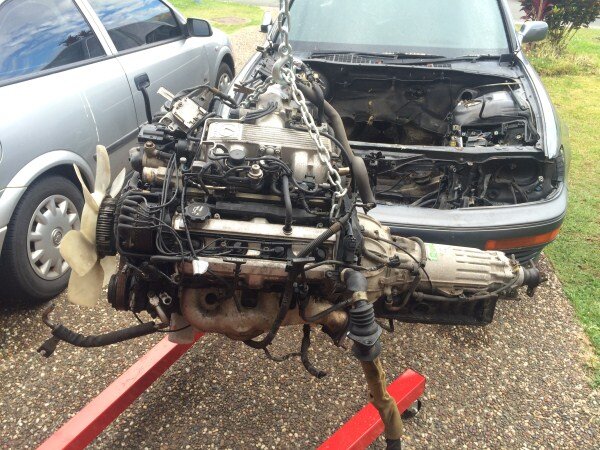
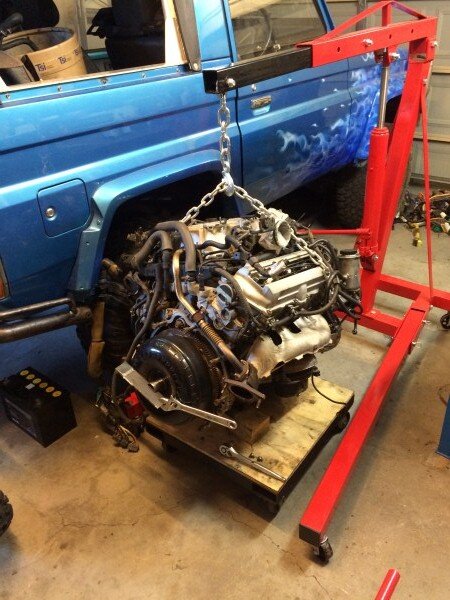
I had a really productive 4 hours on the build this morning and got the engine out of the Lexus!
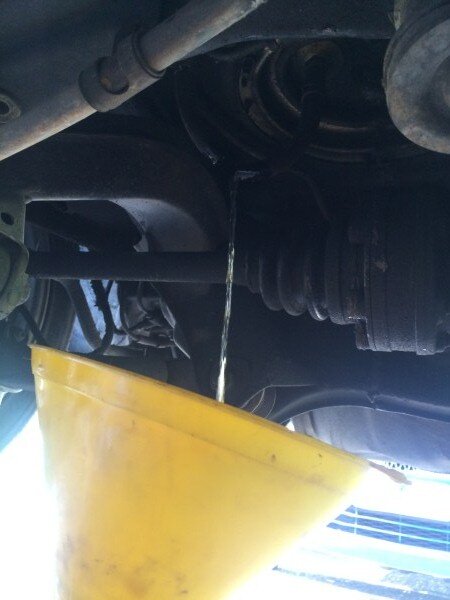
Drained 15 litres of petrol out of the fuel tank first.

Disconnected a few other things and then pulled the engine out.
It was definitely the hardest engine I've ever removed. There was not much room in the engine bay and with such a big heavy engine and a driveway on a slope it was tricky pulling it out.
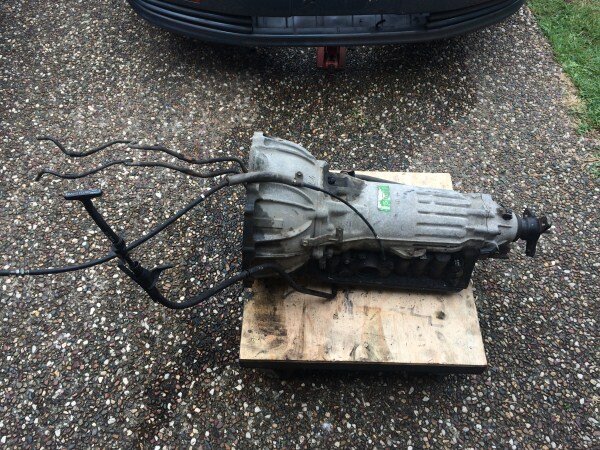
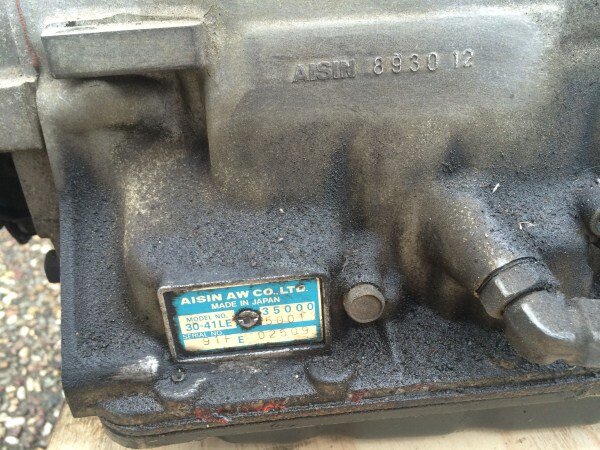
Pulled the auto box off.
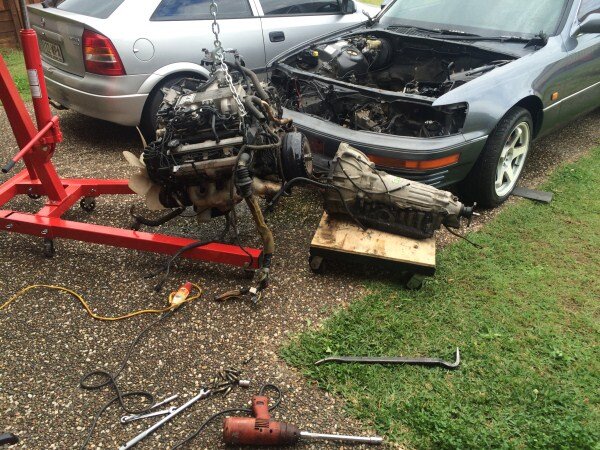
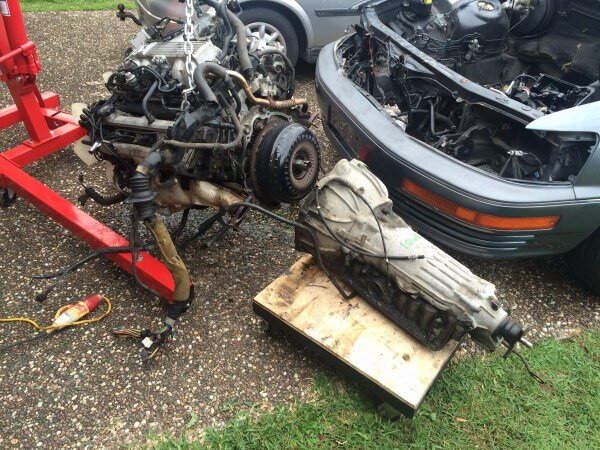
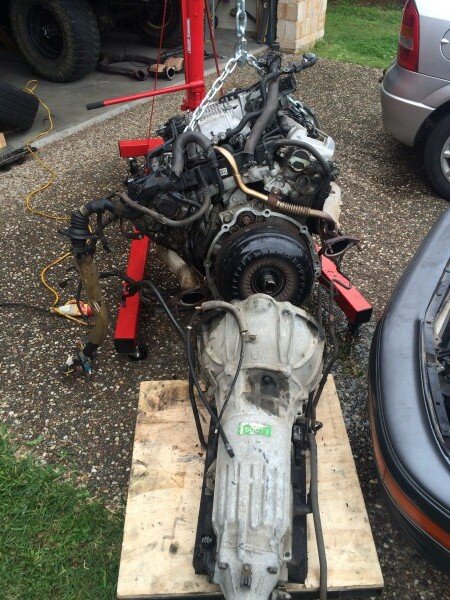
Hoping I can recover some of the money I put into the Lexus with the sale of the auto box, if anyone wants it. Otherwise it can go for scrap.
Gave the new engine a good degrease and pressure wash.

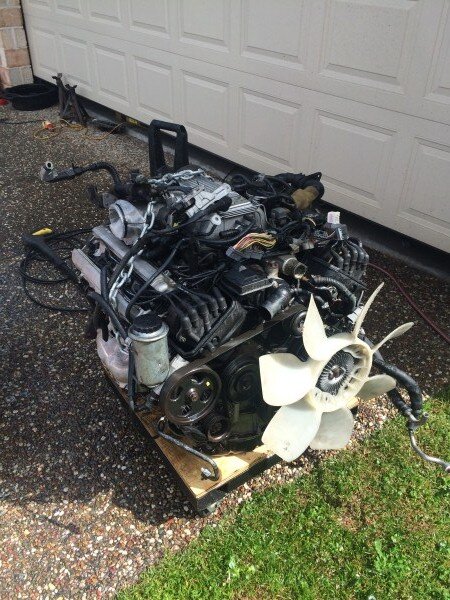
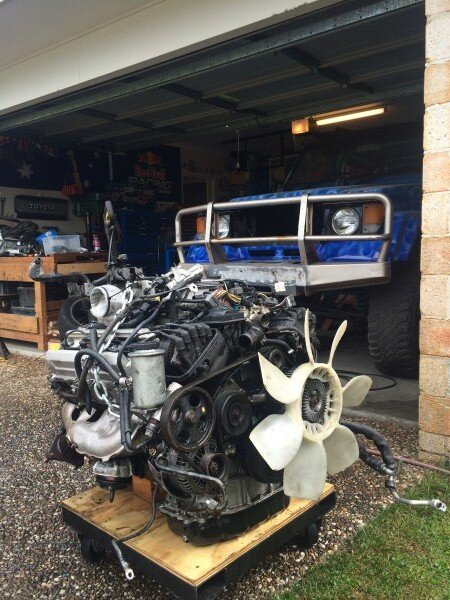
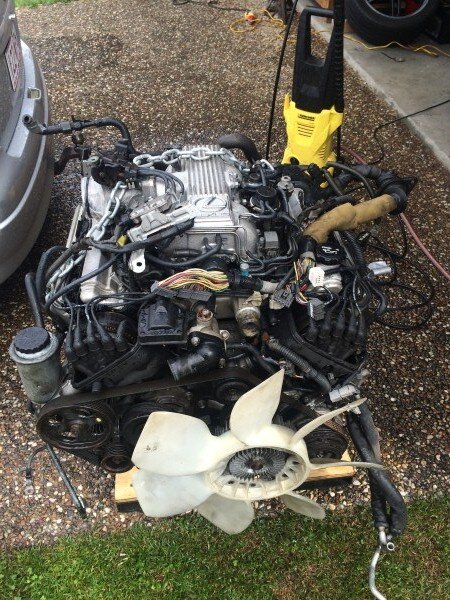
Pushed it into the garage.
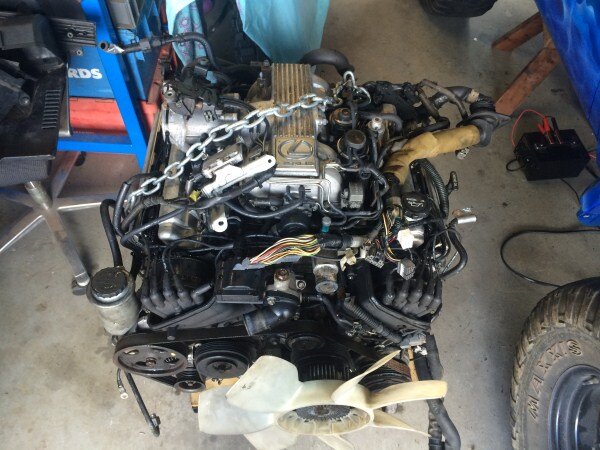
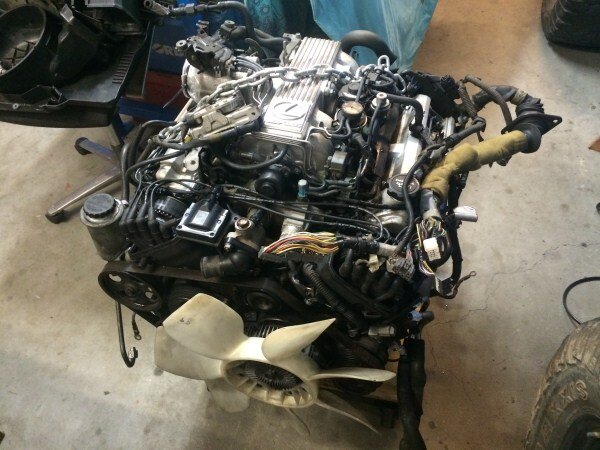
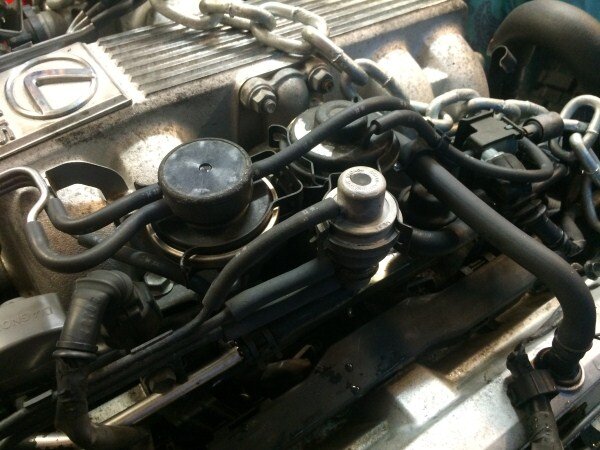
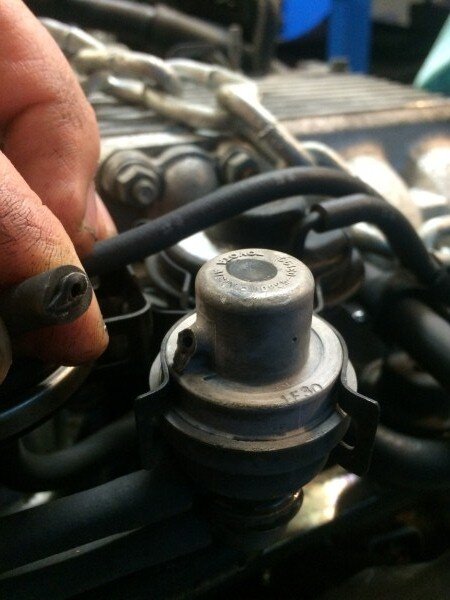
Only 1 thing got broken removing the engine and that was this which I think is to do with the EGR system.
Can the EGR system be removed on these engines?
I need to order an engine stand and get it bolted to the stand and then I can start getting the engine work done.
I had a really productive 4 hours on the build this morning and got the engine out of the Lexus!

Drained 15 litres of petrol out of the fuel tank first.


Disconnected a few other things and then pulled the engine out.
It was definitely the hardest engine I've ever removed. There was not much room in the engine bay and with such a big heavy engine and a driveway on a slope it was tricky pulling it out.


Pulled the auto box off.


Hoping I can recover some of the money I put into the Lexus with the sale of the auto box, if anyone wants it. Otherwise it can go for scrap.


Gave the new engine a good degrease and pressure wash.


Pushed it into the garage.


Only 1 thing got broken removing the engine and that was this which I think is to do with the EGR system.
Can the EGR system be removed on these engines?


I need to order an engine stand and get it bolted to the stand and then I can start getting the engine work done.
- Joined
- Feb 2, 2013
- Messages
- 17,108
Watching this with interest Ben i would love to build my own cruiser as your doing making it as i want it to be , and if i live another couple of hundred years i might actually start thinking i could  but something tells me that even if i did my old bruiser warts n all would still be my number one . I do hope the RJ brings you as much pleasure as the LJ has in the long term .
Paddler Ed
Well-Known Member
A bit of super glue and a pin will fix that... Stick the pin in hole to hold it in situ and then superglue it in place... Told to me by someone who worked for Toyota!
On the bar, I know you've removed all the tabs, but I think it would be worth leaving one centrally located for mounting a GoPro so it doesn't use the tube clamp to secure it. Seeing the mountain bike helmets coming with flat spots to mount the camera to, I'm surprised ARB etc haven't put a mount on the back of the bar.
On the bar, I know you've removed all the tabs, but I think it would be worth leaving one centrally located for mounting a GoPro so it doesn't use the tube clamp to secure it. Seeing the mountain bike helmets coming with flat spots to mount the camera to, I'm surprised ARB etc haven't put a mount on the back of the bar.
Rusty Bottoms
Member
- Joined
- Aug 23, 2016
- Messages
- 121
- Country Flag
Motor is looking shiny! My EGR is blocked off behind the intake where it joins exhaust I think, but that's one area of the motor I don't know very well, need a mirror and a ladder to see down there!  the valve is still connected on the side of the intake. Not setting codes anyway. Common to block off the EGR on these. I want to remove the valve completely to start tidying up the engine compartment, but will need a block-off plate on the side of course. You could leave it for now and sort it as Paddler Ed suggests, or just ditch it while it's out. Mine flew through emissions test here, well below limit.
- Joined
- Oct 13, 2010
- Messages
- 6,058
- Country Flag
Don't like the adverts? Click here to remove them
- Joined
- Oct 13, 2010
- Messages
- 6,058
- Country Flag
I had a delivery today! 
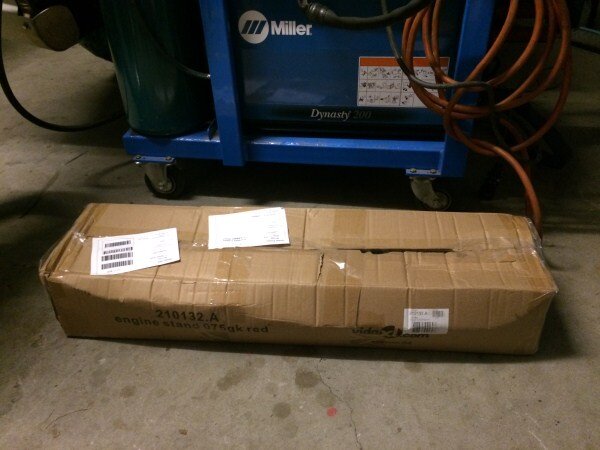

This weekend is a 3 day weekend so I'm hoping to get the engine setup on the stand and then I can make a start getting it ready to drop in RJ.
I'd like to get it wired up and running on the stand before I fit it.
I also need to finish removing bits off the Lexus so I can weigh it in.


This weekend is a 3 day weekend so I'm hoping to get the engine setup on the stand and then I can make a start getting it ready to drop in RJ.
I'd like to get it wired up and running on the stand before I fit it.
I also need to finish removing bits off the Lexus so I can weigh it in.

Great work as usual Ben, what to say?
Keep it coming mate!
Keep it coming mate!
- Joined
- Oct 13, 2010
- Messages
- 6,058
- Country Flag
Thanks mate. 
Small update..............
I used a scrap piece of steel and an adjustable spanner (shifter if your an Aussie) to hold the torque convertor while I undid all the bolts holding it on.
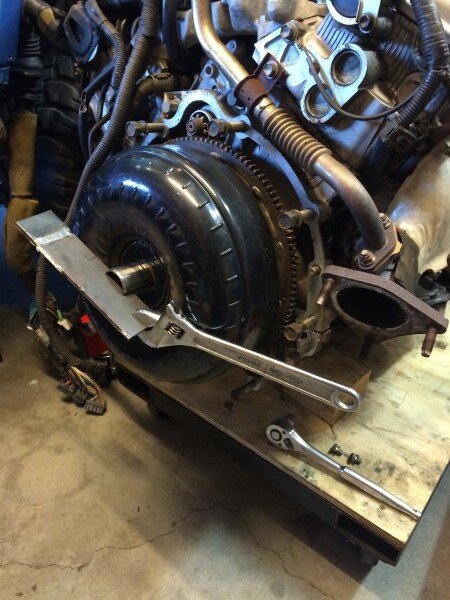

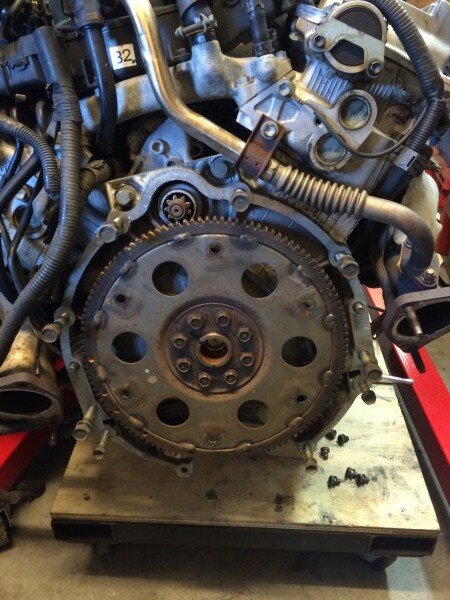
I then removed the ring gear.
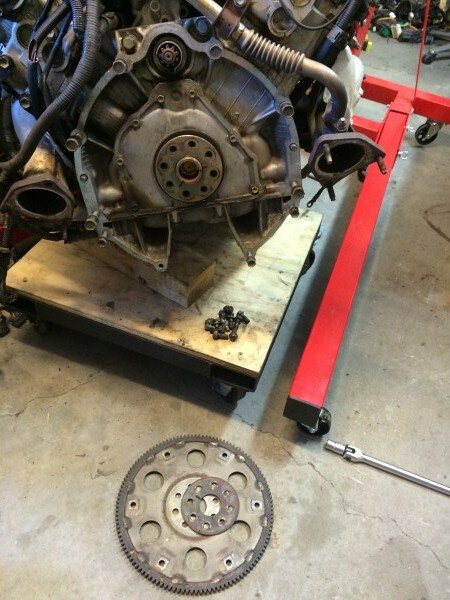
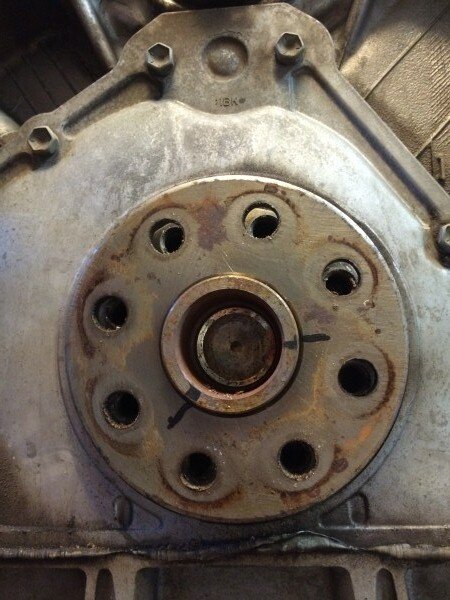
Someone has obviously been in here before as there is matchmarks.
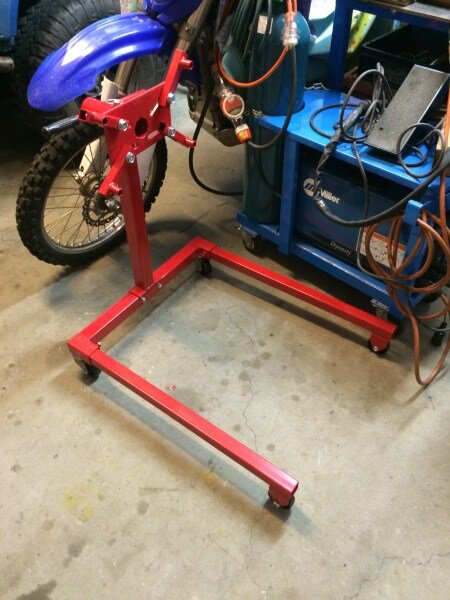
The engine stand has turned out to be a bit of a lemon.
Now I could put up with the disgusting welds that have been thrown at it in China and the terrible paint finish they have applied over the top.
I could even put up with the fact that it wont fit between or under the engine crane properly, meaning getting the engine from the crane onto the stand is bloody difficult.
But it wont physically take the weight of the engine even though its supposedly rated at 1/2 ton.
Surely the all alloy Lexus lump doesnt weigh 500kgs?
Anyway.................
I adapted and made do, but once the engine is fitted in RJ, the engine stand is on the transfer list!
Got the engine bolted onto the stand.
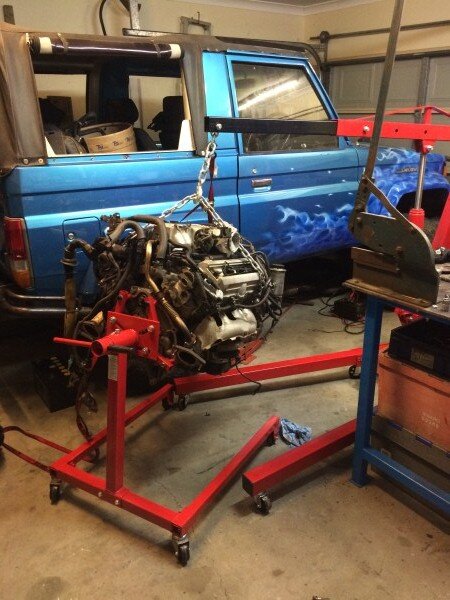
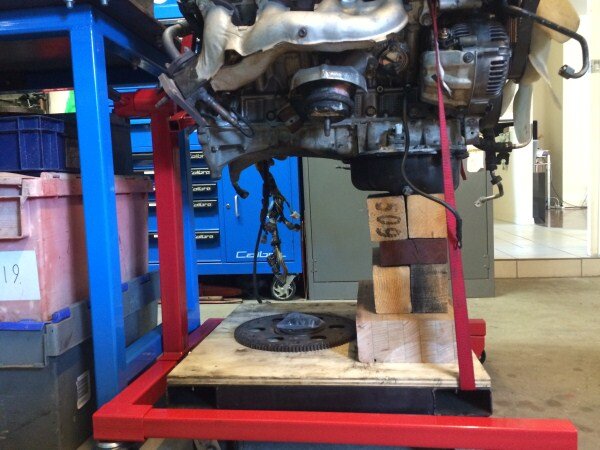
But with some of the weight taken off the crane the engine stand began to list quite badly.
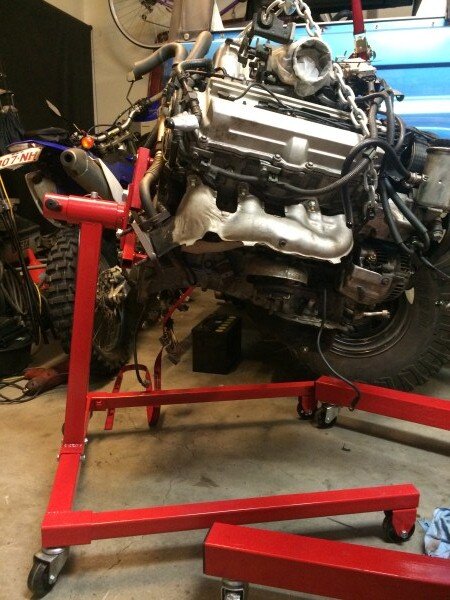
The pic above doesnt really show how badly it was leaning, but this one does!
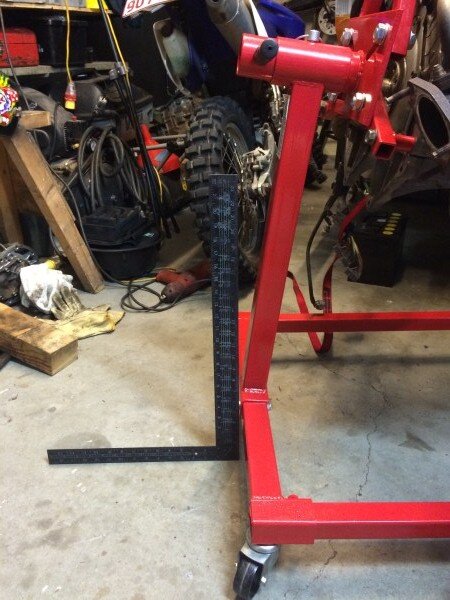
So this is what I came up with so I can move it around the garage easy and work on it at a decent height.
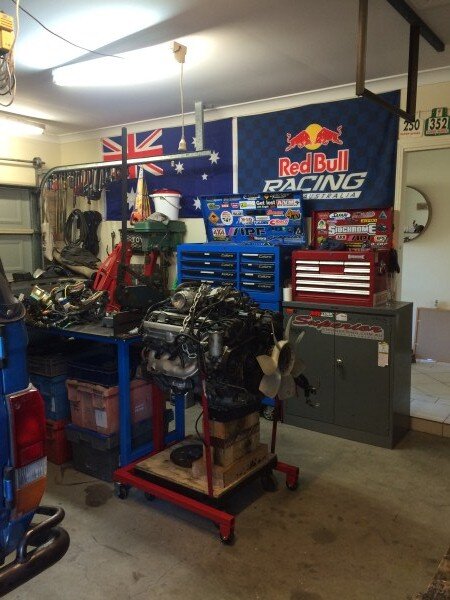
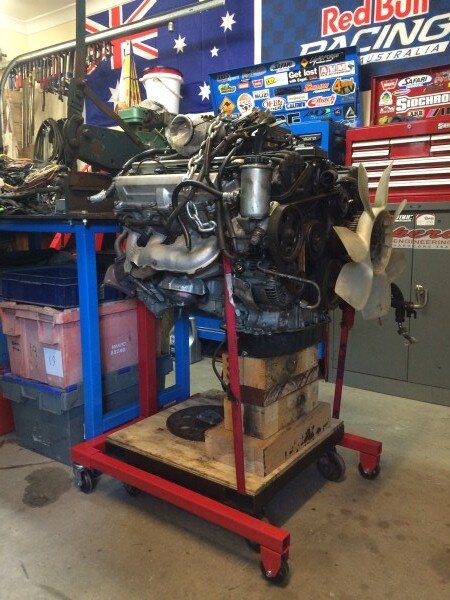
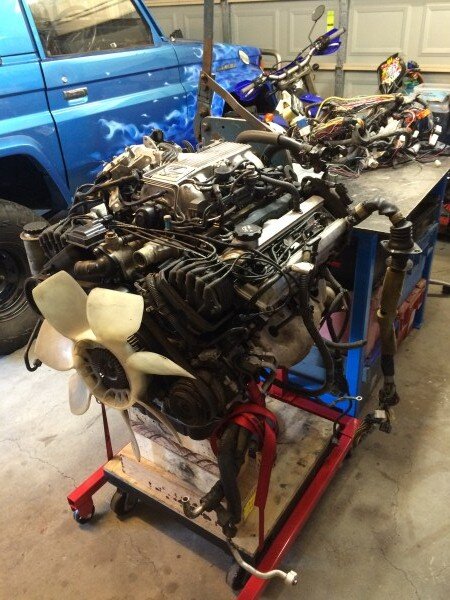
The weight of it is all going through the blocks of wood and onto one of my heavy duty trollies.
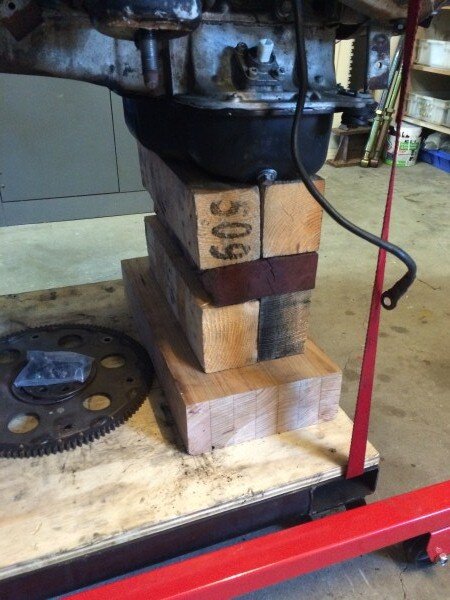
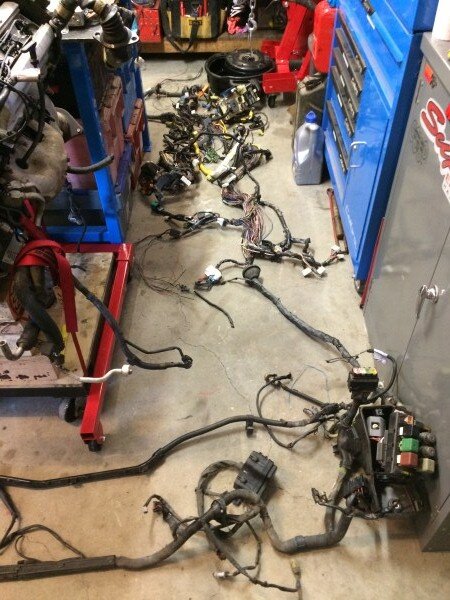
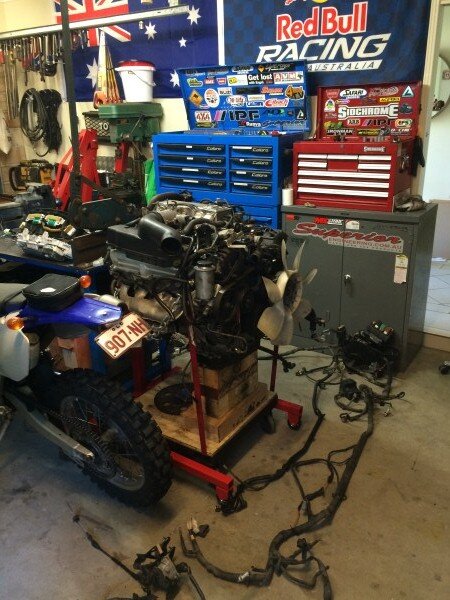
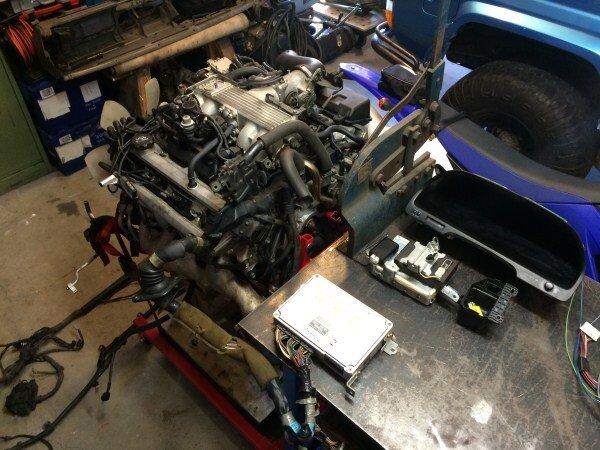
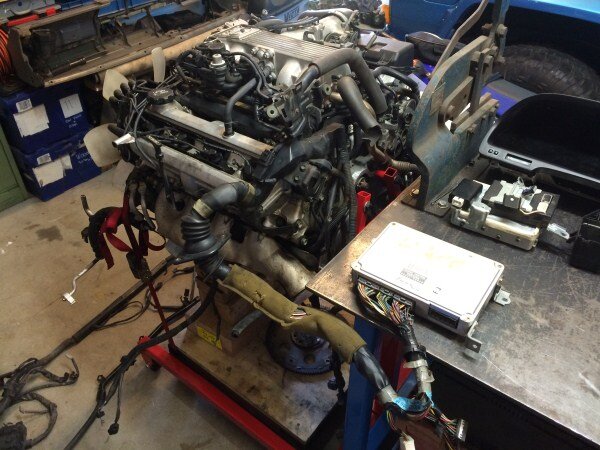
I started to have a look at the maze of wiring.
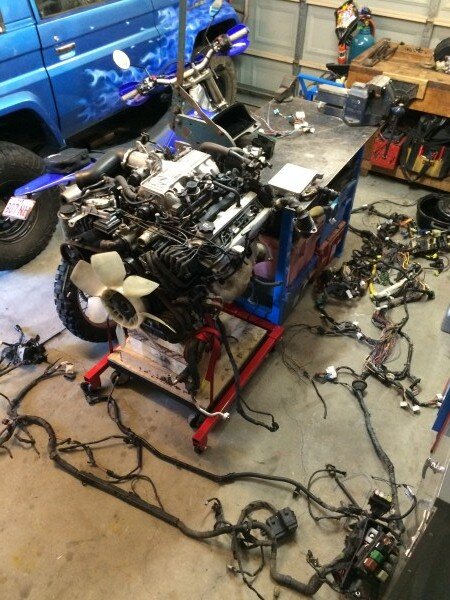
I wanted to pull the aircon compressor off as I've removed the rest of the factory aircon from RJ as I'm planning on keeping the roof off it all the time so aircon would be pretty pointless.

Removed the ridiculously long belt and the pump.
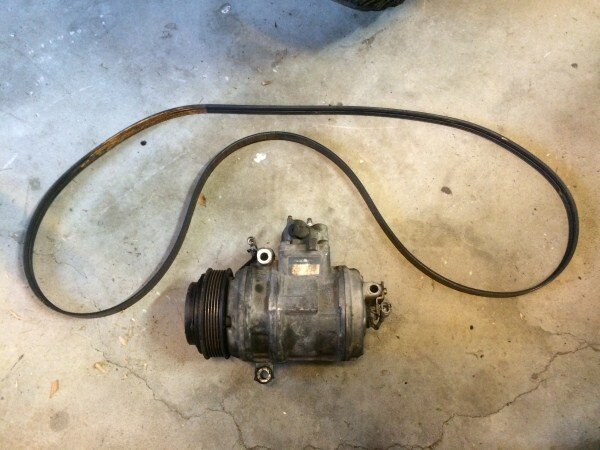
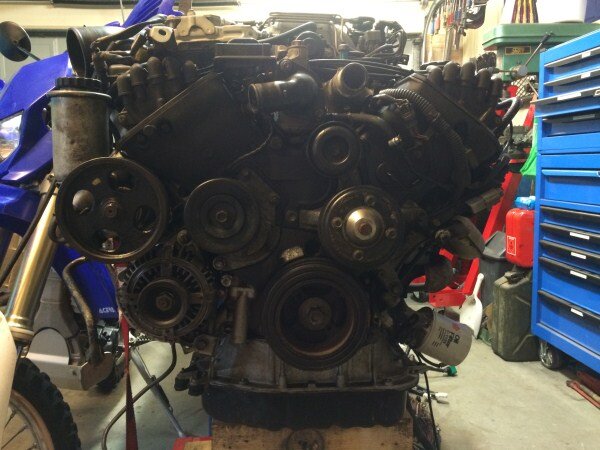
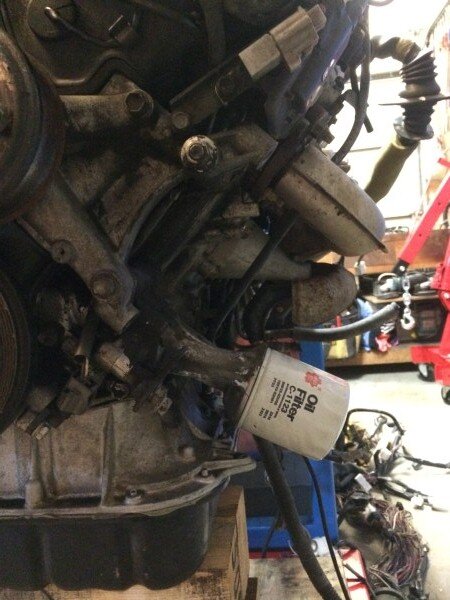
Its left quite a gap now without the pump fitted. I want to look into moving the oil filter and fitting a bigger one so maybe it could go where the pump was.
I pulled a load more bits off the Lexus today and its getting very close to being ready to go off to the giant claw in the sky.
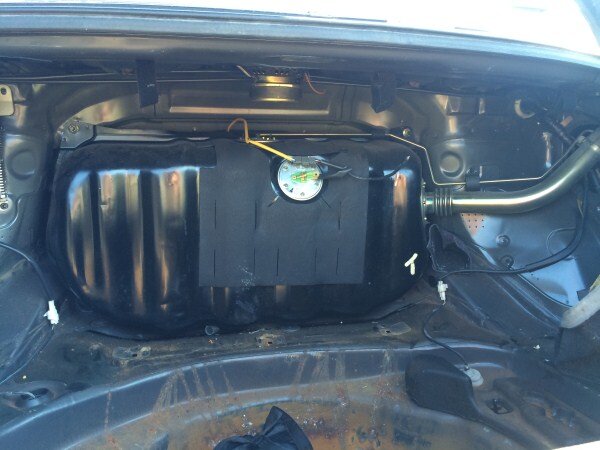
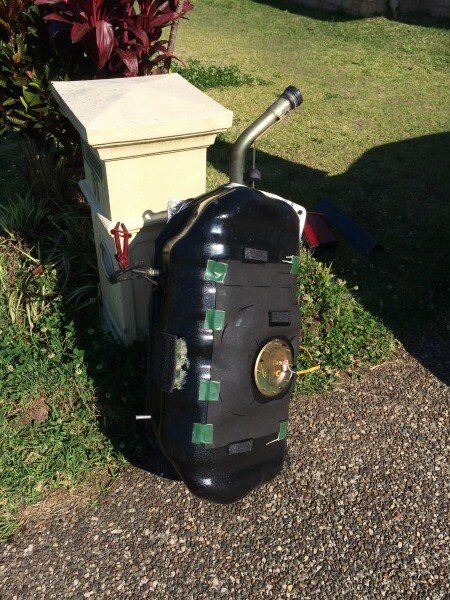
I pulled the fuel tank off today which because it has spent the last 24 years in the boot of the Lexus covered in carpet, is in pristine condition!
Not sure if I can use all of it, just the fuel pump, or non of it yet. But figured it was worth saving for now.
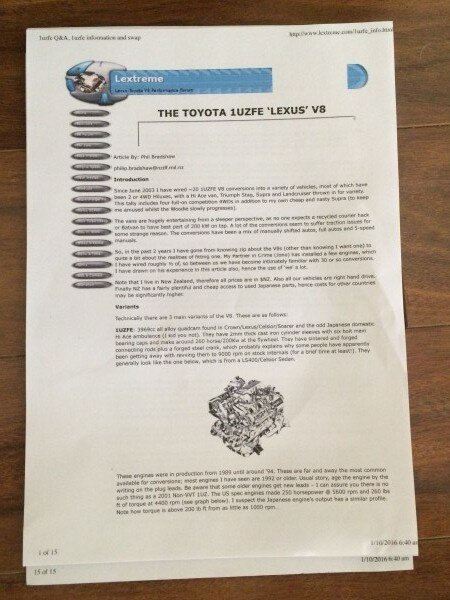
I've been building up a folder of information I've collected online.
I've got all 87 pages of the excellent "How To Wire Up A 1UZ-FE" by Nigel Wade, that Ryan kindly emailed me.

And I've just added the excellent 15 page document by Phil Bradshaw.
I've got a few more articles and documents to print out which I think will help with the conversion and as I get 4-5 hours of down time every day at work, I will take the folder in with me and have a good read.
I did a tiny job on RJ today that has been bugging me since I got the car.
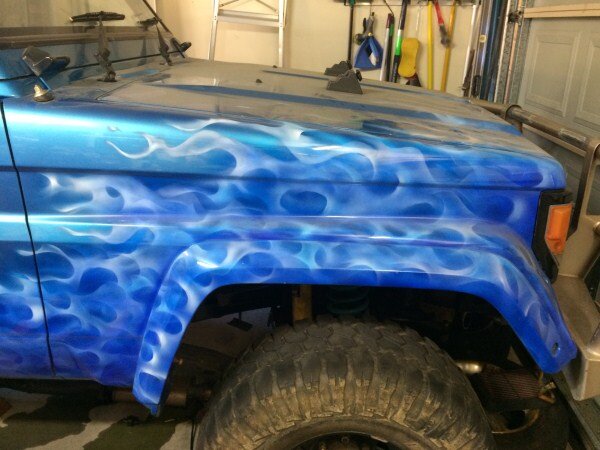
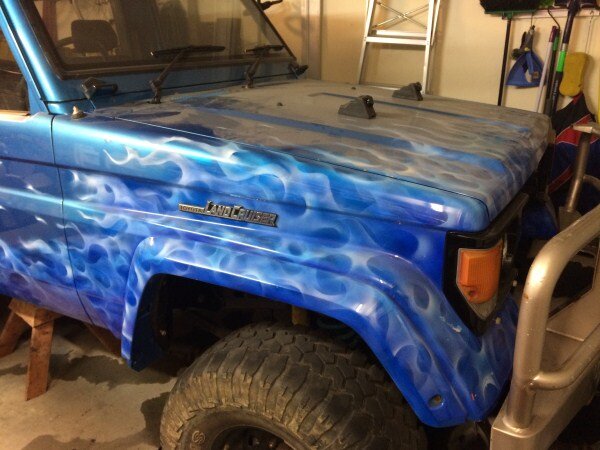
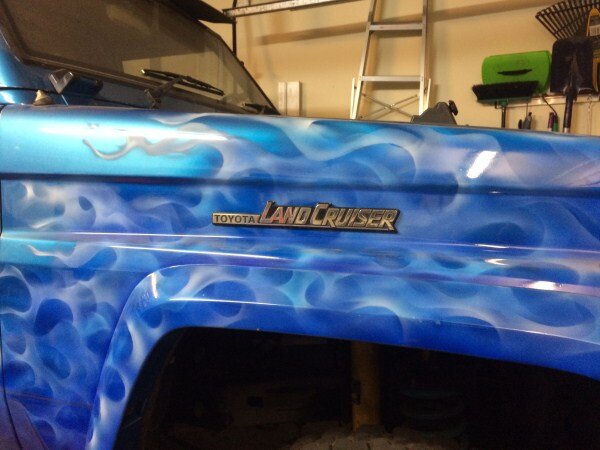
The previous previous previous owner who resprayed the car in Zion blue with airbrushed flames also decided to remove all the badges and weld the mounting holes up.
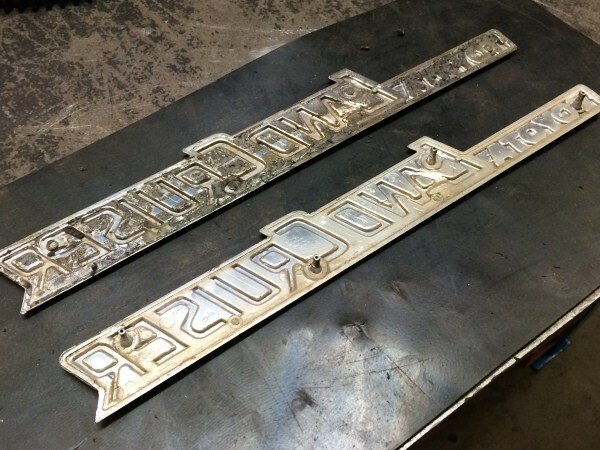
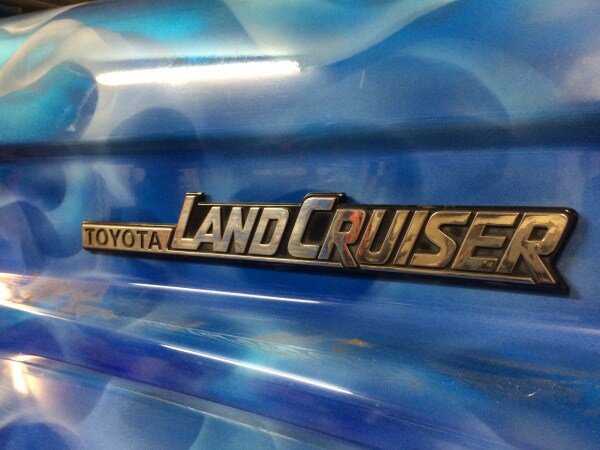
So RJ was missing the classic LandCruiser badges off the front guards.
I had got spare badges.
Just needed to cut the tabs off.

Applied some 3M double sided foam automotive tape.
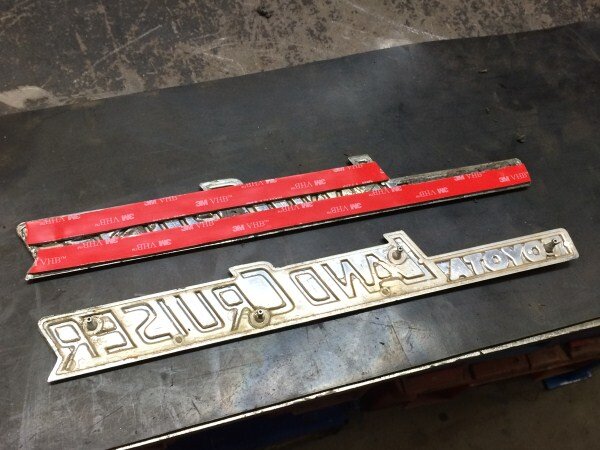
And stuck them on back in their rightful spot, just like the 40 series before it and in fact all the LandCruiers before that right back to the 20 series!
Small update..............
I used a scrap piece of steel and an adjustable spanner (shifter if your an Aussie) to hold the torque convertor while I undid all the bolts holding it on.


I then removed the ring gear.

Someone has obviously been in here before as there is matchmarks.

The engine stand has turned out to be a bit of a lemon.

Now I could put up with the disgusting welds that have been thrown at it in China and the terrible paint finish they have applied over the top.
I could even put up with the fact that it wont fit between or under the engine crane properly, meaning getting the engine from the crane onto the stand is bloody difficult.
But it wont physically take the weight of the engine even though its supposedly rated at 1/2 ton.

Surely the all alloy Lexus lump doesnt weigh 500kgs?
Anyway.................
I adapted and made do, but once the engine is fitted in RJ, the engine stand is on the transfer list!

Got the engine bolted onto the stand.

But with some of the weight taken off the crane the engine stand began to list quite badly.

The pic above doesnt really show how badly it was leaning, but this one does!

So this is what I came up with so I can move it around the garage easy and work on it at a decent height.


The weight of it is all going through the blocks of wood and onto one of my heavy duty trollies.


I started to have a look at the maze of wiring.


I wanted to pull the aircon compressor off as I've removed the rest of the factory aircon from RJ as I'm planning on keeping the roof off it all the time so aircon would be pretty pointless.

Removed the ridiculously long belt and the pump.


Its left quite a gap now without the pump fitted. I want to look into moving the oil filter and fitting a bigger one so maybe it could go where the pump was.


I pulled a load more bits off the Lexus today and its getting very close to being ready to go off to the giant claw in the sky.
I pulled the fuel tank off today which because it has spent the last 24 years in the boot of the Lexus covered in carpet, is in pristine condition!
Not sure if I can use all of it, just the fuel pump, or non of it yet. But figured it was worth saving for now.


I've been building up a folder of information I've collected online.
I've got all 87 pages of the excellent "How To Wire Up A 1UZ-FE" by Nigel Wade, that Ryan kindly emailed me.

And I've just added the excellent 15 page document by Phil Bradshaw.

I've got a few more articles and documents to print out which I think will help with the conversion and as I get 4-5 hours of down time every day at work, I will take the folder in with me and have a good read.
I did a tiny job on RJ today that has been bugging me since I got the car.
The previous previous previous owner who resprayed the car in Zion blue with airbrushed flames also decided to remove all the badges and weld the mounting holes up.
So RJ was missing the classic LandCruiser badges off the front guards.


I had got spare badges.
Just needed to cut the tabs off.


Applied some 3M double sided foam automotive tape.

And stuck them on back in their rightful spot, just like the 40 series before it and in fact all the LandCruiers before that right back to the 20 series!


Last edited:
Julian T
Well-Known Member
Very nice Ben some good progress there and what an engine stand, interesting idea with the flat bar and adjustable spanner, I have always used a pry bar or screw driver into the ring gear braced by a bell housing bolt.
Very interesting to see where the starter motor mounts on that engine it strikes me you don't want to have any starter motor issues
With most engines that I have worked on with auto box's there was normally an inspection/dust plate that could be removed to allow removal of the torque converter bolts before removing the gear box.
Removing the bolts before splitting the box and engine was to prevent damage to the white metal bearings in the torque converter which could lead to premature failure of the converter after reassembly.
Looks like you're keepin' the flames then Ben? Kind of Ben Hur…

- Joined
- Oct 13, 2010
- Messages
- 6,058
- Country Flag
Very nice Ben some good progress there and what an engine stand, interesting idea with the flat bar and adjustable spanner, I have always used a pry bar or screw driver into the ring gear braced by a bell housing bolt.
Very interesting to see where the starter motor mounts on that engine it strikes me you don't want to have any starter motor issues
With most engines that I have worked on with auto box's there was normally an inspection/dust plate that could be removed to allow removal of the torque converter bolts before removing the gear box.
Removing the bolts before splitting the box and engine was to prevent damage to the white metal bearings in the torque converter which could lead to premature failure of the converter after reassembly.
Thanks mate.
I did try a little pry bar in the teeth on the ring gear but I was struggling to hold it and reach under with the ratchet.
Yes there is a dust cover and that makes sense that you can remove the torque convertor before removing the box, I didnt think of that, thanks.
Yes the starter motor is in a difficult to access spot and apparently when
these engines are fitted to comp vehicles the drain holes can become clogged and the starter motors fill up with mud and water and die.

I want to pull it off before the engine goes in and I might buy a rebuild kit for it so I know its as good as new.
But at least going to manual I can always bump start it.
Looks like you're keepin' the flames then Ben? Kind of Ben Hur…
No definitely not Rich!

I dont hate them and actually think it will look a lot better once the barwork has been powdercoated and the new wheels and tyres go on.

But I am looking forward to getting it put on a rotisserie and resprayed.
Thanks mate.
No definitely not Rich!
I dont hate them and actually think it will look a lot better once the barwork has been powdercoated and the new wheels and tyres go on.
But I am looking forward to getting it put on a rotisserie and resprayed.
Thank goodness for that Ben!
Rusty Bottoms
Member
- Joined
- Aug 23, 2016
- Messages
- 121
- Country Flag
Hey Ben, I've been busy with life lately, so thought I'd catch up with your thread. Coming along I see! If you get stuck on anything, let me know and I can see how mine is wired and send some pics. It's running well, need to waxoil the underside before winter sets in. I'll hopefully be using the LJ for offroad survey work (er, next to ASDA, lol) for the first time next week, may be sleeping in the back (remove rear seat temporarily and stick legs between front seats - will see how that works!) and pocketing the B&B money - to spend on the cruiser of course! G'luck and hope it's coming on, take your time, plenty to do before you pop it in I'm sure.
- Joined
- Oct 13, 2010
- Messages
- 6,058
- Country Flag
Thanks Rob. 
Will almost certainly need your help when it comes to wiring up the new engine.
Enjoy the off road action in you're UZJ70!
My engine wiring is on hold at the moment while I finish a few other projects and jobs. Hoping to get stuck into it properly in a 5-6 weeks after my wedding.
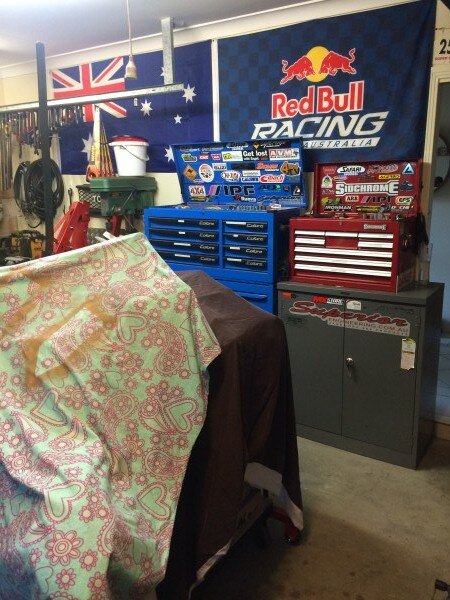
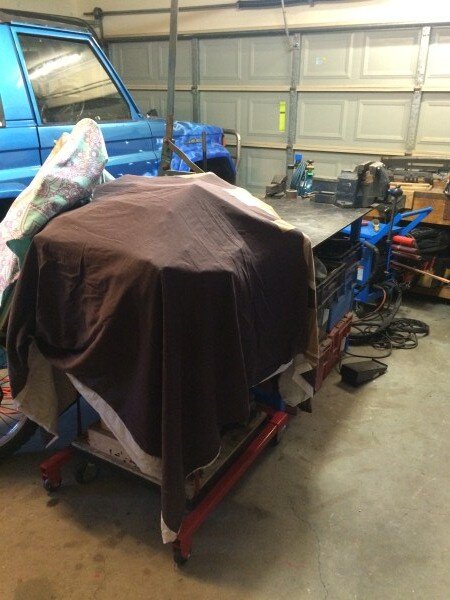
Until then the new engine is snugly tucked up under a dust sheet.
I have been doing a bit of work on the build though....................
I was keen to ditch the gauges and garish Zion blue surround in the dash console.
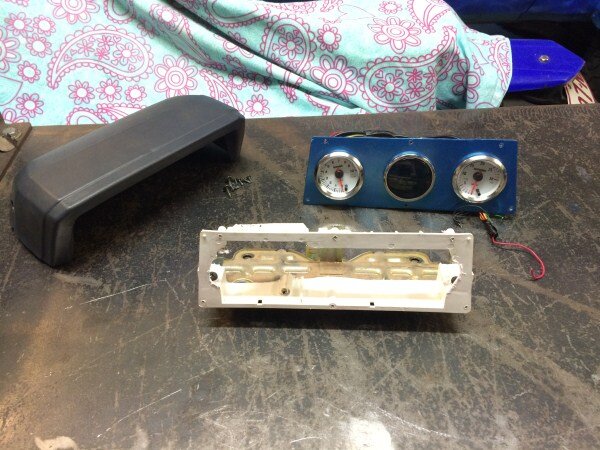
When I remembered I still had the front and internals out of the one in my LJ70.
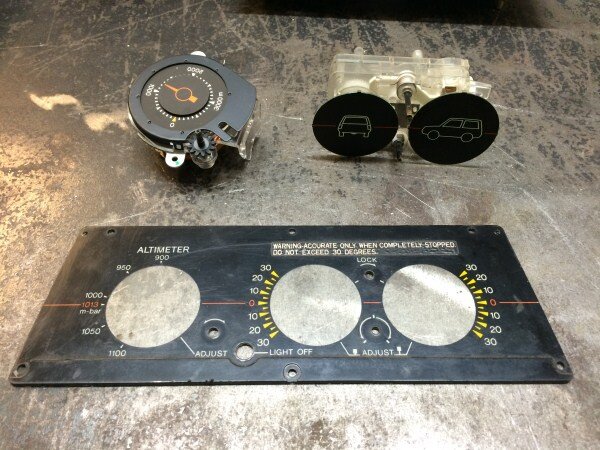
I had to make an aluminium bracket to mount the parts.
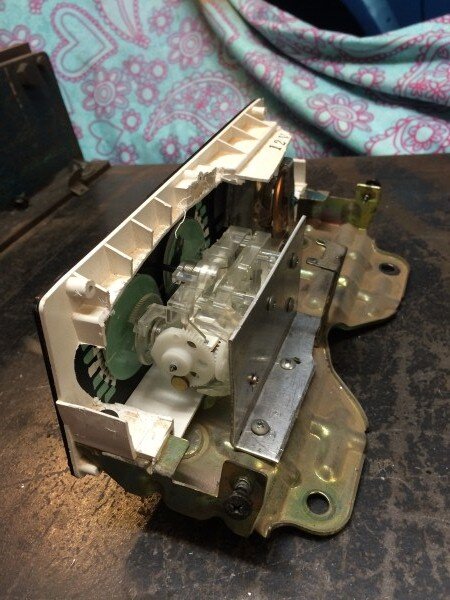
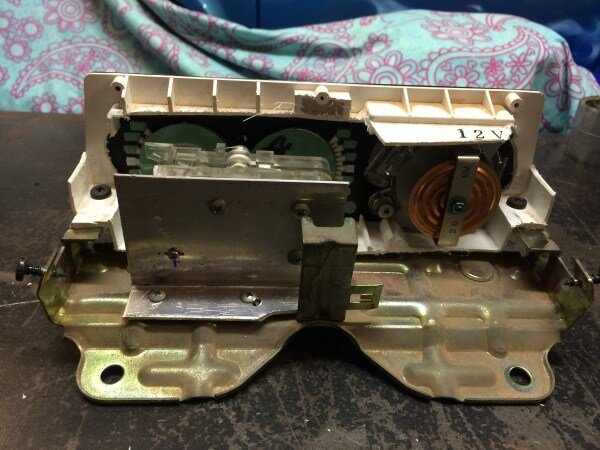
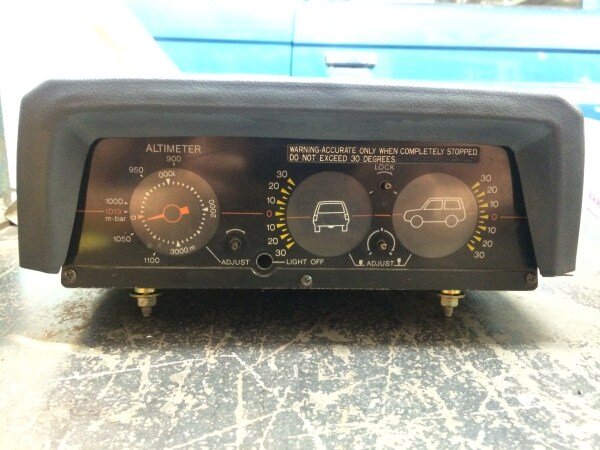
I wanted to refit the dashboard but I've found quite a bit of surface rust.
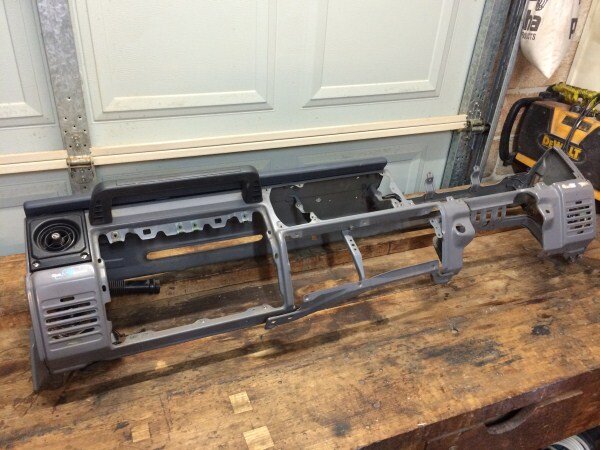
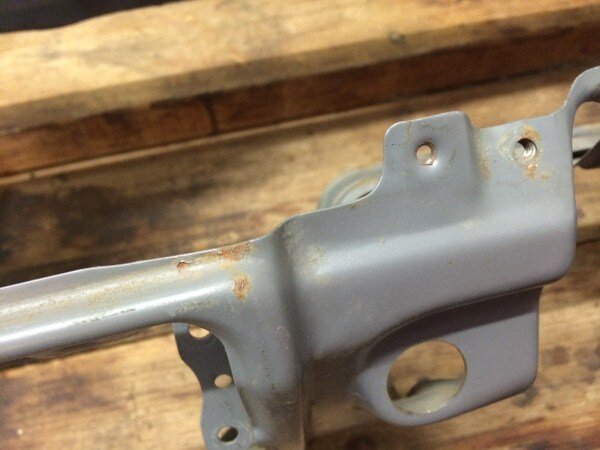

Decided I would have to repaint the whole thing, so I removed all the bits of trim and anything that could be removed.
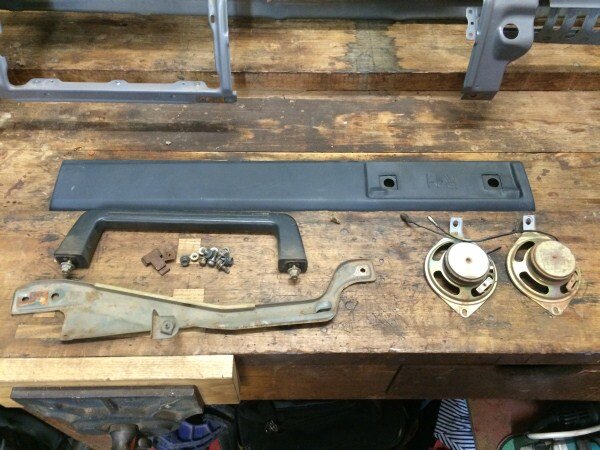
Gave it a good wash.
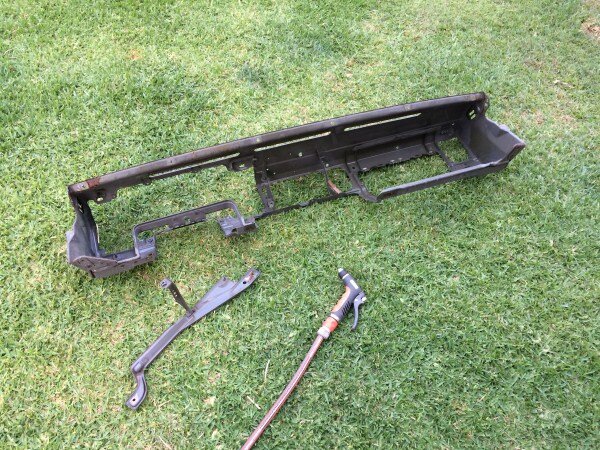
Started sanding the rust off it but decided it would be easier and better to just get it sandblasted and powder coasted.
So I took all these bits to a local company that does blasting and powder coating.
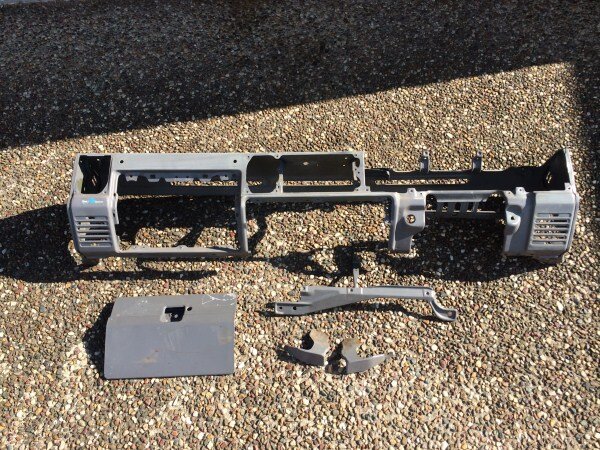
Sadly they wanted a ridiculous amount of money so I need to find some where else. Thinking I will have to go to Brisbane as finding decent suppliers for this build has proven next to impossible!
I drove around 8 different steel suppliers/fabricators/sheet metal companies the other day trying to find some where I could buy some 2mm steel checker plate and get it cut and folded.
Eventually I found some where and 4 days later they called me back with a price for the 3 pieces I need.
In Melbourne I can get stuff like this very easily, cheaply and quickly, but not up here.
Anyway......................
I got some 2mm checker plate cut and folded for the rear bar.
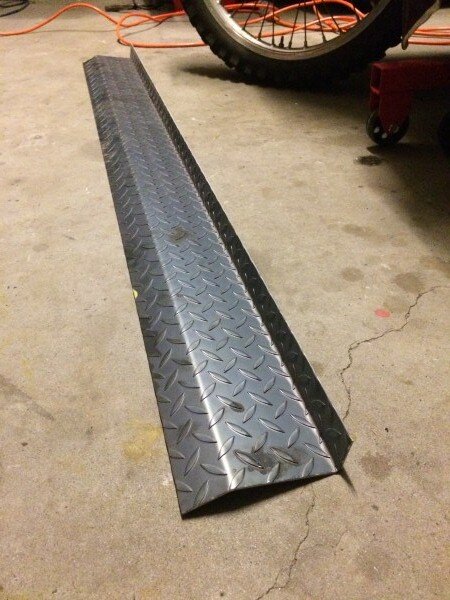
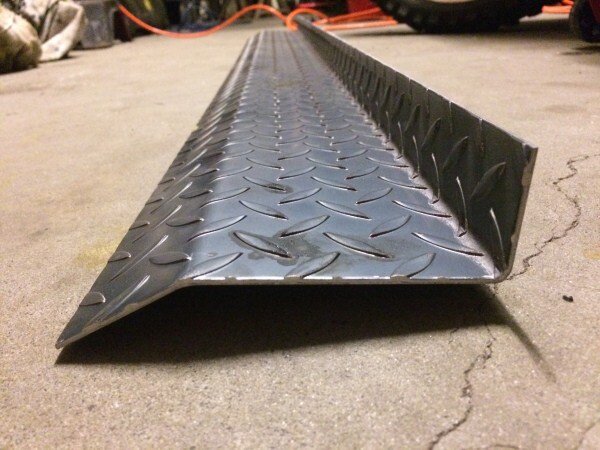
Once thats welded on, the rear bar and bull bar can be shot blasted and powder coated (once I find a decent company).
I pulled all the wheels off the Lexus this week.
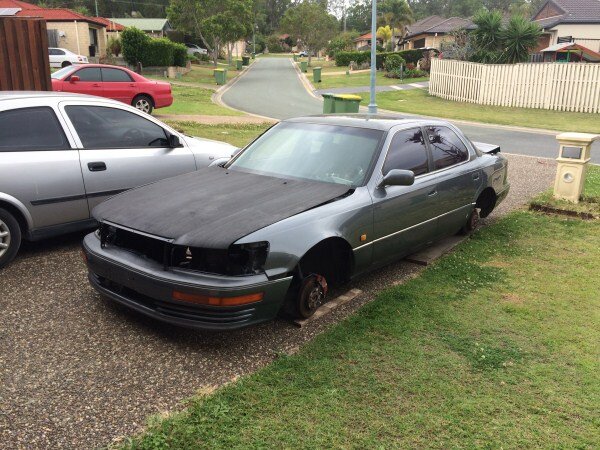
As well as the coil over suspension which it turns out is pretty valuable, so I'm hoping that should recoup most of my investment.


I dropped the Lexus down on pieces of wood and then used a trolley jack under the front to prevent the car from damaging the driveway while the local scrap man winched it onto his tilt tray.

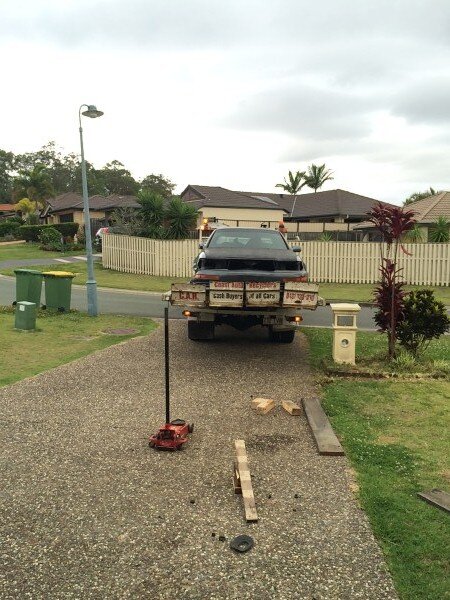
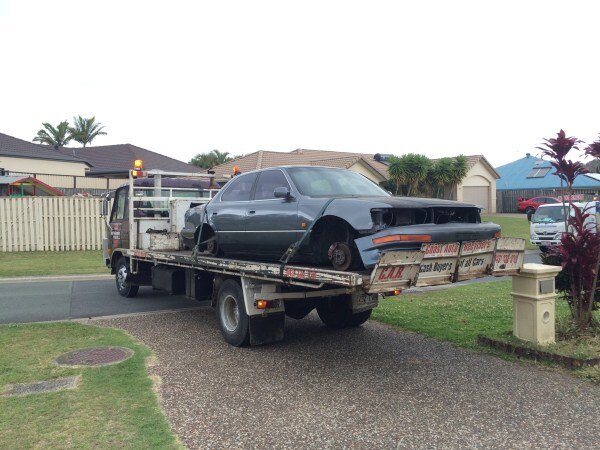
The scrap man was a nice guy. He had a glance around when he got here and saw all my toys and projects then asked if I was single, when I said I wasnt he said "Congrats mate, you've got yourself a keeper there, not many women will let you do this, its why I divorced my Mrs"!
And thats about it on the build this week.
Although I did buy a new tool that will come in very handy on this build.
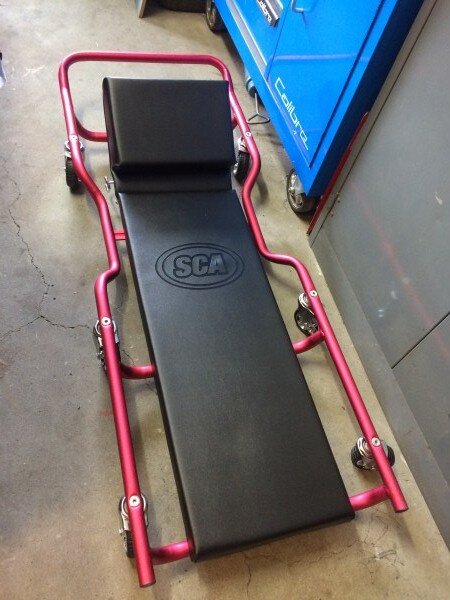
Got myself an alluminium creeper as they were on sale and almost half price.
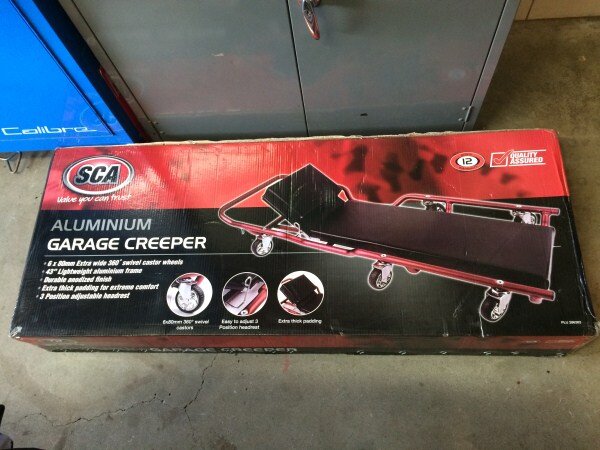
So much better than all the plastic ones I've seen and used over the years.
China you've excelled yourself with all the sexy TIG welds on this well designed, quality product!


Will almost certainly need your help when it comes to wiring up the new engine.

Enjoy the off road action in you're UZJ70!
My engine wiring is on hold at the moment while I finish a few other projects and jobs. Hoping to get stuck into it properly in a 5-6 weeks after my wedding.

Until then the new engine is snugly tucked up under a dust sheet.


I have been doing a bit of work on the build though....................
I was keen to ditch the gauges and garish Zion blue surround in the dash console.


When I remembered I still had the front and internals out of the one in my LJ70.

I had to make an aluminium bracket to mount the parts.


I wanted to refit the dashboard but I've found quite a bit of surface rust.


Decided I would have to repaint the whole thing, so I removed all the bits of trim and anything that could be removed.

Gave it a good wash.

Started sanding the rust off it but decided it would be easier and better to just get it sandblasted and powder coasted.

So I took all these bits to a local company that does blasting and powder coating.

Sadly they wanted a ridiculous amount of money so I need to find some where else. Thinking I will have to go to Brisbane as finding decent suppliers for this build has proven next to impossible!

I drove around 8 different steel suppliers/fabricators/sheet metal companies the other day trying to find some where I could buy some 2mm steel checker plate and get it cut and folded.
Eventually I found some where and 4 days later they called me back with a price for the 3 pieces I need.
In Melbourne I can get stuff like this very easily, cheaply and quickly, but not up here.

Anyway......................
I got some 2mm checker plate cut and folded for the rear bar.


Once thats welded on, the rear bar and bull bar can be shot blasted and powder coated (once I find a decent company).

I pulled all the wheels off the Lexus this week.

As well as the coil over suspension which it turns out is pretty valuable, so I'm hoping that should recoup most of my investment.


I dropped the Lexus down on pieces of wood and then used a trolley jack under the front to prevent the car from damaging the driveway while the local scrap man winched it onto his tilt tray.


The scrap man was a nice guy. He had a glance around when he got here and saw all my toys and projects then asked if I was single, when I said I wasnt he said "Congrats mate, you've got yourself a keeper there, not many women will let you do this, its why I divorced my Mrs"!
And thats about it on the build this week.
Although I did buy a new tool that will come in very handy on this build.
Got myself an alluminium creeper as they were on sale and almost half price.


So much better than all the plastic ones I've seen and used over the years.

China you've excelled yourself with all the sexy TIG welds on this well designed, quality product!


Rusty Bottoms
Member
- Joined
- Aug 23, 2016
- Messages
- 121
- Country Flag
Congrats on the upcoming wedding! I'm married and we have a little one, so getting time to work on things can be tricky, but my wife is pretty understanding, I have parcels arrive all the time and she's generally calm about it... speaking of which, just got an autometer pro-comp mech oil pressure gauge, looks nice, just need to get a 1/8x28 BSP compression fitting today to plumb it into the filter housing before my work trip Monday. I see you stripped and shipped the LS400 quickly, that's a lot of work in itself! Nice coilovers, should be worth a few dollars there. All the best on upcoming events! The motor isn't going anywhere, you'll get it sorted soon enough, happy honeymoon, 4x4 camping trip?? Catch you soon! 
Paddler Ed
Well-Known Member
I've got my trailer in and out at the sandblasters this week - went in for a rough blast, then out for rust repairs, back in for a final blast and then painting in 2 pack. $800ish
Steel for the repairs came from the off cuts pile at the place a mate works at; he's been on downtime this week, so we went in on Friday with the trailer and got all the steel be needed and what I needed. Best of all, any bends needed he did and cut to size on the shearer.
Looks good, and yes, BC colilovers are worth a bit...
- Joined
- Oct 13, 2010
- Messages
- 6,058
- Country Flag
Thanks guys. 
Were going on a pre-moon as we will be too busy after the wedding with all our international visitors and I dont really want to spend anymore of our savings on a flash holiday, as I'm desperate to get on the housing market next year.
So were going to head across to Stradbroke Island for some beach driving and camping in my other 70!
Would have liked to have gone to Fraser or Moreton but we cant take the dog there and camping without her just isnt the same!
happy honeymoon, 4x4 camping trip?? Catch you soon!
Were going on a pre-moon as we will be too busy after the wedding with all our international visitors and I dont really want to spend anymore of our savings on a flash holiday, as I'm desperate to get on the housing market next year.
So were going to head across to Stradbroke Island for some beach driving and camping in my other 70!
Would have liked to have gone to Fraser or Moreton but we cant take the dog there and camping without her just isnt the same!


