Don't like the adverts? Click here to remove them
You are using an out of date browser. It may not display this or other websites correctly.
You should upgrade or use an alternative browser.
You should upgrade or use an alternative browser.
Who is doing what maintenance today?
- Thread starter warrenpfo
- Start date
silvercruiser
Well-Known Member
- Joined
- Mar 22, 2010
- Messages
- 3,368
Well got the lc mot'd no advisory's straight through
Sag
Well-Known Member
- Joined
- Aug 24, 2014
- Messages
- 756
Must admit I never really worry come mot time,mot bloke commented how good it was for its age then popped the bonnet and asked how long it took to polish it lol,don't think he's ever seen a clean engine bay.got to love a landcruiser
- Joined
- Jun 30, 2011
- Messages
- 1,301
- Country Flag

All this talk of MOTs and mine is up next month. A great time for a brake caliper to seize up.
8:40 a.m - Noticed the rear driver side sticking, and had a look. Cue the famous 20 minute job....
9:20 a.m - Well didn't a slider pin only go and shear completely, such was the extent of its desire to remain in the carrier.... Bugger. Rang the motor factors as I knew Mr T wouldn't keep them in stock. "Yeah I'll have that by lunch time" I specifically asked if the caliper came with a carrier included and was assured that it was a complete unit.
2:20 p.m - after borrowing a van to drive 45 min to the factors, lo and behold, there's no carrier, just the bare caliper. I conveyed my displeasure, called on evil spirits to inhabit the building, and left with half of what I needed..
2:50 p.m - as it happens my local Mr T is across the road from the motor factors. Nothing to lose , in I ventured. After 10 minutes of key tapping and sighing, the parts guy said he couldn't find the carrier listed as a separate part and that it doesn't come with the caliper..... I channeled my inner Ghandi, remained calm and took out my phone, opened ToyoDIY and found a Toyota part number in 90 seconds. "How'd ya get that??" He asked.... Clickety tap."I'll have it by Wednesday"
Now my problem is that I'm working tomorrow and utterly reliant on my cruiser to get me there. So home I went with renewed determination to defeat the rusty offending article.
3:40 p.m - much drilling, progressive from 2mm up to 9mm and some use of the persuader and pin punches, and the slider was eventually liberated from it's prison. I'm certain no curse words were uttered at the workbench.
4:20 p.m- I decided to assemble what I had to get me going, even though I'm not happy to have that carrier on it long term. Needs must. Had a new disc and pads sitting waiting, so they went in too. I'll replace it and put new sliders and seals on it next week, along with the other side.
Finished just in time for Mrs Bob to arrive home wondering why I had brake dust on my forehead.
The joys of a quarter million mile truck.
Paddler Ed
Well-Known Member
If we're doing woes of MOT's/RWC's then I can add the bike to the list...
The XT600 went in for it's RWC and a service... the RWC was fine, it only needs a switch for the brake light on the brake lever, the service on the otherhand has slowly crept up from $200ish to $800 as the engine is coming out as the timing chain has stretched; originally the plan was to take it out via the side, but that wasn't possible so the whole motor is coming out... oh well... it'll still be a cheap bike... and I don't have to do it!
On the car side, I think I need to strip the front hubs and redo the bearings there, also most of the steering components and the shocks... however, the bike service is eating into that fund quite quickly....
Don't like the adverts? Click here to remove them
Paddler Ed
Well-Known Member
So I'm now looking at just the idler and pitman arms, and see how that goes. Bike ended up being $1k...
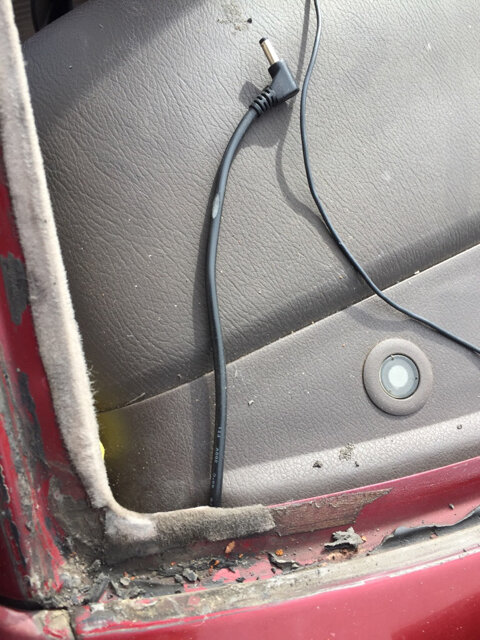
I now have 2 nice little charging points in the car for phones, so that's good. Live feed comes off of the ignition, then down the back of the dash and into the centre console to where there were 2 blanks in the trim, so they've now been mounted nice and neatly there.

I now have 2 nice little charging points in the car for phones, so that's good. Live feed comes off of the ignition, then down the back of the dash and into the centre console to where there were 2 blanks in the trim, so they've now been mounted nice and neatly there.
Last edited:
BRE Fabrications LTD
Well-Known Member

Not exactly maintenance. But I been have getting to grips with the new tig welder and having a crack at Aluminium...


Sent from my iPhone using Tapatalk
Sent from my iPhone using Tapatalk
Well today I decided, as The Weather Outlook said it was not going to rain and there was no sign of the stuff on RainToday to pull my windscreen out in order to put right the leaking mess left by the company that replaced it (three times including breaking the first one!! Don't get me started). Smothered the seal in Arbomast which promptly dried up cracked and leaked. 

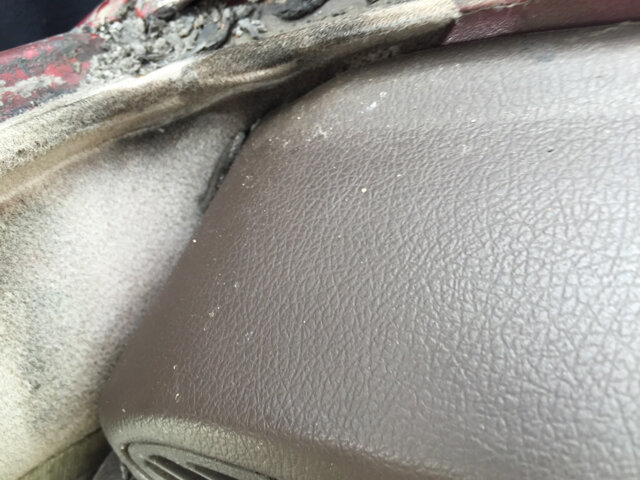
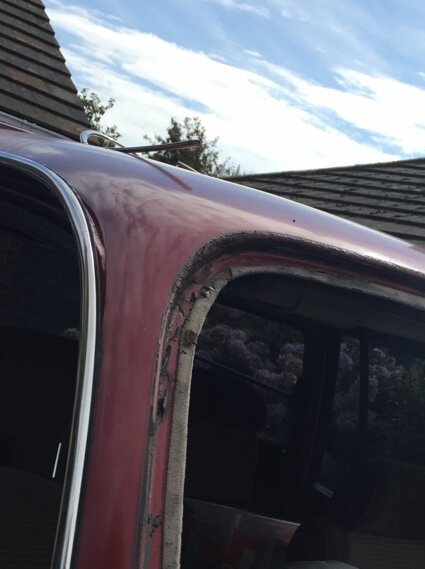
Found the paintwork bubbling at the front edge of the roof so decided to scrape it off and get some sandpaper to it before it got too bad.
So then it decided to rain, not much, just enough to scupper any chance of spraying so will put some rust converter on there and retreat inside to clean off the seal rubber with a Brillo pad in the bath.
Attachments

- Joined
- Oct 13, 2010
- Messages
- 6,058
- Country Flag

Not exactly maintenance. But I been have getting to grips with the new tig welder and having a crack at Aluminium...


Sent from my iPhone using Tapatalk
Looks good mate!
What machine did you get?
Are you using a foot peddle or is it scratch start? [emoji3]
Sent from my iPhone using Tapatalk
BRE Fabrications LTD
Well-Known Member
Looks good mate!
What machine did you get?
Are you using a foot peddle or is it scratch start? [emoji3]
Sent from my iPhone using Tapatalk
Thanks dude. Using an R-Tech 160Amp ACDC Tig set with a foot pedal. Just trying to figure out the settings for the machine. The foot pedal is awesome though compared to the scratch start setup I was using previously.
Quick question, how do you prep your tungsten for aluminium? I have tried the balling thing but find the arc wonders pretty badly.
- Joined
- Oct 13, 2010
- Messages
- 6,058
- Country Flag
Cool.
I sharpen mine to a point on the bench grinder, going with the grain.
I always put the tungsten in a cordless drill and allow the tungsten to spin flat out on speed 2 as I sharpen it.
You should be aiming for it to look like a sharpened pencil in scale.
Always give the alluminium a quick rub over with a wire brush before welding and its best to have a dedicated wire brush that you use just for that purpose. Then give it a wipe over with thinners. With TIG, and especially alluminium you want the metal to be spotlessly clean as any contaminates will cause problems.
Sometimes moving the earth lead to a different spot of what your welding can help give you a more stable arc.
Pre flow and post flow is very important with TIG. Give the peddle a quick press, with the torch away from the work piece to start with to ensure the tungsten has a good shielding of gas a few seconds before you actually start welding.
As you get to the end of the weld slowly back off the peddle (this will help prevent craters and pin holes) and then once the arc has been extinguished keep the torch in place for 5-10 seconds to allow post flow gas to continue to shield the weld pool as it cools.
As a general rule of thumb you want a second of post flow for every 10 amps your welding at.
Ensuring you have the correct gas pressure is also very important and will also help staberlise the arc.
What size tungsten and wire are you using?
1.6mm tungstens should be used with 1.6mm wire and 2.4mm with 2.4mm.
Using a 1.6mm tungsten will create a much smaller and narrower weld and will look a lot neater when say welding a tank/box etc. out of 2-3mm sheet. Using a 2.4mm tungsten wont look anywhere near as neat.
The angle of the torch/tungsten is also very important as is the angle of the filler wire, ideally the wire and tungsten should meet at 90 degrees and the tungsten should be angled at about 60 degrees to the work piece.
Last edited:
Paddler Ed
Well-Known Member
Helped a mate remove the brake drum on his 12 tonne Isuzu JCR... would have been a lot quicker had he remembered there was a collar that holds the bearings in place inside the rear hub... once we had that removed, and made a puller using an M16 bit of threaded bar and some 10mm plate we were cooking on gas.
The 150cm breaker bar extension helped undo the wheel nuts quite nicely; next time though I know to undo the outer wheel nuts AND start to undo the inner nut as well whilst it's still on the ground.
The 150cm breaker bar extension helped undo the wheel nuts quite nicely; next time though I know to undo the outer wheel nuts AND start to undo the inner nut as well whilst it's still on the ground.
BRE Fabrications LTD
Well-Known Member
Great tips there Ben. I never thought to use a drill when sharpening the tungsten.
I have been using 1.6mm tungsten with 1.6mm rod. I
I'll give a few of your other tips a go tomorrow. Cheers for the comprehensive post!
Sent from my iPhone using Tapatalk
I have been using 1.6mm tungsten with 1.6mm rod. I
I'll give a few of your other tips a go tomorrow. Cheers for the comprehensive post!
Sent from my iPhone using Tapatalk
Prepped and rust treated around my windscreen for most of the day. Decided to temporarily paint around 20mm above the top of the screen in black until I get the whole roof resprayed. Hopefully it will look ok. Got it all masked up ready…then, guess what…paint but no primer so, used acid etch. No rain showing on RainToday.…as soon as I put the primer on…yep, rain shows on the radar!!! Then after the first coat of black…rain!!! But only 5 spots!! Then after the second and third coats but got it done, and it doesn't look like the rain has affected it.
Sag
Well-Known Member
- Joined
- Aug 24, 2014
- Messages
- 756
Well fitted new rear shocks after tea today with my son if you have changed them before you know what a b#####d why would you design something like that is all I can say and with a dodgy finger didn't make it any easier hence the help of my son what a star.
Chas
Well-Known Member

Since I had the LRT fitted my exhaust has been rattling like buggery on the bottom of the tank  so today I wedged a block of wood between the exhaust and the tank and another piece under the pipe and used a jack to squash the exhaust a little. Result no rattle.

so today I wedged a block of wood between the exhaust and the tank and another piece under the pipe and used a jack to squash the exhaust a little. Result no rattle. 
Bloody hell hope you don't burst into flame on the motorway Chas!!