Don't like the adverts?  Click here to remove them

80 series gullwings rear windows

Ok so now I have egg on my face, 1min after that post Hermes arrived. Had a chat with the chap who turned out to be the local depot manager. They have had trouble with the driver covering our post code not delivering so hes been sacked.

Looks like our problems with them was down to 1 bad person
 
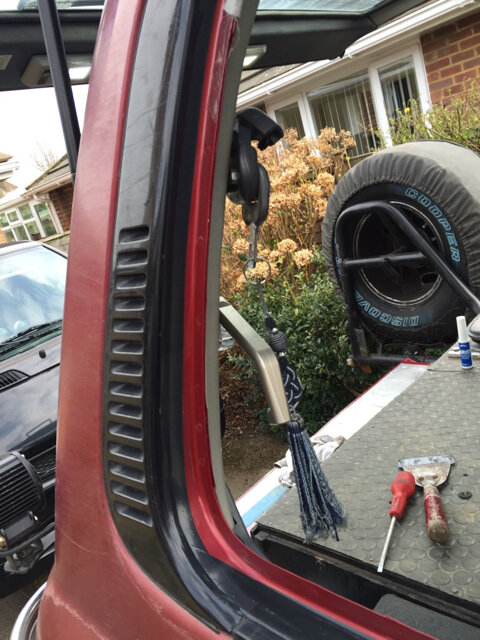
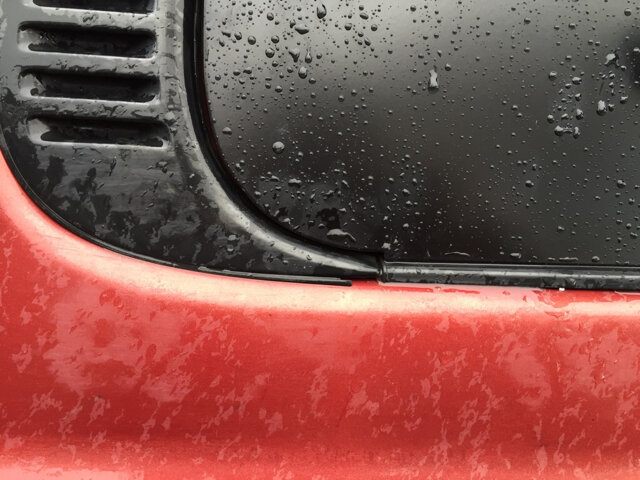
As you may have seen on the buying thread, Chas now has his pair of gullwings fitted. The modification I made went well although I needed to take a little more off, which was OK, it just took a bit of time and trial and error to do. One thing I have noticed is that the plastic louvred trim that sits to the rear of the doors on the sliding window version, actually sits flush in line with the metalwork of the d pillar. So, I tried a little experiment with Chas's with some black electrical tape.

ImageUploadedByTapatalk1458844250.223360.jpg

And I was quite pleased with how it tidies this area up, totally removing any need to replace this plastic trim (which I think was a no no anyway at £147 or so each side [emoji33]). Quite how long it would stay is anybody's guess but it was worth a try.
 
Fitting instructions for Gullwing doors.

You will need:-

A length of stout cord (para cord is ideal) about 3-6mm or so in diameter. Braided is best but not essential.
Rubber safe lube such as rubber/nylon lubricant or glass cleaner.
Black electrical tape.
Window/trim removal tools, or pieces of plastic, such as plastic window packers, broad lolly sticks or the like.
Soft mallet, or hammer and wood block.
Small piece of wood approx 1/2" x 1" and about 6" long. (13x 25, 150 long)

1, remove your internal rear side guard rail (if fixed window type) if fitted.
2, remove your existing side window by prising back the rubber inside around the window. This can be done by hand with the aid of some stiff pieces of plastic and is the same process whether fixed or sliding Windows are fitted. Take care not to damage the head lining and work round from a top corner along the top and down the side. Feel your way, if it becomes difficult then go down the other side, away from the corner. E.g. Start at the rear and for every 6" along the top do 3" down the rear side, that sort of thing. There is a video from Yodateq here
though I believe starting at the top is easier.
Having someone on hand to grasp the window as it emerges on the outside and check that the plastic vent moulding doesn't get dislodged is useful but not essential. If you leave the doors open and don't push it fully out from inside, you can do it on your own but do check that the rubber is not caught on the vent moulding in the early stages of removal (it breaks easily!).

Once you've worked 2/3 of the way down each side and all the way across the top, that is the time to go outside and wiggle the rubber and window upwards and free.
3, if you plan to reuse the rubber (and you have the fixed window cruiser), note where the pre-formed corner goes on the glass and remove the rubber from the glass.
4, clean off the rubber if necessary. I find a bath load of hot water and a Brillo pad is really good at cleaning off rubbers. [emoji4] just watch out as it can leave black marks so take care doing it and do it when alone in the house unless you have an understanding wife and clean the bath afterwards.
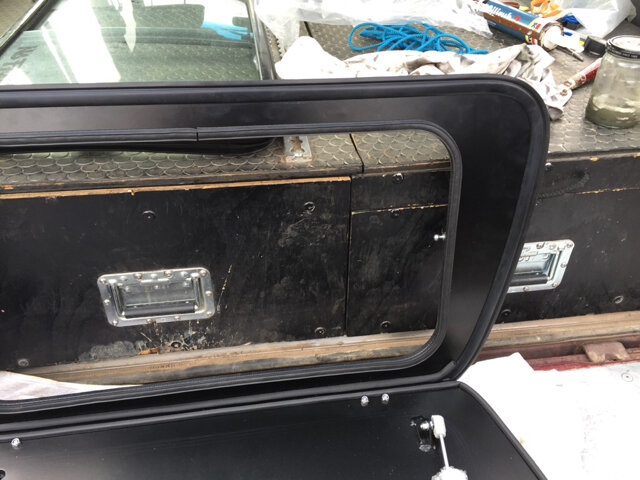
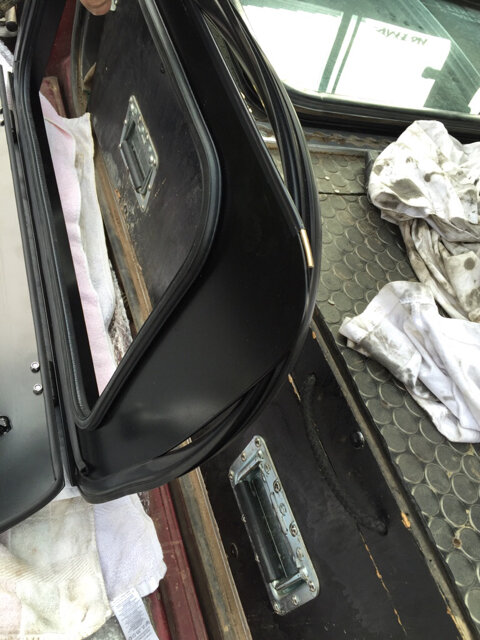
5, refit (or fit) the rubber to the rear (fixed) frame of the Gullwing door, smooth side out and with the pre-formed corner in the correct orientation on the correct corner that you noted earlier. This is the tightest corner on the gullwing, top right on the right hand side and top left on the left hand side (looking from the drivers view).
ImageUploadedByTapatalk1458845258.795973.jpg
ImageUploadedByTapatalk1458845291.445308.jpg
Make sure the metal sits correctly in the rubber and that the rubber is not turned under itself. New rubbers need a fair bit of working to and fro to get them in place. You may find it easier to open the door up to do this but the top needs care as it is underneath the top hinge angle and is tight in places, especially around the hinge nuts, but it will go, take care not to dislodge the secondary stuck on seal.
6, treat any rust around the opening and apply paint as necessary and leave to dry.
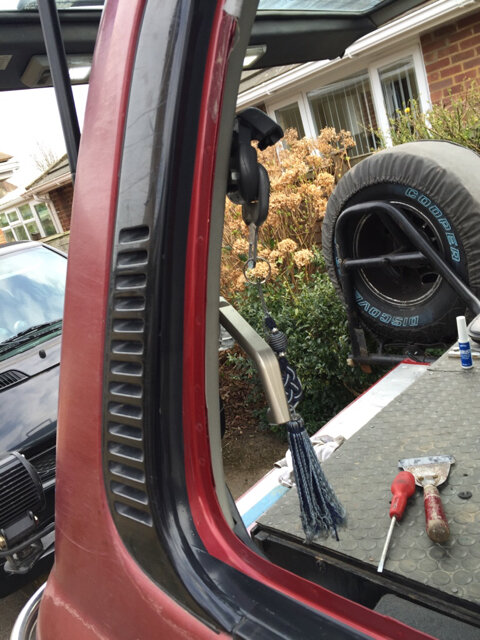
7, Tip…if replacing sliding Windows, clean the area where the rear plastic vent moulding meets the metal of the car body in the frame and run a length of black electrical tape from top to bottom without stretching it. This will help cover the join left by the difference in the fixed and sliding window mouldings, and is mostly covered by the rubbers.
ImageUploadedByTapatalk1459705343.835970.jpg
Without the tape, a small area of frame remains uncovered.
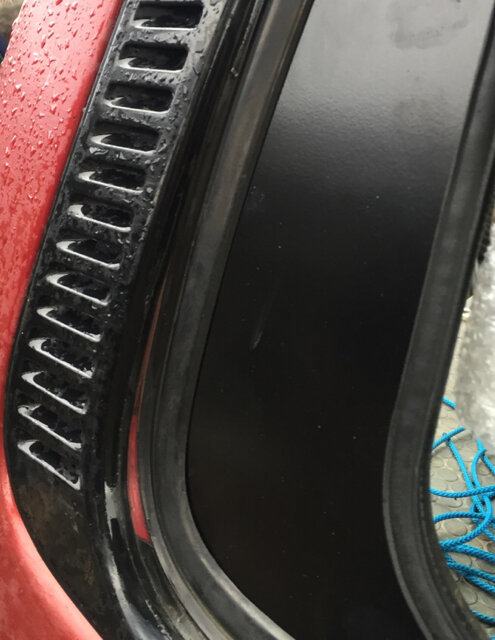
ImageUploadedByTapatalk1459705700.567854.jpg
8, take the length of cord and lay it in the channel in the rubber that will end up holding onto the cruiser bodywork. Start and finish at the bottom in the centre.
A small amount of lubricant can be applied to the rubber, but ensure what is used is rubber safe (such as glass cleaner) and minimal to prevent contamination on to the head lining. Lube the corner nearest the internal cabinet frame as a minimum.
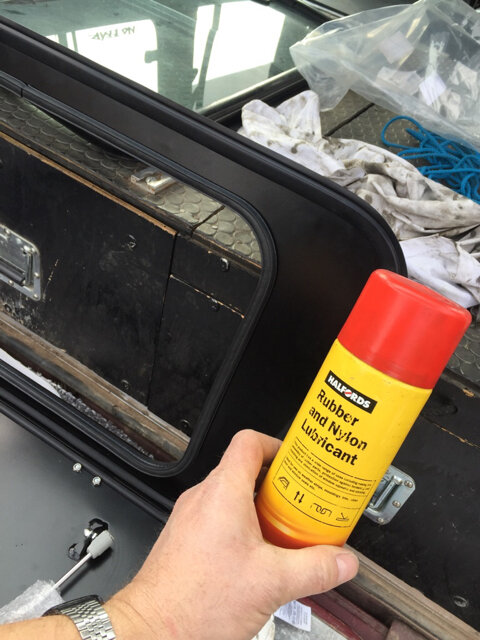
ImageUploadedByTapatalk1458892848.910658.jpg

9, hold the Gullwing up near the outside of the opening and throw the tails of the cord in through the opening.
10, Place the lower acute corner so that the channel with the cord sits over where the body panels are welded together, then pass the other bottom (obtuse) corner down again over the body weld. Open the door up and press the frame down.
11, With the door in the open position, fit the gas strut by pressing the free end onto the ball in the side of the cabinet frame.
12, With an assistant holding the Gullwing outside and pressing lightly, from inside begin pulling the rope out in order to fold the rubber out and over the body. Work round from the base and part way up the side.
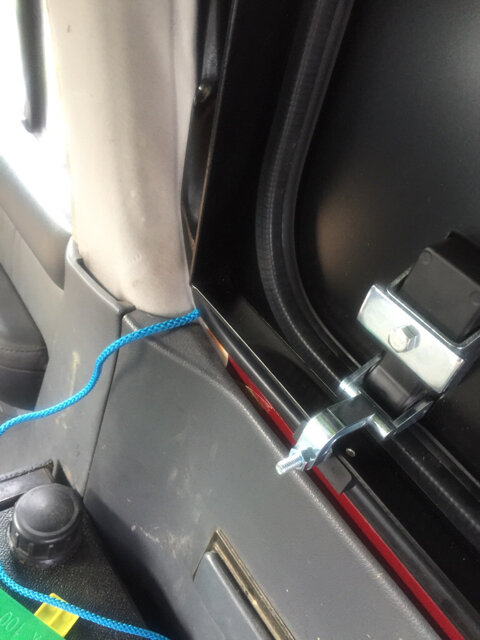
ImageUploadedByTapatalk1458892903.370881.jpg
Then do the same with the other end of the cord.
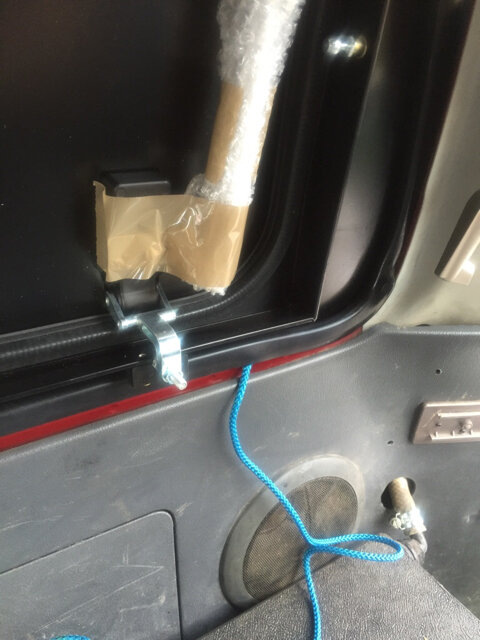
ImageUploadedByTapatalk1458892926.431305.jpg
Keep an eye on the rubber to ensure it has enough to begin to overlap the body and pause to push the frame down fully home. Give a push on the door frame from outside inwards to bring the rubber in, or pull the frame from inside, working around and finishing at the top rear most corner where it may be difficult. * Take care not to split the rubber, they can take some tugging but if it needs this then the frame will need pushing away, like trying to push it back out again but not quite. A screwdriver or small plastic spatula may help pull the last bit around.
Note*:- I haven't yet tried it, but it may be easier to do this tight top corner before the front one and finish at the front.
During this process, it may be necessary to push the frame in and down to seat it, use the mallet and block of wood on the inside edge of the opening to gently tap it down once the cord is clear of the bottom channel and a check has been made that the rubber is in the correct position and not caught up anywhere.
13, gently lower the door and check for correct fit around the edges especially at the junction at the lower rear of the vent plastic with the step in the door. If the door touches the body here it will be necessary to use the mallet and block of wood to raise the top rear corner by knocking the frame upwards in the rubber. If this still does not give enough clearance (it seems the window area varies very slightly here and with the alignment of the body panels). If necessary take the small piece of wood and use it with the mallet to tap down the body panel at this point. This can be very successful and non damaging, easily gaining the 1mm or so essential clearance to stop the door rubbing against the body panel and causing a corrosion point.
ImageUploadedByTapatalk1459705456.325520.jpg
14, Fully close the door and latch it shut. Should the door need closing tighter or looser, the catches can be adjusted by slackening the nuts on the catch arms and screwing the bolt in or out to suit. Re tighten the nut once the bolt is set.

Your new Gullwing door is now fitted and ready for use.

The rear cabinet mounting frame can be drilled to attach whatever you build to fit it.

Please post photos of your doors installed. [emoji4]
 
Last edited:
Excellent post Rich :clap:

I had a good look at mine yesterday alongside a bog standard 80, decided I'll have to remove the storage solution to stand a chance as it comes right up to the window rubber and pins the plastic side panels too. I'm redesigning the whole storage solution so this will give me more ideas anyway, not a huge big deal!

I'm refitting 2nd row seats, the eventual design will have permanent alluminium panels (welded edges/shelves) vertical in the back to make the gullwing and leisure battery storage, but still allow the 2nd row of seats to be in place for config 1 - everyday vehicle. Config 2 day laner, options will allow one side of the 2nd row to be folded up to fit the fridge, but still leave the rear load space for the dogs. Config 3 weekend laner/overland will have an alluminium load space storage draw sytem that slides in between the gullwing storage up to the 2nd row seats, with an optional side locker next to the fridge so the loadspace is all the same height as the fridge with the 2nd row folded up - alowing a sleeping space in the back of the truck. I'm still toying with another option with the 2nd row removed for additional space for full on overland.

The main bit to get right is the gullwing storage, as eventually I want to make an allucab style flip top roof, could hang a fold up bench seat off one side with a slide in locker the other side type thing. (it looks great on paper LOL)

Question: once the window is out do those plastic grill insert thingys come out easy for painting?
 
Thanks Pete, I've had a bit of practice writing instructions and it's not the easiest thing to do from the point of view of someone whose never seen the item before.

Plastic grills are held with a 5mm screw at the bottom which has an 8mm (IIRC) nut on the inside. There are two more points where they push fit with pegs similar to door card fixings. These tend either to break off the slide-in clip moulded onto the rear of the vent it the clip itself. Mr Silicon or Mr Tiger Seal sort this out I believe but it is worth perhaps removing the rest of the plastic trim inside where you might get to the back of them to punch them in. Not sure if this is possible as mine were ripped off anyway but you need to remove the trim to get to remove the nut.
 
OK Folks, you've asked for it....., well them actually!:)
Now don't get too excited as its the same old story, all the machines are busy so I couldn't get them made up for this weekend but a prototype should be along soon along with photos. For the time being its a drawing only.

Same material as the doors, 3mm ally which I intend to leave plain, though I'm open to suggestions on this. All edges returned, bit like a baking tray and the brown rectangles are cut-outs for straps (may be too many of these but open to comment). I may supply some elasticated 50mm wide webbing as fixing straps that can be fashioned to suit...I'm still thinking on this one. The kit will also contain an extra gas strut.

What do you think of the new Molle Panel?
2016-04-29 (1).png
 
Don't like the adverts?  Click here to remove them
In principle Rich, very good. If I went with this, there's a chance I'd only do one side maybe. I'd like lighting on there that's for sure and that would help with fixing and wiring. More stuff is definitely always better. End of story.
 
In principle Rich, very good. If I went with this, there's a chance I'd only do one side maybe. I'd like lighting on there that's for sure and that would help with fixing and wiring. More stuff is definitely always better. End of story.

Ok, now you've got me thinking.

Would the lighting be at the outer edge to light the area outside the door, or the inner edge (nearest the hinge) or both as possibilities?

I had considered lighting as something I would want but had thought about putting it just inside the aperture, however there's no reason why it couldn't go on the door.
 
Along the short edges not the long ones. Perhaps?
 
OK Folks, you've asked for it....., well them actually!:)
Now don't get too excited as its the same old story, all the machines are busy so I couldn't get them made up for this weekend but a prototype should be along soon along with photos. For the time being its a drawing only.

Same material as the doors, 3mm ally which I intend to leave plain, though I'm open to suggestions on this. All edges returned, bit like a baking tray and the brown rectangles are cut-outs for straps (may be too many of these but open to comment). I may supply some elasticated 50mm wide webbing as fixing straps that can be fashioned to suit...I'm still thinking on this one. The kit will also contain an extra gas strut.

What do you think of the new Molle Panel?View attachment 41056
I'm liking the look of these Rich, I would say the number of cut outs is OK they would only be seen when GW's are open and then a lot will be covered by whatever will be attached, BTW, How do the panels attach to the doors?
 
I'm liking the look of these Rich, I would say the number of cut outs is OK they would only be seen when GW's are open and then a lot will be covered by whatever will be attached, BTW, How do the panels attach to the doors?
Thanks Chas.

They attach to the backs of the catches, the one ball stud supplied with the doors that holds the gas strut, and a new ball stud the other side that will be supplied in the kit that then holds another gas strut. All very neat and tidy Chas. :)
 
Last edited:
Thanks Chas.

They attach to that backs of the catches, the one ball stud supplied with the doors that holds the gas strut, and a new ball stud the other side that will be supplied in the kit that then holds another gas strut. All very neat and tidy Chas. :)
Gimmee, gimmee. One side only please.
 
Ok, pop your names down on the list of interest below. No obligation of course.

1, Chas 1
2,
3,
4,
 
Do we have a price yet Rich. (Or a guestimate?)
I'm awaiting that Chas. Typical, as soon as I get a drawing to the fabricators it's after they get three weeks work on and don't have time to do anything. I should hear something in the next week or so and I'll post up a firm price then.
 
Thanks Paul

1, Chas 1
2, Paulgeert 2
3,
4,

I will hopefully have a price this week and have sourced some very nice LED lights that should work very nicely.
 
I'll hold off til then Rich. Don't want to give you false hope. Ha ha. Took nine out this weekend and put them back in with butyl sealant. I didn't go all the way around. Just halfway up the sides. I didn't like that water seemed to be sitting in the bottom of the rubbers. Mine are old rubbers and a bit like yer Dad's saggy pants.
 
Re plastic grill thingys
These tend either to break off the slide-in clip

Yep :lol:

Which is best, tiger seal or silicon?

Looks like I caught them just in time too, paint under the seal was bubbled and tin worm starting to set in, think I'll get away with wire brushing, filler primer, some sanding and painting

OK so I have to glue the rubber edge back on the grill thingys too, what's the best glue for that too?
 
Last edited:
Back
Top