- Joined
- Oct 13, 2010
- Messages
- 6,058
- Country Flag

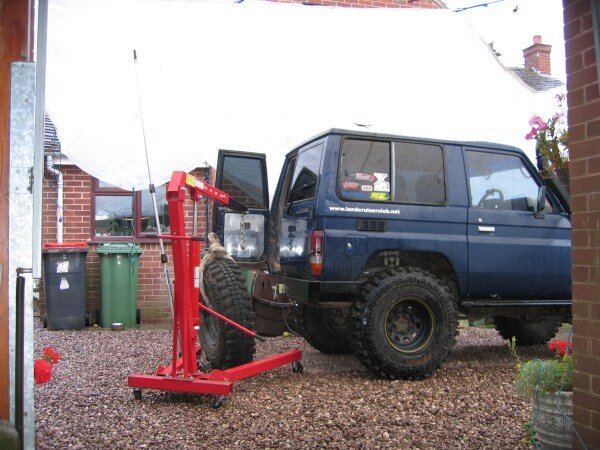
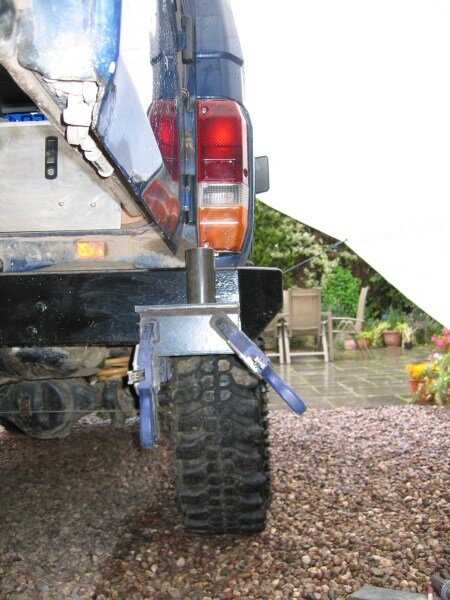
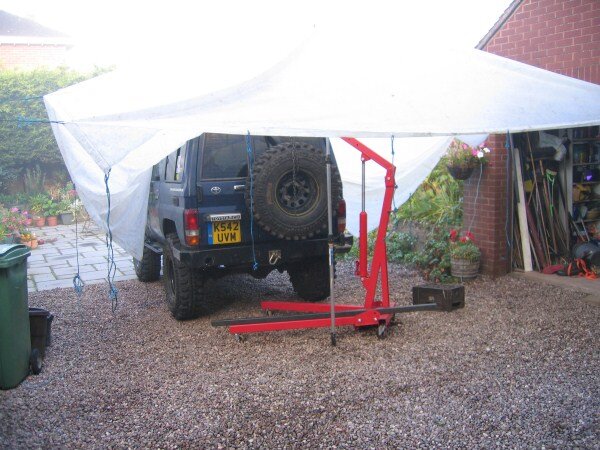
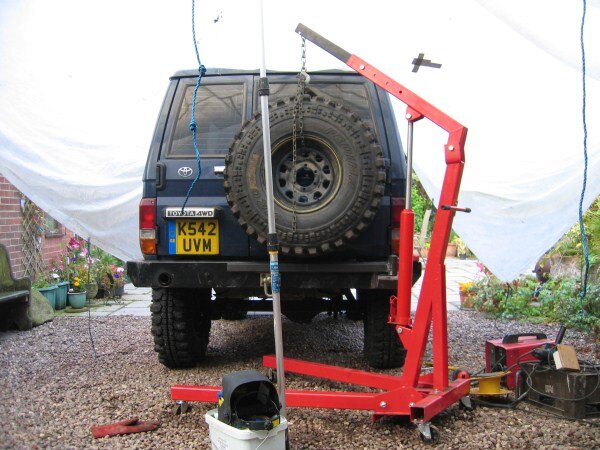
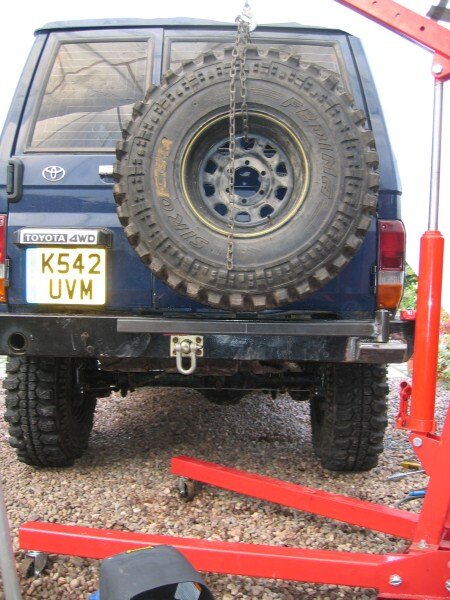
I borrowed my mates engine crane, so that i could lift and position the spare 37" tyre so i could take my measurements.

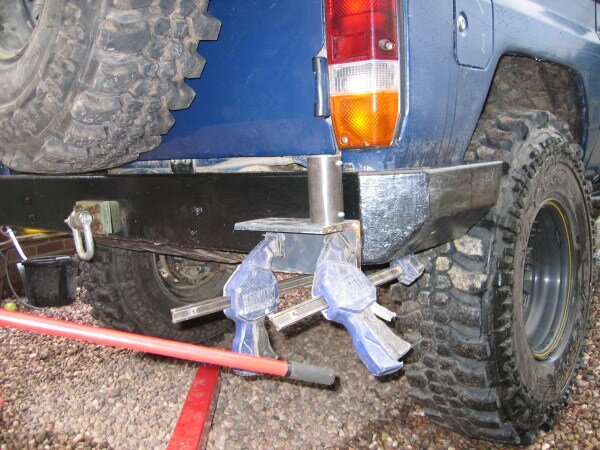
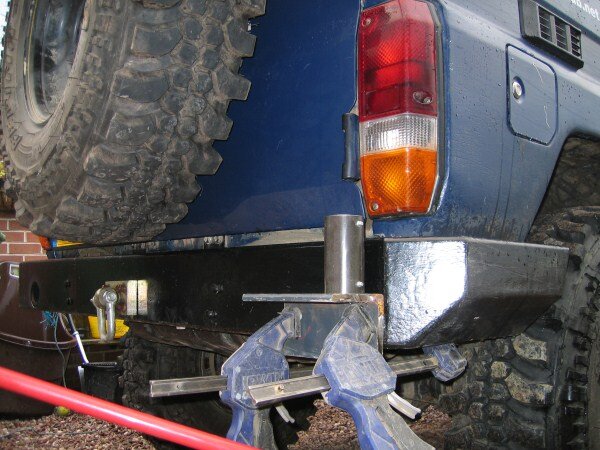
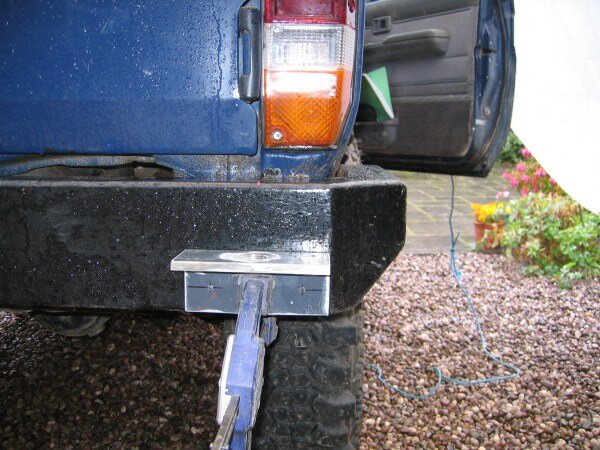
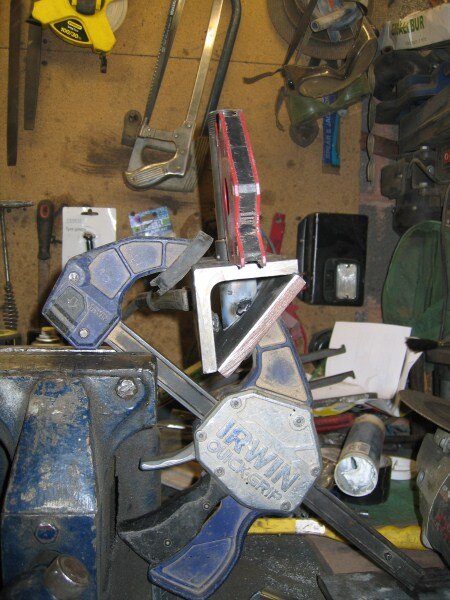
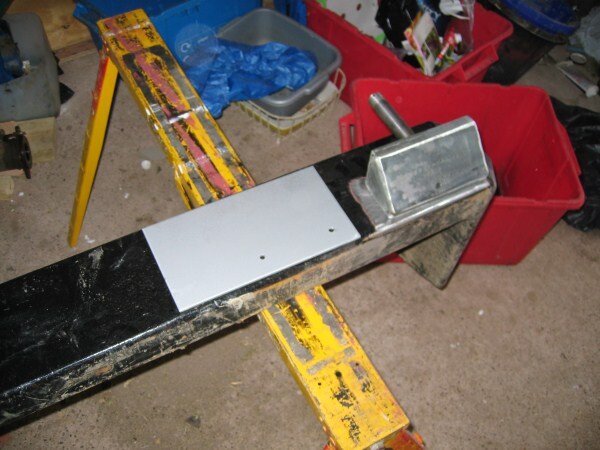
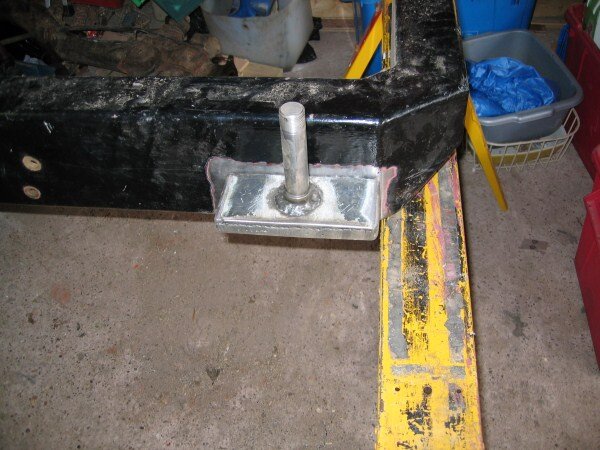
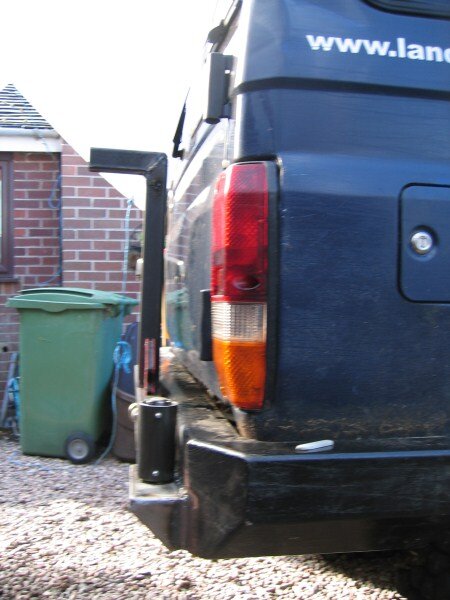
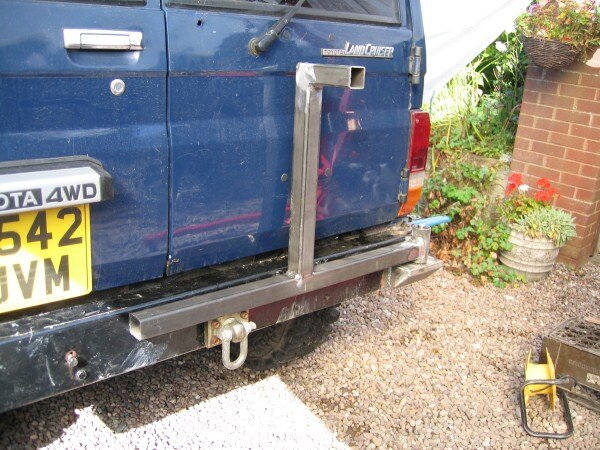
I needed to work out a way of mounting the spindle to the bumper, without it obscuring the rear light.
So after having a look through my metal pile in the shed, i found a piece of the chunky 10mm thick angle, that i used for my front recovery points.


Checked it didnt obstruct the rear door from opening.

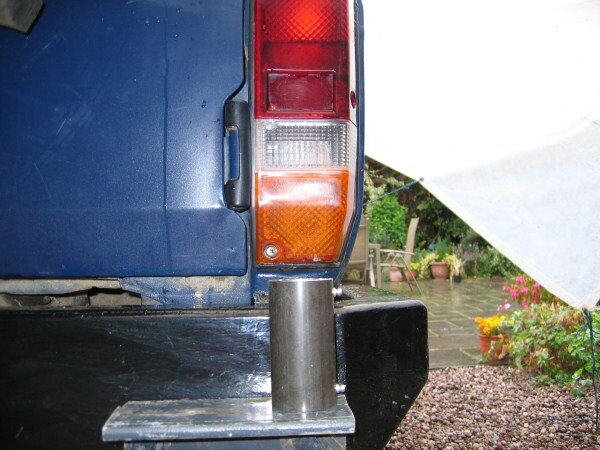
The angle was 4", and after measuring i decided it would be better if it was 3".

Man 10mm thick steel takes some cutting, even with a thin slitting disc in the 9" grinder!

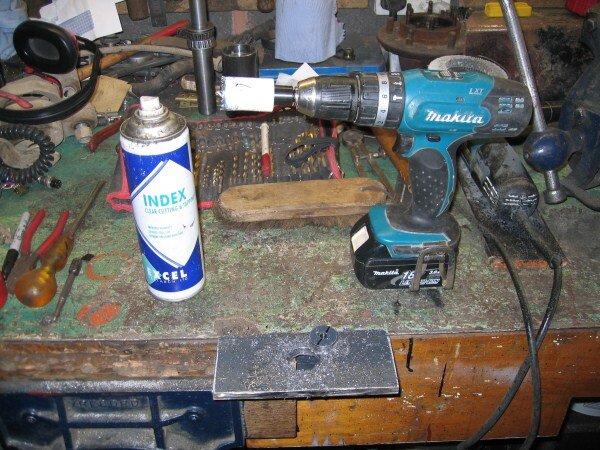
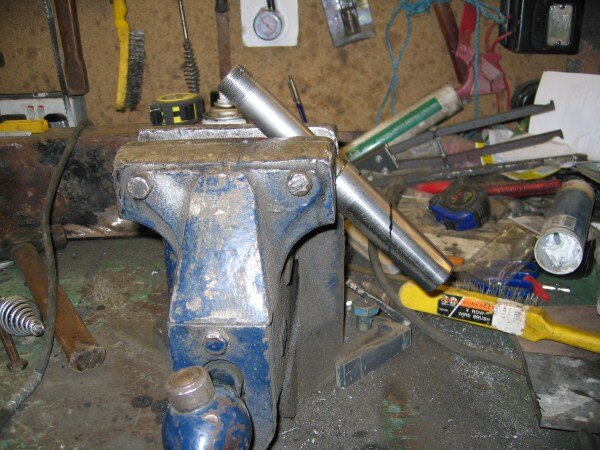
The next job was to drill a 32mm hole through the 10mm thick angle.
No hilti 110v drill from work today, so i had to use my cordless.

managed to do it without changing the battery. plenty of cutting fluid and a sharp hole saw made light work of it.
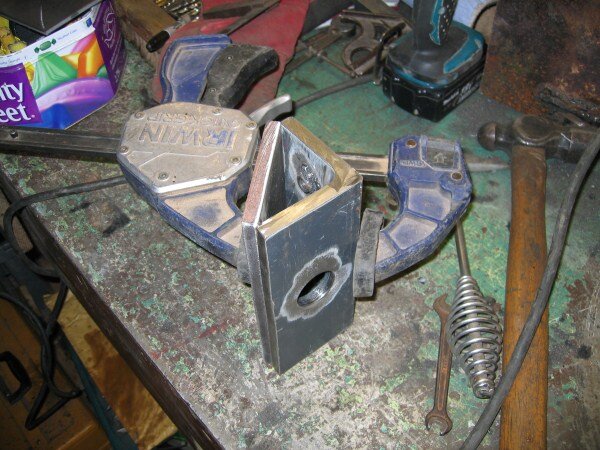
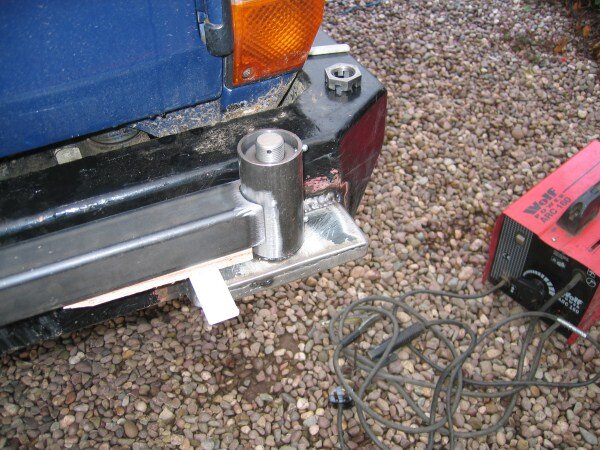
I decided that this spindle mount would also be bolted to the bumper, which would allow me to insert a piece of 6mm steel plate inside the bumper, to reinforce it a bit.
So i drilled some holes through the angle, and then drilled through these into the bumper to mark where the bolts needed to be.

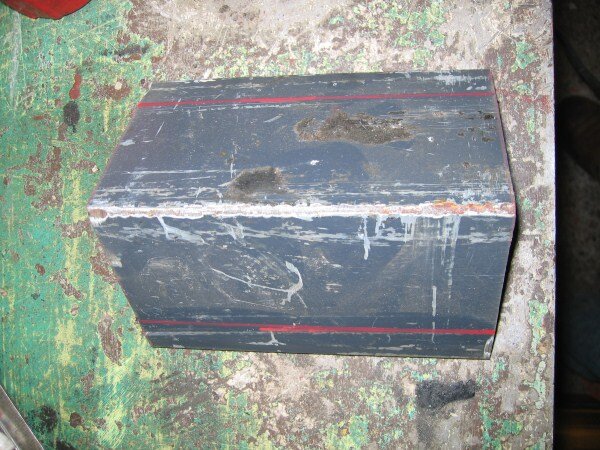
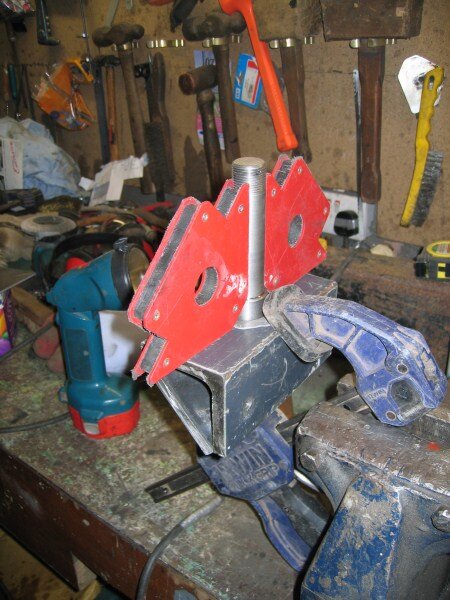
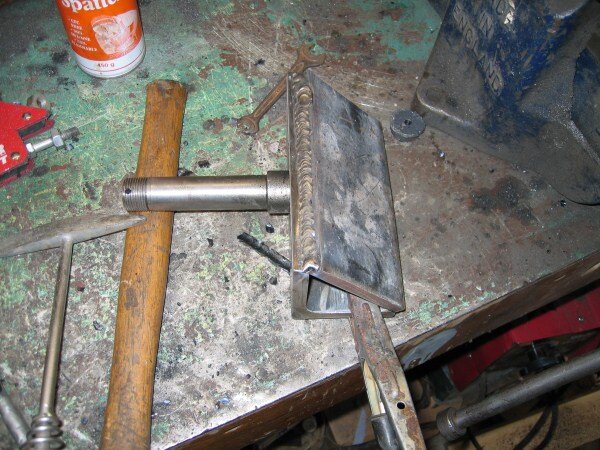
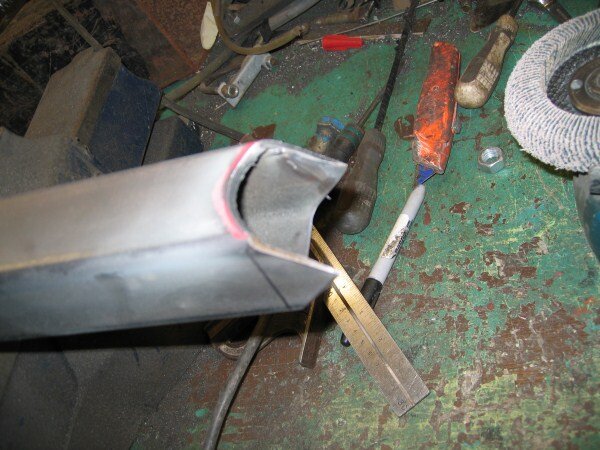
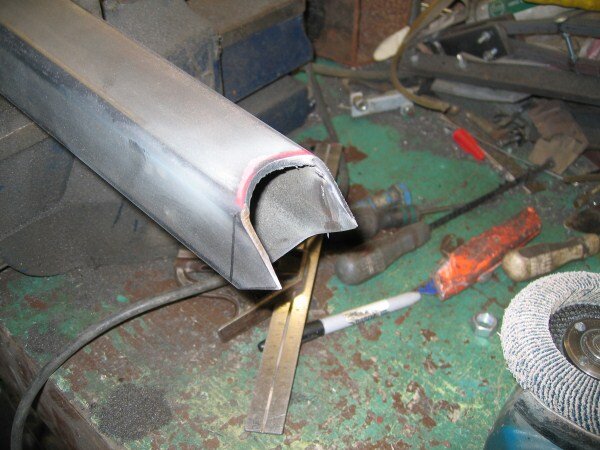
Marked and cut what i needed to remove from the bottom of the spindle.

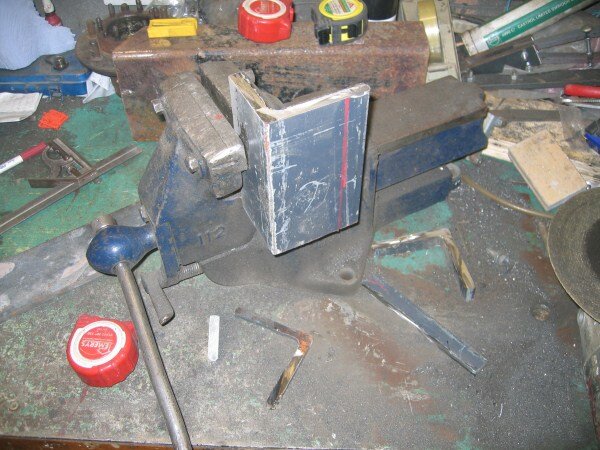
Cut a piece of 75mm x 10mm flat to length and clamped it in position.

Clamped the spindle in place.

And tack welded the bottom the spindle to the 75mm flat.


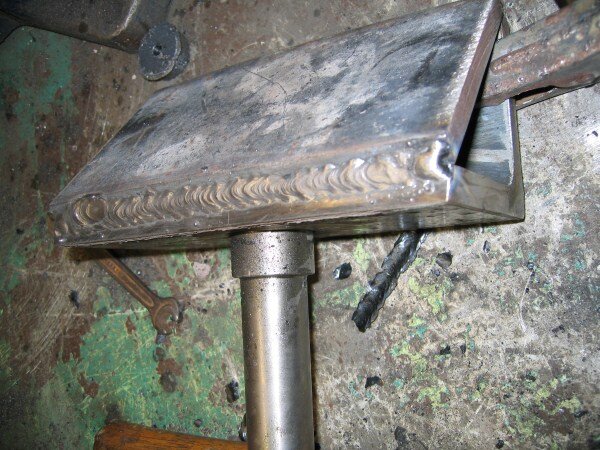
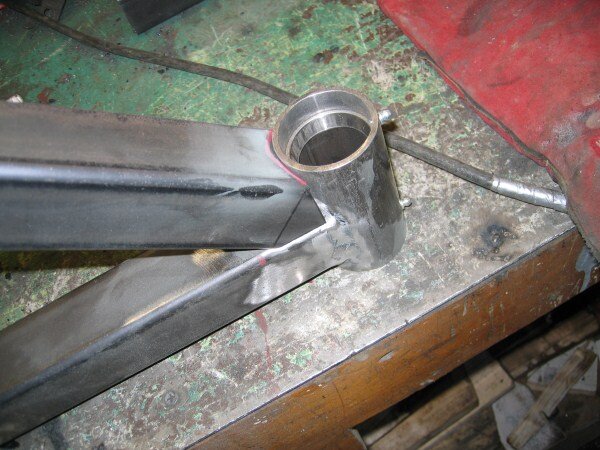
I then removed the spindle and 75mm flat from the angle, and fully welded the spindle on.

I also welded some nuts to the inside of the angle, to create captive nuts.
I then put it back through the angle, cranked the amp's right up on the welder and melted a few rods into the 10mm thick steel.


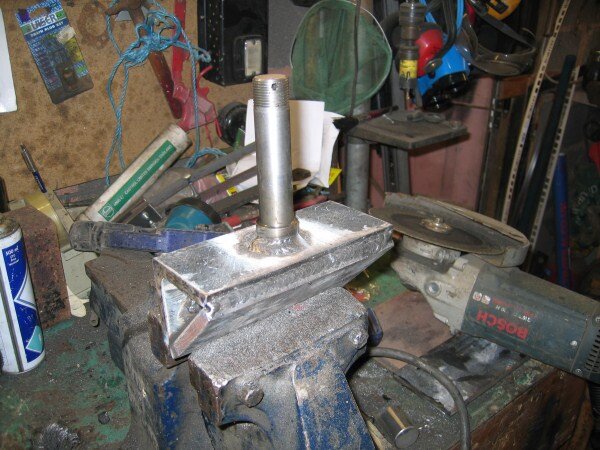
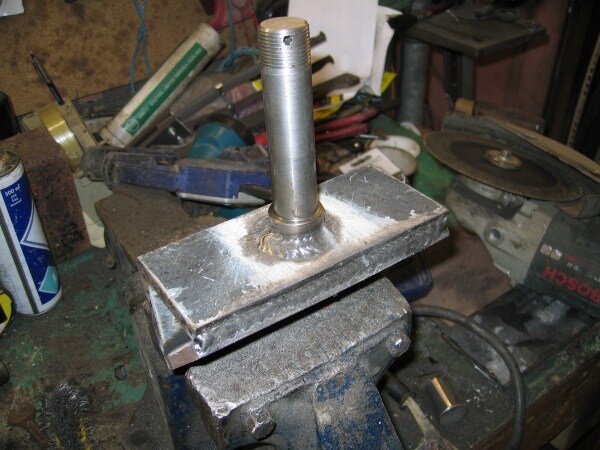
Welded the top of the spindle to the angle.


Cut some 4mm thick plate on the guillotine to cap the ends off with.
Tack welded in place.


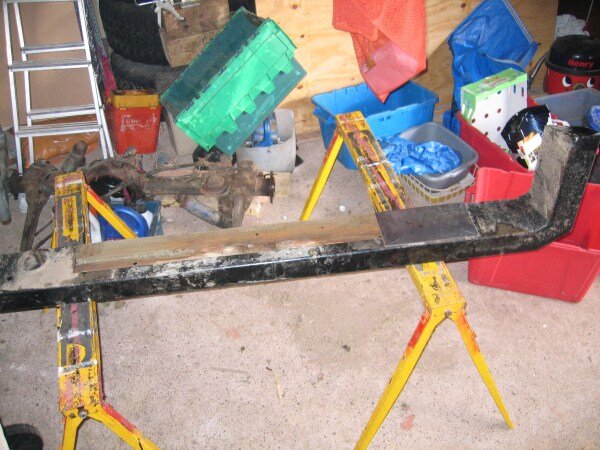
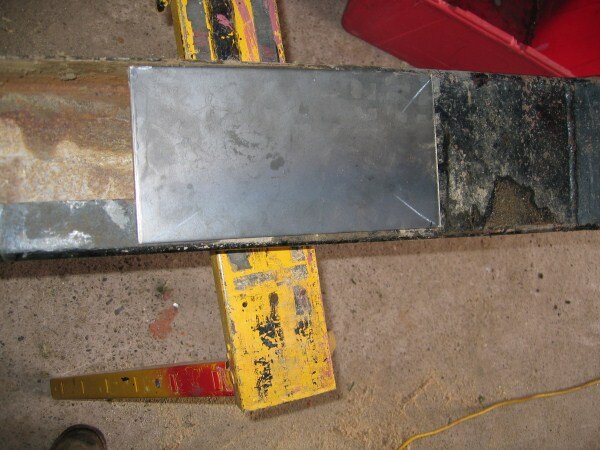
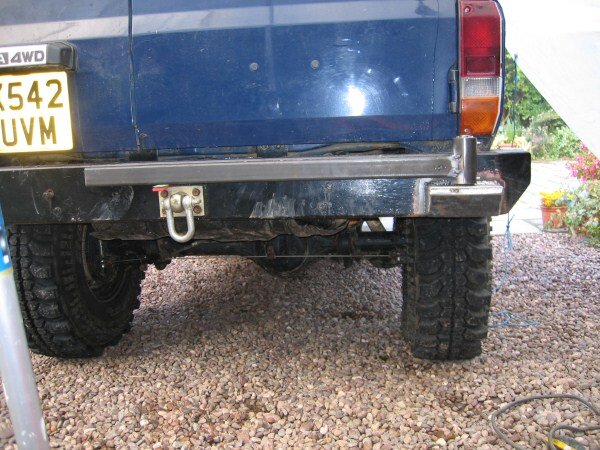
Got the bumper off and on some trestles.

Piece of 6mm steel cut to fit perfectly inside the box section.

Slid it in place, drilled through the holes in the bumper, then gave it a quick lick of paint.

So i slid the plate back inside the bumper, and bolted through that and into the spindle mount.
Skinned my knuckles a bit getting the bolts done up though.


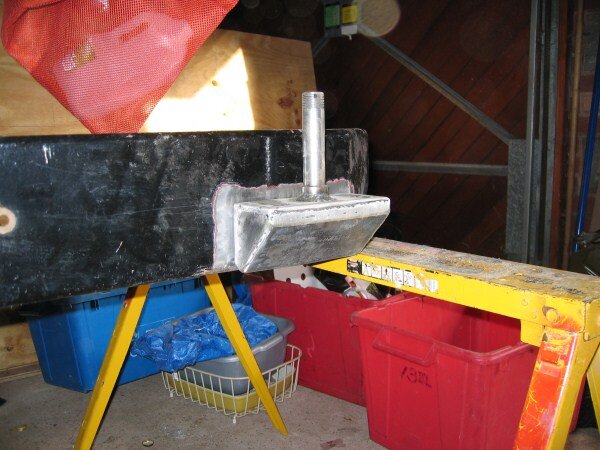
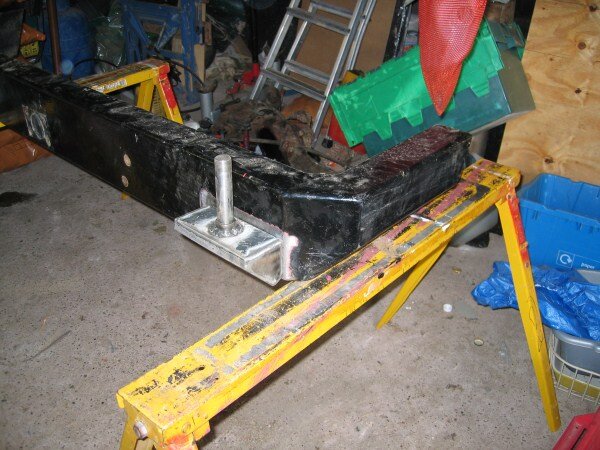
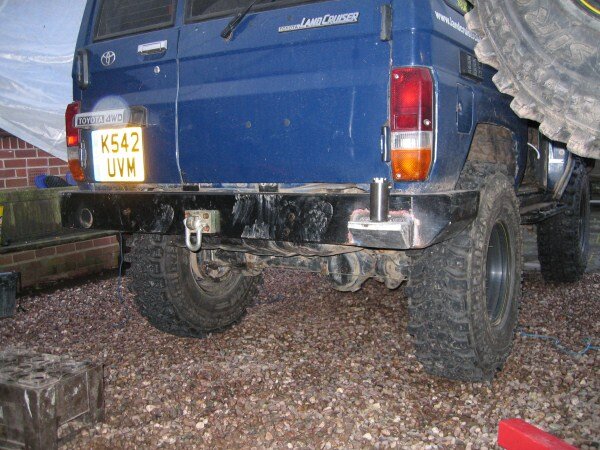
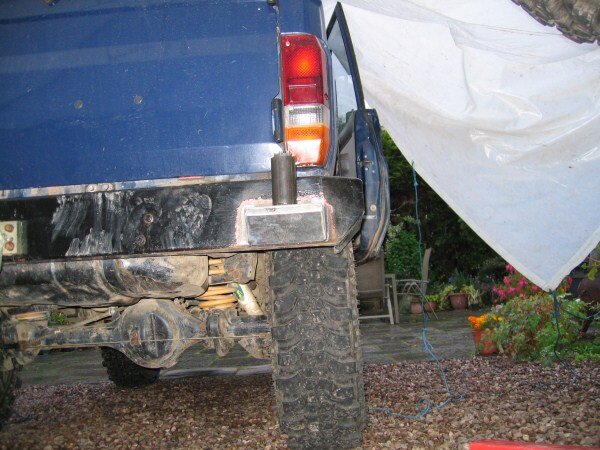
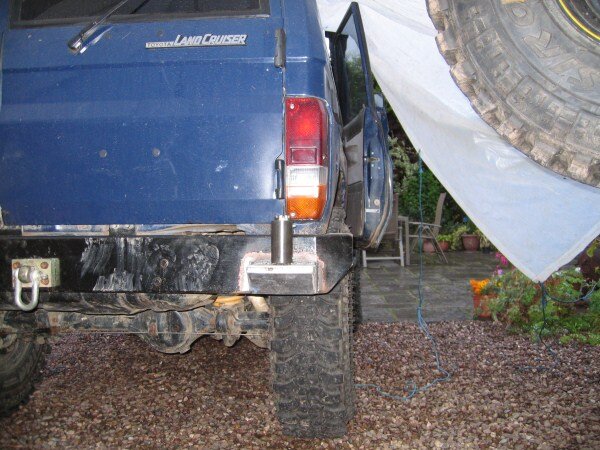
Welded all the way around the mount, and then got the bumper re-fitted on the truck.


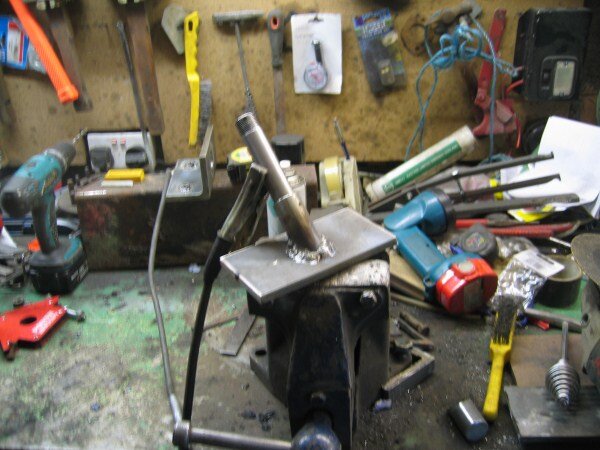
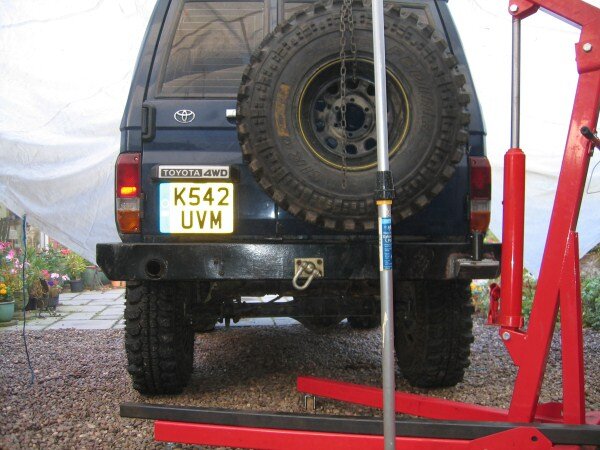
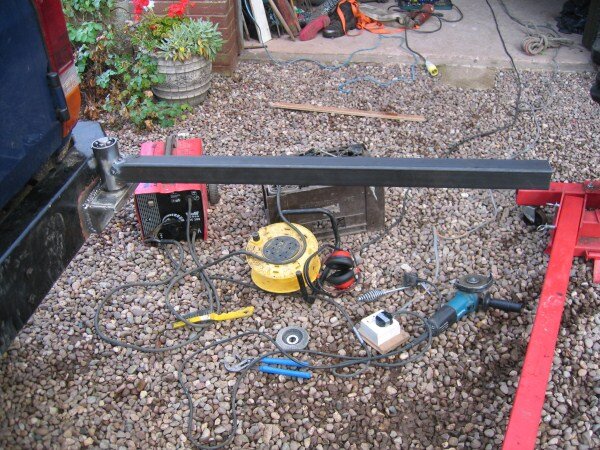
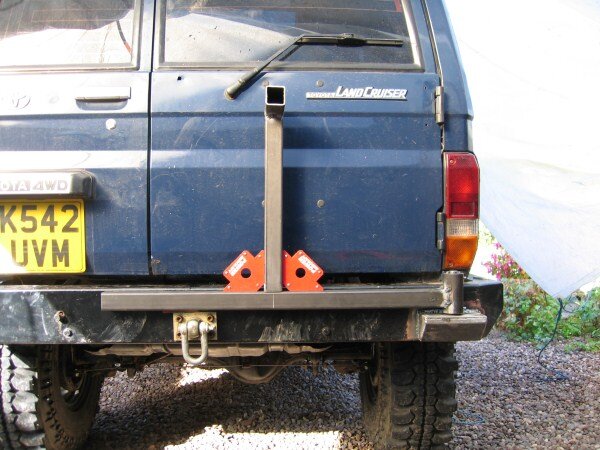
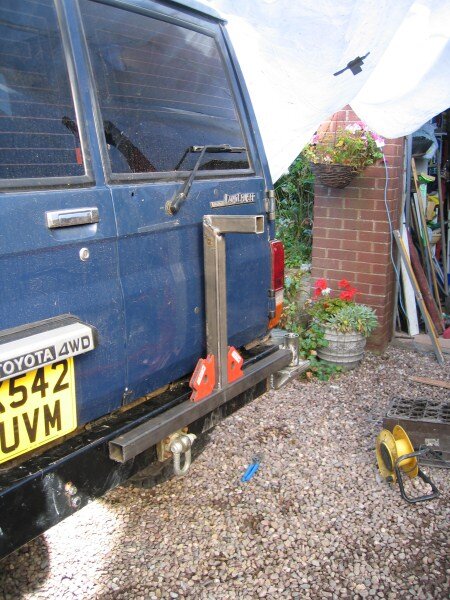
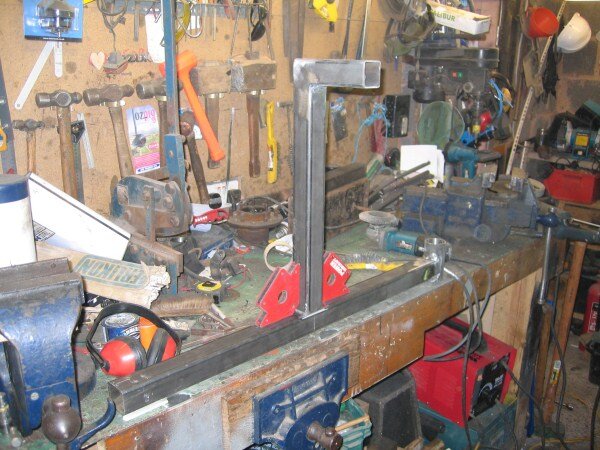
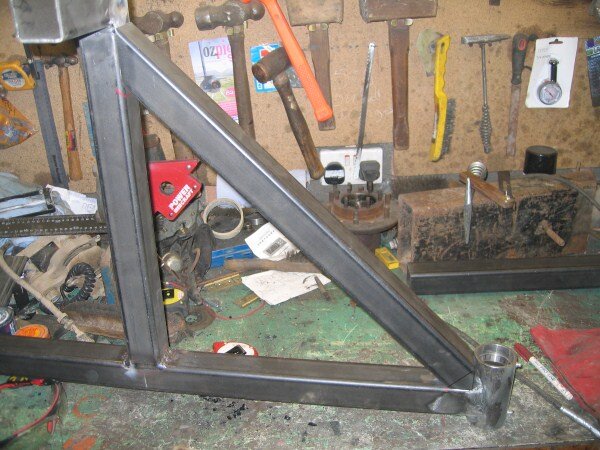
So this morning I got the spare re-positioned and measured up for the arm.


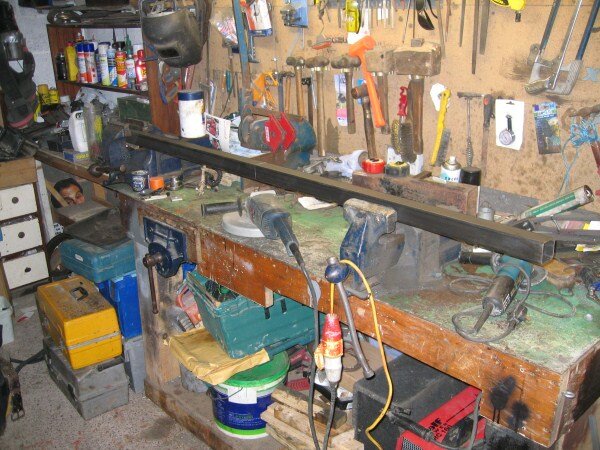
Dragged a length of 50mm box out of the shed and got it on the bench.


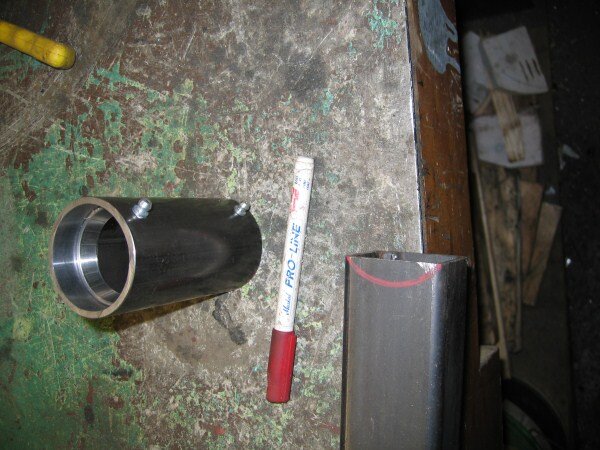
After cutting the first length of box i needed to notch the end to fit the tube.

cut and ground the notch, and then tried the box in position.


Tack welded it in place.


Spare back in place for final measure up.


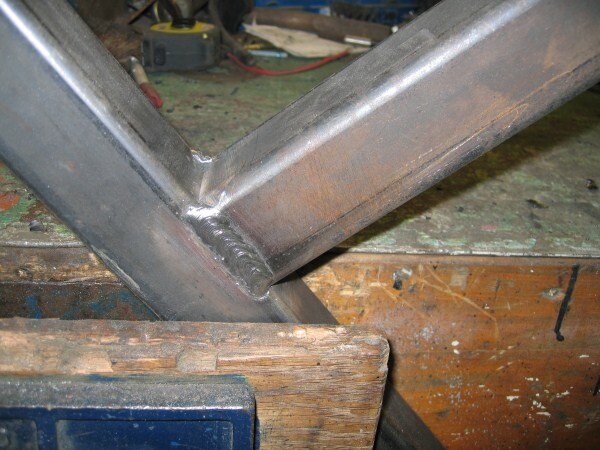
Cut and welded 2 pieces of box together, and then positioned it on the arm.


Back into the workshop to get it welded on.

The joys of using an ARC instead of a MIG, means that I have to keep turning what im welding for optimum results.


Done and back on the truck.


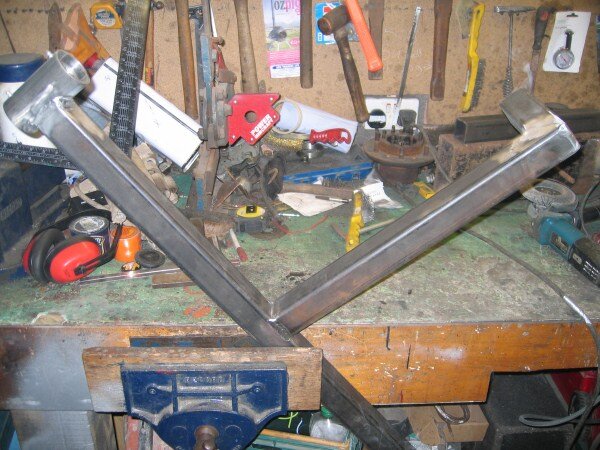
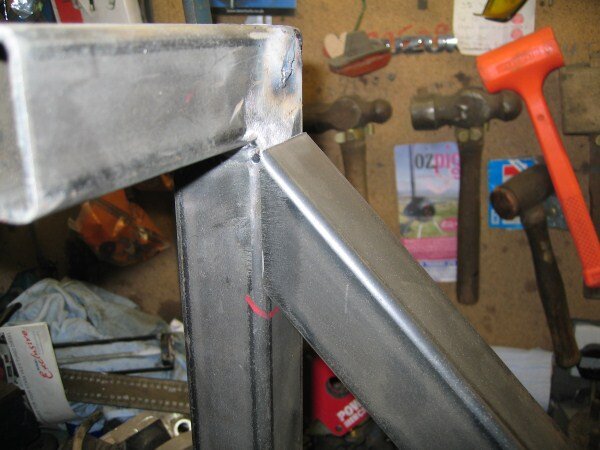
Braces next.


The most technical cut on the whole project.


Welded it together.


Other side.

And back on the truck.


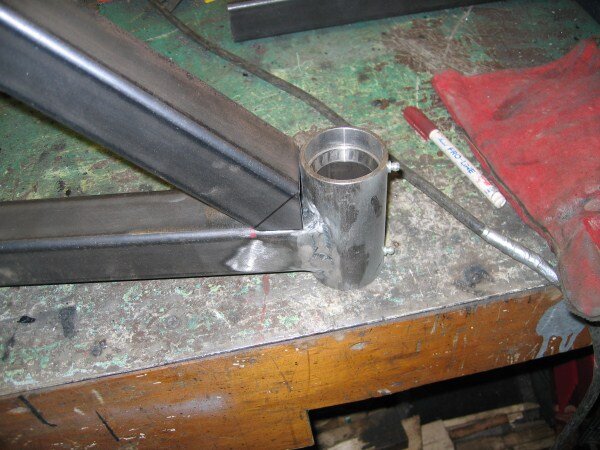
Needed to make the piece that the actual wheel will mount to next.
This is the steel i got that i thought would do the job, but after measuring it, it was 12mm thick which i decided was over kill.

So i found an off cut of 6mm from my first steering guard.

cut it to size.

And marked and centre punched ready for drilling.

Knocked some studs out of an old 4-Runner wheel hub.

Plate drilled and studs.

Due to the fact the thread doesnt go all the way down the stud, i found some nuts which were a tight fit, but would just push down the studs.

Dropped the studs through the nuts in the vice, ready for welding.

Positioned the plate behind a spare wheel and did the nuts up to centre the studs in the holes in the plate. (i drilled the holes in the plate bigger than the size of the studs to allow for a few mm of movement.)


And welded the nuts/studs in place.

Took it off the wheel, and i now have a plate with studs welded in place at the perfect stud pattern.


I needed to work out a way of mounting the spindle to the bumper, without it obscuring the rear light.
So after having a look through my metal pile in the shed, i found a piece of the chunky 10mm thick angle, that i used for my front recovery points.
Checked it didnt obstruct the rear door from opening.
The angle was 4", and after measuring i decided it would be better if it was 3".
Man 10mm thick steel takes some cutting, even with a thin slitting disc in the 9" grinder!
The next job was to drill a 32mm hole through the 10mm thick angle.
No hilti 110v drill from work today, so i had to use my cordless.
managed to do it without changing the battery. plenty of cutting fluid and a sharp hole saw made light work of it.
I decided that this spindle mount would also be bolted to the bumper, which would allow me to insert a piece of 6mm steel plate inside the bumper, to reinforce it a bit.
So i drilled some holes through the angle, and then drilled through these into the bumper to mark where the bolts needed to be.
Marked and cut what i needed to remove from the bottom of the spindle.
Cut a piece of 75mm x 10mm flat to length and clamped it in position.
Clamped the spindle in place.
And tack welded the bottom the spindle to the 75mm flat.
I then removed the spindle and 75mm flat from the angle, and fully welded the spindle on.
I also welded some nuts to the inside of the angle, to create captive nuts.
I then put it back through the angle, cranked the amp's right up on the welder and melted a few rods into the 10mm thick steel.
Welded the top of the spindle to the angle.
Cut some 4mm thick plate on the guillotine to cap the ends off with.
Tack welded in place.
Got the bumper off and on some trestles.
Piece of 6mm steel cut to fit perfectly inside the box section.
Slid it in place, drilled through the holes in the bumper, then gave it a quick lick of paint.
So i slid the plate back inside the bumper, and bolted through that and into the spindle mount.
Skinned my knuckles a bit getting the bolts done up though.
Welded all the way around the mount, and then got the bumper re-fitted on the truck.
So this morning I got the spare re-positioned and measured up for the arm.
Dragged a length of 50mm box out of the shed and got it on the bench.
After cutting the first length of box i needed to notch the end to fit the tube.
cut and ground the notch, and then tried the box in position.
Tack welded it in place.
Spare back in place for final measure up.
Cut and welded 2 pieces of box together, and then positioned it on the arm.
Back into the workshop to get it welded on.
The joys of using an ARC instead of a MIG, means that I have to keep turning what im welding for optimum results.
Done and back on the truck.
Braces next.
The most technical cut on the whole project.
Welded it together.
Other side.
And back on the truck.
Needed to make the piece that the actual wheel will mount to next.
This is the steel i got that i thought would do the job, but after measuring it, it was 12mm thick which i decided was over kill.
So i found an off cut of 6mm from my first steering guard.
cut it to size.
And marked and centre punched ready for drilling.
Knocked some studs out of an old 4-Runner wheel hub.
Plate drilled and studs.
Due to the fact the thread doesnt go all the way down the stud, i found some nuts which were a tight fit, but would just push down the studs.
Dropped the studs through the nuts in the vice, ready for welding.
Positioned the plate behind a spare wheel and did the nuts up to centre the studs in the holes in the plate. (i drilled the holes in the plate bigger than the size of the studs to allow for a few mm of movement.)
And welded the nuts/studs in place.
Took it off the wheel, and i now have a plate with studs welded in place at the perfect stud pattern.
Attachments
-
 IMG_4302_zps4cfa878e.jpg78.5 KB · Views: 61
 -
 IMG_4303_zps10a29667.jpg95.3 KB · Views: 46
 -
 IMG_4304_zps4ac6a5ac.jpg82.5 KB · Views: 67
 -
 IMG_4305_zpsb6da6b96.jpg67.2 KB · Views: 54
 -
 IMG_4309_zps63b54f86.jpg78 KB · Views: 49
 -
 IMG_4311_zps261a0ac0.jpg101.3 KB · Views: 73
 -
 IMG_4312_zps4177b1fd.jpg85.7 KB · Views: 57
 -
 IMG_4314_zps9b1ae52e.jpg97.8 KB · Views: 60
 -
 IMG_4315_zpse107bc1e.jpg91.7 KB · Views: 66
 -
 IMG_4316_zps72d8eac6.jpg84.3 KB · Views: 74
 -
 IMG_4317_zpsb814c2c1.jpg90.3 KB · Views: 84
 -
 IMG_4318_zps312f1fd9.jpg83.1 KB · Views: 63
 -
 IMG_4319_zps21a7378b.jpg74.9 KB · Views: 60
 -
 IMG_4320_zps2c52d810.jpg81.6 KB · Views: 46
 -
 IMG_4321_zps756e9113.jpg71.8 KB · Views: 87
 -
 IMG_4322_zps410486f8.jpg96.5 KB · Views: 48
 -
 IMG_4323_zps5f30ea4d.jpg97 KB · Views: 60
 -
 IMG_4326_zps6a42225e.jpg84.6 KB · Views: 57
 -
 IMG_4327_zpsaf27dd7d.jpg74.4 KB · Views: 48
 -
 IMG_4328_zps1a1d8ad5.jpg81.4 KB · Views: 70
 -
 IMG_4329_zpsdaed25a7.jpg67.6 KB · Views: 51
 -
 IMG_4330_zps4a7f348b.jpg89.2 KB · Views: 69
 -
 IMG_4331_zps861f2bde.jpg87.5 KB · Views: 65
 -
 IMG_4333_zpscfc14dc0.jpg75.6 KB · Views: 66
 -
 IMG_4335_zpsee61861f.jpg67.3 KB · Views: 71
 -
 IMG_4336_zpse62b0ea8.jpg71.5 KB · Views: 65
 -
 IMG_4337_zpsc86678cd.jpg86.3 KB · Views: 61
 -
 IMG_4338_zps0ced07ab.jpg78.3 KB · Views: 90
 -
 IMG_4339_zps3d28db29.jpg94.3 KB · Views: 47
 -
 IMG_4340_zpse767cc47.jpg82.8 KB · Views: 62
 -
 IMG_4341_zps4abe0c90.jpg88.4 KB · Views: 100
 -
 IMG_4342_zpsf8fb5a52.jpg83.3 KB · Views: 60
 -
 IMG_4343_zpsa3d54928.jpg76.1 KB · Views: 65
 -
 IMG_4344_zps96ca1f5a.jpg96.8 KB · Views: 67
 -
 IMG_4345_zpsc0954b85.jpg100.9 KB · Views: 55
 -
 IMG_4346_zpsba5bedea.jpg78.8 KB · Views: 57
 -
 IMG_4347_zps44787785.jpg82.9 KB · Views: 53
 -
 IMG_4348_zps8d0141c6.jpg101.1 KB · Views: 74
 -
 IMG_4349_zpsb3fa26fd.jpg92.8 KB · Views: 86
 -
 IMG_4350_zpse7a60a3d.jpg123.7 KB · Views: 74
 -
 IMG_4351_zps0e19f4f5.jpg81.1 KB · Views: 51
 -
 IMG_4352_zps292962ba.jpg87.1 KB · Views: 48
 -
 IMG_4353_zpsd537d39e.jpg78.2 KB · Views: 55
 -
 IMG_4354_zpse28bc785.jpg99.3 KB · Views: 50
 -
 IMG_4355_zps95be1d75.jpg90.1 KB · Views: 48
 -
 IMG_4356_zpseff394ca.jpg61.7 KB · Views: 54
 -
 IMG_4358_zps1361c97b.jpg89.7 KB · Views: 64
 -
 IMG_4357_zpsfef57018.jpg90.9 KB · Views: 65
 -
 IMG_4359_zps7e87bf8d.jpg74.2 KB · Views: 60
 -
 IMG_4360_zps9fdd4823.jpg86.2 KB · Views: 41
 -
 IMG_4361_zps0028a8aa.jpg97 KB · Views: 51
 -
 IMG_4362_zps6c1fe32e.jpg86.8 KB · Views: 70
 -
 IMG_4363_zpscfaf74c0.jpg77.5 KB · Views: 61
 -
 IMG_4364_zpsa3df2d3f.jpg59.7 KB · Views: 56
 -
 IMG_4366_zpsa8753a5d.jpg76.7 KB · Views: 64
 -
 IMG_4365_zps9ce8a452.jpg71.5 KB · Views: 60
 -
 IMG_4367_zps6a793505.jpg78.1 KB · Views: 50

")

 )
)


")