Don't like the adverts?  Click here to remove them

Rusty HJ60 Restoration and Overland Build

Fantastic restoration so far. My local Fire service used to have this 1986 HJ60 with full winch bumper,bull bar long range tank, and it looked beautiful with the blues on top.
37087e73c1015a017e47ef74e9ee6036.jpg


Last I heard it was sold in a auction about 10 years ago, when I was still in university and had no money to buy it. Wanted that truck so bad.. Best of luck with the restoration. Very envious!
 
Thanks Gents,

Ok so couple of things tonight, first up was to not shy away from welding and play with new toys so it was to weld the passenger front door and the reward if i got it done was try out an ebay purchase delivered today.

How the door started after i had already cut it back the other week.
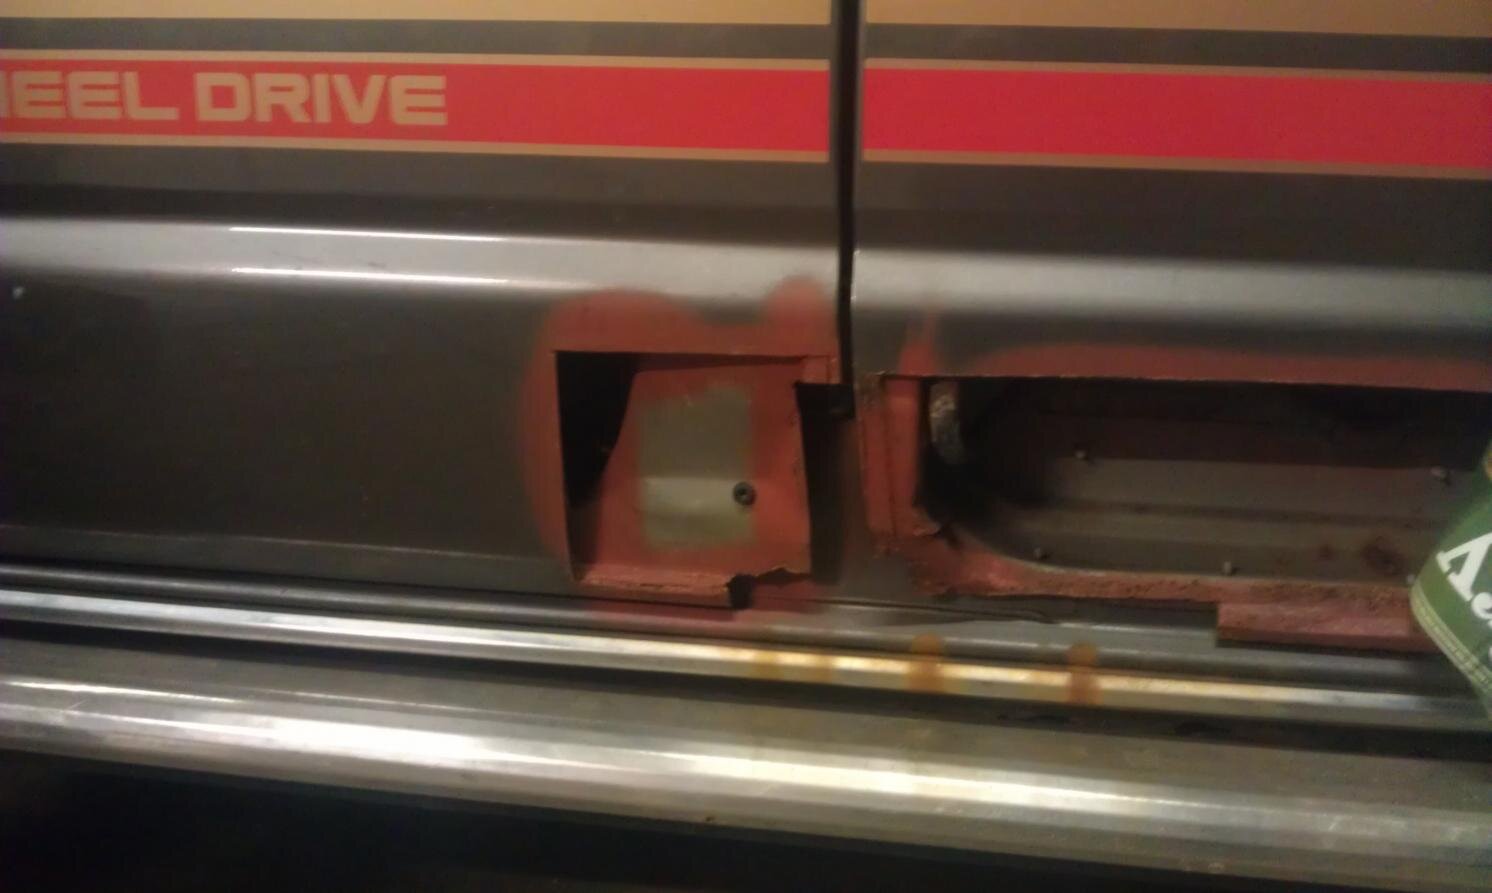
Pass door unstarted.jpg
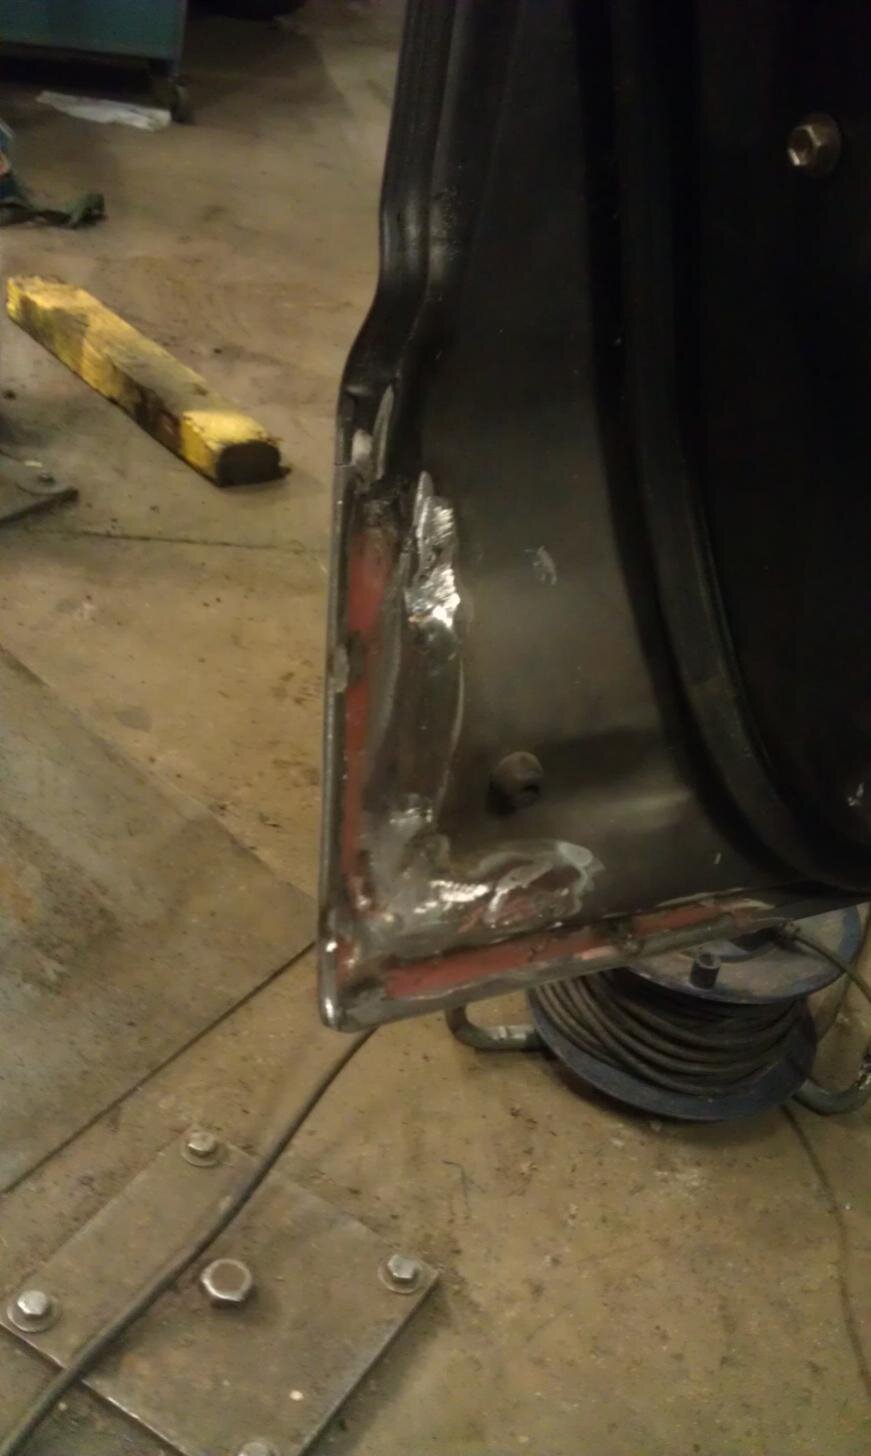
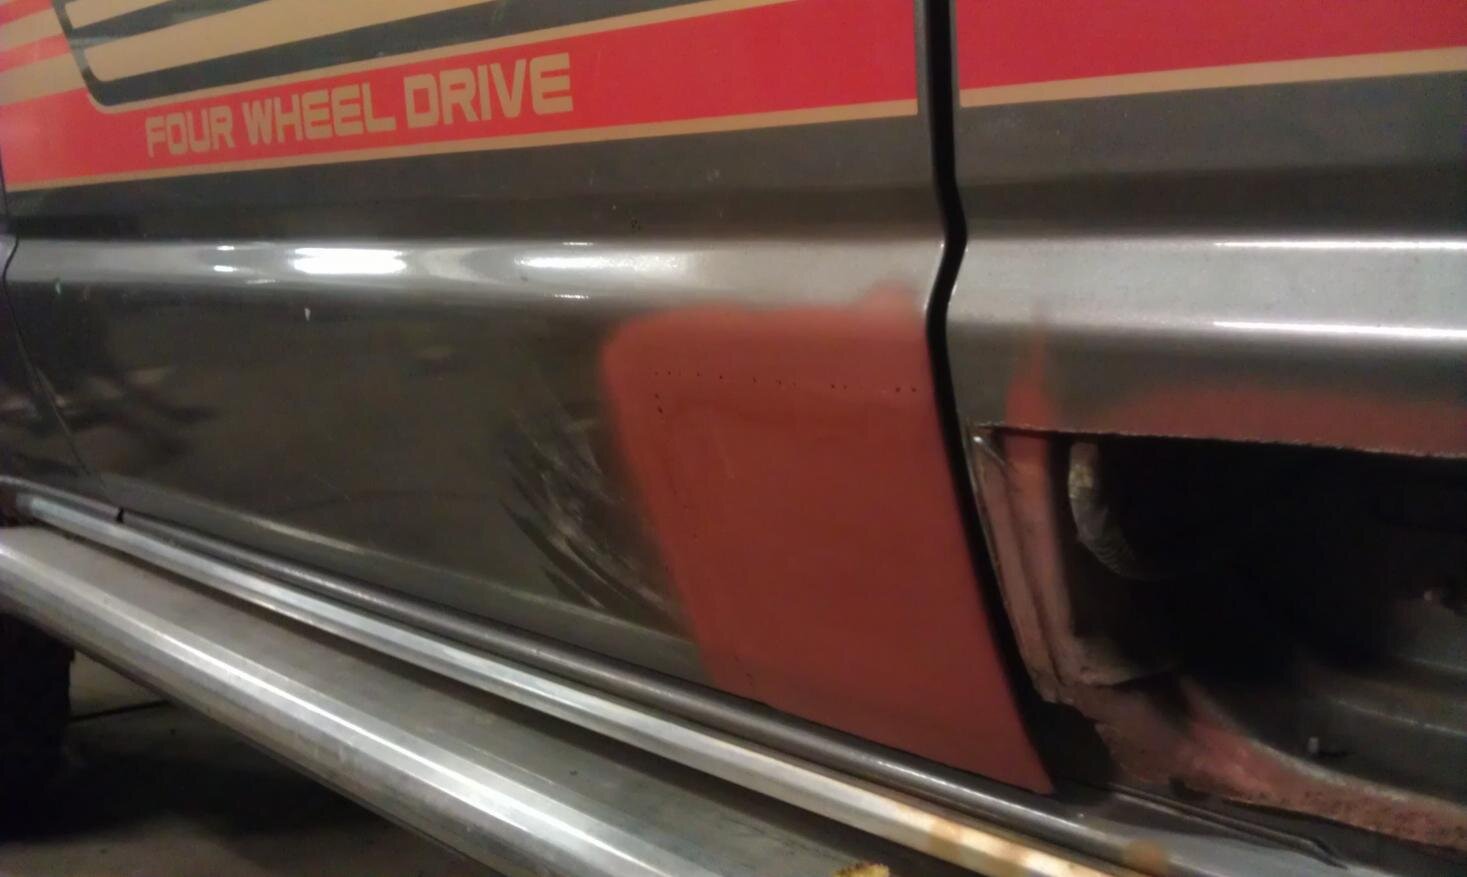
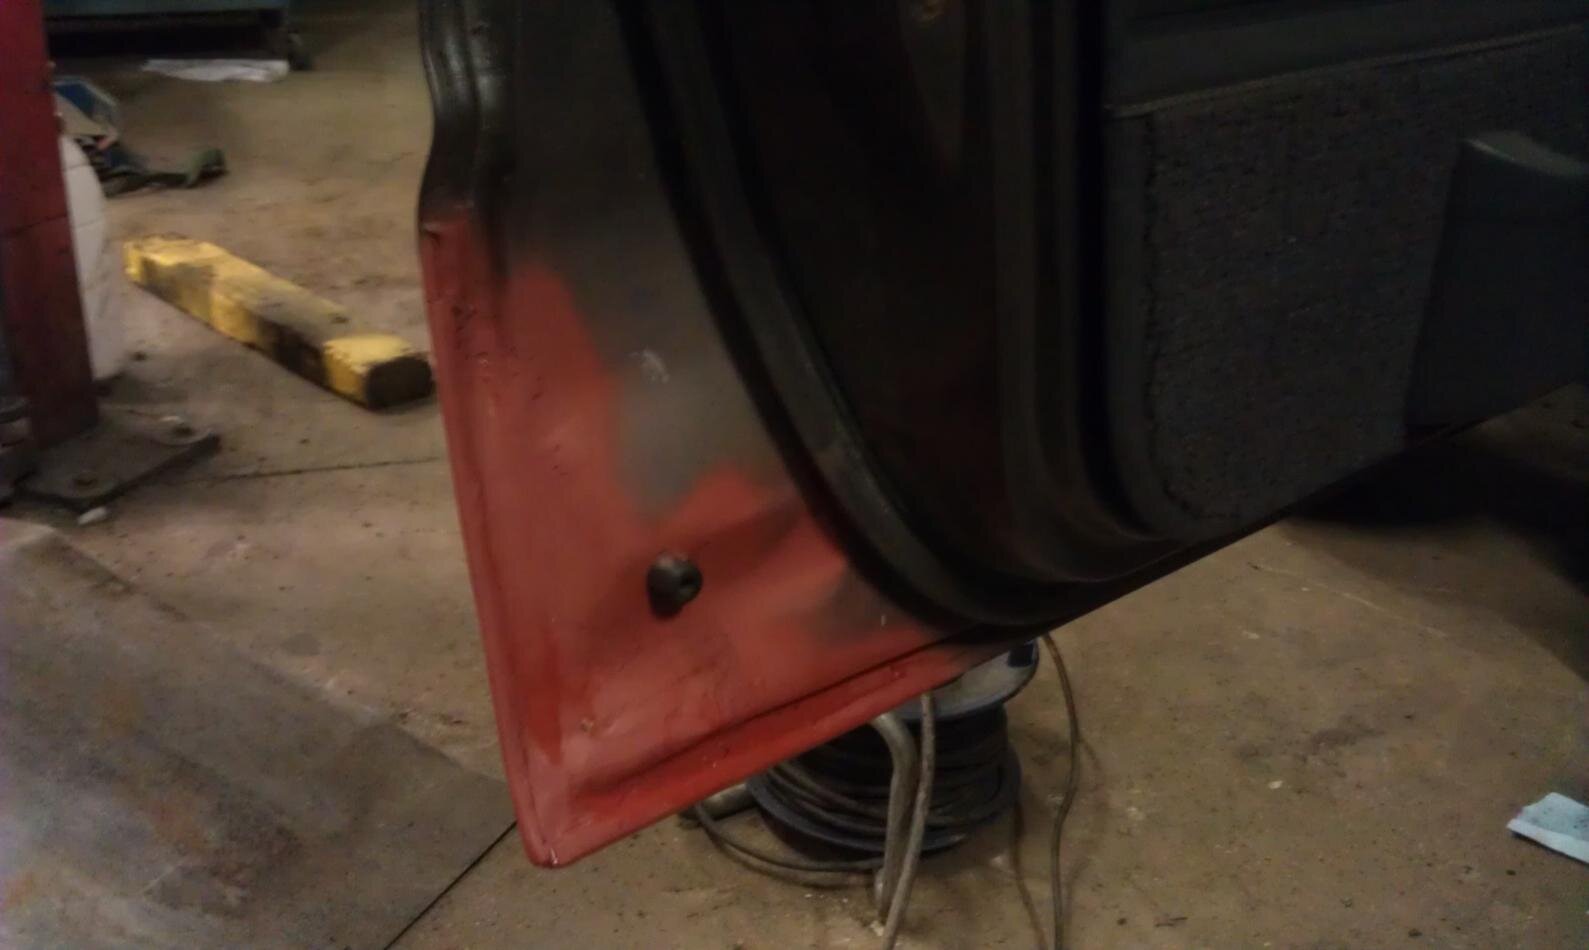
Took along time to get to this stage and get the repair panel i made to fit exactly, made it with the lips that folded over the freshly made inner skin. After the other days performance i welded it in sooo carefully, a series of tiny spots to prevent to much heat build up.
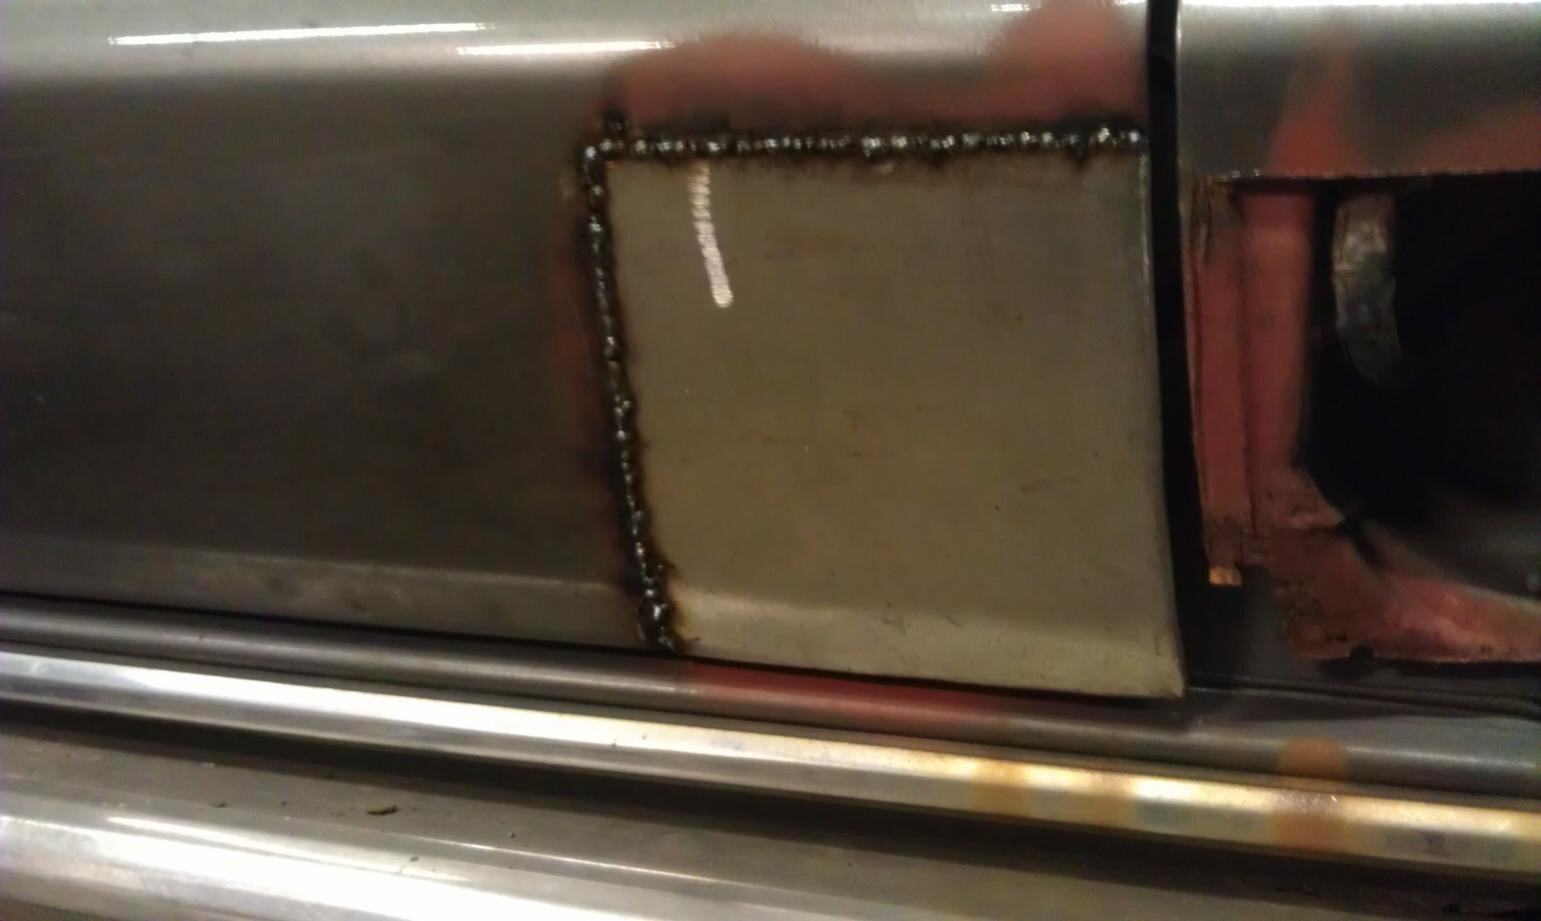
Pass door2.jpg

The rebuilt inner and the outer
pass door.jpg

mostly finished metal work
pass door 3.jpg
Just a bead of sealant across the seam as per original and who would know:icon-biggrin:
IMAG0150.jpg
Ok so the nerves of the night were reserved for todays delivered ebay item, fresh from an attic after apparently 6 years out of use but with a ton of spare parts electrical and pumps etc ...would it work.
I believe they didnt mention this install position in the Eberspacher manual but it seemed to work for me.:shifty:
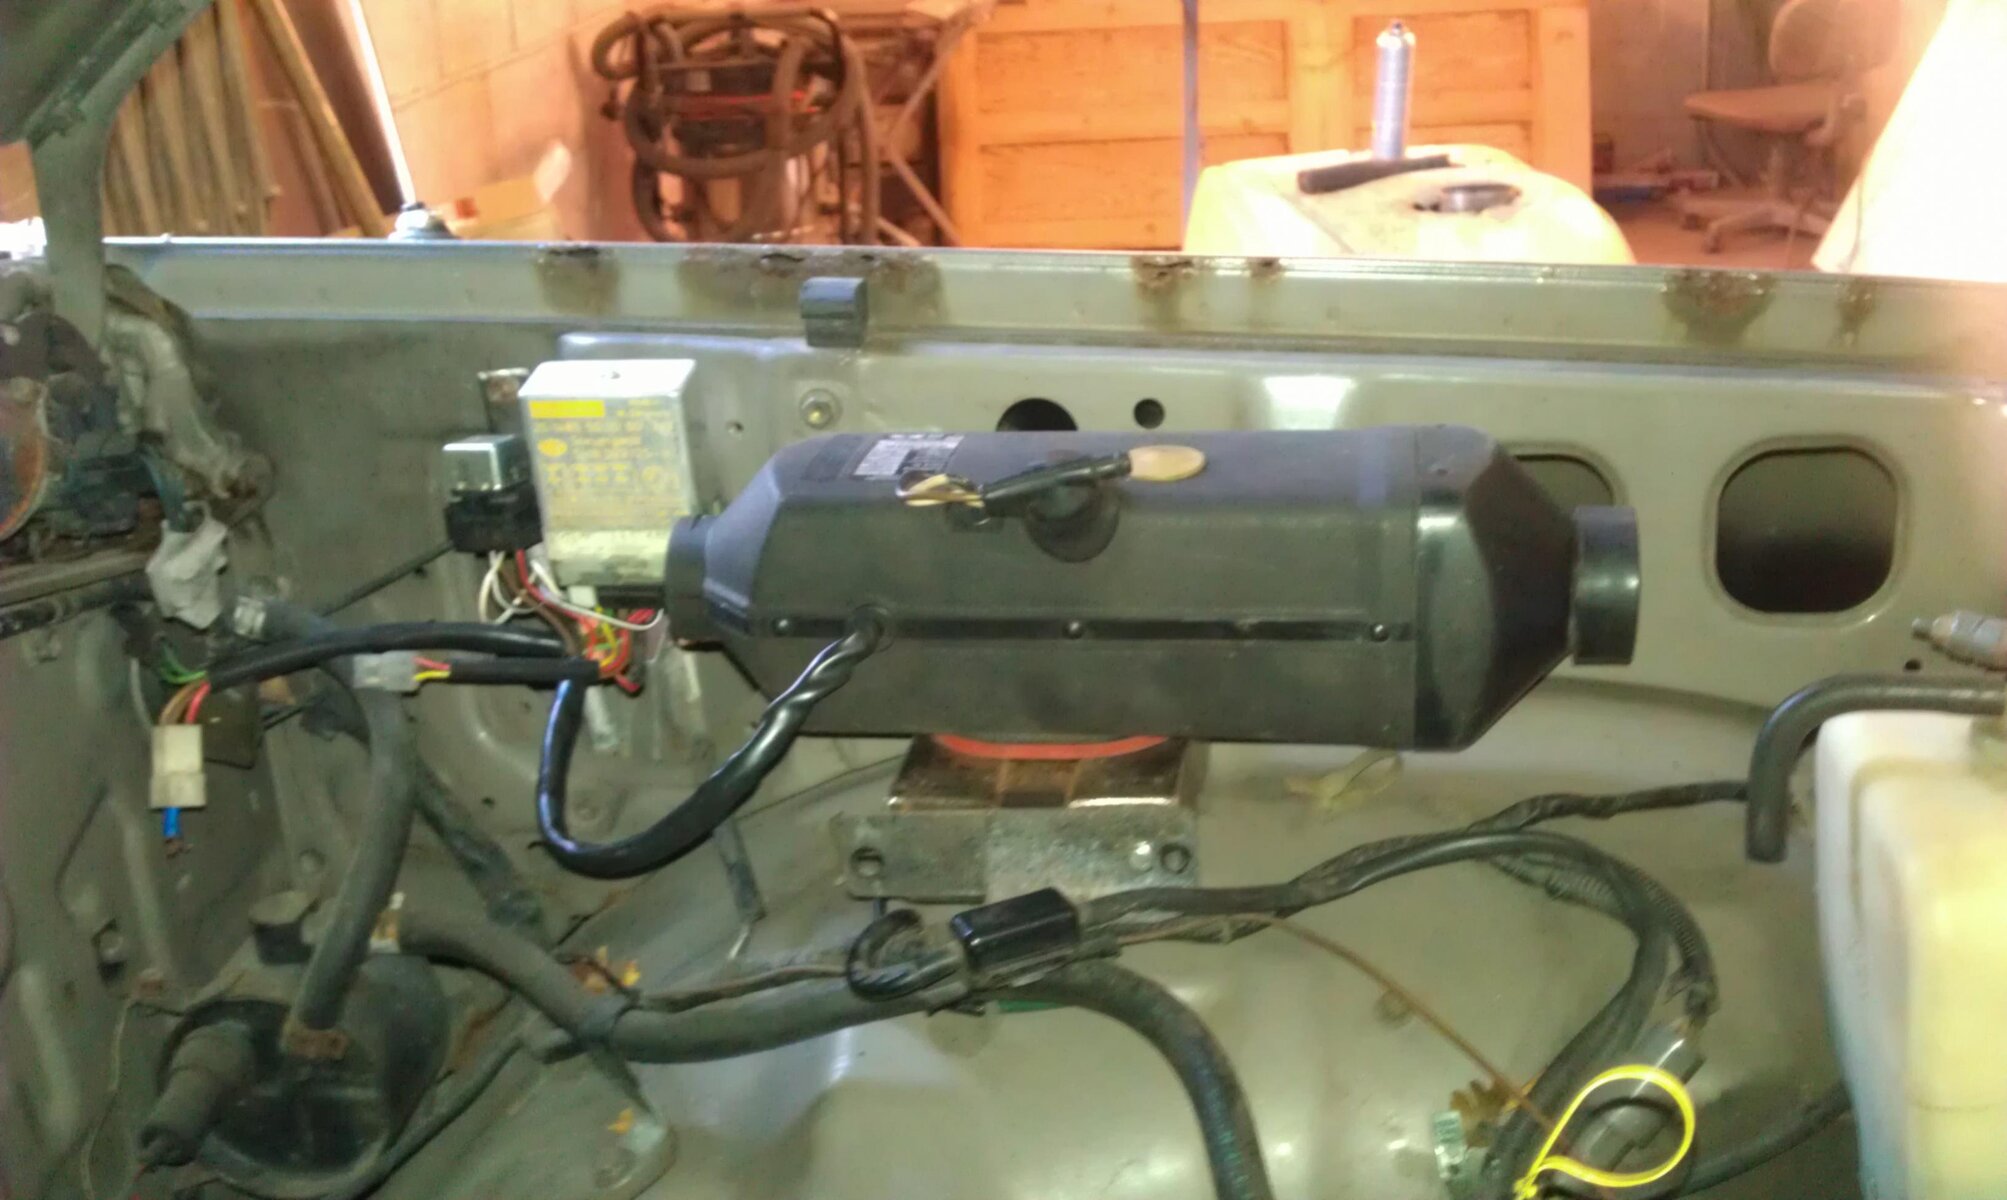
Connected it up, diesel in a mug and hit the switch, few wiring noises and then a ton of white diesel smoke which cleared and it ran like a dream. After a few restarts no more smoke and it ran for 15 mins with no problems. SO this is to be fitted in the engine bay and fingers crossed i have an idea how to get heat in the roof tent or Landcruiser which will do a little later on.
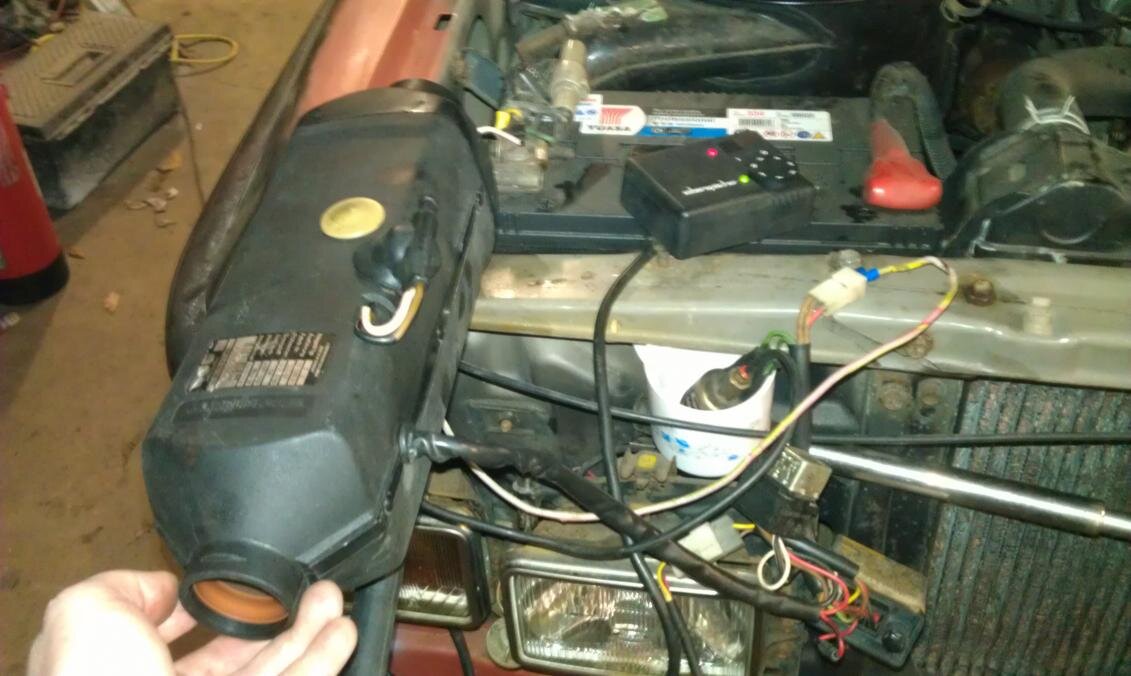
Eberspacher.jpg

Cheers

Mark
 
Last edited:
Like the look of the heater! Be interested to hear how well it works in a tent.
 
Mark what red oxide paint are you using? Before you sealed up the bottom of your door did you paint inside? If I look down my panels with a torch I can see bits of surface rust. How do I know I have stopped it all so it does not re appear from the inside out?

Keep us informed on the heater fitting as I have one too that could be incorporated into mine.

Jonnie

Just a little Rustoleum stuff, seems to protect against the water while its outside ok but i will strip it off and use etch primer before paint.
I must admit i didnt take the door card off due to time, i pulled it back and the membrane was still intact so i took the rubber door stop out and went crazy with the red stuff till it dripped out between the fresh seams. When i take the door card and inner out i will fill it with spray rustoleum paint and then waxoyl.

For rust already in the seams i think i would/will probably spray phosphoric acid in to the seams, let that dry, repeat and then once dry again a little overrust paintable product sprayed in and once dried a coat of waxoyl or dinatrol. Should last a good while..
I think if you ask anyone they will have a different opinion of the best products but making sure the drain holes are not blocked and the door is not full of mud will slow the process by a huge degree anyway.


Cheers
 
Hi,

So had another Evening on it tonight, lower passenger rear door was the target.

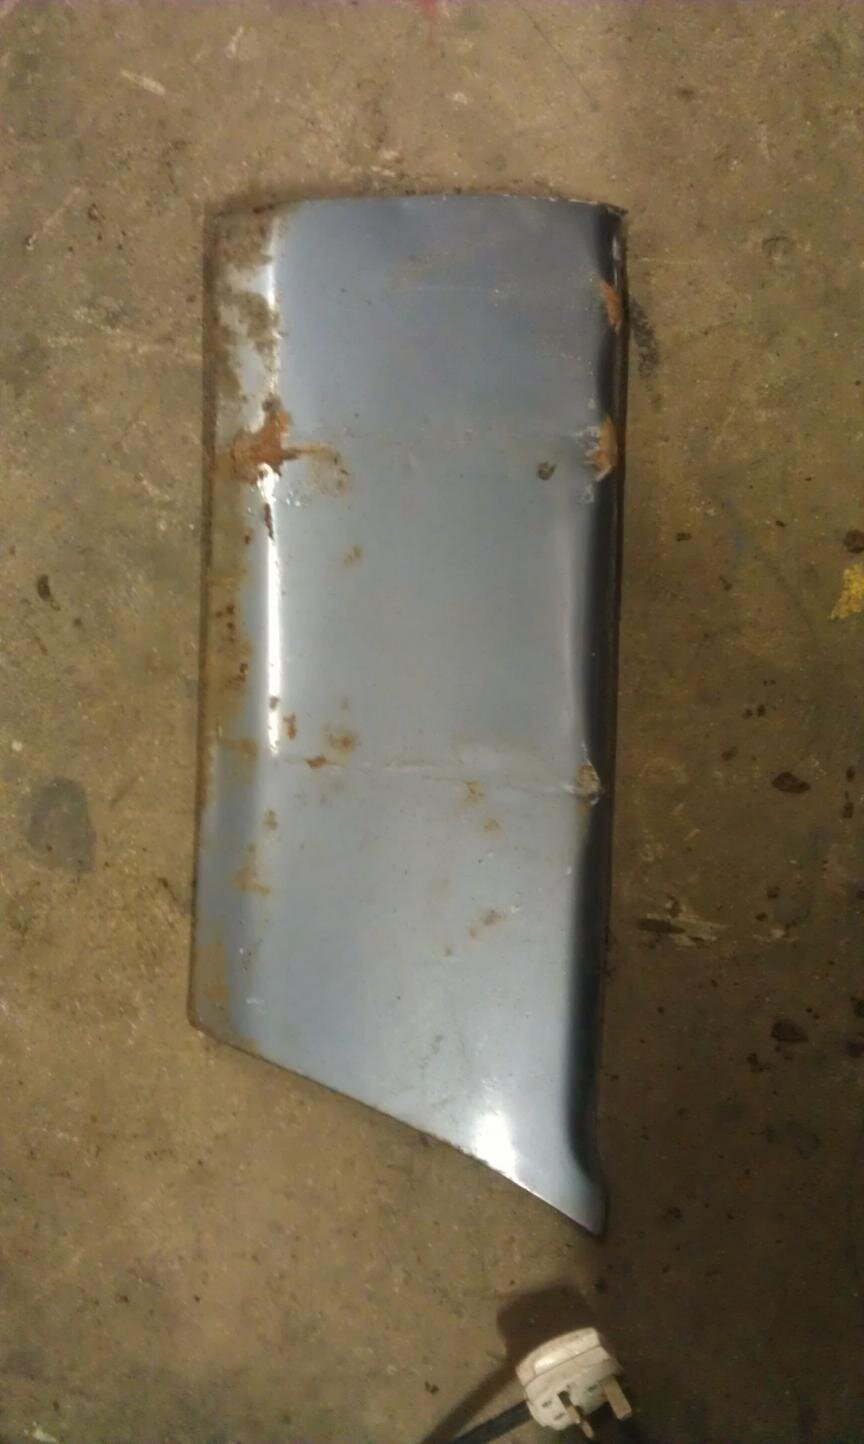
Luckily i had a panel i cut from the scrap 60 for this part, unluckily it had 3 huge creases in it from some damage it had taken at some point. I had decided to take it anyway and after a little work most of the creases came out and i had this to start with

REARPASSDOOR.jpg

I decided in the end to keep the two side lips that i had left on the door and just replace the lower on as i only had half left and this one wasnt too bad along the bottom edge just needing a small repair.

Finally trimmed and ready to go

PASSREARDOOR1.jpg
Inner repaired and ready

PASSREARDOOR5.jpg
I will spare you the in between shots but many hours later and the panel was fitting exactly and welded it in again all flush fit.

Final seam seal to add and what not to match original finish but fine for now till i do the body work

PASSREARDOOR3.jpg

PASSREARDOOR2.jpg

More tomorrow night

Cheers

Mark
 
Don't like the adverts?  Click here to remove them
Good progress - what condition are the sill in?
 
Are your welds and grinding that exact or will you have to skim some filler when doing the final paint? I now have to do my rear arch and I am wondering if I am going to get it perfect or expect to have to use something to smooth it out. Like yourself I don't believe in filler for a repair. Metal is the way forward!
J

I try but between a little high build primer and may be a tiny smear of dolphin glaze here and there i think they will be filler free.
May be teaching you to suck eggs but my only tip would be to get the panels fitting exact and this takes nearly all the time, for body work use tiny spot welds spread out and dotted about the length of the join till you sort of joint the dots and this gets almost no heat into the panel so you get no distortion and then to finish use a flap disk (the sandpaper ones) on an angle grinder. Dont use a grinding disk they take too much off, too coarsly. When you use the flap disk work across the welds one way till one side of the weld is flush (the heat seems to lower the far side), flip the grinder round and work across them till the other side is flush.

The other way is to joggle the panel to go in but im not a fan of this as it creates a water trap, although seam sealed it wouldnt make much odds

Im no welding expert though, this is just the way i do it. No idea if its right or wrong but seems to work for me.

Cheers
 
Last edited:
Good progress - what condition are the sill in?

What Sills? :icon-biggrin:

To be fair the passenger one needs about the rear 1/3rd and inner rear wheel arch repairing and the driver side is about rear 3/4 of the arch and inner rear wheel arch repairing.
Luckily the front parts of both sills are solid as a rock near the front wings.
Will probably start the Pass sill on Monday night.

CHeers
 
Very impressive stuff!

I must say, I didn't realise until I'd registered that this was a UK club - still, the restoration looks to be going very well indeed.

May I ask if there's rust in the gutters? I have two 60s (I may sound like a capitalist, but I assure you I'm not - I'm a hoarder!) and they both (and almost every other 60 I've seen here in Oz) has traditional gutter-rust...

Would you consider (if yours had this rust) repairing it? Looking at what you've done so far, you've a much braver heart than I, but I'm determined to get the rust out, as my newer 60 was an absolute bargain and the rust isn't major (as yet!).

You're an inspiration. Maybe I can talk the mrs into letting me keep the older one and fixing it up... but she'll say she's heard it all before (and she has!)
 
Usually I have found with 60's that roof rust problems are the result of having had roof racks fitted in the past where the fixing brackets break the sealant which seals the roof panel. Uk cars rarely have these fitted so dont usually have a roof corrosion problem. This car of Marks doesn't have a roof rust problem.

Andy
 
Hi,

Thanks. As Andy says its all good up top thankgod. Andy makes a good point actually, i will be making the very large contact points for the roof rack to spread the load!

So been plodding away at the Landcruiser...

Got the air and diesel filters changed and have the other side rear brakes all stripped out including the rear brake pipes to be changed soon. More chassis stripping surface rust and painting it all nice new shiny black..

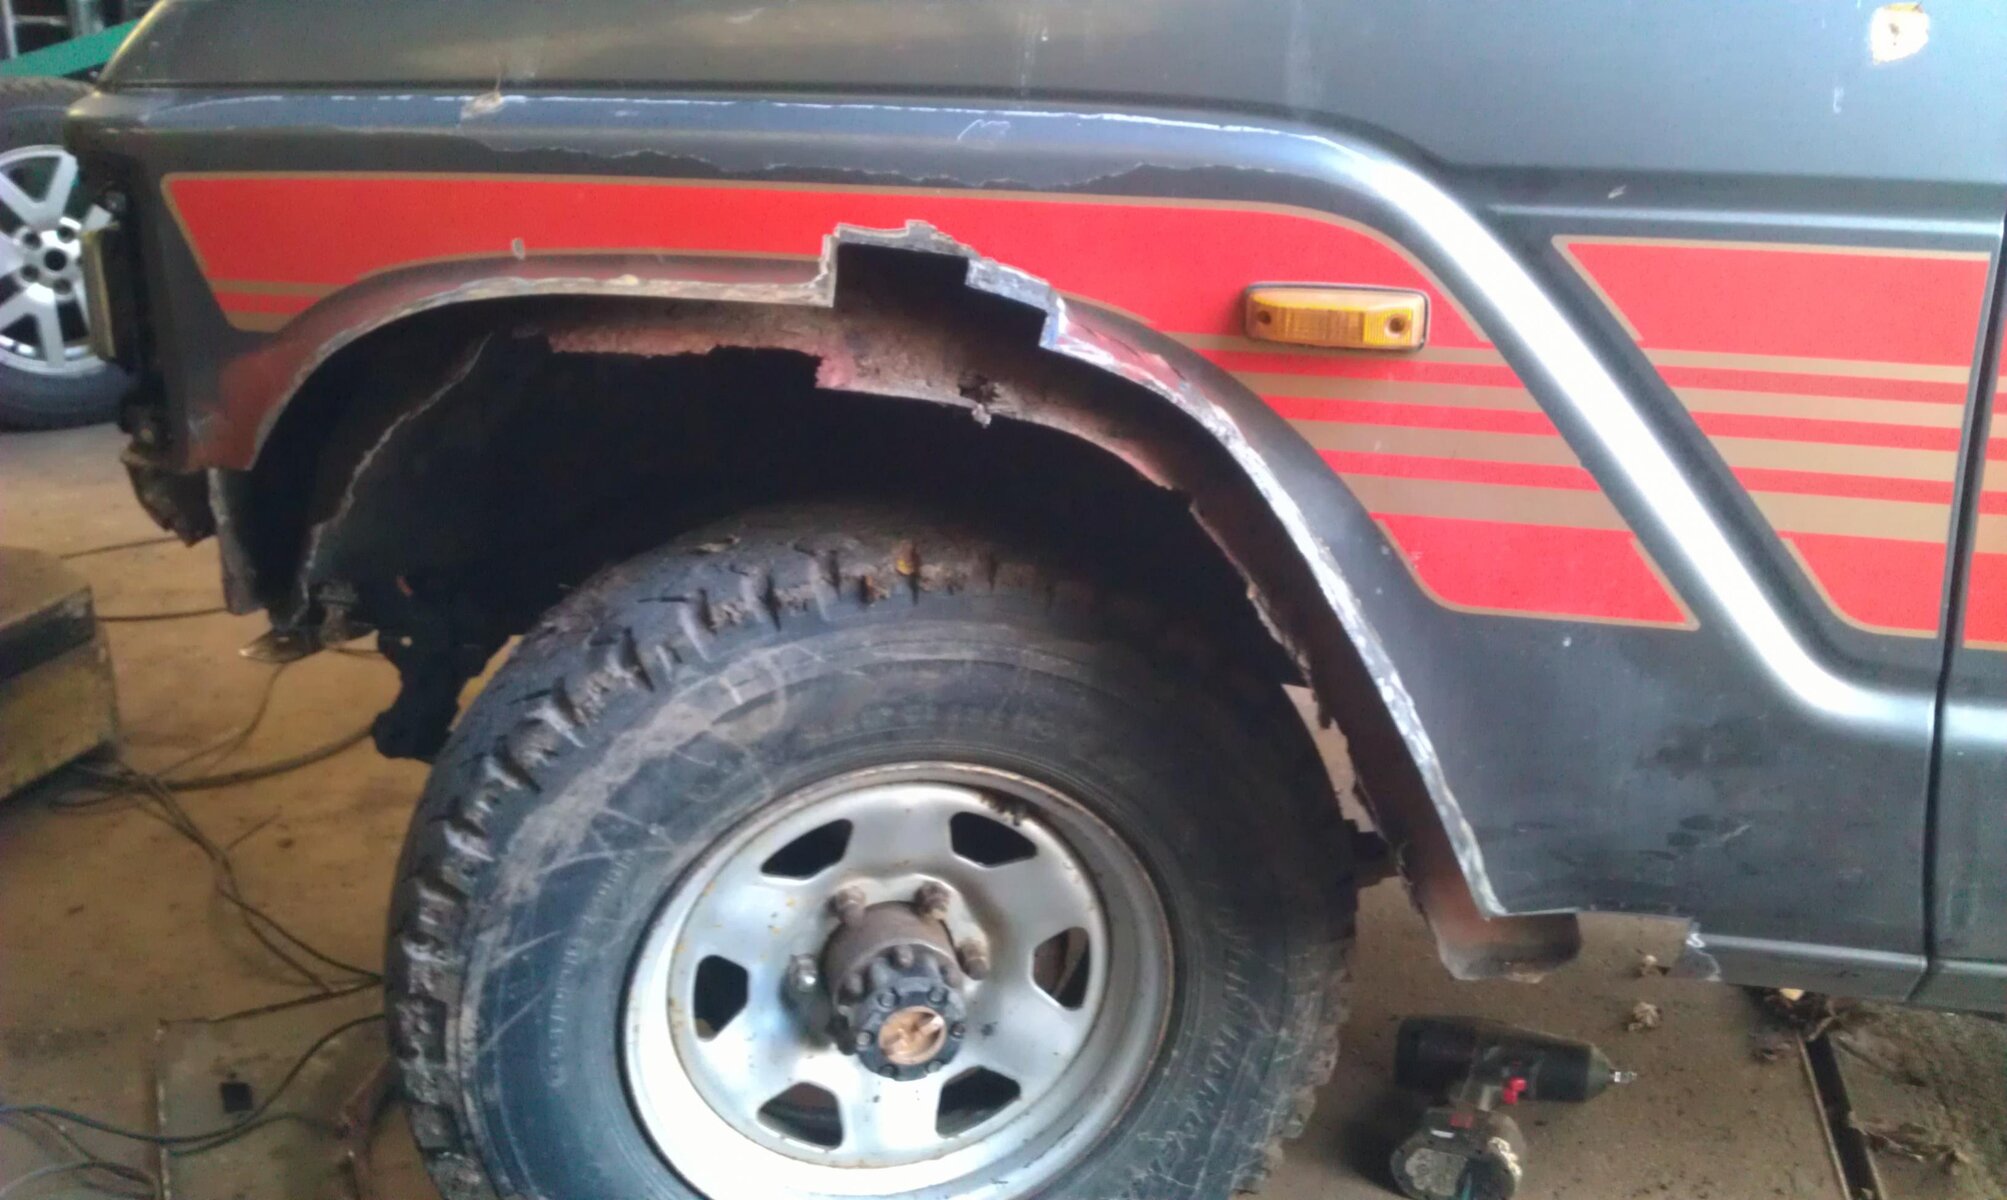
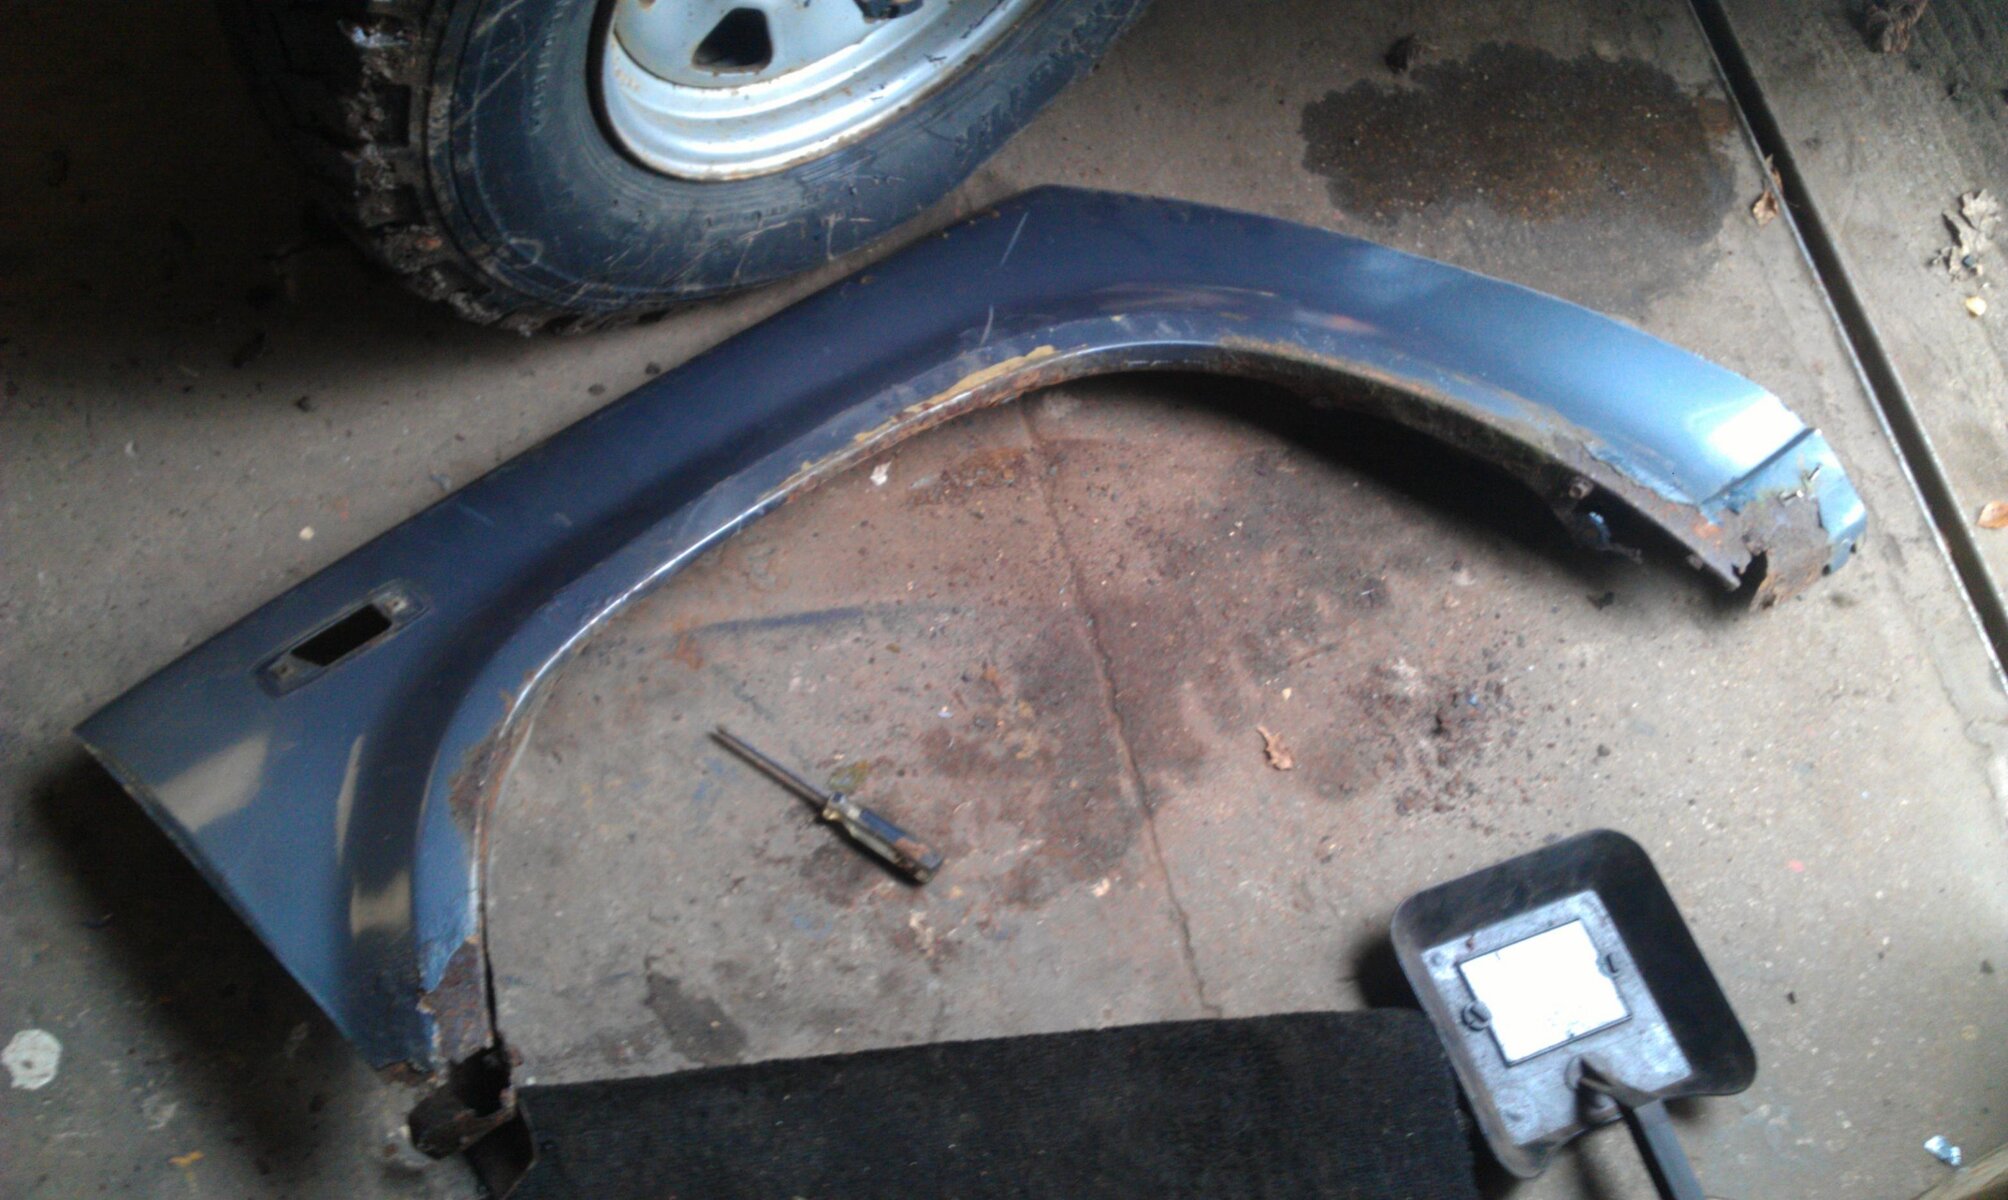
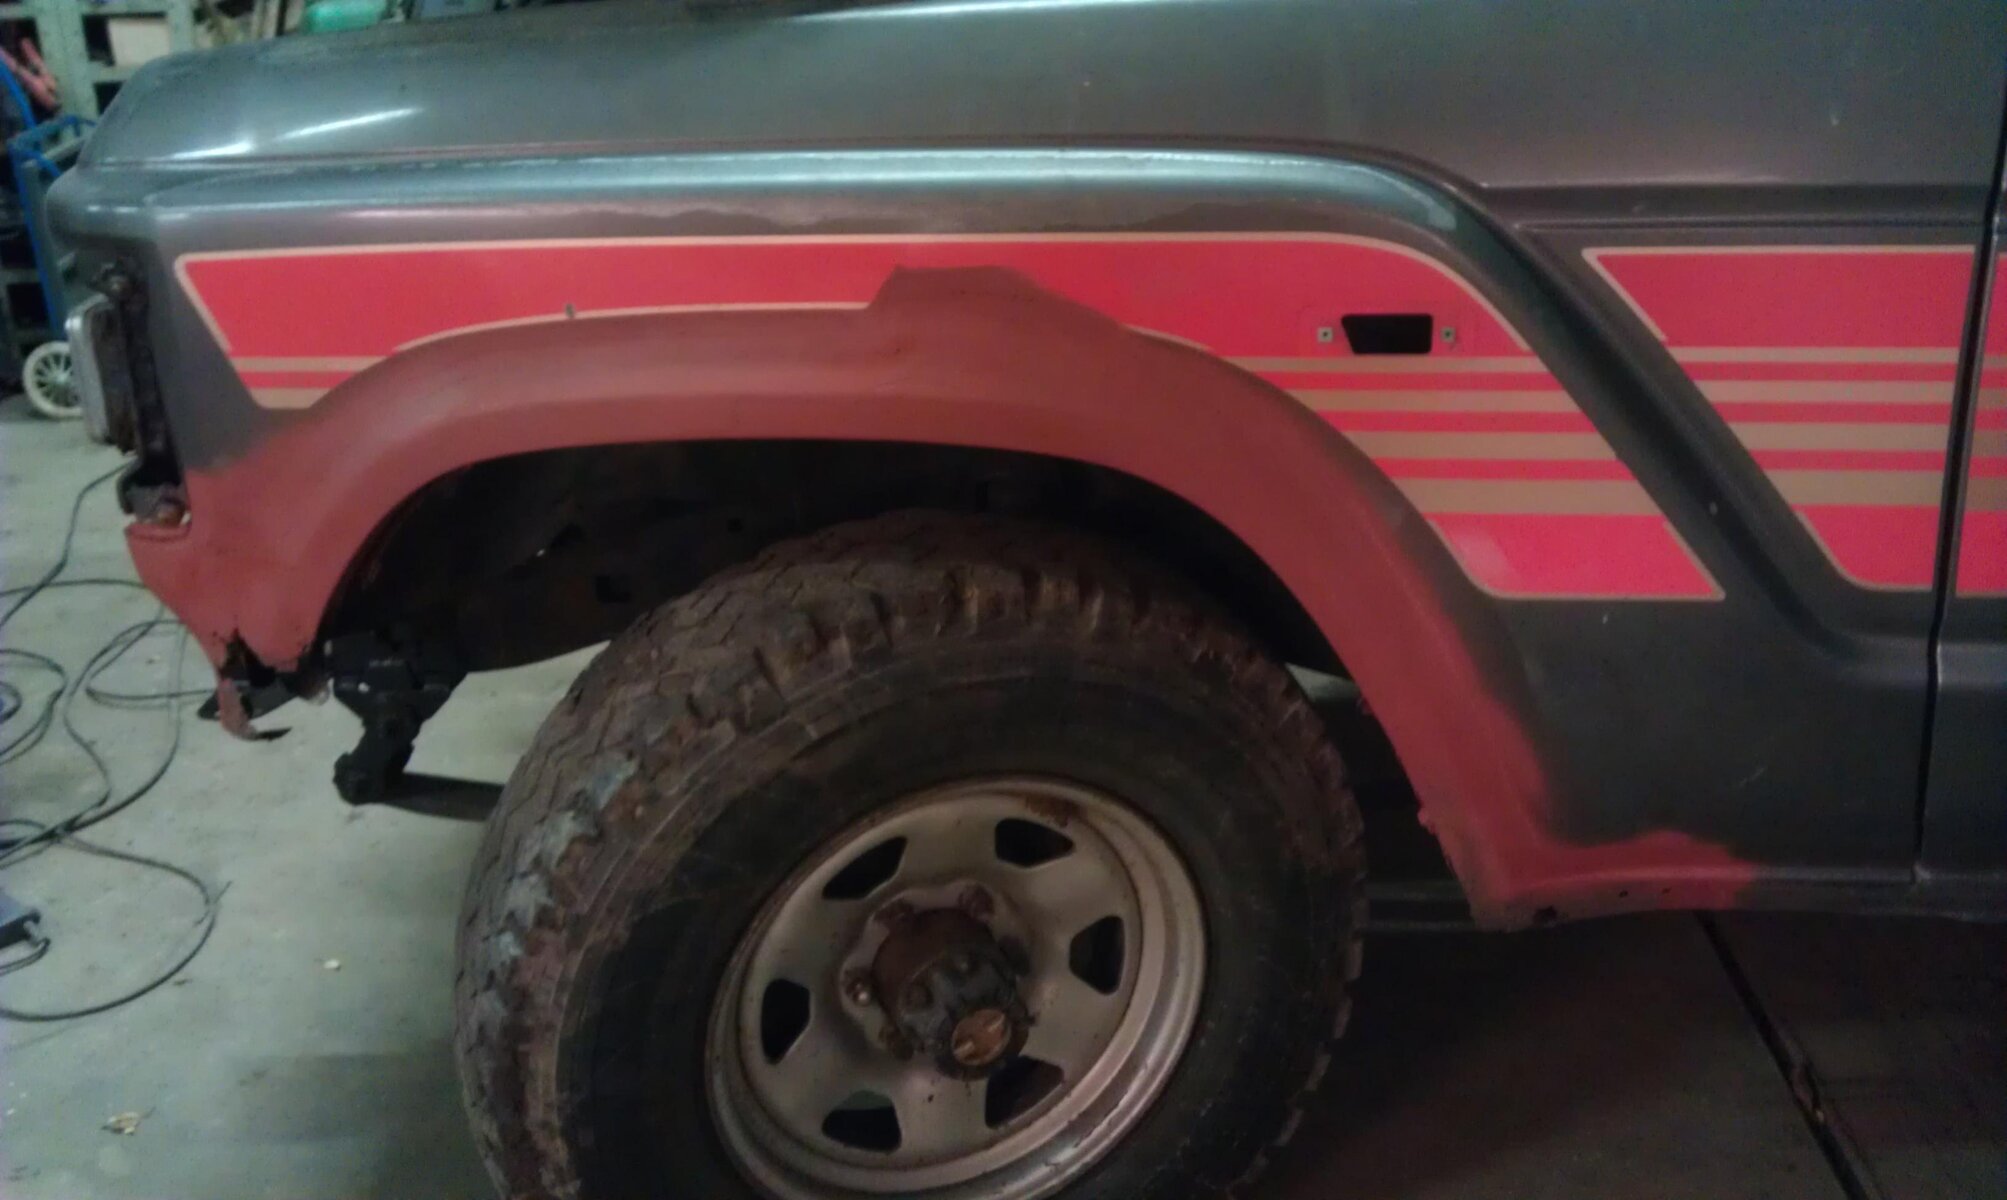
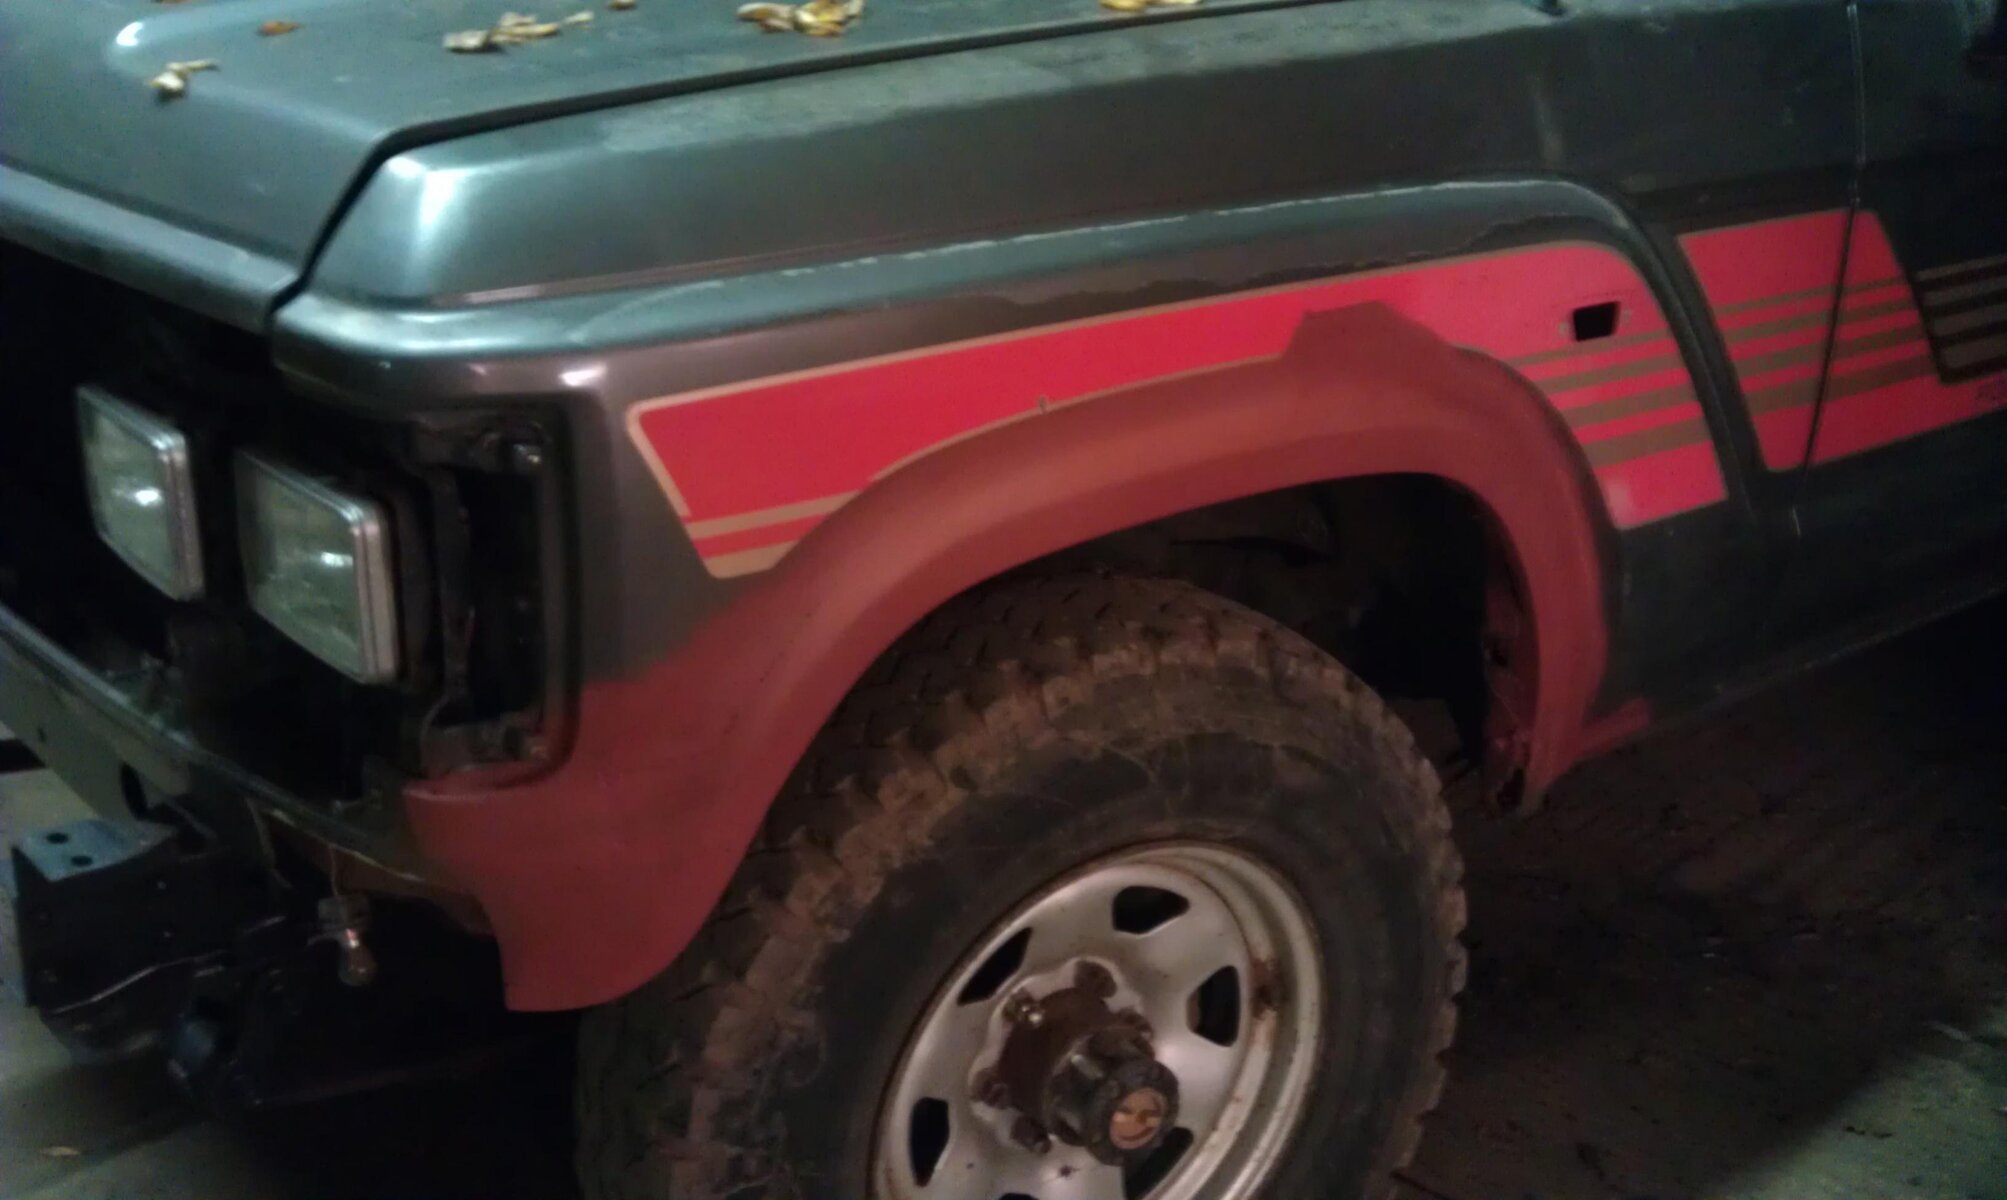
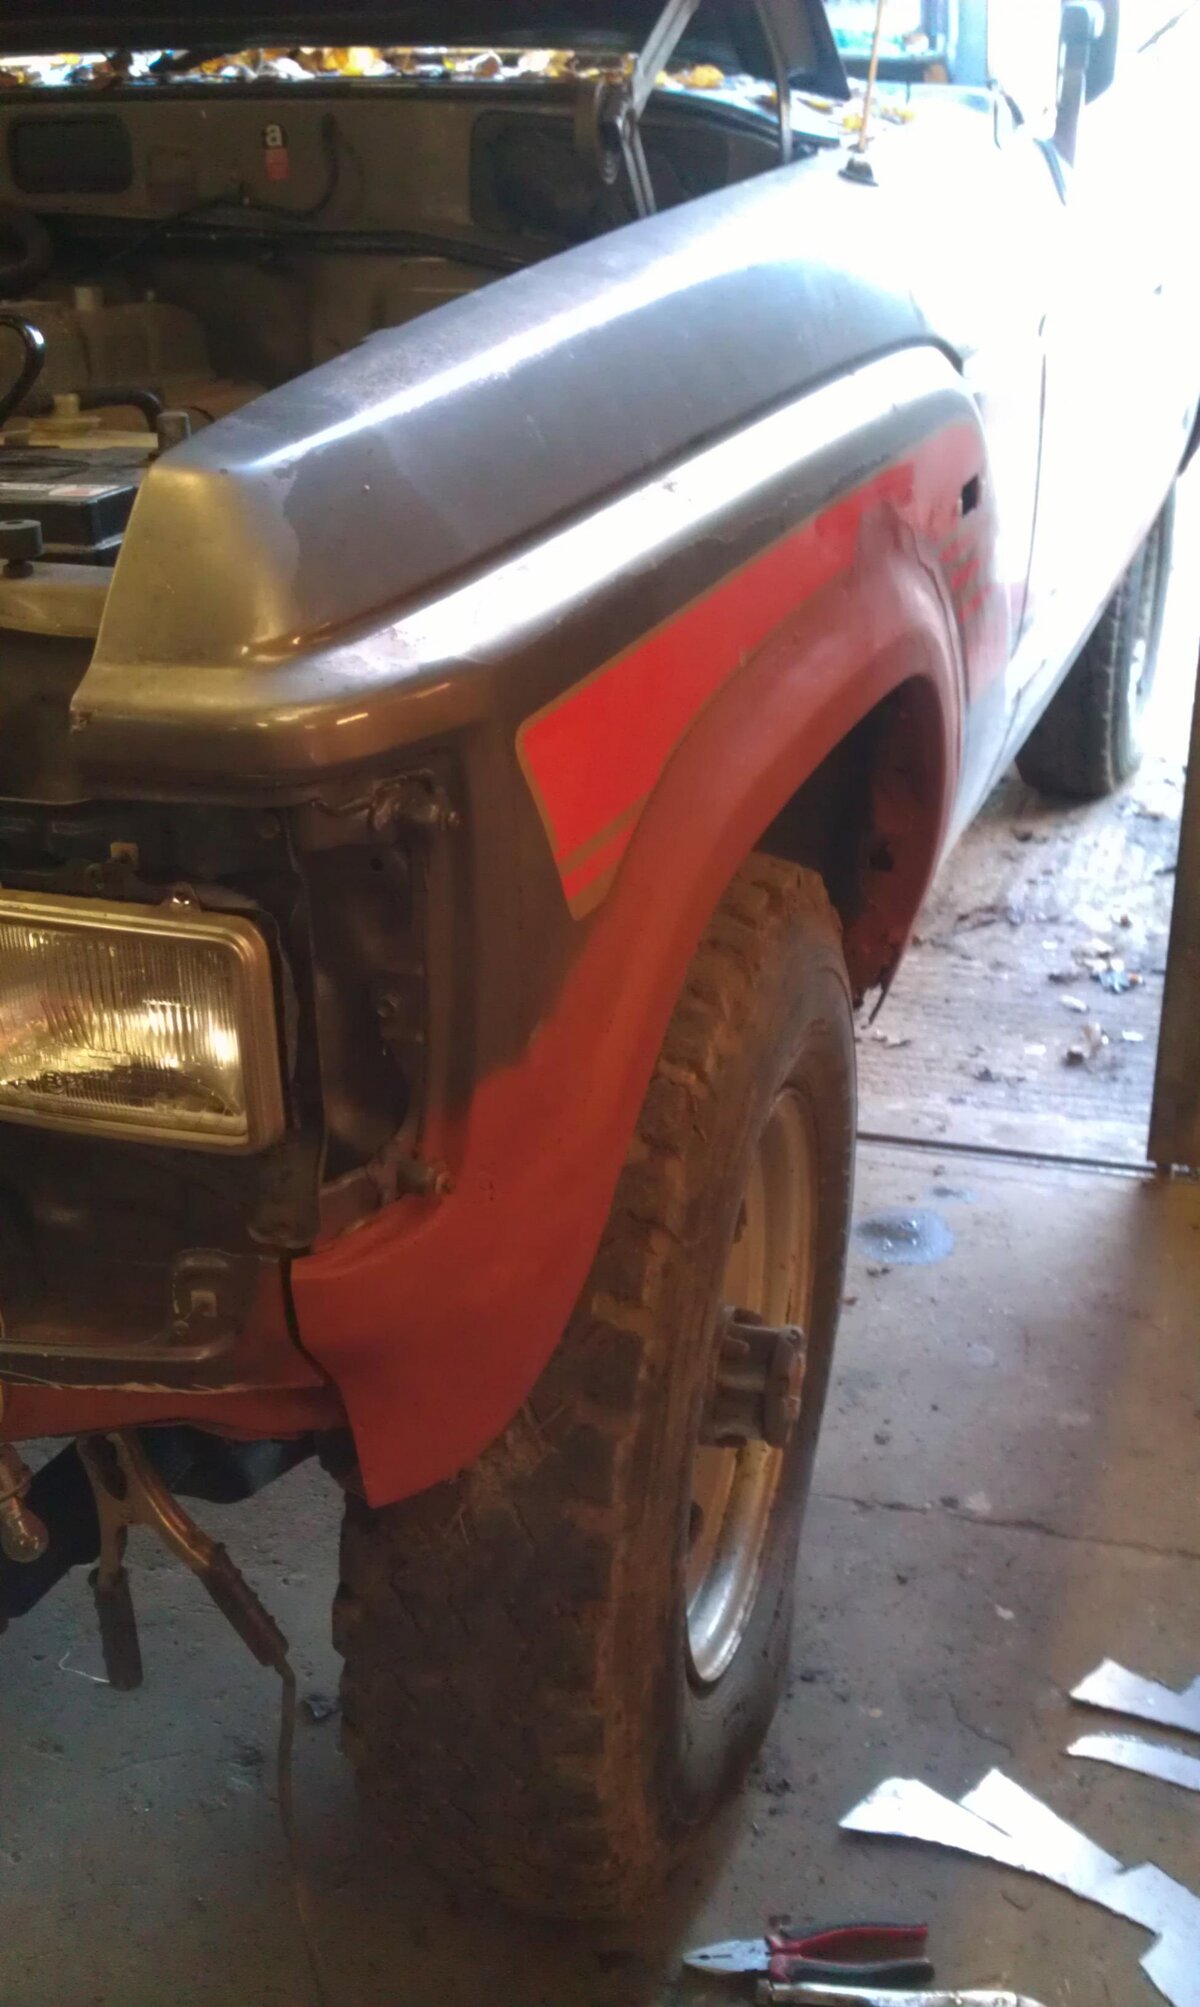
Anyway today got back to the welding, worst job i have not been looking forward to ...the front passenger wing...

i had a slightly rusty part i cut off that scrap 60 which needs a few repairs but without it it just would not have been possible.
Also got the side step off too so i have can access the sill to repair
Few pics.

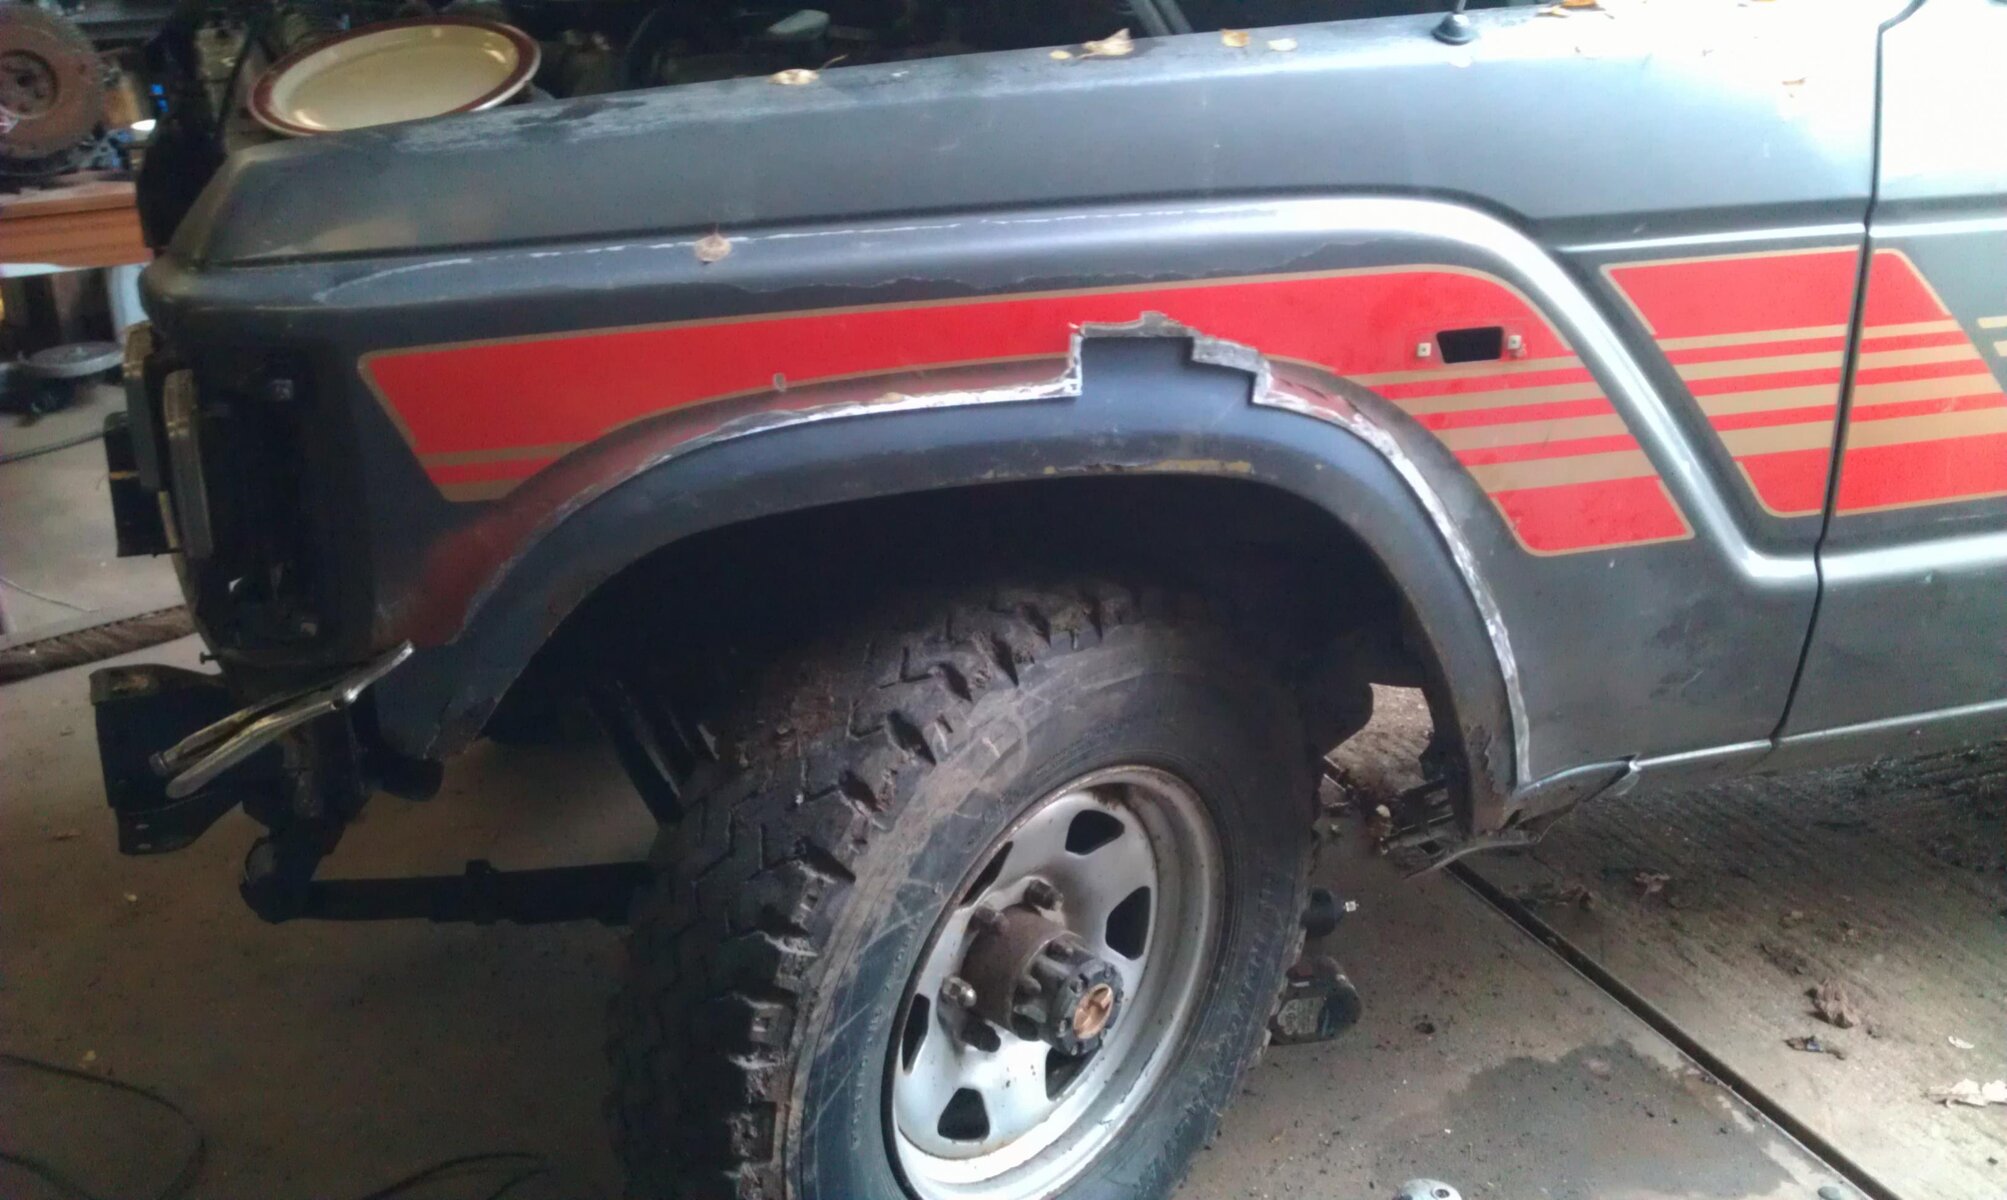
The start, just the outer wing today. Once its done i will repair the inner wing so all the bolt holes line up.
WINGOUTER3.jpgWINGOUTER8.jpg
Measuring up
wingouter.jpg
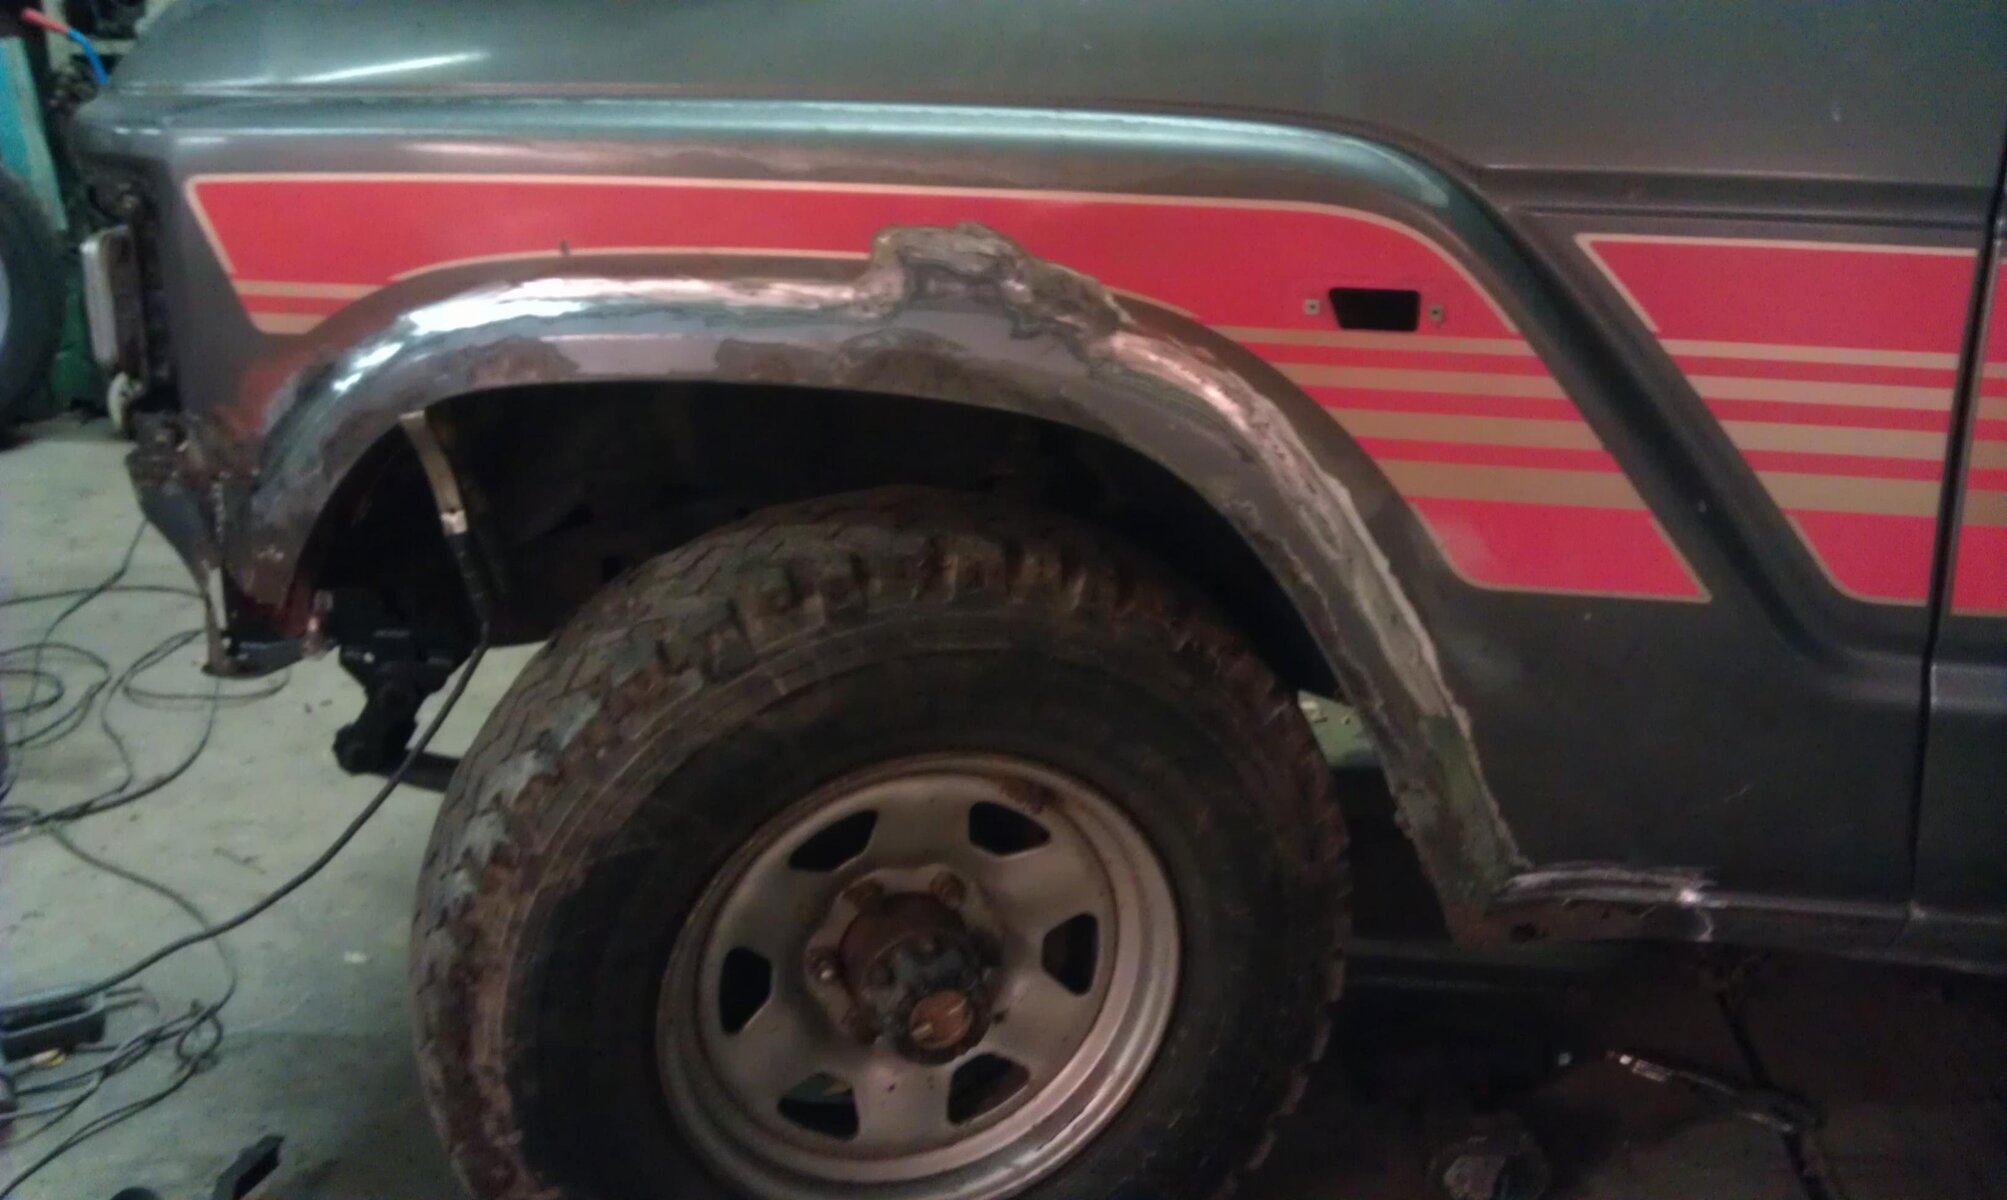
welded flush
WINGOUTER7.jpg
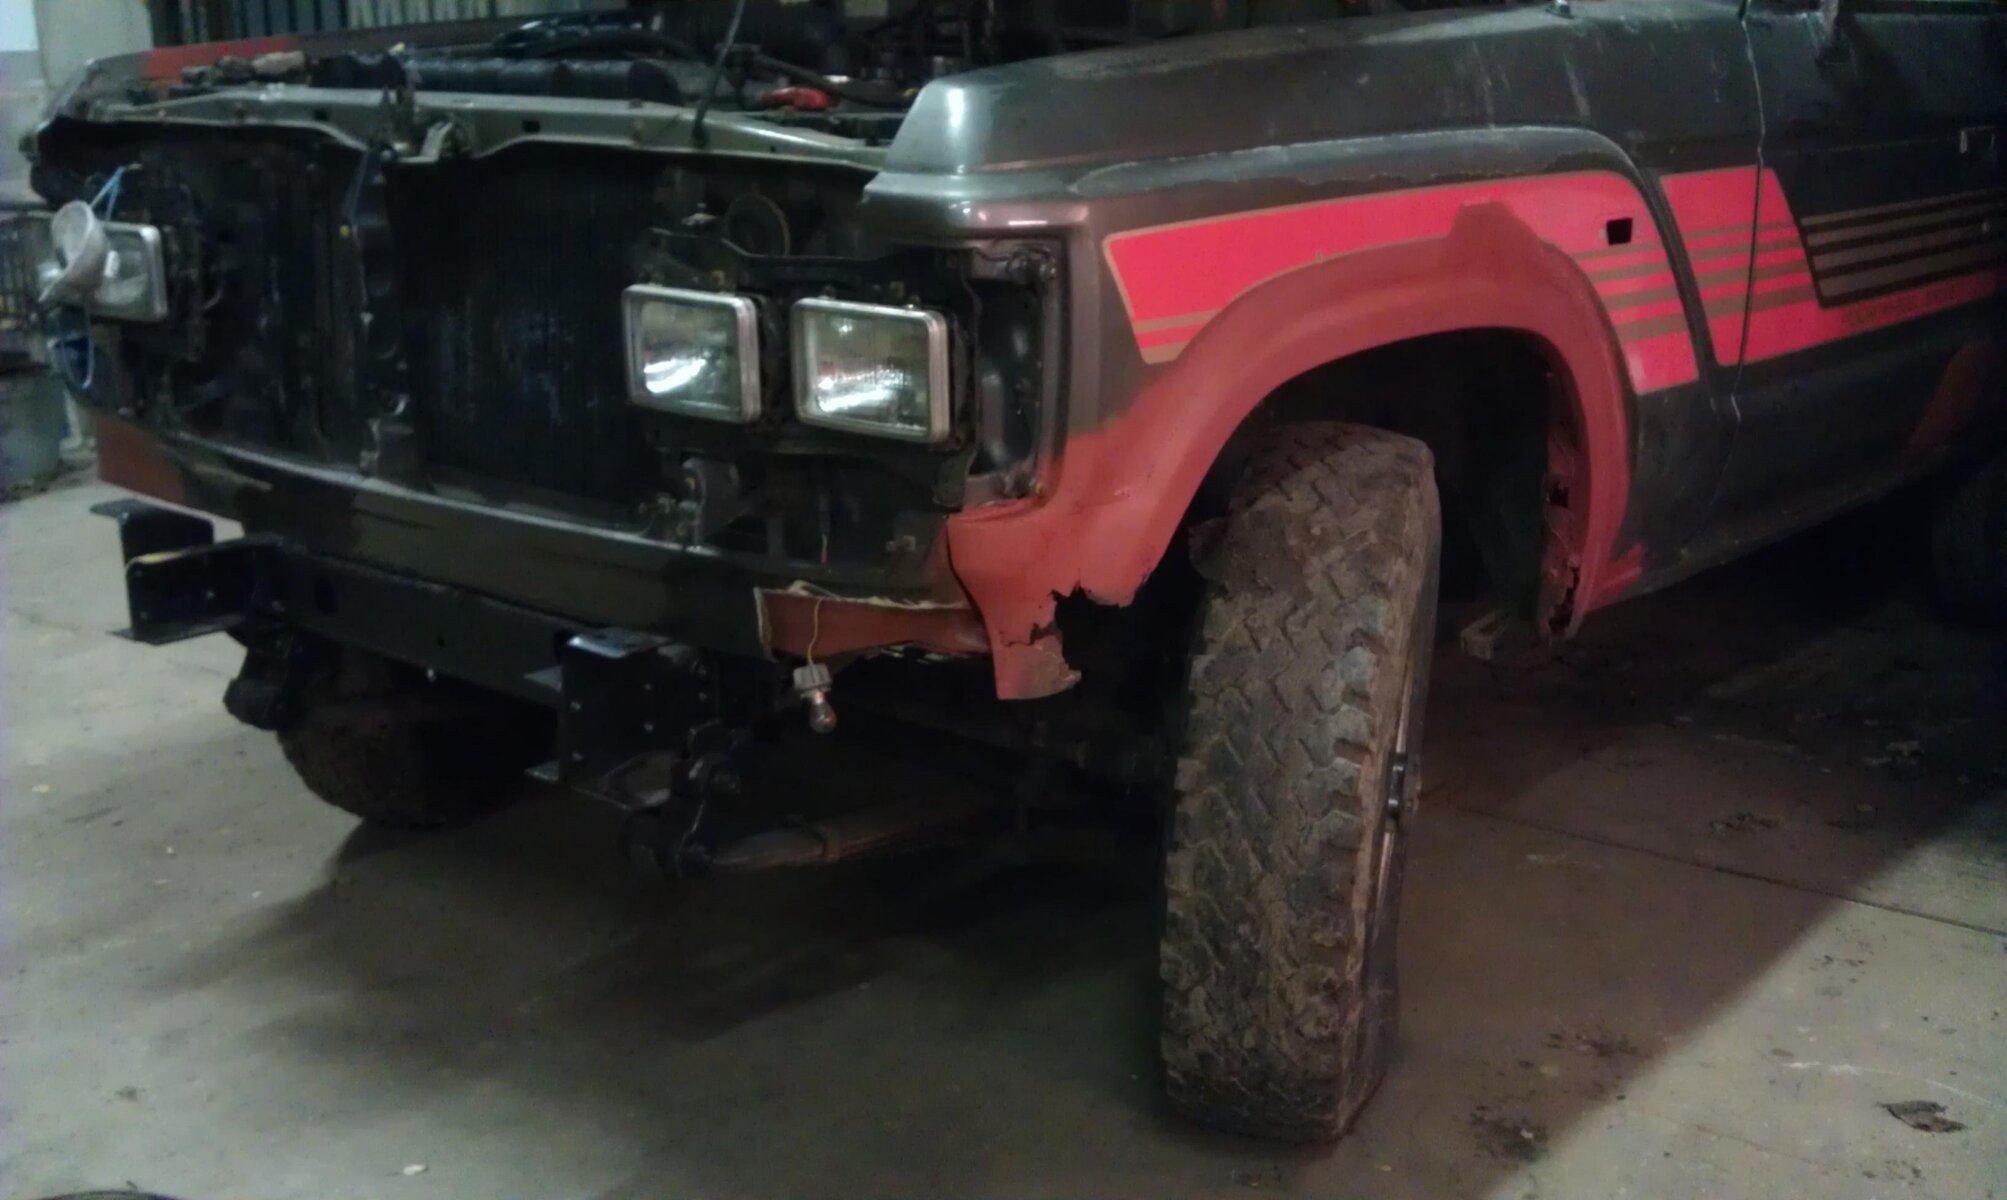
still a little part to do at the front and a little on the lower to repair, i put the front corner on separately and left the rusty part in so i can get the shape right. Have a section from the scrap 60 to go in the inner wing when i come to that

WINGOUTER6.jpgWINGOUTER1.jpg

More tomorrow, should get the outer wing finished and make a start of the sill.

Cheers
 
Last edited:
I think, as quite a few people do this restoration is unbelievably interesting, I am so pleased a 60 is being resurrected so well.
Keep up the good work Mark
Andy
 
I think, as quite a few people do this restoration is unbelievably interesting, I am so pleased a 60 is being resurrected so well.
Keep up the good work Mark

Andy

Many Thanks Andy. I do hope my welding ramblings are of interest.

Anyhow had another day on it today.

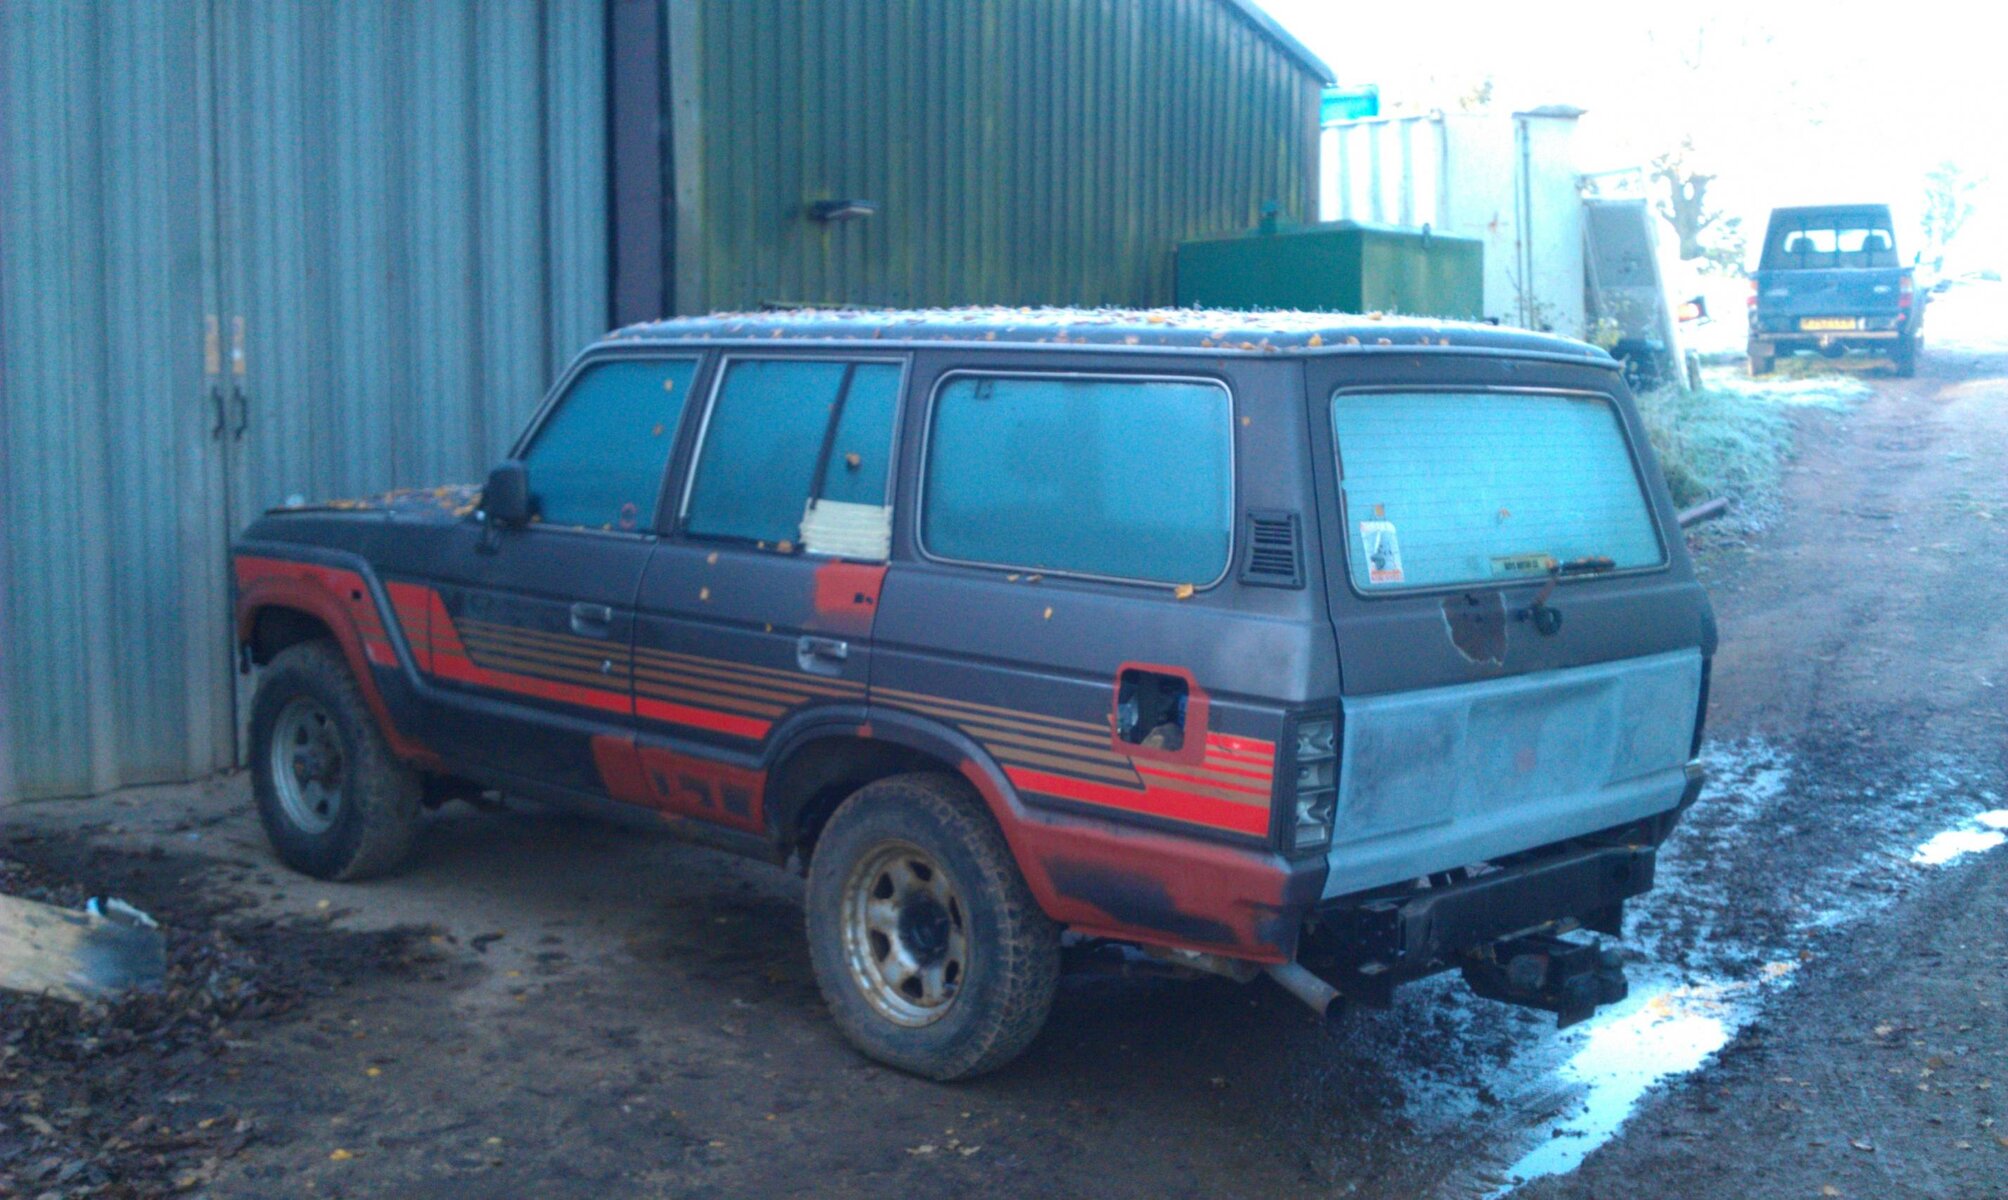
Very cold start, also a chance to see how far i have got, Its usually dark when im working on it recently. Realy feels like i'm getting somewhere with it now.
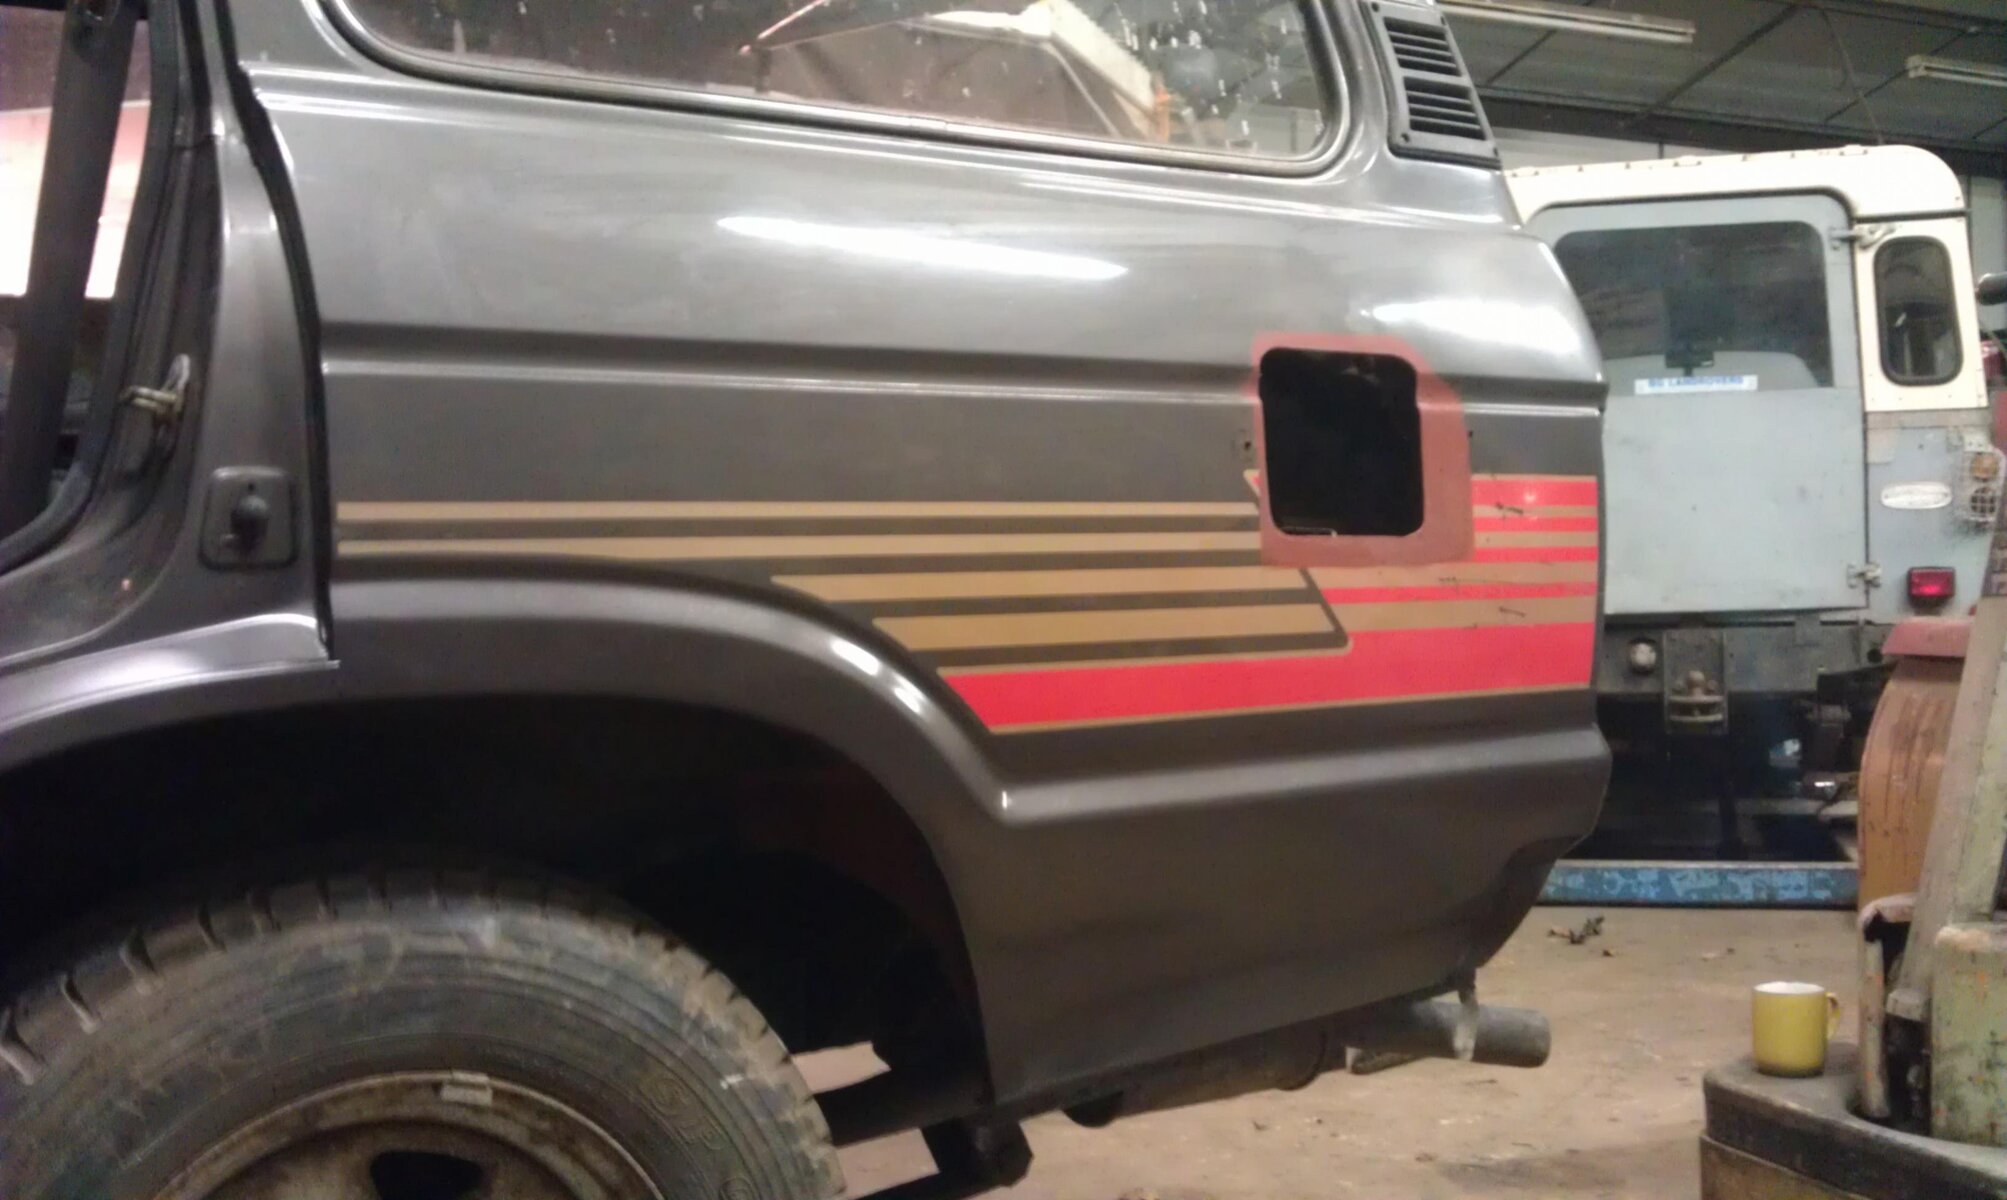
LANDCRUISER1.jpg

So got the wing front corner finished, had to make a few sections to repair this but i'm happy i have this side right now and also can use it for a template to get the other side more right

WING.jpg
WING3.jpg

Another job i decided to get on with so hopefully when we get it on the road we can keep warm in the roof tent..

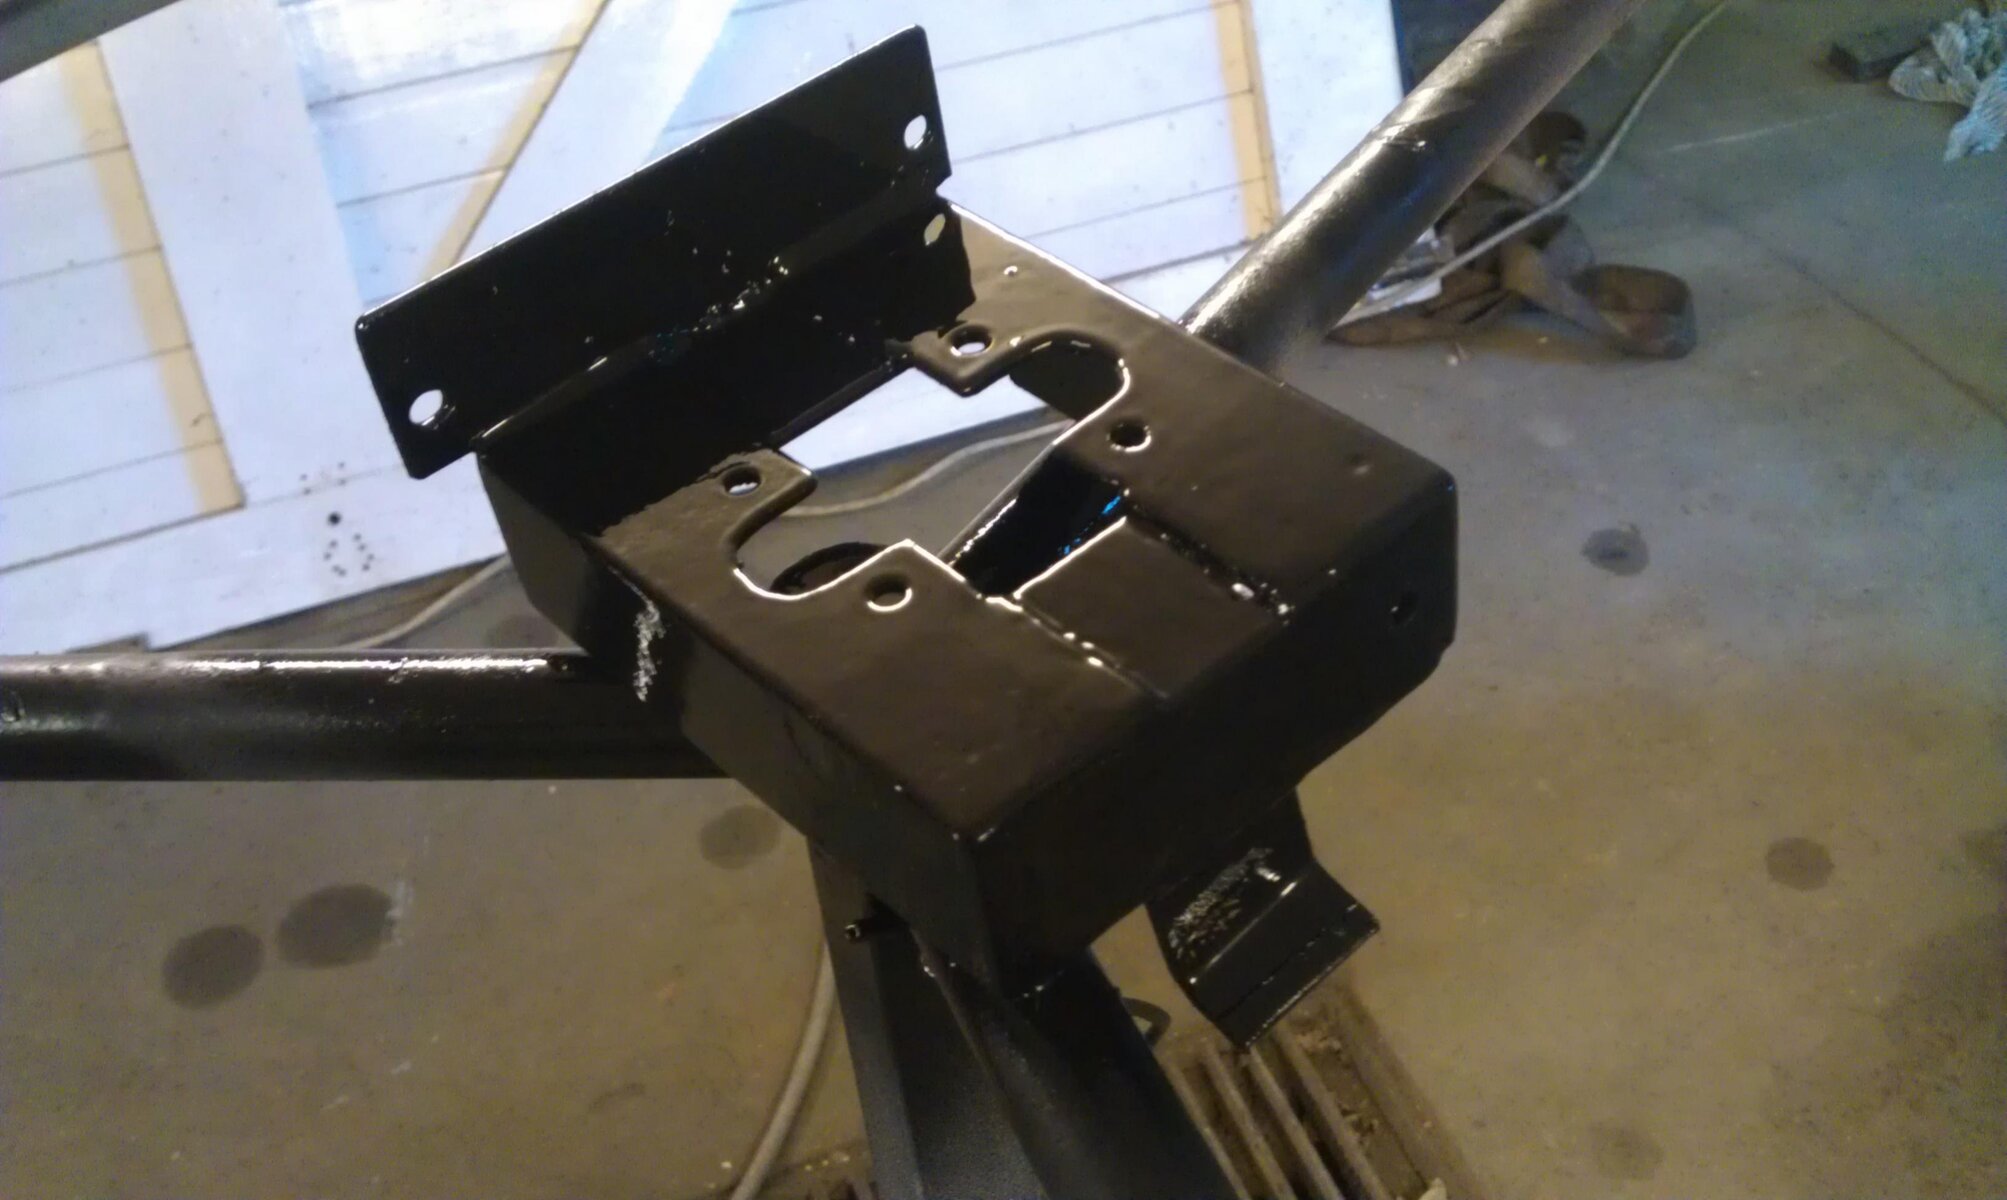
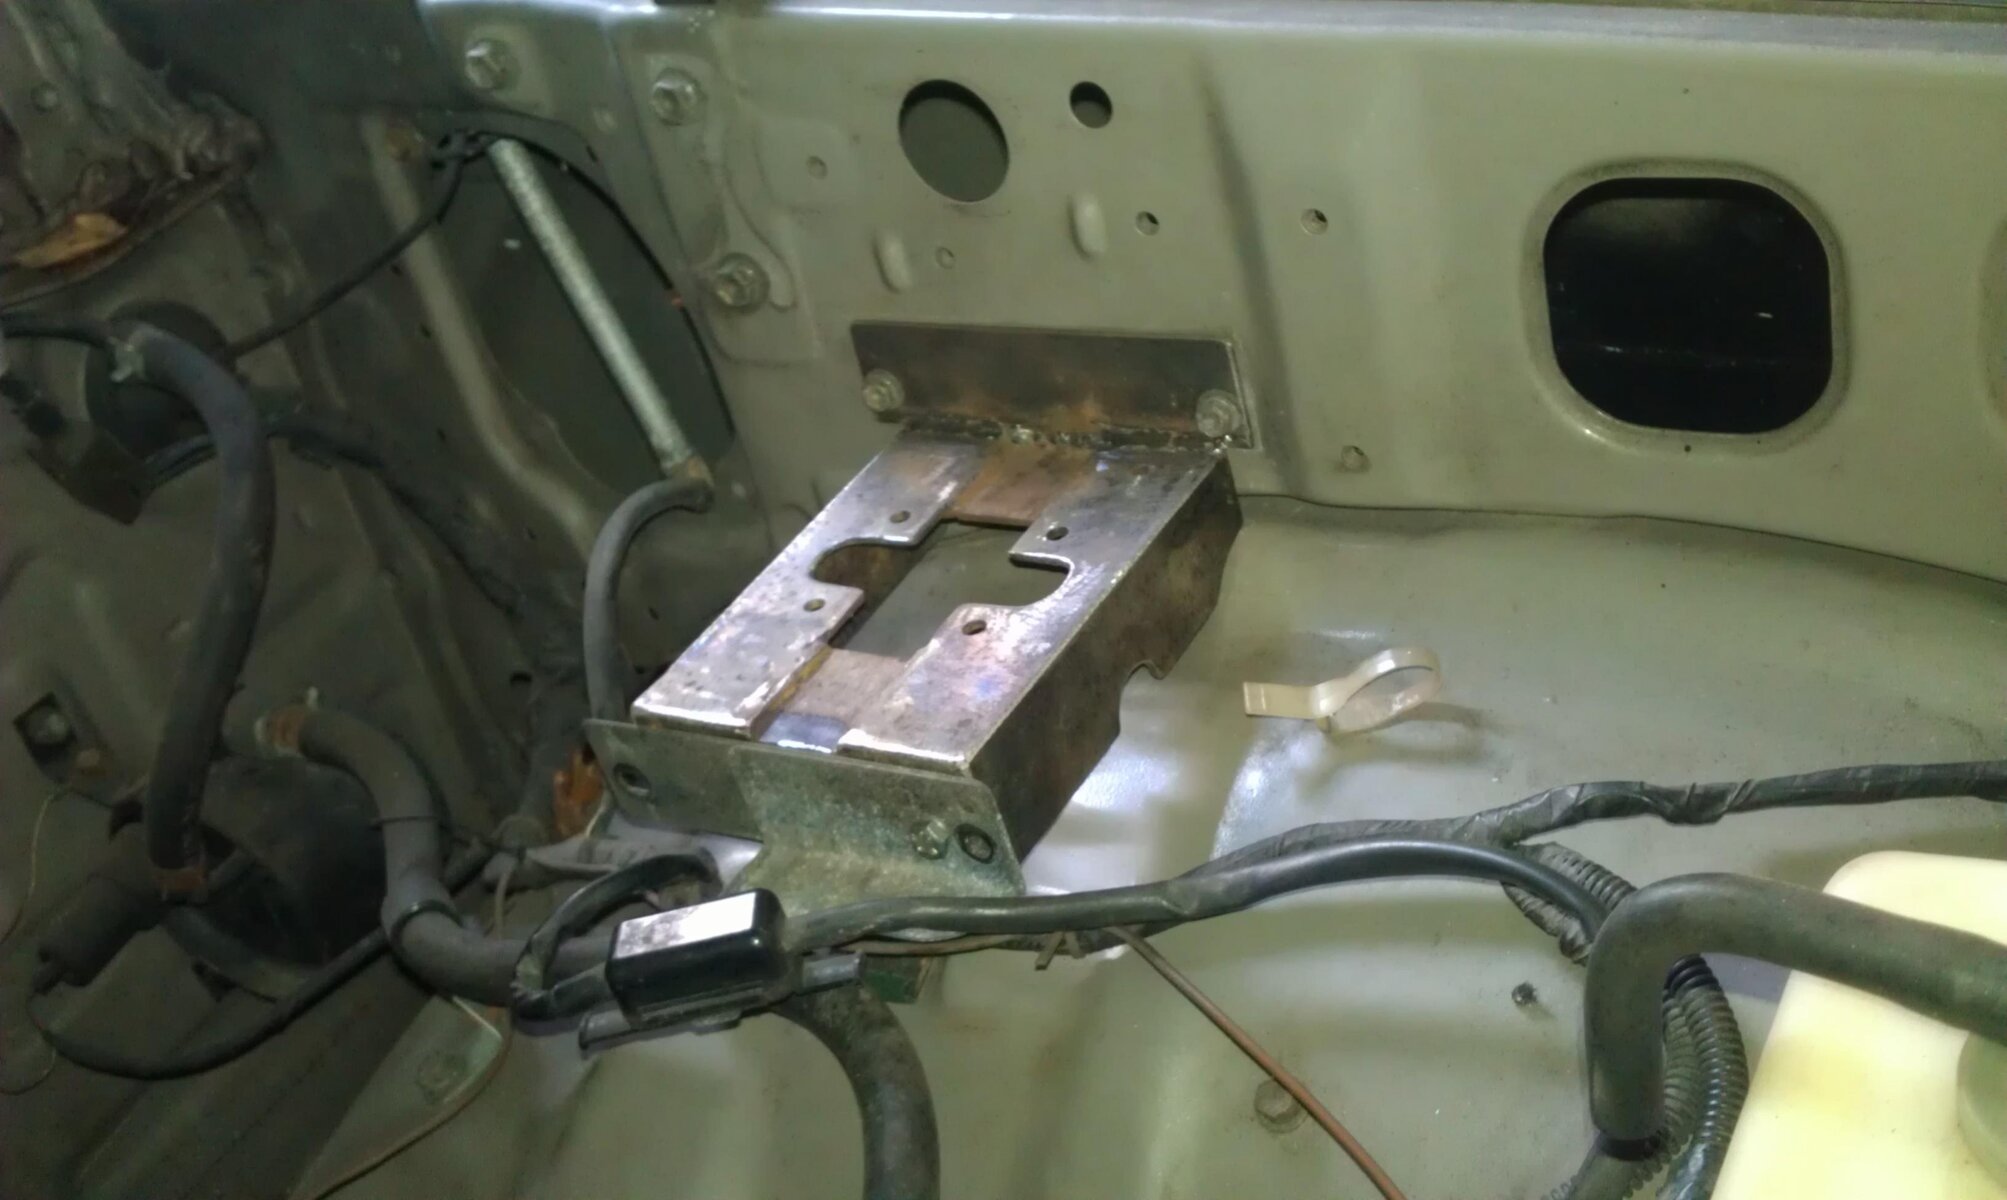
Eberspacher mount..

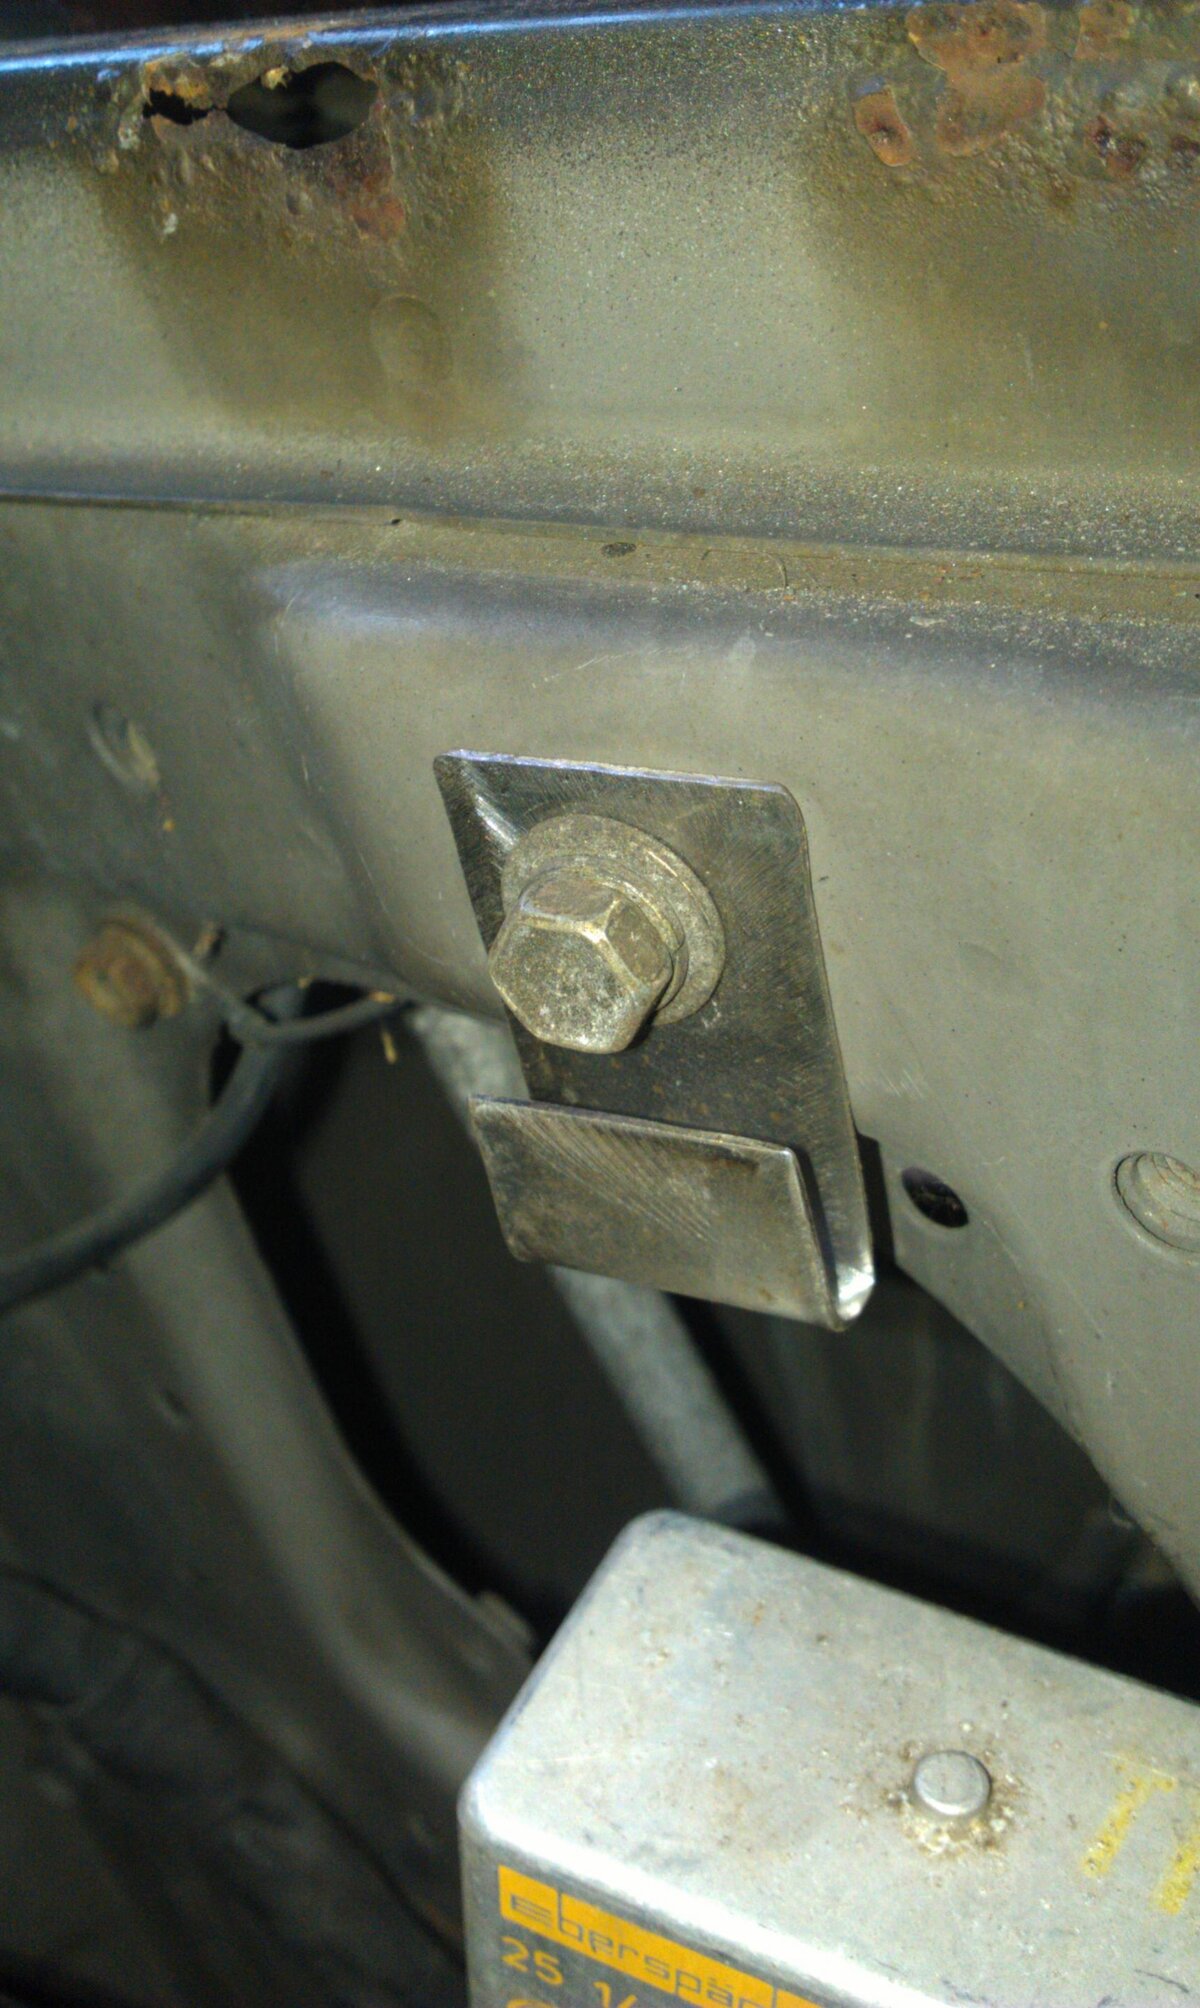
Using some scrap angle iron i decided to make a mount that requires no holes to be drilled in the LC, i decided to shift the "thing" what ever it is (not really looked at it) and make the mount to fit the same mounting holes. Also made a mount for the ecu and fuse.
EBERSPACHERMOUNT2.jpg
ECUMOUNT.jpg
The plan to get the heat in the roof tent is a little elaborate and im not fully settled of having it mounted this way round but i think it may work better for getting the heat where i want it... being a little vague on the plan as it may not work, i think the biggest problem will be keeping the heat in the pipe work before it gets into the tent..... but only one way to find out
EBERSPACHER (1).jpg
And a finally a little paint

EVERSPACHER MOUNT.jpg

Cheers
 
Last edited:
As Andy said, very interesting thread. :clap:

I'm pretty sure most people would have seen the pics of your 60 on page one and thought its beyond repair. :think:

I know I did. :oops:

But your doing some great work, very impressive. :clap:
 
As Andy said, very interesting thread. :clap:

I'm pretty sure most people would have seen the pics of your 60 on page one and thought its beyond repair. :think:

I know I did. :oops:

But your doing some great work, very impressive. :clap:

Thanks Ben, have had a little time to have a look round here and have started reading through your thread with great interest, custom build bumpers etc very much on my list. Great thread and skills and nice to see you fit and well after the tumble in the 70. Look forward to the roof swap updates too.

Must admit when i bought it i knew it was a whole lot of work, but if it hadn't been for the absolute luck that Andy had a scrap one there about to go to the knackers yard then this thread would be miles further back than it is.

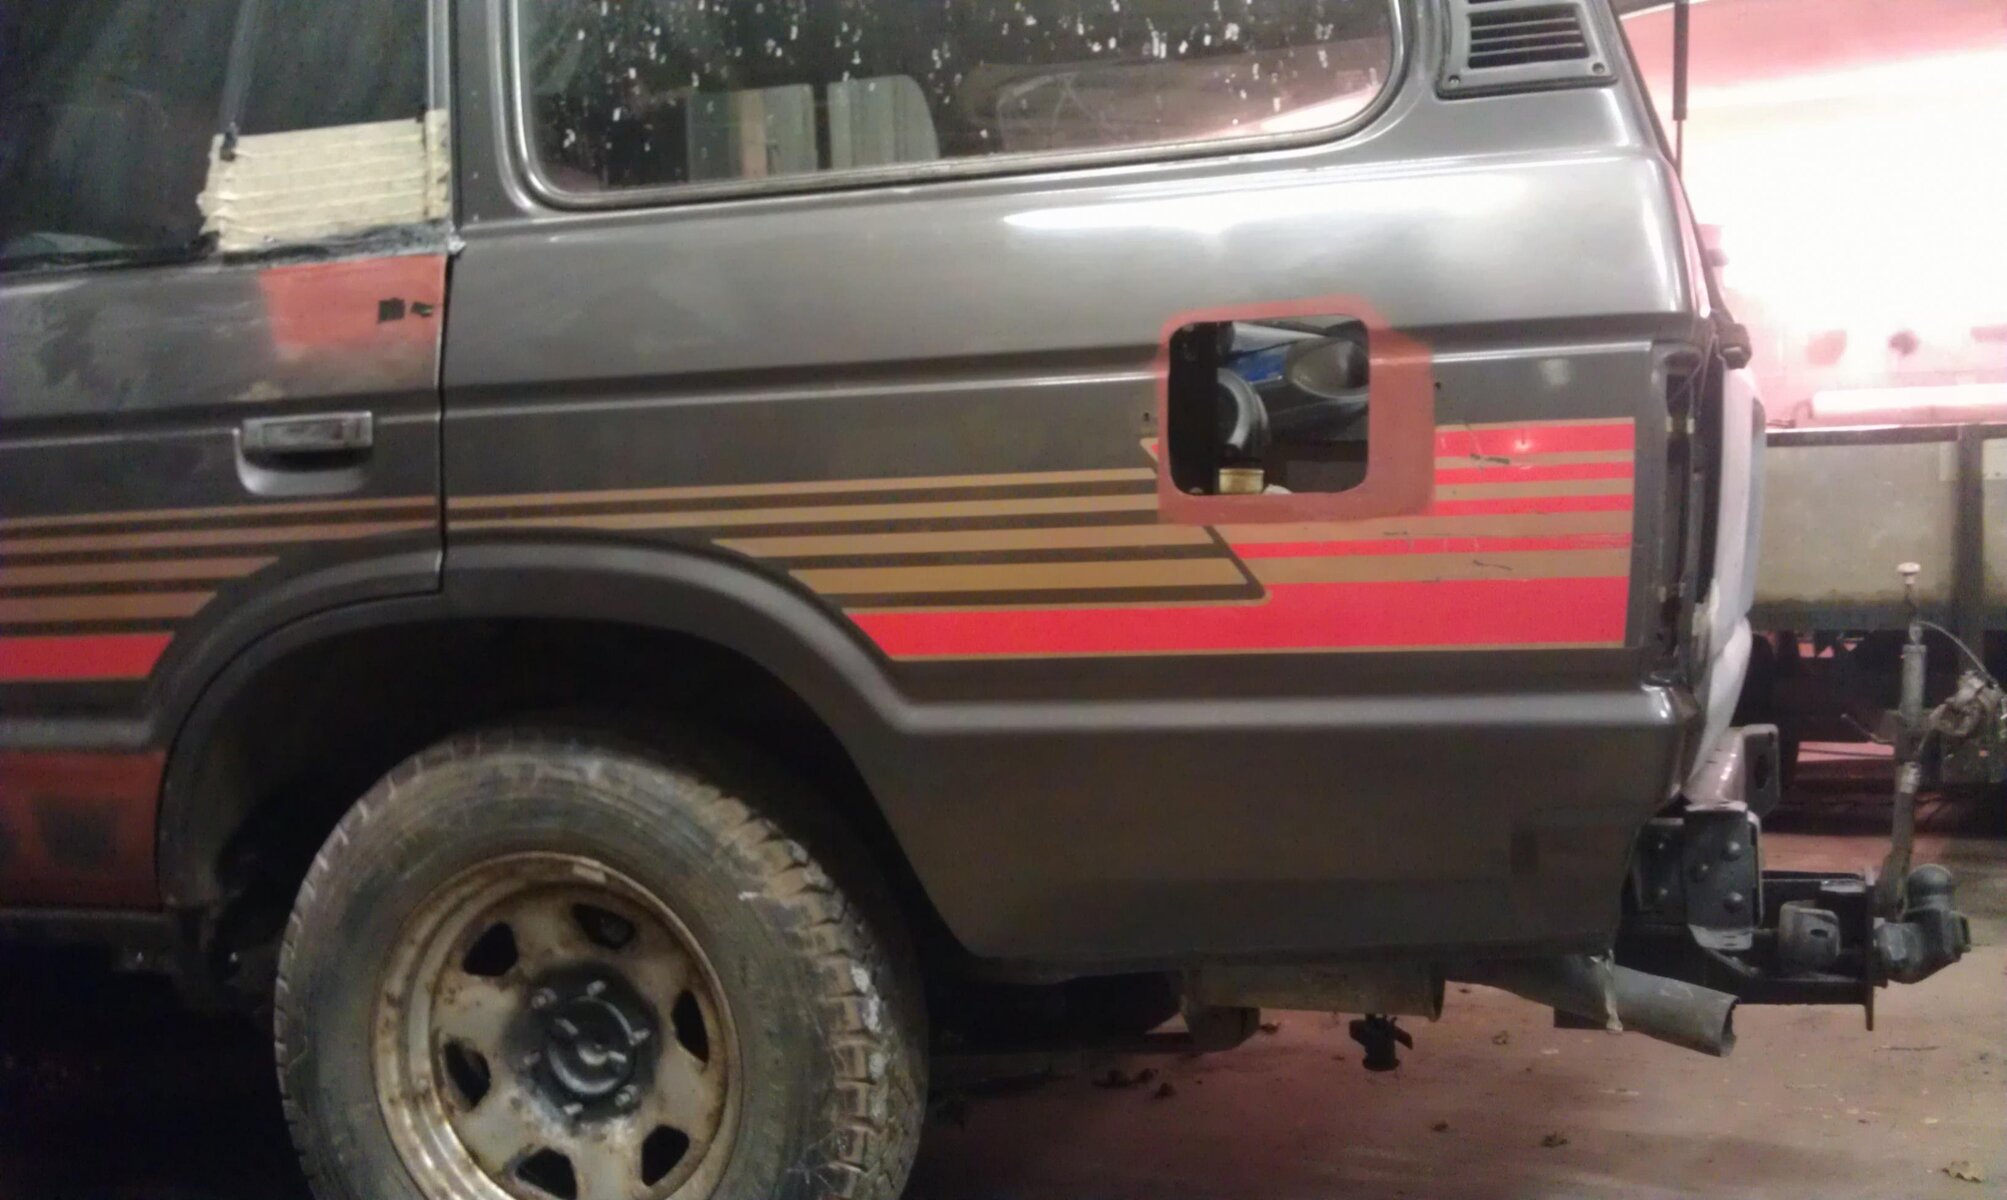
Anyhow ...Weather and time were a little against me tonight, shitty rainy night , didnt feel like welding but did have a spray can of topcoat and lacquer in the boot so i decided to have a go at body work tonight, just so i can tick a little area off....

All things considered came out well, needs final flat and polish although i may give it another coat of lacquer but its near as damn it.
By the time its covered in dirt or up to its axles in mud who will know:icon-biggrin:
REAR PAINT.jpgrear corner 3.jpgREAR CORNER2.jpg

cheers
 
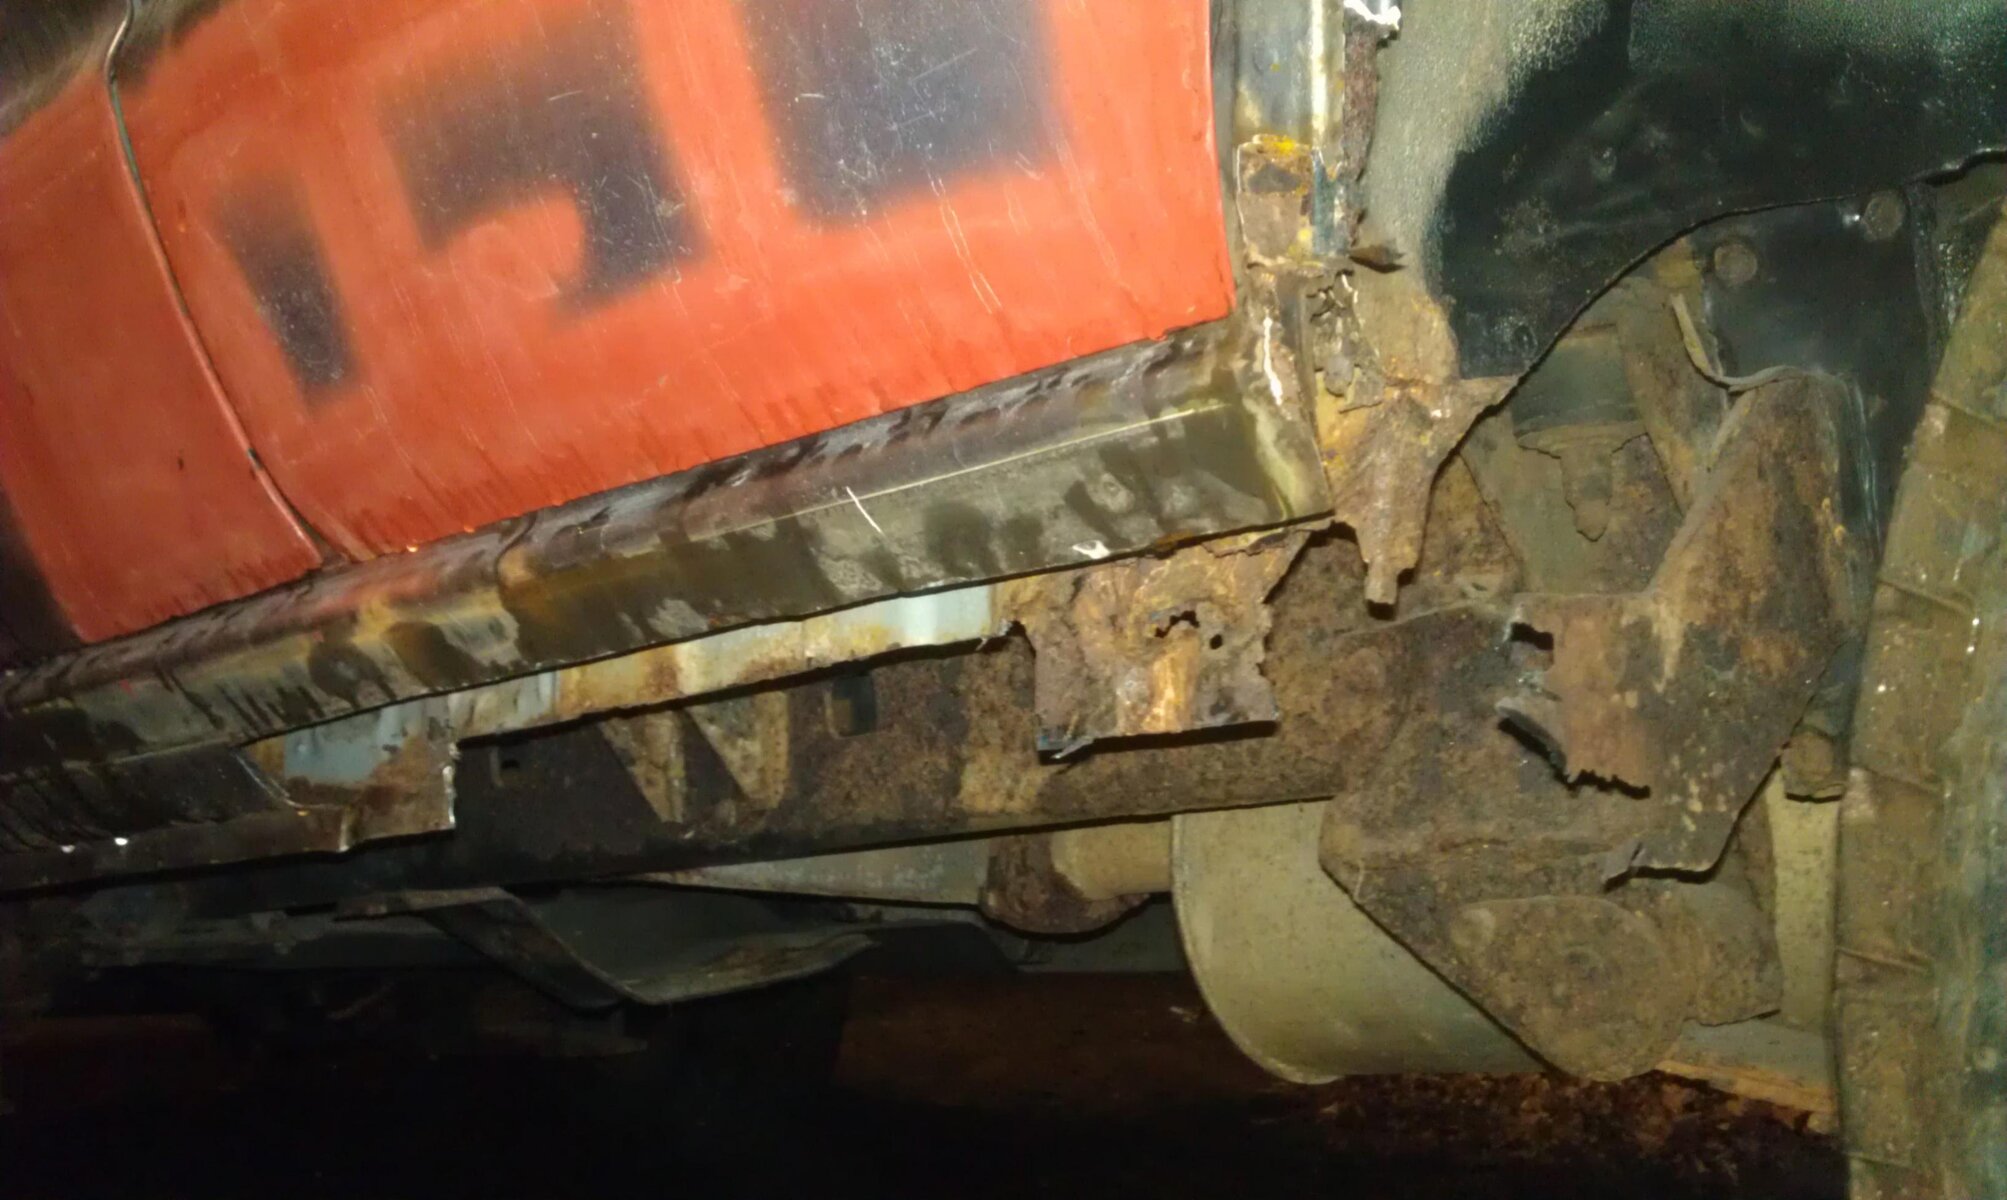
So Tuesday night i got stated on the rear pass sill. Should have had this finished tonight but the weather knocked the power out so with no chance this weekend wont get it finished till start of next week.

I had it slightly cut out already and had to get the remains of the side step off the chassis. They were so rotten it was untrue, the drivers side i knocked off with a lump hammer but this side needed only 2 small cuts for it to fall off. Luckily the chassis behind them was ok.

This is the good side the other side is more rusty
REARSILLUNWELDED.jpg

So really just half done, lots to do to finish. Trying to put it back as best i can seam by seam but seam welding it all hopefully for extra strength and to hopefully survive the British weather for longer

rear sill 1.jpg

cheers
 
Last edited:
Still plugging away at it, sorry for lack of updates... Eberspacher now installed in the engine bay and wiring in..

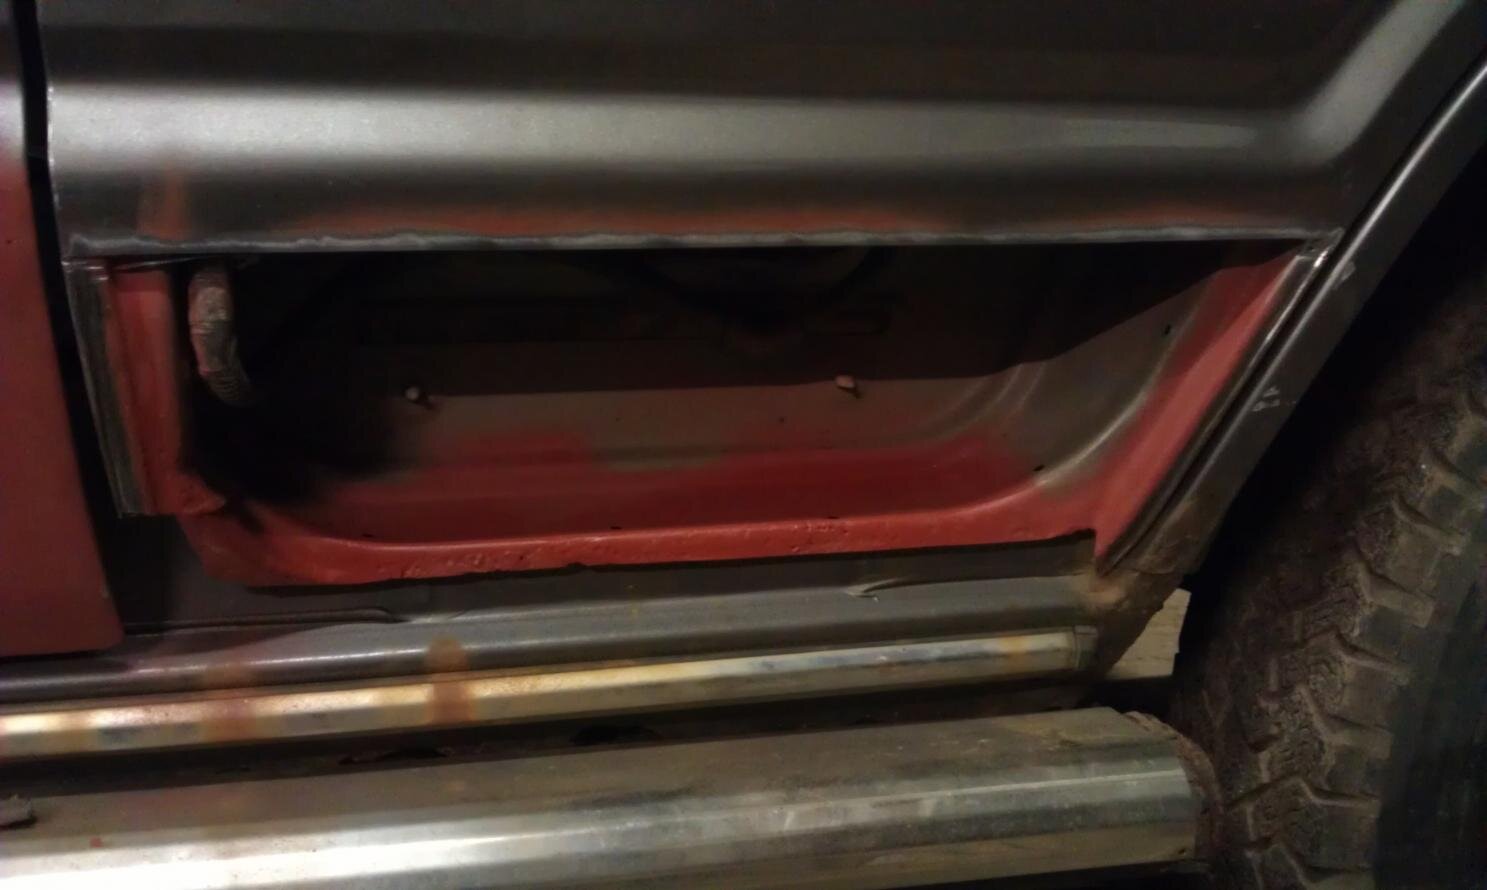
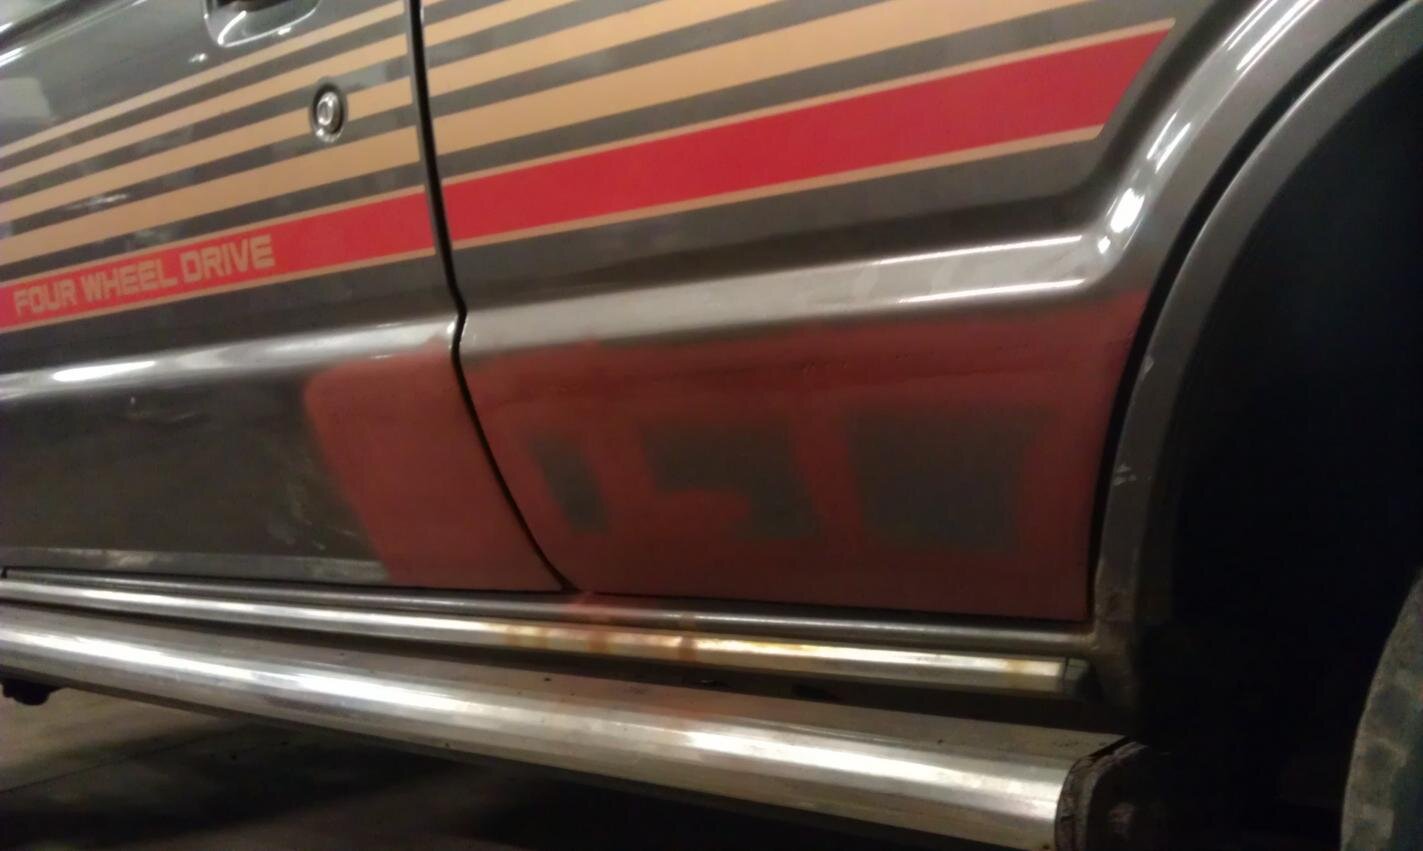
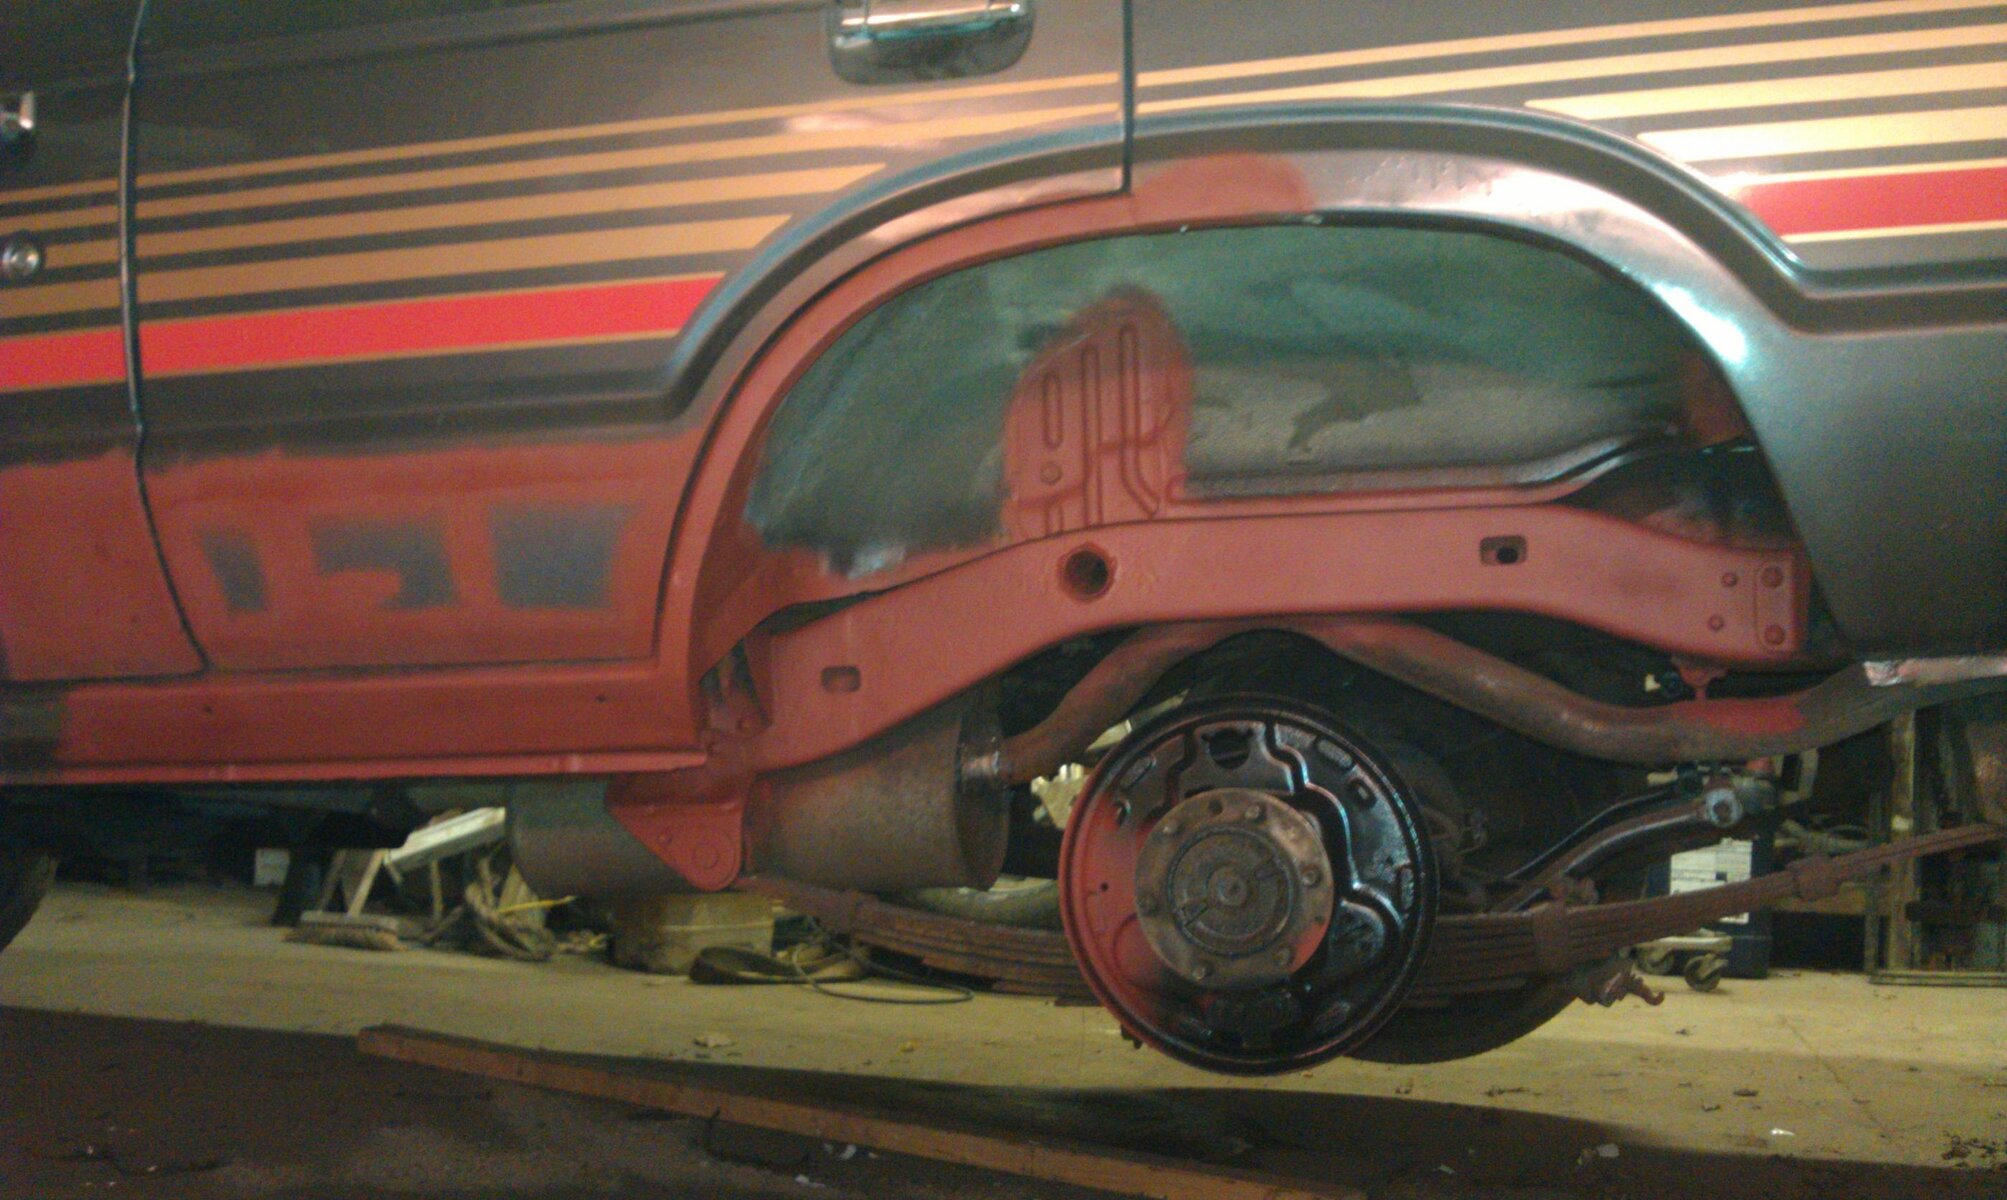
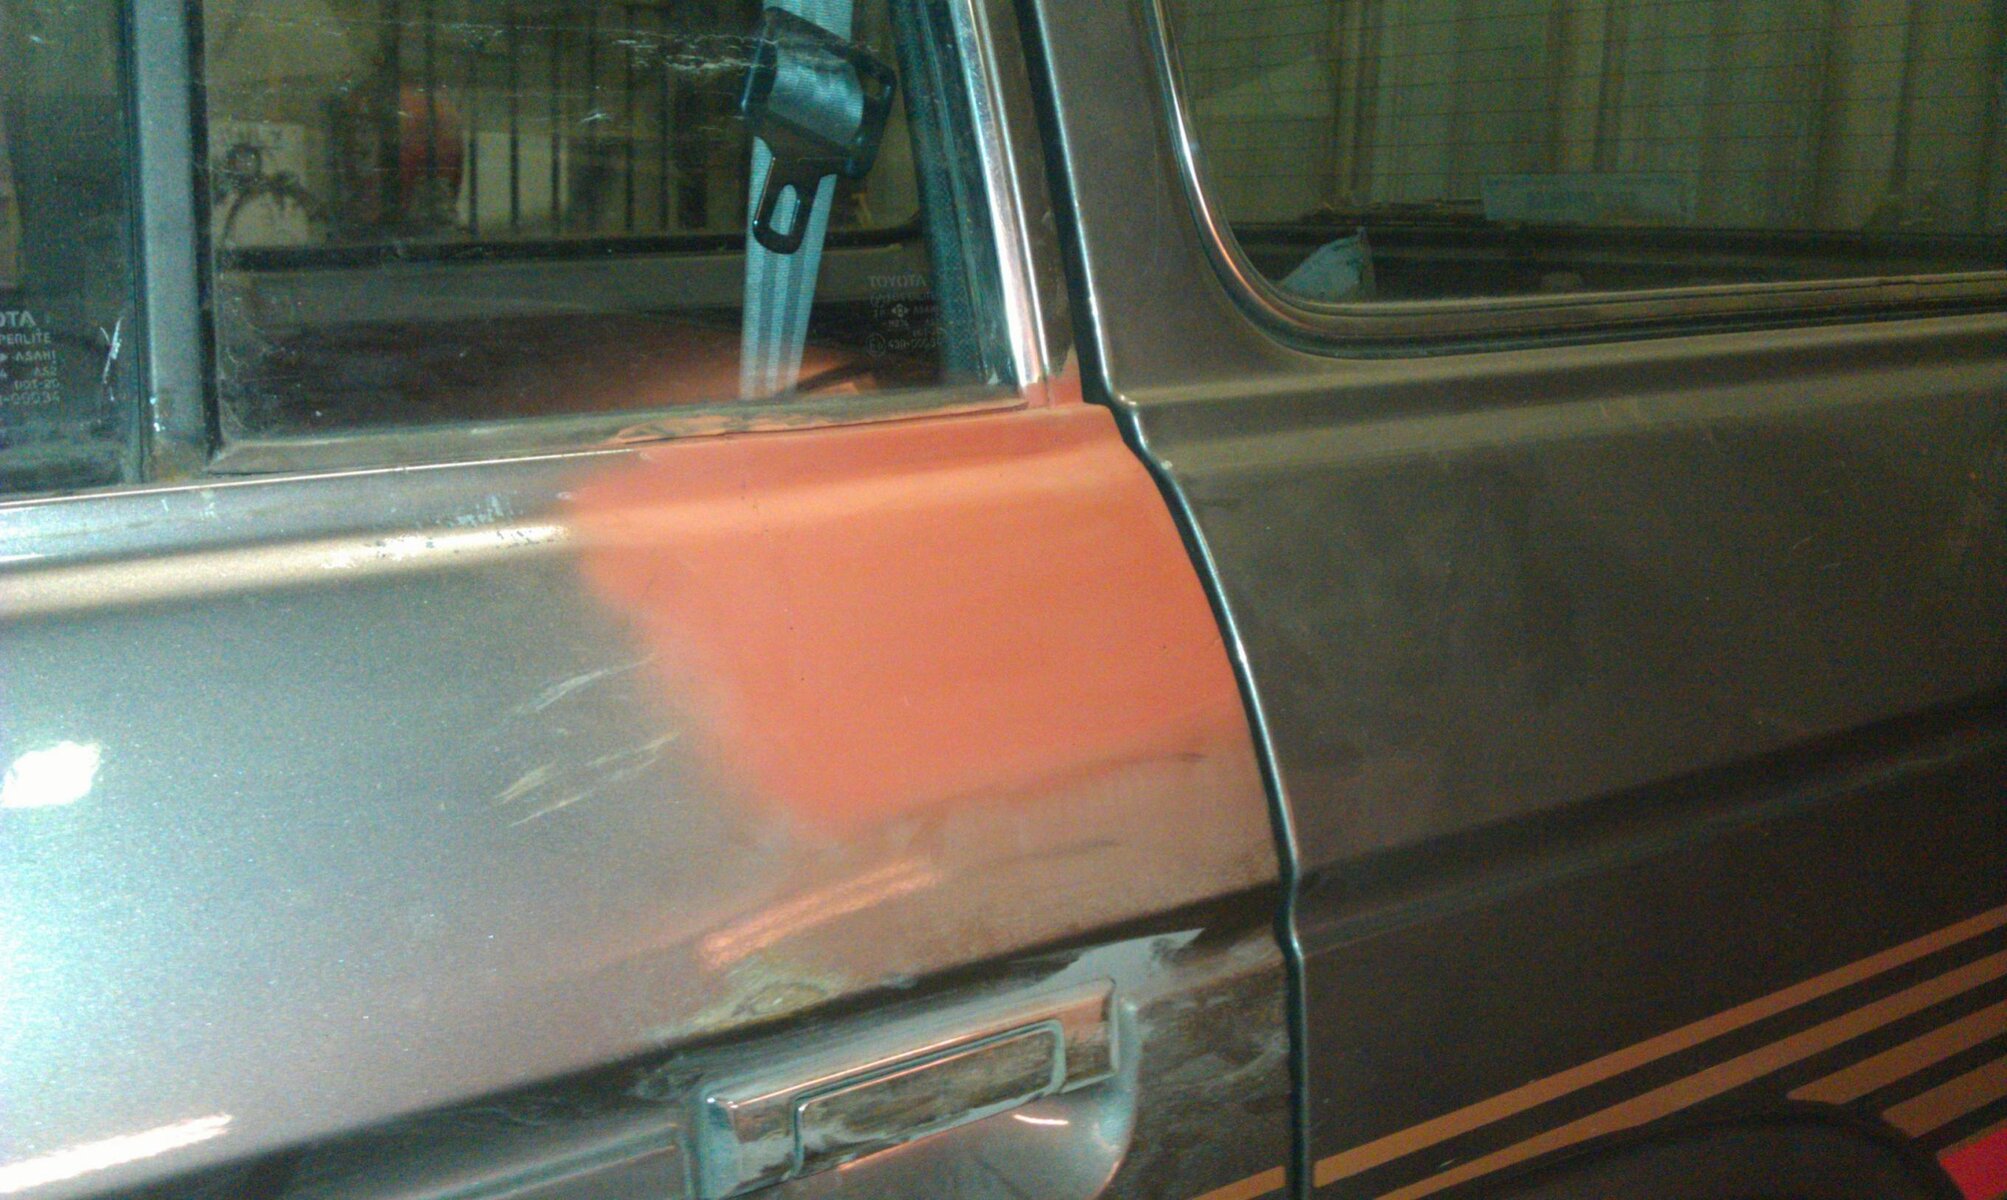
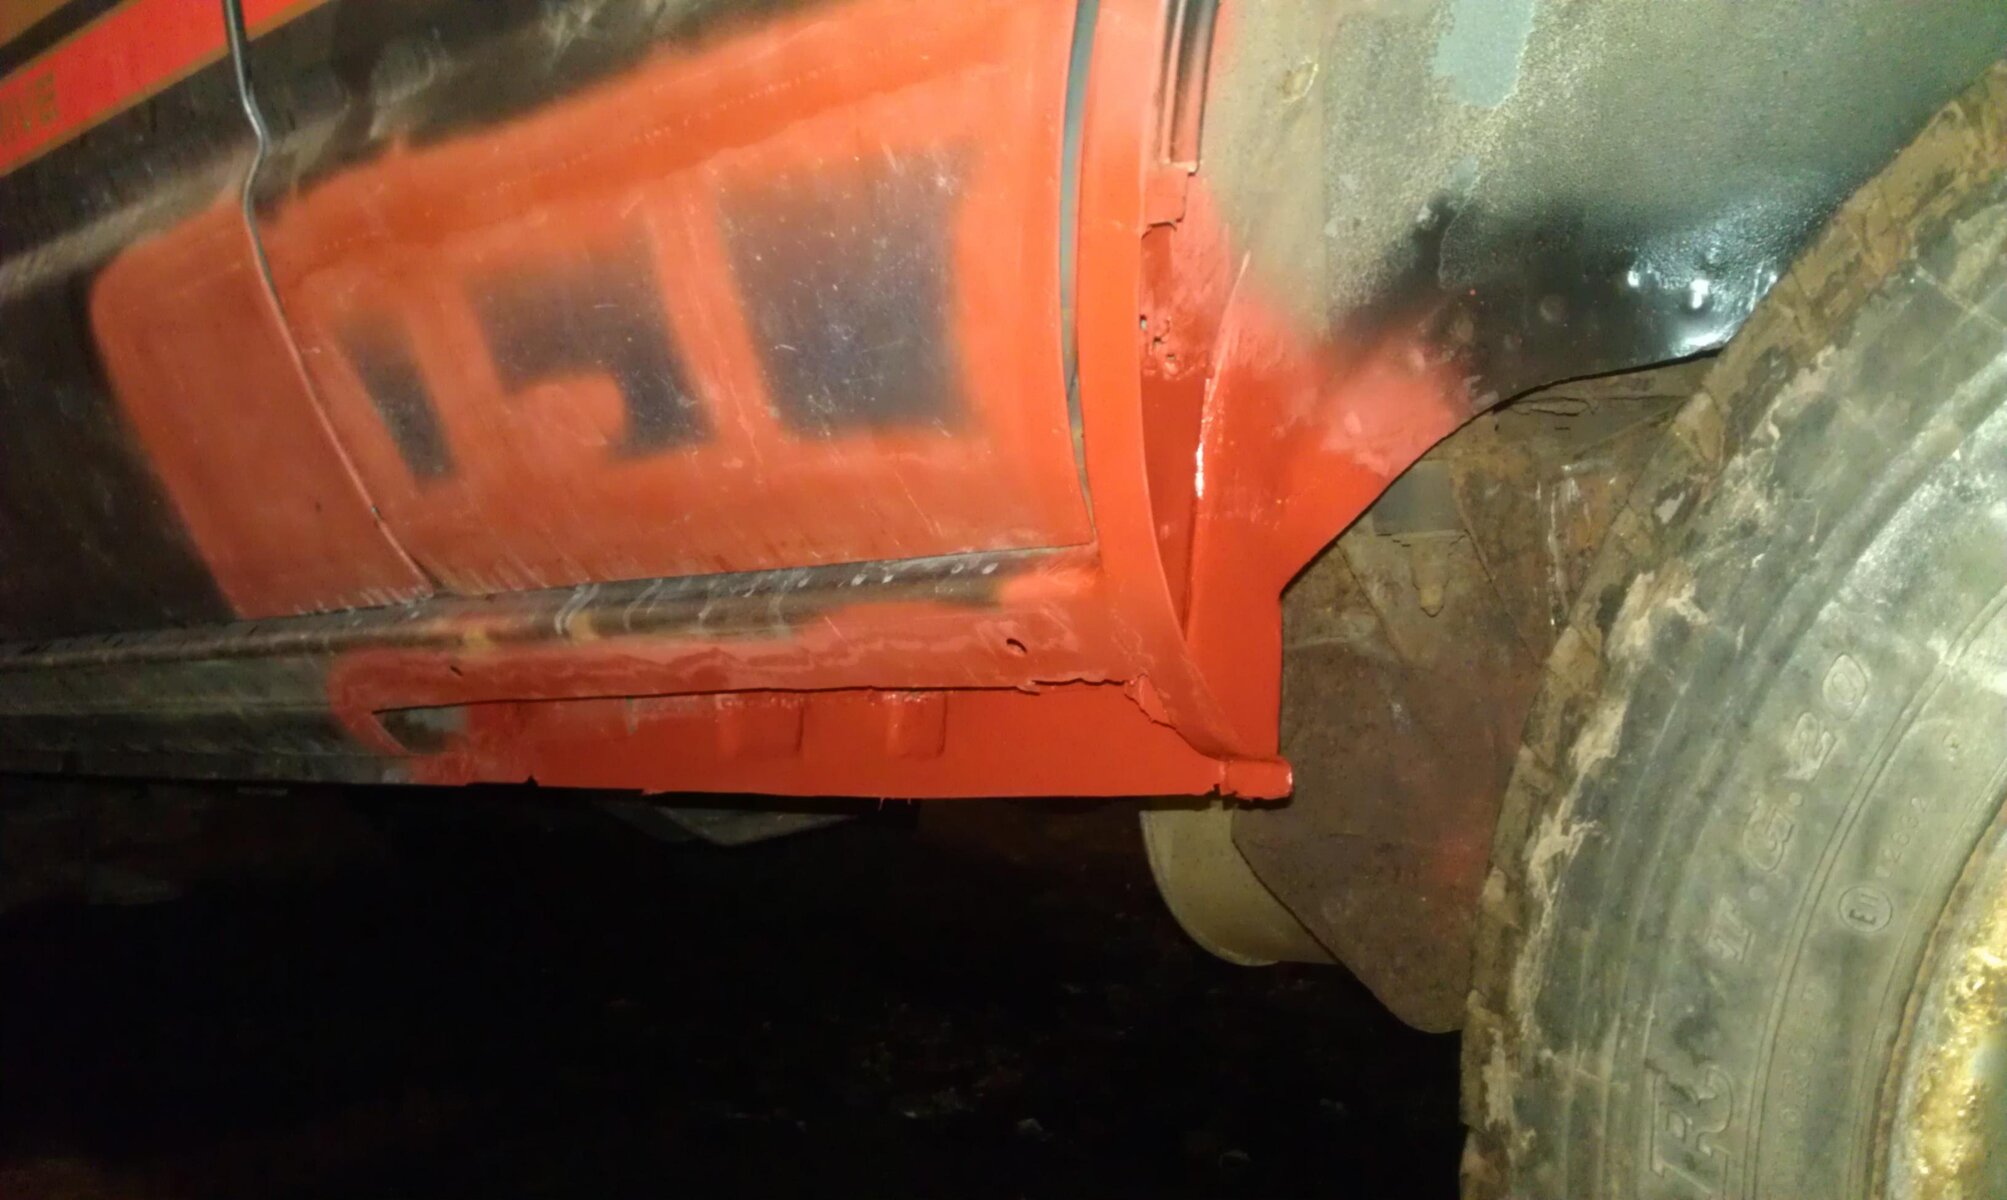
But main thing has been to rebuild the end of the sill and the inner rear wheel arch which turned out to be rotten too all the way round, got the door top finished and the lower wing too so apart from the inner front wheel arch this side is almost finished steel work wise...
few pics

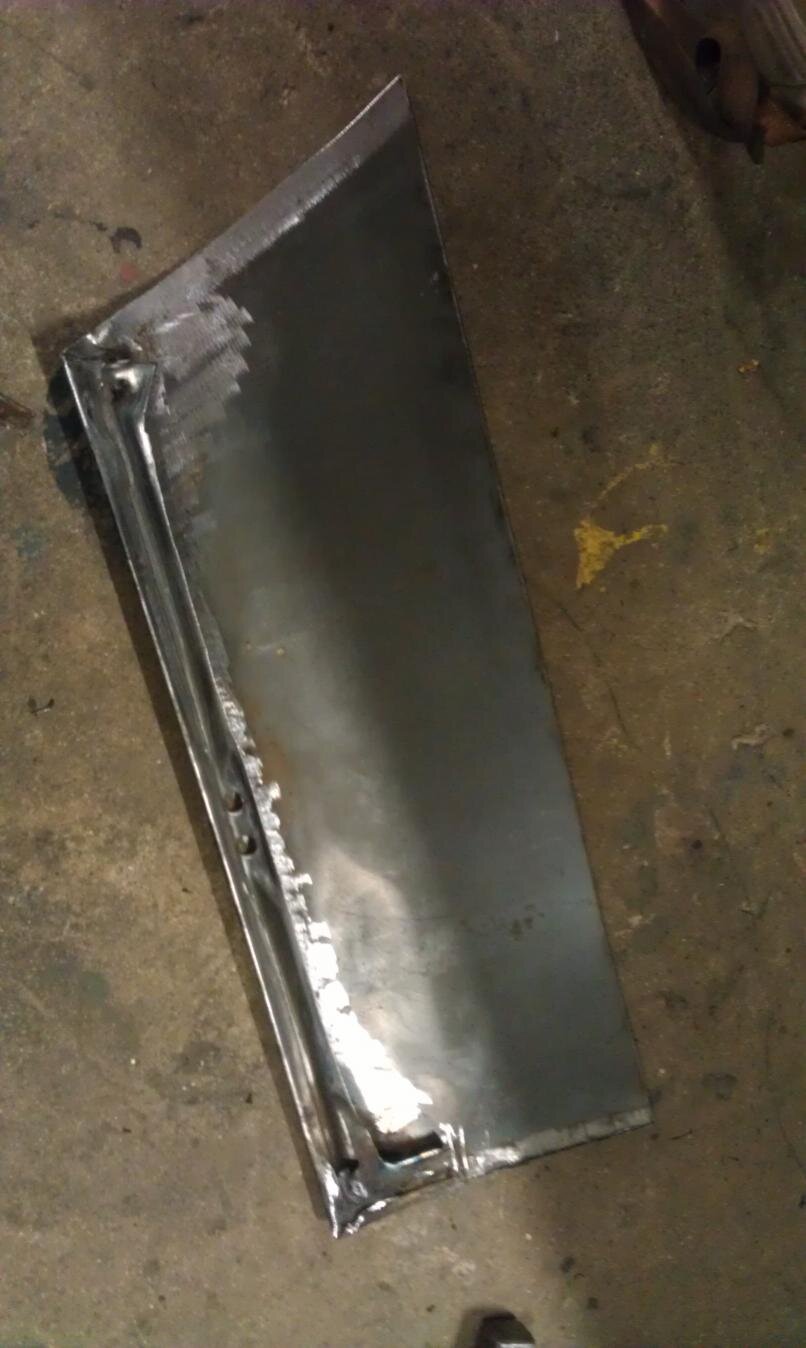
new rear sill i made up with two extra drain holes and the rubber bung holes
rear sill 7.jpg

so all rebuilt including the body mount channel at the end of the sill at the back
REAR SILL 3.jpg
door top finished
DOOR TOP.jpgREAR SILL2.jpg
This side metal work is nearly finished :icon-biggrin:

IMAG0599.jpg

Cheers
 
Looking good. :clap:

Are you going to be re-spraying the truck? if so what colour? :think:
 
Back
Top