OK another busy week on the build...............................
Monday night I carried on with the front axle rebuild and copied an idea I'd seen Trev post of using a couple of screws to pull out oil seals.

Nothing like winding screws into perfectly good, expensive genuine oil seals.


With the oil seal out I could remove the bearing and clean all the old grease off everything. I used petrol for this as it works really well.


Lots of cleaning later.


Spotlessly clean bearings.

Out with the marine grease from the company that employ people who are colour blind!


Bearings nicely packed and in waiting for the new seals to go in behind them.


Driven in using a proper seal fitting tool.

I havent moaned about the horrible Melbourne weather for a while..........................
Freezing cold foggy mornings have become the norm lately.


Had my deserts pass delivered for the trip!


Along with the VDO boost and pyro gauges and fitting kits.

I got the storage boxes welded onto the back of my panels.

Picked up the roof rack brackets and awning brackets from the electro platers.

Dropped it all off at the powder coaters and a few hours ready it was all ready along with the roof rack, and all for the pricely sum of $50 so £25 ish.

Got everything back from the powder coaters.


Sat roughly in position.


Picked up the new king pin bearings as the old ones were a bit rusty and didnt look too great.

Tuesday night I finished the front axle rebuild.

The half shafts needed pulling out so I could clean all the old grease off and repack them.


Lots of old grease to clean out.

Pulled the old seals out.


Fitted new genuine seals.

Re-greased and fitted the cv.

New kingpin bearings needed packing with grease next.


I found that the easiest way to fit the king pin bearings is to fit the bottom one in the hub.

And fit the top one in the top of the ball.

And then put the swivel hub on at an angle and then tap the top cap/arm into the top kingpin bearing.

Dust shield next.

Hub next.

I used my rough/work shop copy of the FSM, a spring gauge and torque wrench to properly pre load and tension the wheel bearings.


Brake caliper next along with new tie rod end.


Other side.

I mentioned that I'm going to fit an 80 series diesel alternator as there much cheaper than 1KZ-T ones and much easier to get hold of. The 80 series is a hugely popular vehicle in Australia, and rightfully so given the fact it is widely regarded as the best 4wd ever built. Anyway......................this means 80 series parts can be obtained all over the country without too much hassle, meaning if I'm some where remote in the future and need one it will be a lot easier to find than a 1KZ-T one.

So this is my bosses old alternator that I've borrowed to see if I could make it fit.

Comparing it to my 120 amp 1KZ-T alternator.

Very slightly different mounting position but not enough to be an issue.

Main difference is where the belt tensioner bolts on.

Bolted straight on.

And I can even use the standard belts as they fit on OK and dont take much to tension them up.

My belt tensioner wont work as standard but I could modify it.

I made a start on finishing off the rear bumper next.
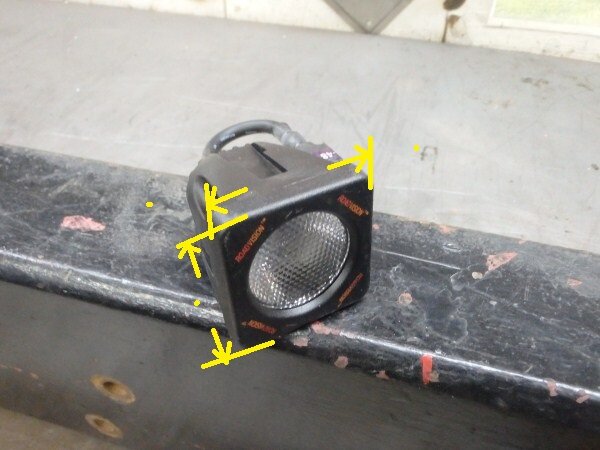
I want to fit some of these lights, there not cheap but there really good quality and fully water proof, submersible to 3 meters.


Got the bumper on the bench ready to fit the lights.

Worked out where to put them.


We will come back to the bumper shortly as I wanted to crack on with the rear wheel bearing press tool I was making.

I made the bottom bolt on plate.


Checked it fitted on the hub.


Positioned it ready for welding and welded it on.

Removed the circlip from the half shaft.


And bolted the press tool on.

On to the press.


It moved a bit but it bent my 6mm plate like a banana!


Cut some gussets.

Hammered the bottom flat again and positioned the gussets ready for welding.

Welded them on.


And tried again.


It got the half shaft separated from the bearing but badly bent the press tool again.


Not good!

Used the press to straighten the tool.


Put so much pressure on it the RSJ sections on the press were bowing!


I rescued the first piece of 6mm plate that I'd drilled the holes in the wrong place, out of the scrap bin and cut the corners out to make the hole spacings work.

Clamped it on to the tool.

And would the amps right up on the welder.


Bolted onto the other half shaft.

This one pressed off without any bending of the press tool.


Needed to press the actual bearings out of the backing plates next.


Removed the handbrake mechanism.


The bearings pressed out very easily.


I put all of that to one side for now and I will come back to it another day.

Back to the rear bumper.

Cut a piece of 6mm steel to weld in for one of the mounting brackets to bolt to.

Welded it in and also welded up some more holes.


Added some holes for the electro plater so the liquid will all drain out when he dips it.

Needed to finish fitting the lights.

44mm hole saw, slow speed on the drill and plenty of cutting fluid and I soon had some holes for the lights.


Needed to add a hole behind one of the lights for the wires.


Should work well.

Other side didnt need drilling for the wires as it falls in one of the weight saving cut outs I added.


Marked and drilled holes for the mounts.


Had to finish welding the arm.


Bolted the arm back on as I had forgotten to add a support for the arm when its in the closed position.


Cut a piece of 8mm.

Thought about putting it near this end of the arm but decided it would be too close to the latch handle.

So put it in the middle where the main weight of the wheel will be.


Fully welded it and then actually cut it down a bit. It will have a piece of black nylon on top of it when finished.

Today I dropped the bumper off at the shot blasters and I will pick it up next week and take it to the electro platers and then the powder coaters. Should have it back by the end of next week hopefully.

Today I borrowed the 60 series from work and bought my roof rack home. If the rack was bigger in any way it wouldn't fit in the 60, its so tight getting it in and out.


I siliconed the rubber strips on to the bottom of the feet.

And bought home some more alternator tensioning brackets. An 80 series one and a Suzuki one.

Comparing my old bracket with the 80 one.

Neither will bolt straight on and work, so I'm going to have to design and make something as my new 80 series alternator should be here any day now.

OK so I still need to...............................
-Fit the starter motor when I get it back from being rebuilt.
-Fit the new alternator and design and fit a tensioning bracket.
-Clean the engine and try and find the oil leak, if there is one.
-Design and make rear shock, bottom mount adapters and fit new shocks.
-Fit the new drawer fronts, latches and side storage fronts which I'm thinking will be on magnets.
-Fit the rear bar when its back from the powder coaters.
-Fit the roof rack and awning.
-Weld in the pyro sensor into the exhaust down pipe.
-Fit the dash pod with pyro and boost gauges and plumb in the boost gauge.
-Fit the rear side panels with storage boxes and drill holes for the 12v cig sockets and Engal socket.
-Press the new rear wheel bearings onto the spare half shafts, fit the half shafts and re-bleed the brakes and adjust the handbrake.
-Polish the new paintwork.
-Load LJ for the trip.
I have one weekend left which is next weekend, the one after she will be with the auto electrican, the following weekend is the trip!
No pressure then!


