Don't like the adverts?  Click here to remove them

my grey 80

looks far more involved that I thought fitting a auxillary fuel tank :shock:
i looked into getting one - a new one in kit - for my colorado, but was quoted in the region of £1100-1200
i cannot recall what brand it was, one of the south african makes.

are you planning some long trips then Jon! to need that range of fuel.
 
I don't need that range of fuel particularly, it's just something I wanted and because of how everything was sourced it only cost a small fraction of your figure Andy. It's a fair amount of fiddly and dirty work but no rocket science involved, just work your way through each task and line them up in the right order :) On an even slightly older 80 there'd be no need to change the exhaust rear pipe, that was just a complication of having one of the last ones :roll: Other than that, it's fit tank and filler, cut fuel pipes, insert valves, run wire to switch, run pipes to aux tank, nothing complicated there :mrgreen:

I've fitted it because I just have a thing about wanting an extended range for no particular purpose although Toby is hoping it will encourage me into making a desert trip somewhere :) Not sure about heating oil Graham, but I'll keep it in mind. I don't normally do enough miles to make it worth messing with veg oil either but it has occurred to me that I'm 3/4 of the way to a suitable system for that. Next time there's a sniff of a fuel strike, if I brim both tanks, that'll probably keep me going for 5 to 6 months at normal rates of use :lol:
 
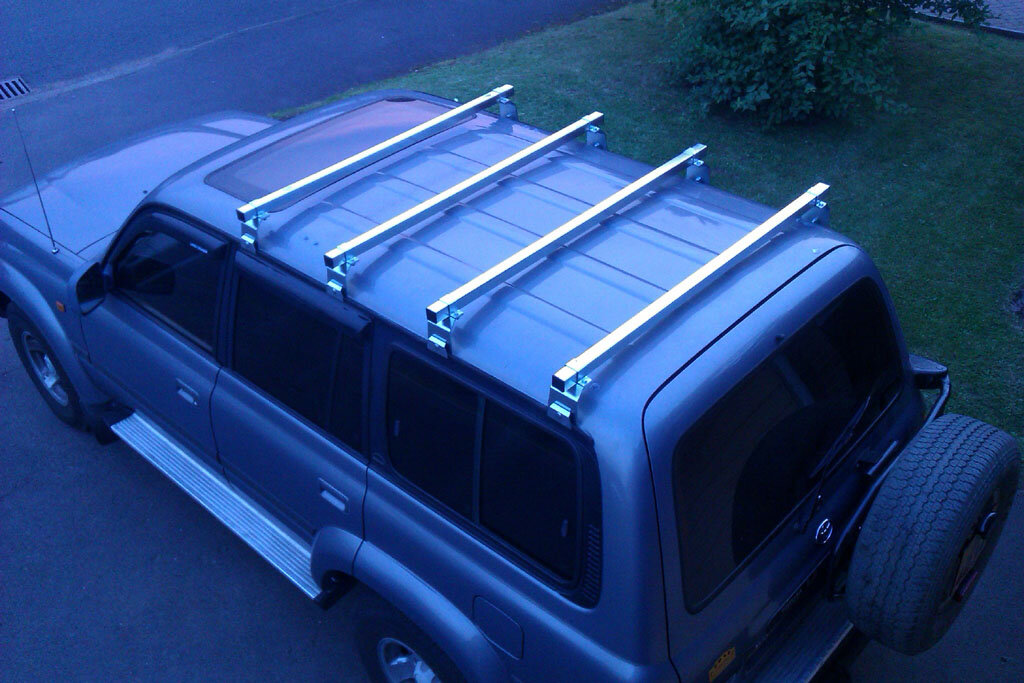
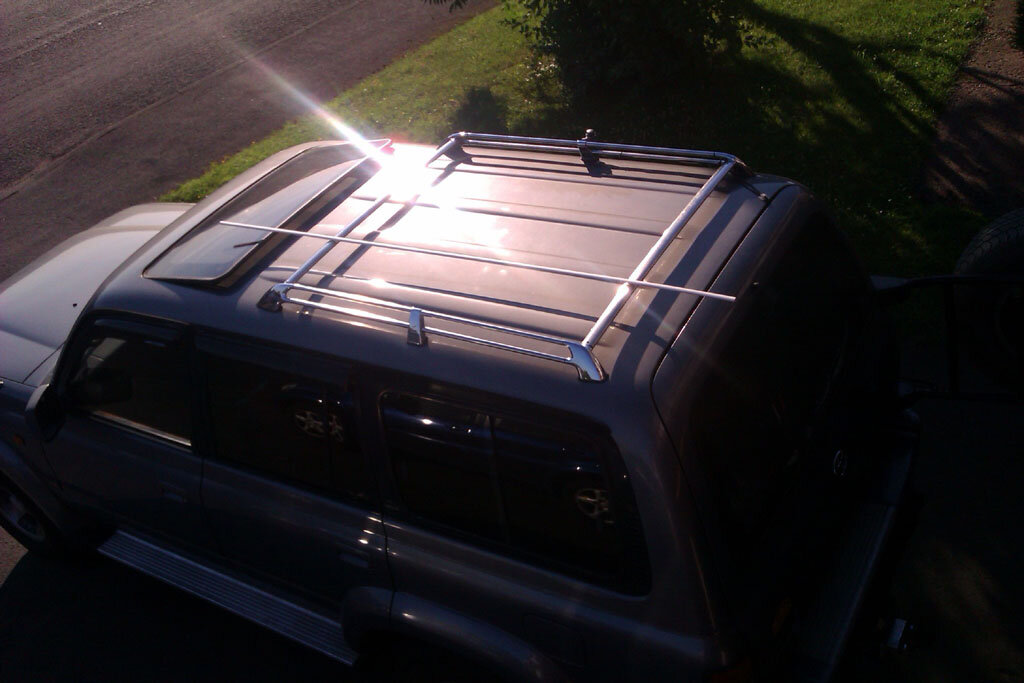
Not wanting to give chance for boredom to set in, this evening I thought I'd investigate just how tricky those bling OEM roof bars are to remove. As a reminder, these are the bars in question.
[attachment=4:1azy32oo]IMAG1118.jpg[/attachment:1azy32oo]
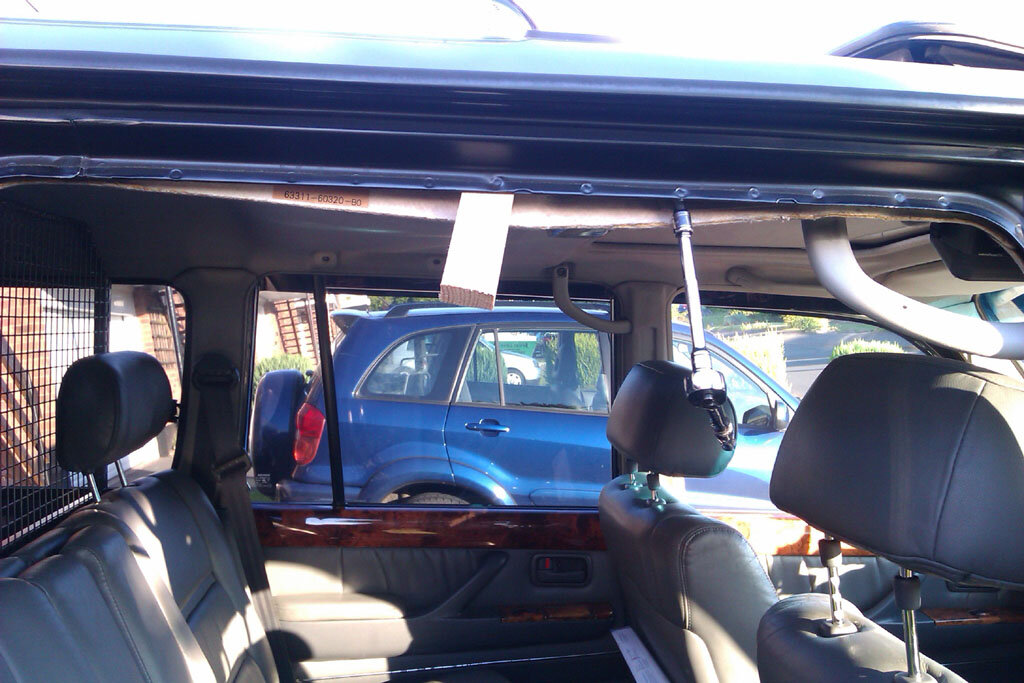
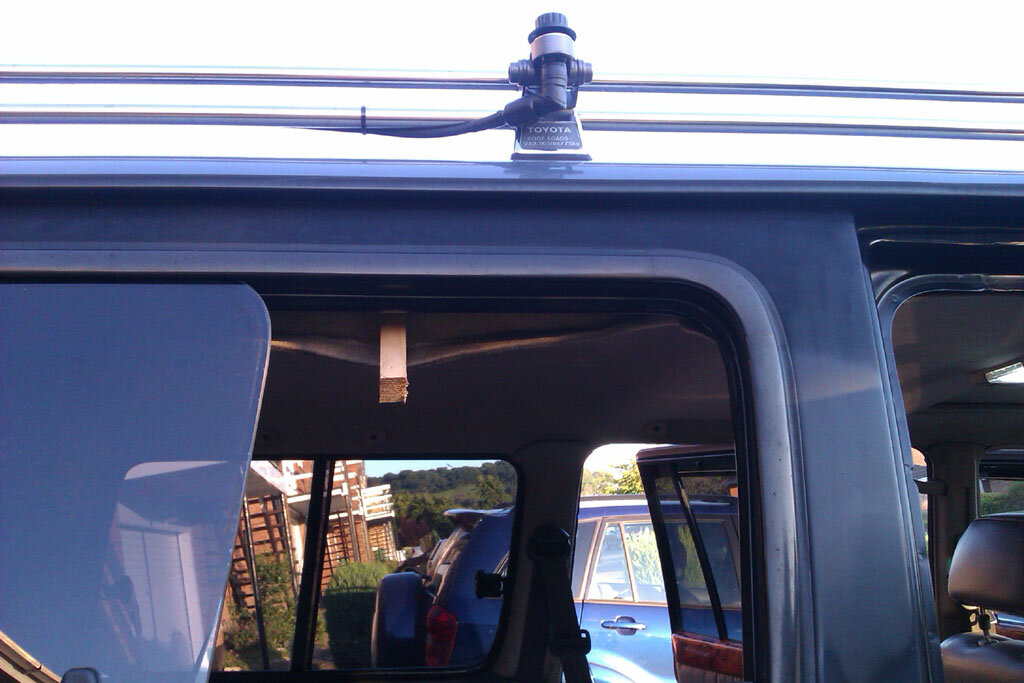
I took the door opening trim off and the grab handle so I could push the headlining in a bit to sneak a look up towards the front nuts. Seeing the nuts I though they don't look too hard to get at but what if they are seized? they would be a right pain to sort out so I'd better check they will undo, I can always do them up again :lol:
[attachment=3:1azy32oo]IMAG1122.jpg[/attachment:1azy32oo]
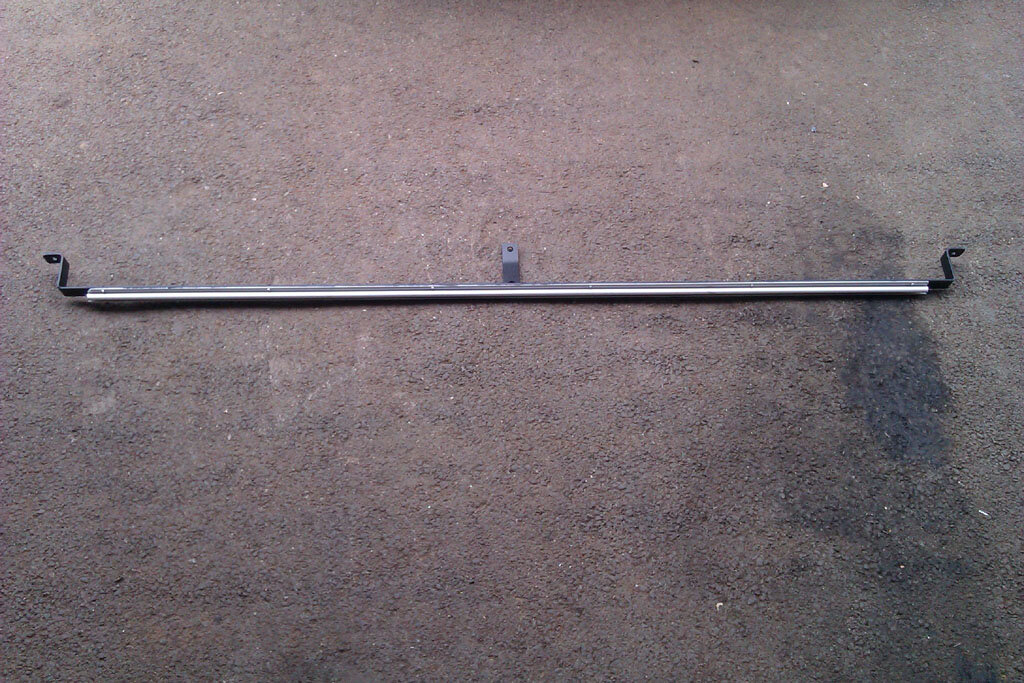
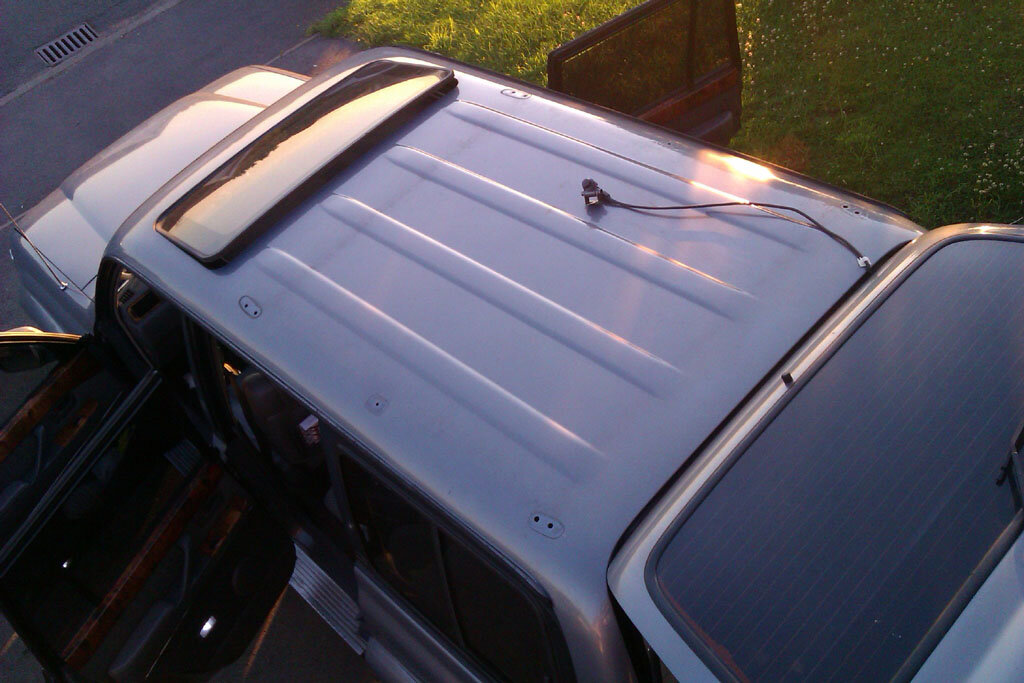
well that was easy enough, better check the other side and they came off easy as well so I thought I might as well just do the job instead of simply investigating! The middle mount was even easier
[attachment=2:1azy32oo]IMAG1124.jpg[/attachment:1azy32oo]
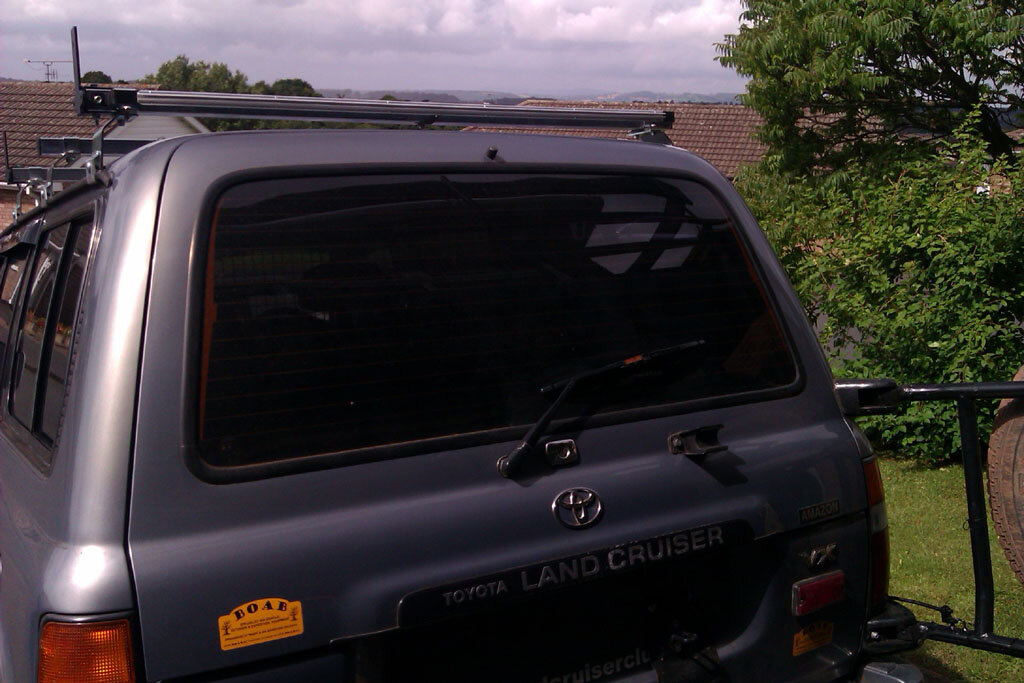
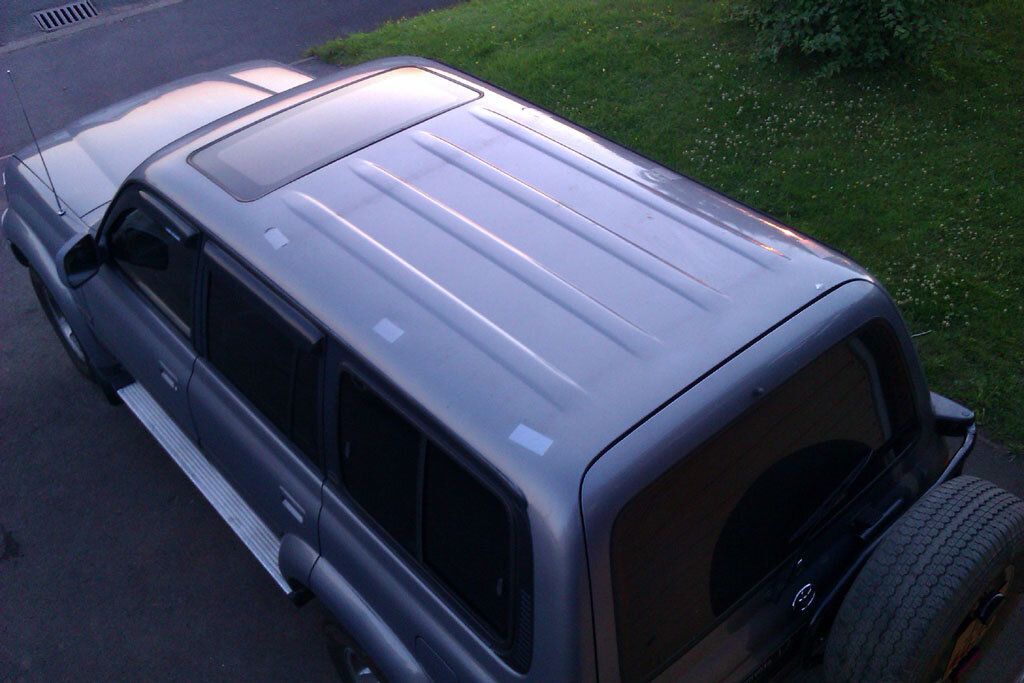
and the rear was so easy I didn't take a picture but no knuckle needed for the rears. So about 30 minutes after starting my investigation it looked like this
[attachment=1:1azy32oo]IMAG1125.jpg[/attachment:1azy32oo]
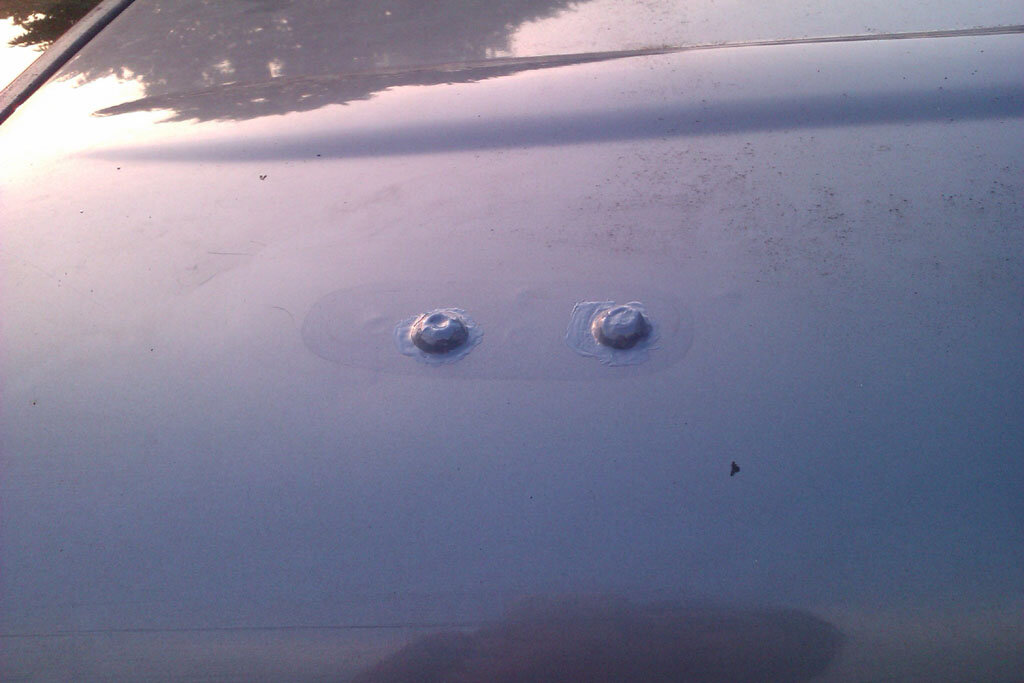
I've put some gaffer tape over the holes while I decide how I want to seal them up properly, lots of options there.
[attachment=0:1azy32oo]IMAG1126.jpg[/attachment:1azy32oo]
So start of investigation to all trim back in place and holes taped up was about an hour all told :) That's another 9kg of scrap removed, to go with the 11kg for the spare wheel cross member and hoist and 16kg for each of the 3rd row seats, not a bad weight saving to offset against some of the weight I've added.
 

Attachments

  • IMAG1118.jpg
    IMAG1118.jpg
    113.2 KB · Views: 386
  • IMAG1122.jpg
    IMAG1122.jpg
    165.7 KB · Views: 294
  • IMAG1124.jpg
    IMAG1124.jpg
    139.5 KB · Views: 325
  • IMAG1125.jpg
    IMAG1125.jpg
    146.6 KB · Views: 319
  • IMAG1126.jpg
    IMAG1126.jpg
    144.7 KB · Views: 295
Looking good Jon

I may be interested in the 9kg of scrap to go on one of mine,if your selling it :think: As for the valve set up similar thing to the veg kit i had on mux.

I am liking that fuel range,wouldnt fancy the fill up of just diesel though. The veg makes my smile still face the right way up.I know you have said beore if you dont do the miles it makes easier to deal with.

Keep up the good work :thumbup:
 
It's yours if you want it Karl, just let me know. It's in nice condition, not absolutely perfect but close. As it's something that normally lives outside I'm sure I can find somewhere to keep it till Lincomb if you aren't over this way before then or I can try undoing the fittings and see how small it packs down for posting? Looks like if should come apart ...
 
Don't like the adverts?  Click here to remove them
Stuck some rivnuts in the roof rack holes with a dome head bolt in each one
[attachment=1:2pce96ei]IMAG1129.jpg[/attachment:2pce96ei]
then blobed a bit of Acrypol over them to seal them up
[attachment=0:2pce96ei]IMAG1130.jpg[/attachment:2pce96ei]
Could have done something fancier / lower profile but I'm not tall enough to care :)

Been playing with BOAB roof bars as well but still got to trim those down to size.
 

Attachments

  • IMAG1129.jpg
    IMAG1129.jpg
    95.3 KB · Views: 228
  • IMAG1130.jpg
    IMAG1130.jpg
    100.3 KB · Views: 219
Jon, bit late now, but I would have perhaps have used the rubber riv nuts for that. No corrosion potential and removable.

Chris
 
Thanks Jon Lincomb would be great.If i get over your way before i will give you a shout. No need taking it to bits as more work for me putting it back together and time never seems on my side.

karl
 
I have some rubber rivnuts Chris and I don't feel the top flange is robust enough for a long term solution, very flimsy and unlikely to age well in that exposed position IMO. No worries about corrosion under the Acrypol, not unless I submerge the truck :) I could have just bridged the hole with the Acrypol but wanted something even more solid plugging the hole and I couldn't be bothered to weld them up.
 
karl webster said:
Thanks Jon Lincomb would be great.If i get over your way before i will give you a shout. No need taking it to bits as more work for me putting it back together and time never seems on my side.
ok, doesn't want to come apart anyway :)
 
Jon

I've spent the last hour reading this entire tread and I'm green with envy. Gordon Bennett, is there nothing you can't do? I have neither the time or money to really get to grips with my truck and your progress just makes me feel worse (especially the way you've found a solution to the rear spare wheel number plate which is both elegant and practical).

Sick as a parrot, me! Sick!

John
 
What you have to wonder at is just how does he do this after selling off all his equipment? Come on Jon, just how much are you paying those Elves :?: We know they have a lot of downtime this time of the year.

Chris
 
:lol: and there's me feeling like glaciers move faster than I make progress on my truck :mrgreen:
 
been fiddling with the BOAB roof bars, the gutter drops at the back so I'll need to make a spacer to level up the rear bar with the rest. They'll only need to be on when there's something on the roof :shifty: 
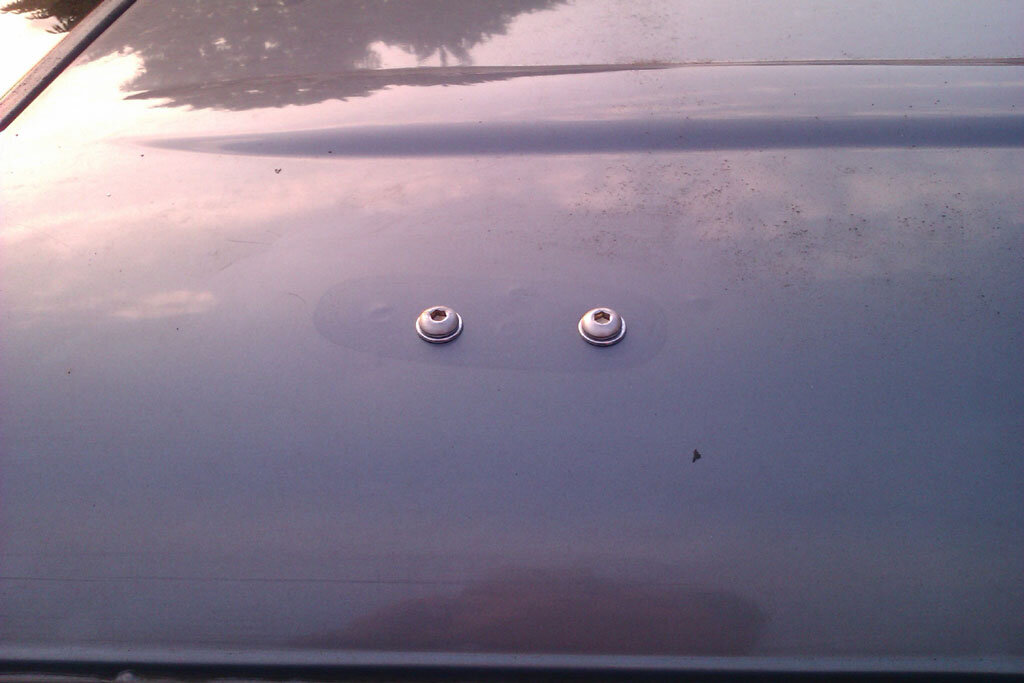
How wide are most peoples roof racks? I've cut these bars down to 1360 to stop them sticking out too far.
[attachment=0:knp8jqtn]IMAG1132.jpg[/attachment:knp8jqtn]
 

Attachments

  • IMAG1132.jpg
    IMAG1132.jpg
    168.5 KB · Views: 435
Looks good - do they give you enough overhang for the FoxWing that's coming next? :lol:
 
They should be plenty wide enough for a FoxWing if we got one, don't think we'll sort that before our trip though so I will get my tarps out to experiment with.
 
No pictures for this update (would have just been a picture of a relay :lol: ) but this evening I wired in a change over relay for the fuel gauge so it will show the aux tank fuel level or the main tank level depending which is selected. The relay needs to be a 5 pin or SPDT type not the more usual 4 pin SPST that you might use for extra lights etc. I used a Maplin part - N00AW.

The main tank fuel level sender wires go through a grommet under the carpet just inside the passenger side rear door, under the plastic panel with a tread pattern on it. If you remove the plastic outer, in the bundle of wires the ones I used were the brown which I t'd off to one side of the aux tank sender to provide a ground and the yellow with a red stripe which I cut to go to the change over relay. The loom side of the yellow and red wire is the feed to the dash gauge and should go to the common contact on the relay (pin 30). The grommet side of the yellow and red wire should go to the NC contact on the relay (pin 87a). The other wire from the aux tank sender should go to the NO relay contact (pin 87). The relay coil is connected to the same circuit as the fuel change over solenoids (pins 85 & 86).

Wired like this the fuel gauge shows the level of whichever tank is in use. It does take a while for the gauge to move as it has a very damped response. The gauge itself must use a stepper motor I think because it holds the reading when the ignition is off.

I thought about getting an OEM aux gauge that goes up by the sun roof controls but I think I'm so used to looking at the main gauge that an aux gauge would just confuse me :lol:
 
Got a FoxWing, mounts, extension panel and RV5 caravan connector from BOAB in the week. The FoxWing is great when there's space to put it out but sometimes the pitch is too narrow or you're just at the side of the road and the FoxWing isn't going to work so I like to have something to put over just the back of the truck for those occasions as well. This is something I trialed on the 100 but with an RV1 caravan connector because they were going cheap but those are a bit short. This time Chris at BOAB compared sizes for me and it turns out the RV5 caravan connector has exactly the right length zip.

Mounted a 1.2m length of awning rail onto a length of steel
[attachment=5:2axa7d8b]IMAG1134.jpg[/attachment:2axa7d8b]
bolted that to the rear roof bar
[attachment=4:2axa7d8b]IMAG1135.jpg[/attachment:2axa7d8b]
zipped the FoxWing extension panel onto the RV5 caravan connector and slid it into the awning rail
[attachment=3:2axa7d8b]IMAG1138.jpg[/attachment:2axa7d8b]
stuck the poles under
[attachment=2:2axa7d8b]IMAG1139.jpg[/attachment:2axa7d8b]
makes a good space and saves carrying a normal tarp as well as all the FoxWing stuff
[attachment=1:2axa7d8b]IMAG1140.jpg[/attachment:2axa7d8b]
because of the orientation of the zips either the caravan connector or the extension panel have to be used reversed. I reversed the caravan connector for this test and then realised that means the zip joint isn't covered and might drip when it's raining so probably best to have the extension panel reversed instead.
[attachment=0:2axa7d8b]IMAG1141.jpg[/attachment:2axa7d8b]
 

Attachments

  • IMAG1134.jpg
    IMAG1134.jpg
    231.1 KB · Views: 203
  • IMAG1135.jpg
    IMAG1135.jpg
    153.5 KB · Views: 192
  • IMAG1138.jpg
    IMAG1138.jpg
    142.9 KB · Views: 188
  • IMAG1139.jpg
    IMAG1139.jpg
    139.7 KB · Views: 189
  • IMAG1140.jpg
    IMAG1140.jpg
    123.7 KB · Views: 202
  • IMAG1141.jpg
    IMAG1141.jpg
    198.3 KB · Views: 189
Back
Top