Don't like the adverts?  Click here to remove them

Project 80: Codename Grey Ghost

.
I think the "tank dip" is just step 1.
They then swirl a cotton bud, inside your exhaust pipe to collect a sample of the soot.
Then burn the cotton bud off in some flame with a catalyst.
Depending on the colour of the flame,,,,,,,,,,,,

Gra

.....Your gran is @&^%#d. How i hate them.
Cheers Graham would hate to lose the LC over a little thing like tax and fuel duty, Besides i know someone has to finance basket weaving courses for refugee immigrant transexuals. Its a worthy cause :crazy:
 
Just hijacking my own thread for a second here, at our local pay and play place recently the cops had all exits covered and were dipping tanks. One guy had his Landie impounded and another was given an on the spot fine of over £600. No, they didn't come up red, they just looked shite. No, kidding. They were using red. Well, the tanks were positive. If you buy a used vehicle you have no idea if it's been run on red but it may be you that's caught.
 
Just hijacking my own thread for a second here, at our local pay and play place recently the cops had all exits covered and were dipping tanks. One guy had his Landie impounded and another was given an on the spot fine of over £600. No, they didn't come up red, they just looked shite. No, kidding. They were using red. Well, the tanks were positive. If you buy a used vehicle you have no idea if it's been run on red but it may be you that's caught.

A number plate is as near as they can get to tattooing a number on your arm. What is everone supposed to do have their tank steam cleaned and replace their exhaust. Just trying to work out the new tax disc scenario, For years it was failure to display (i got done for the disc holder falling off) now it seems displaying is a crime ?!! or not registering or whatever
Anyway back to the thread, Its coming on really good ive managed to look through the whole build so far and its brilliant. Had a look at the guy who made the drawers from cable trays and they look pretty good. I cant justify a grand and a bit for drawers (unless they're victorias secret, Then i'm reaching for my wallet) :icon-biggrin:
 
Oddly, I looked back and read it from start to finish the other day. There's been a lot of 'stuff' to do. Almost there really. Few more bits. Might mess with the water system tonight. Seeing as how my new relay hasn't turned up. Sad face.
 
Being a curious bear, I found that I wanted to know how much water I had in my tank this weekend. Err, lots it appears, but a visual means of reading it was in order. Now this is only a lsh up and the proper thing will look nicer, but I wanted to just mock something up for proof of concept etc.

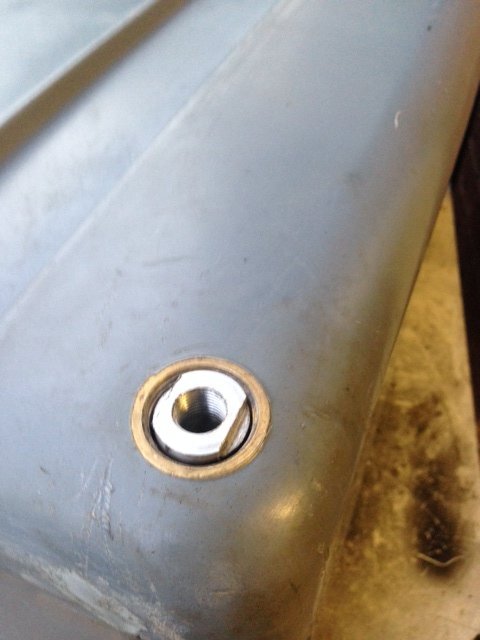
Pulled out one of the blanking plugs and machined a threaded (26mm x 1.75 thread) plug which I drilled out and tapped 1/4 BSPT

photo 1.JPG


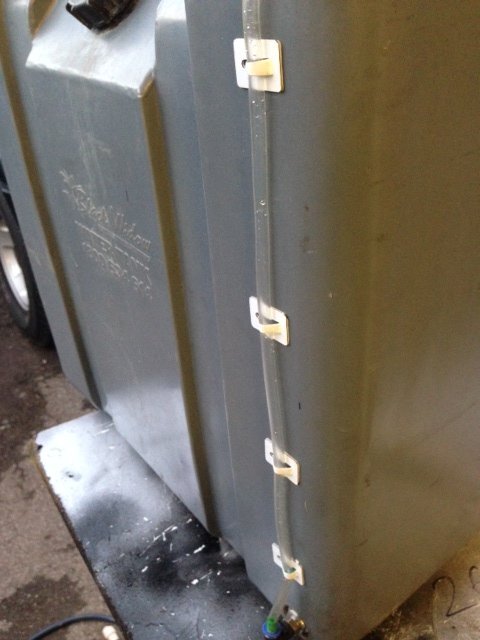
Screwed in a 6 mm swivel air fitting and some washer pipe. Hey presto, a manometer. I have some silver tape to go behind it and some nice pipe clips. Began filling it and just as science predicted the sight tube started to fill up.

photo 2.JPG
 
Don't like the adverts?  Click here to remove them
That's an OK sort of idea Chris, but over time, is that not a bit vulnerable to knocks and sheering off the manometer pipe fitting, or will it be buried so deep in a hideaway place that it will be fully protected?

Like it, anyway... :icon-biggrin:
 
Did I mention it was a mock up. I should really have said that shouldn't I. :icon-rolleyes:
 
Did I mention it was a mock up. I should really have said that shouldn't I. :icon-rolleyes:

Of course you did Chris, but you see, with the rolling eyes, :icon-rolleyes:, you missed the perfect opportunity to explain part 2, how your cunning skills would overcome the weaknesses of the mock-up and how the ideas were forming for the real thing.

Some folks just don't appreciate the work of the straight-man.... :icon-rolleyes:
 
The truth is Chris (& Chas) I'm green with workshop envy and the thought of having your own lathe and milling machine... Oh heaven!

Chris, you make wonderful things. I'm truly looking forward to seeing how this all comes together in the truck, when finished. :thumbup:
 
I might decide not to finish now just to brass you off and ride around with a vulnerable water meter bashing about in the back of my old thrown together truck. Ha Ha.

Have faith. The water tank isn't even bolted in yet. The filling system isn't even installed nor the connections to the heat exchanger. and you want advance details of the finished system??
 
Have a look at parker sight glasses chris the do some interesting things might help you out. If you find what you want pm with the details and i can buy on your behalf for alot less then most other people.
Stu
 
Cheers Stu, but we are in danger here of totally over engineering a simple tube up the side of the tank. It's going to be finished off nicely, visible but not vulnerable where it's going. Once I screw the fitting fully into the tank, there will hardly be anything protruding and these fitting are pretty tough too.
 
I might decide not to finish now just to brass you off and ride around with a vulnerable water meter bashing about in the back of my old thrown together truck. Ha Ha.

Have faith. The water tank isn't even bolted in yet. The filling system isn't even installed nor the connections to the heat exchanger. and you want advance details of the finished system??

Just enjoying being part of the thought processes Chris, that's the fun of this forum for me :icon-biggrin:.

There's no intended criticisms as I'm sure you'll appreciate, its simply a matter of putting myself in the shoes of the doer... while I relax and have (another) cold one :thumbup:
 
Heaven's Clive, no need to explain. Of course I understand. If people didn't reply I wouldn't bother posting. The plug bit is 2" long and there is a sort of housing into the tank which you might think is only skin thickness, but it's not. It's at least 3" into the tank. I will screw the plug in to the point that the elbow is flush with the outer of the tank. This will then be mounted in the cargo barrier with the sight tube against the corner where it will be very well protected. But still visible.
 
OK got stuck in today. Made a cargo barrier / splitter thing. A divider I guess. This is so that I can pile stuff in the open space without it falling on the fridge. I bought a piece of weld mesh and some neat U channel which made a perfect edging to go around the outside. Materials cost was a princely £3.06 plus a rattle can. It got the standard galv spray first
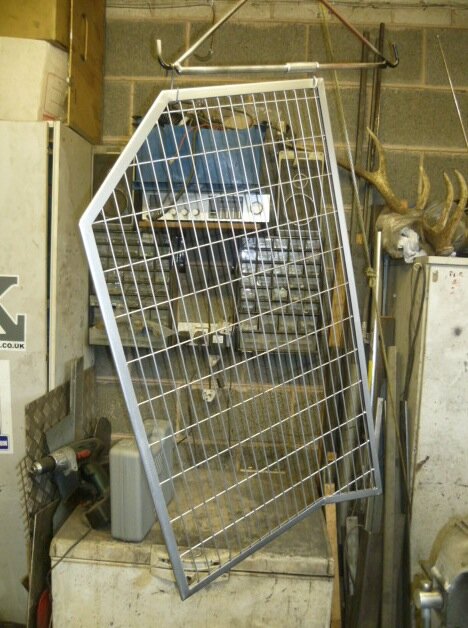
Zinc spay 2.jpg

Then some gloss black.

Painted black 2.jpg

It's screwed into the wooden deck at the bottom and bolted via rivnut into the upper shelf.
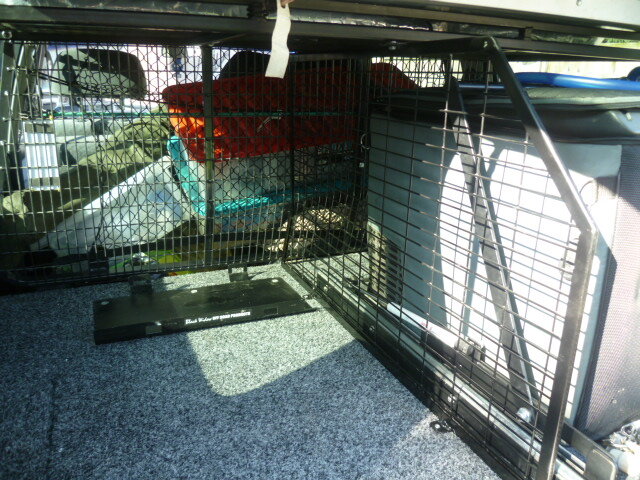
Bolted in.JPG

It'll do. Next to it,you can see the base plate for the water tank. This is screwed into the deck as well.
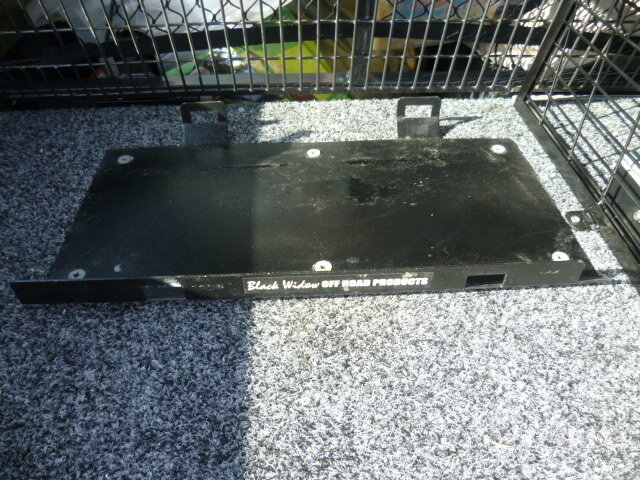
Plate.JPG

More on that later.

I was given a neat little table by Lazz when I bought the kit from Derf. I'll add a section in the table later but for now I needed somewhere to store it. I got some ally channel and laid it on the floor so that the table would sit it in and made a thingy to go on the barrier upright for it to slot into so it doesn't fall over. What this does is replicated the divider on the other side so we cam ram stuff in there and it not get caught in the fridge mechanism.
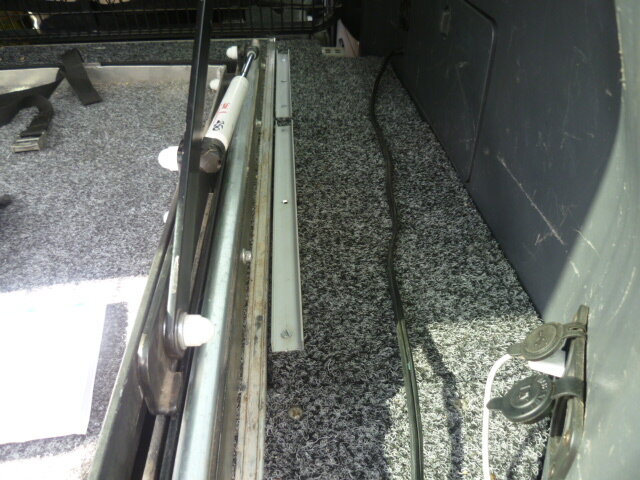
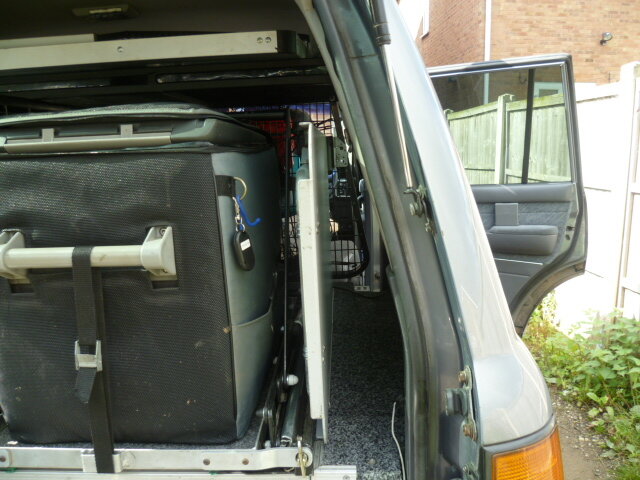
Table runner.JPG

Table in.JPG

Right, slight diversion there. Back to the main install today. Water.

I secured the heat exchanger under the driver's seat. It's a really good fit and I used some rubber riv nuts to fasten it in place. The heater hoses were already plumbed in.
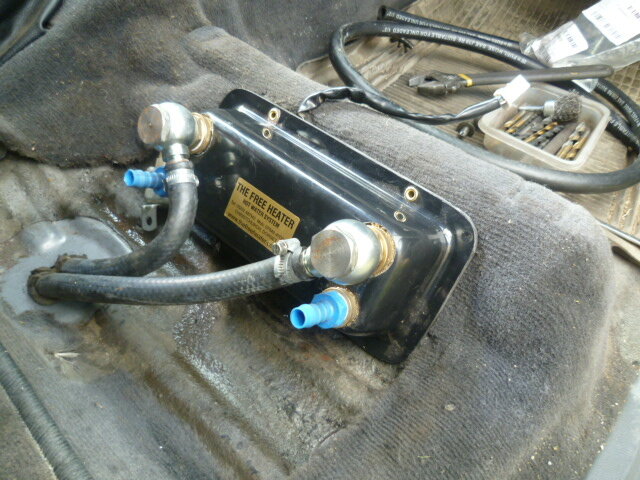
Exchanger 1.JPG

I bought some new food grade reinforced water hose yesterday. I wasn't sure that water sitting in the rubber heater hose would be a good idea. This stuff was easier to work with as well.
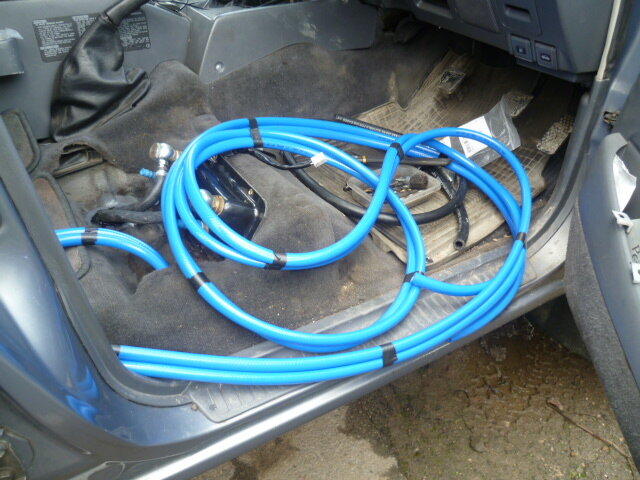
Hose.JPG

P1010588.JPG

I connected that up to length and ran the rest across the barrier. Should stop it from freezing in the Winter.
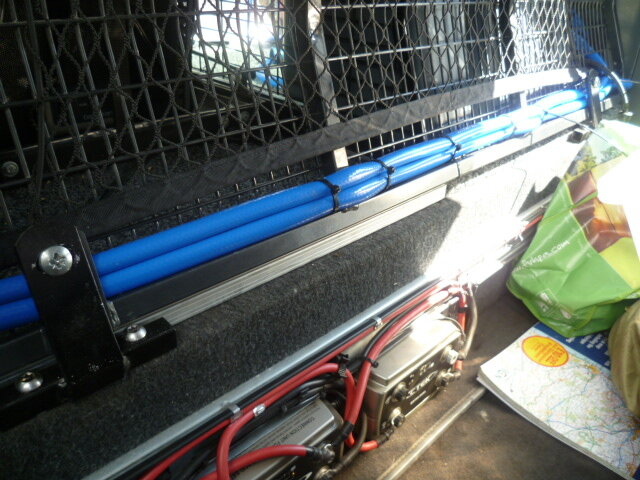
Laid hoses.JPG

Here's the water tank finally in place
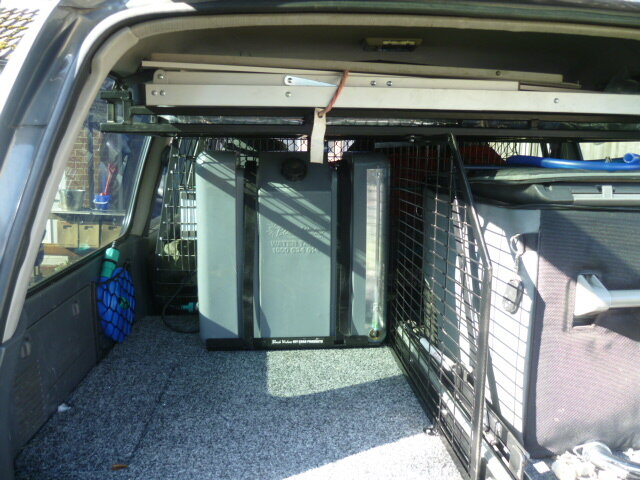
Adjacent tank.JPG

And the new water gauge. Which is not going to get ripped off or knocked, banged and broken. OK?
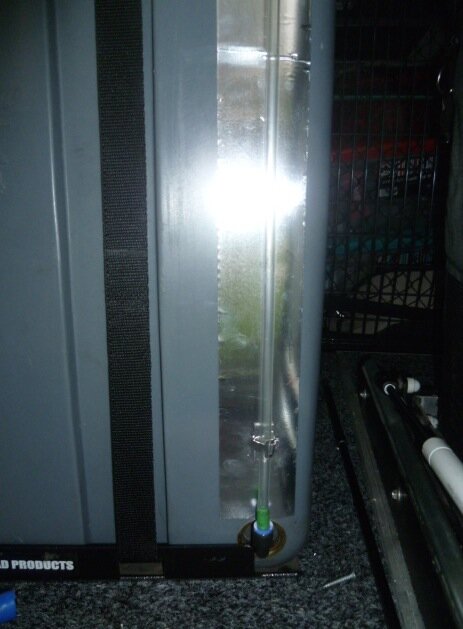
Gauge 2.jpg

I put together a filler point. There's a valve to isolate it and a snap connector for filling. OK as the tank fills, the pressure of the mains tap is only just enough to fill it to the top. But if I had some lower pressure mains somewhere in the world, I can just drop the hose in the top. This is just a bit more swish.
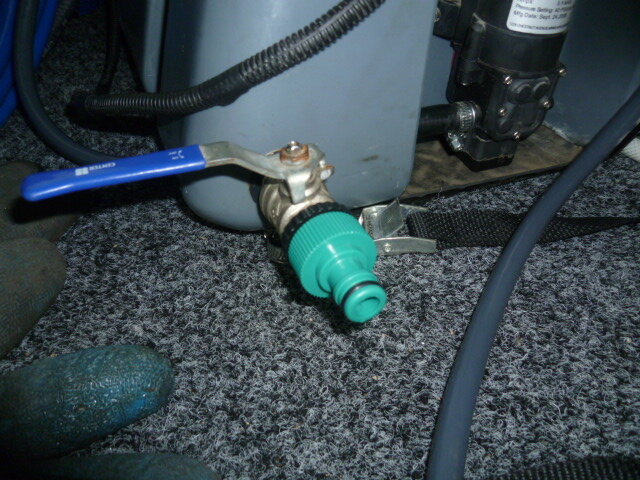
Fill point.JPG

I put this map pocket here and found it was perfect for putting the roll flat hose in. Awesome!
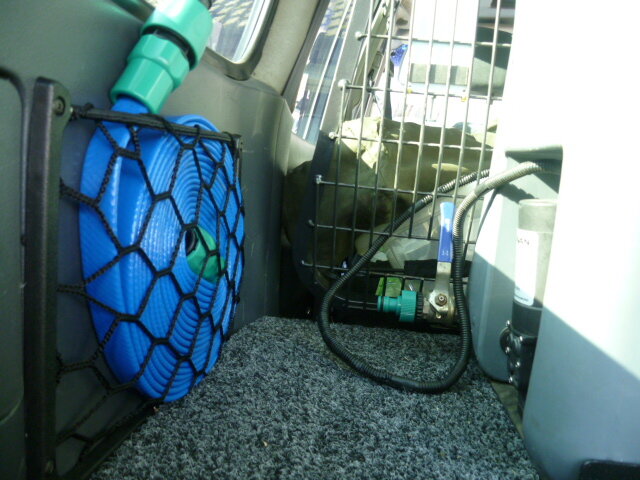
Hose store.JPG

Now I don't have a tap set up yet and I'm considering where to put that so currently it just ends in plain hose. I did a water test yesterday and yes, it really does make hot water. As I won't be drinking this water, I have decided to have it both hot and cold in one tap rather than a mixer tap.

For those who like little shiny baubles, I had to make up a joiner to go from the 1/2" hose to the slightly smaller pump fitting. Yes, it's aluminium not steel.

Joiner.JPG

So, when the Grand Prix is finished, I shall go and fill the tank, run the engine and see what it does.
 
Looking good in there.
Water level tube looks a bit exposed to me :whistle: :laughing-rolling:
 
Bloody good days work there Chris. If i could ask what size rivnuts did you use on the aux tank? M10 rings a bell but not 100% sure. I know you said you would make another plan but seen as i still don't have my metal joining machine yet its about the only option for me.

Oh and you mentioned purchasing 10m of hose if you have any left over you don't need happy to buy it off you.

EDIT: Would these do the job instead of the rivnuts?
http://www.metrofixings.co.uk/main/...iJYa4--_rZIhLXd9zxygnA0igFdwmP9Rr0RoCWzfw_wcB
 
Last edited:
Back
Top