Don't like the adverts?  Click here to remove them

LJ78 Build Thread

Looks good as always Ben.

Glad that you've found the solution to the Top Tether challenge - it'll make it much easier for transporting Sam. I found one in the boot floor of the 4Runner a while ago when I was doing some stuff to it.
 
Nice work Ben, looks very neat and professional
 
Good progress Ben. I too have utilised ally for the drawer sides but combined with ply front, base and rear. But then I've got my custom runners underneath as they only then take up one lot of space.
 
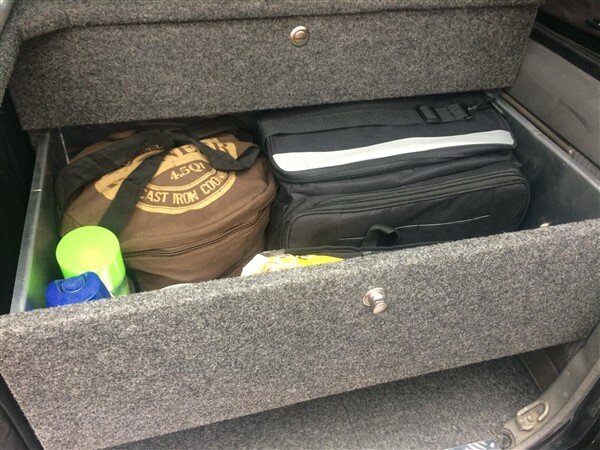
Nice work on the drawers, I like the bags for cooking items, been trying to store stuff more efficiently in mine and might look into that.
 
Yeah, i too found out that the factory 4.88 diffs have a thinner ring gear when i tore mine apart and it wouldn't go back together with the new 5.29 gears.. Solution in my case was a V6 casing, much much larger bearings.. But! This only applies to the rear, front high pinions is fine, was a brease installin the 5.29's there!

In your case though, get a shim made to make up for the thinner ring gear..
 
Thanks guys. :thumbup:

Yeah, i too found out that the factory 4.88 diffs have a thinner ring gear when i tore mine apart and it wouldn't go back together with the new 5.29 gears.. Solution in my case was a V6 casing, much much larger bearings.. But! This only applies to the rear, front high pinions is fine, was a brease installin the 5.29's there!

In your case though, get a shim made to make up for the thinner ring gear..

Yeah its a real pain! :thumbdown:

I'm trying to source 4:8 ratio gears for a KZJ70, but its looking like I will have to source them from the US. :shifty:

I want to try and avoid using the thinner 4:8 gears because they must be weaker, being so much thinner! :think:
 
Don't like the adverts?  Click here to remove them
image.jpg
image.jpg
image.jpg
image.jpg
image.jpg
image.jpg
image.jpg
I like your cast iron pots&pans.I have just started using ours again and they are beauty.the weather in both our countries is unreliable now,hot and bloody wet,flooding all over the place.it's affecting our firewood gathering and tractor
Work on the property.a few photos of our first house? And some tree felling.
My toolkit always carries some no 8 wire and fencing pliers,great in an emergency.
 
  • Like
Reactions: Ben
Thanks guys. :thumbup:


Yeah its a real pain! :thumbdown:

I'm trying to source 4:8 ratio gears for a KZJ70, but its looking like I will have to source them from the US. :shifty:

I want to try and avoid using the thinner 4:8 gears because they must be weaker, being so much thinner! :think:

I dont know really.. I've put my 30 year old gears through ALOT of shit, and all that has gone bad was 2 teeth that the very tip broke off on the crown-wheel..
 
  • Like
Reactions: Ben
A small update.................

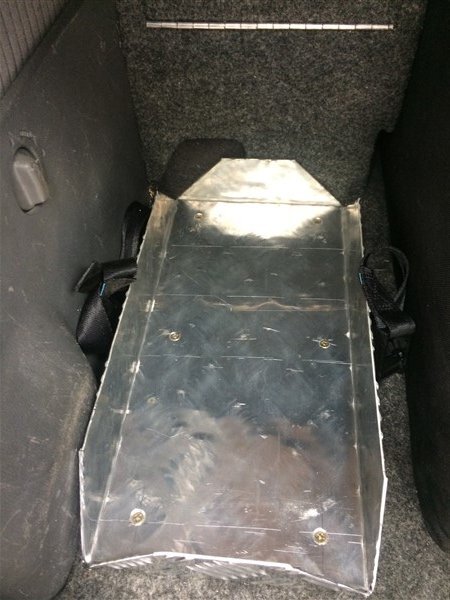
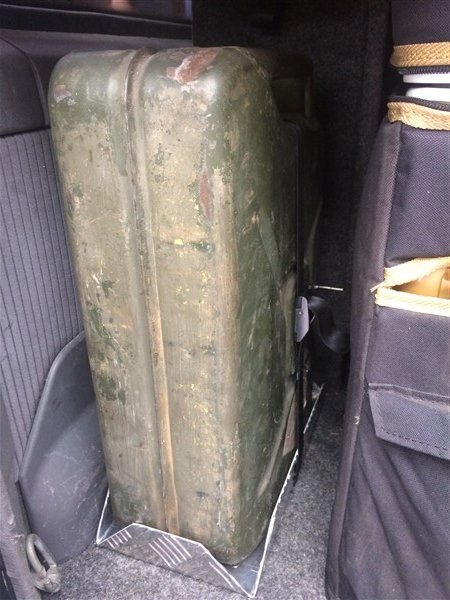
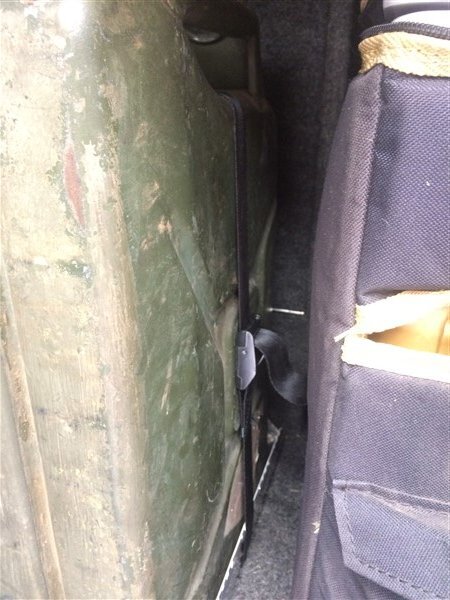
I added a strap to secure the jerry can in its mount and screwed the mount into position.

IMG_6202.jpg

IMG_6203.jpg

IMG_6204.jpg

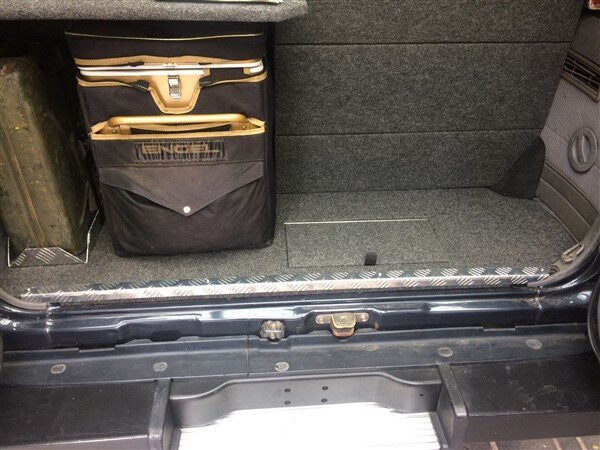
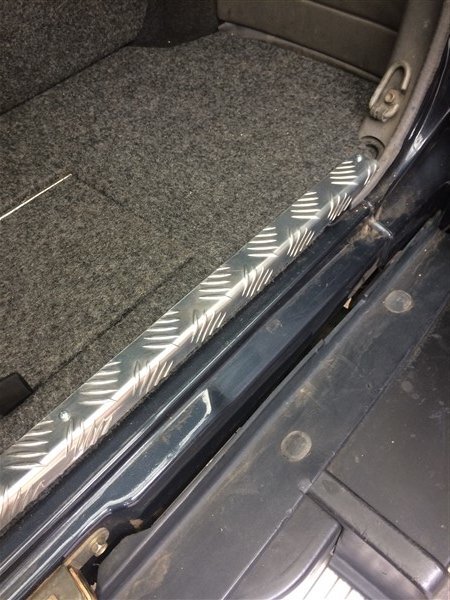
And I screwed the piece of checker plate down along the edge of the false floor.

IMG_6205.jpg

IMG_6206.jpg

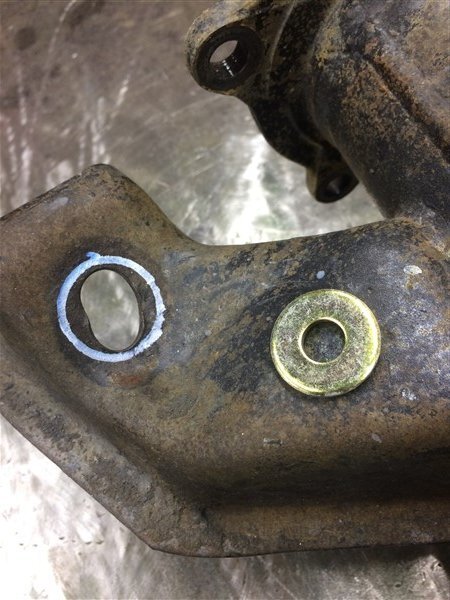
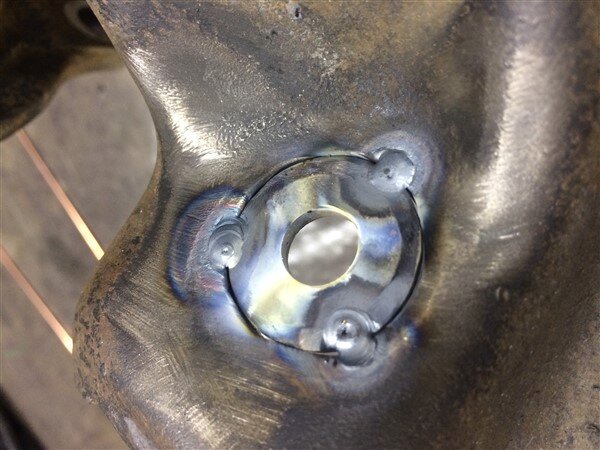
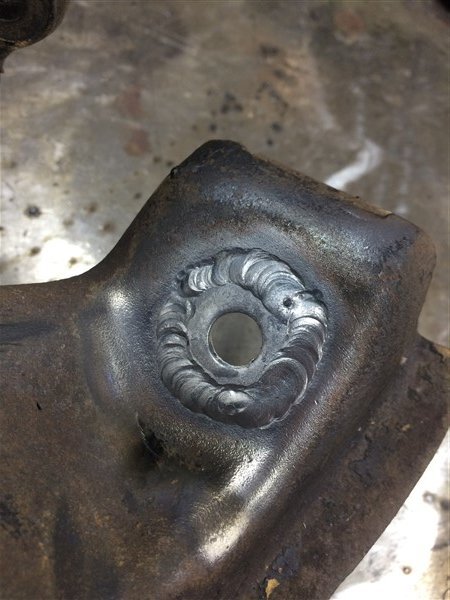
I repaired the flogged out bottom shock mounting holes on the KZJ78 rear axle.

Marked what needed removing for the repair washers to be welded in.

IMG_6215.jpg

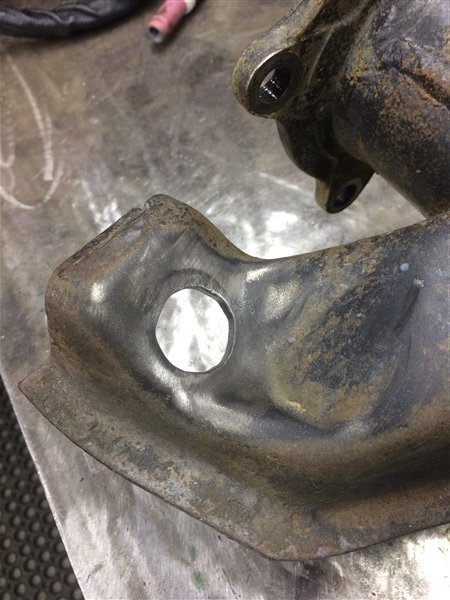
Die-ground the holes out.

IMG_6216.jpg

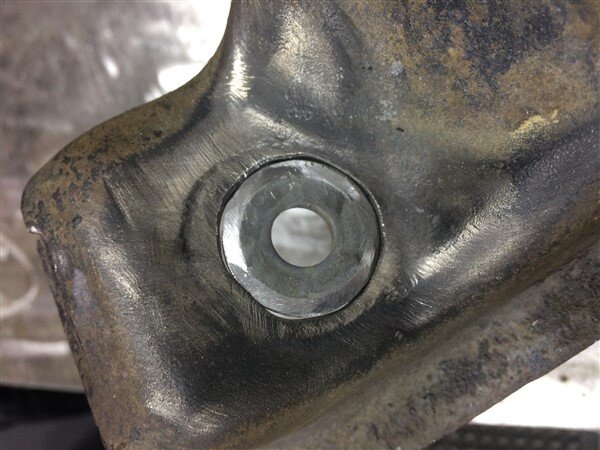
And tapped the washers into place.

IMG_6217.jpg

Then TIG welded them into the axle.

Few tacks first.

IMG_6218.jpg

Followed by a full weld.

IMG_6220.jpg

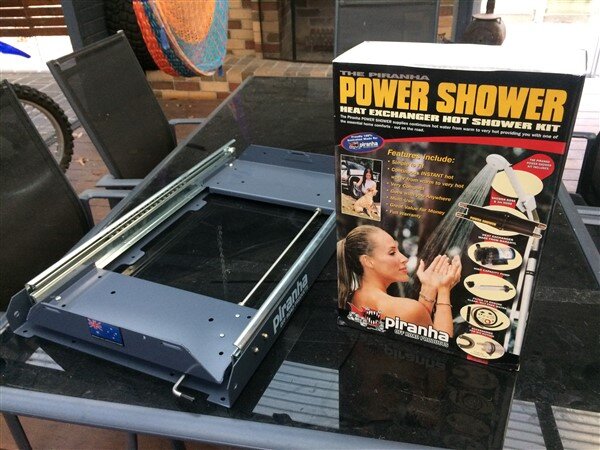
I picked up some goodies from work! :dance:

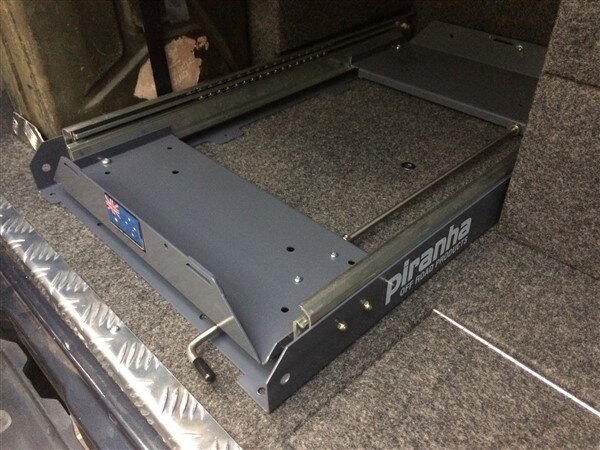
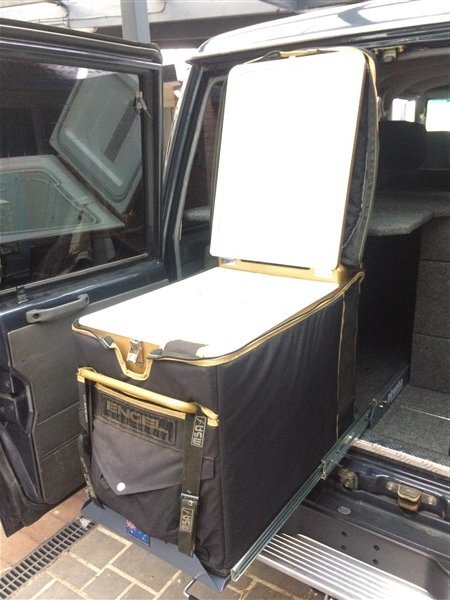
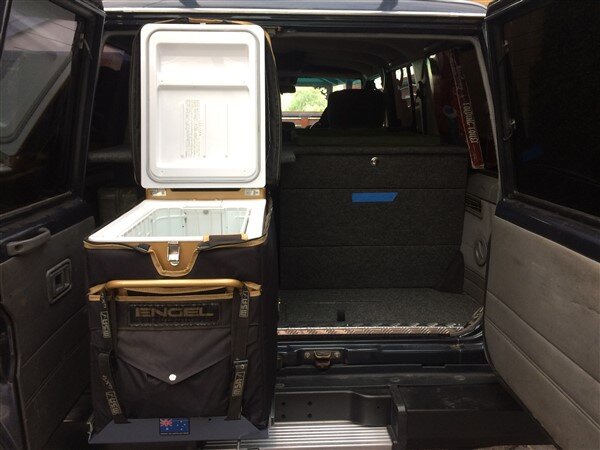
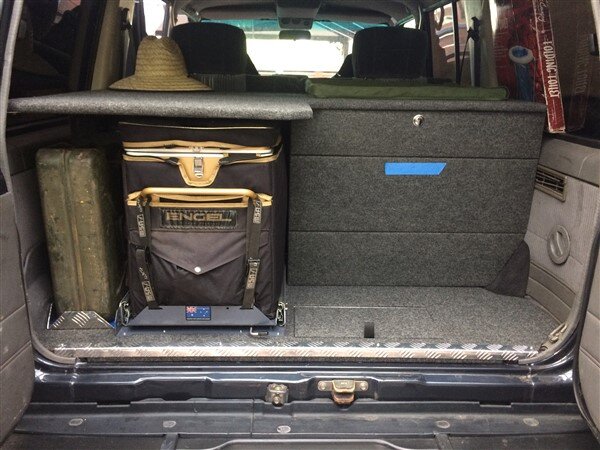
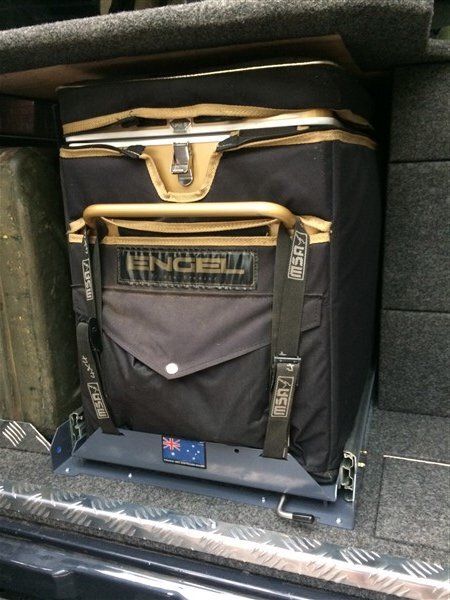
A 40 litre fridge slide and a power shower. :icon-cool:

IMG_6282.jpg

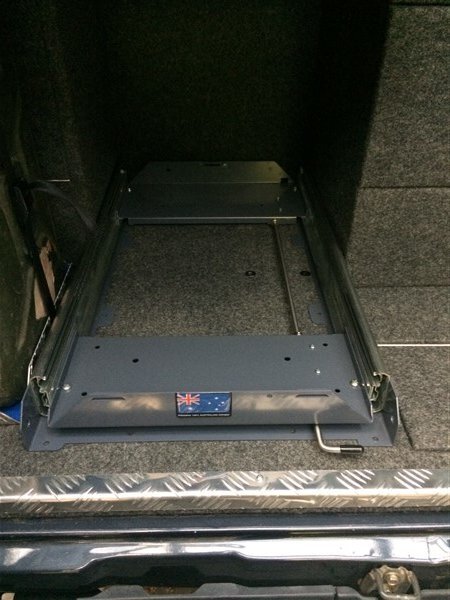
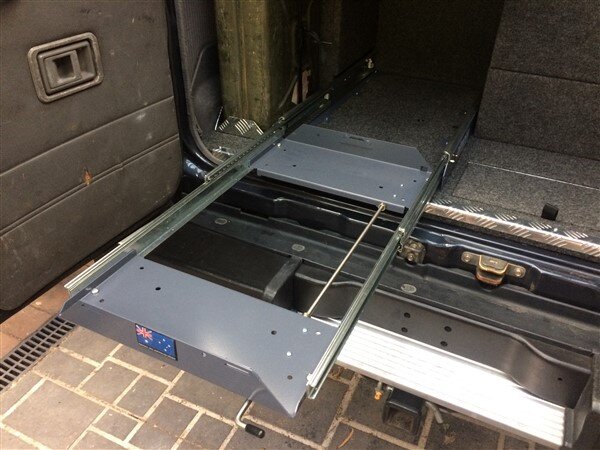
The fridge slide fitted perfectly into the hole.

IMG_6283.jpg

IMG_6285.jpg

IMG_6284.jpg

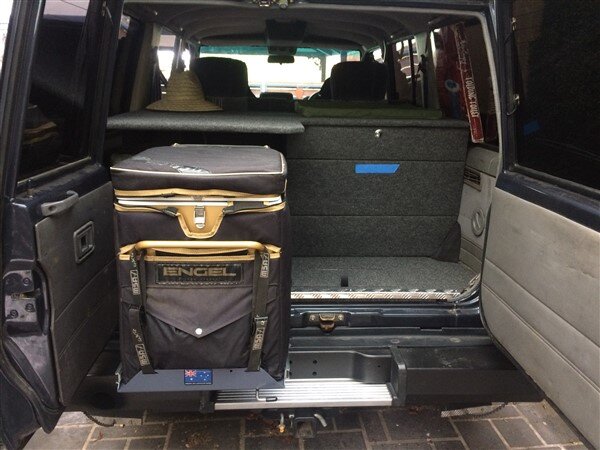
I screwed it down into position.

IMG_6286.jpg

IMG_6293.jpg

IMG_6294.jpg

IMG_6295.jpg IMG_6296.jpg

IMG_6297.jpg

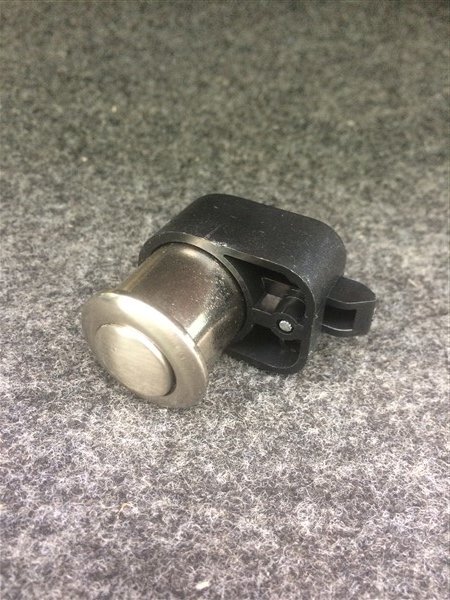
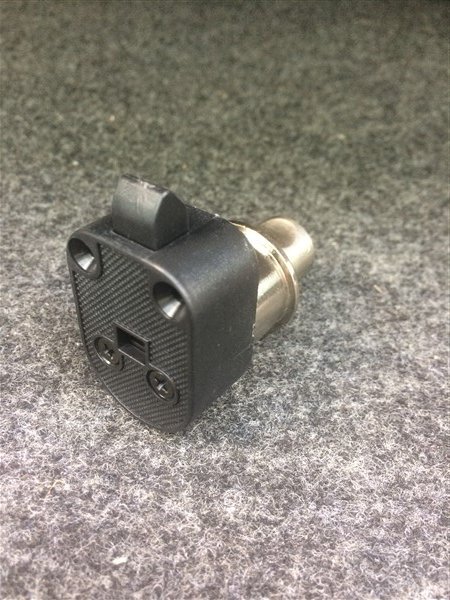
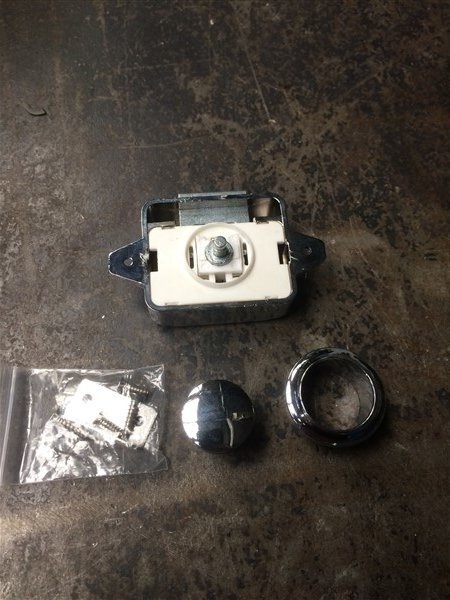
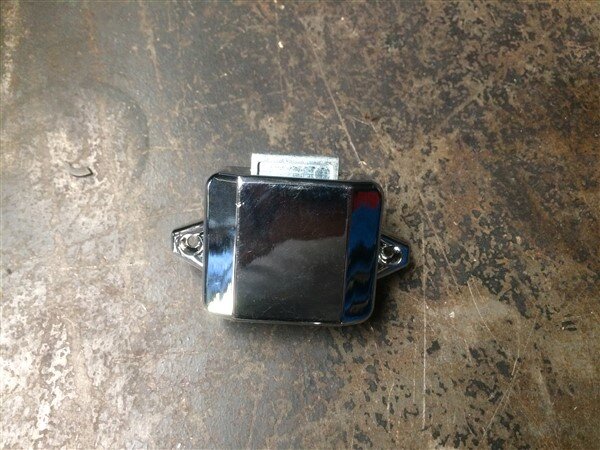
My drawer latches arrived from China.

IMG_6229.jpg

IMG_6230.jpg

I wasnt hugely impressed with the quality of them! They were super cheap but the ebay listing said they are metal, when the casing and knob is in fact plastic. :icon-rolleyes:

I decided to give them a go anyway.

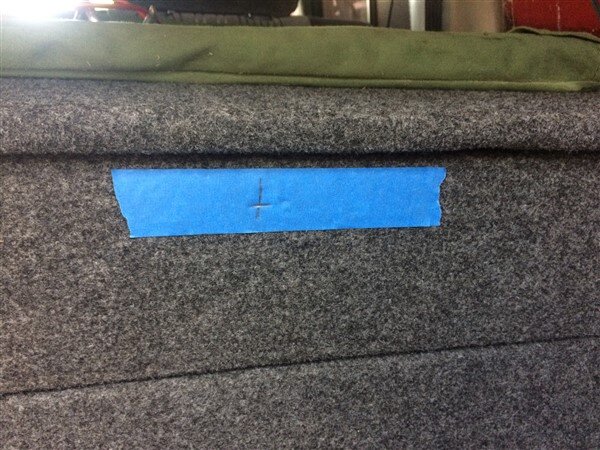
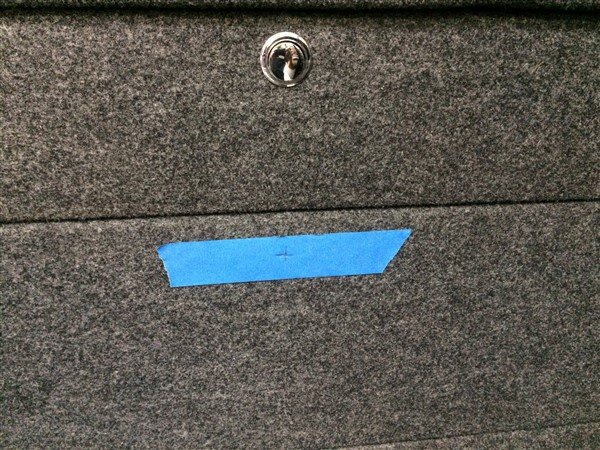
Marked where to drill the hole.

IMG_6231.jpg

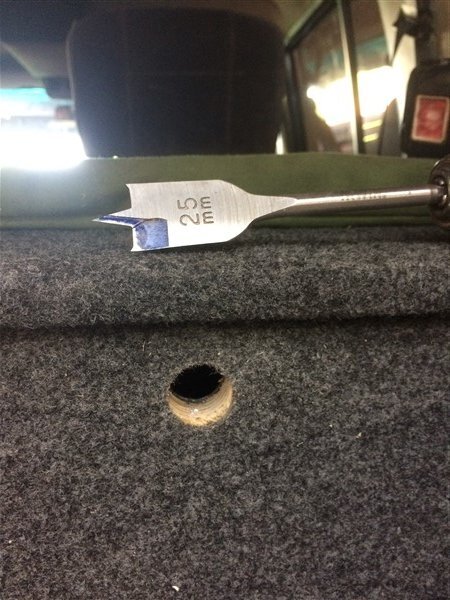
And drilled it out.

IMG_6232.jpg

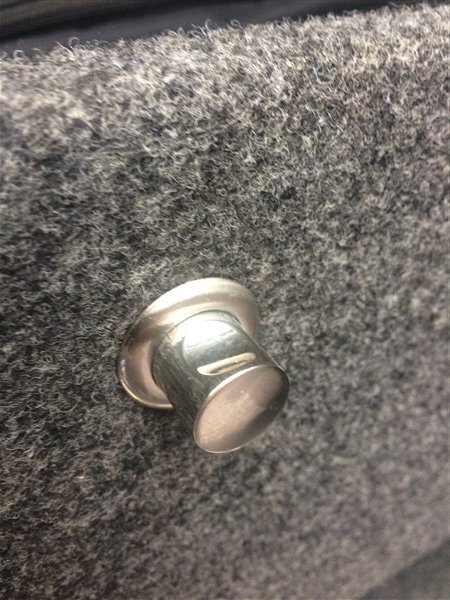
And screwed the lock on.

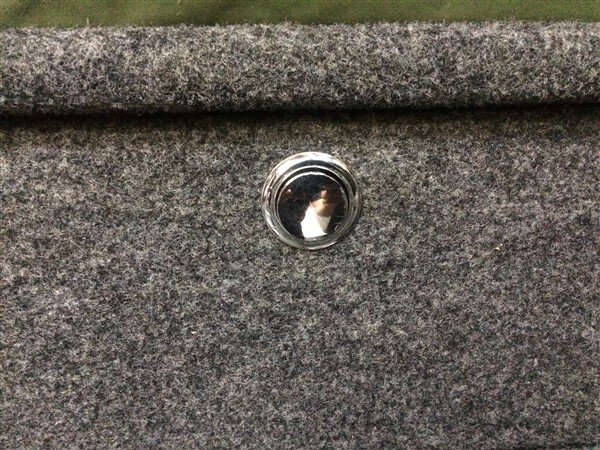
Knob in is the lock position.

IMG_6287.jpg

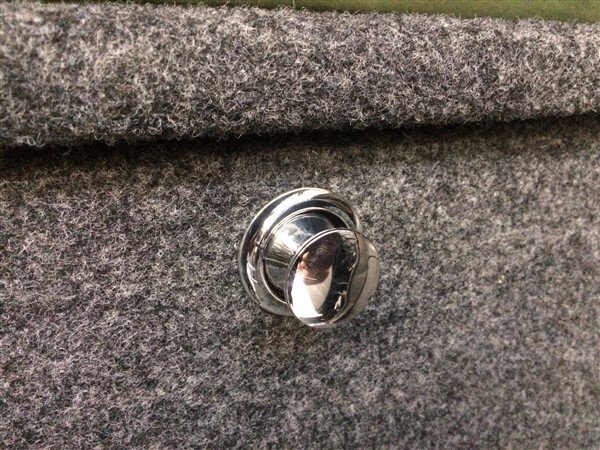
Then when pressed it pops out, unlocks and the knob can be used to open the drawer with.

IMG_6288.jpg

IMG_6289.jpg

I marked the second hole but decided against drilling the hole and fitting it as Im just not happy with the lock.

IMG_6292.jpg

I've ordered a much better quality one from a place in Australia who sell caravan/campervan fittings.

It will fit and mount through the same hole I put in the first drawer and if it proves to be as good as I suspect it will I will order another 2. :shifty:

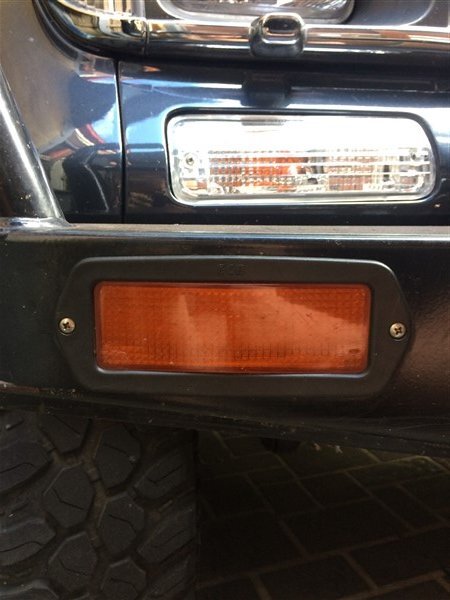
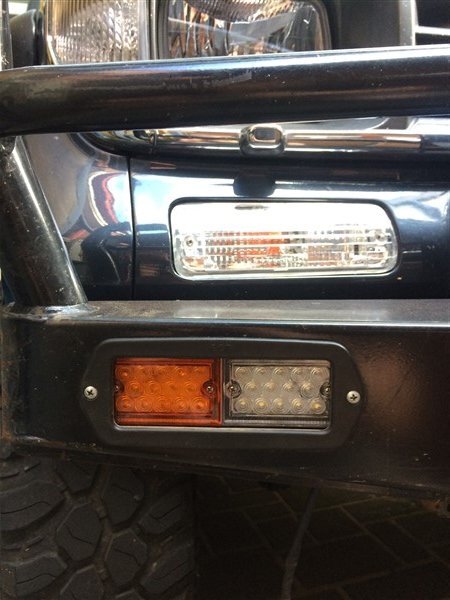
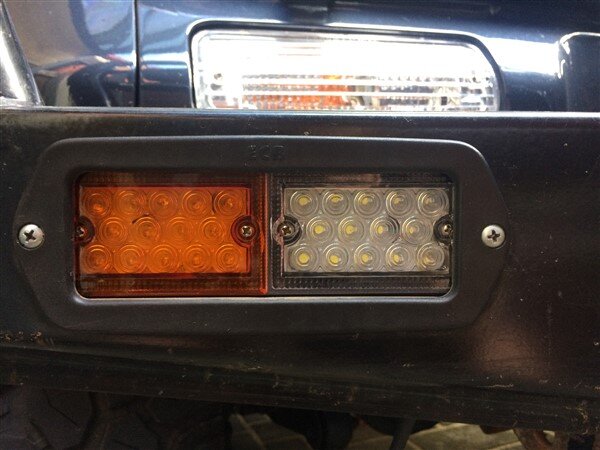
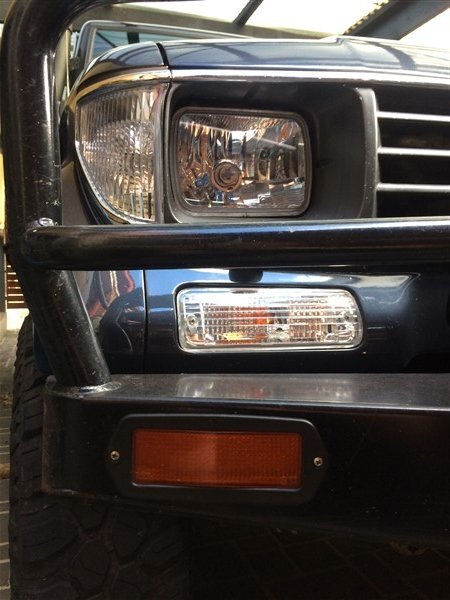
I wasnt happy with the indicators in the bullbar as they looked quite dated.

IMG_6298.jpg

IMG_6299.jpg

So I changed them for LED side light and indicator ones.

IMG_6300.jpg

IMG_6301.jpg

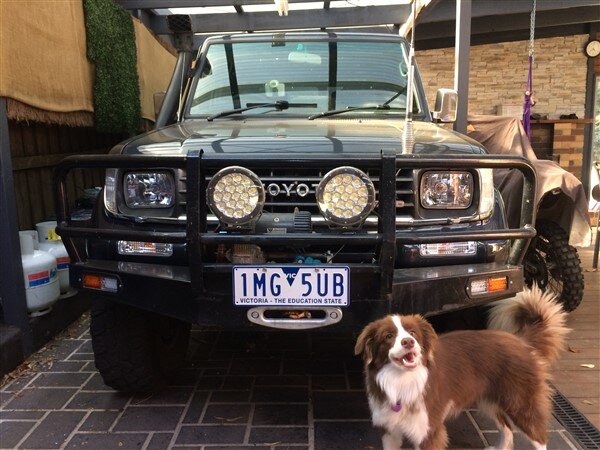
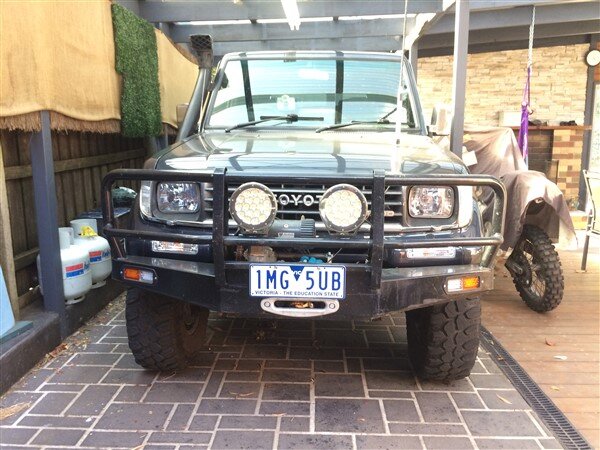
Then with my QLD registration running out next week, I registered it in Victoria and got new number plates.

I just paid for 6 months as I'm hoping within the next 6 months to get this on club/historic reg. :icon-cool:

IMG_6302.jpg

Lexi approved.

IMG_6304.jpg

IMG_6307.jpg

I still havent got the replacement ring and pinion so the rear diff is still no closer to being fixed. :thumbdown:

Hoping to get one ASAP. :pray:

Thinking I will buy the alluminium tube and mesh next week and build the load barrier. :icon-cool:

6 weeks to go until its maiden High Country trip, so I should still be able to get everything done ready for the trip. :think:

Then work on this one should almost come to an end and this vehicle can start being used regularly for trips and camping and I can concentrate on getting my LJ70 finished. :icon-biggrin:
 
I hope you have more luck than me with the LED side/indicator lamps Ben.

Mine worked fine for a year. Now the side-light on one side has stopped working :icon-rolleyes:

I’ve checked the wiring connections and all is well, but still no joy.

Looks like I’ll be ordering another pair to replace them.

Problem is, you by cheap and get cheap, and IME, when you buy expensive, you still get cheap. :lol:
 
Last edited:
Thanks Clive, so far so good. :thumbup:
 
Last week was a busy week for me working on this project. :sleeping-sleep:

I can only use the workshop at work for 20 minutes each day before work, 20 minutes at lunch time each day and 5-10 minutes each day after work. Oh and Thursday night for 4 hours. :think:

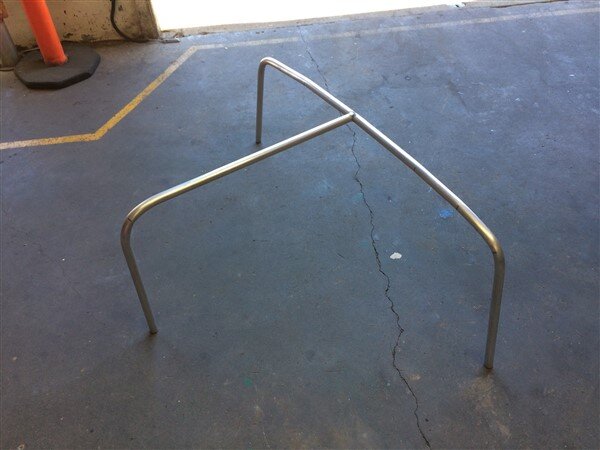
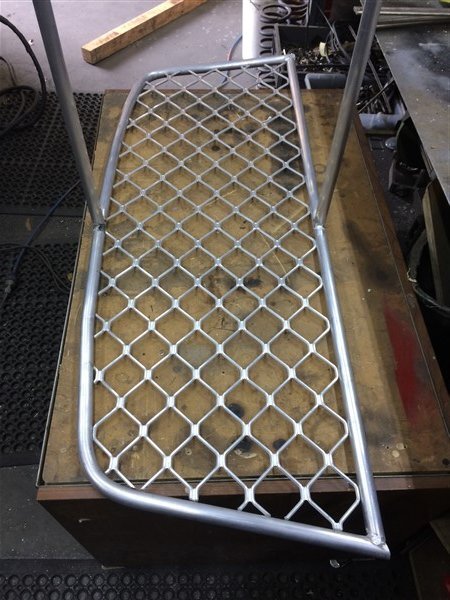
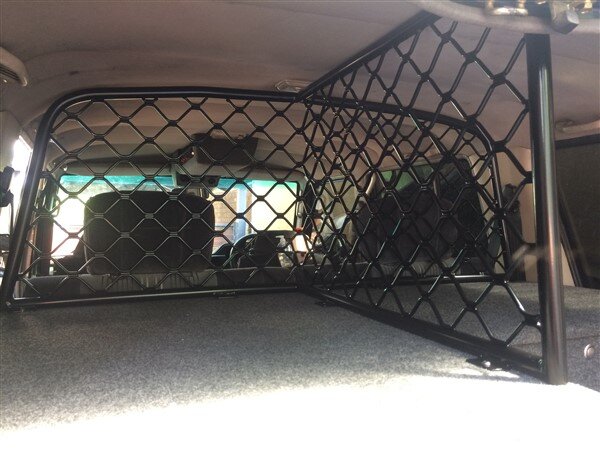
So this week I used all that time to make the super light weight, load barrier. :icon-cool:

But first I had a little delivery.............

The new drawer latch arrived (I only ordered 1 as I wanted to check the quality before ordering more, they were coming from an Australian supplier anyway so postage was super quick, but being an Aussie supplier the cost was 3x what I would pay ordering them myself from China) :|

Unlocked position.

IMG_6315.jpg

Locked position.

IMG_6316.jpg

Rear view.

IMG_6317.jpg

Much better quality and I think they will be perfect for my build! :clap:

So I ordered 2 more. :shifty:

OK...............

The main project this week! :icon-cool:

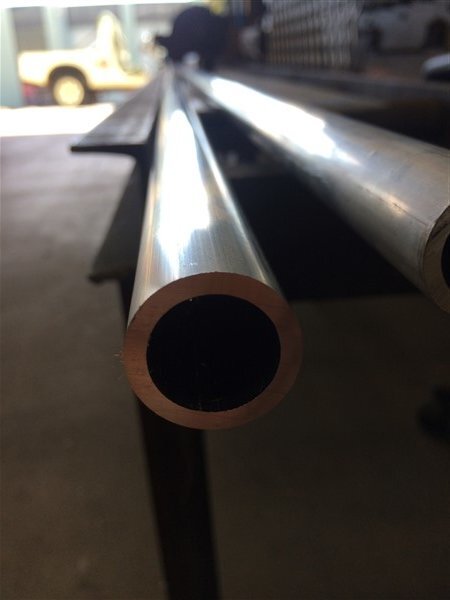
Monday lunch time I borrowed the 60 series and picked up a sheet of alluminium mesh and a 6 meter length of 25mm x 3mm tube.

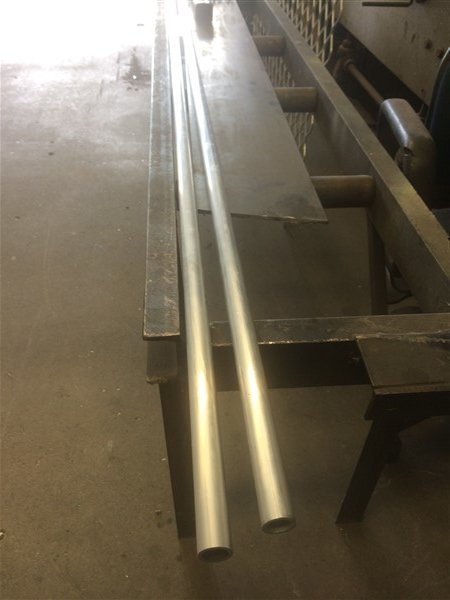
IMG_6318.jpg

IMG_6319.jpg

IMG_6320.jpg

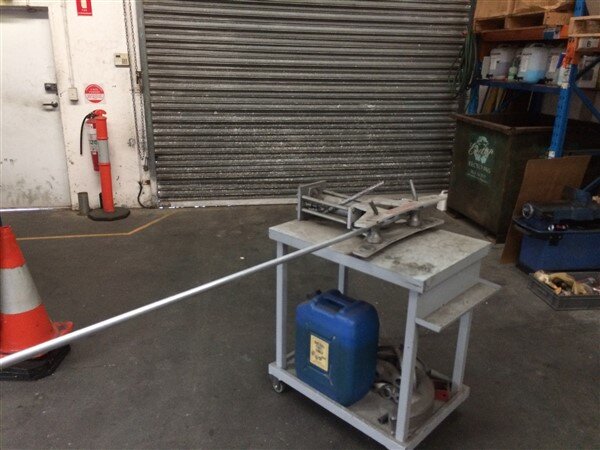
And the next morning before work I began bending the tube.

I wasnt sure how well it would bend in this bender, but hoped that by going for a thick wall it wouldnt kink, which it didnt! :icon-biggrin:

IMG_6323.jpg

IMG_6325.jpg

By 8am when it was time to officially start work the main hoop was bent.
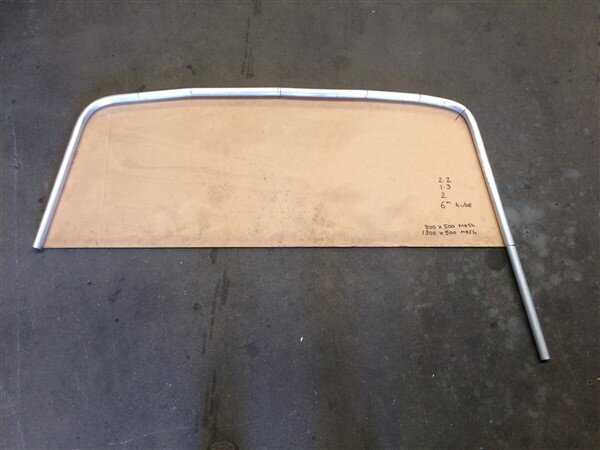
IMG_6326.jpg

At lunch time I bent the next section up.

IMG_6327.jpg

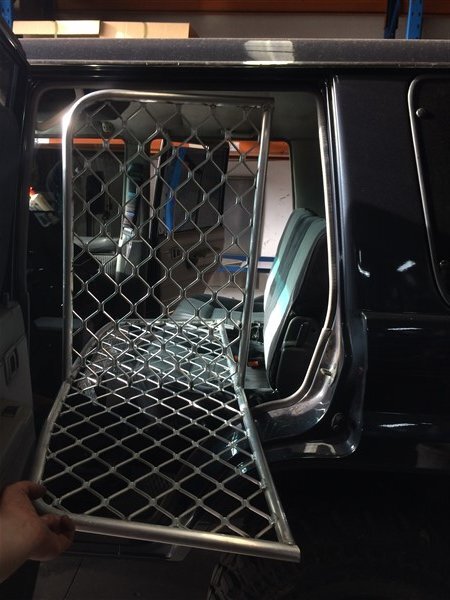
Initially I thought I might have to make it in 2 sections so it would fit in the car, but decided to have a go at getting it in in one section.

So I tack welded the 2 parts together.
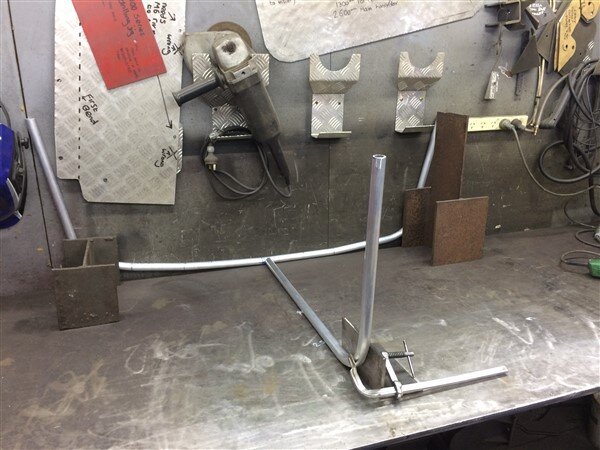
IMG_6328.jpg

IMG_6330.jpg

Tried it in the car.

IMG_6331.jpg

IMG_6332.jpg
IMG_6333.jpg

Perfect! :dance:

IMG_6334.jpg

Back onto the bench to add more tube.
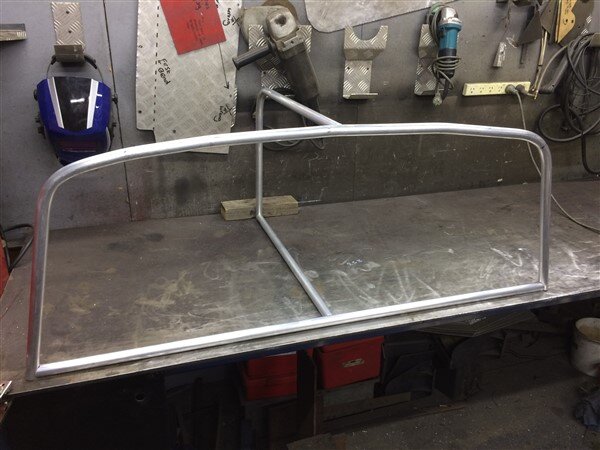
IMG_6337.jpg

I did these sexy notches on the mitre saw by cutting 2 x 45 degree cuts to basically form a point and then just grinding a little bit out on the flats of the mitres.
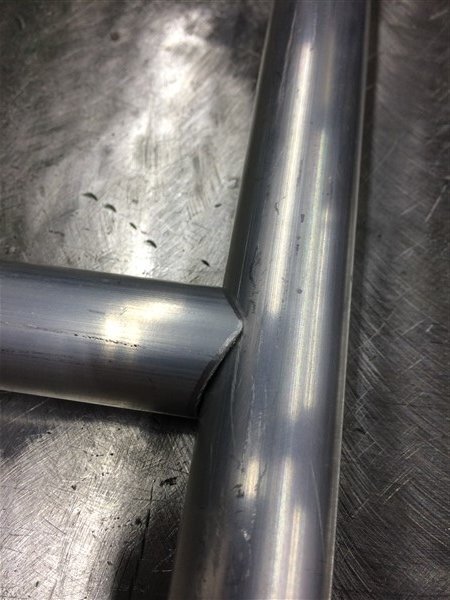
IMG_6338.jpg

Mesh next!

The mesh was the trickiest part of the whole job as I had to keep taking a little off at a time until it just fit snugly into the hoop.

I also had to make sure that the middle point where the other mesh would join to it was in the correct position so it would all line up beautifully. :think:

IMG_6339.jpg

IMG_6340.jpg

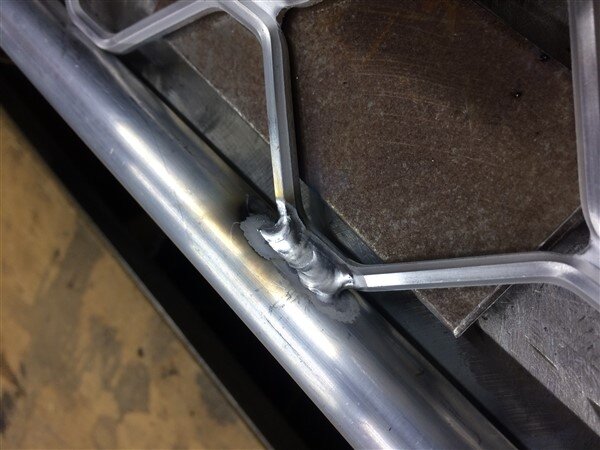
With that cut and pushed into position it was time to weld it.

Now as alluminium is such a ridiculously good conductor of heat, its always important to have it secured in position as it wants to start moving once you start welding, a lot more than steel ever would. :ugeek:

So I put 3 x pieces of 3mm sheet steel underneath it to pack it up 9mm to the center of the tube, then weighted the mesh down on these packing pieces to prevent it lifting with the heat. I also clamped the tube to the bench.
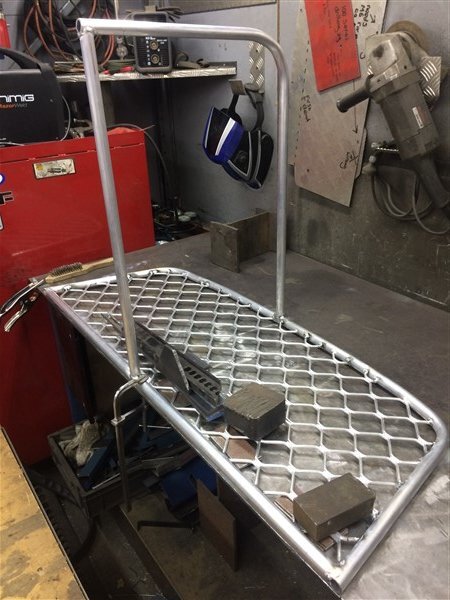
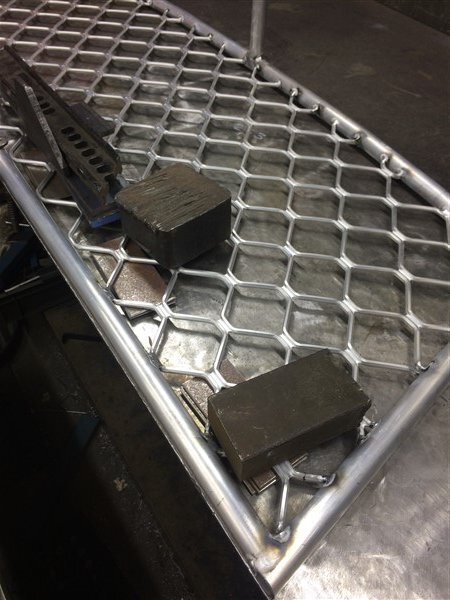
IMG_6363.jpg

IMG_6364.jpg

IMG_6365.jpg

And that side was soon welded, well one side of it anyway (I welded the other side later).
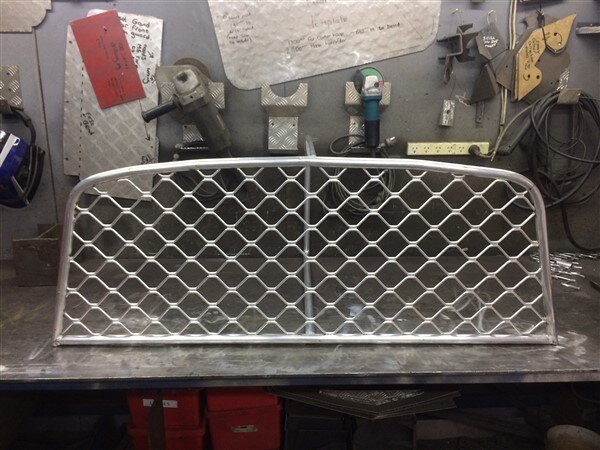
IMG_6370.jpg

And then it was time to cut and grind the other piece until it fitted.
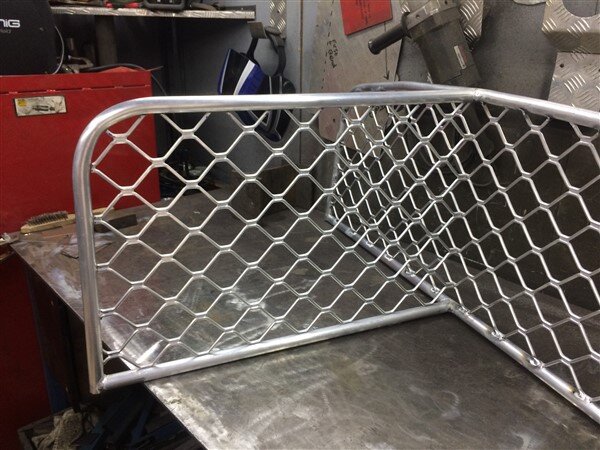
IMG_6371.jpg

This is what I meant when I said getting the first piece of mesh perfectly in the center of the hoop, so that the other piece of mesh would line up to it perfectly.
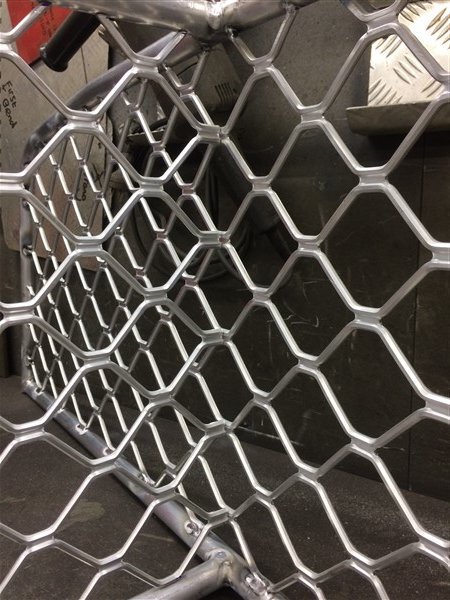
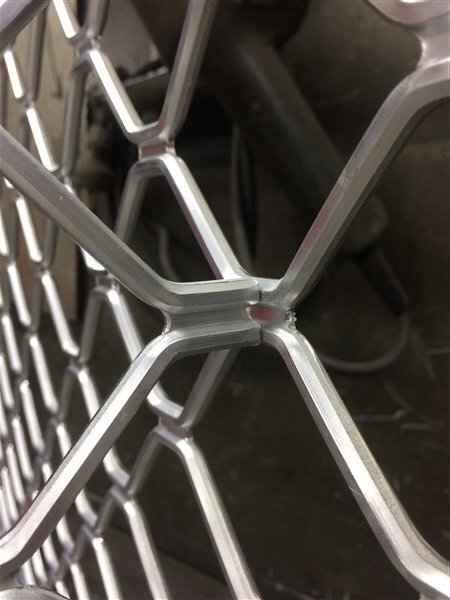
IMG_6372.jpg

IMG_6373.jpg

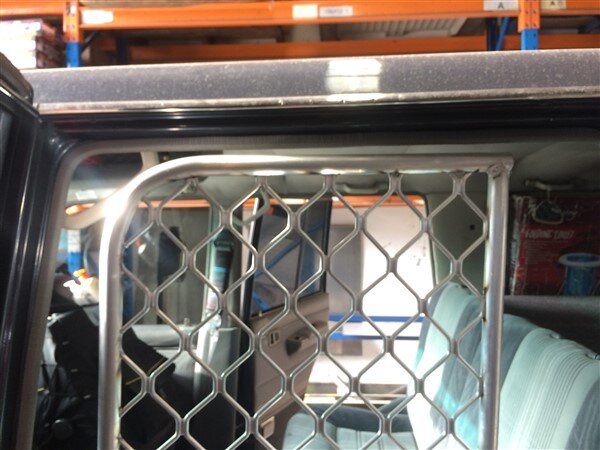
Then it was time to see if it would fit in the car. :pray:

Its bloody tight and only goes in one way and only just fits! :crazy:

IMG_6374.jpg

IMG_6375.jpg

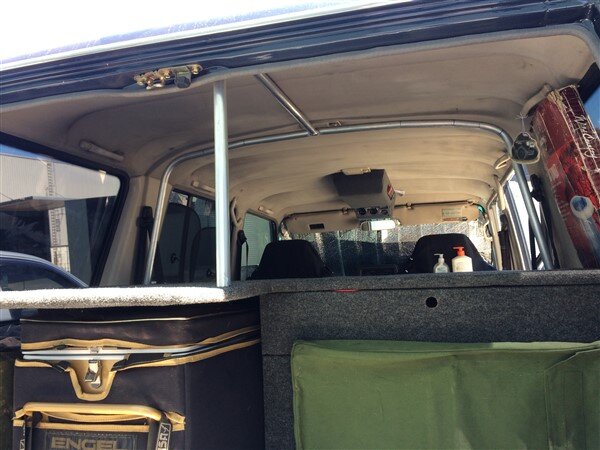
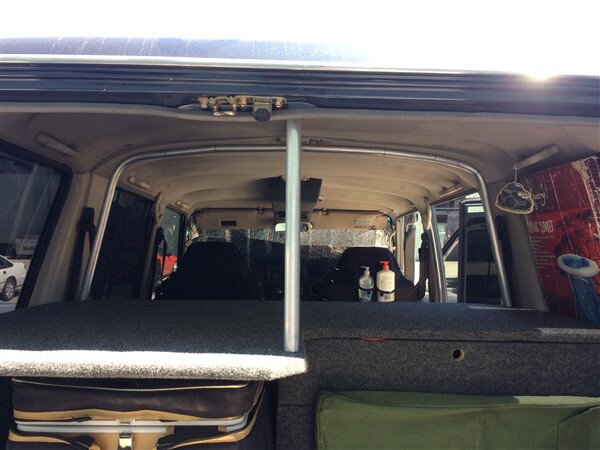
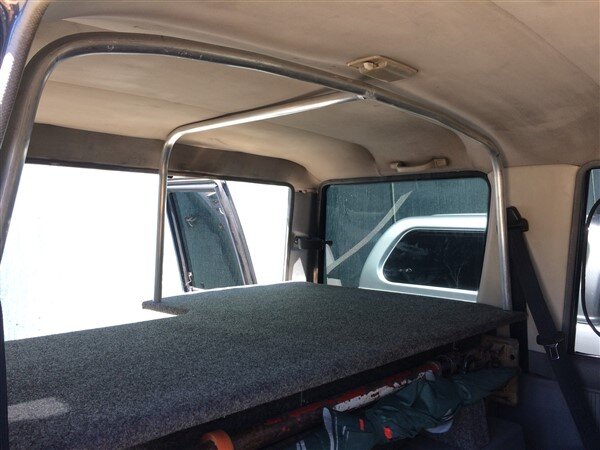
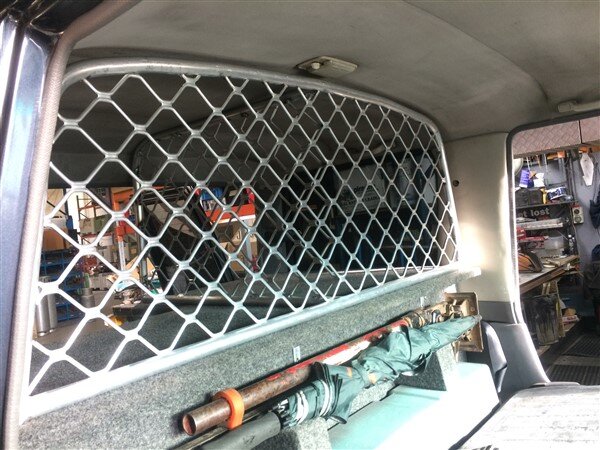
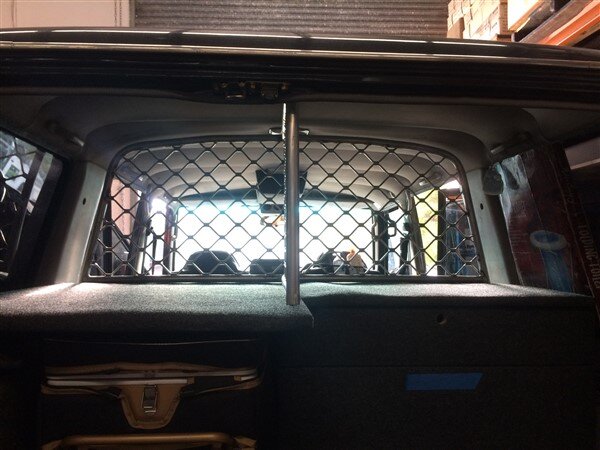
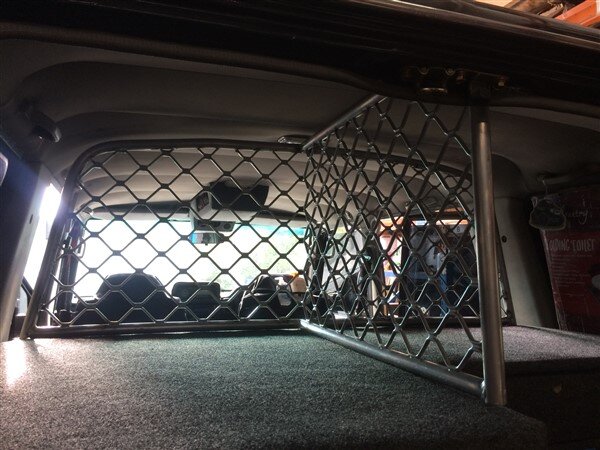
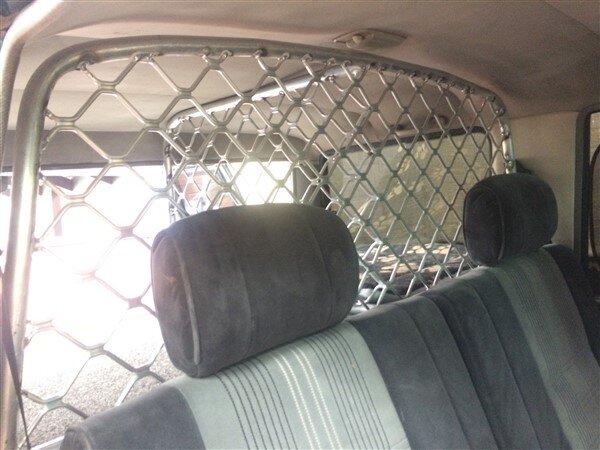
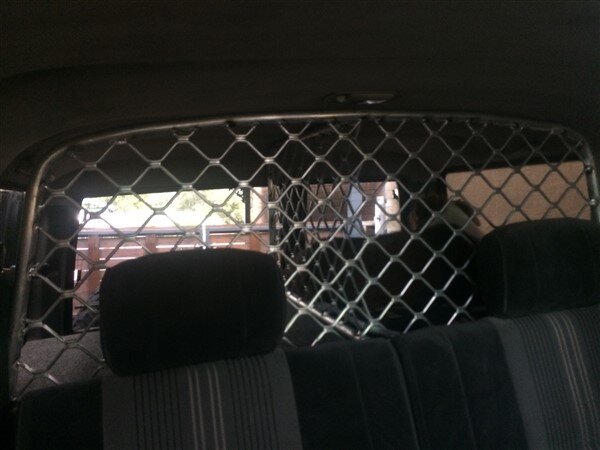
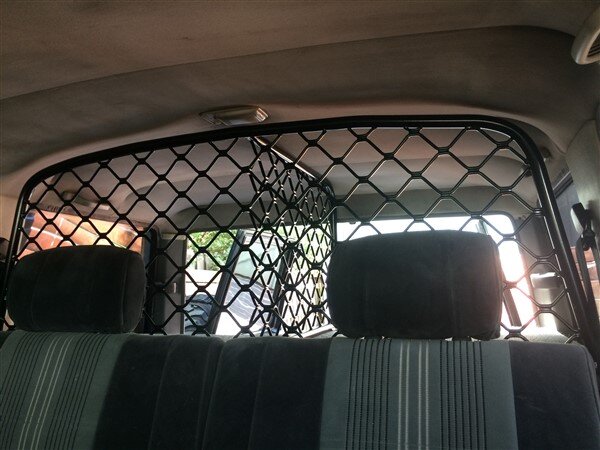
But once in the car it fits like a glove! :clap:

IMG_6376.jpg

IMG_6377.jpg

IMG_6378.jpg

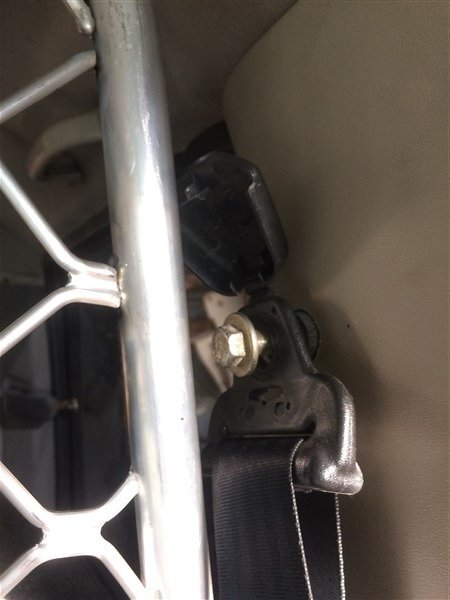
Initially I was thinking of picking up on these rear seat belt mounts, but I decided in the end that I didnt need to. With the barrier being the shape it is and what it will actually need to restrain (the dog one side and pillows, bedding and clothes on the other) I decided it would be over kill and add unnecessary complexity to the build.

Had it been a heavy steel load barrier like most load barriers and just a single wall without the return on it then it would have absolutely been necessary. :think:

IMG_6380.jpg

Next I cut some 50mm x 8mm alluminium flat bar into pieces to form the brackets to bolt the whole thing down.
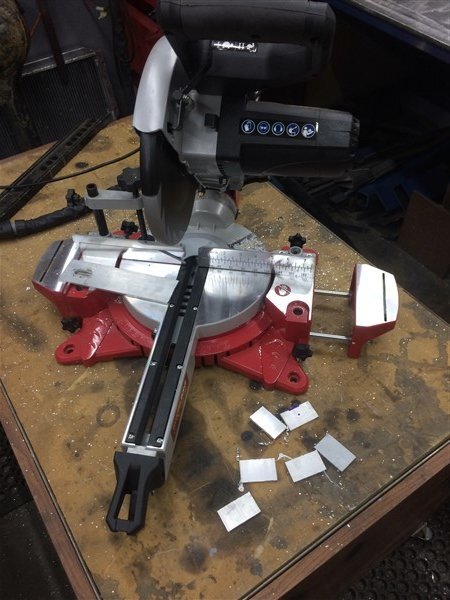
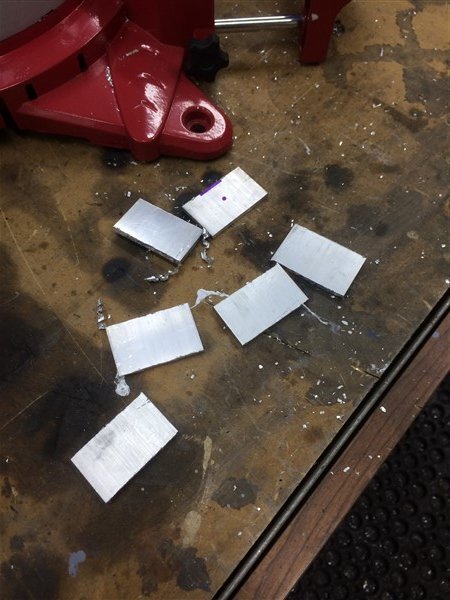
IMG_6381.jpg

IMG_6382.jpg

Drilled 6.5mm holes in them for M6 bolts.

IMG_6383.jpg

Clamped the barrier down to the bench and had to kneel behind it on the bench to weld it.

(In my ideal workshop I would have a large fabricating/welding bench with access on all 4 sides, as thats what I really needed in this instance. Only being able to clamp on the front edge of the bench was a real pain)
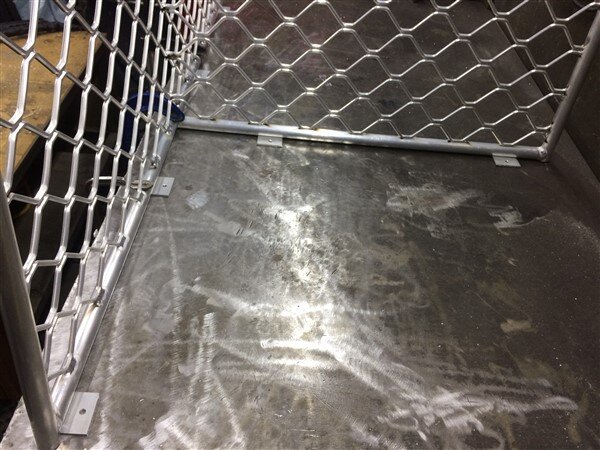
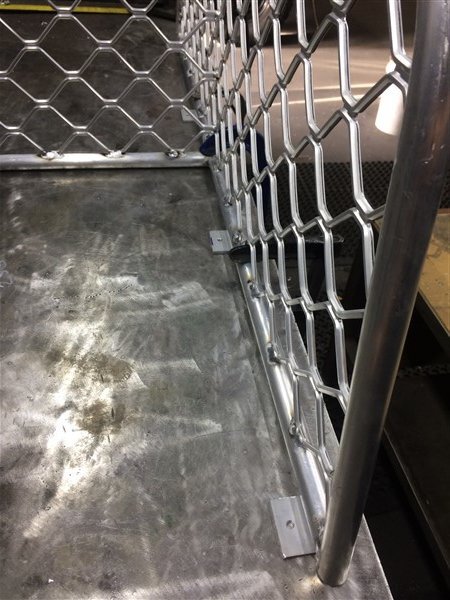
IMG_6384.jpg

IMG_6385.jpg

Right I've hit the pic limit again! :angry-screaming:

I will finish this update in a minute with the rest of the pics. ;)
 
Last edited:
I stayed back Thursday night and finally finished all the welding on it by 8pm! :sleeping-sleep:

I could then put it in the car and bring it home. :dance:

A few shots Friday morning in the light. :icon-cool:

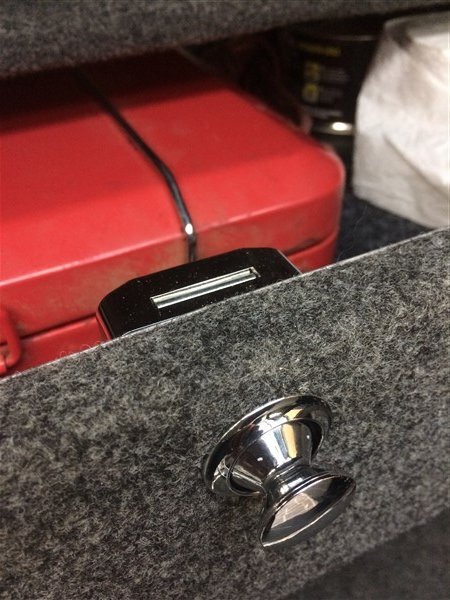
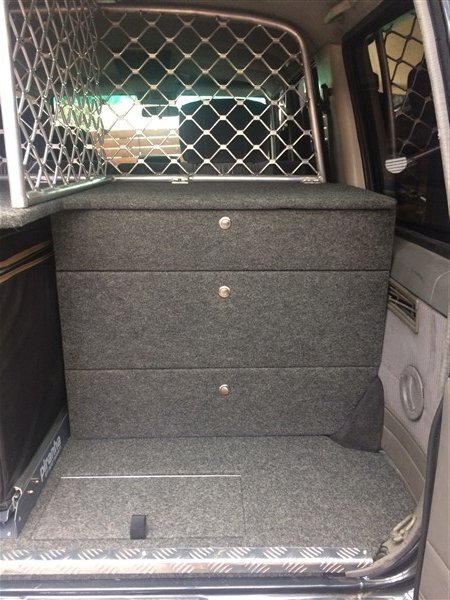
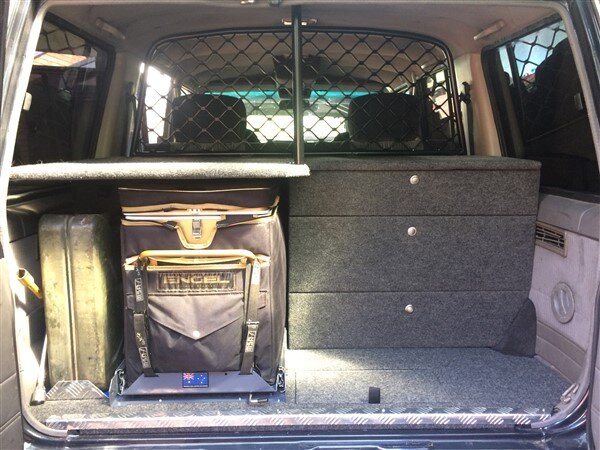
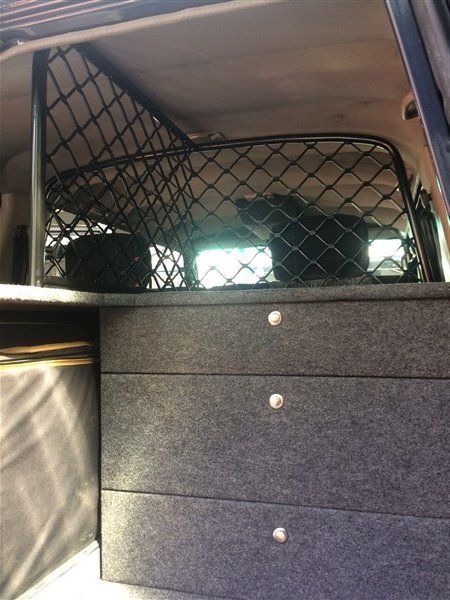
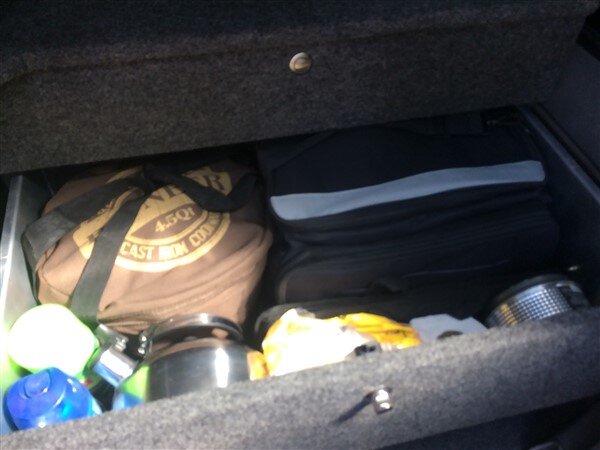
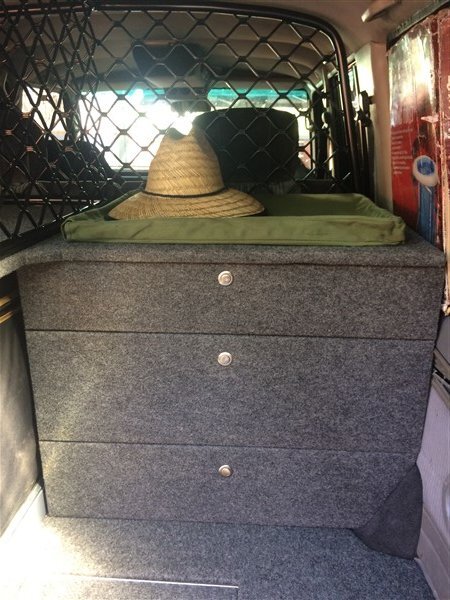
First the drawers which I had fitted all the new latches too. :icon-biggrin:

IMG_6390.jpg

IMG_6391.jpg

IMG_6392.jpg

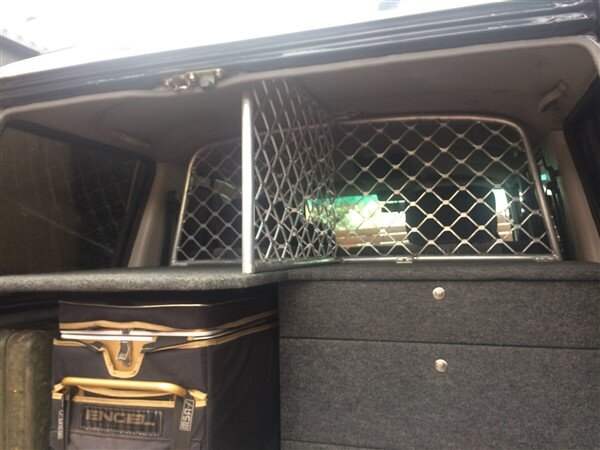
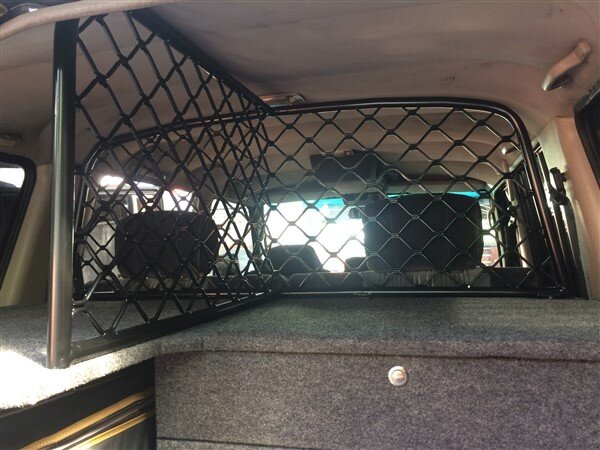
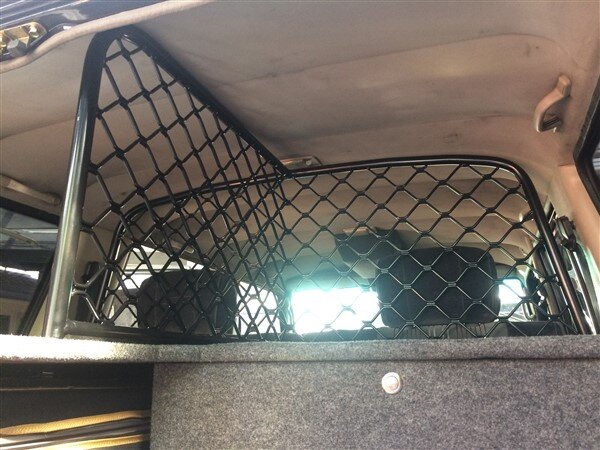
Load barrier next!

IMG_6388.jpg


IMG_6389.jpg

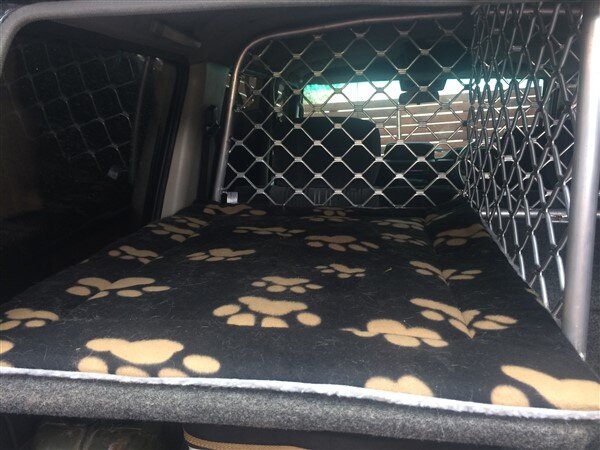
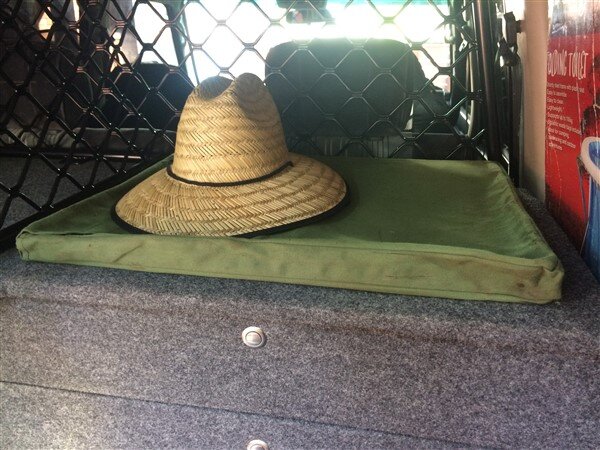
Lexy's bed fits perfectly on her side.

IMG_6393.jpg

IMG_6394.jpg

As does Lexy!

I think she will be happy as not only does she have a nice high up commanding view over The mighty 78, but she can see us all, has room to stand up, turn around and lie down! :icon-cool:

Shit shes got the best seat in the car! :lol:

IMG_6398.jpg

IMG_6399.jpg

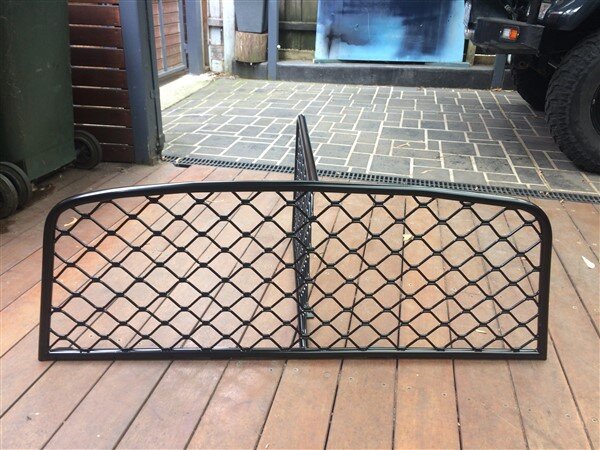
I dont work Fridays, so yesterday (Friday) I took the barrier to our local powder coater and asked him how much to do it in satin black, I will pay cash and dont require a receipt! :shifty:

$40 and it will be ready in 3 hours! :wtf: :clap:

So 3 hours later it was home with me! :character-beavisbu:

IMG_6400.jpg

IMG_6401.jpg

It was soon bolted into position using some nice stainless steel button head M6 bolts into T nuts on the underside of the ply. :icon-cool:

IMG_6402.jpg

IMG_6403.jpg

IMG_6404.jpg

IMG_6405.jpg

IMG_6406.jpg

IMG_6407.jpg

I'm very pleased with it and it came out exactly how I pictured it in my head many months ago! :dance:

I had another little delivery from China! :shifty:

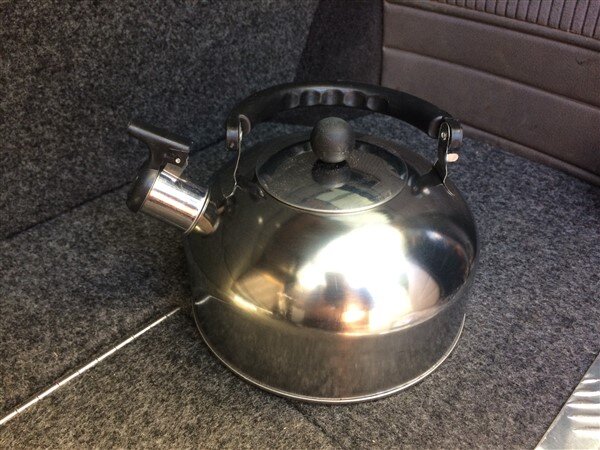
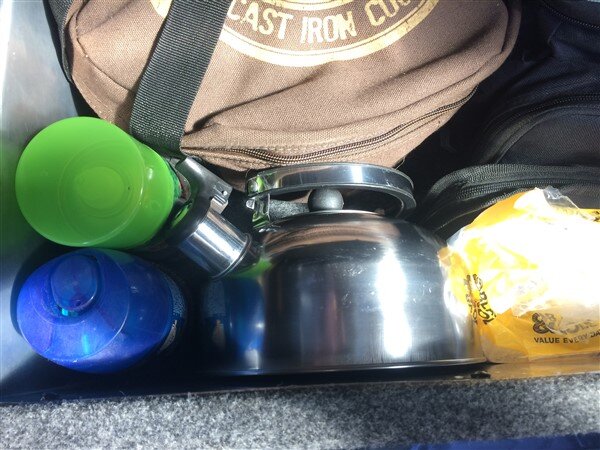
A stainless steel kettle which I wanted as it has a folding handle it packs down quite small and will fit nicely into my pan drawer, unlike my old one. :think:

IMG_6409.jpg

IMG_6410.jpg

IMG_6411.jpg

As many of you know when I camp I cook the traditional way, over the fire and rarely use the gas stove anymore, thats just an emergency back up.

Well the folding steel cooking plate has been awesome, it really has! :clap:

But as its steel it is a bit rusty in places which isnt ideal. :thumbdown:

And seen as I stupidly made the space for the fridge 20mm too narrow to allow for the cooking plate to live above the fridge. :icon-rolleyes:

IMG_6412.jpg

IMG_6414.jpg

IMG_6415.jpg

I'm going to make a new one, completely out of stainless steel. :icon-cool:

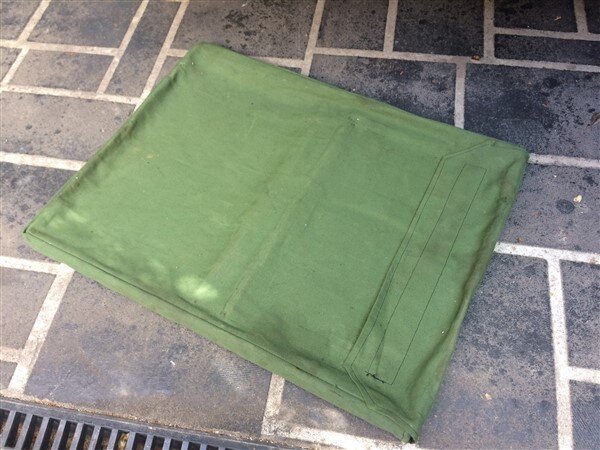
I will try and use the nice canvas bag that the old one came in, even though the new one will be slightly narrower to fit above the fridge. :think:

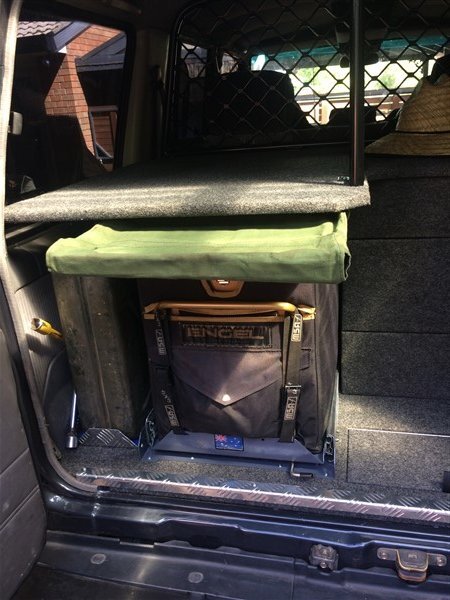
For now it can live where all the pillows, bedding and clothes bags will live when on trips.
Here.
IMG_6416.jpg


IMG_6417.jpg

I've ordered 2 strips of the alluminium anchor tracks and I will have one running down each side so all that stuff can be securely strapped down.

This is what I have ordered.

https://www.ebay.com.au/itm/Pair-Al...069050?hash=item4b2eb3983a:g:VgsAAOSws6ZaGzzl

And that will almost complete the rear fit out, once those tie down rails are fitted along with the new stainless steel cooking plate! :dance:

Still no progress with the rear diff! :thumbdown:

My boss has spoken to Marks Adaptors and they dont reckon they can get a KZJ70 ring and pinion in 4:8.

And I have had no luck with the 5-6 companies I've been talking with in the US. :icon-rolleyes:

But I still have 5 weeks until our big Easter High Country trip and if it comes to it I will just fit the rear diff out of LJ and use that for the time being as that project is many months away from needing a rear diff. :think:

The other big job I need to tackle before the Easter trip is the wiring! :shifty:

I'm thinking I will make a loom up at work and then just fit that into the car. Its going to be tricky in that virtually everything that needs wiring will be controlled/used/viewed from the over head console. So all the wiring, hoses and cables need to be run up a pillar and behind the head lining. :think:

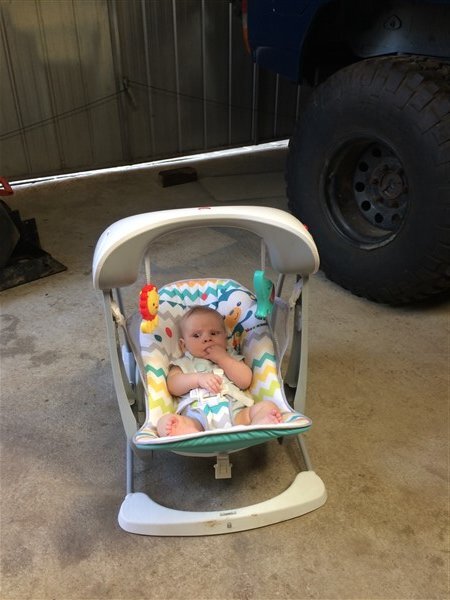
Anyway.........got to go, I'm on baby minding duties! :text-baaa:

IMG_6418.jpg
 
Last edited:
Use relays with minimal wiring up to your switch panel. Even a multi core suitably low fused just tonoperate the relays all in the same place with their corresponding fuses. Simplifies the wiring and keeps it short without going to the switch panel and back down. 1 wire -ve one wire +ve then 1 for each switch.
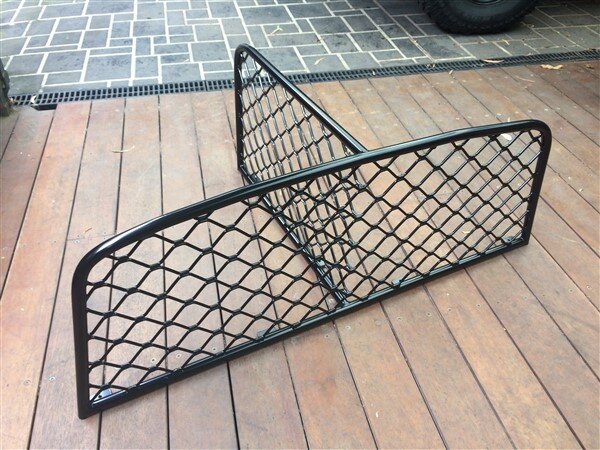
 
Beautiful job on the barrier lad. I reckon there' a good nixer in that for you making them up to lads:thumbup:. There' only one thing I don' like about the rear fit ut and it' probably just me but I don' like storing a jerry can of fuel inside the truck for starters but esp right beside the fridge with food in it. Personally I just wouldn' like it. Also with lexi just over the can make sure to watch out for vapours. I know your going to say the fuel will be put into main tank once 20 ltrs is used up but as I said it wouldn' be for me. The rest of the build is savage lad, keep up the good work:thumbup:
 
Use relays with minimal wiring up to your switch panel. Even a multi core suitably low fused just tonoperate the relays all in the same place with their corresponding fuses. Simplifies the wiring and keeps it short without going to the switch panel and back down. 1 wire -ve one wire +ve then 1 for each switch.

Will do mate. :thumbup:

Was thinking of running one main power wire up there that goes into a small fuse box and then having multiple positive wires coming out of that to the switches, with each switch wire being individually fused, then use 7 core trailer wiring to go from my switches down to the relays.

Was also thinking I will buy one of the neat fuse holder/relay combination boxes you can buy so that all the relays and fuses are contained in one neat box that can be fitted in the engine bay.

One of these:

https://www.ebay.com.au/itm/Univers...218341?hash=item212cd72665:g:G4QAAOSw0bxZp62h

Beautiful job on the barrier lad. I reckon there' a good nixer in that for you making them up to lads:thumbup:. There' only one thing I don' like about the rear fit ut and it' probably just me but I don' like storing a jerry can of fuel inside the truck for starters but esp right beside the fridge with food in it. Personally I just wouldn' like it. Also with lexi just over the can make sure to watch out for vapours. I know your going to say the fuel will be put into main tank once 20 ltrs is used up but as I said it wouldn' be for me. The rest of the build is savage lad, keep up the good work:thumbup:

Thanks mate. :thumbup:

If it was petrol I would totally agree with you, in fact I wouldnt carry petrol inside the vehicle full stop! That would be extremely dangerous! :eusa-naughty:

But diesel doesnt give off vapours like petrol and those original WW2 jerry cans that I use are pretty tough. Granted the can could split and leak but its securely fastened down and is sitting on a layer of rubber matting so I think its unlikely. :think:

Even if it did leak though, it wouldnt get in the fridge, it would leak all over the floor pan and create a horrible sticky, smelly mess! :thumbdown:

But it still wouldnt be unsafe as theres no vapours and unlike petrol it isnt anywhere near as flammable or explosive. :shifty:
 
Will do mate. :thumbup:

Was thinking of running one main power wire up there that goes into a small fuse box and then having multiple positive wires coming out of that to the switches, with each switch wire being individually fused, then use 7 core trailer wiring to go from my switches down to the relays.

Was also thinking I will buy one of the neat fuse holder/relay combination boxes you can buy so that all the relays and fuses are contained in one neat box that can be fitted in the engine bay.

One of these:

https://www.ebay.com.au/itm/Univers...218341?hash=item212cd72665:g:G4QAAOSw0bxZp62h


Thanks mate. :thumbup:

If it was petrol I would totally agree with you, in fact I wouldnt carry petrol inside the vehicle full stop! That would be extremely dangerous! :eusa-naughty:

But diesel doesnt give off vapours like petrol and those original WW2 jerry cans that I use are pretty tough. Granted the can could split and leak but its securely fastened down and is sitting on a layer of rubber matting so I think its unlikely. :think:

Even if it did leak though, it wouldnt get in the fridge, it would leak all over the floor pan and create a horrible sticky, smelly mess! :thumbdown:

But it still wouldnt be unsafe as theres no vapours and unlike petrol it isnt anywhere near as flammable or explosive. :shifty:
That’s exactly the sort of fuse/relay combination I was thinking of. Fuse a Main Power wire at the battery Post, there’s some good fused battery connections about, I put an isolator in series to be able to isolate the lot. Trailer multi core is ideal. It often has one wire thicker than the others which could be your +. Or send a separate pair up there as your + and - .
Anyway, you probably figured out what you were going to do long ago as you’re always three steps ahead of us.

On the diesel, I agree with you. The only time you would be in troublevwoukd be in a severe rear end shunt that ruptured the can spraying diesel through the vehicle to an ignition source. Look up Hatfield rail crash. Don’t want to worry you or anything but Doyle May have a point in the scenario I’ve outlined.
 
  • Like
Reactions: Ben
Cool! :icon-biggrin:

Do I need to run a negative up there or can I just earth to the body?

I will actually need to run 2 x positives as I will need ignition live for most things, but for the UHF radio and interior light I will want them permanently live. :think:

Yes a rear shunt could rupture the fuel can, very true. :thumbdown:

I dont really have anywhere else it could good though. :doh:

Having swing out wheel carriers/jerry can holders is something I swore I would never do on any of my vehicles ever again as they just make opening the rear doors a pain!

OK on something like an 80 where there is little choice if you want to carry a bigger spare that wont fit underneath, but on a barn door 4wd with the spare on the back door I dont think it makes any sense.

And I dont want to put heavy things like fuel cans on my roof rack, I only want to use it for light, bulky items so as not to negatively alter the centre of gravity.

So the only option is to add another fuel tank underneath or to replace the main tank with a bigger one.

But for now I'm happy with it in the back as its only the occasional High Country trip that will require that extra fuel range. :shifty:

I certainly have no desire to do any big desert trips in it like the Simpson or the Canning. :icon-biggrin:

You can earth to the body but bringing an earth back to a common point near your fuses or battery means it’s all in the same place and easy to test if you get a break or something rather than having to pull your console down. Radio earths are better taken direct from the battery via a fuse as well as one in the positive. You will need two positives. Switched on the ignition and unswitched. If just for your radio then just take the radio feed direct from the battery via fuses at the battery. If you have a fairly direct feed that’s ok too but seeing as you want it permanently live with the light a direct dedicated feed from the battery might just be the simplest.

On the Jerry can is there an under body space where you could fabricate a mount?

I have the same thoughts as you on rear swing outs, weight up high etc. Maybe I’m being over cautious, but rear end shunts do happen, of course chances are it will never happen (I hope) but who knows. You’ve got mini me to think of now too of course (ok I know you’re thinking of him first now anyway). Just a thought Ben.
 
Last edited:
Nice job with the rear set up and barrier mate.
 
  • Like
Reactions: Ben
Back
Top