Don't like the adverts?  Click here to remove them

Project 80: Codename Grey Ghost

OK quick update time. Not moved more than 5 feet today, been tied to the lathe. I was only going to have one pivot on the bumper then some bright spark, who shall remain nameless, suggested that I might regret that later. So after a sleepless (not) night, I cracked on this morning.

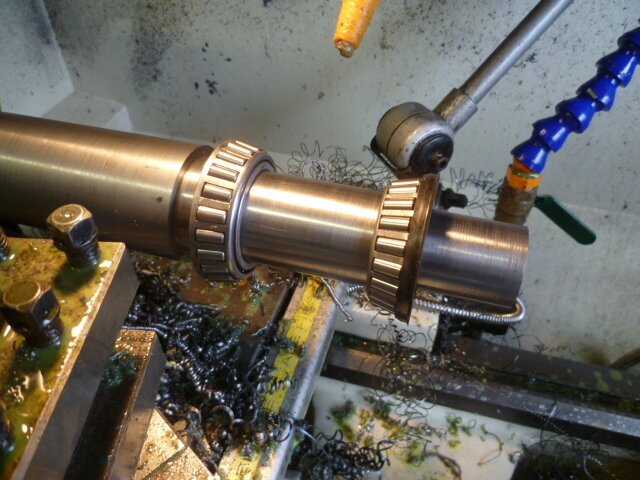
Started with a piece of bar which needed cleaning up quite a bit to get it into a reasonable state for rough machining. Once I'd done that I started with the bottom bearing.
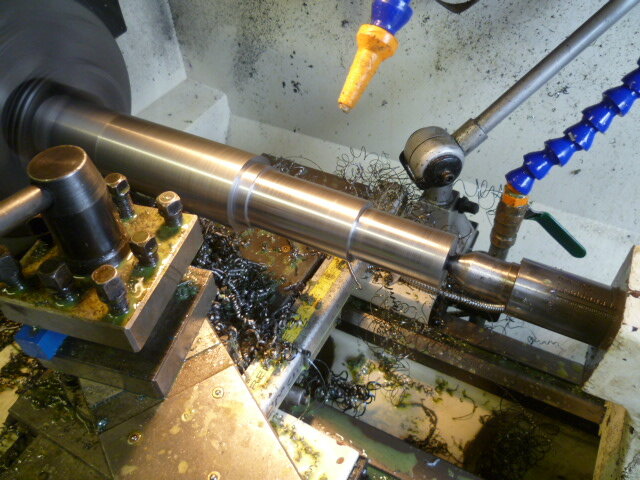
P1010299.JPG

Then the top bearing

P1010300.JPG

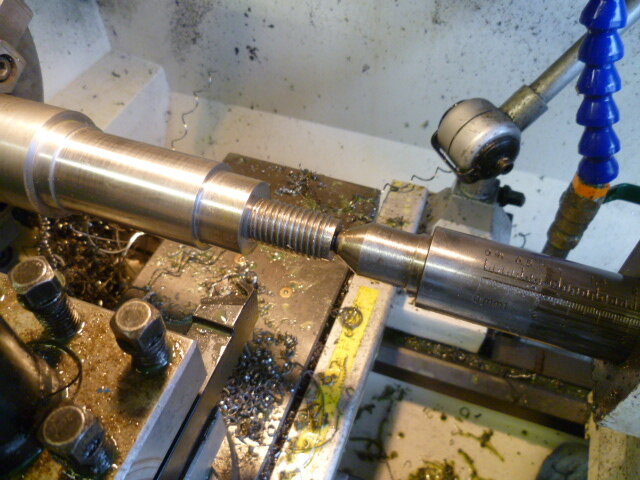
Then the 20mm threaded section

P1010301.JPG

The shroud from No 1 carrier fitted perfectly on the new spindle
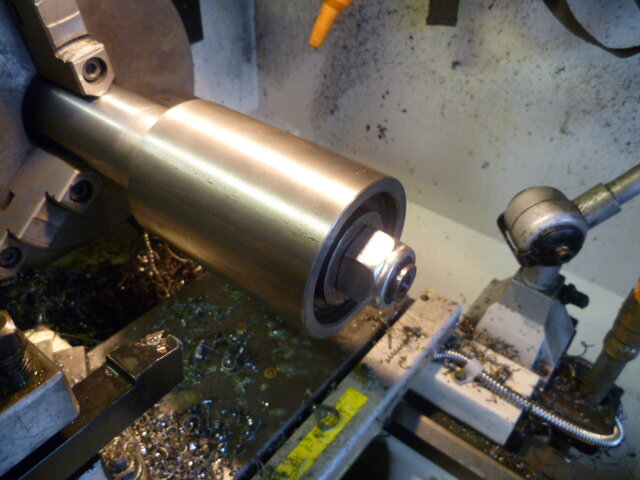
P1010302.JPG

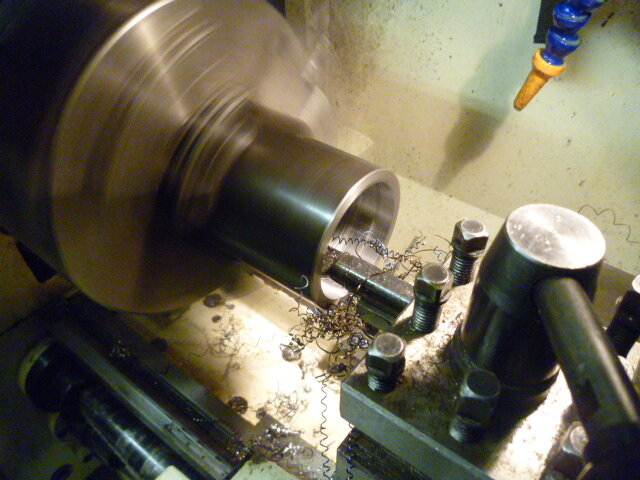
Then I started the new shroud

P1010304.JPG

Milled in some internal cut outs for removing the outer races
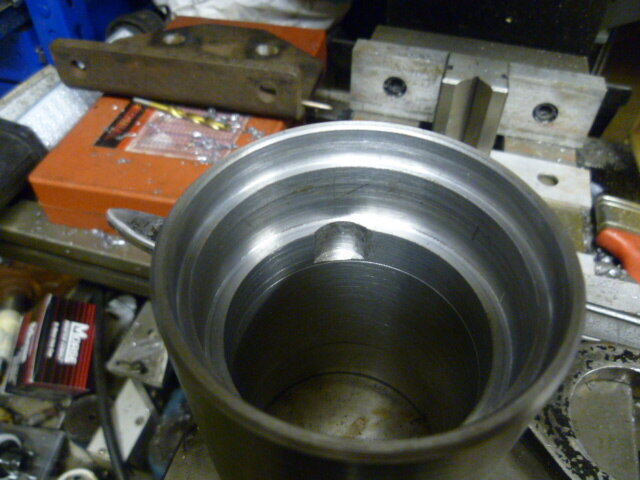
P1010305.JPG

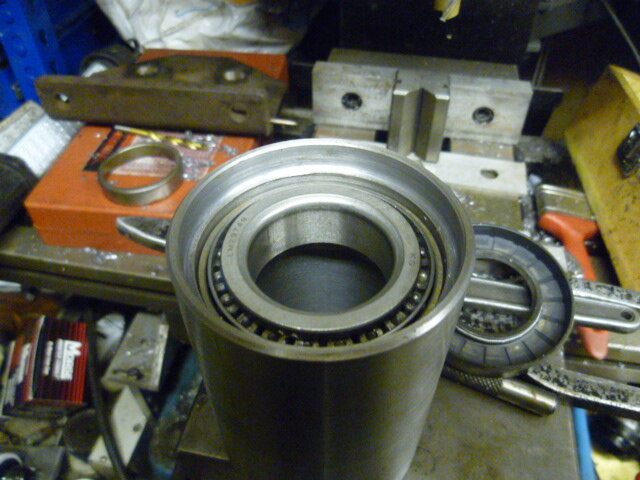
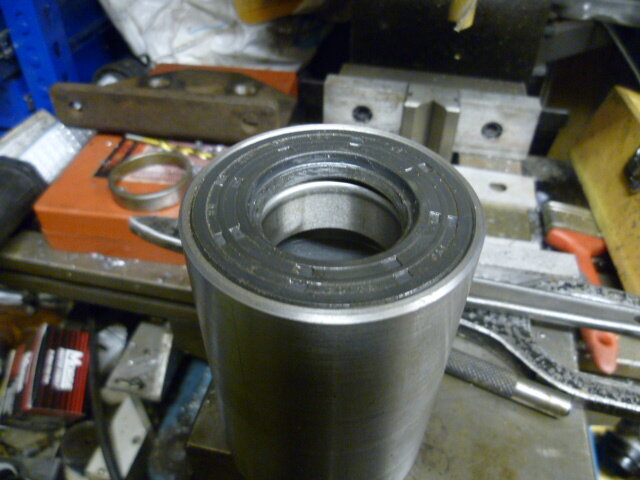
Bottom bearing in

P1010306.JPG

And seal

P1010307.JPG


And lastly, the top bearing. All went together nicely and interchangeable with other spindle which is good news. I must be improving.
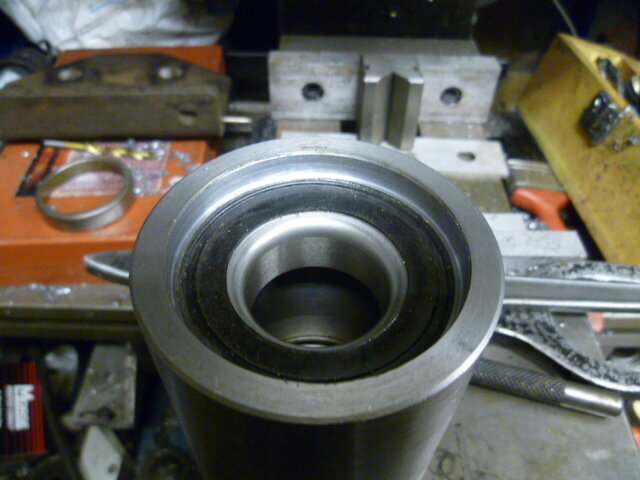
P1010308.JPG

Whilst I was working, a courier arrived. Mystery parcel. Hmm, could it be the items I won on e-bay yesterday afternoon? No ......

Yes! Nice tidy bottom arms. Easier than treating rust - just replace the parts.
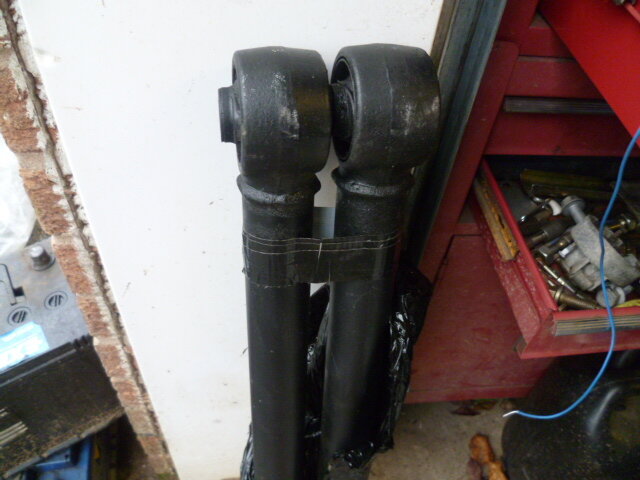
P1010303.JPG
 
Sweet work young Chris, very nice indeed. How much I envy you having all that kit to hand!:clap::clap::clap:
 
Just another cap to do now then? Looks like it only took you half an hour, I'll have 5 please :lol: Nice win on the arms.
 
:laughing-rolling::laughing-rolling::laughing-rolling:

Jon, you little tinker. Half an hour? You know full well it takes 45 mins to do one of those. I have to say to those tuning in that there must be credit here to JW Enterprises inc for the original support on making these. Machining this actually took me a whole day, but if I had to work out all of the dimensions too, then I'd have been another day at it. People probably look at these and think they're worth about £25.00 each. Well without giving away any secrets, the bearing and seal kit comes in at around £30.00. Then there are the tips for the lathe tools, the steel for the pin and shroud then obviously the time and electricity + PG and Hobnobs. I can't say how much they'd be in total, but you wouldn't pay it!

There is tremendous satisfaction in knowing that you have made something. This carrier won't be as flashy as an ARB but there's a great feeling when people say 'You made that???'

Now if I can just master plastering and bricklaying, I'll be very happy.
 
Chris, there's nothing flashy about ARB, they're mass-produced and look like it when you get close.

I had welding wire ends protruding from some of the welds and I guess mine was in the batch stuck out in the rain just before they wizzed it through the powder-coat, so fast that not much powder stuck. Not impressed at all I'm afraid.

You're doing a fine job.

The old adage comes true again, if you want a job doing well, do it yourself.
 
Nicely made.
Those arms would look much better painted red bolted to a black 80. I'll pick them up next weekend :lol:
 
Don't like the adverts?  Click here to remove them
Ha, nice try Gary. You can have the ones I take off though if you like. Orange is sort of like red.

Thanks Clive. Much appreciated. The ARB are mass produced but not cheap. When are the Chinese going to cotton on to knocking out cheap 80 bumpers? I have heard many tales of ARB products rusting. I was thinking of lacquering mine. I even thought about blasting it and having it coated properly here. What I am after is the real factory finish with my stuff. I get it sometimes, but not always. And I look at some of the things that other people make and I think Wow, a bit of packaging and a price ticket and it would look like a bought one. I don't want this new truck to be rammed full of kit and gadgets, but I do want it to look really well finished. I've had two others to practice on.
 
Thanks chaps. Going to try and let them onto the bumper today. But - I've had an idea and that's always dangerous.
 
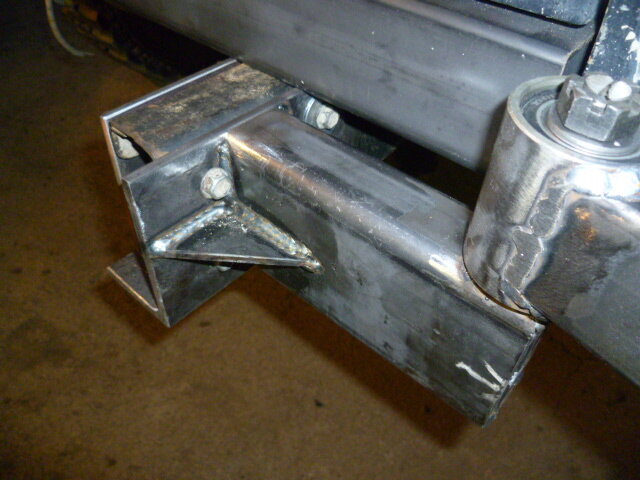
Well that's what thinking did for me. Spent the whole damn day thinking! Didn't get that far on the build but I did in my mind. Here's what I ended up with on the main carrier side for now.

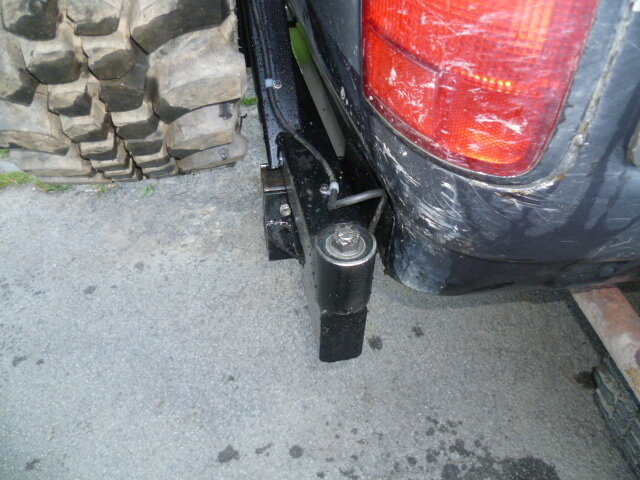
A hole with something welded in it. Yeah, impressive I know for a whole day in the workshop.

P1010309.JPG

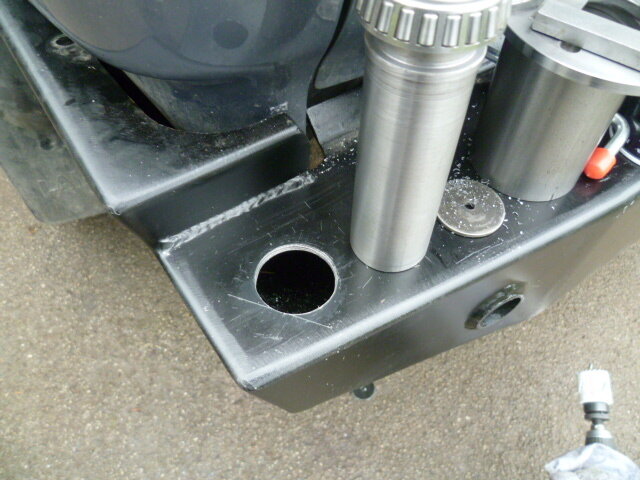
Bit like cutting a hole for a snork. measure measure, more tea, measure. f*** it driiiiillllll. Top hole was spot on, bottom hole slightly out but a whizz with the die grinder and it was dead straight.

P1010310.JPG
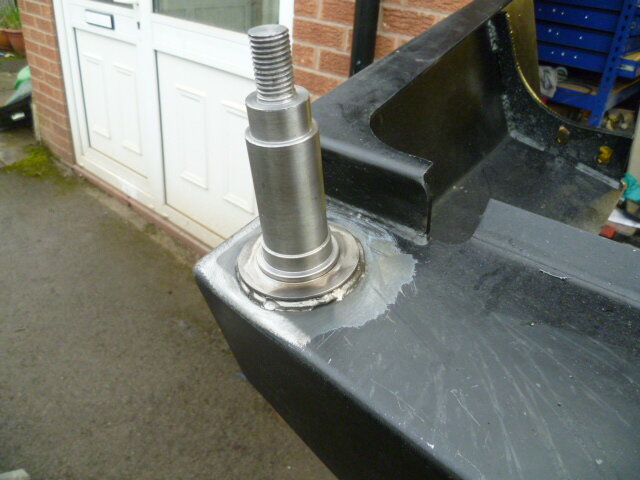
The picture isn't on its side, the bumper is. I decided I wanted a flange here rather than it just go into the bumper. Extra strength and load spreading. It also ensured that the spindle was cock on perpendicular to the bumper


P1010311.JPG

Now over on the other side, I am taking a different approach. There will never be another spare wheel over there but maybe Jerry cans or something. I am going to machine up a heavy gauge tube which will be let into the bumper and fully welded in place. This will be a bit like a washing pole socket. The spindle pin will slot snugly into the tube and be threaded at the end to take standard Toyota 54mm hub nuts. So, when and IF I decide I need something over there, I'll pull out the blanking plugs and drop in the new accessory.
 
Now over on the other side, I am taking a different approach. There will never be another spare wheel over there but maybe Jerry cans or something. I am going to machine up a heavy gauge tube which will be let into the bumper and fully welded in place. This will be a bit like a washing pole socket. The spindle pin will slot snugly into the tube and be threaded at the end to take standard Toyota 54mm hub nuts. So, when and IF I decide I need something over there, I'll pull out the blanking plugs and drop in the new accessory.
Great idea to make the righthand swing out simple to remove. Looks like a quality job to me.:thumbup:
 
Perfect! I'd use it for a rack mount for up to 6 bikes. I'm pondering ideas for one to mount in the receiver in the centre of the spare on the ARB. Probably for 4 bikes....:think:
 
Yes, that's the idea. Sat dish, fuel, water, outboard motor, shed. I dunno. Not bikes though I can guarantee that one. Why have it removable? Why not just leave it in? Well, 2 reasons, I'd have to stop it from rusting which means having it coated or painted and secondly but more importantly, I'd have people continually asking 'Uhh, what's that for?' And I can't be arsed to keep explaining.

I like JW's idea of having a little oven on the back, but I am in and out of the back so many times that I want entry to be as easy as possible so not sure I'll ever put another arm on. But it's there if I ever do.
 
Sorry Chris, didn't intend to imply that you may want to carry bikes, that remark was my thoughts on how I might use it!

The "removable" idea gets my vote :thumbup:
 
Heavens Clive, there's no need to apologise. This is a friendly thread. No one get shot against a wall here. I don't mind carry bike, but the thought of riding one, no no no no it's just wrong. Plain wrong. No engine you see?
 
Hi chris
2 questions
1st what bumper are you using is it a frog island one. do they come painted or bare?

2nd what's your thoughts on using a car wheel bearing as they are 2x taper roller bearing in 1 outer race and sealed in 1 unit so this would then cut the lathe time down as your outer tube would be size with a circlip either end. Your shaft would be one lip at the bottom which could be welded on, then the end threaded to put you nut on the end? I think this way would save a lot of time ( now you have done yours). I am not sure on the size shaft you would need and how thick have you had you outer part as I am concerned about shrinkage as you weld the outer to mount the arm part.

I am in the process of doing something soon to mine once I finish of my front bumper.

I have found out that you cant use Water based paints in a damp garage. its just doesn't go off.

Stu
 
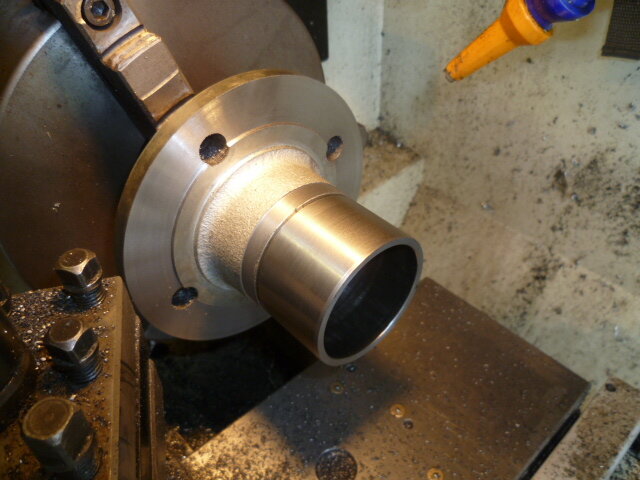
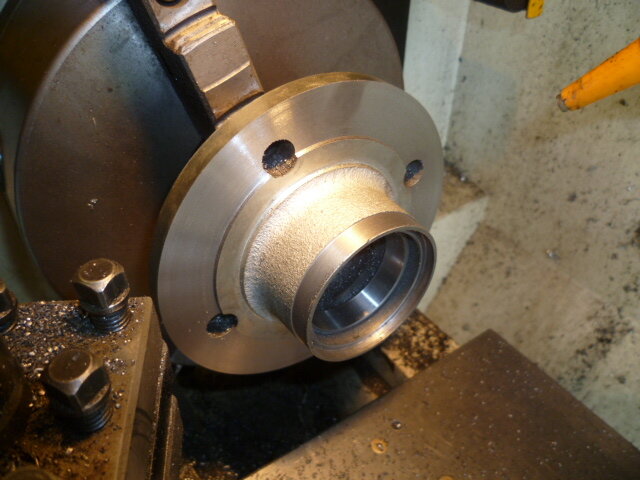
Stu, hiya. Been there, done that. Look -

This now has a 37' hanging off it.

P1010229.JPGP1010215.JPGP1010205.JPGP1010203.JPG

It worked reasonably well but isn't really big enough and did require more messing around than I have thought actually. It works and that's about all I can say. I think I'd need a different hub to make a better job of it. It wasn't nice to machine either as it's cast.

Yes it's an unpainted Frogs.

C
 
Chris
I wasn't thinking of using a hub just a piece of bar bored to the correct internal diameter.
Was this strong enough for the 37 ? as I thought you did bend it at lincomb how did you beef it up?
stu
 
Back
Top