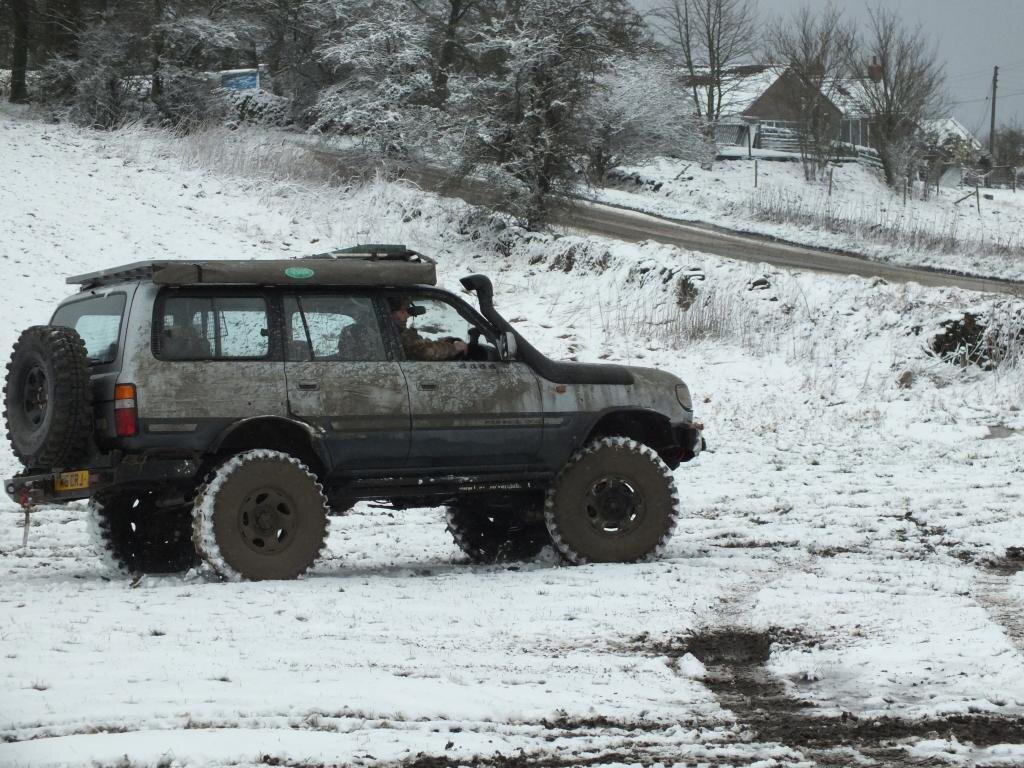
Very nice Chris, just the right degree of tint IMHO. The truck looks great!
Don't like the adverts? Click here to remove them
You are using an out of date browser. It may not display this or other websites correctly.
You should upgrade or use an alternative browser.
You should upgrade or use an alternative browser.
Project 80: Codename Grey Ghost
- Thread starter Chris
- Start date
moggy1968
Well-Known Member
- Joined
- Jun 12, 2013
- Messages
- 2,938
It does look less like a greenhouse doesn't it.
I don't think he'll do another one at £300 before anyone asks. I rather think that he might not have made much out that deal.
who did the tinting?
sorry if this is answered elsewhere, looked but couldn't find it.
It was Spire Tinting Mogg. Local firm here in Chesterfield. They sort of sit within Spire Windscreens who are now part of National Windscreens. I really cannot praise them highly enough. Top customer service and a fabulous finish.
Very very little to wow you with today. Been tootling in the g'rage. Fitted my triple McSquirters which really do blast the windscreen now. Lovely.
As I said some while back, I wanted to fit a removable pin in the off side of the bumper in case I ever wanted to fit a toast rack or washing pole in there. The ideas is to weld a tube into the bumper and then slot a second pin in when needed. So today I made up a proof of concept model. The dirty galv tube bit would be the outer sleeve welded in place. I then threaded the pin 42mm x 1.5 to take a Toyota 54mm nut. Actually one of the best bits of threading that I have done. It really works very nicely. I'd put a thrust washer on and then 2 nuts. I wouldn't finish machine the shank on the pin until the powder coating had been done. I don't know how thick that would turn out and I'd want the pin to be snug but not a hammer fit. I wouldn't PC the pin, I'd just rattle can it probably or simply slather it in grease.
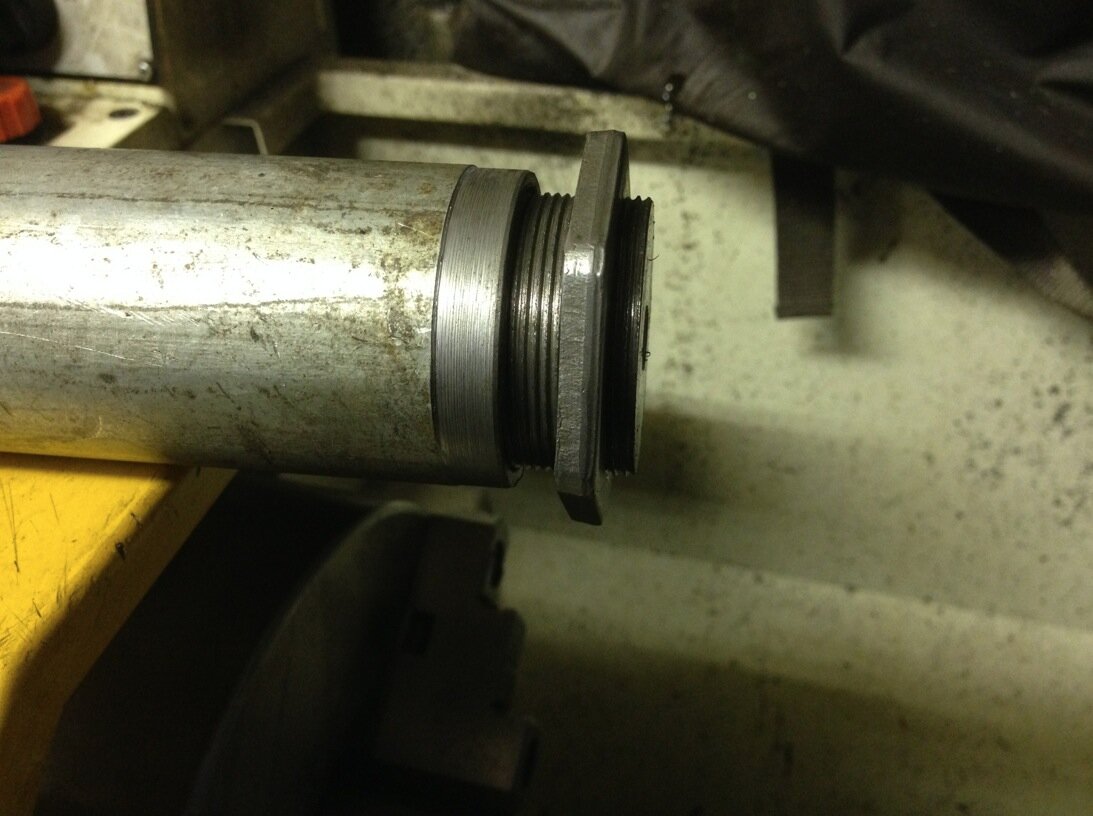
As I said some while back, I wanted to fit a removable pin in the off side of the bumper in case I ever wanted to fit a toast rack or washing pole in there. The ideas is to weld a tube into the bumper and then slot a second pin in when needed. So today I made up a proof of concept model. The dirty galv tube bit would be the outer sleeve welded in place. I then threaded the pin 42mm x 1.5 to take a Toyota 54mm nut. Actually one of the best bits of threading that I have done. It really works very nicely. I'd put a thrust washer on and then 2 nuts. I wouldn't finish machine the shank on the pin until the powder coating had been done. I don't know how thick that would turn out and I'd want the pin to be snug but not a hammer fit. I wouldn't PC the pin, I'd just rattle can it probably or simply slather it in grease.

jonnyboy54321
Well-Known Member
Pics or a link to the washers would be good please Chris 
Don't like the adverts? Click here to remove them
Nice work Chris!
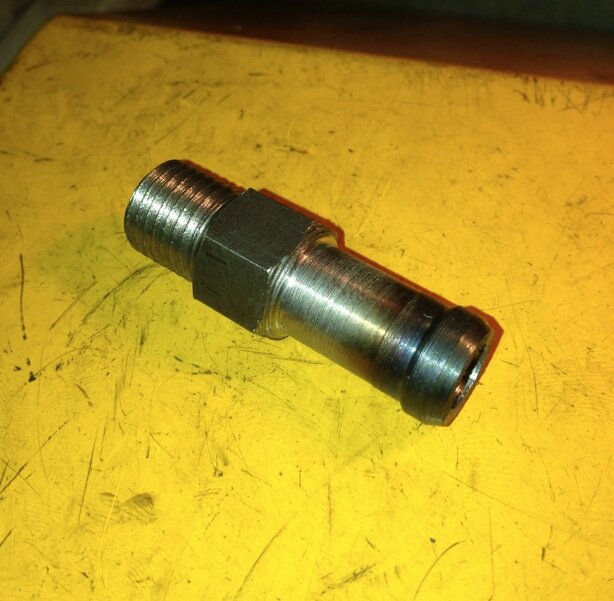
Just a question, is the thread parallel or tapered? I suppose either way, with some PTFE tape, a good seal can be achieved. Presumably, you started with hex bar, drilling out after machining the ends?
Just a question, is the thread parallel or tapered? I suppose either way, with some PTFE tape, a good seal can be achieved. Presumably, you started with hex bar, drilling out after machining the ends?
M14 is a Metric parallel thread yes Clive. An odd one for hose tails. PTFE? These are precision cut threads. No room for tape. Trust me, they are tool tight with copper washers too. Yes, hex bar, but drilled first. Once machined at either end there is little to grip in the chuck you see and drilling could shift it in the jaws. Also means that you can use the drill down the centre as a mandrell when turning it around to machine the other end. Makes sure it's concentric both ways.
Thanks for the explanation, nice work anyway Chris!
Deep in Santa's grotto, the fabrication elves were busy this morning making ......
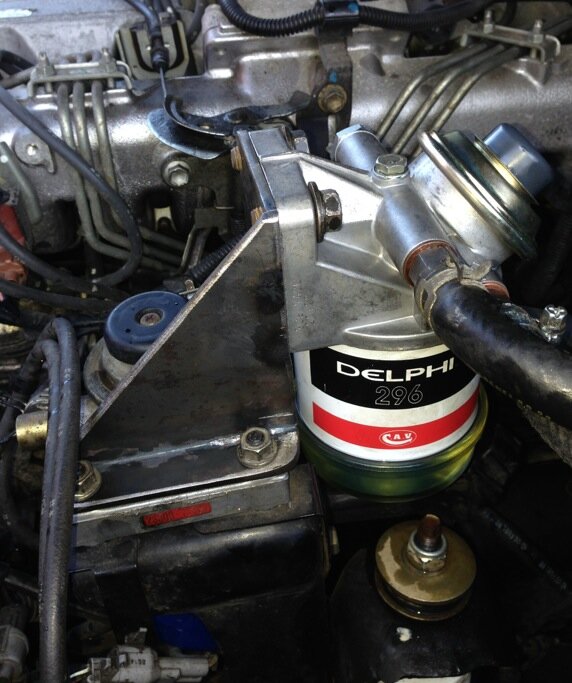
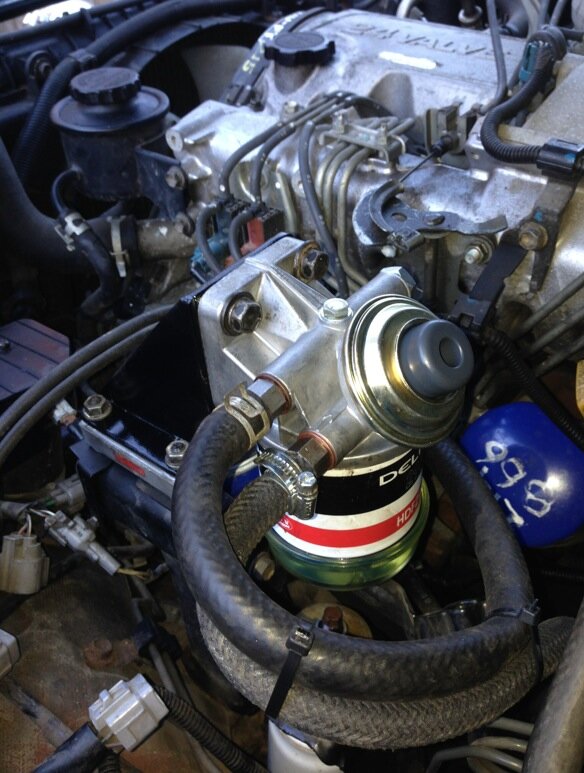
Look, you have to stop asking WHY. There is no 'why' there is a just a 'because'. Just thought it was a space that needed filling so I got a second fuel filter but went for one with a primer pump on top. This way I have a back up if the original one perforates, which they do and I can see what's going in in relation to fuel in the glass section of the filter bowl. It has a drain of course and the filters which are very easy to get are only a couple of quid each. If needs be the pipes can be swapped in seconds to bypass either the main of aux filters. Just need some paint dabbing on there next.

Look, you have to stop asking WHY. There is no 'why' there is a just a 'because'. Just thought it was a space that needed filling so I got a second fuel filter but went for one with a primer pump on top. This way I have a back up if the original one perforates, which they do and I can see what's going in in relation to fuel in the glass section of the filter bowl. It has a drain of course and the filters which are very easy to get are only a couple of quid each. If needs be the pipes can be swapped in seconds to bypass either the main of aux filters. Just need some paint dabbing on there next.
Chris, looks great!, I really admire you guys with your attention to detail, & being able to make a part up from nothing, I wish.....
I have spent many hours looking back through old posts, reading, gathering info etc, and have to comment....really is great to read/look at.
I fear my lack of "being able to turn something up from bugger all" and "weld this to that" may hamper me in my now "new" goal for a 80!, I was only looking for a standard one, now I think I do need a lift and big boots as a minimum!.
Anyways, great post and info, its posts like this and the others I have been reading that inspires us new to the fold to be brave and go for it!.
Danny.
P.S. Chris, I read this "it’s outside on 37” tyres with front and rear winches on a 5” lift" on the first page of the thread, this I need to see, doing a search for some pics but not finding any!....would you be so kind......cant wait to find a good one to make a start now!.
Holiday makes work for idle hands and as I'm on holiday..
Started the day by priming and painting the bracket for the aux fuel filter. Looks nicer in black than in rust.
Then turned the car round so I could back up to the workshop. Here's first fit of the new wheel carrier. I have started the high lift jack mount too but you can't see that here.
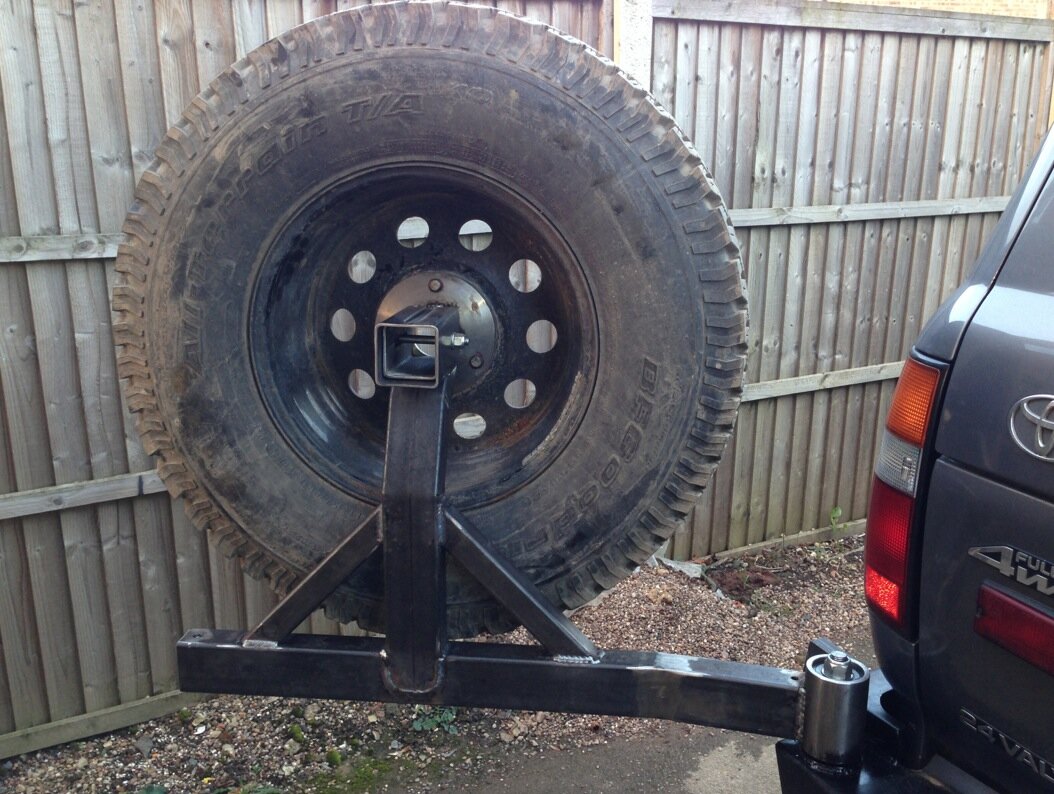
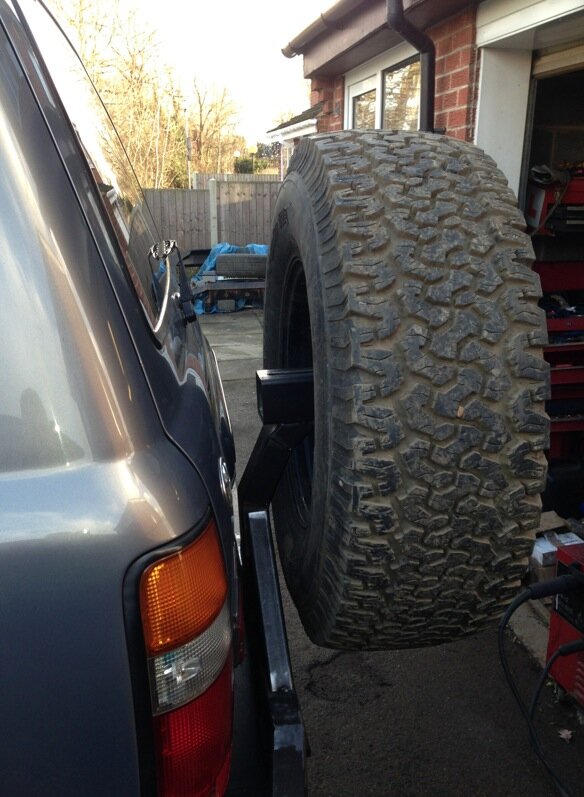
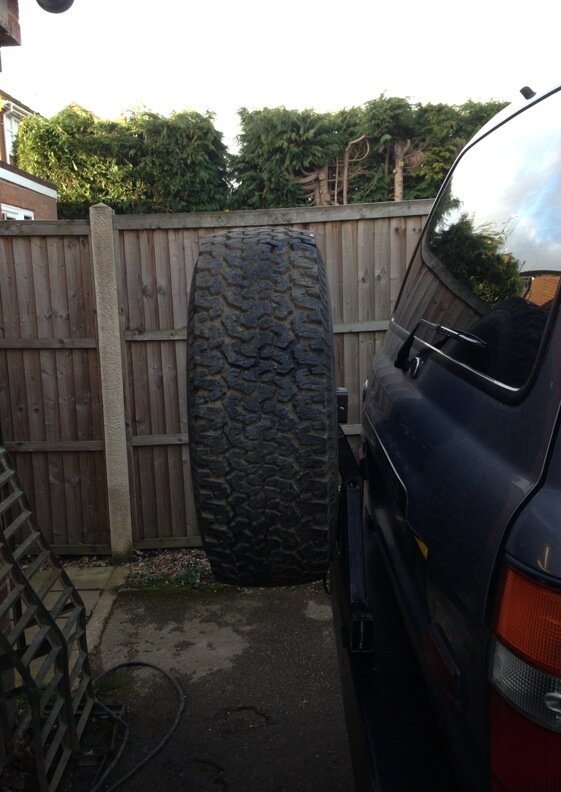
After this, I pulled the wheel in by another 2" I have scope to also drop the carrier a couple of inches too. But might go with a number plate on the bumper instead of on the carrier. Just means there is less to fiddle with and the plate and light can be fixed rather than have to move with the tyre. Less to go wrong or break.
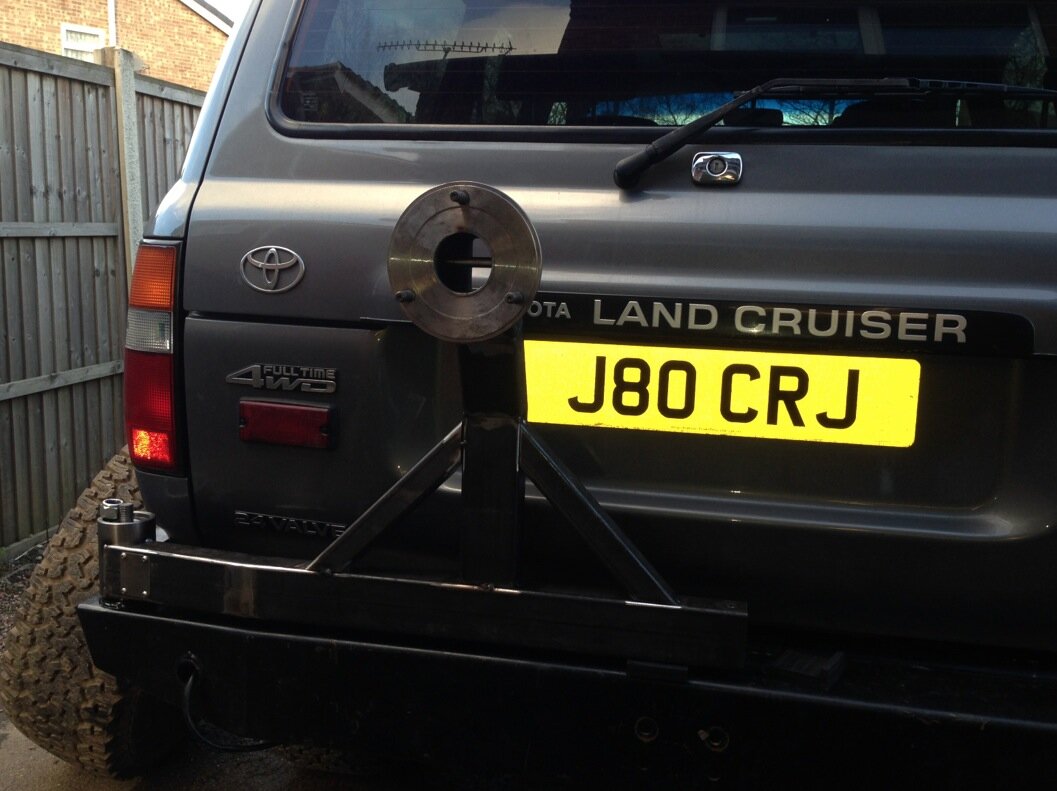
The hold open latch has just dropped perfecto as well. Although as an ultimate stop should the wind catch it, the carrier arm actually stops before the wheel hits the rear wing
Started the day by priming and painting the bracket for the aux fuel filter. Looks nicer in black than in rust.

Then turned the car round so I could back up to the workshop. Here's first fit of the new wheel carrier. I have started the high lift jack mount too but you can't see that here.


After this, I pulled the wheel in by another 2" I have scope to also drop the carrier a couple of inches too. But might go with a number plate on the bumper instead of on the carrier. Just means there is less to fiddle with and the plate and light can be fixed rather than have to move with the tyre. Less to go wrong or break.

The hold open latch has just dropped perfecto as well. Although as an ultimate stop should the wind catch it, the carrier arm actually stops before the wheel hits the rear wing
"...After this, I pulled the wheel in by another 2" I have scope to also drop the carrier a couple of inches too. But might go with a number plate on the bumper instead of on the carrier. Just means there is less to fiddle with and the plate and light can be fixed rather than have to move with the tyre. Less to go wrong or break"....
Interested to know if there's vertical adjustment Chris, or is this "scope" a cut and weld operation?
Very nice indeed, I like the "receiver" type mount for the spare, similar to ARB.
Interested to know if there's vertical adjustment Chris, or is this "scope" a cut and weld operation?
Very nice indeed, I like the "receiver" type mount for the spare, similar to ARB.
The hub will actually slide out by about 5" and locks with a clamp. But I rather needed to set the 'zero' position as it were. There is really only need to be able to slide one way. I want the tyre to actually sit against the upright. In relation to the up and down, no that is a cut and shut job Clive. If I had CAD or were just a genius, I would design all this on paper and then build it to the design. Hey presto perfect every time. Unfortunately pretty much everything I do is designed and built on the job. To an idea, yes, but not to exact dimensions so usually there is some tinker time needed. It's fine, but I like to try and keep all dimensions in nice and tight. With a big wheel and tyre bouncing up and down worrying away at the welds and joints every time you hit something, failure could result. As I have said, I've been listening to people who have travelled and will try to incorporate those lessons where I can. Right down to the point where I might strengthen certain components like anti roll bar mounts or lower shock mounts and such like. Never heard of a wheel carrier breaking but I have certainly seen some that bounce around like DD's in an aerobics class.
It's a good approach Chris, learn by everyone else's mistakes. I had to move mine in towards the doors. The spare had about 60mm free space to the door which is too much. The flex on the tubing/bearing is no more than 3mm so why have 40kg of wheel hanging any further out than necessary.
Looking good so far!

Looking good so far!

Similar threads
- Replies
- 29
- Views
- 1K


